
M365 is great scooter , super light and quality is just legend so I decided to make a true BadAss sleeper , it will looks like random M365 but there is nothing random Inside ? . Power up to 3000watt speed up to 40km/h , 2WD , Advanced Brake system , Weight under 20kg 🙂 .
Actually i will make versions
- Cheapo 2wd on Pro frame with: vesc 4.2 ( real power up to 2,5KW ) , 12s 5p battery ( ~17.5AH ), speed 40km/h+ range 50km+, weight ~ 20kg
- Beasty 2wd on Pro frame with: vesc 6.6 ( real power 3KW+ ) , 13s 5p battery ( ~17.5AH ), speed ~45km/h range 60km+, weight ~ 22kg
- Kraken 2wd on Pro frame with: vesc 6.6 ( real power more than 5KW+) , 13s 5p battery ( ~17.5AH ), speed 50km/h+ range 50km+, weight ~ 26kg
Table of contents
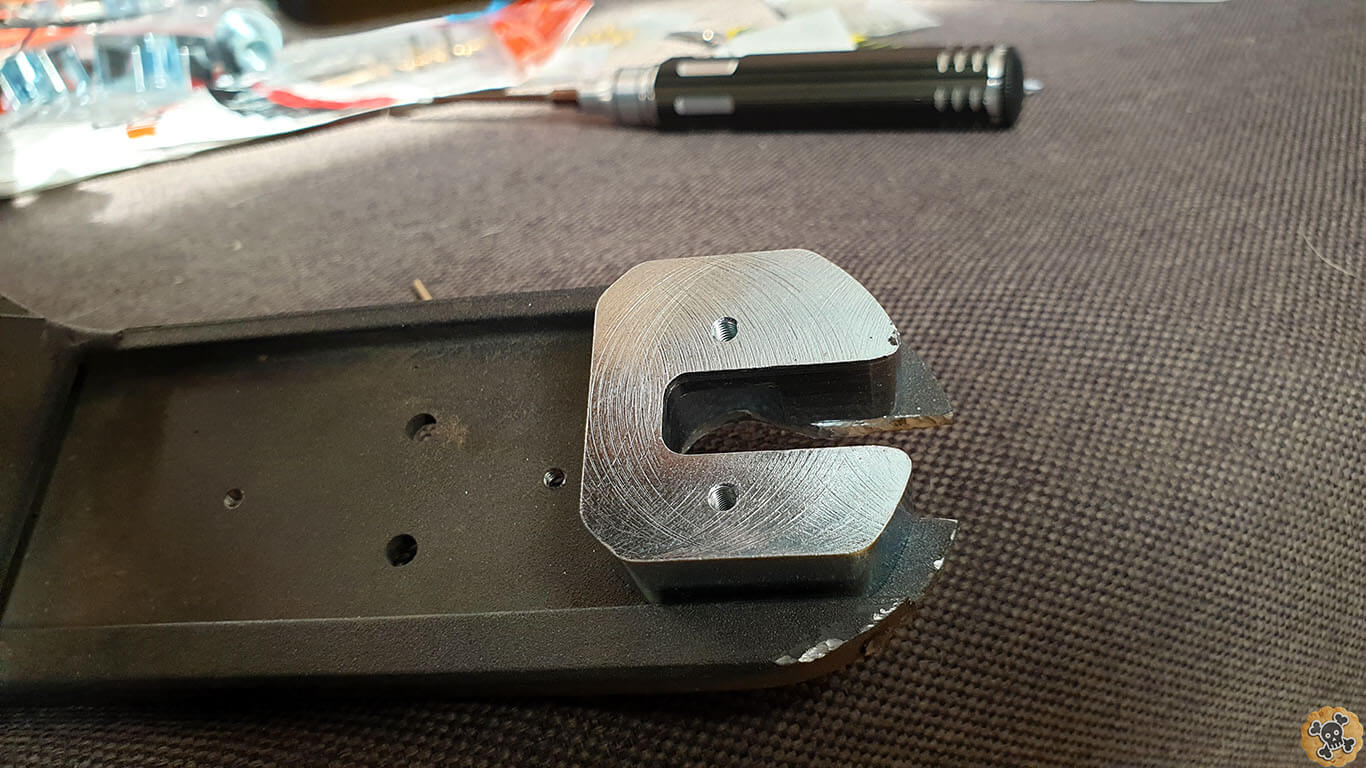
M365 Rear motor adapter
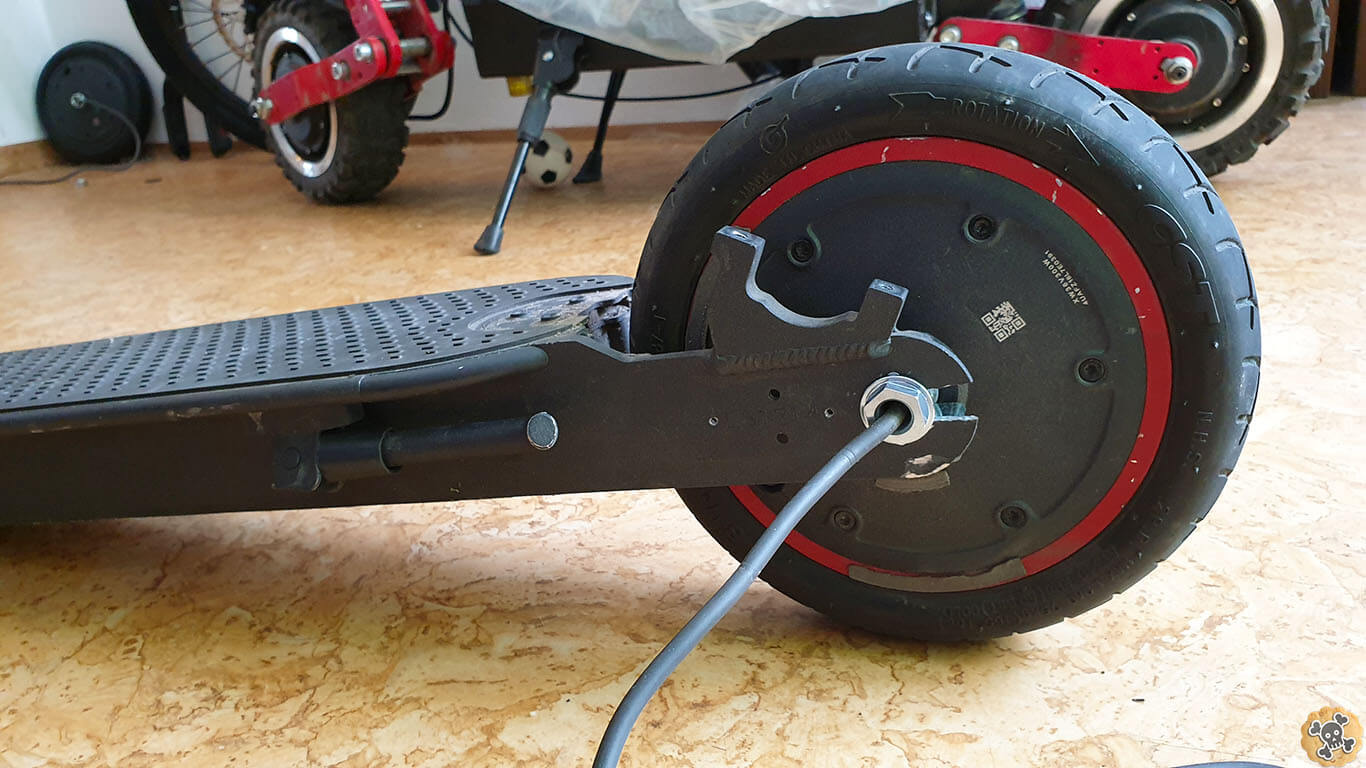
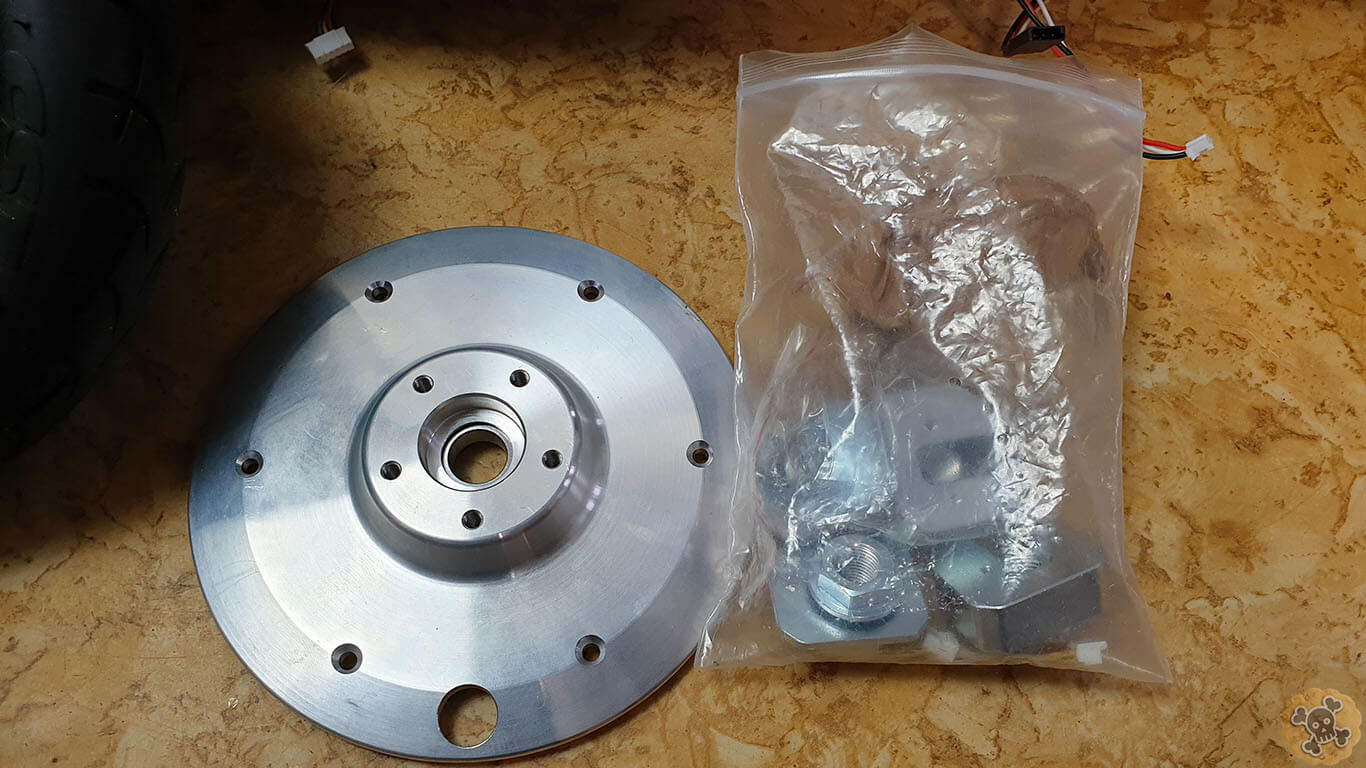
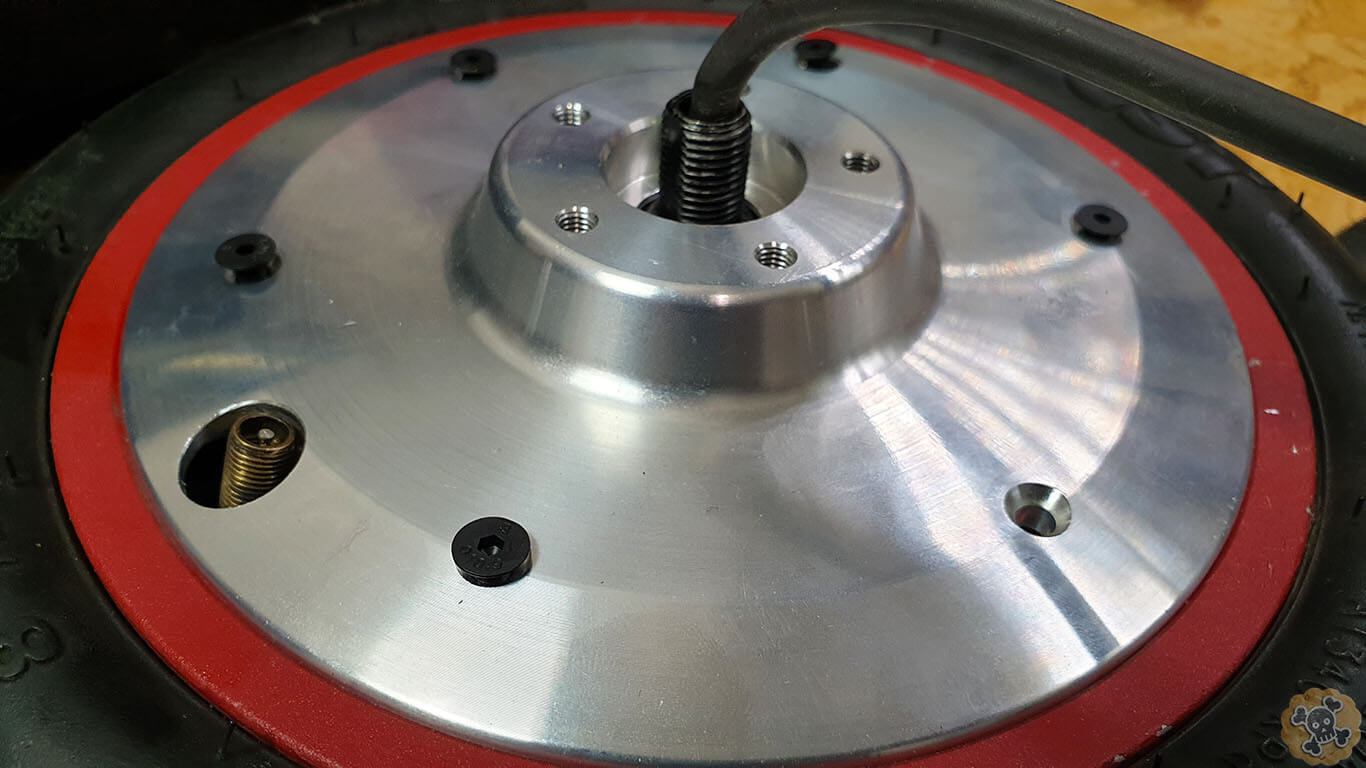
Anyway , to install rear motor you have to buy this Beauty adapter. I got it from Goran https://www.facebook.com/M365-custom-parts-103359807823933/ or m365customparts@gmail.com and I have to say that quality is Insane !!
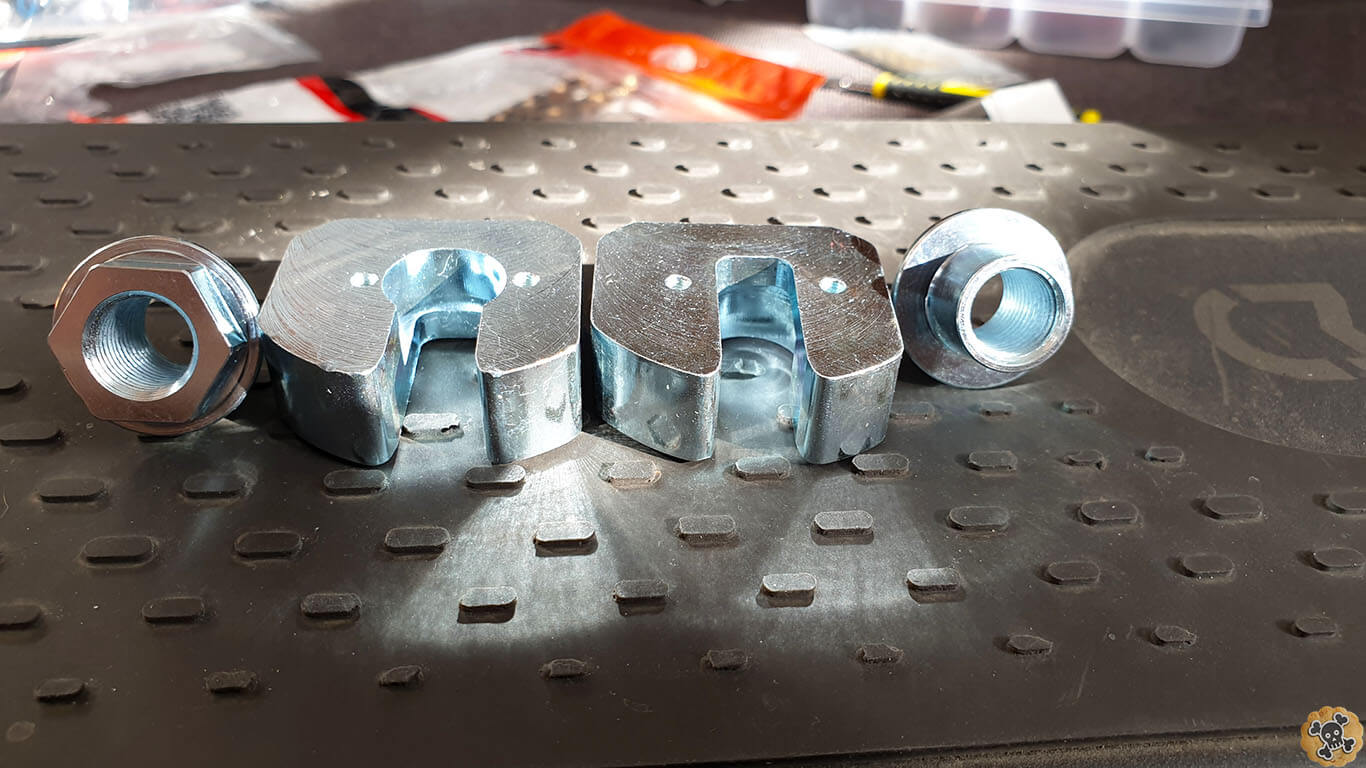

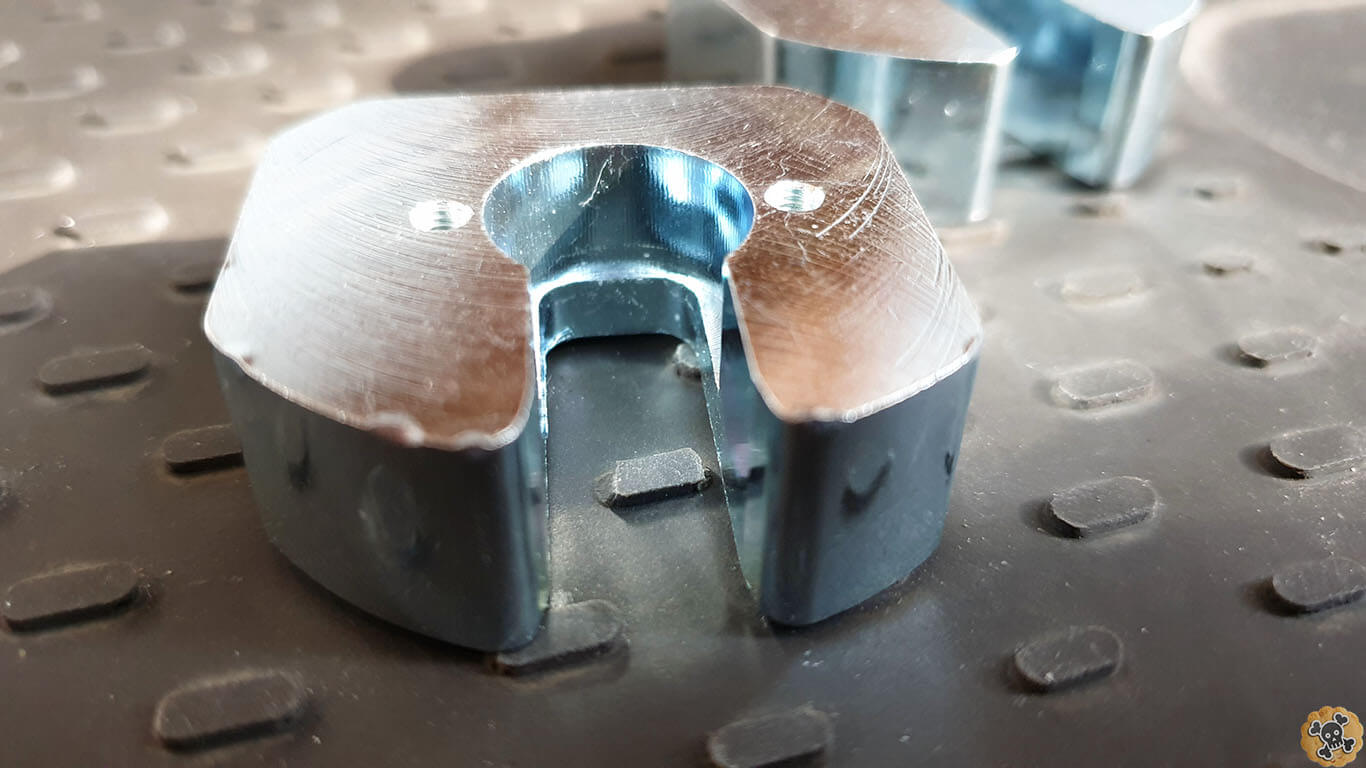
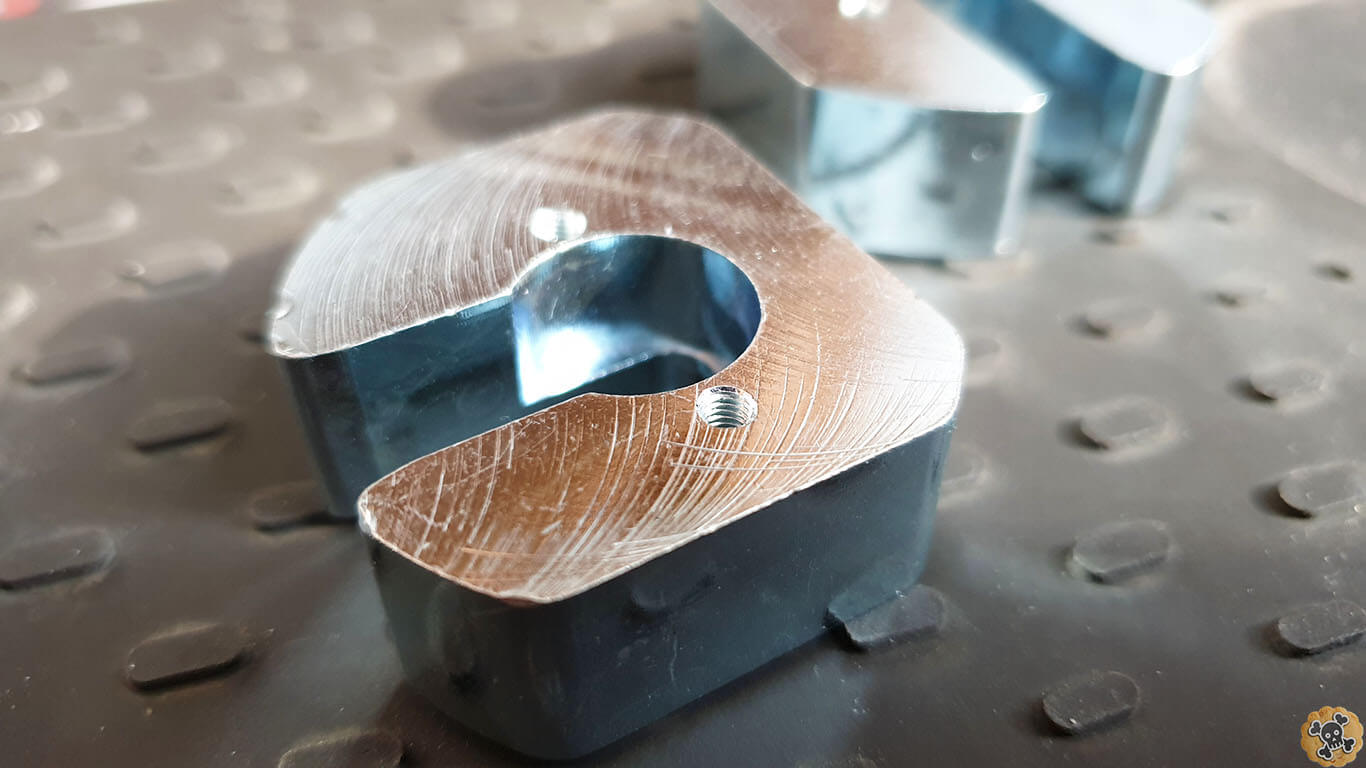
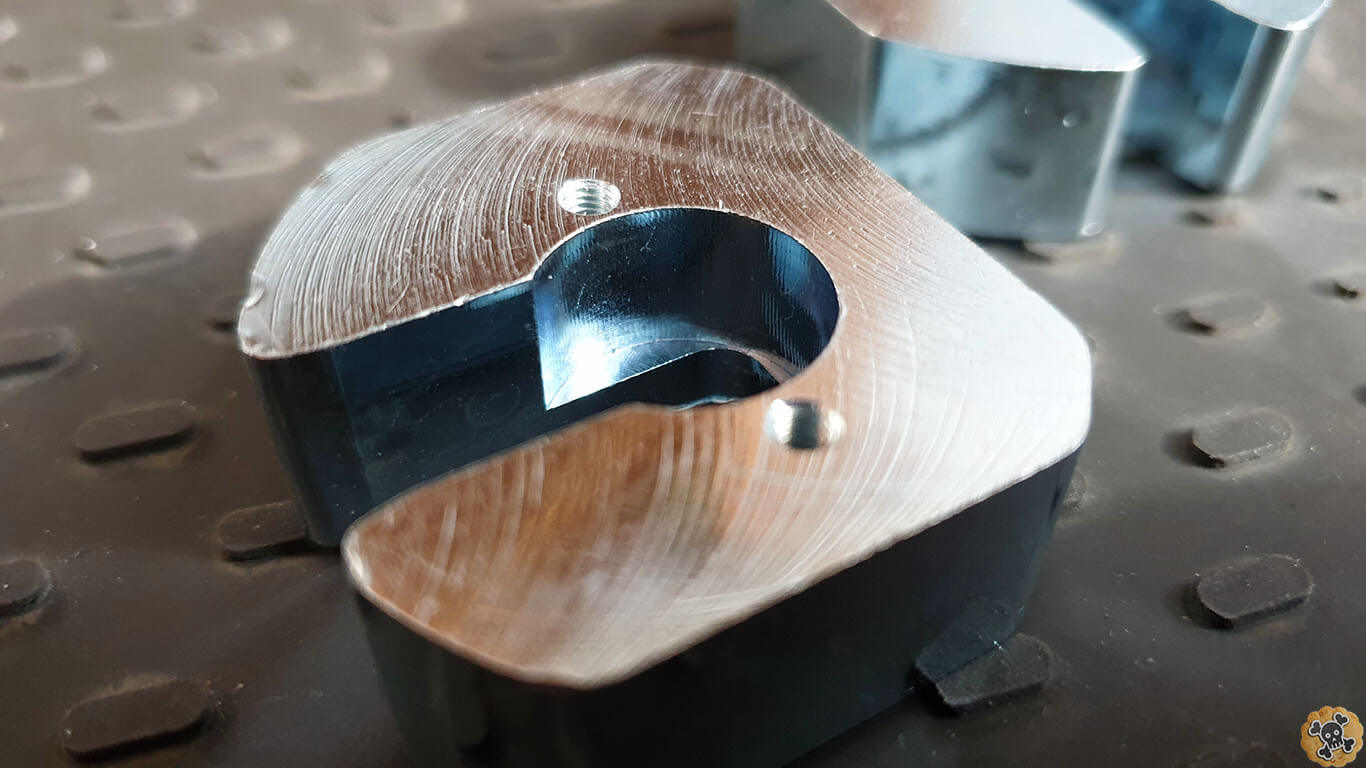
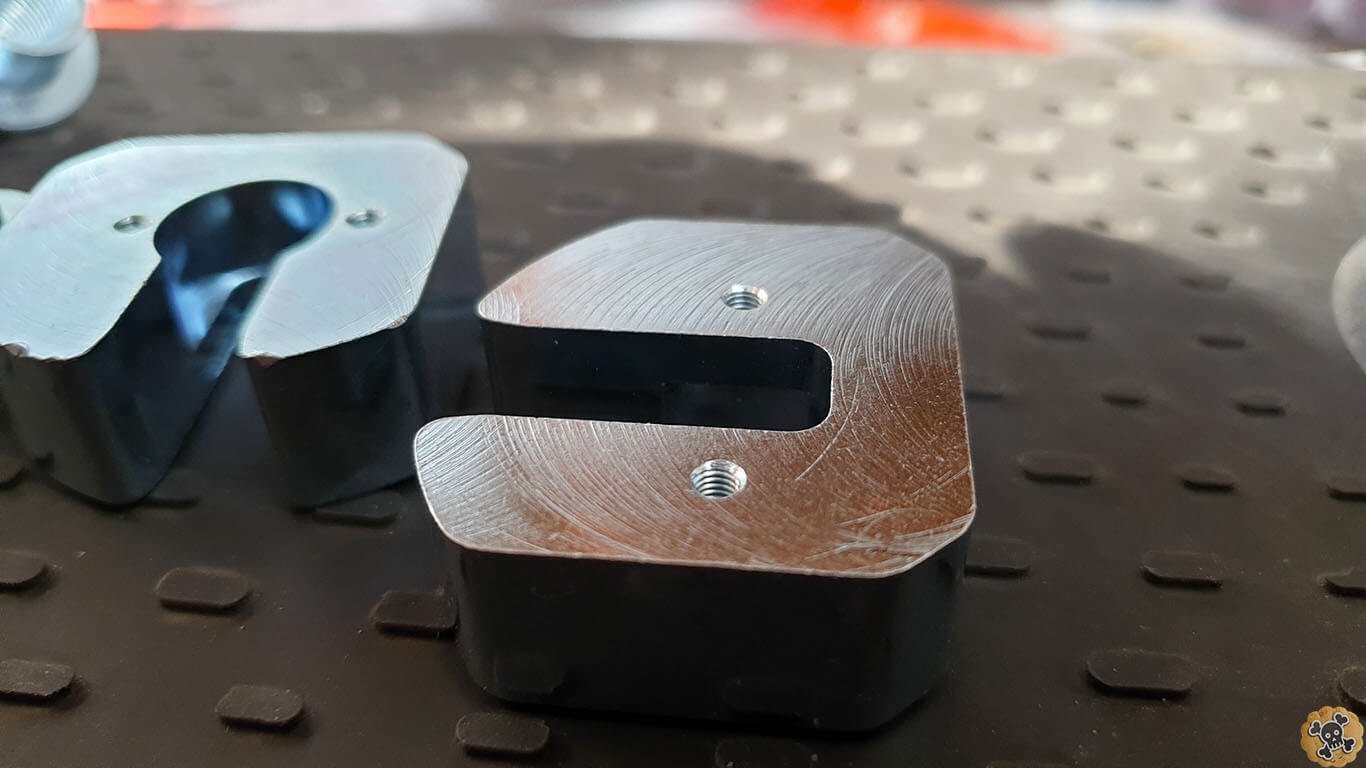
The best thing is that price is the lowest one that you can find on the whole market, just speak with Goran ( super nice guy, he made it and he got other HQ parts !)
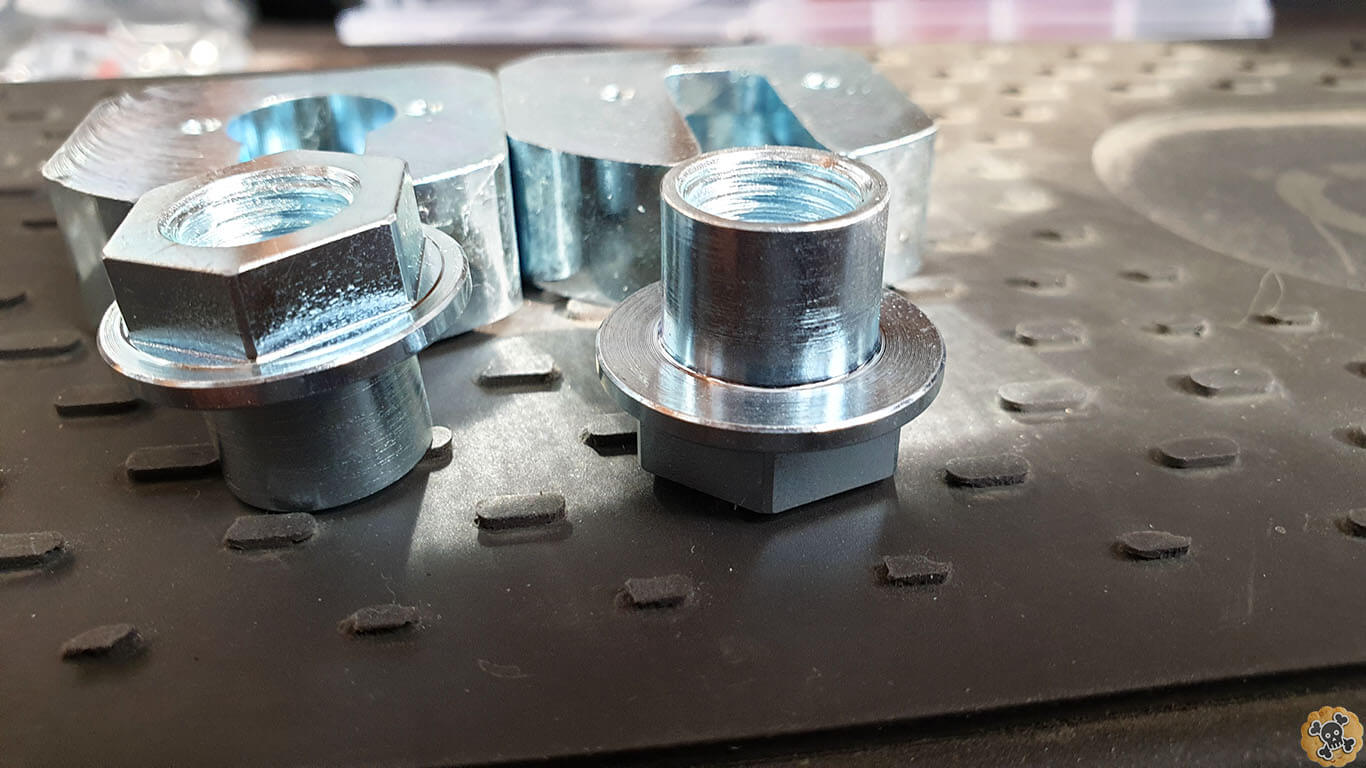
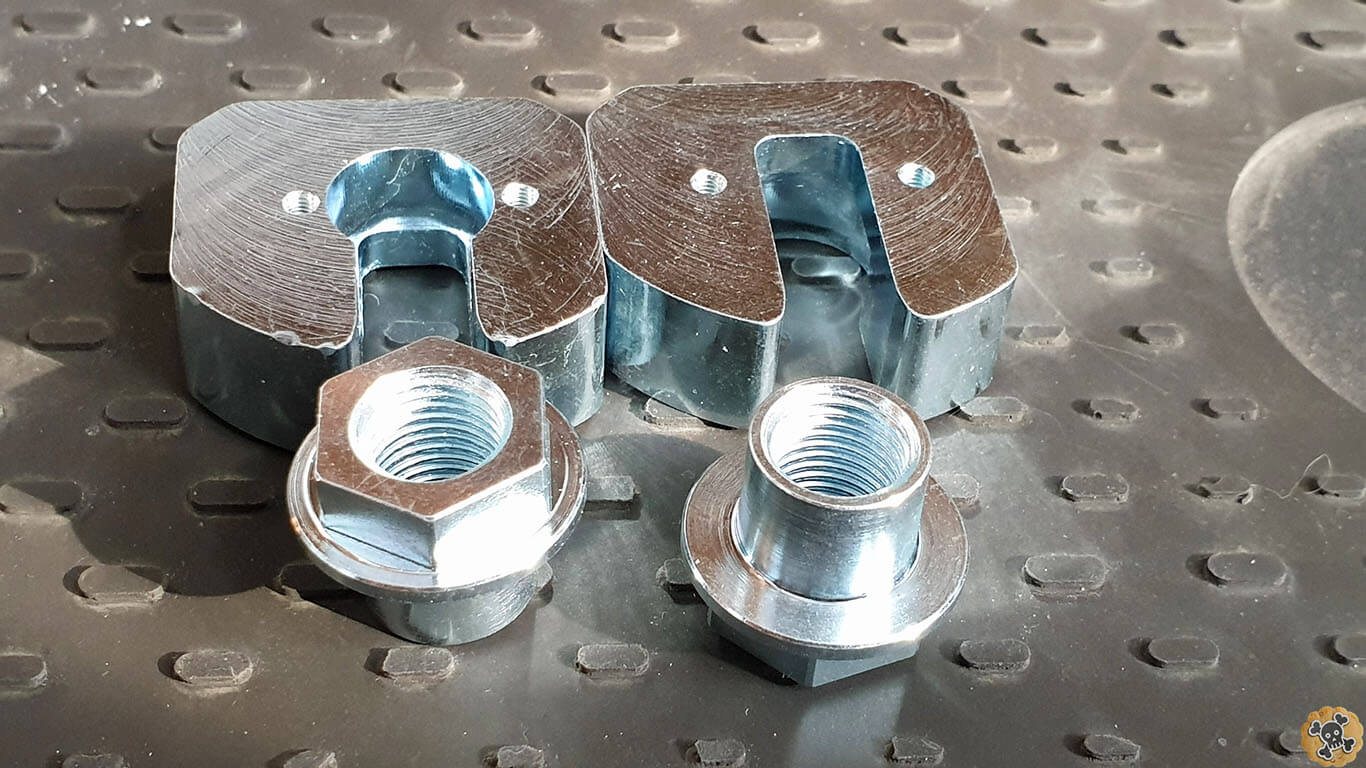
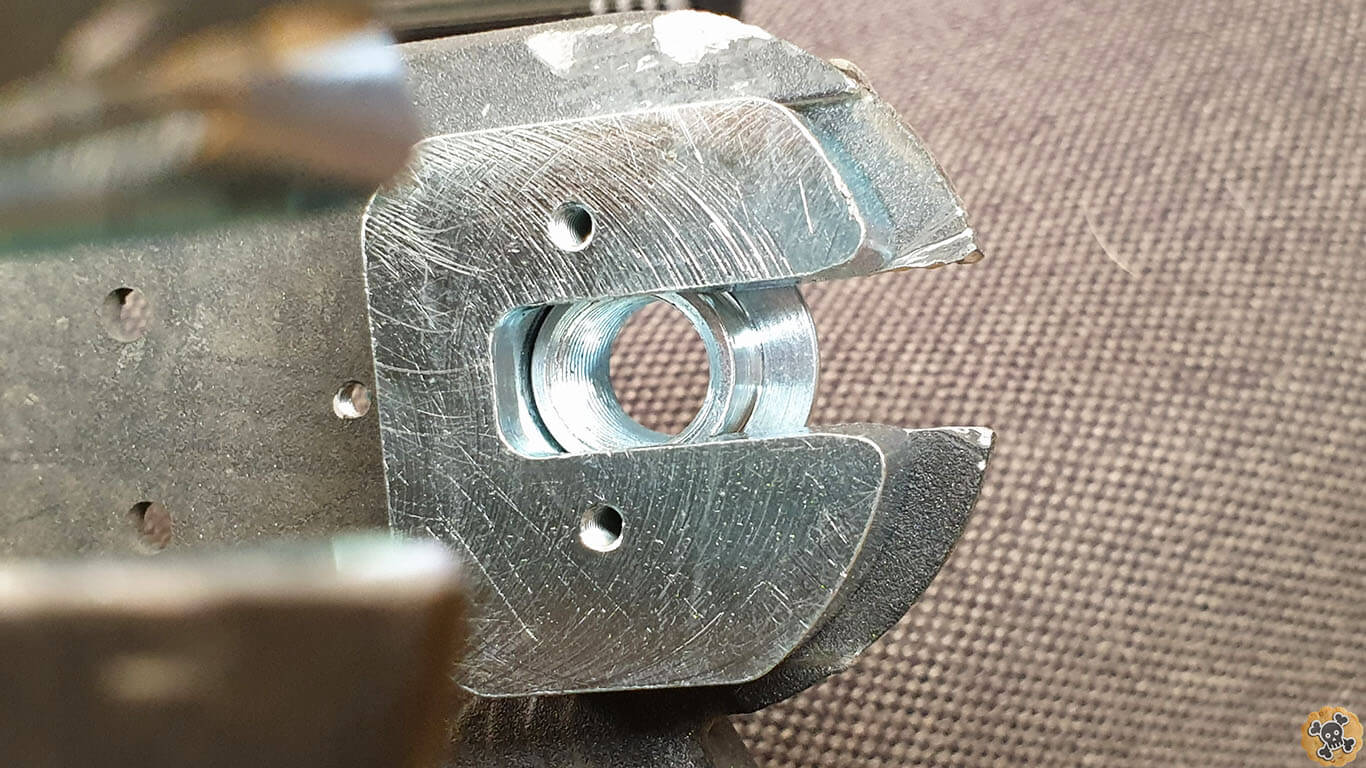
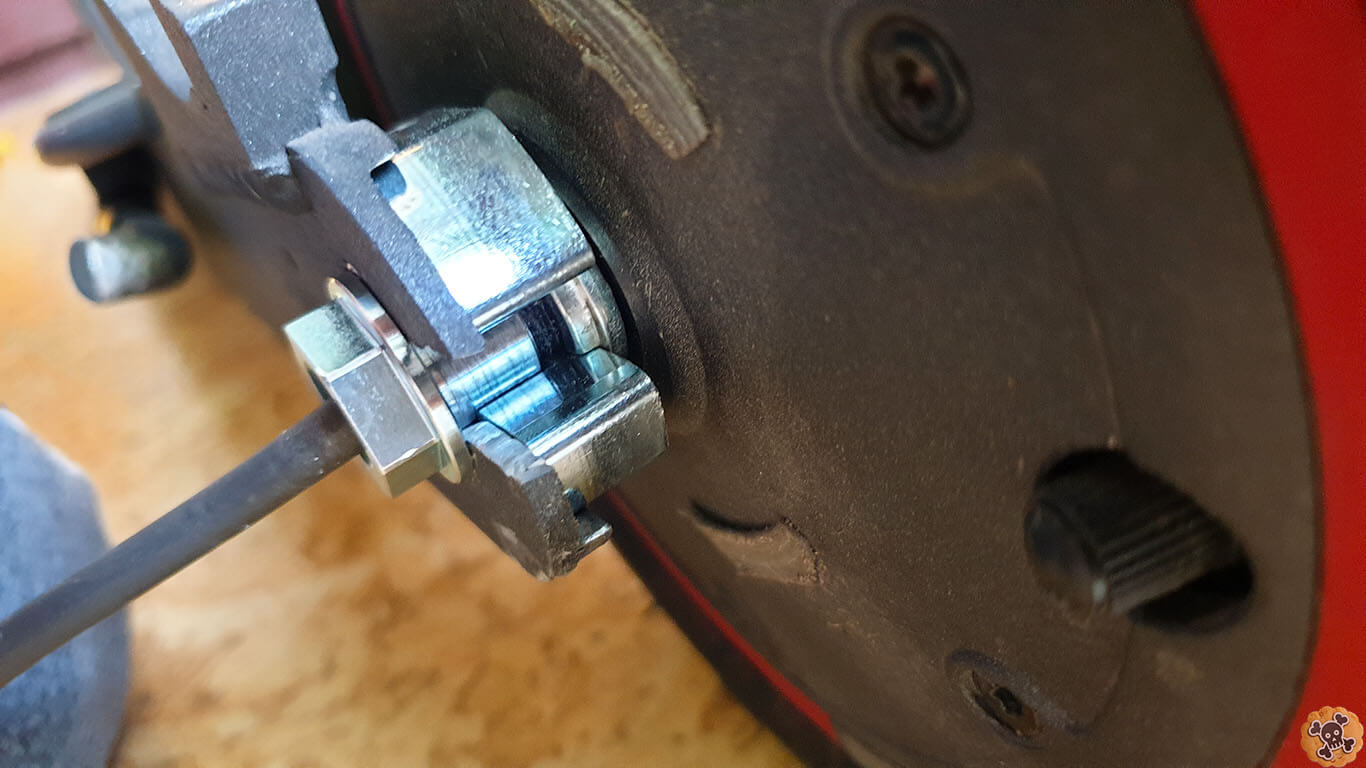
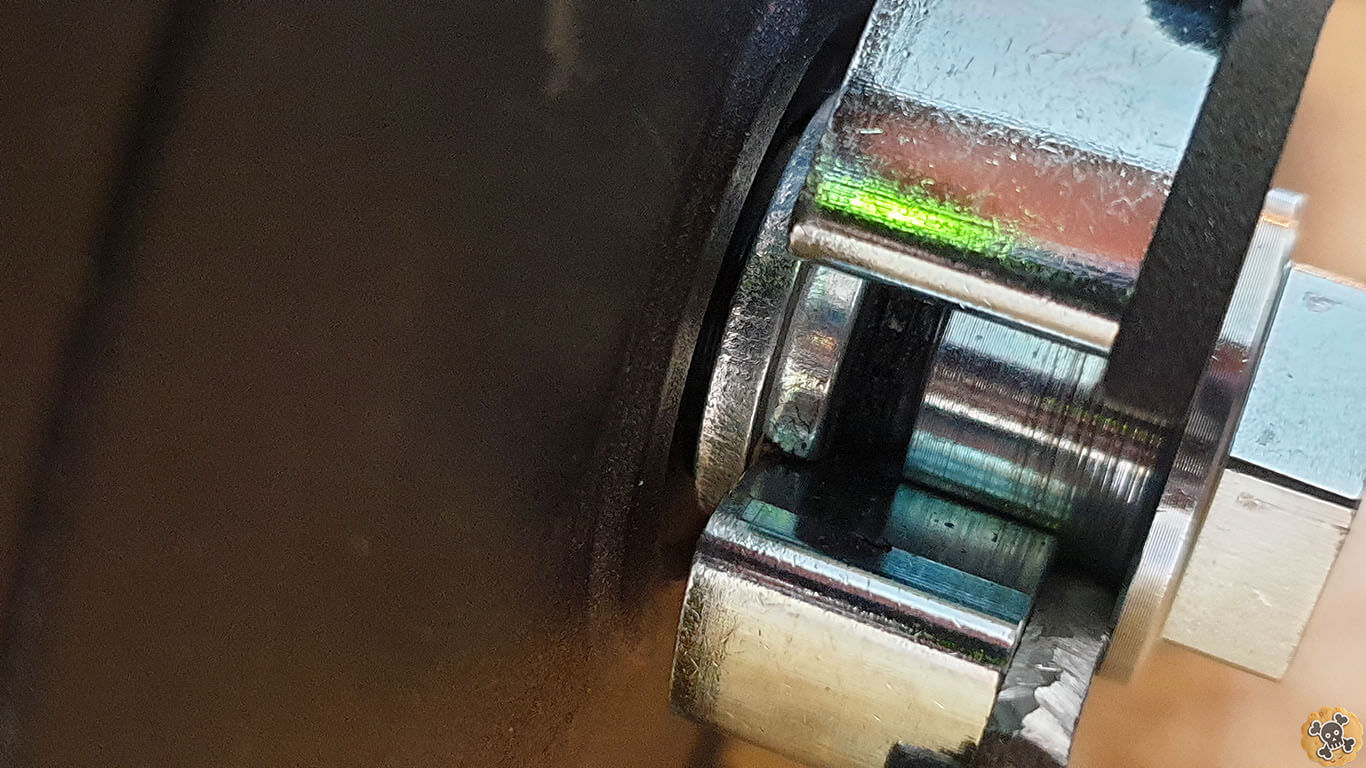
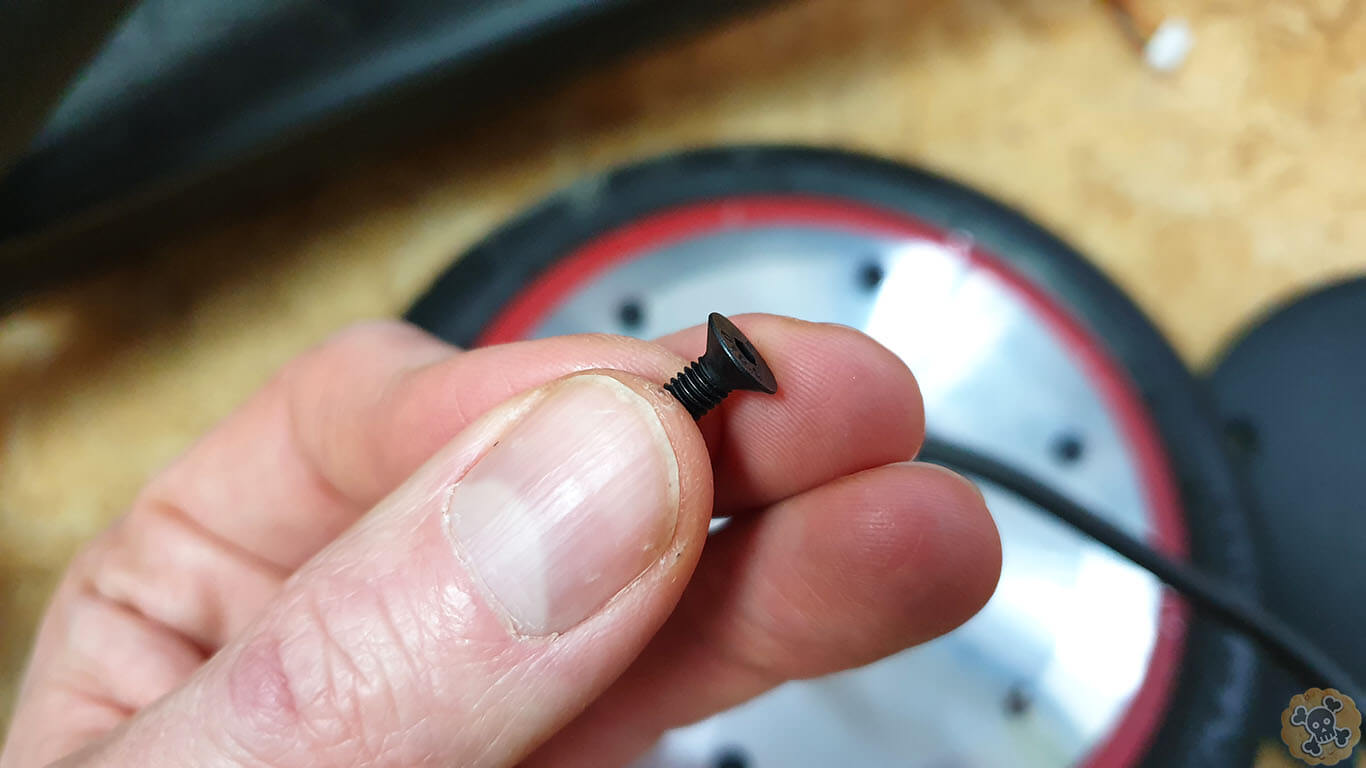
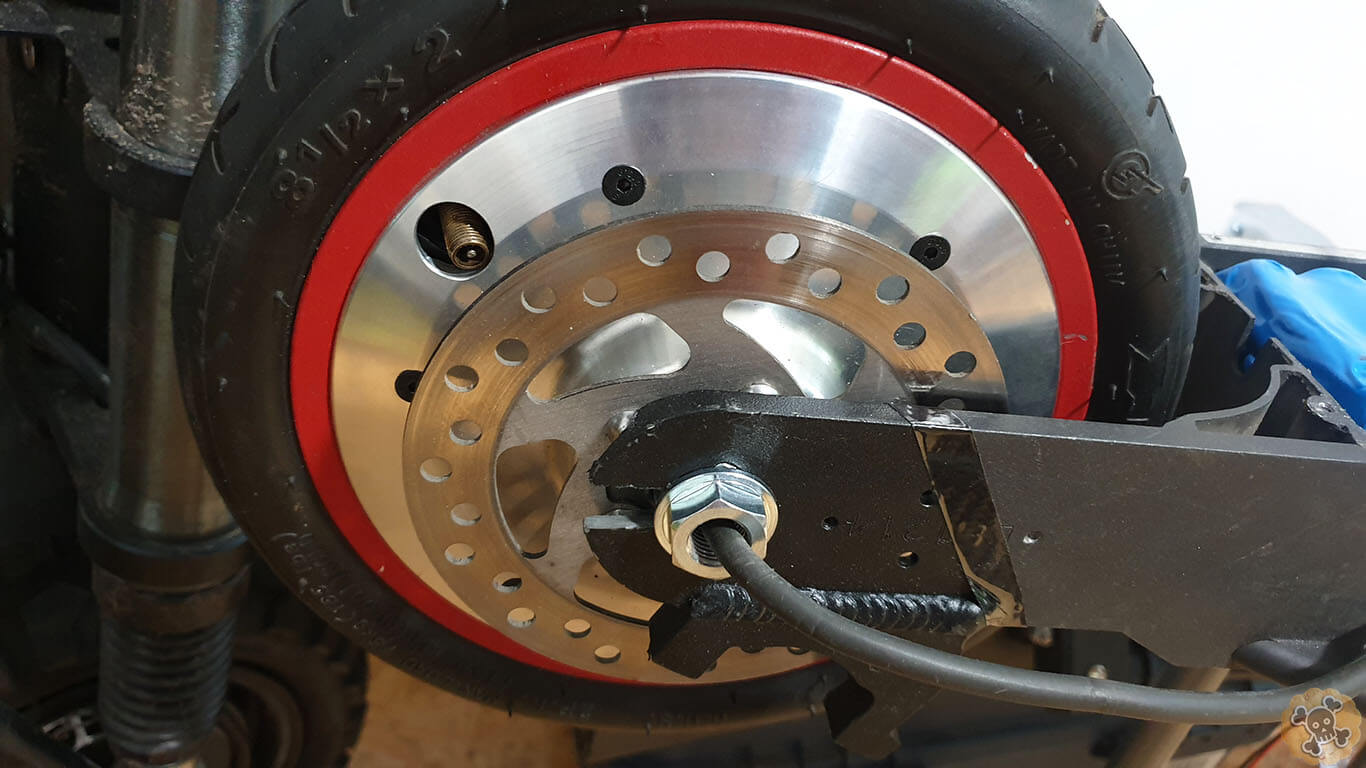
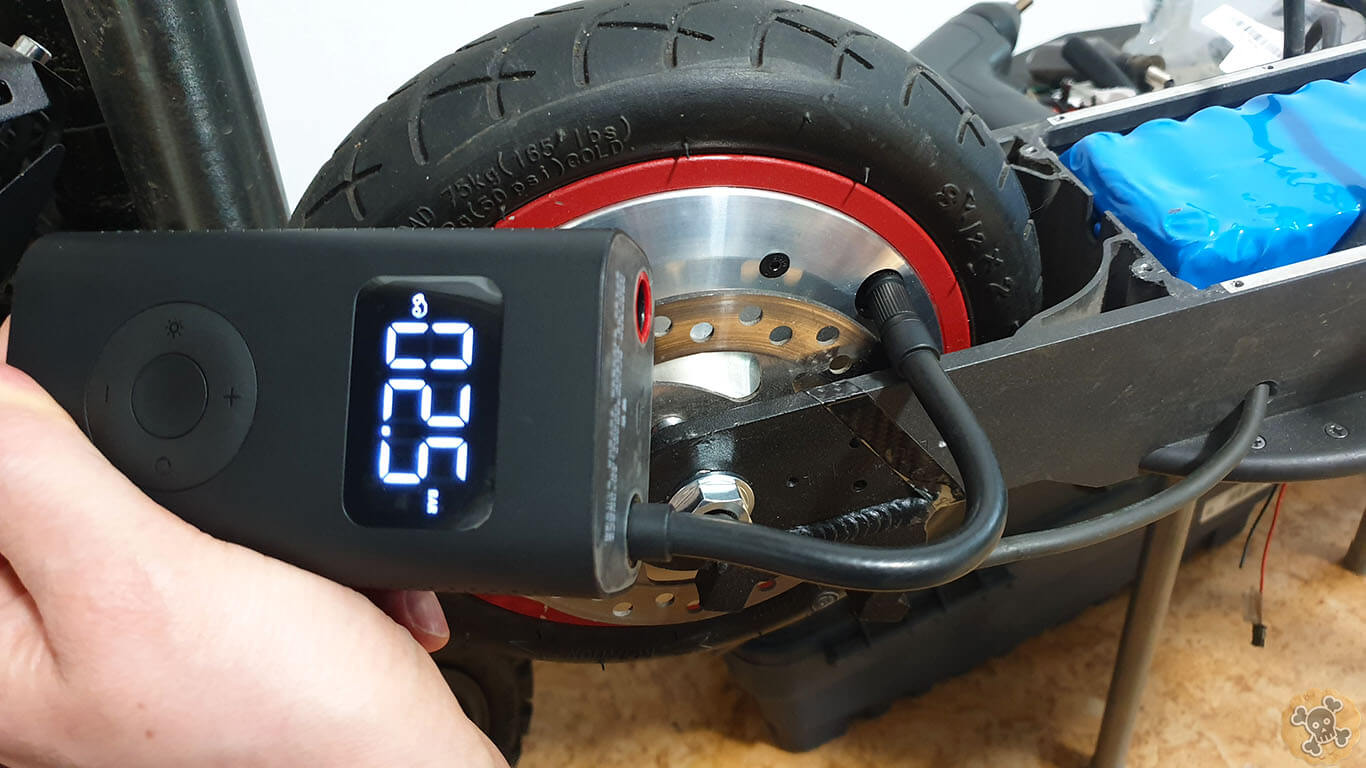
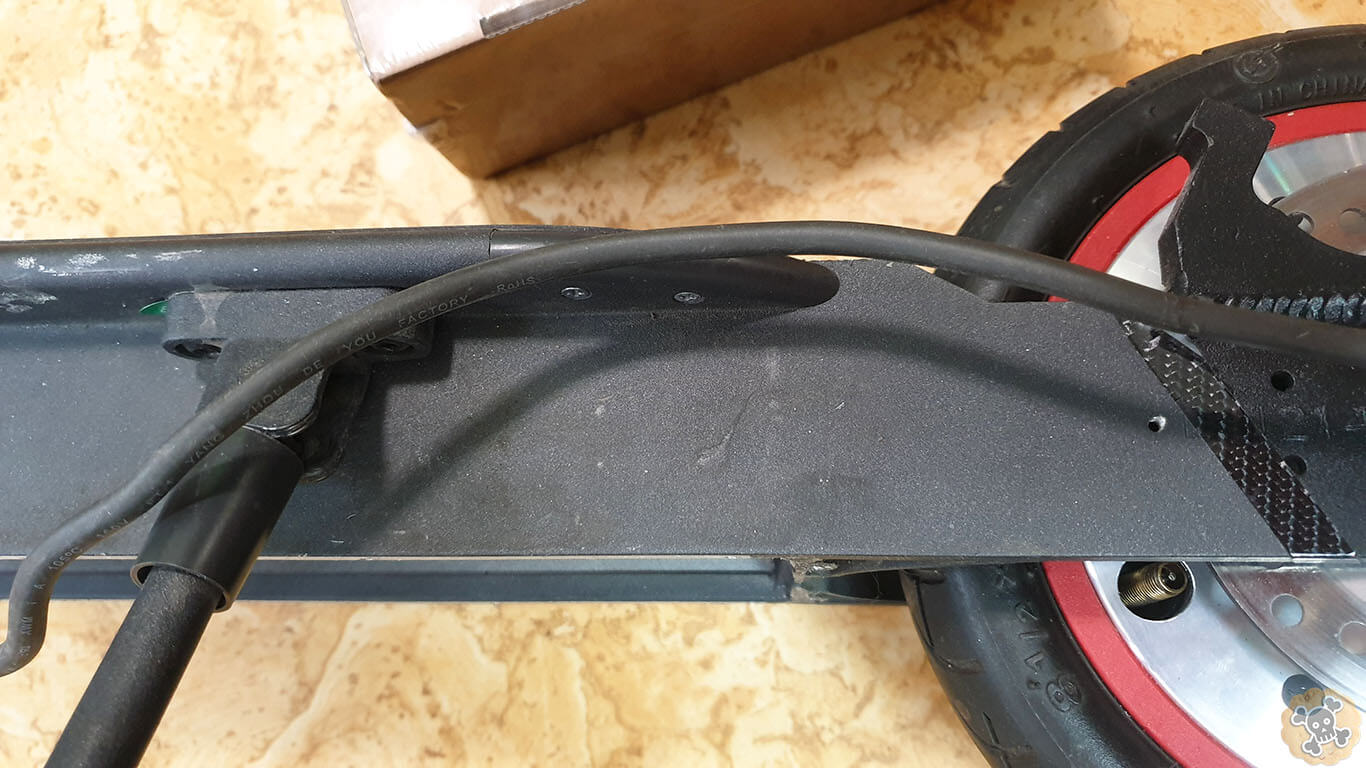
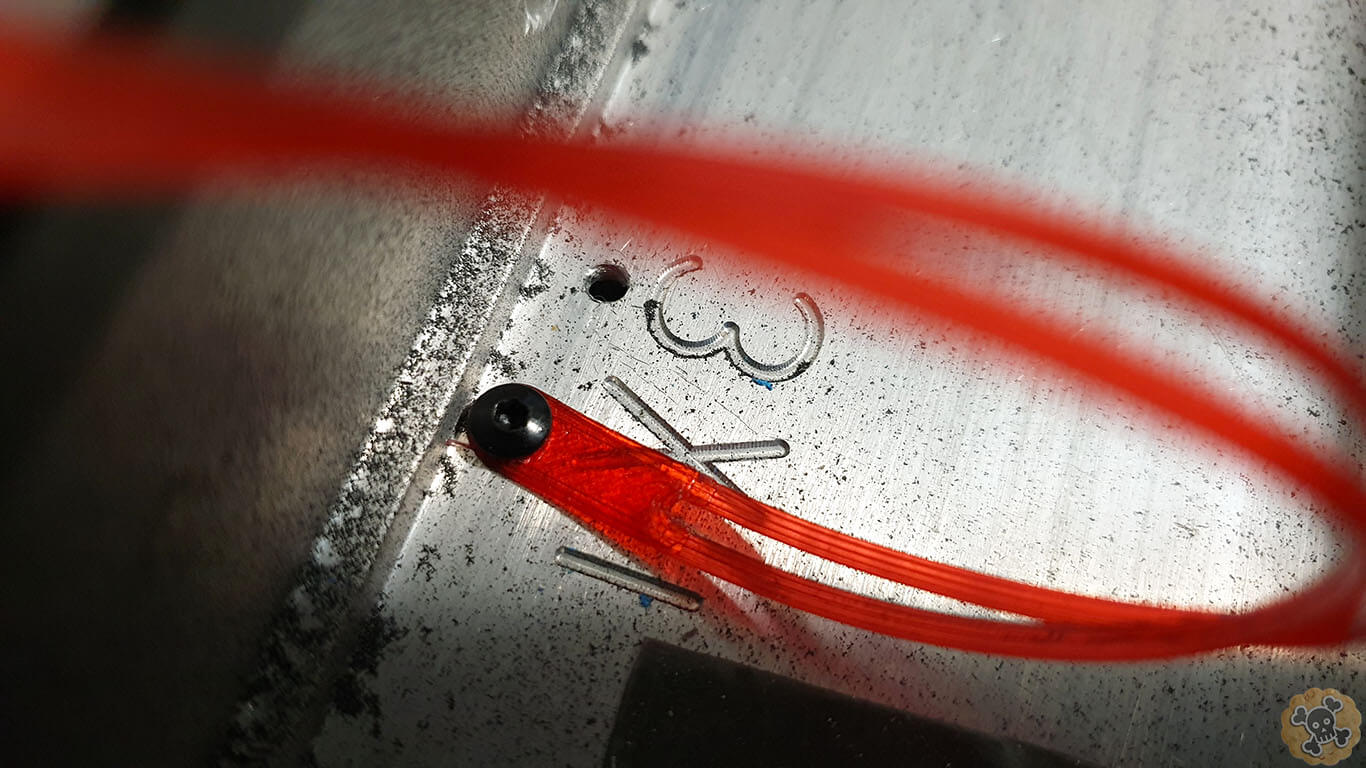
Now important thing , if you got M365 PRO just cut one rail on side where you got disc !!!! ( just drill bigger 15mm hole and it’s done) . I didn’t have at that time 15mm drill and hole looks really bad 😉

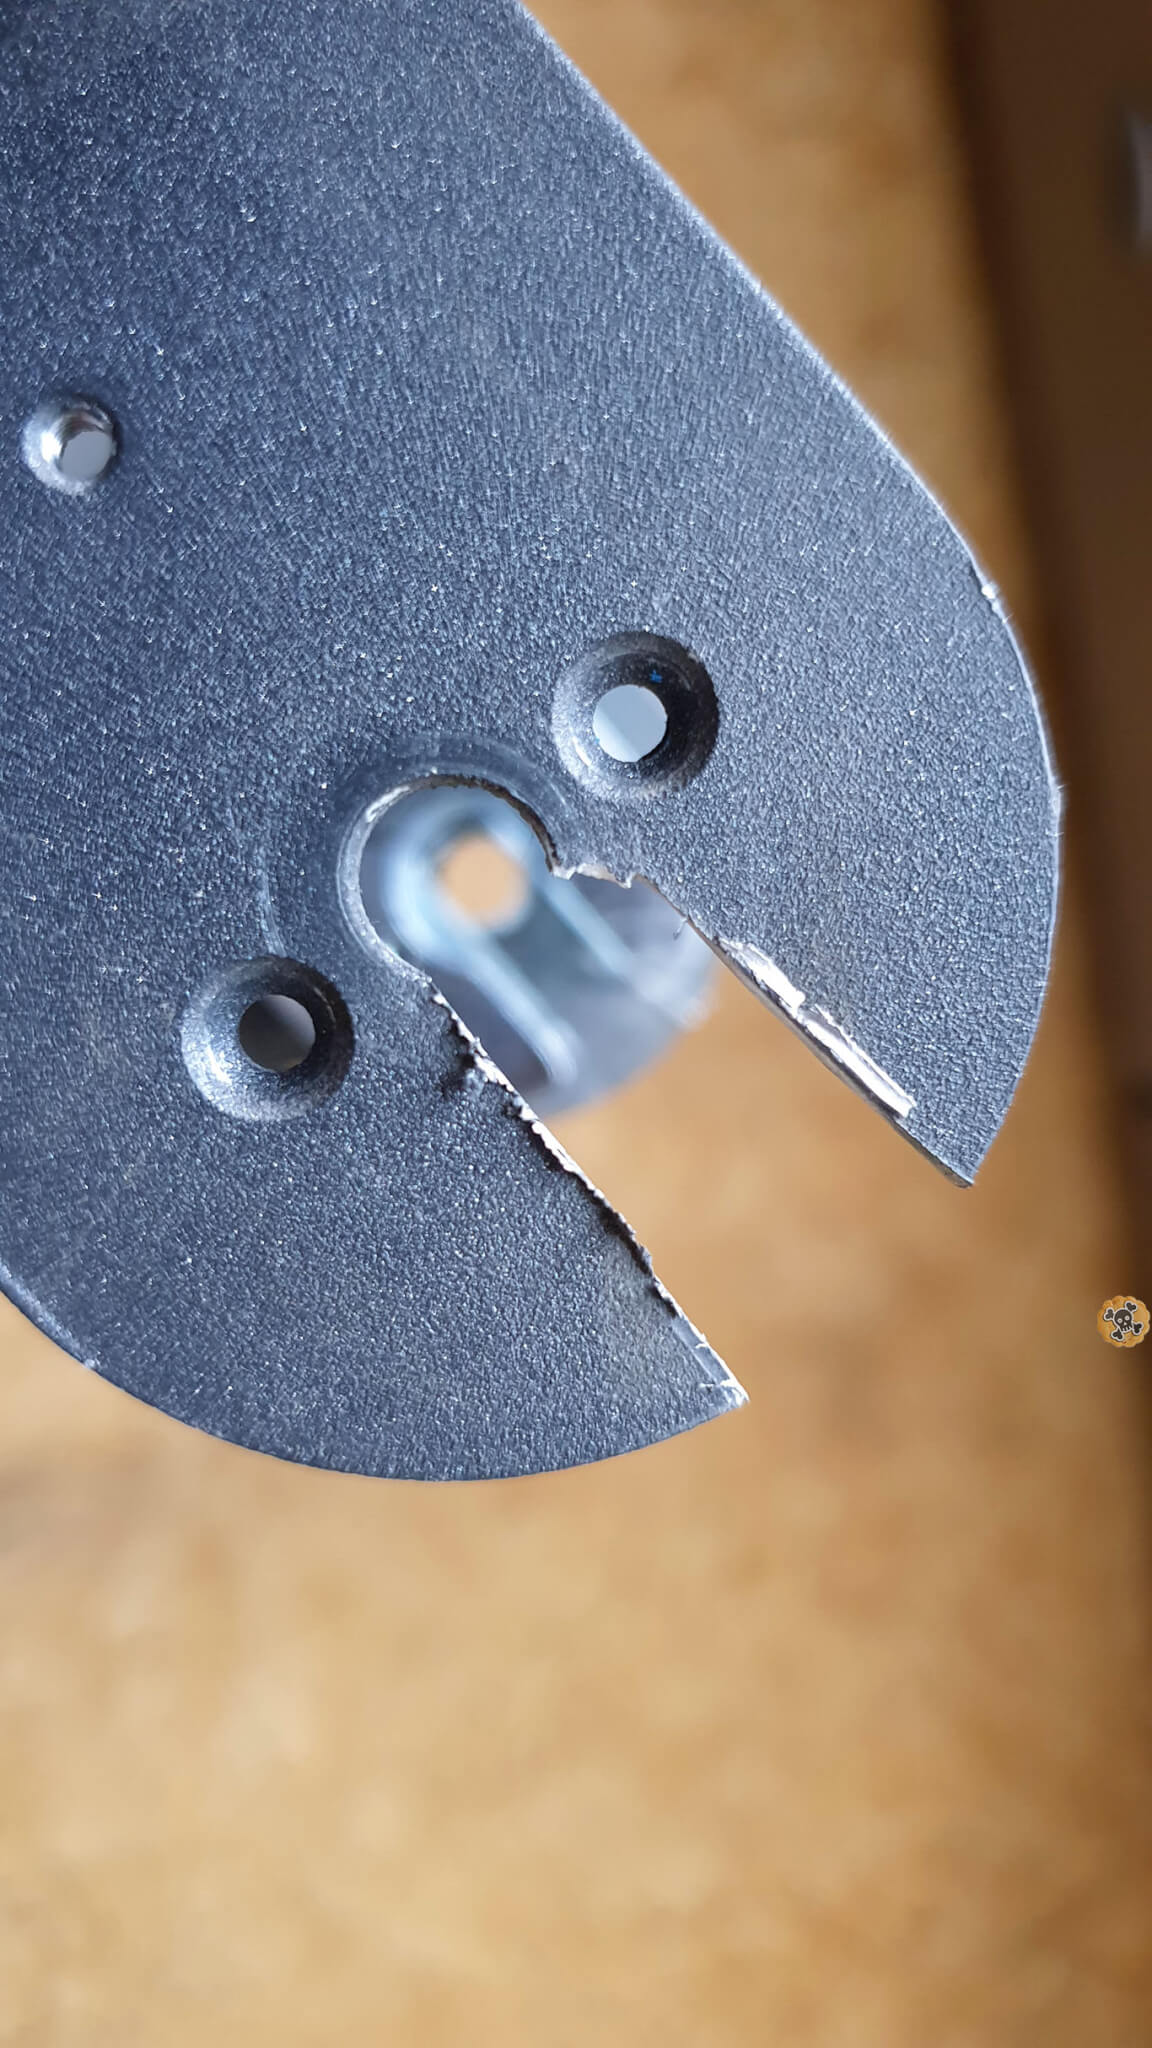
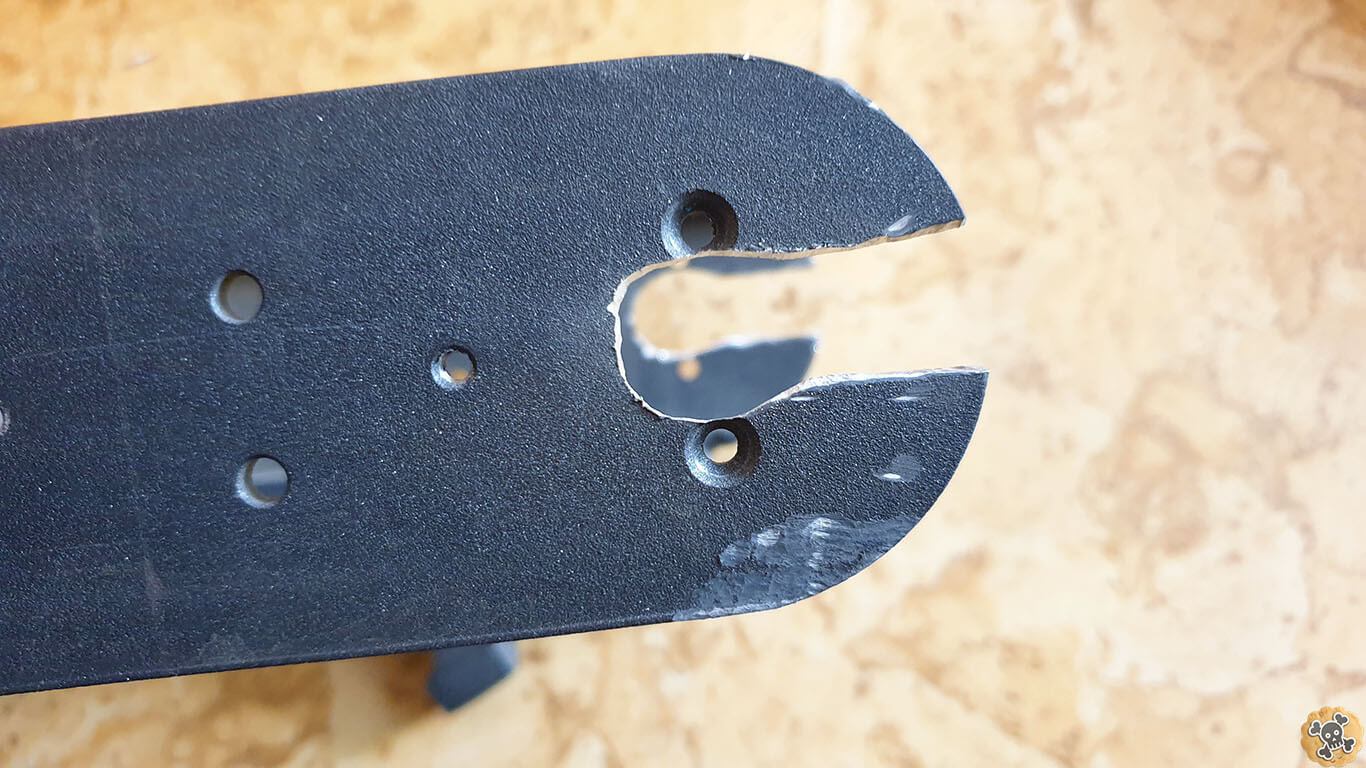
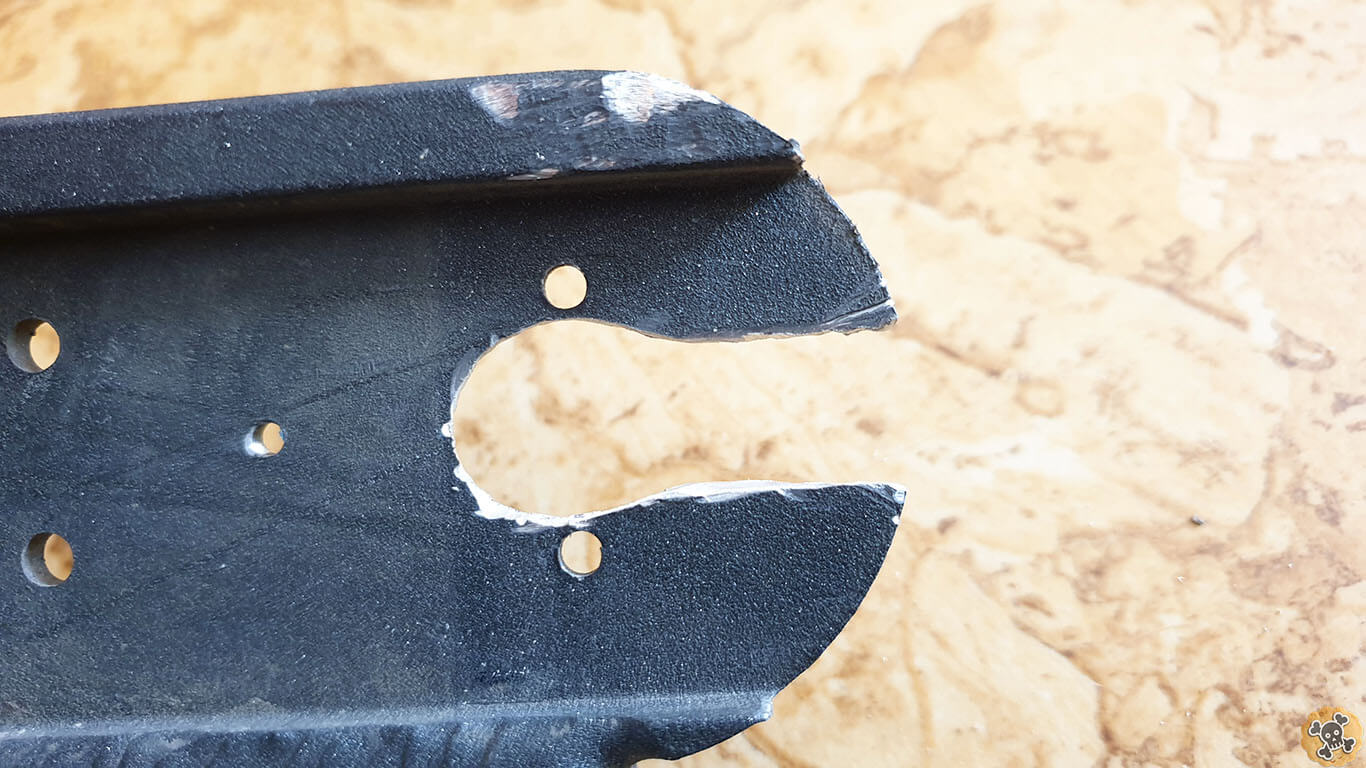
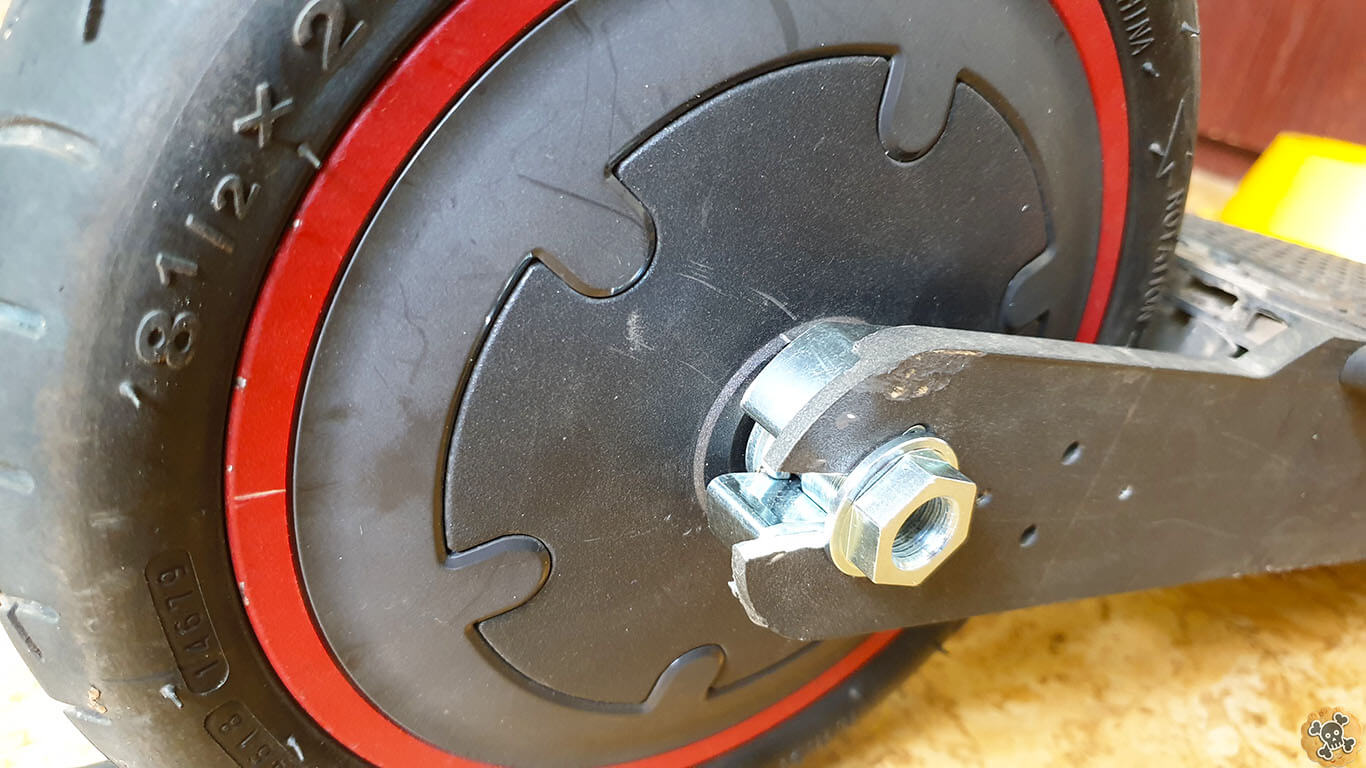
Adapter fits just perfect, you don’t need to be worry if this is not straight cut ( like in my case, looks like some maniac done it by using kitchen knife ?? ). because adapter is hold by 2 screws which holds stock adapter.
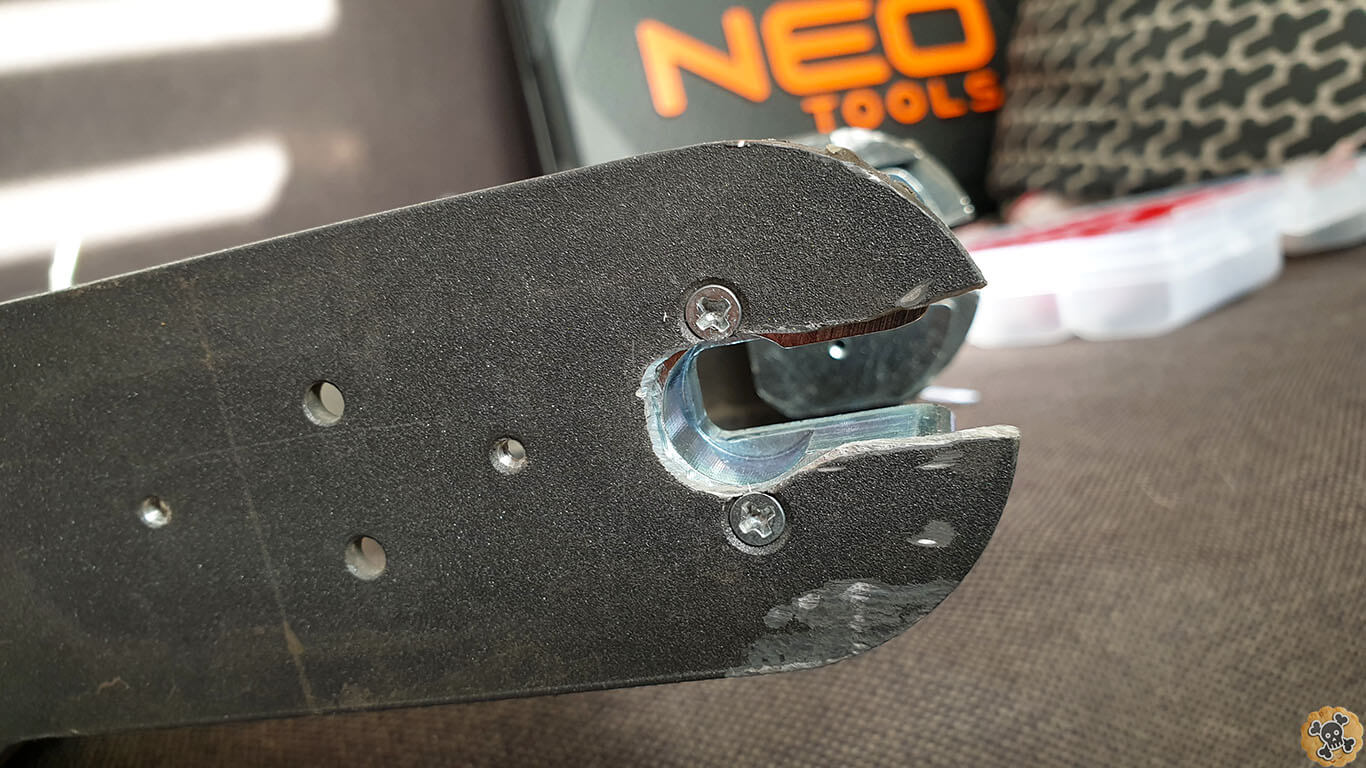
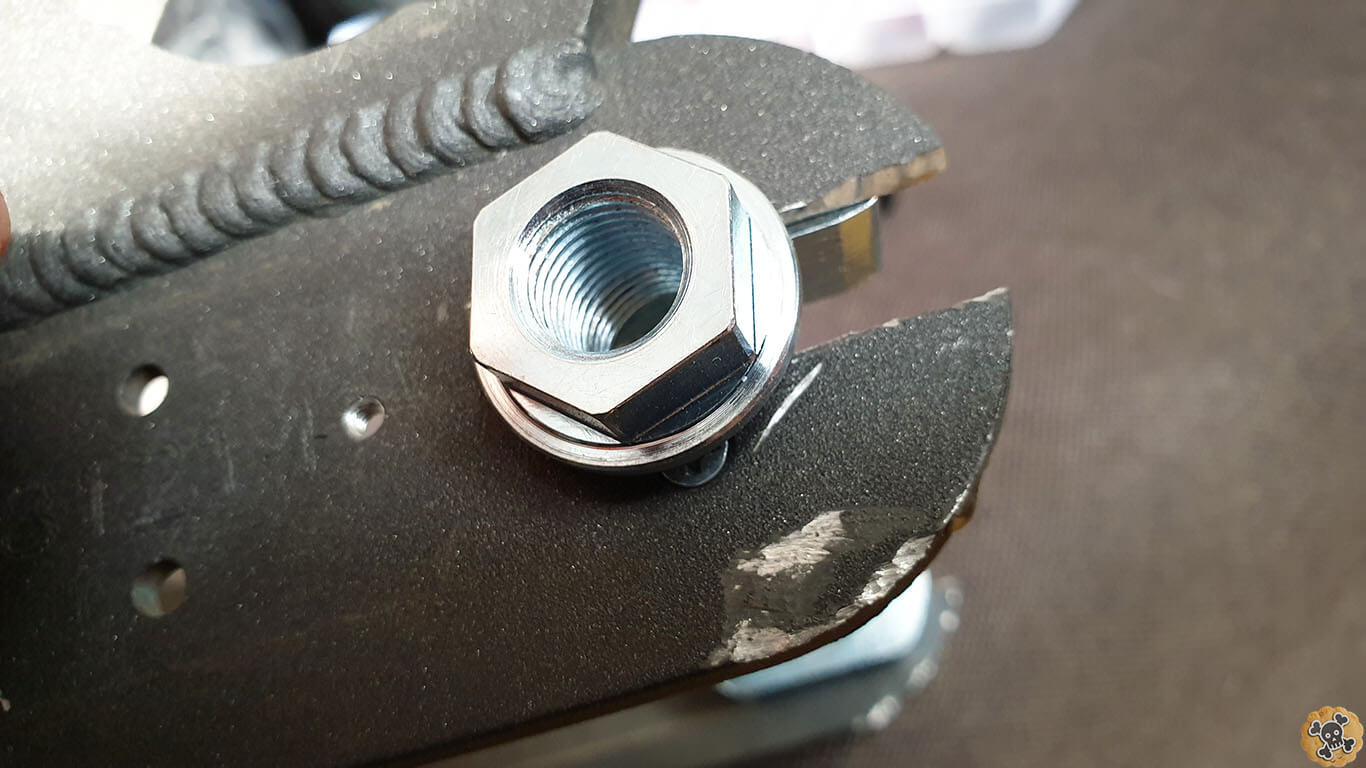
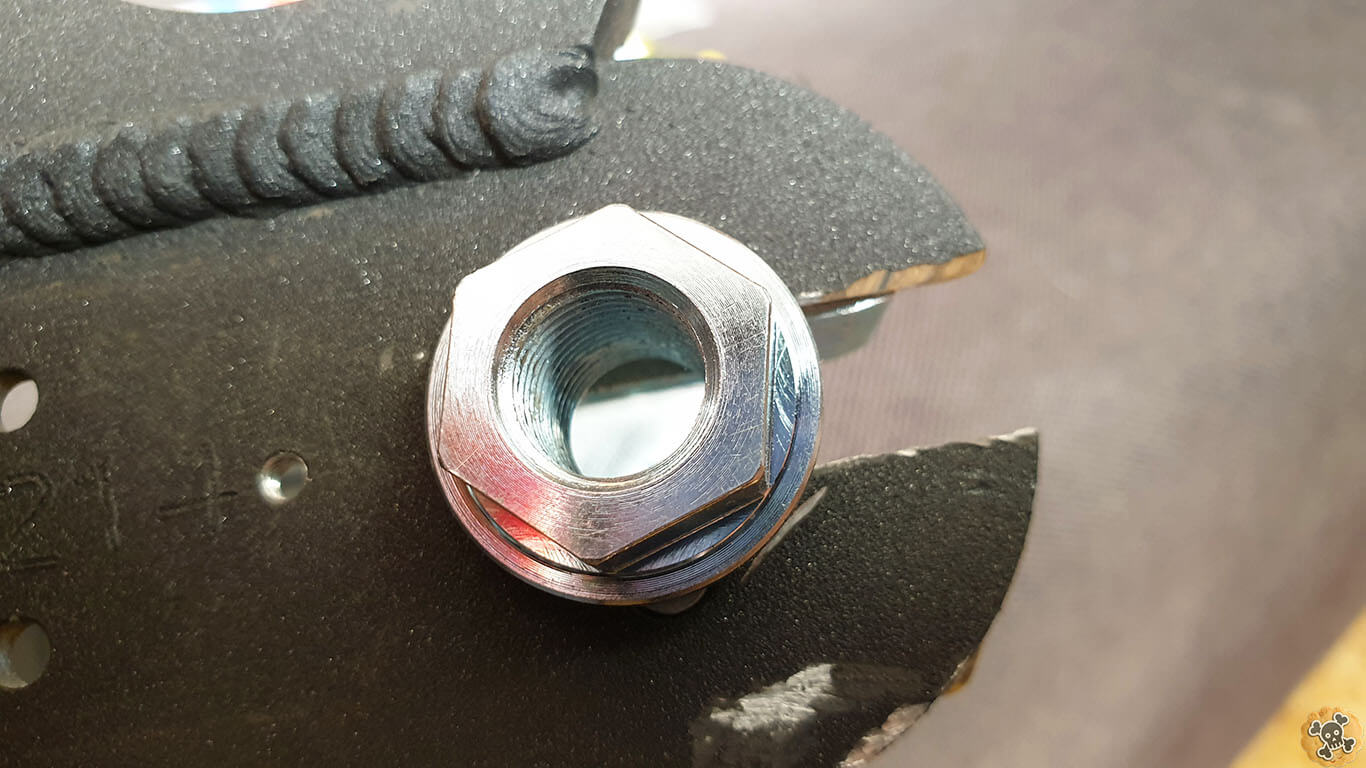
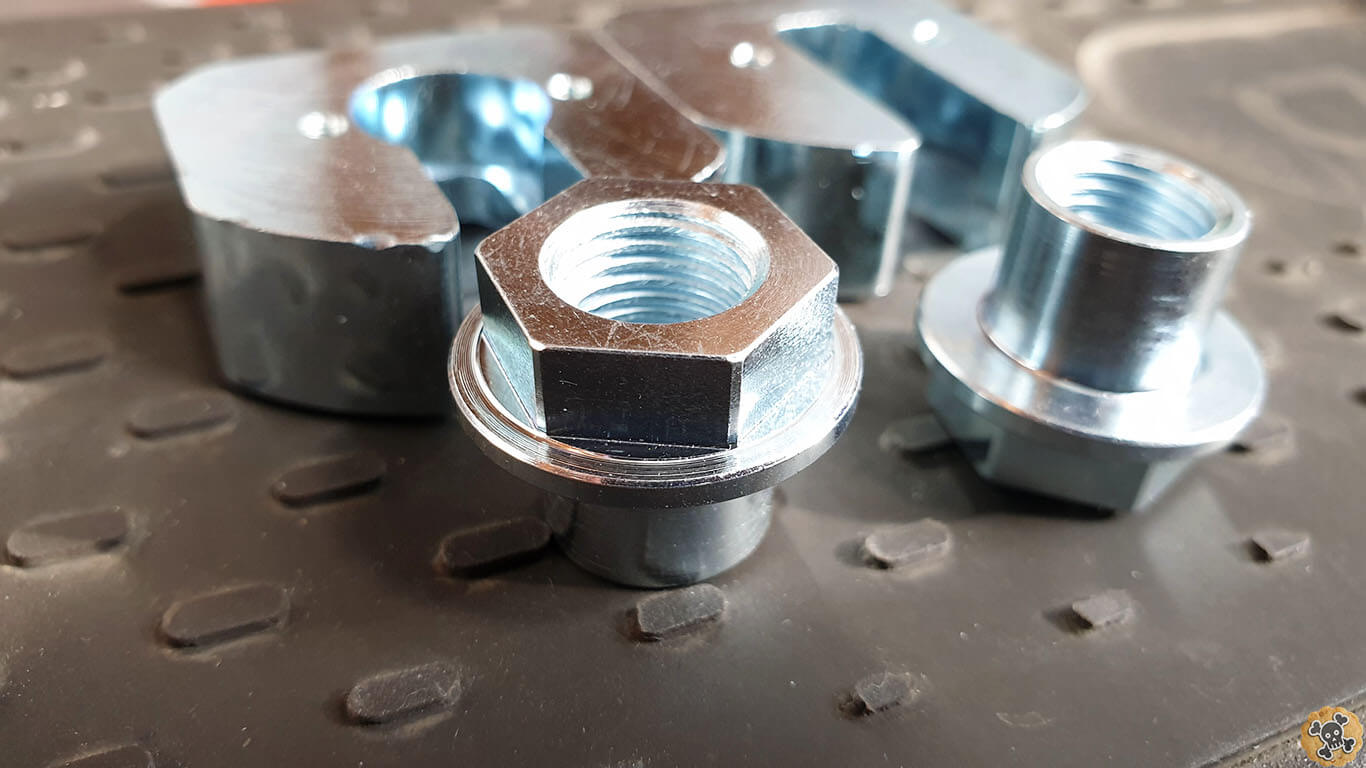
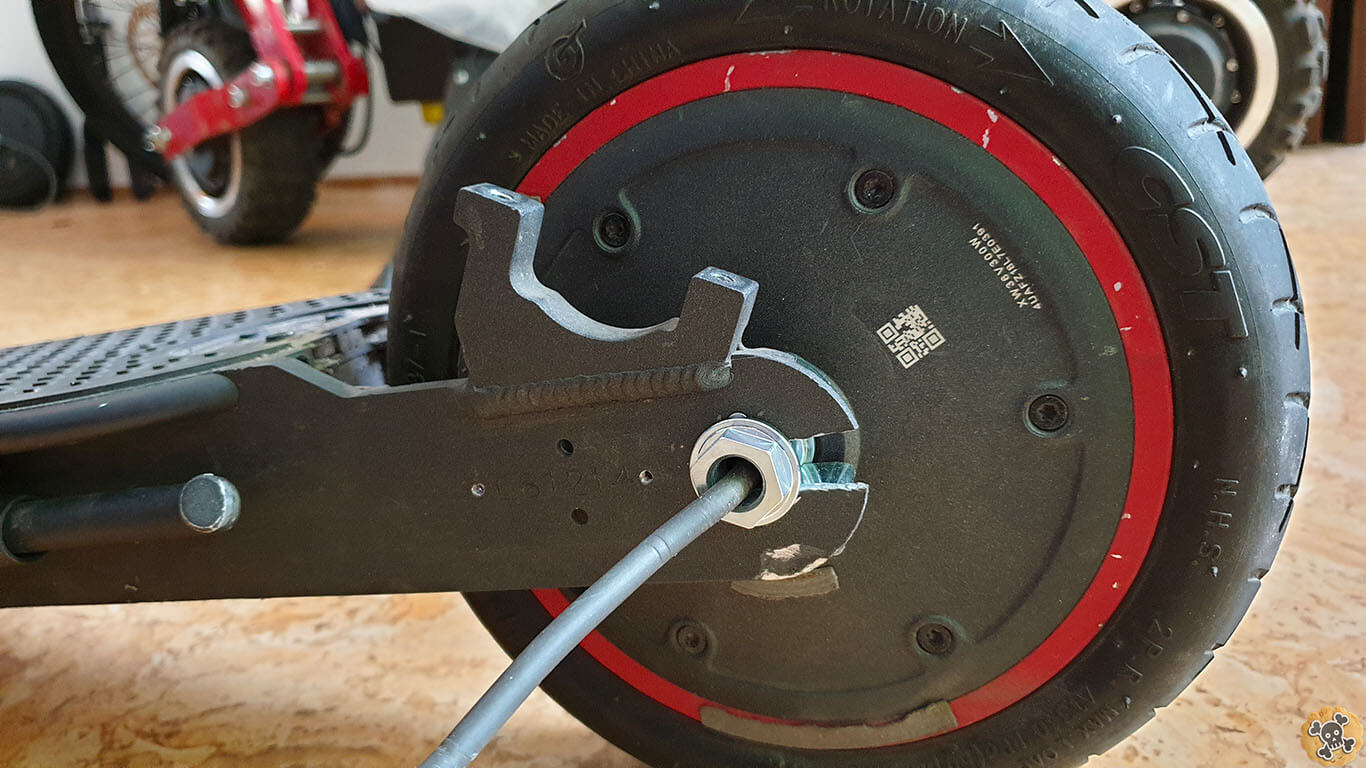
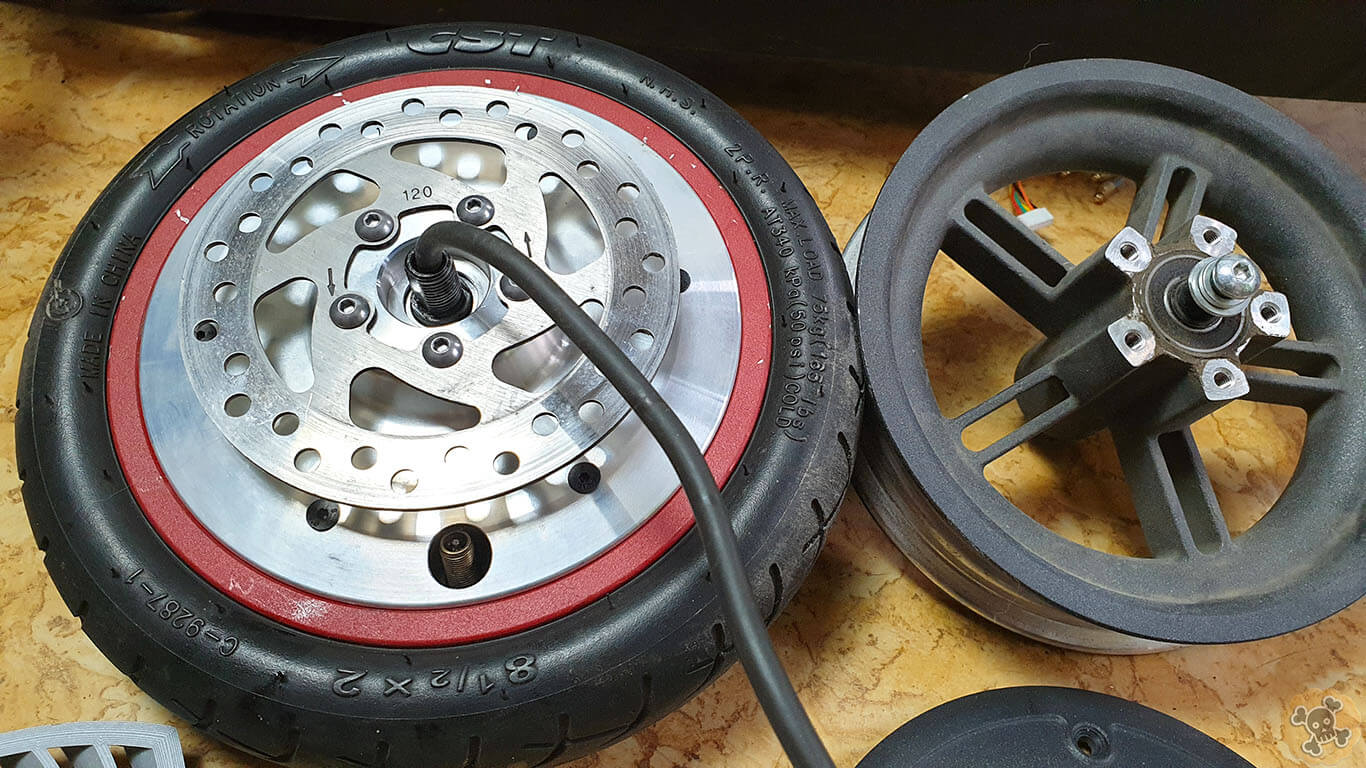
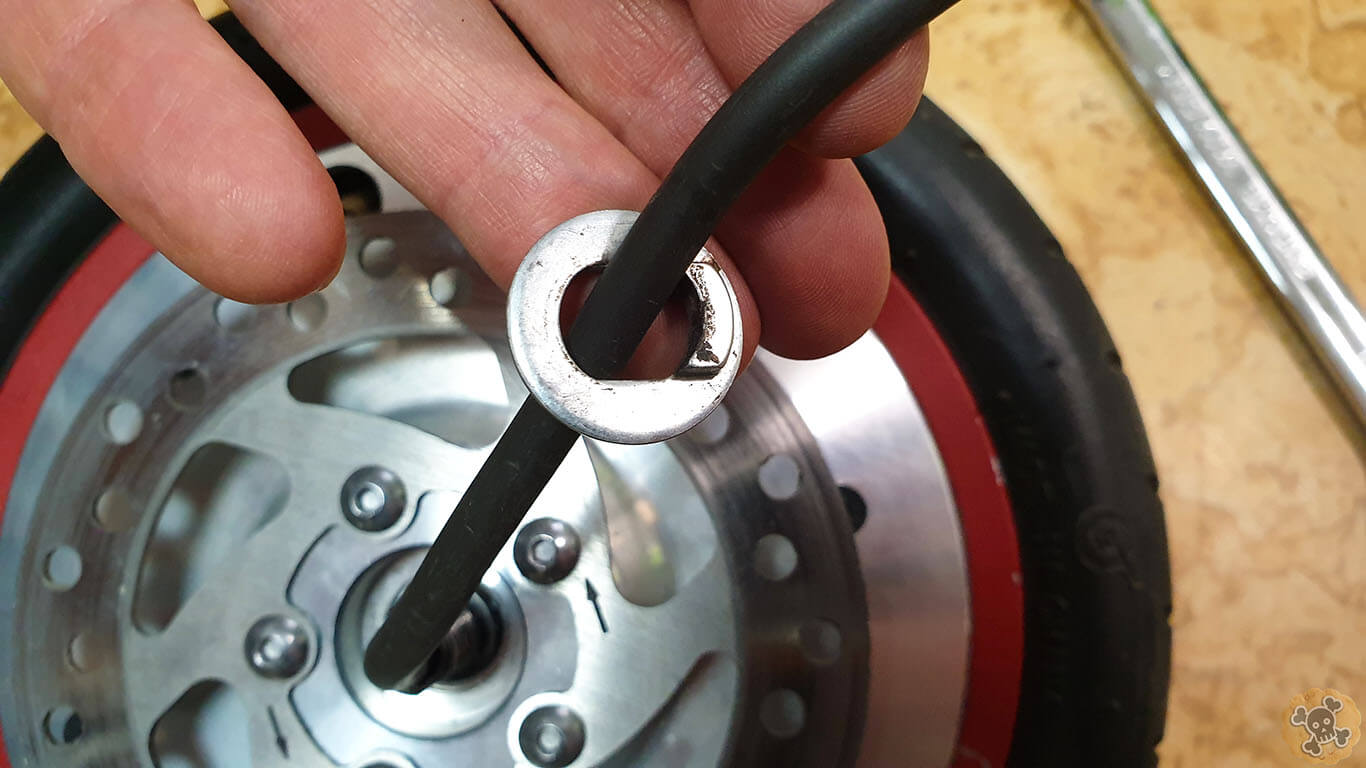
I installed wheel, it’s straight and Man it looks awesome, 2WD M365 !! Now I need to figure out how to rearrange motor cables ? ** don’t forget to add old motor side washer

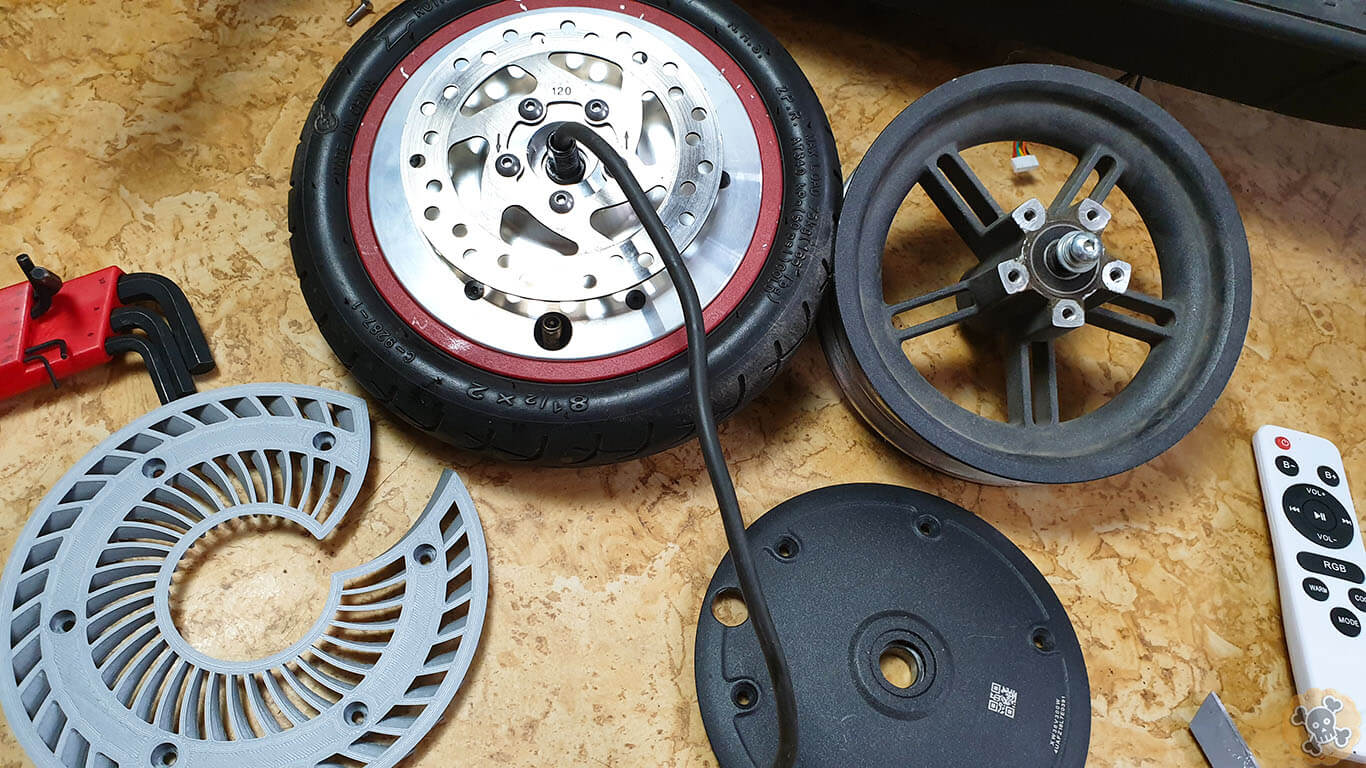
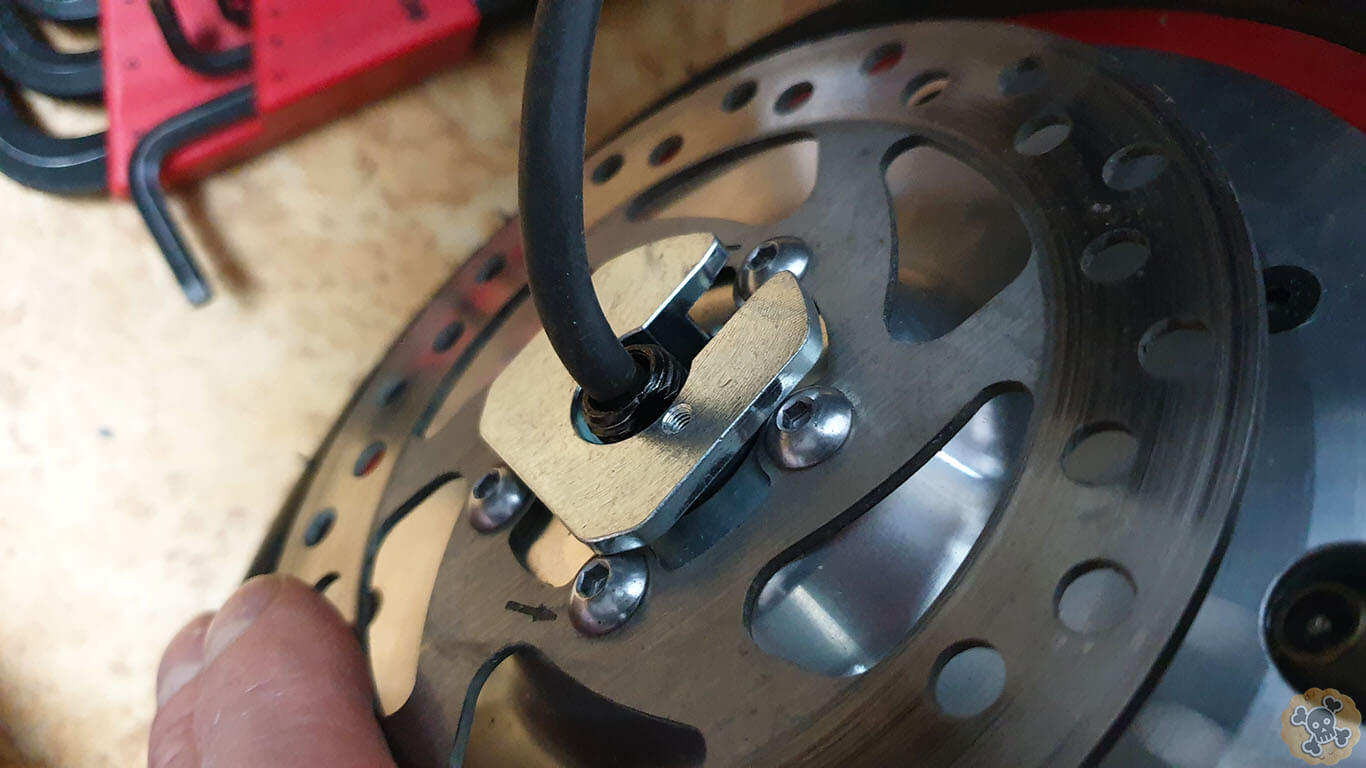
There is also disc motor adapter from Goran, thanks to it we can install disc on motor ( if you want mechanical braking system then it’s like must have ). Super easy to install just remove old side shell from motor and place new one. Quality of this adapter is pretty Insane, ?? Thank you Goran ??
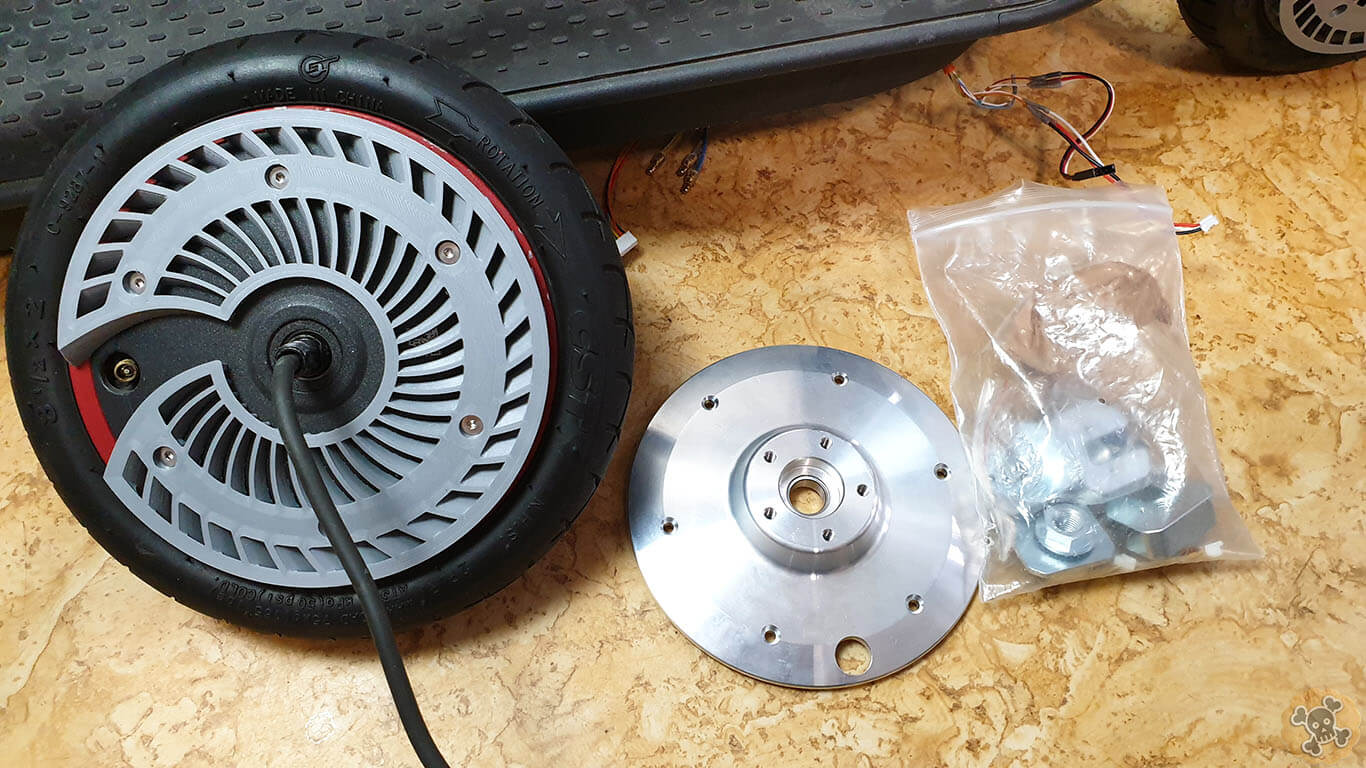
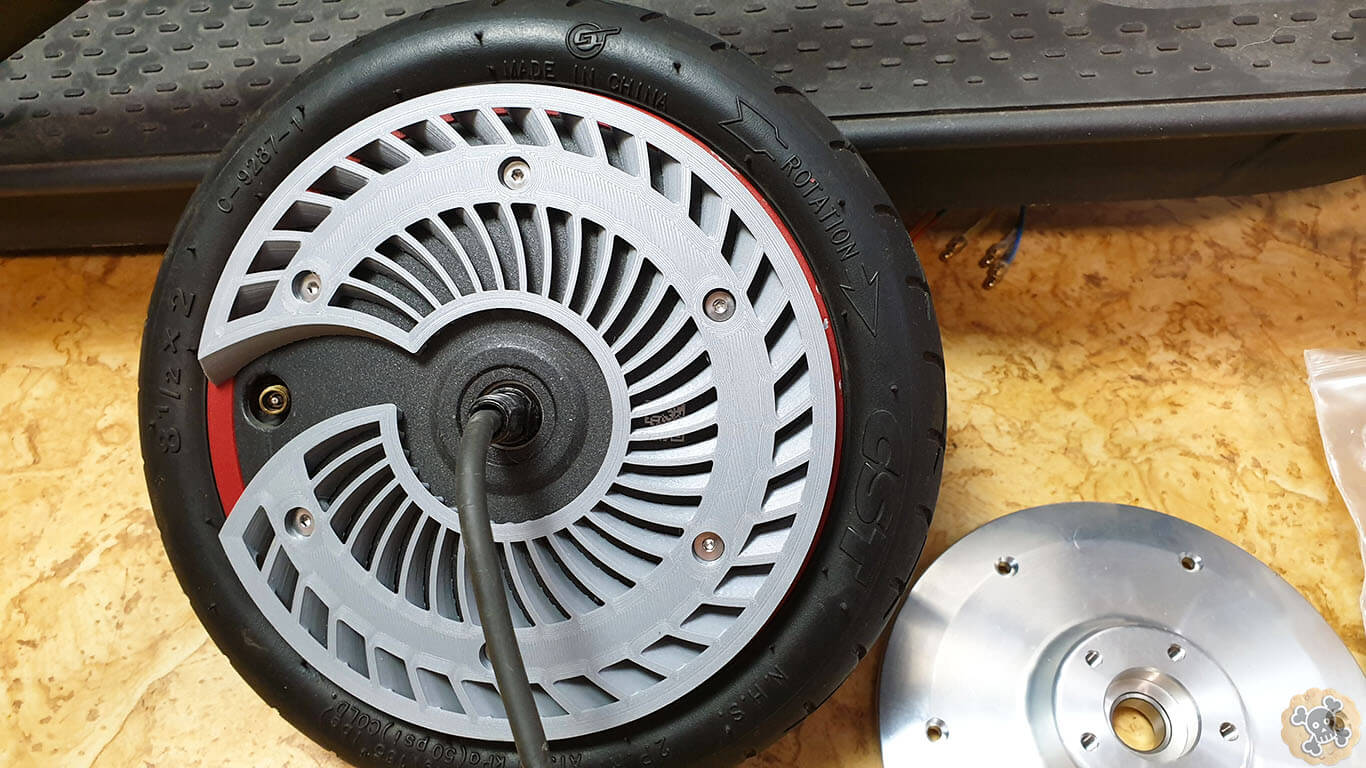
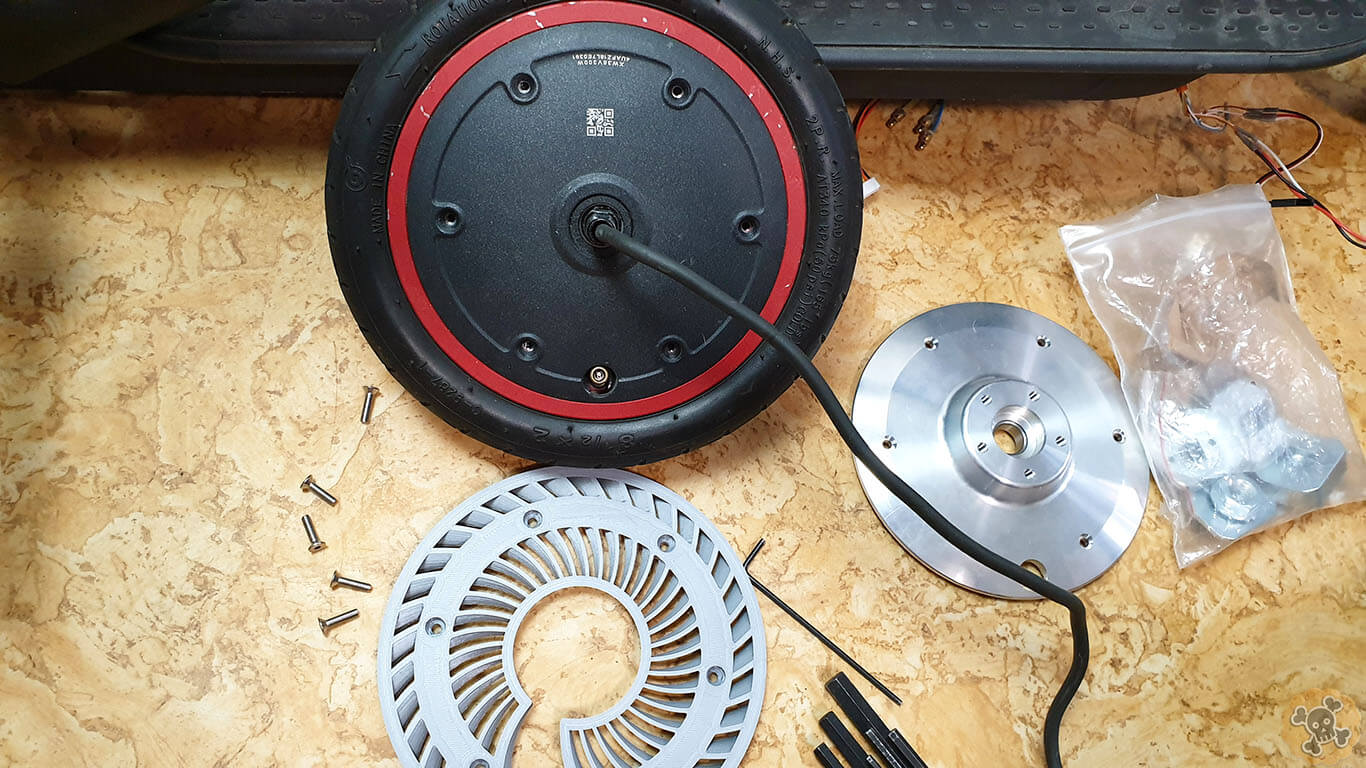
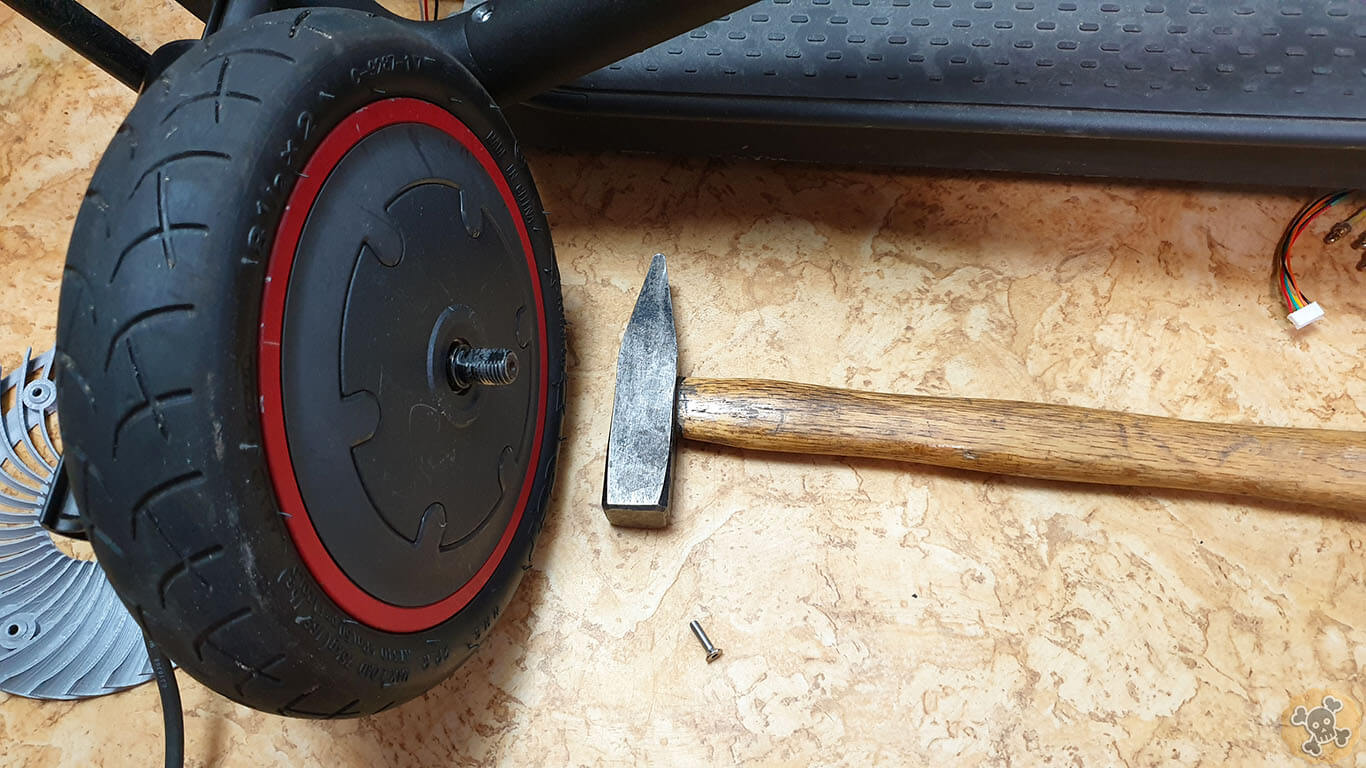
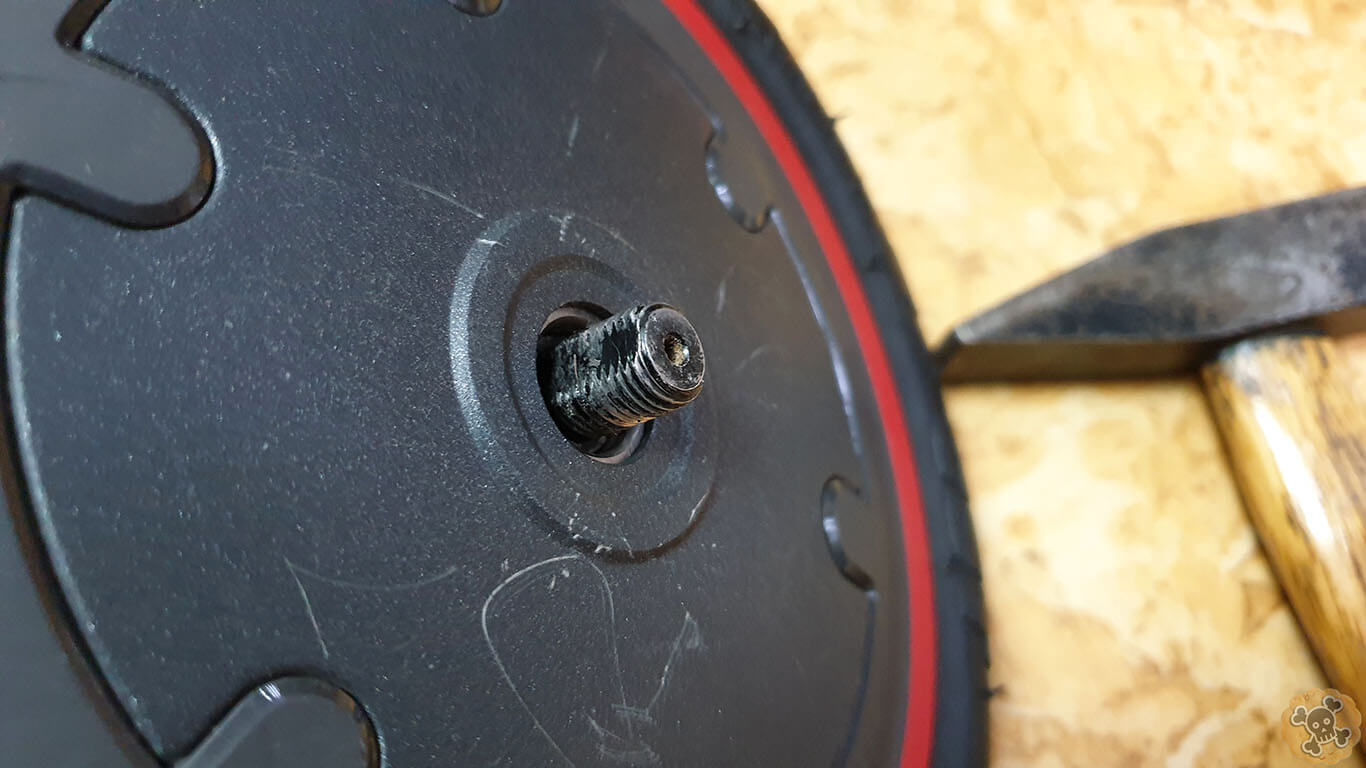
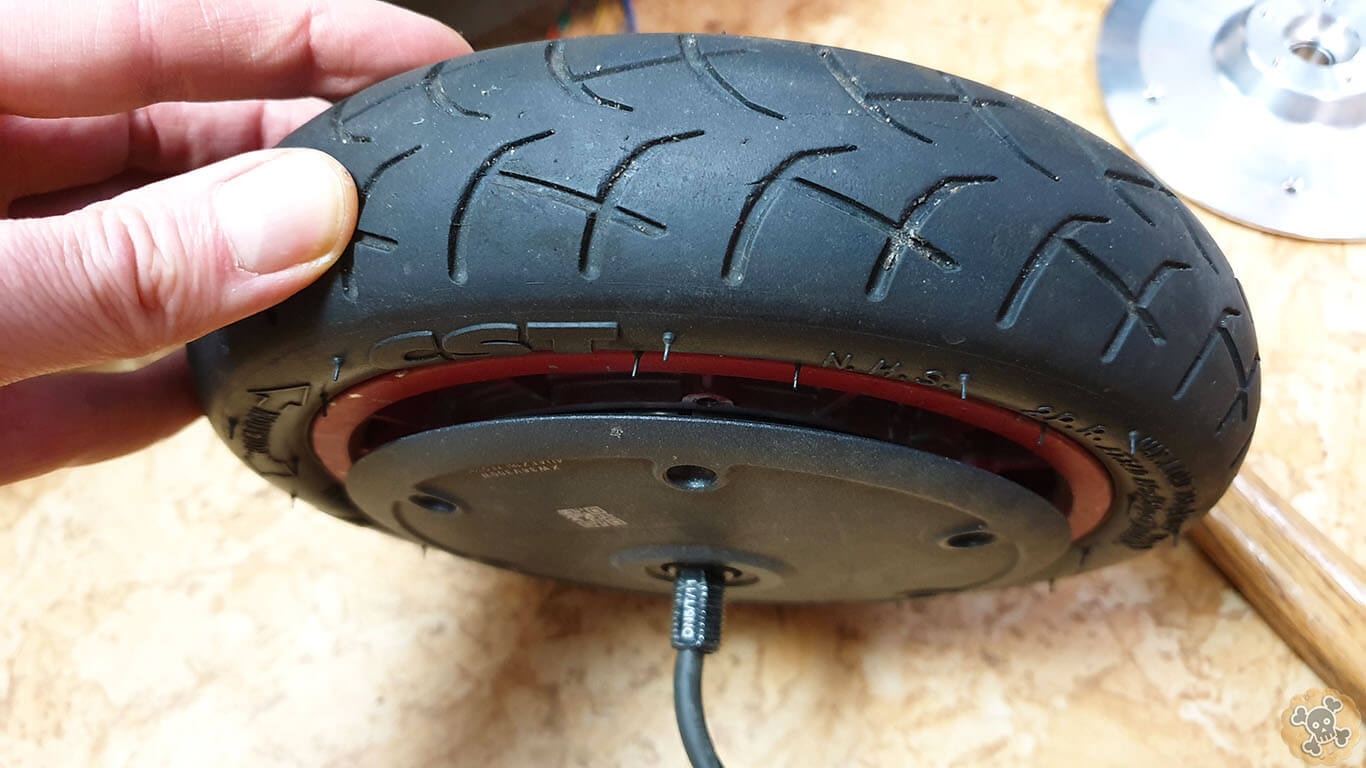
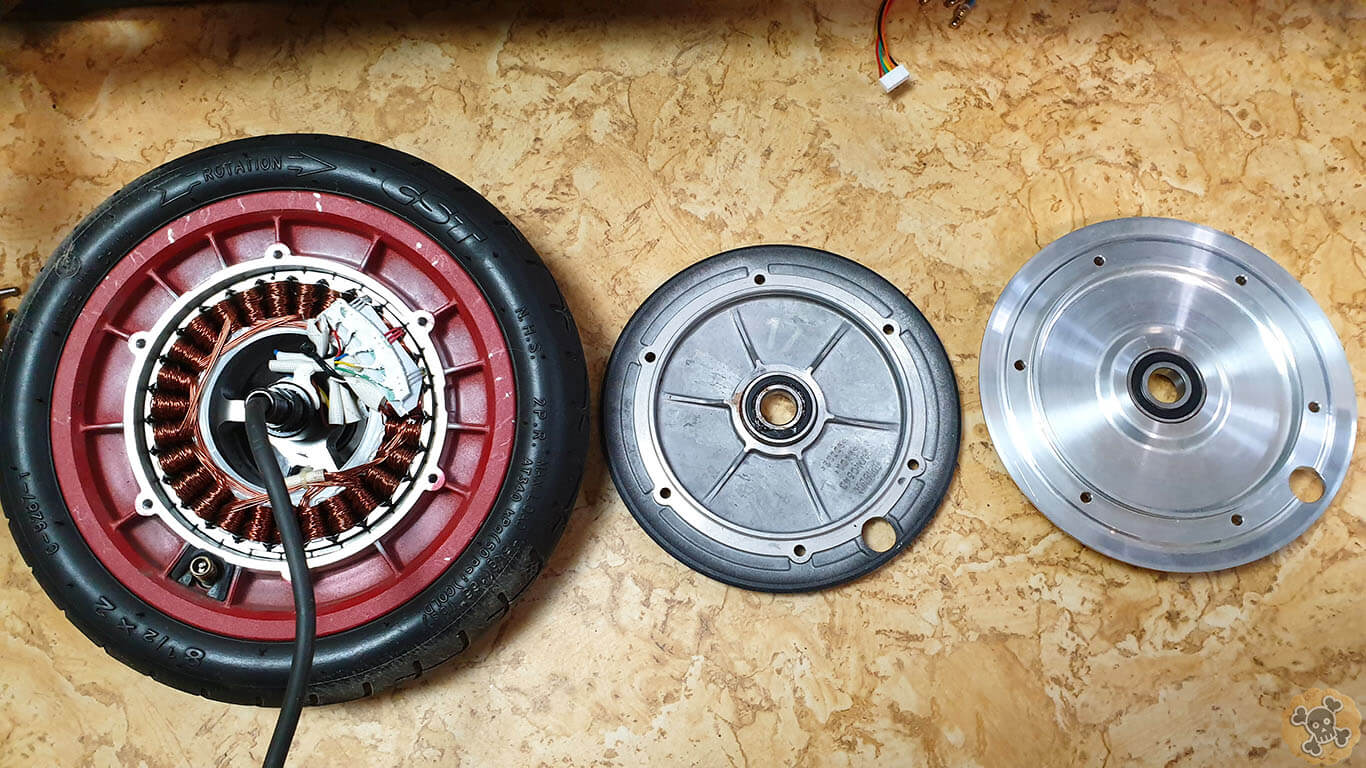
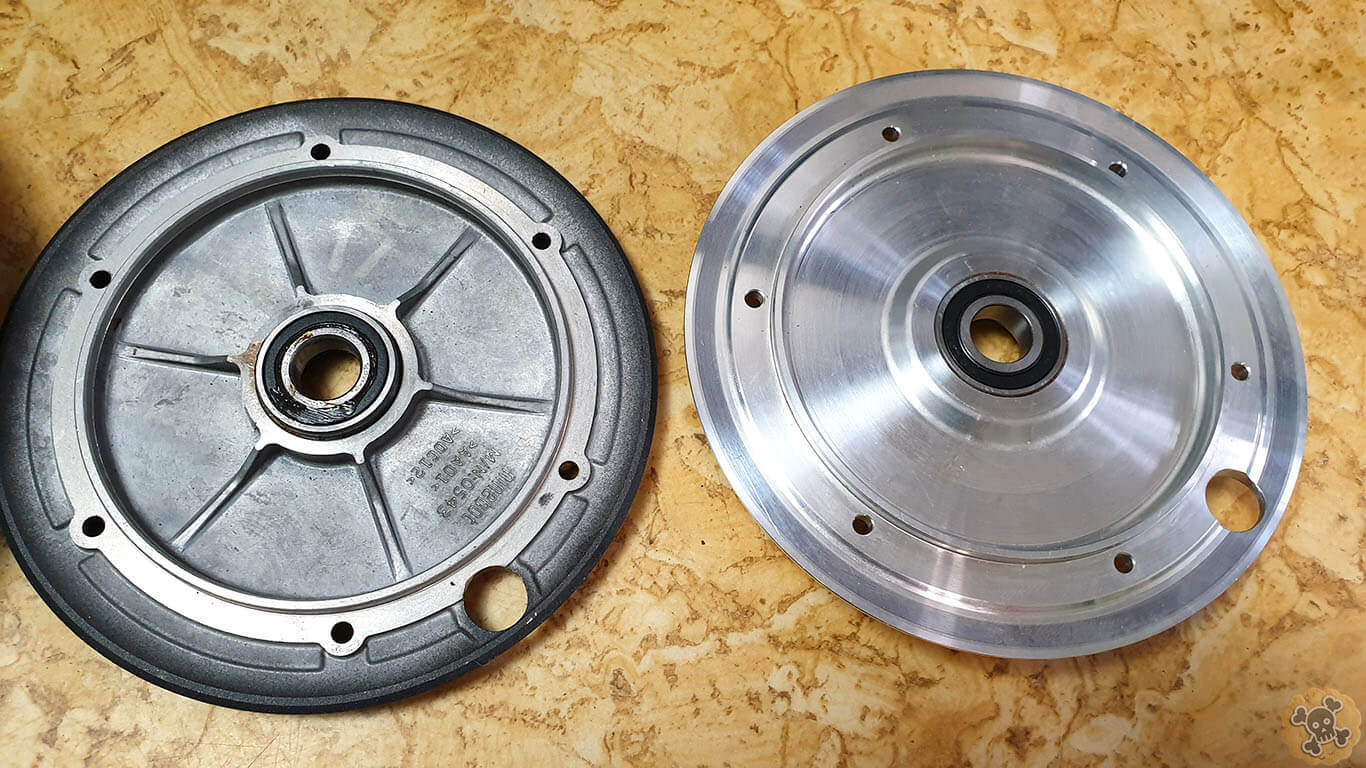
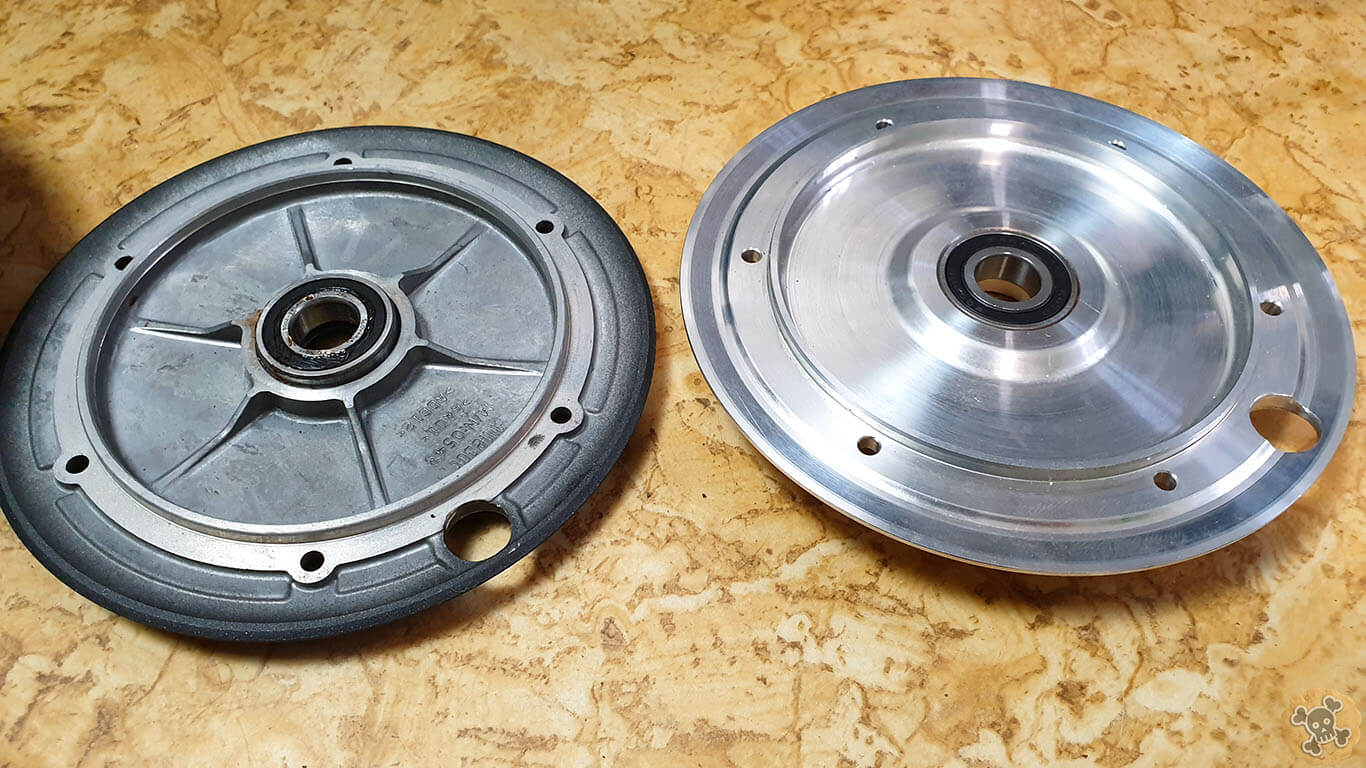


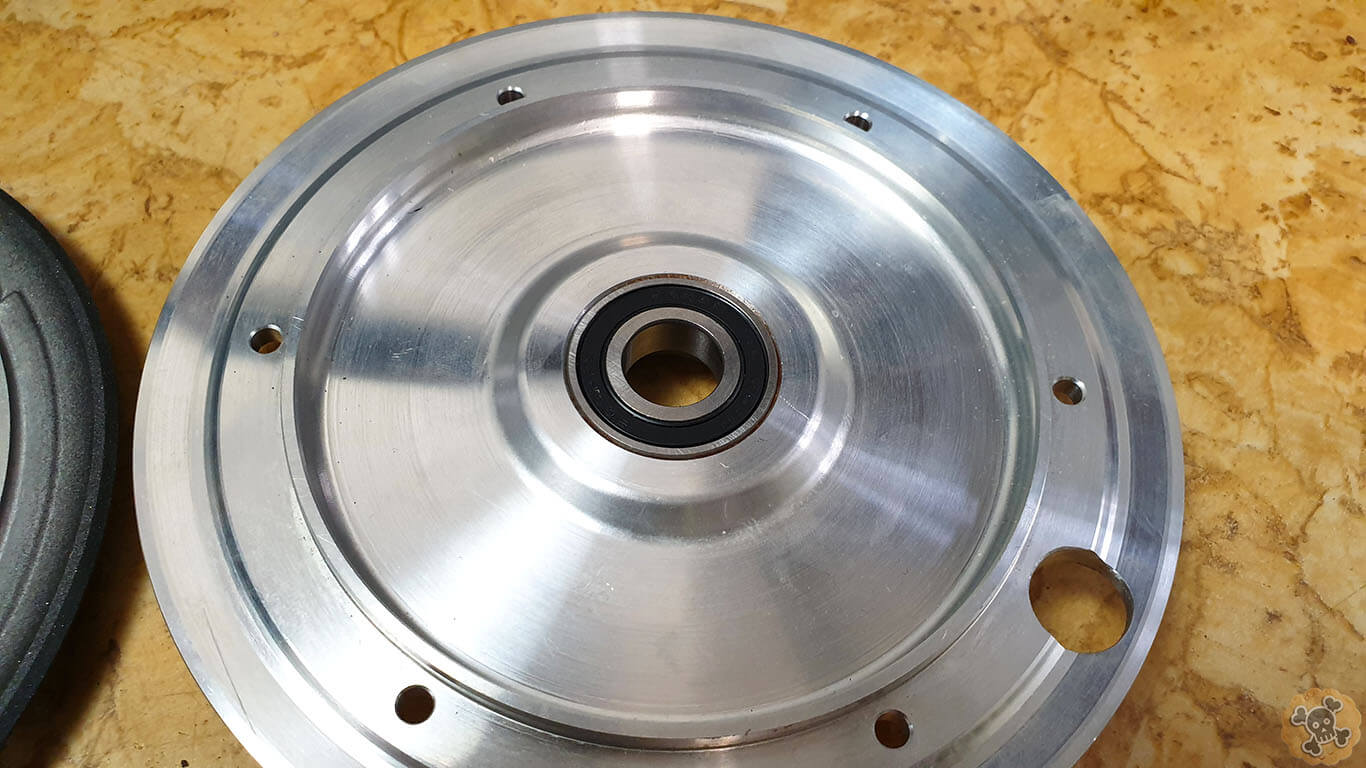
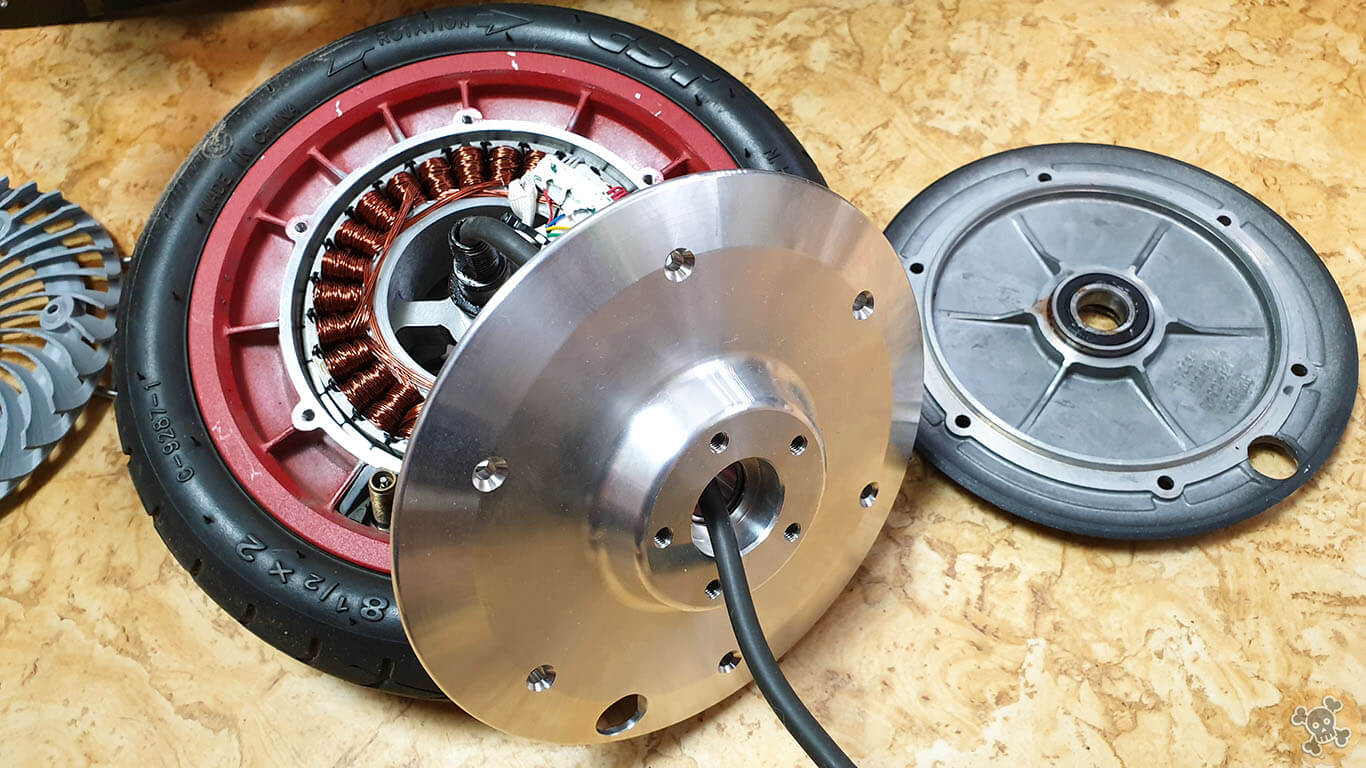
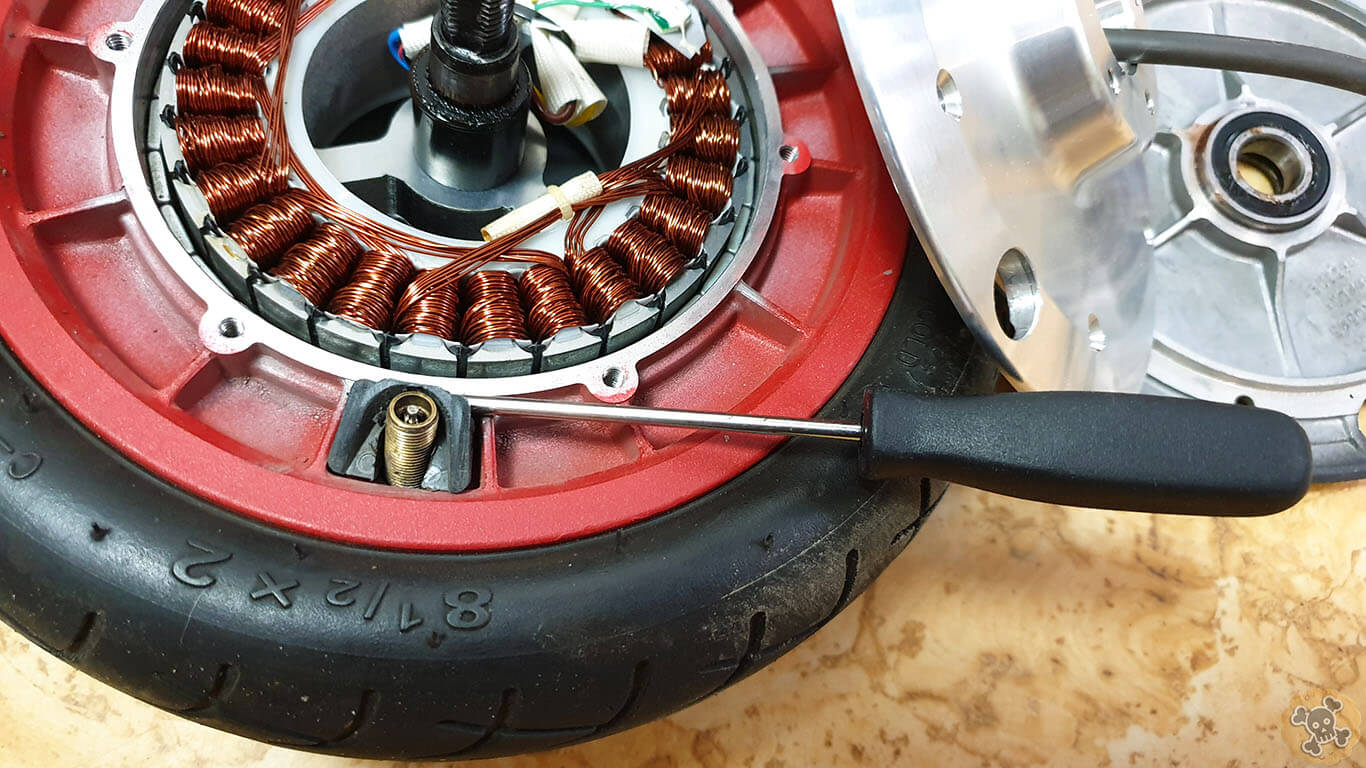
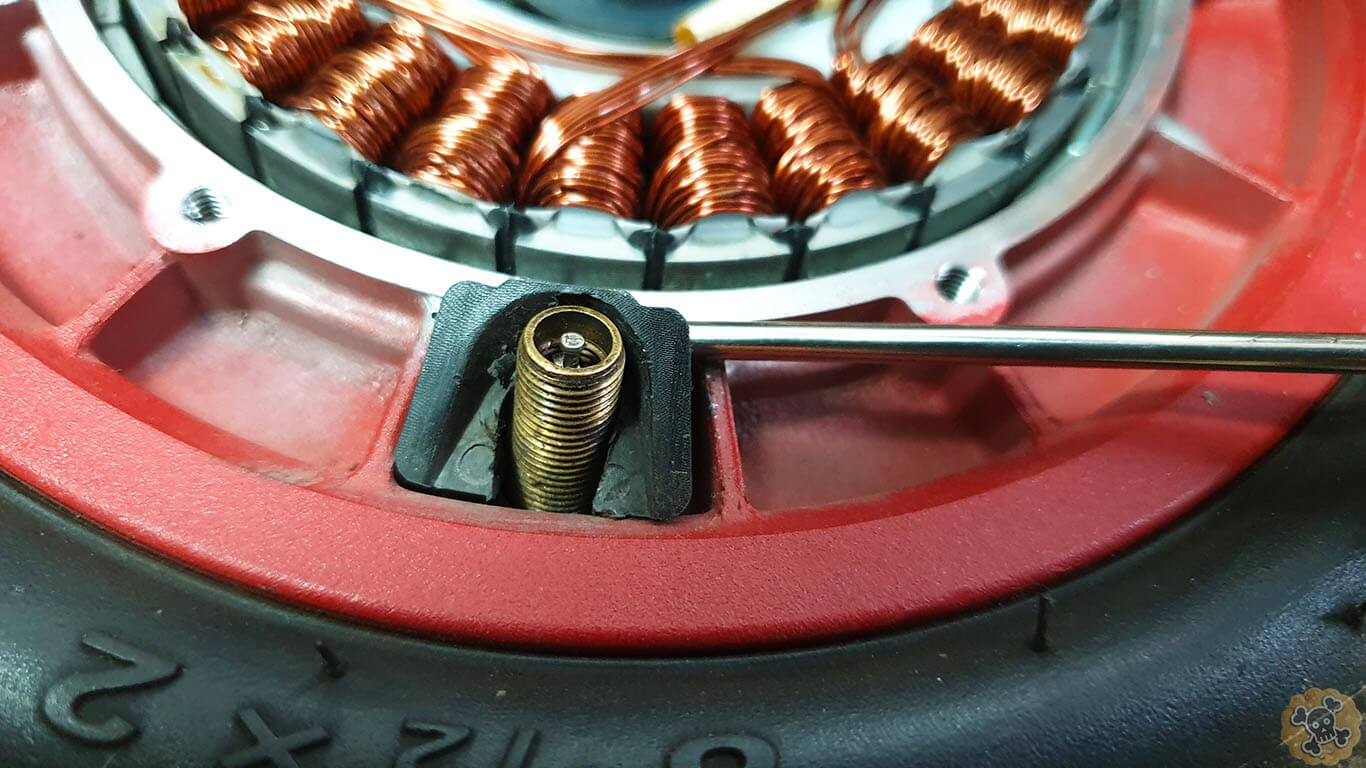
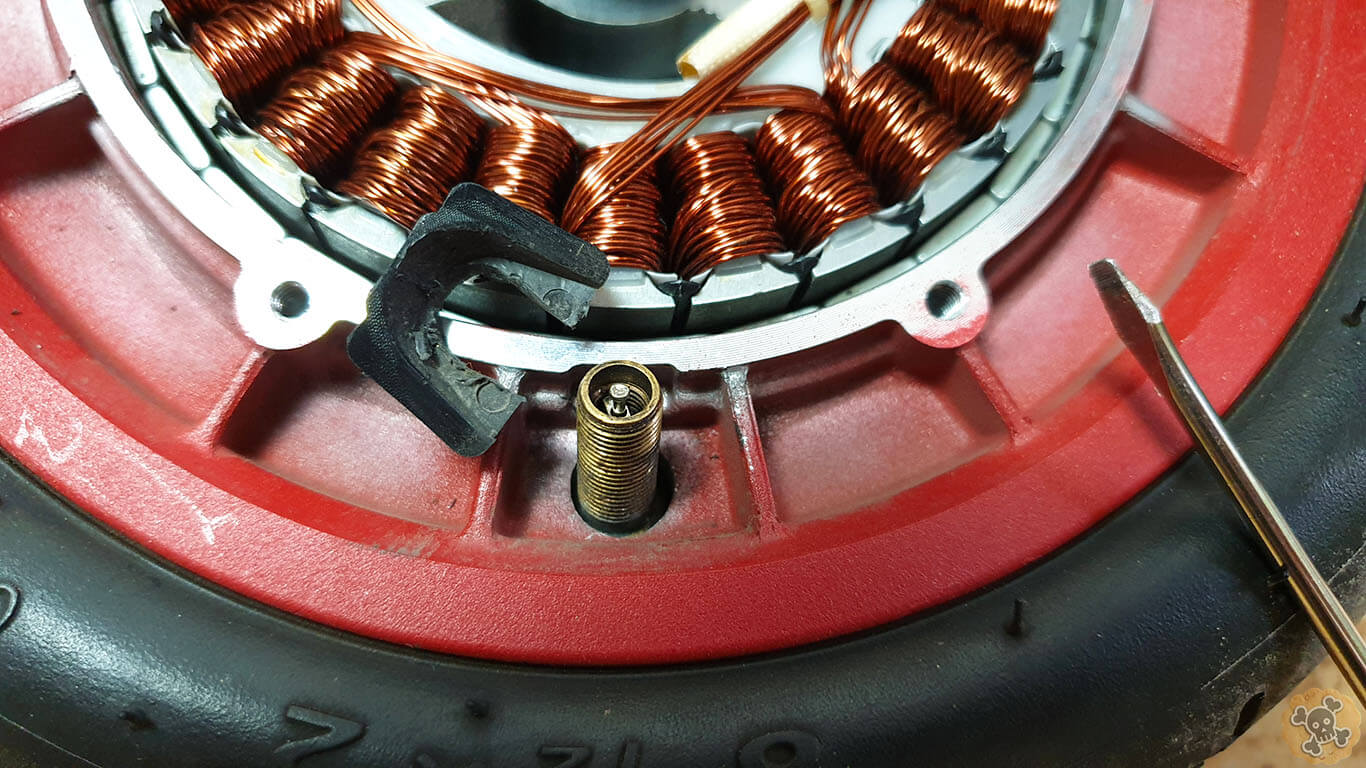
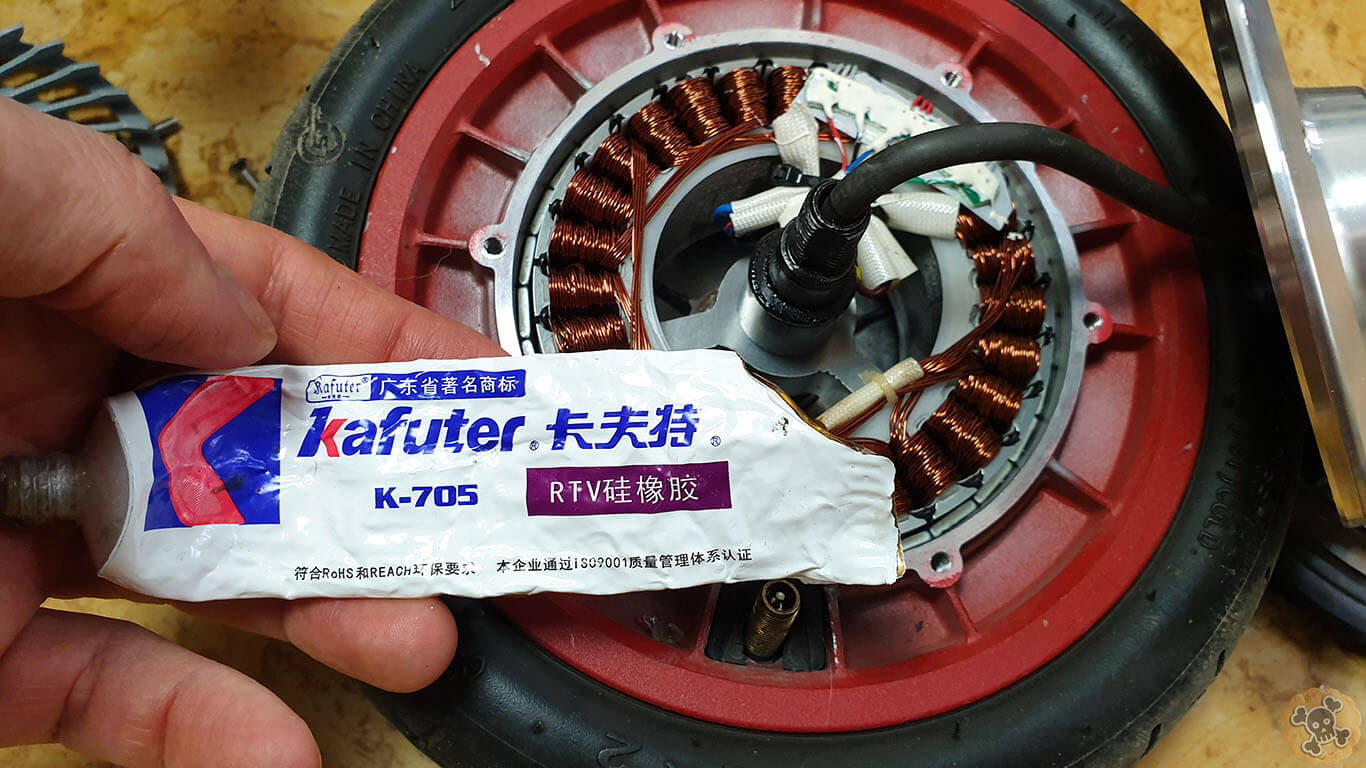
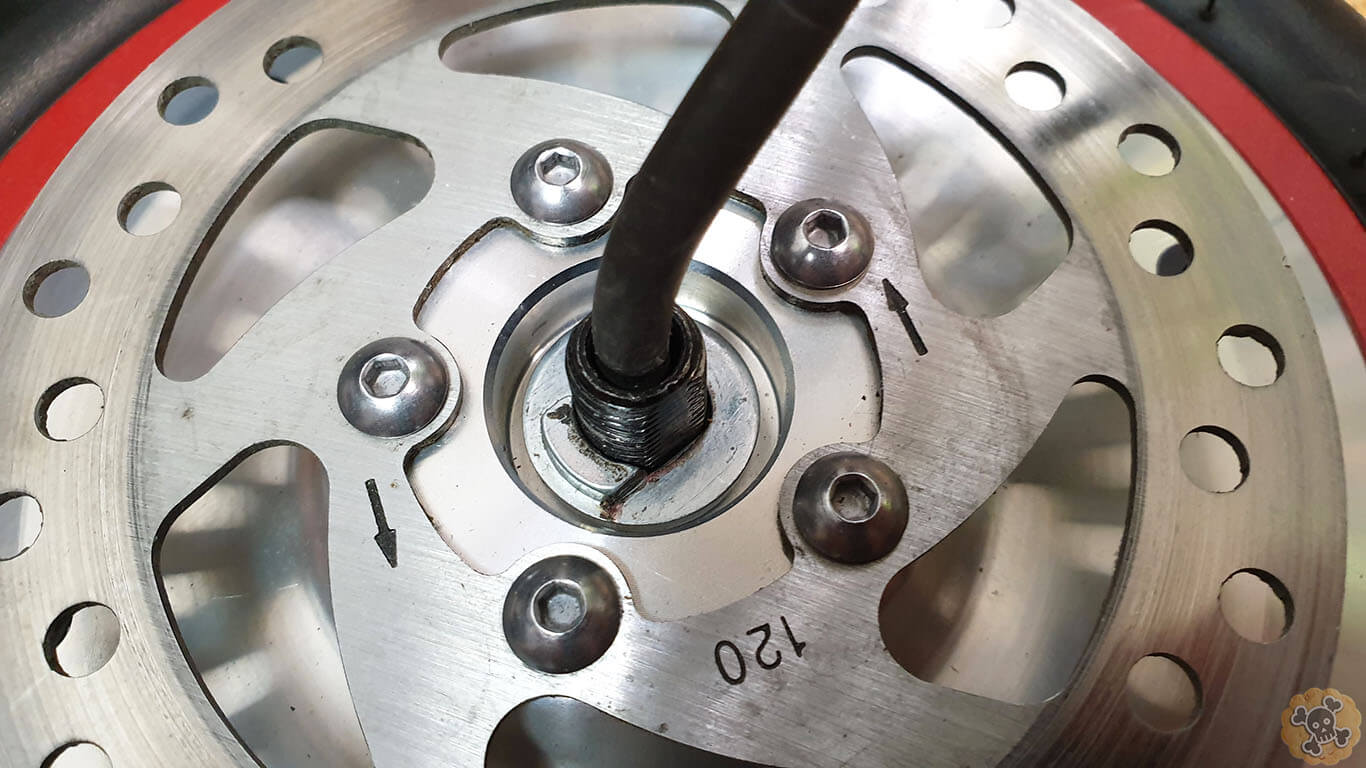
Some users saying that we can remove this black thing , so it will be easier to remove the tube but I decided to leave it like it was. To Seal motor I recommend to use Kaufer K705 Silicone https://s.click.aliexpress.com/e/_98tkOJ , use it only on round edge as you can see on my pics.. . Worth to mention is that if you want to use new disc adapter then you need also new adapter for motor mount, but no worries Goran will know what set to send 🙂


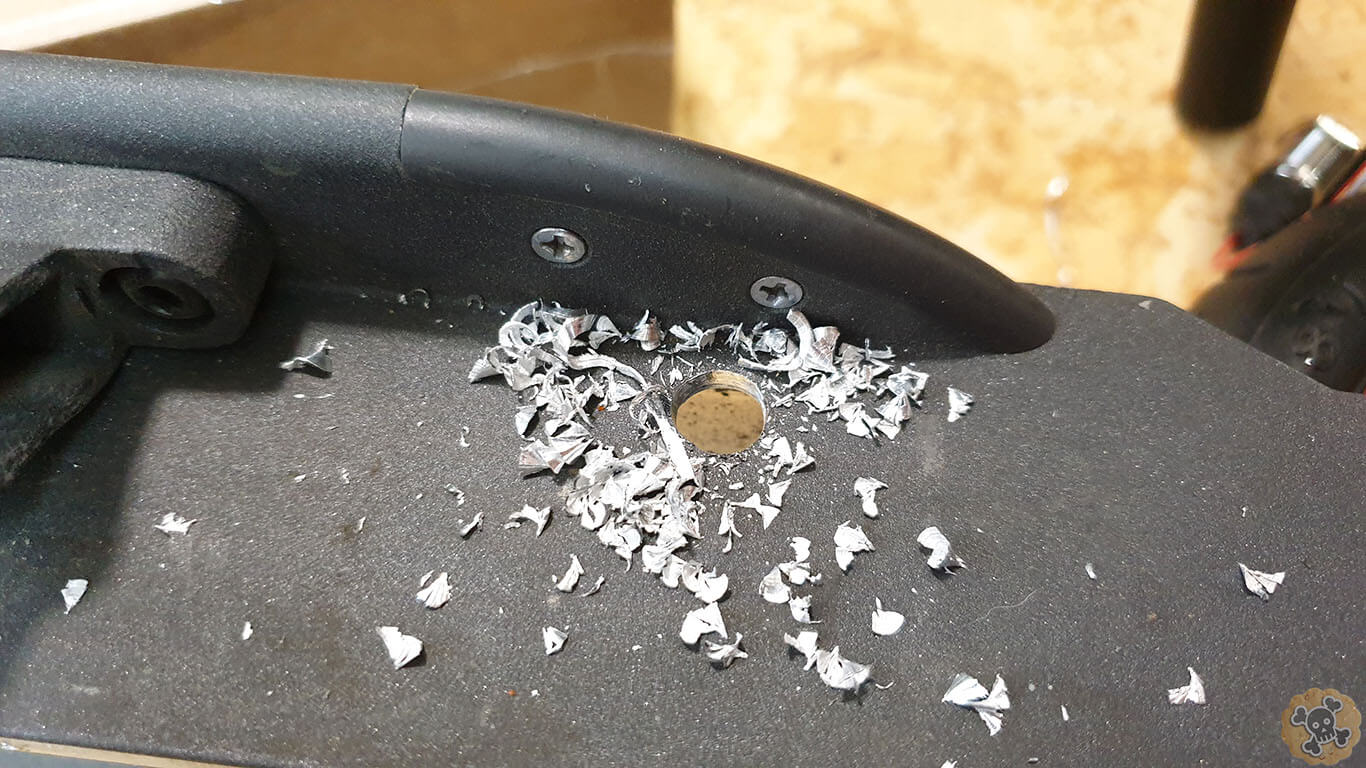
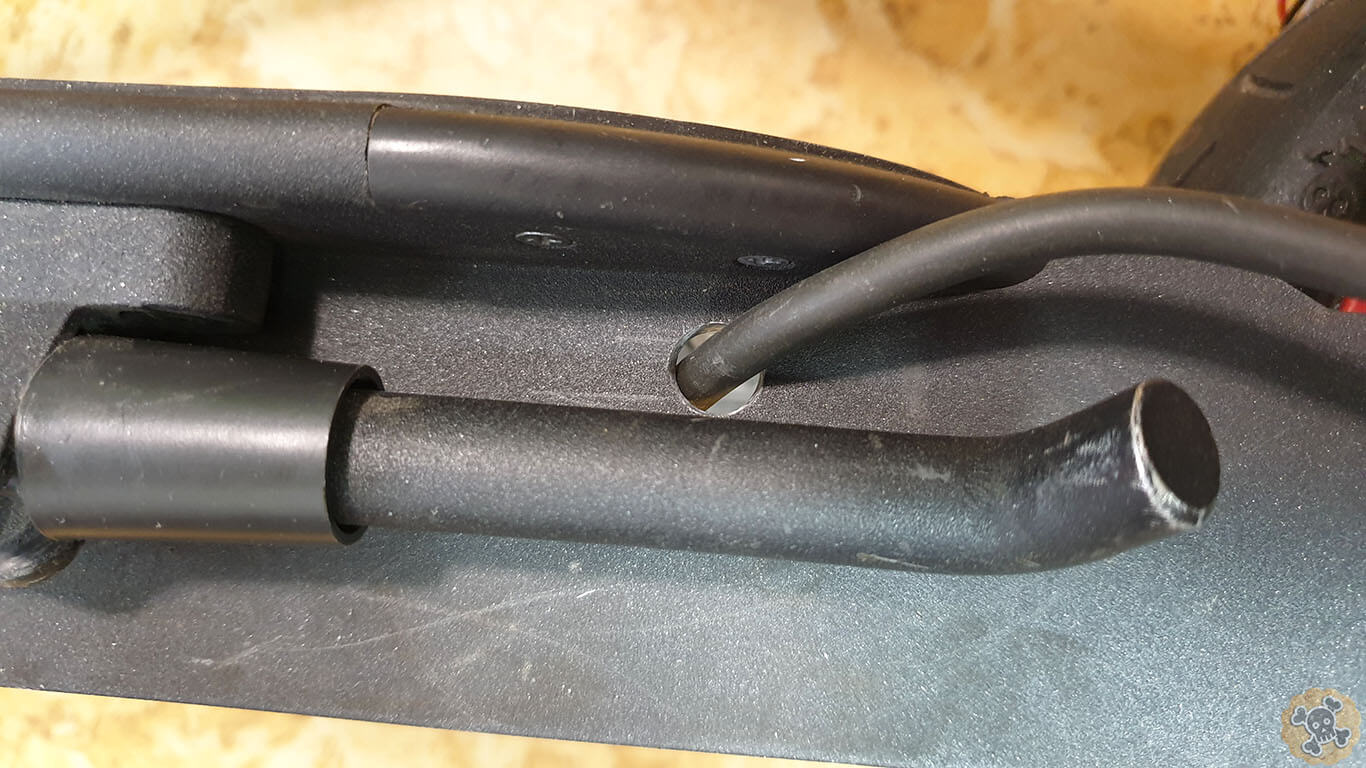
I had to drill 10mm hole for motor wire on left side above kick stand

Vesc Controllers
Flipsky Mini FSESC4.20
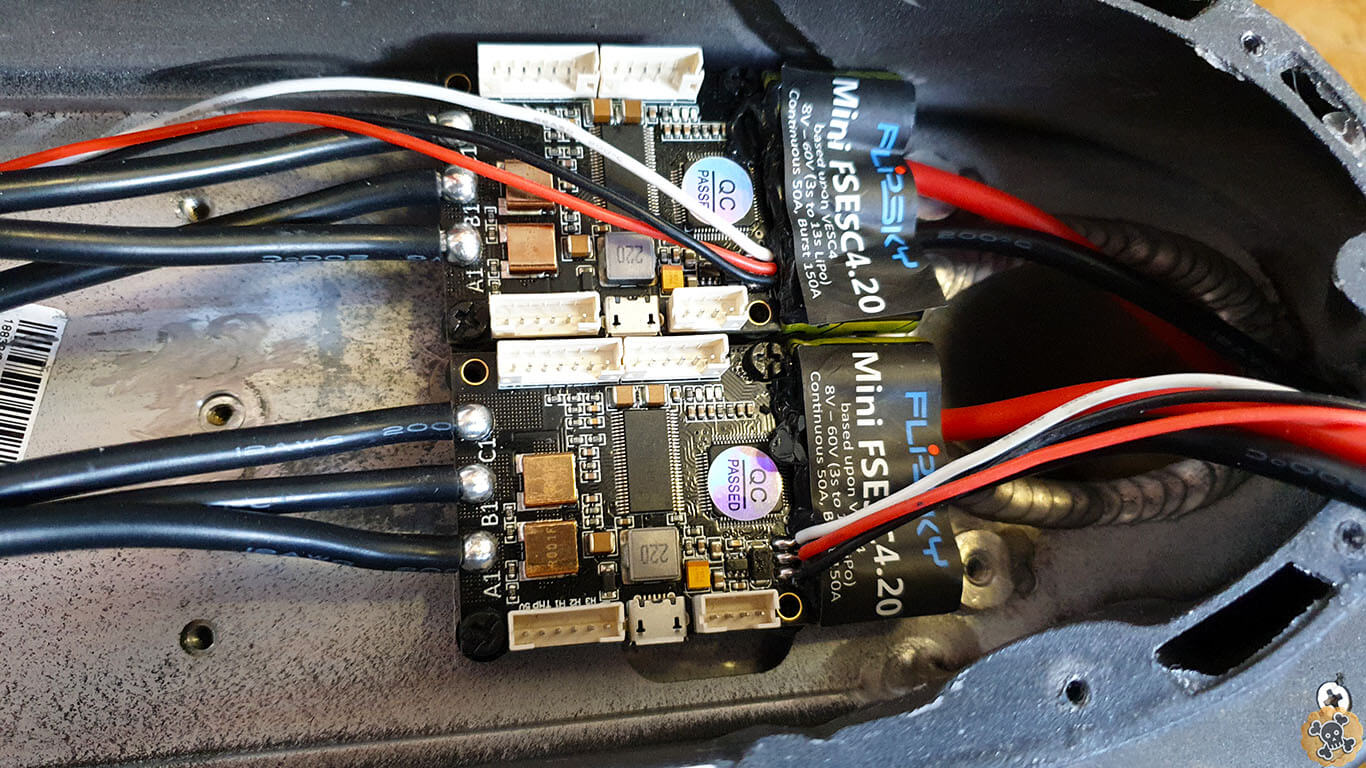
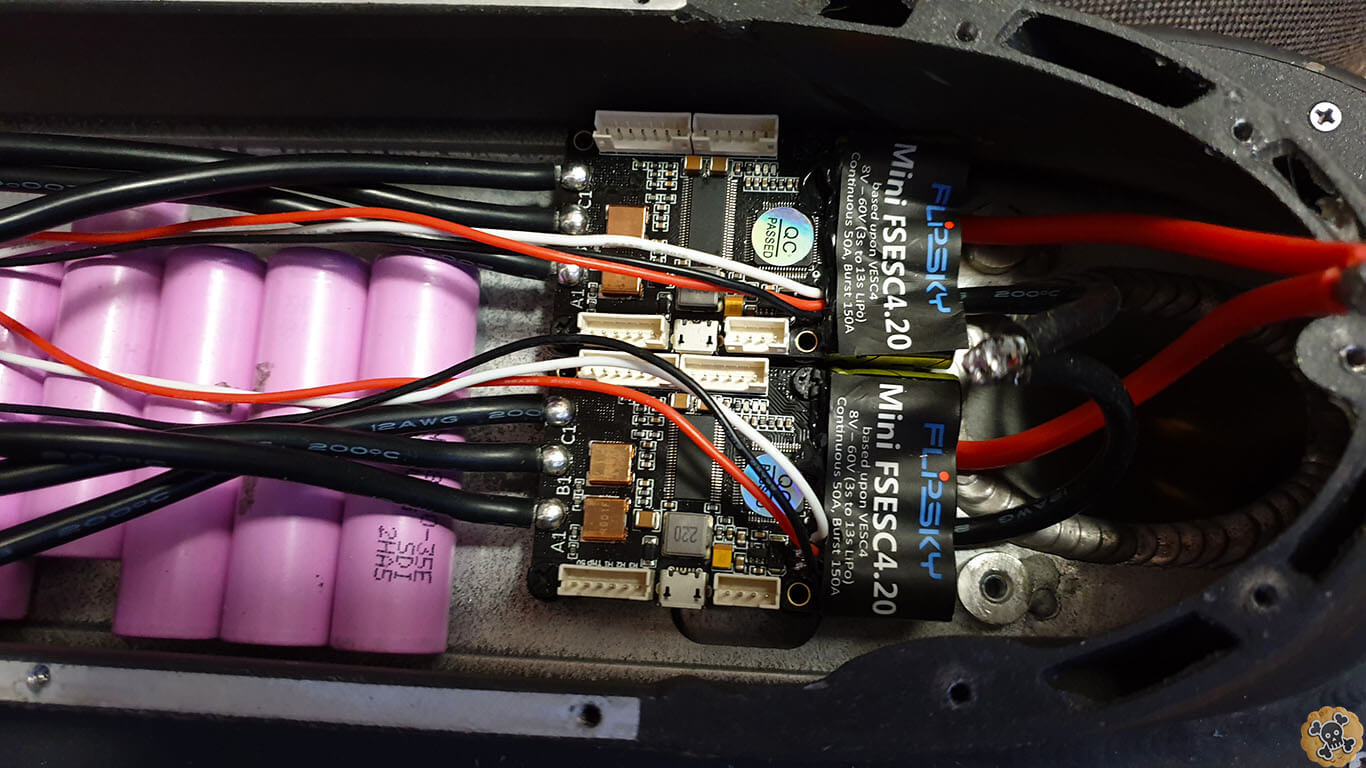
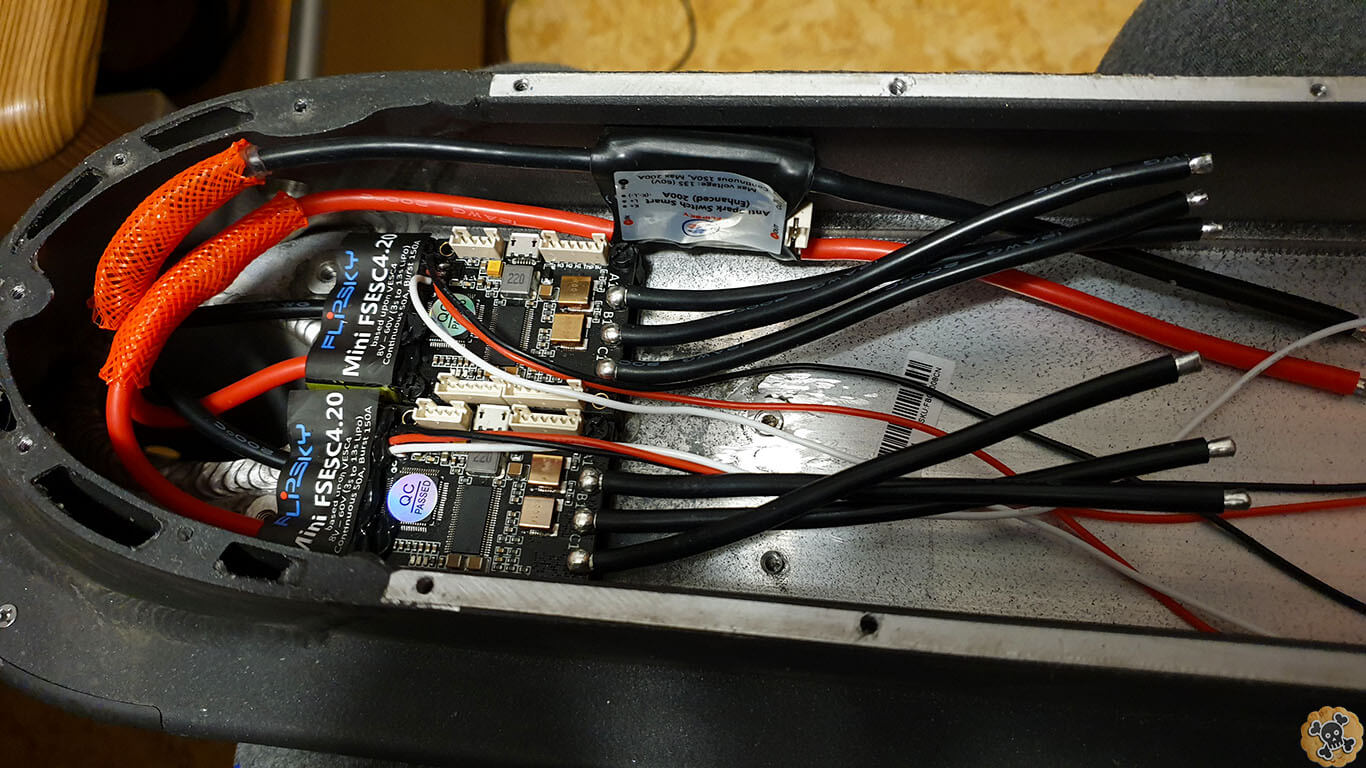
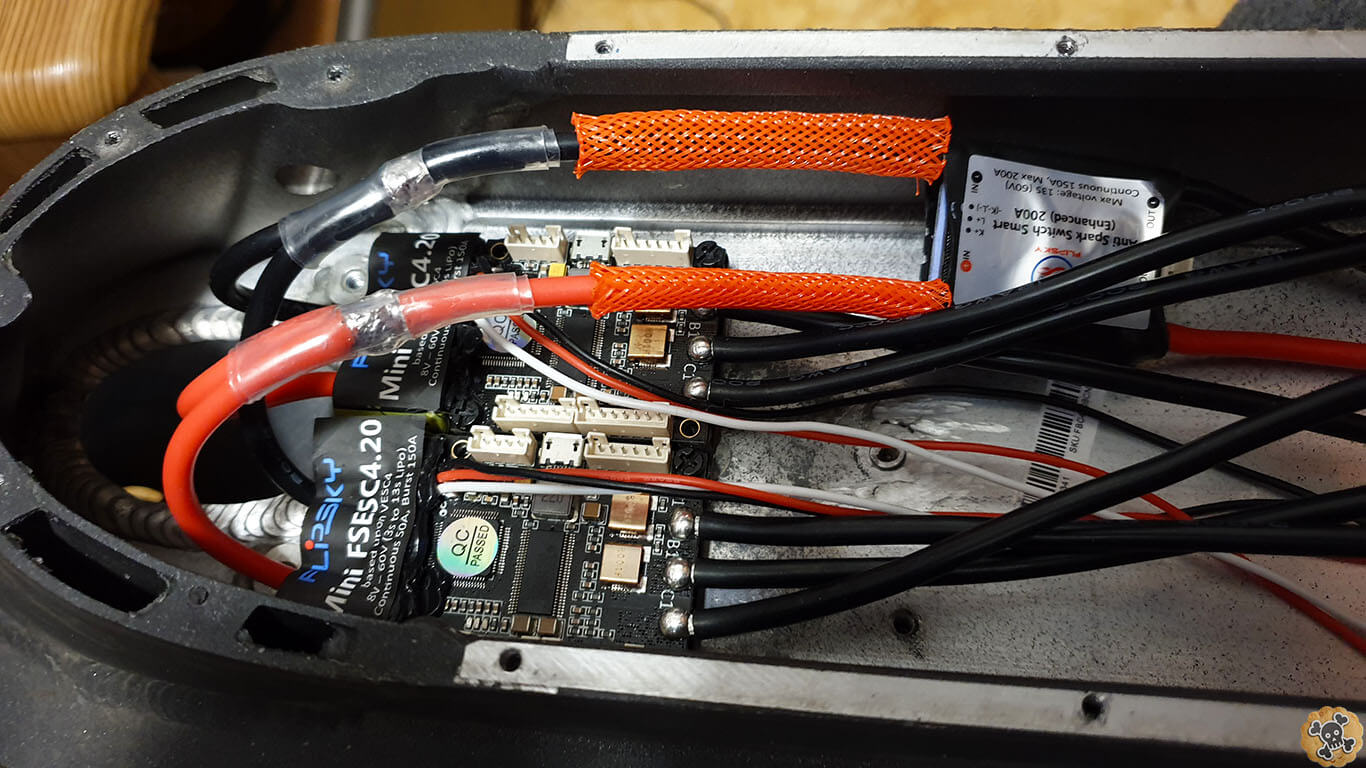
I used Vesc as a controller cause it’s Super advanced system , has lots of features, can hanbdle up to 12s for 4.4ver and 13s for 6.6 ver. Vesc electric braking system is one of the best that you can find on the market ( so yeah we don’t need disc brake any more ) . In my ” Light ” version I used 2x Vesc Flipsky Mini FSESC4.20 http://bit.ly/VescMini42 , tiny size and should handle up to 50Amps at 12s which is around 2400watts per controller , but I will set max 1200watts for rear pro motor and 900W for front classic motor ( I don’t want to burn motors ) and from other hand my battery pack 12s 5p ( 35E cells ) can’t provide more than 60Amp…. but at least it has 17,5amps capacity . Vescs are mounted to the frame so the heat will be spread out, ofcourse some extra thermal paste between frame and radiator is needed . To add ON/OFF switch to 2x single Vesc 4.2 I decided to use Flipsky Smart Switch with AnitSpark http://bit.ly/FlipskySmartSwitch , it cost around 30$ and it’s like must have cause otherwise we will be not able to turn off Vesc


FOCbox
Soon…
Flipsky Mini FSESC6,6
Soon…
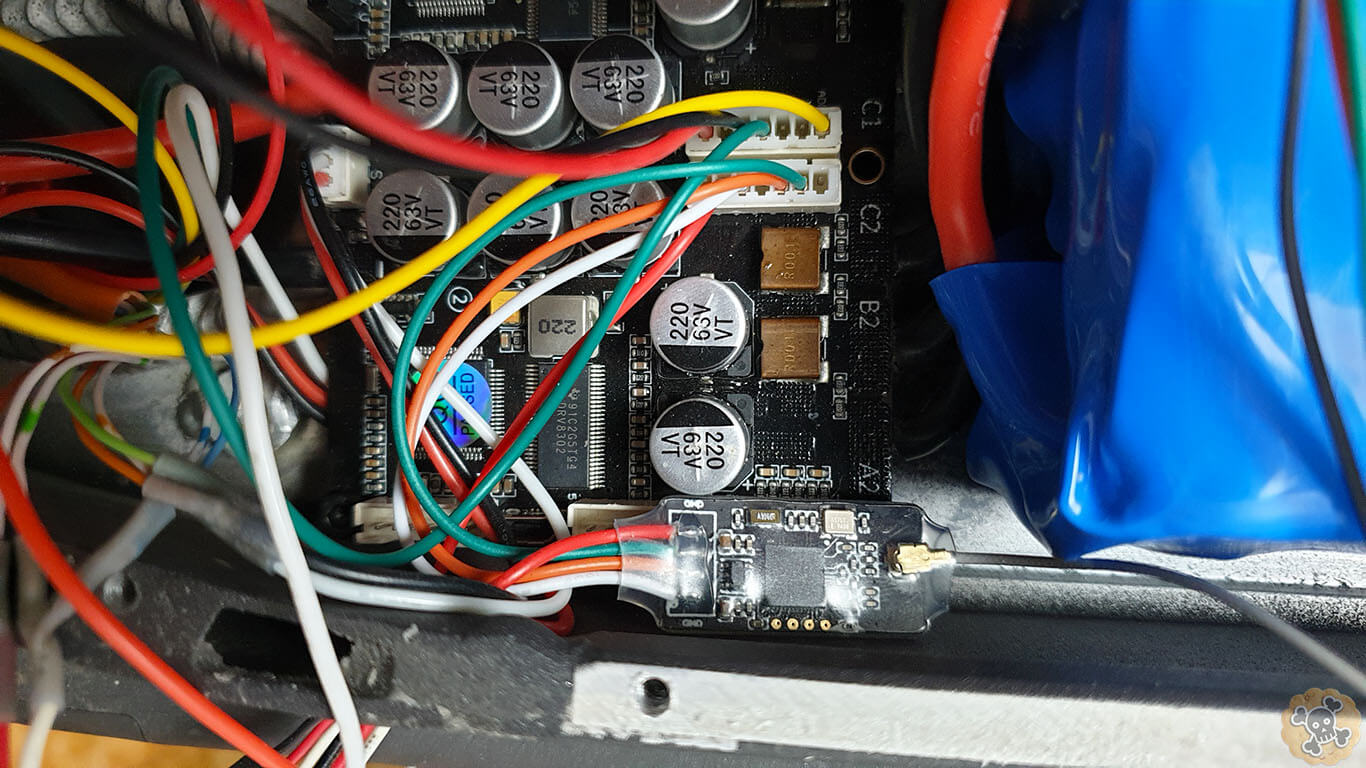
Wiring Vesc to Motors
Here please FOCUS, be careful with RED wires ( + voltage ) , one mistake and you can bake some electronic . Please connect wires Exactly the same way like I did.
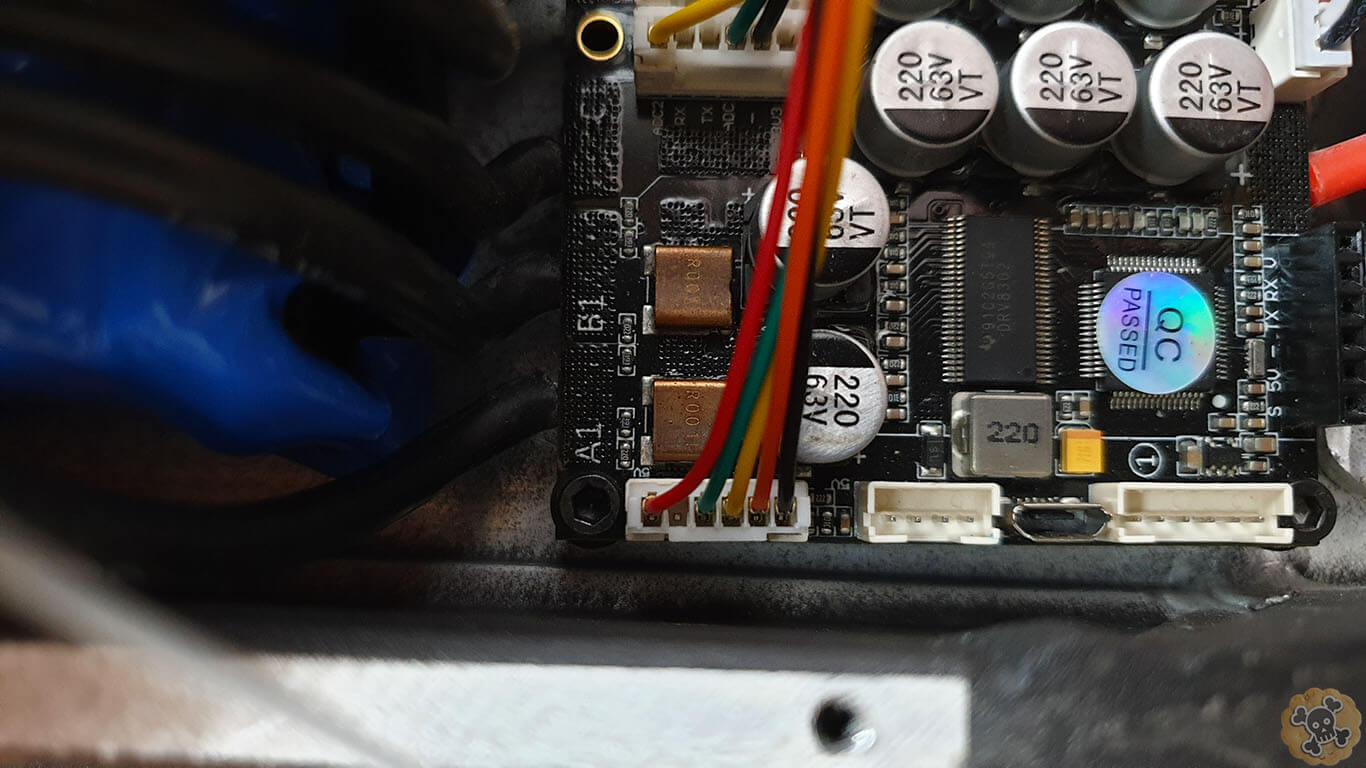
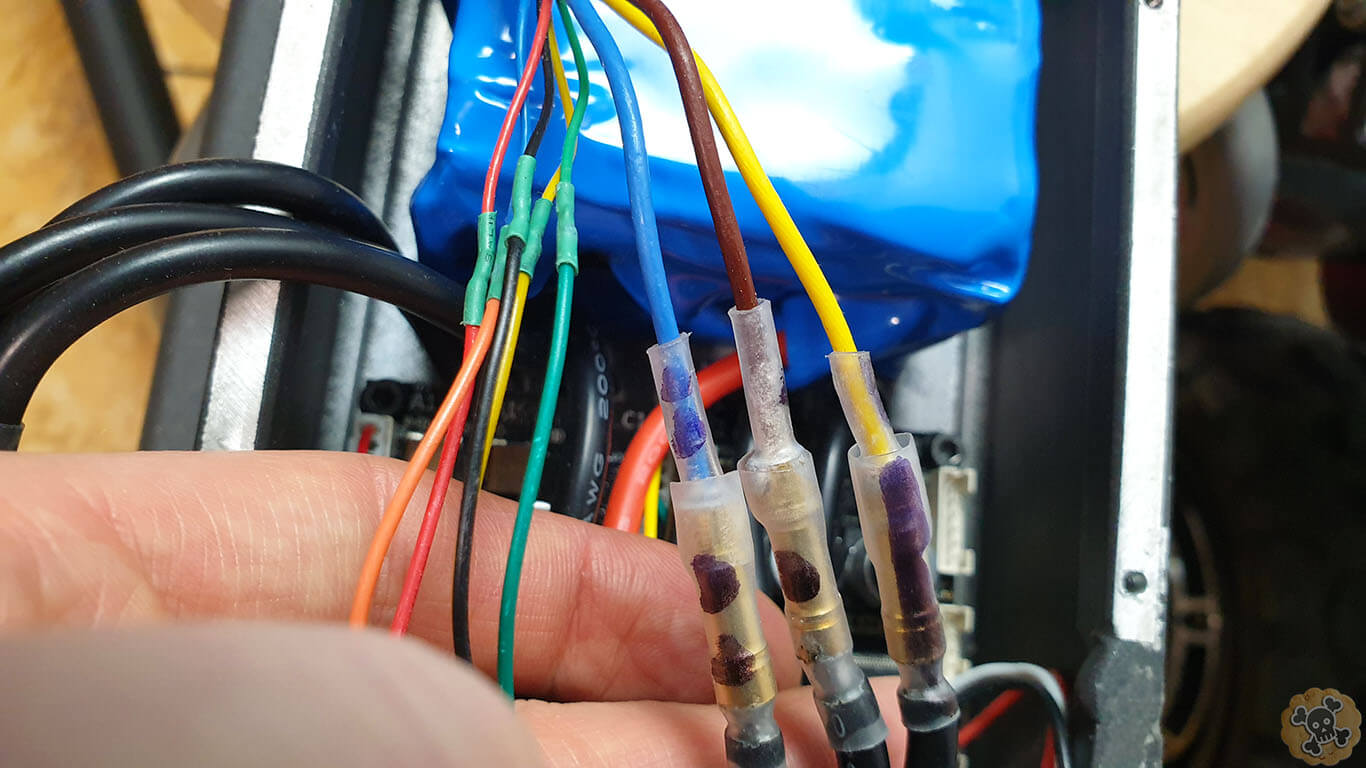
Front motor I connected to port A1 ( yellow ) / B1 ( Brown ) C1 (Blue) . Hall sensor wires are connected to port near by A1B1C1, colors of wires you can see on pics ( I extended a bit stock wires and new cables got different colors but please connect them exactly the same way like I did to the conenctor )
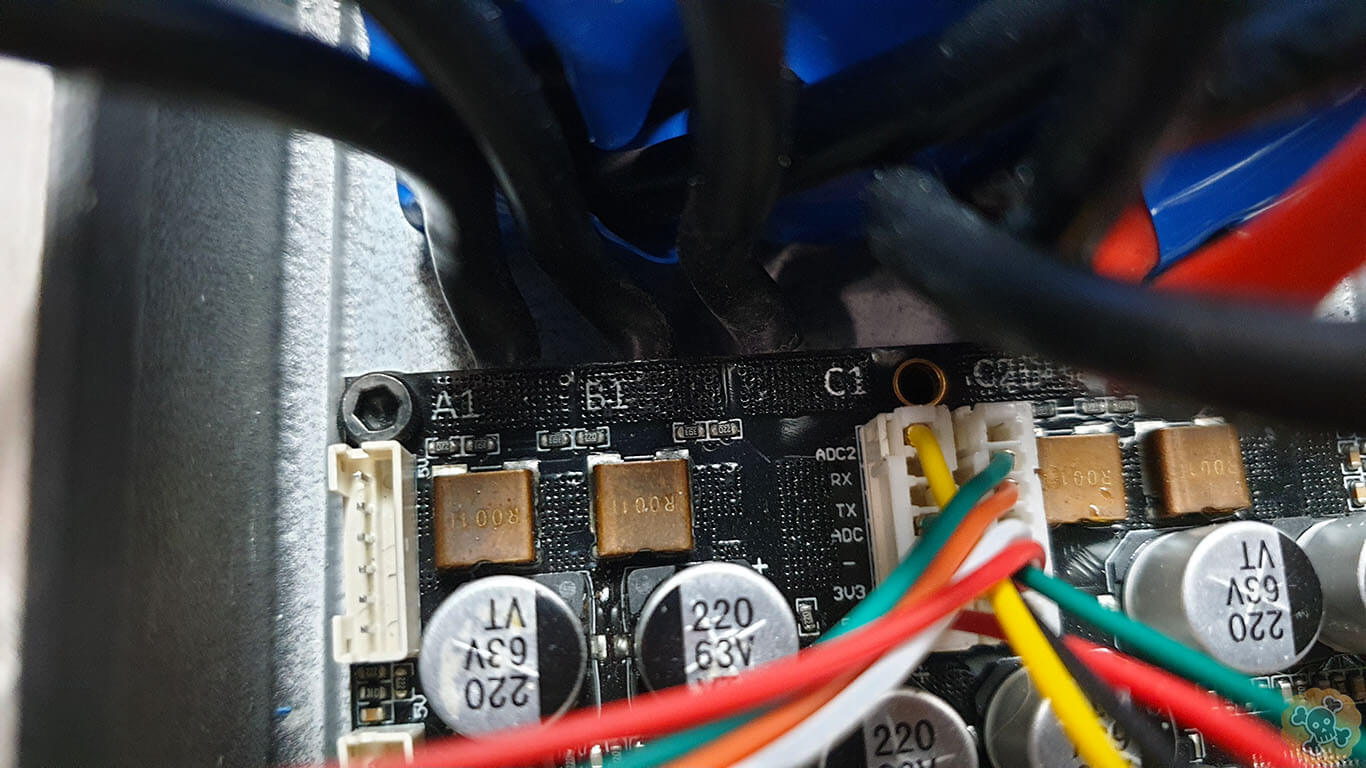
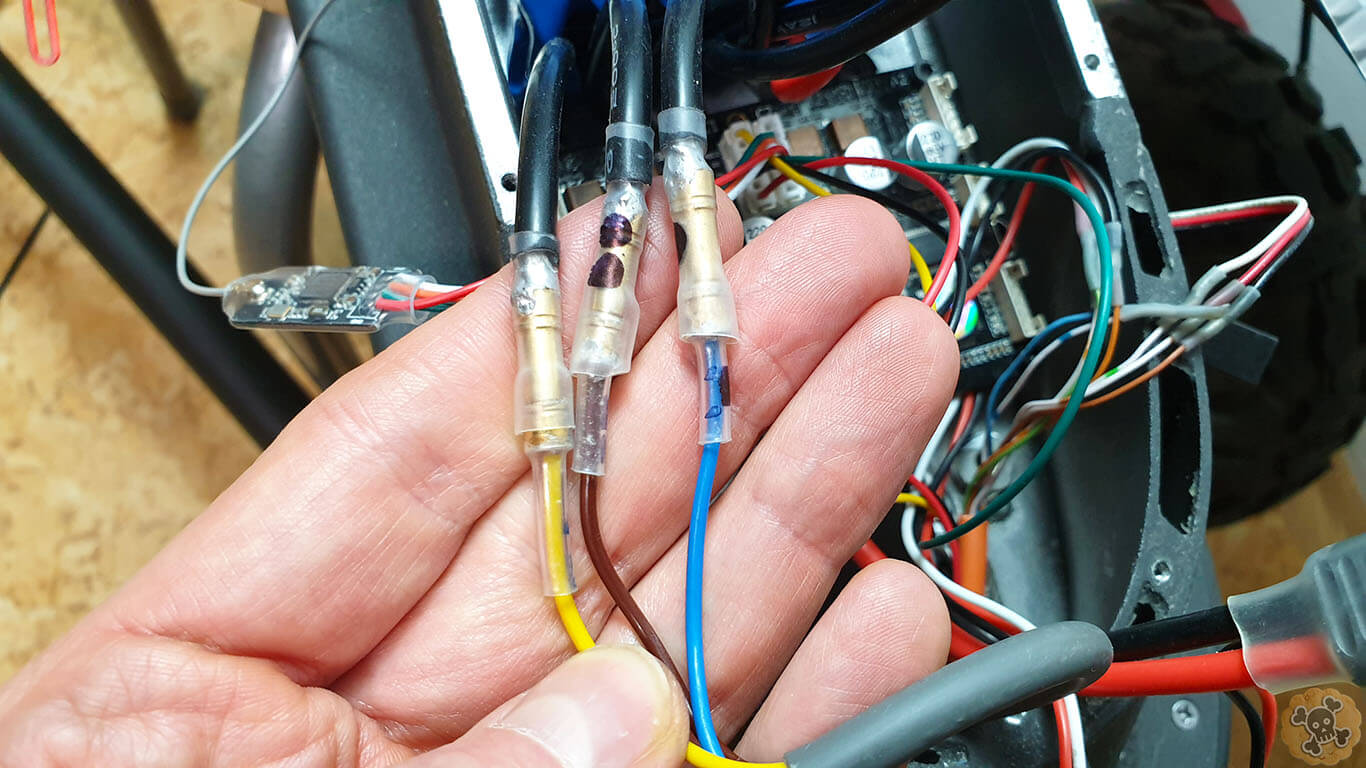
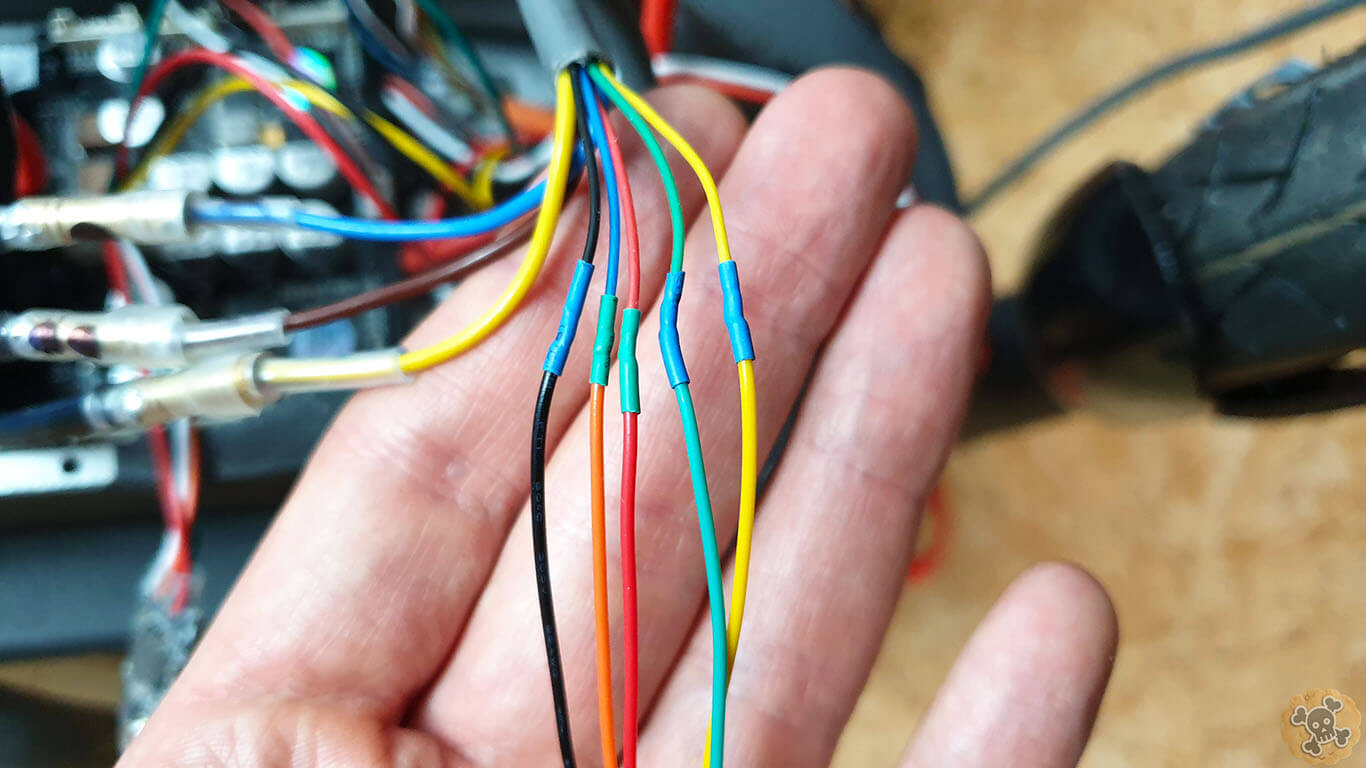
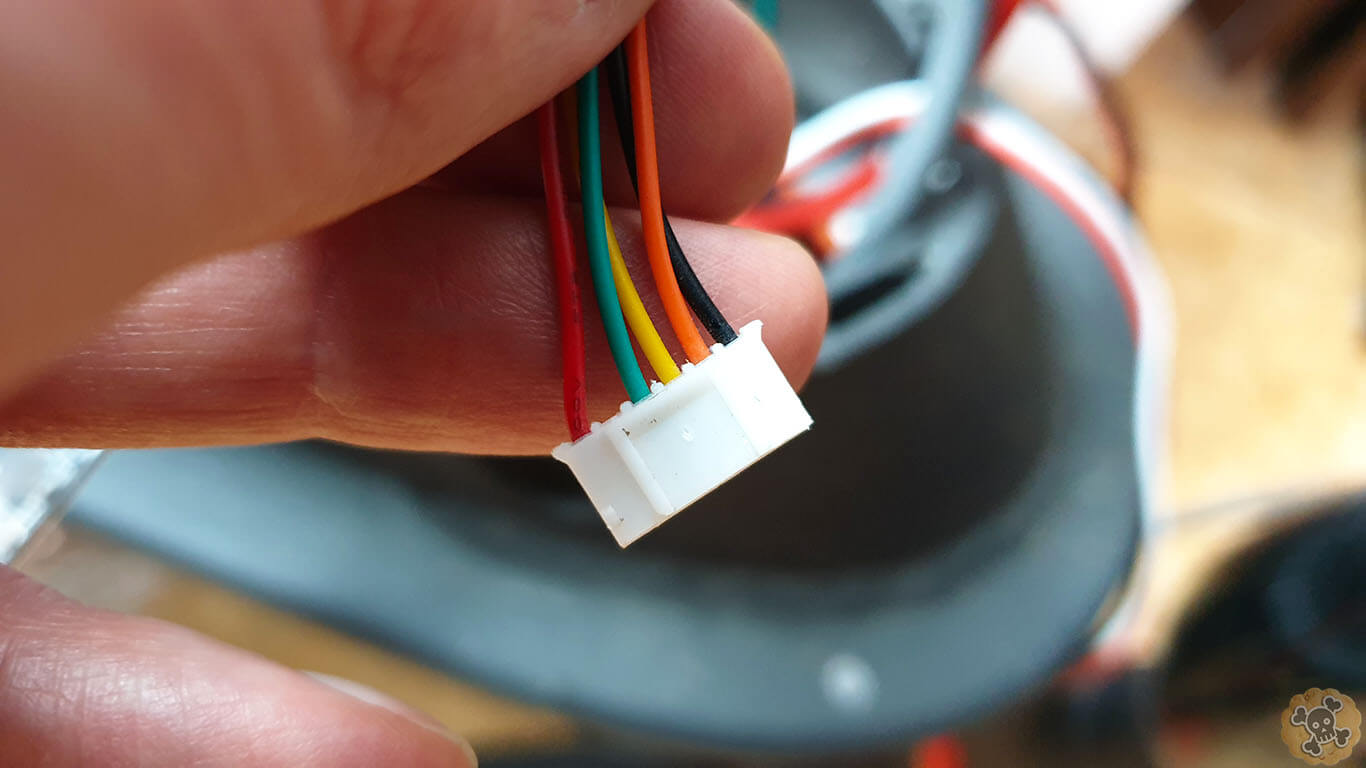
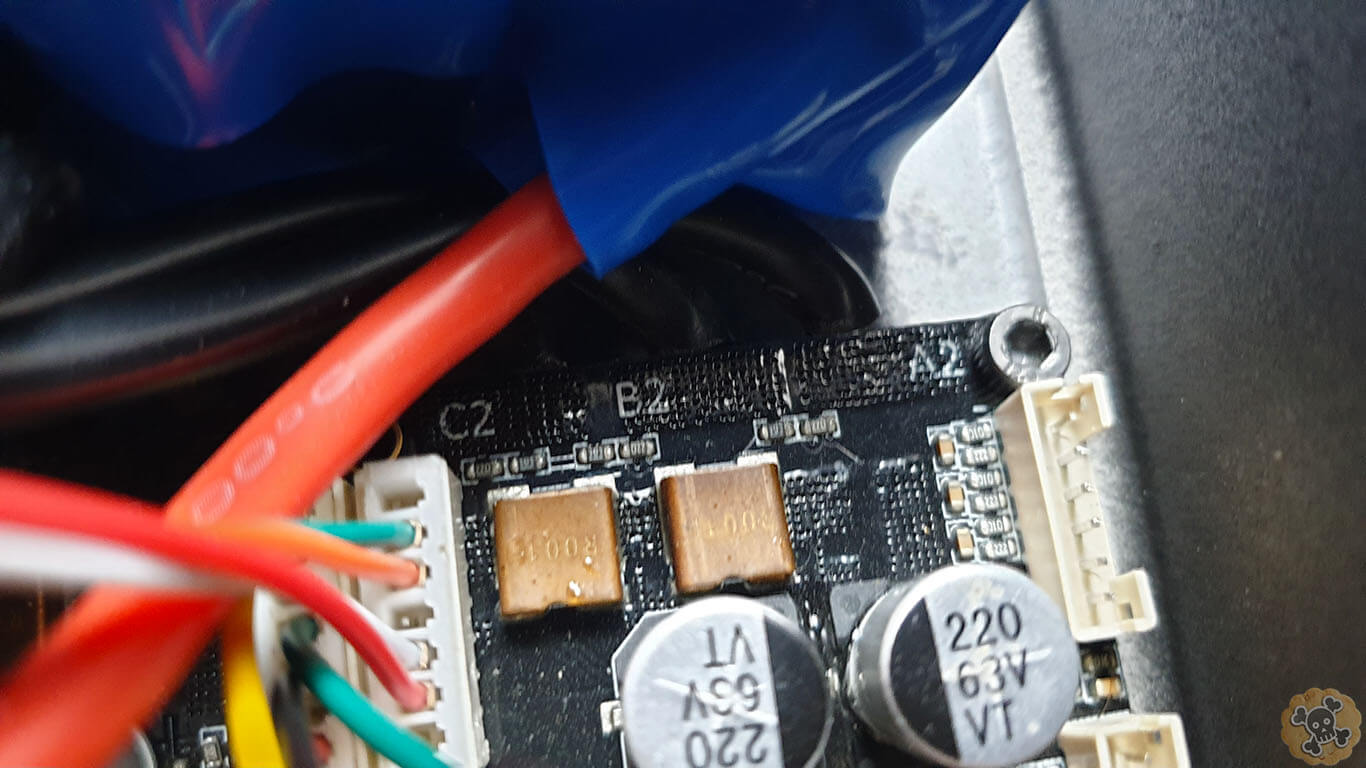
Rear motor I connected to port C2 (Blue) / B2 ( Brown ) / A2 ( yellow ). Hall sensor wires are connected to port near by C2B2A2, colors of wires you can see on pics ( I extended a bit stock wires and new cables got different colors but please connect them exactly the same way like I did to the conenctor )


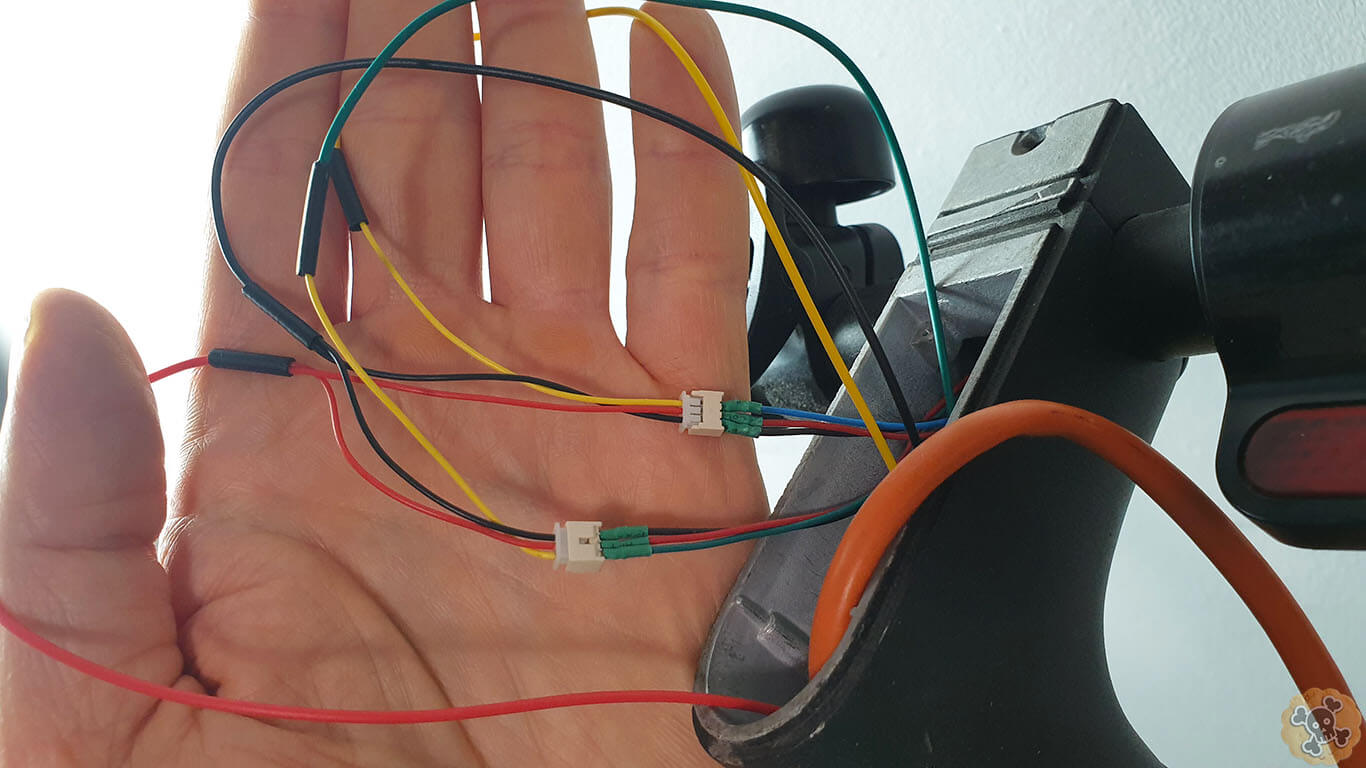
Wiring VESC to Throttle & Brake lever
Here please FOCUS, be careful with RED wires ( + voltage ) , one mistake and you can bake some electronic . Please connect wires Exactly the same way like I did.
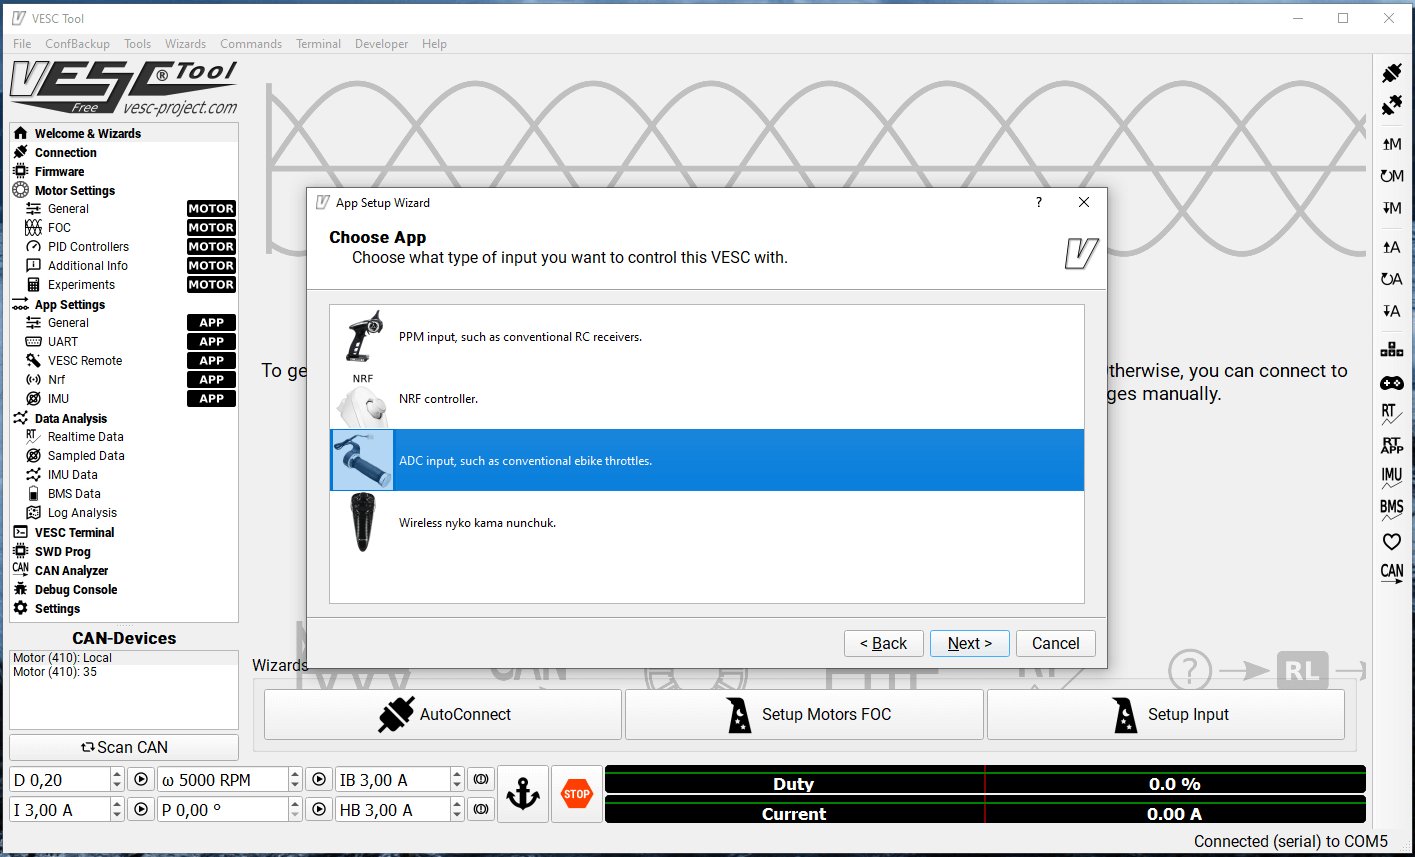
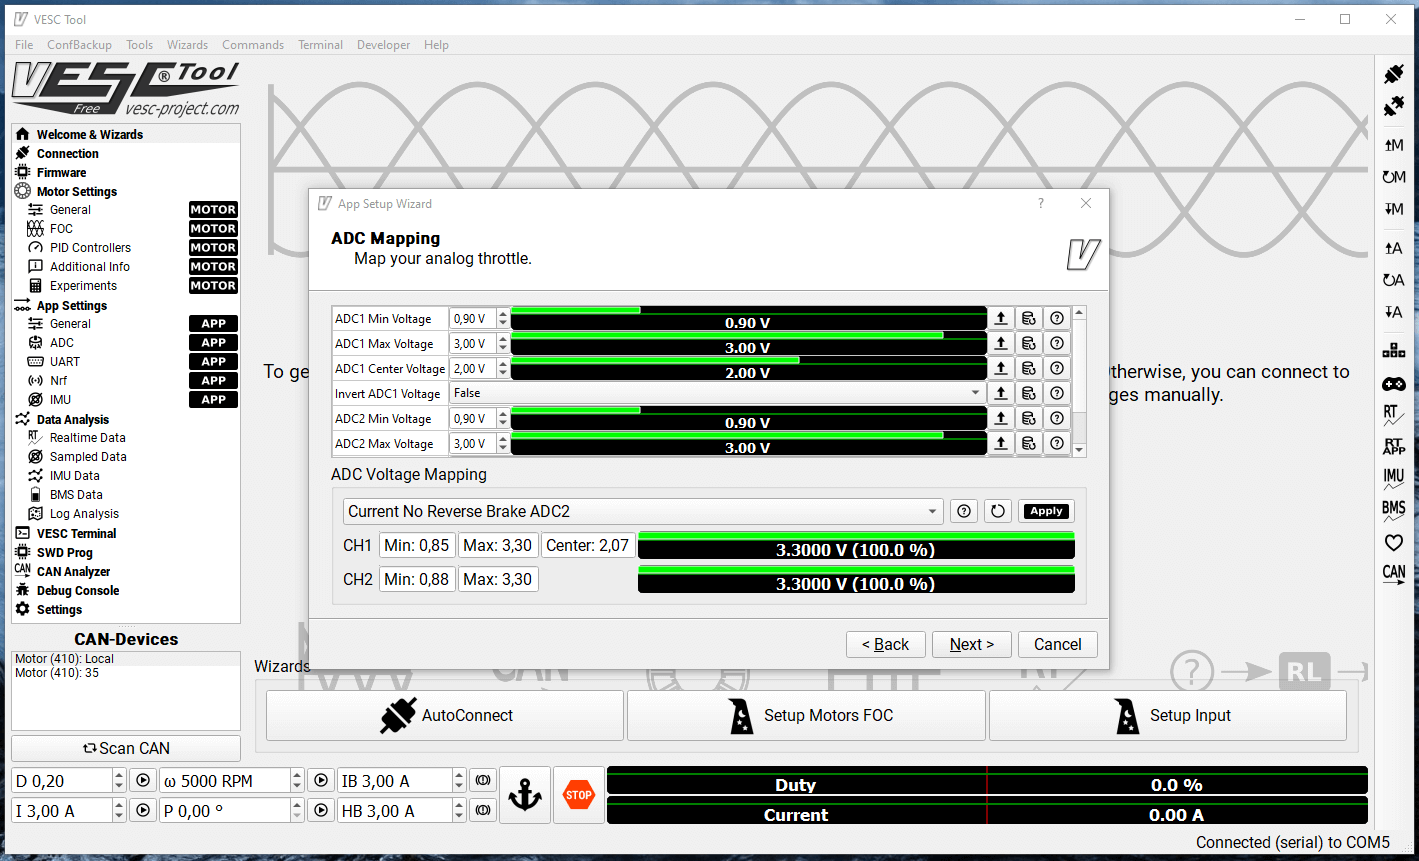
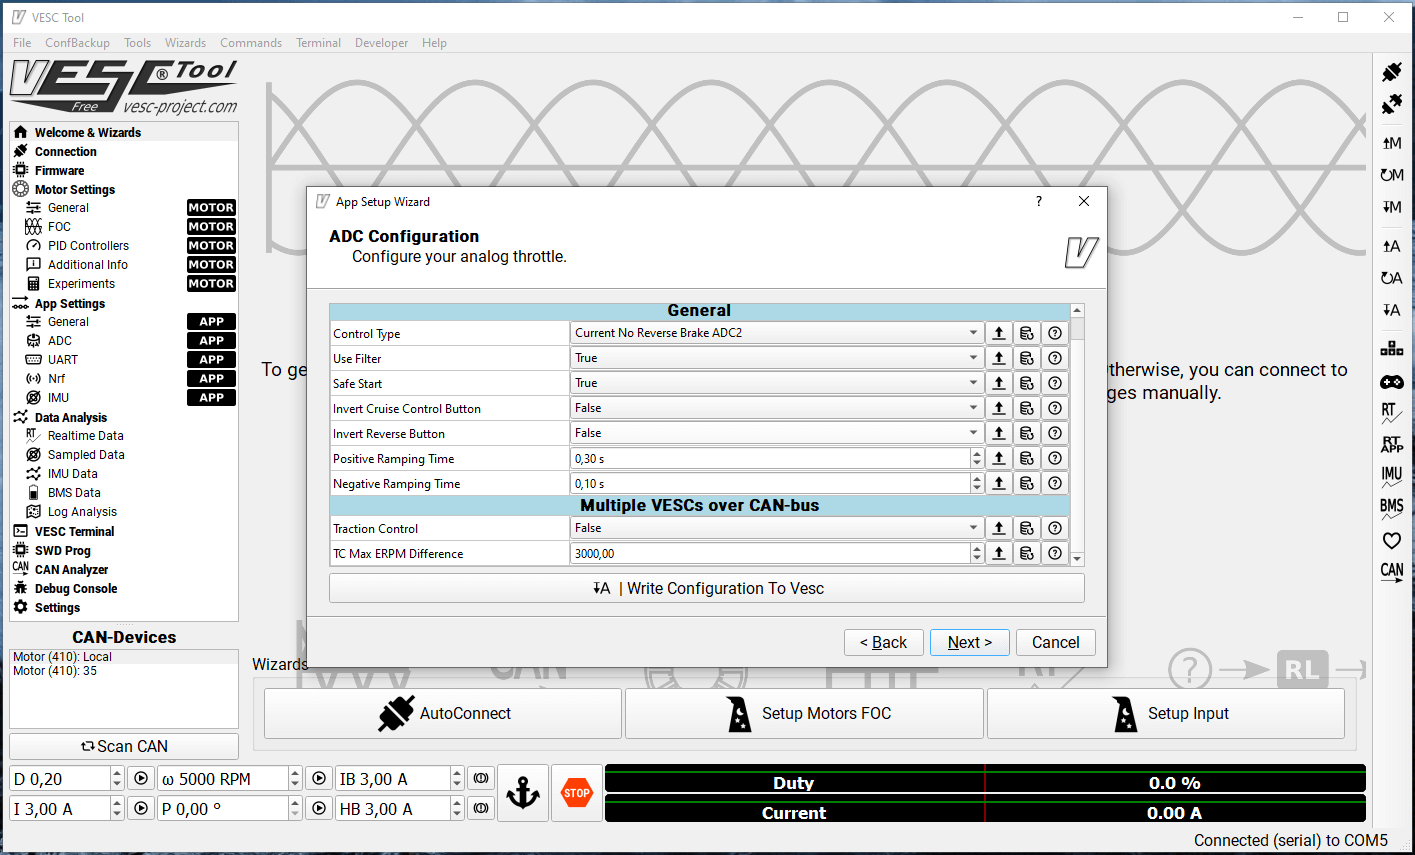
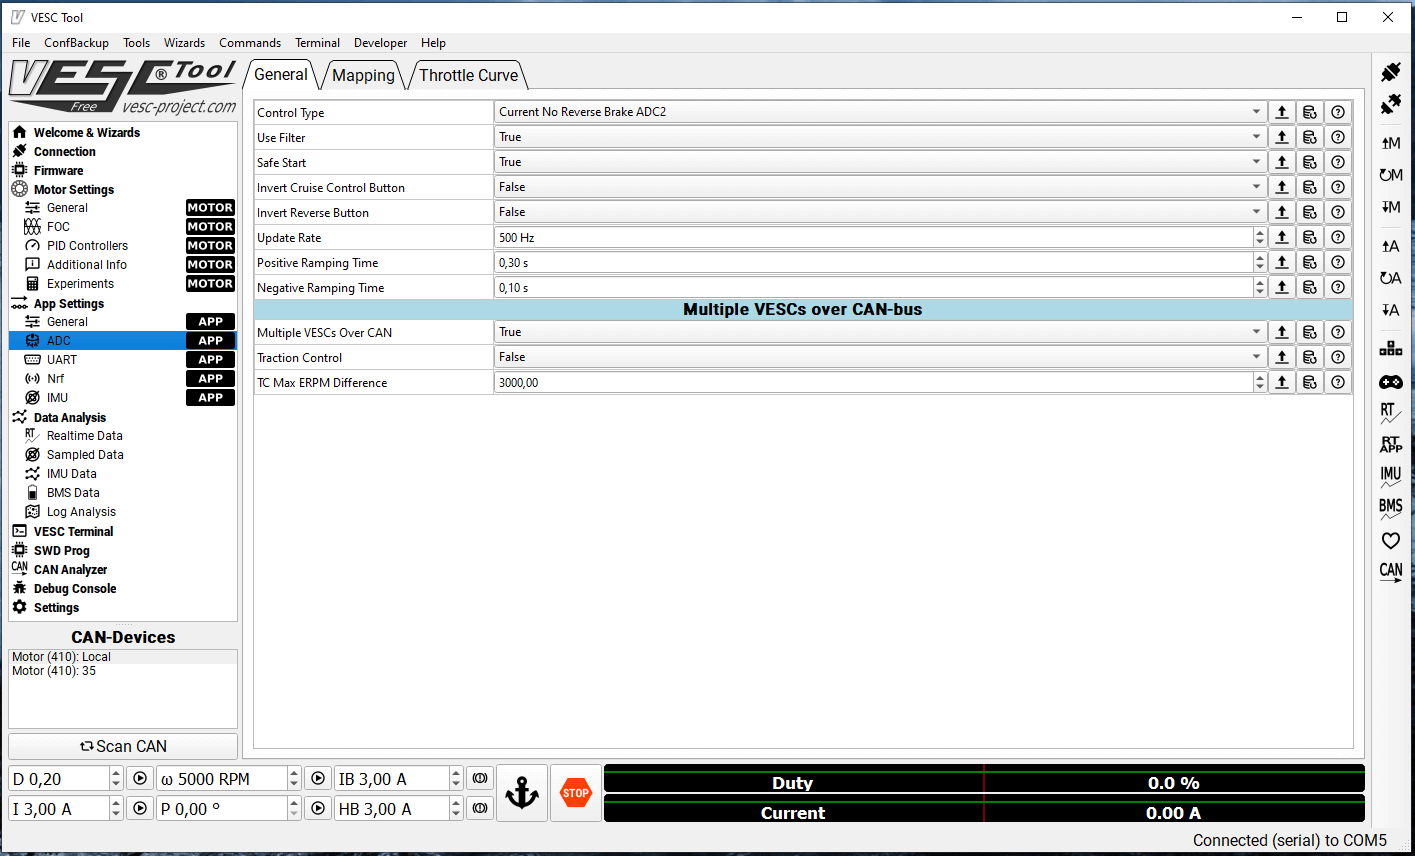
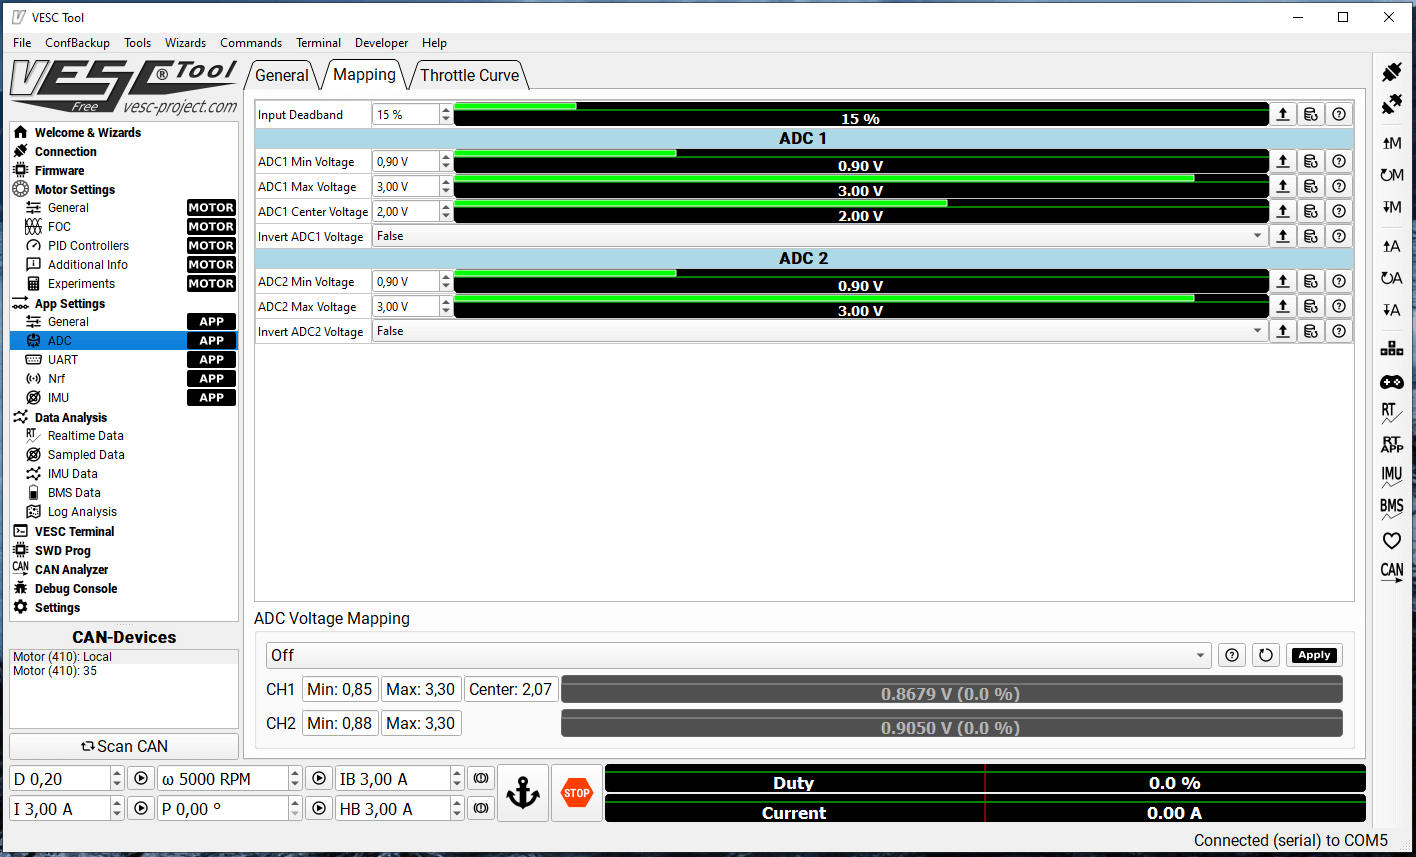
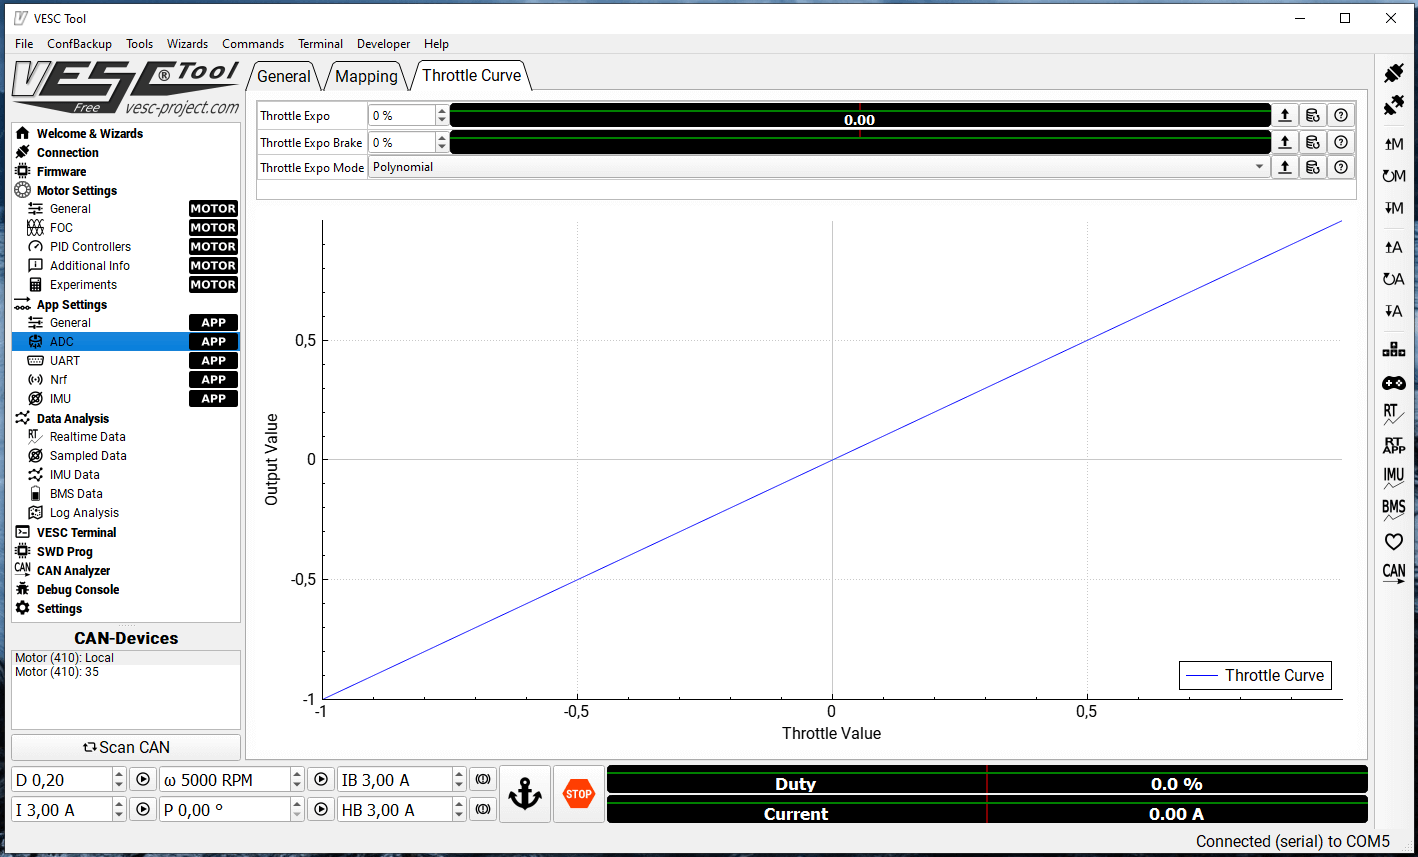
We will use analogue COMM input on VESC called ADC1 / ADC2 , to control brake and throttle ( analogue means that difference in volatge will be measure from 0V to 5V ) . Please connect 4 wires to COMM port as you can see on pic : ADC2 ( Yellow ) / ADC1 ( Green ) / – Ground ( Black ) / +5V ( Red )
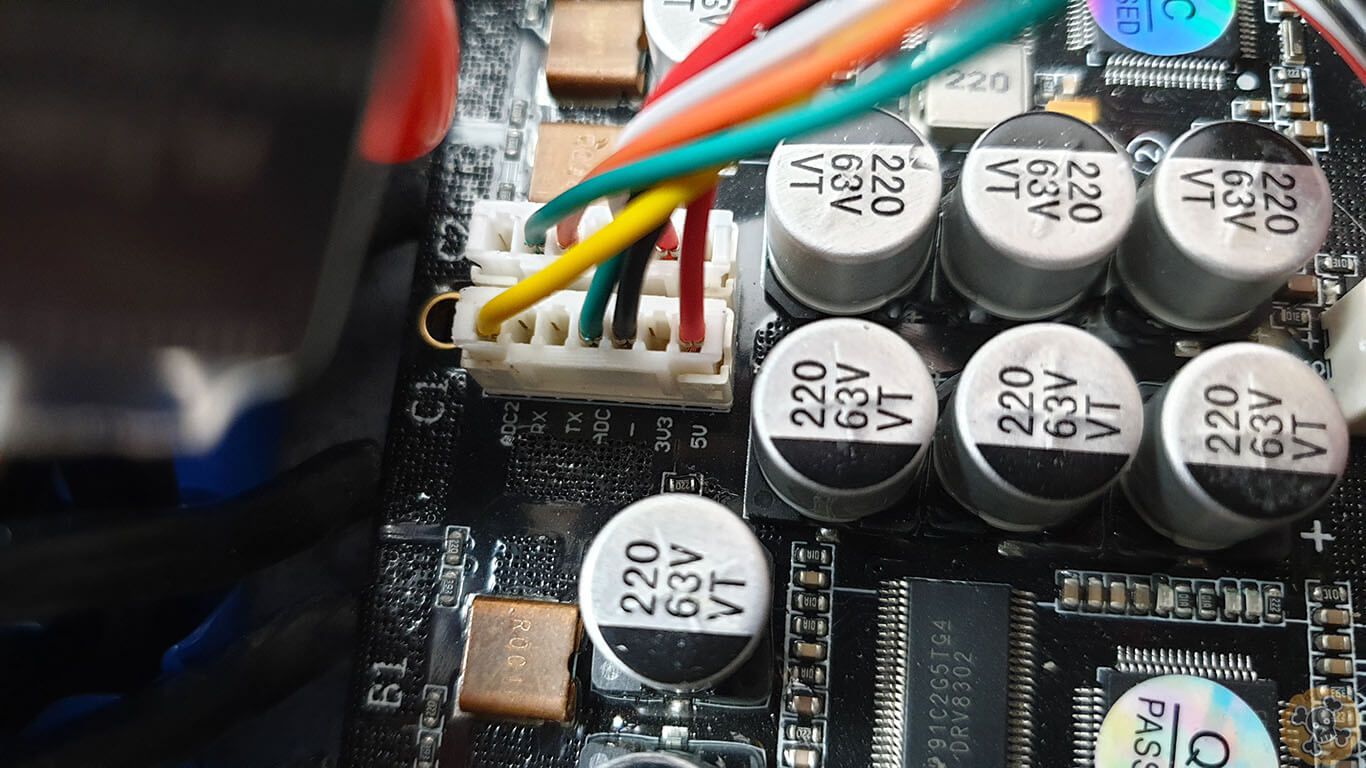
Throttle gimbal has 3 wires : Green ( Signal out ) / Black ( GND ) / Red ( 5V ) . Connect Green wire from Throttle Gimbal to ADC1 on COMM port , then Black to Black and Red to Red.
Brake lever has 3 wiress : Blue ( Signal out ) / Black ( GND ) / Red ( 5V ) . Connect Blue wire from Brake lever to ADC2 on COMM port ( in my case extended wire has yellow color ), then Black to Black and Red to Red.
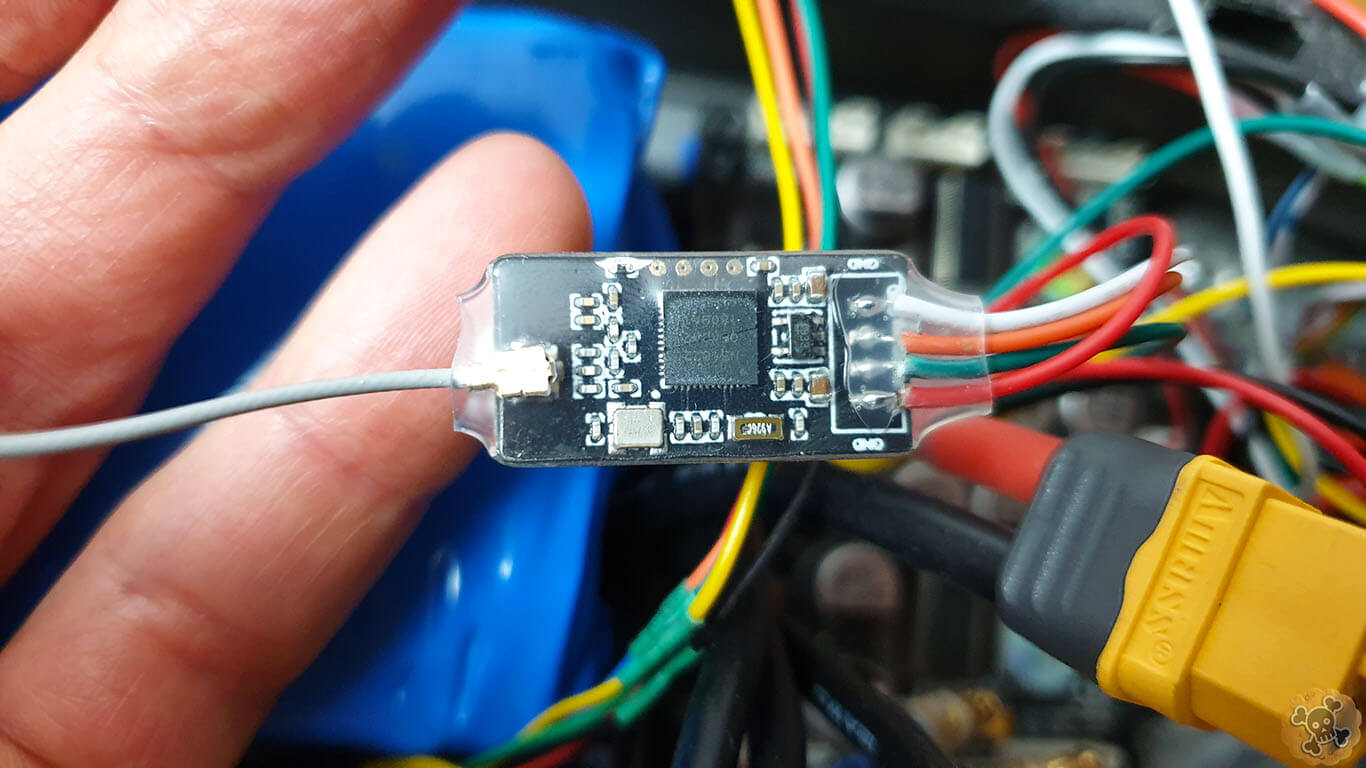
Adding Bluetooth to Vesc
This pretty straightforward , just connect BT module to COMM port and it’s done. Worth to mention is that BT module for Vesc 4.20 and 6.6 has a bit different connector , if U buy wrong then no worries just switch wires on BT connector
Battery pack
13S5P for Max speed
—-soon—-
12S5P for true Sleeper
If you woud like to build true Sleeper then you have to make it look like stock, so controllers and battery need to built inside the deck. I do recommend to make 12S battery pack so 12s = ( 12x 3.7V one LI-IONcell = 44,4V ) , When fully charged 12s = 12×4.2V= 50,4V . Here is quite importnat thing, if you use battery with higher voltage then motor will rotate faster so you can go faster.
What is the Kv rating of an electric motor?
Answer: “Kv” refers to the constant velocity of a motor (not to be confused with “kV,” the abbreviation for kilovolt). It is measured by the number of revolutions per minute (rpm) that a motor turns when 1V (one volt) is applied with no load attached to that motor. The Kv rating of a brushless motor is the ratio of the motor’s unloaded rpm to the peak voltage on the wires connected to the coils.
Knowing the Kv rating of a motor will help you determine how fast that motor will rotate when a given voltage is applied to it. For example, a 980Kv motor powered by an 11.1V battery would spin at 10,878 rpm (980 x 11.1) with no load. A change in voltage will change the rpm and will require changing the propeller to avoid overloading the motor. Kv allows you to get a handle on the torque that can be expected from a particular motor. Torque is determined by the number of winds on the armature and the strength of the magnets. A low Kv motor has more winds of thinner wire—it will carry more volts at fewer amps, produce higher torque, and swing a bigger prop. A high Kv motor has fewer winds of thicker wire that carry more amps at fewer volts and spin a smaller prop at high revolutions. Source: https://www.rotordronepro.com/understanding-kv-ratings
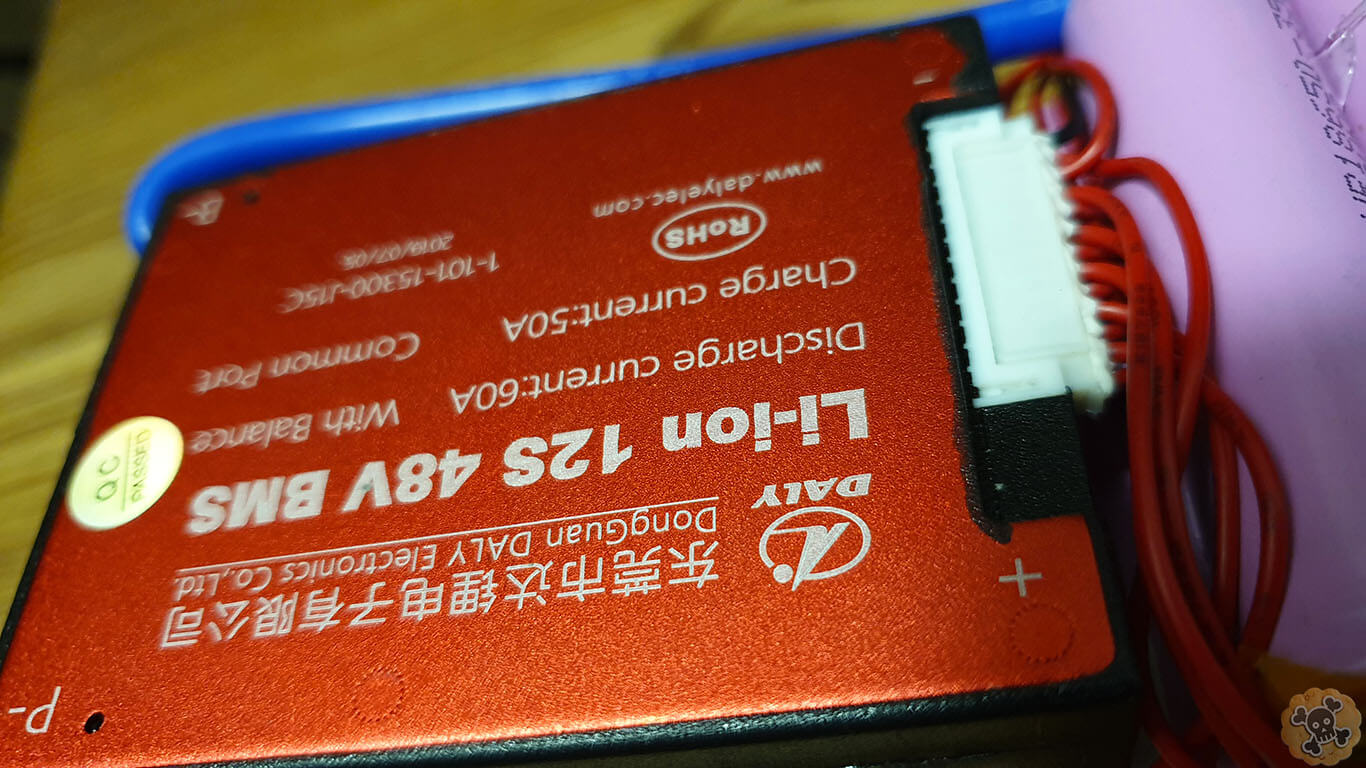
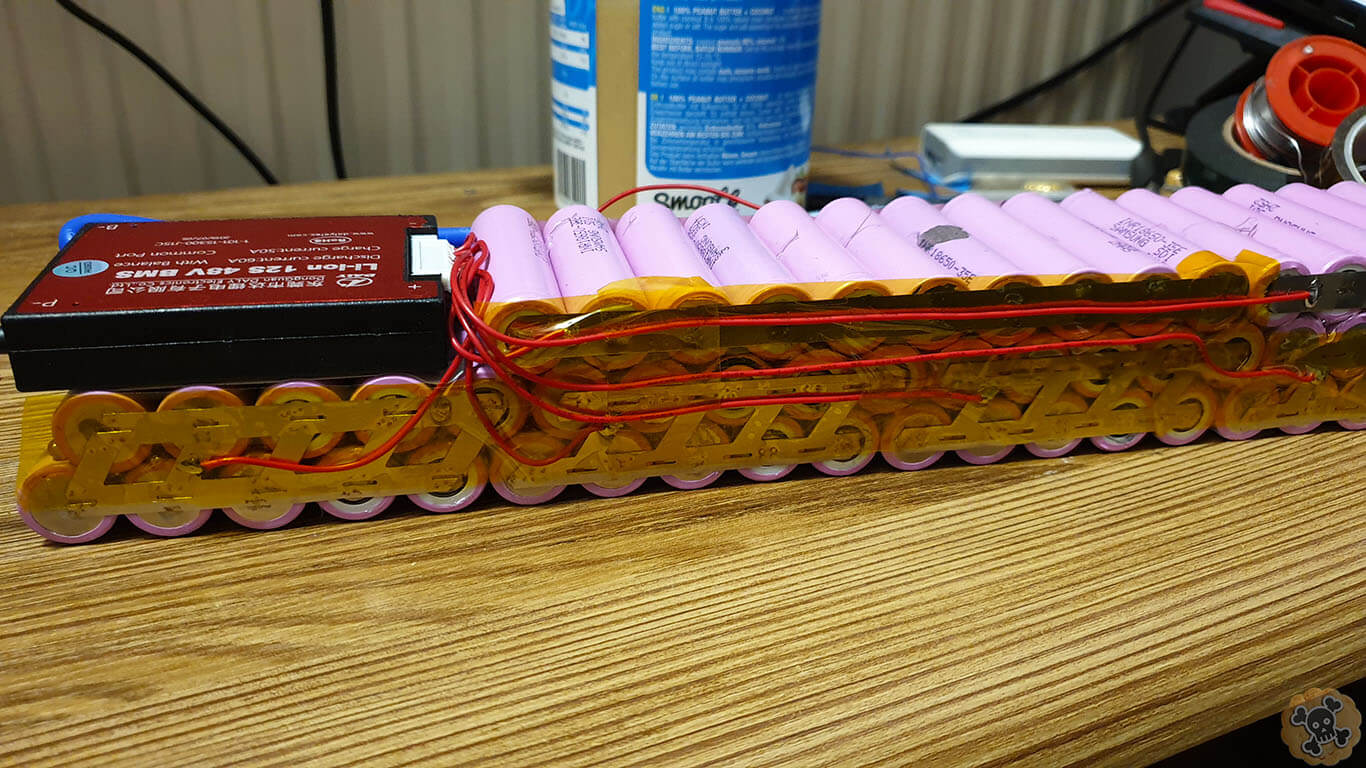
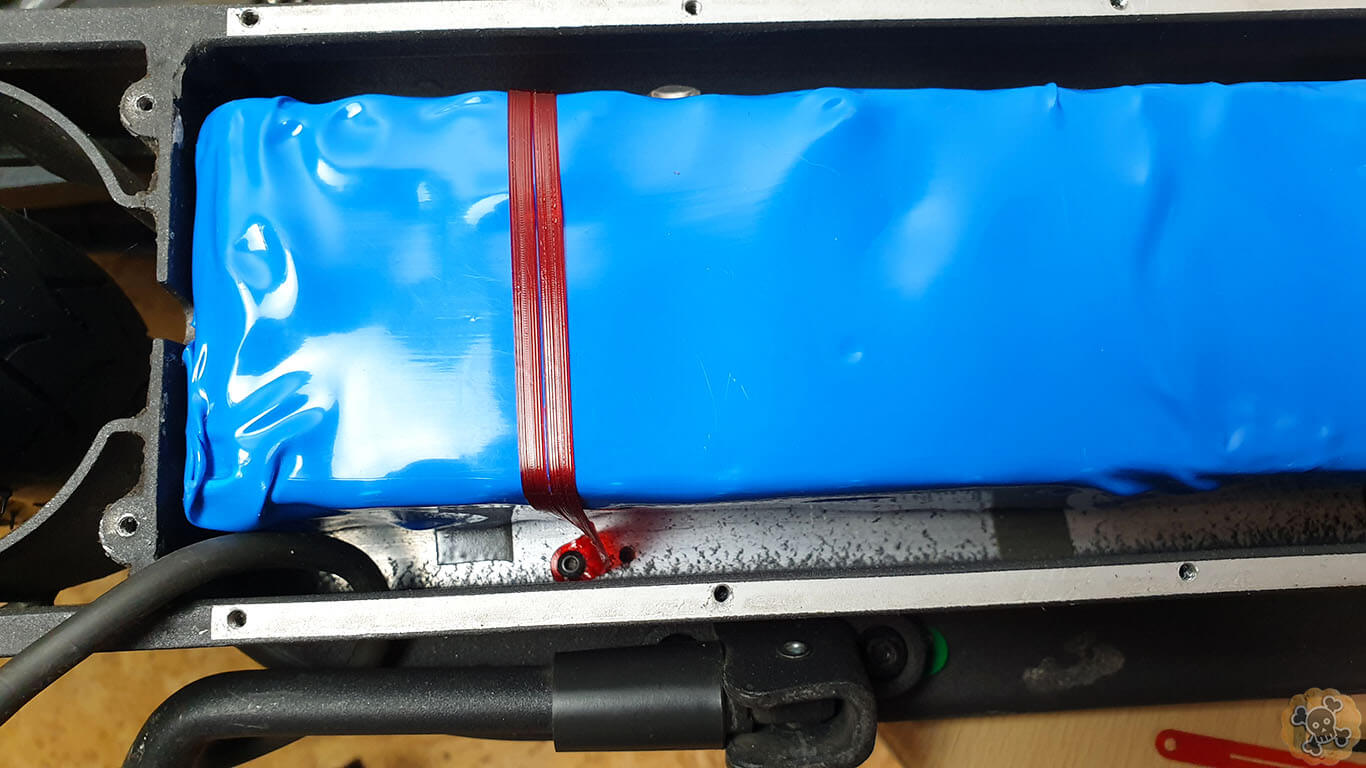
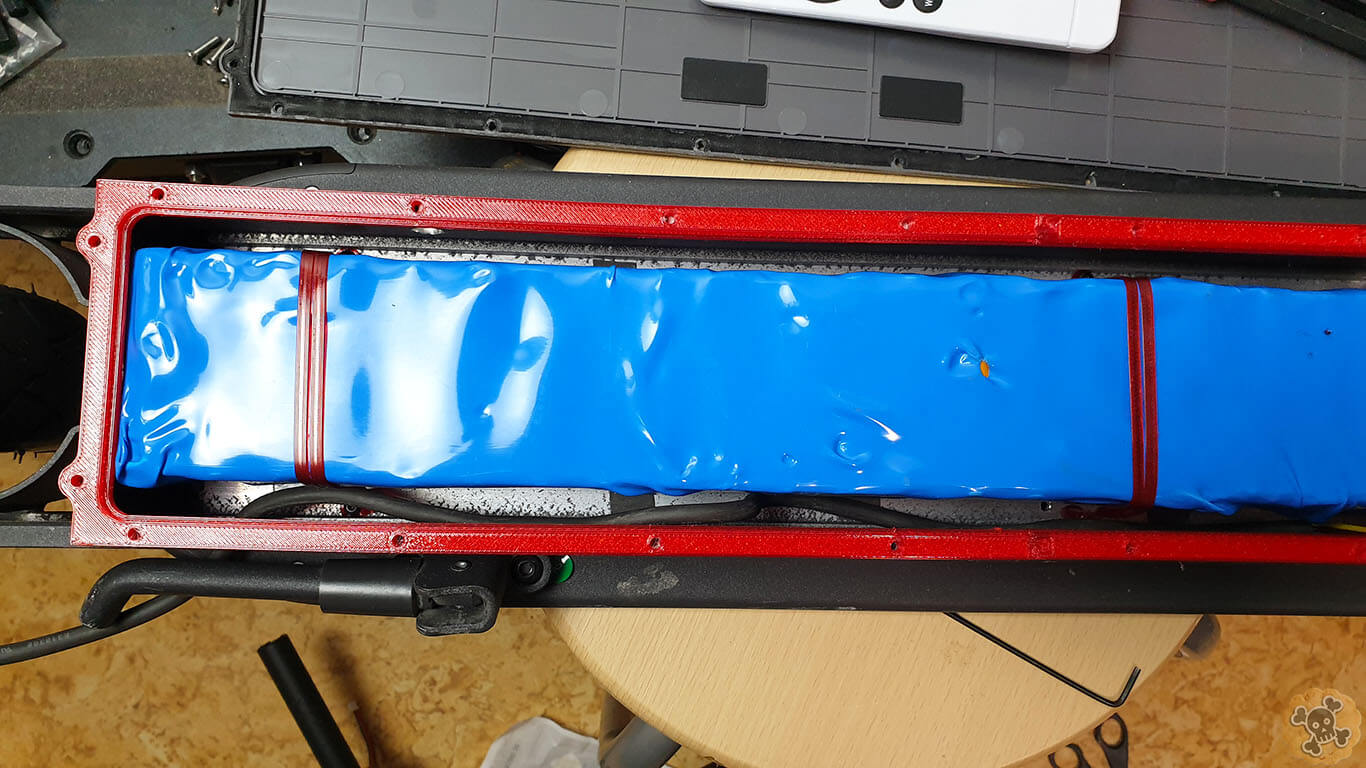
To make my battery pack I used Samsung 35E ( every cell has around 3500mah capacity ) , no of cells is 12s x 5p = 60 cells , 5P means ( 5 cells connected parallel so if one LI IOn cell has 3500mah then 5P x 3500mah = 17 500mah or 17,5AH ) , so battery pack for my sleeper is 44,4V 17,5AH ( we can expect working range 50km+ and speed +-40km/h ) . This is how it looks , we got 3 levels and I been able to fit BMS 60A Delay https://s.click.aliexpress.com/e/_AtVFeA which I do recommend due to quality , ( choose Common port casue you will have only one line to charge/discharge battery so best option for regenerative braking )
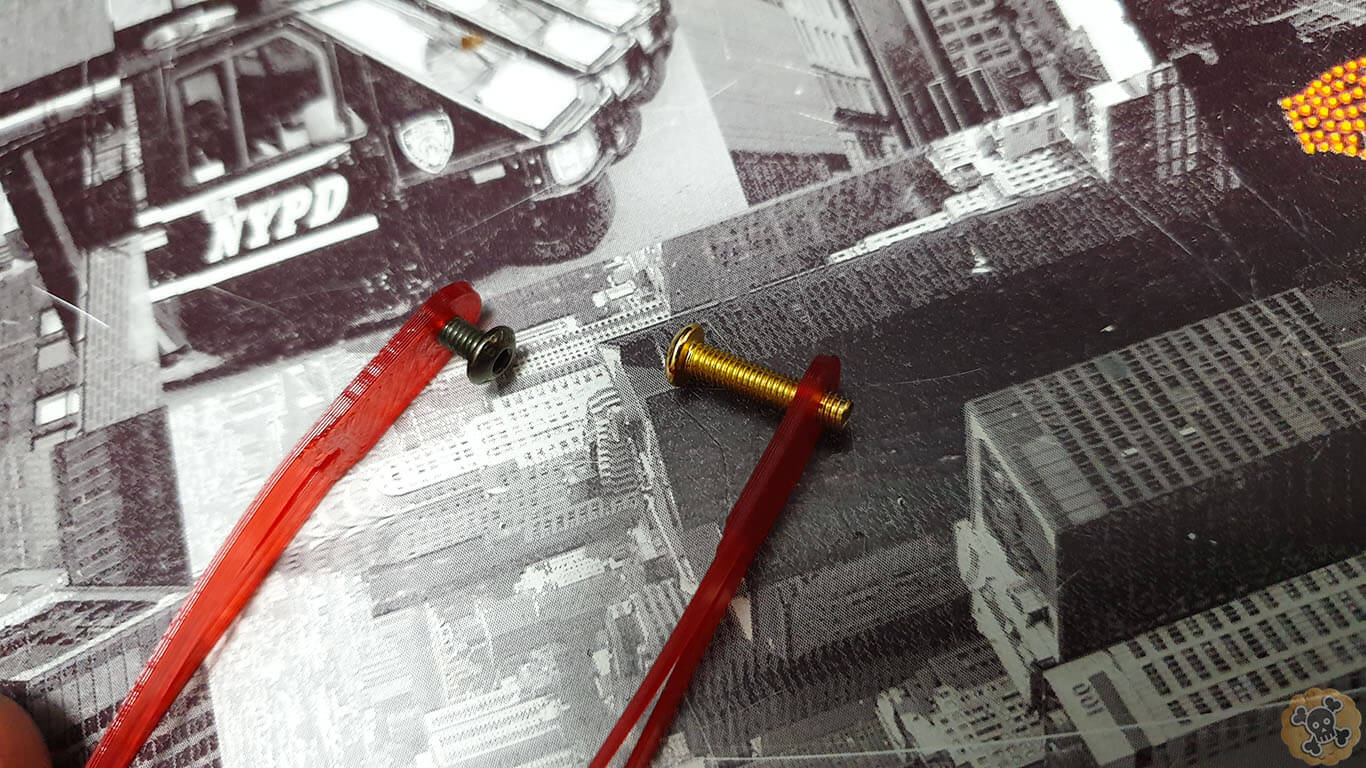
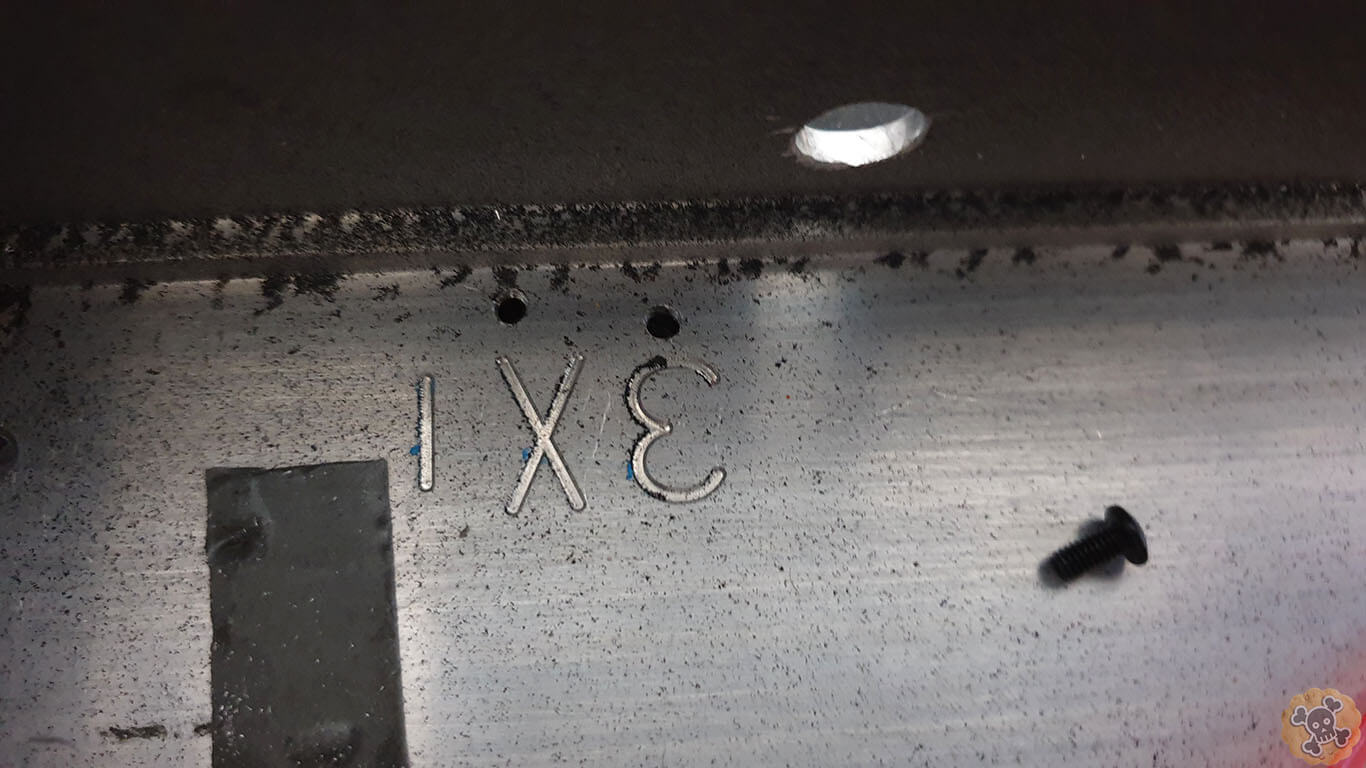
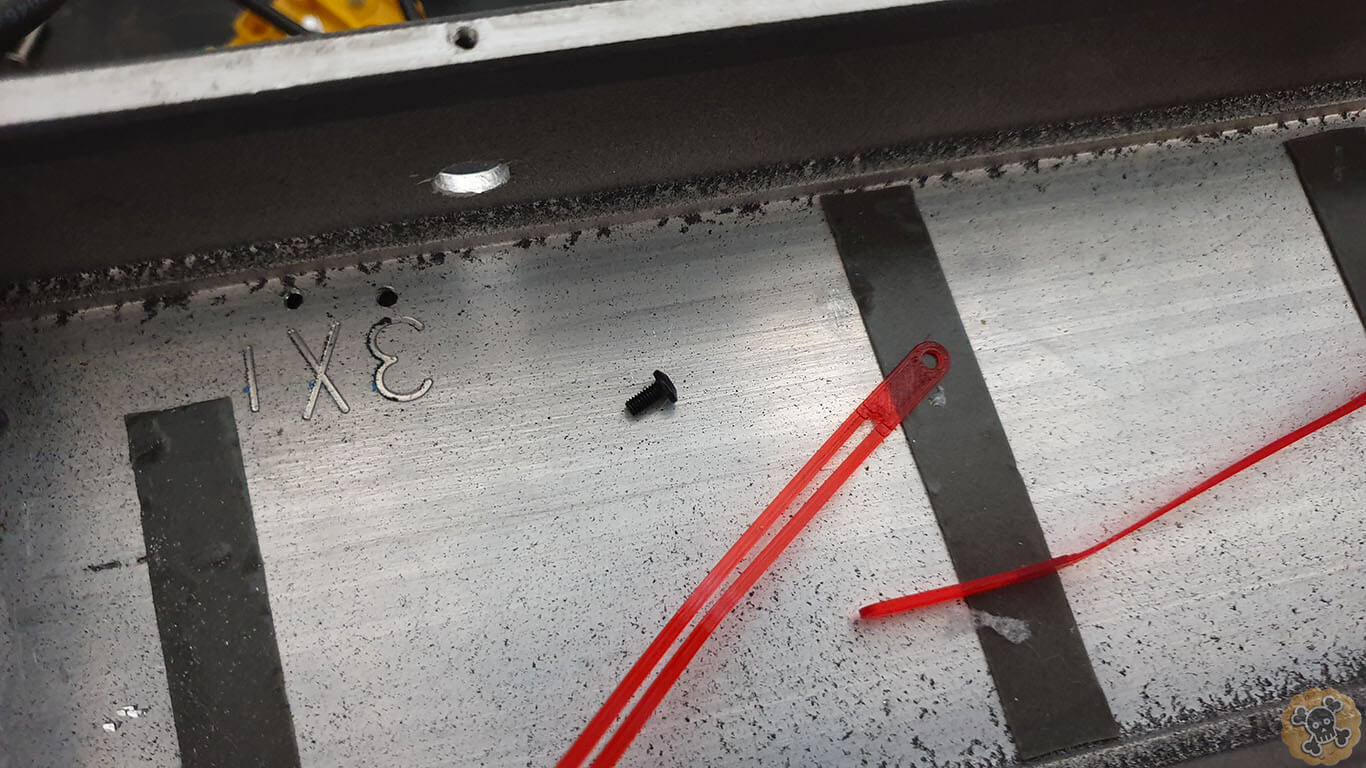
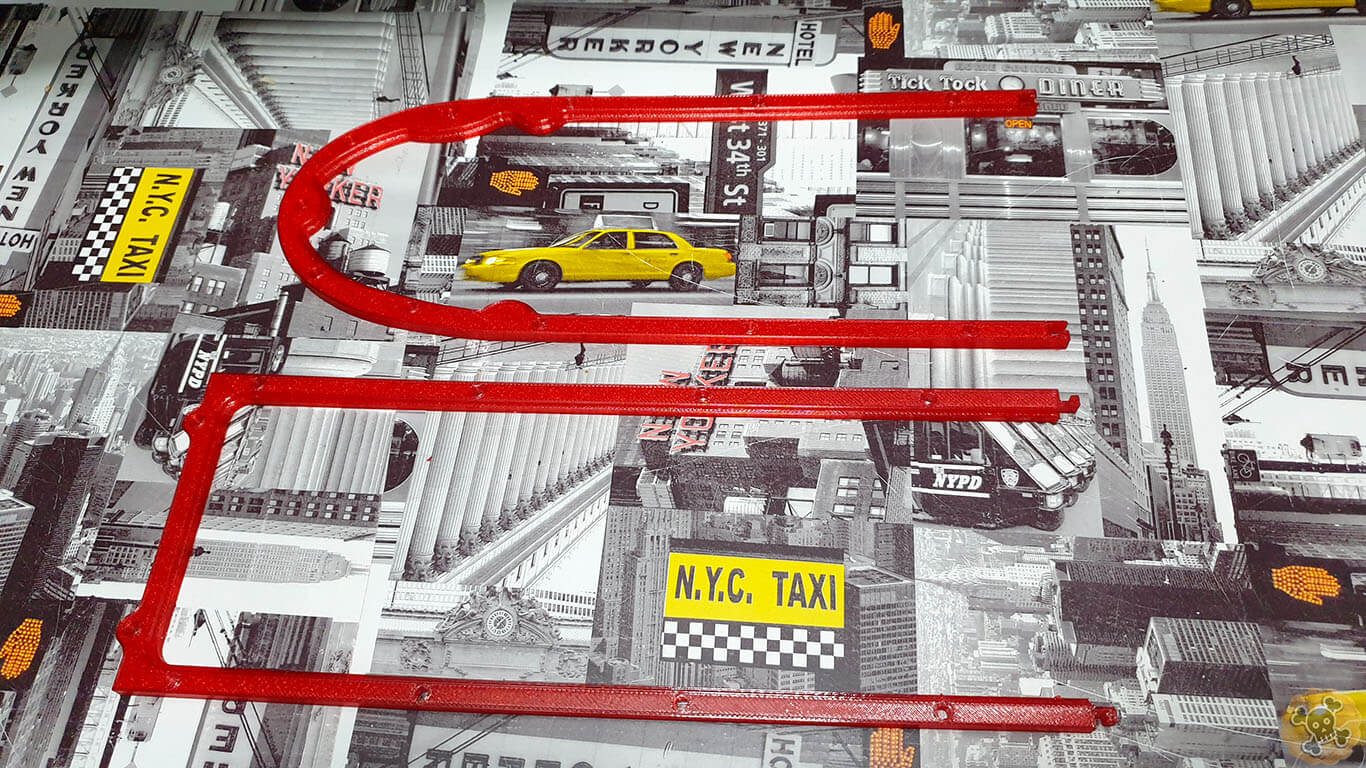
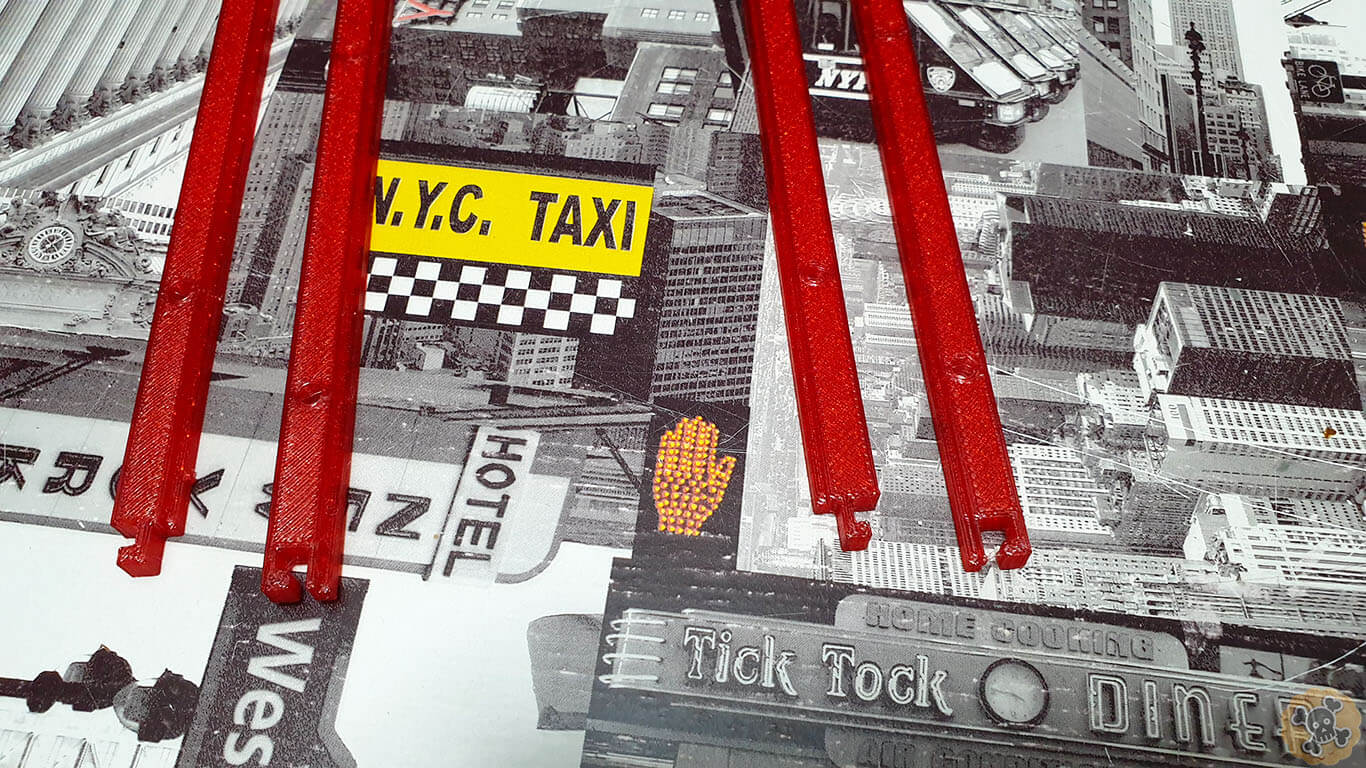
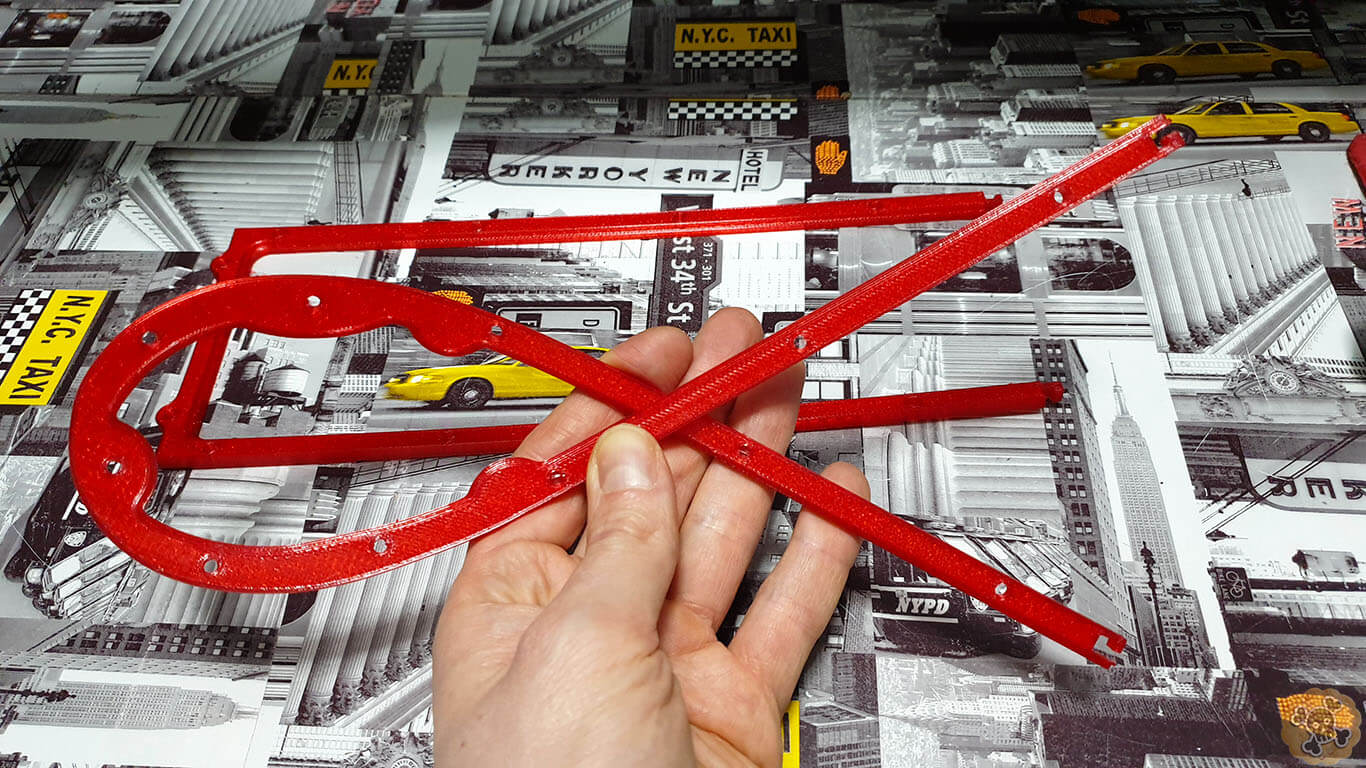
To fix battery pack to the M365 frame I used 2 printed belts and I did 4 holes for M3x8 screws ( Belt project is free for my Patrons , just use TPU filament )


3Level battery is a bit higher then frame so I had to print small spacer, ofcourse this project is free for my patrons ( I recommend flexible TPU filament and printer with bed 300x300mm is needed)


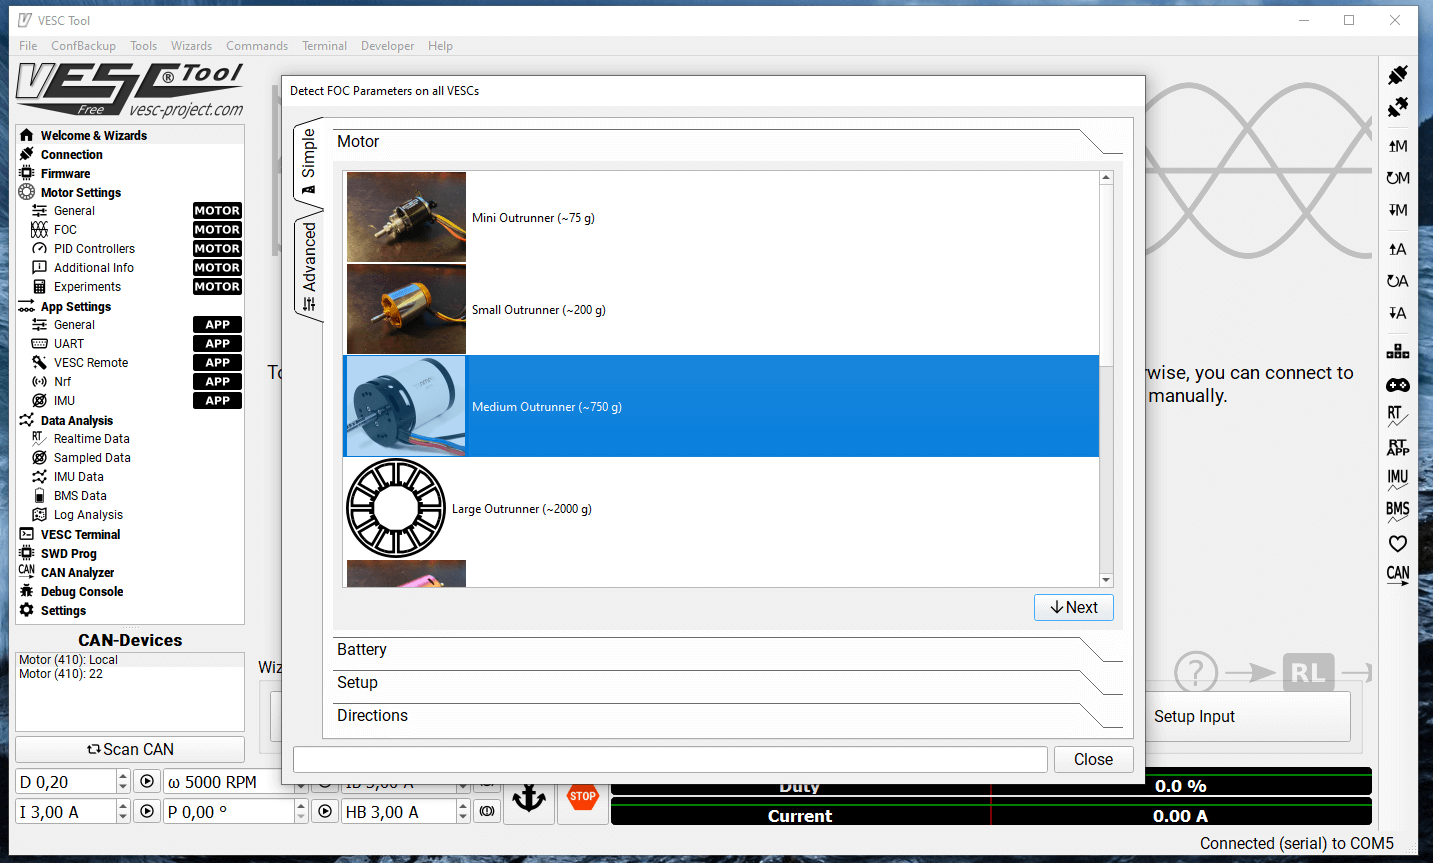
VESC settings for M365

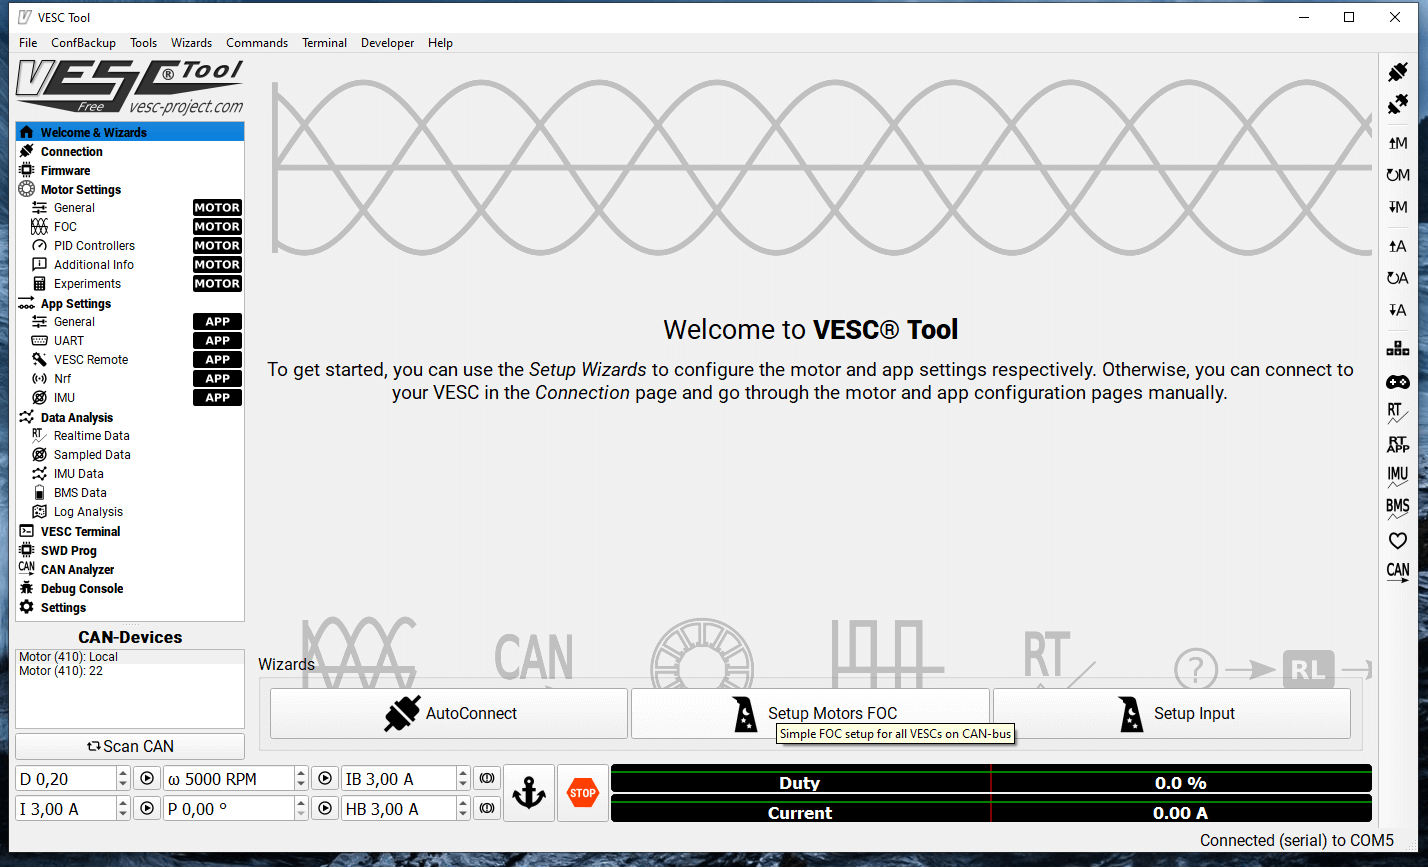
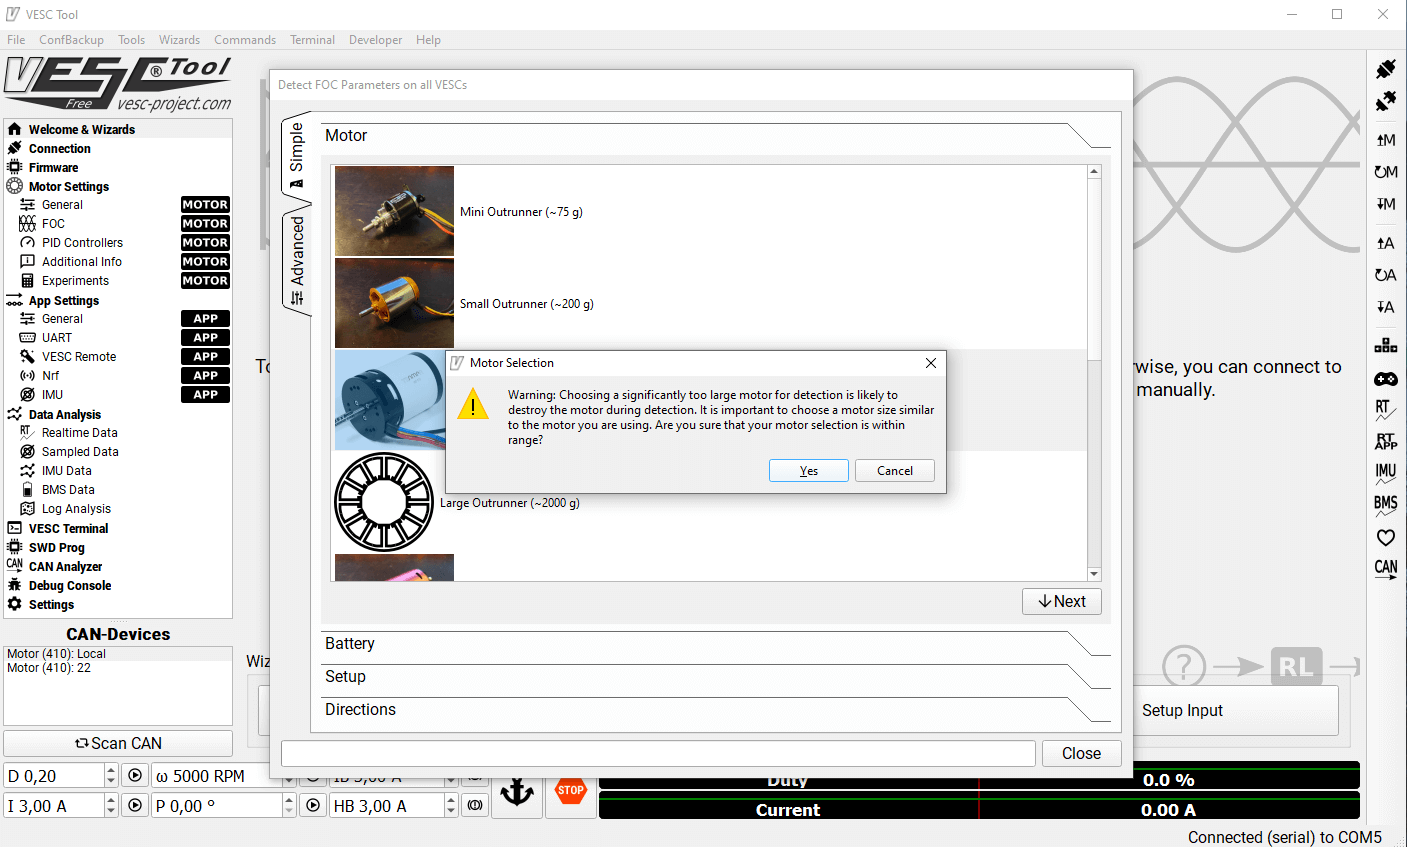
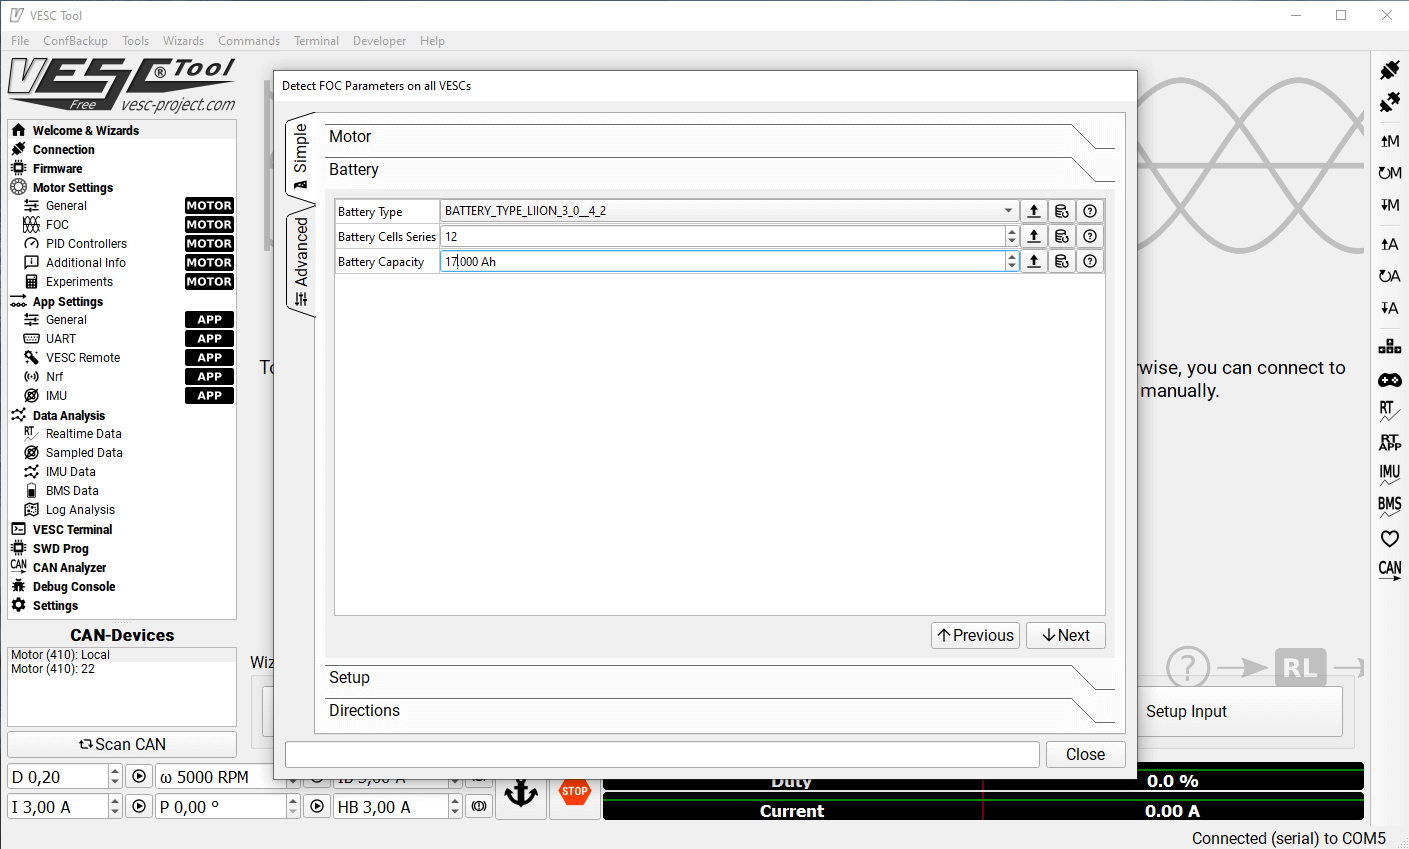
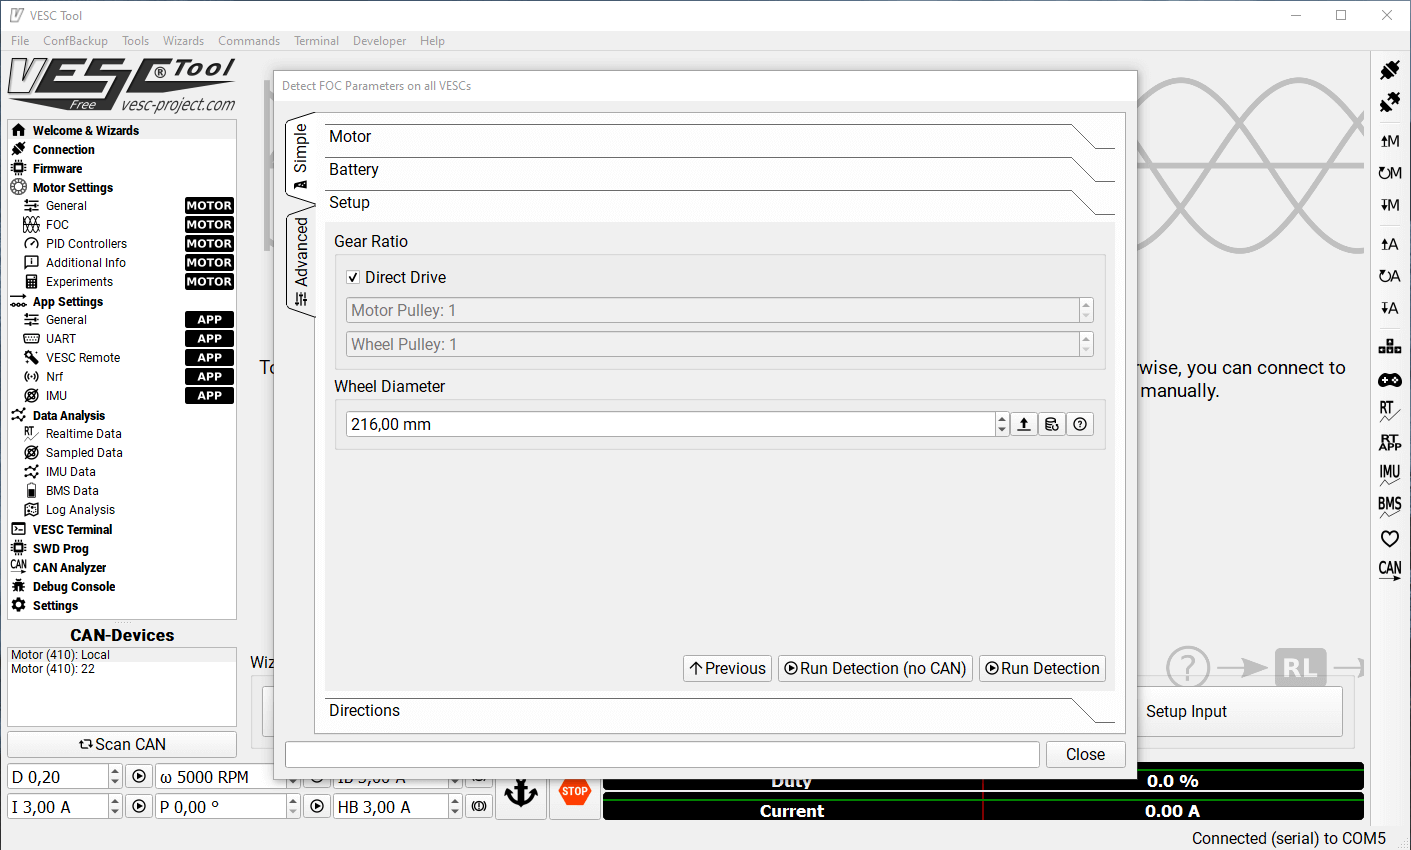
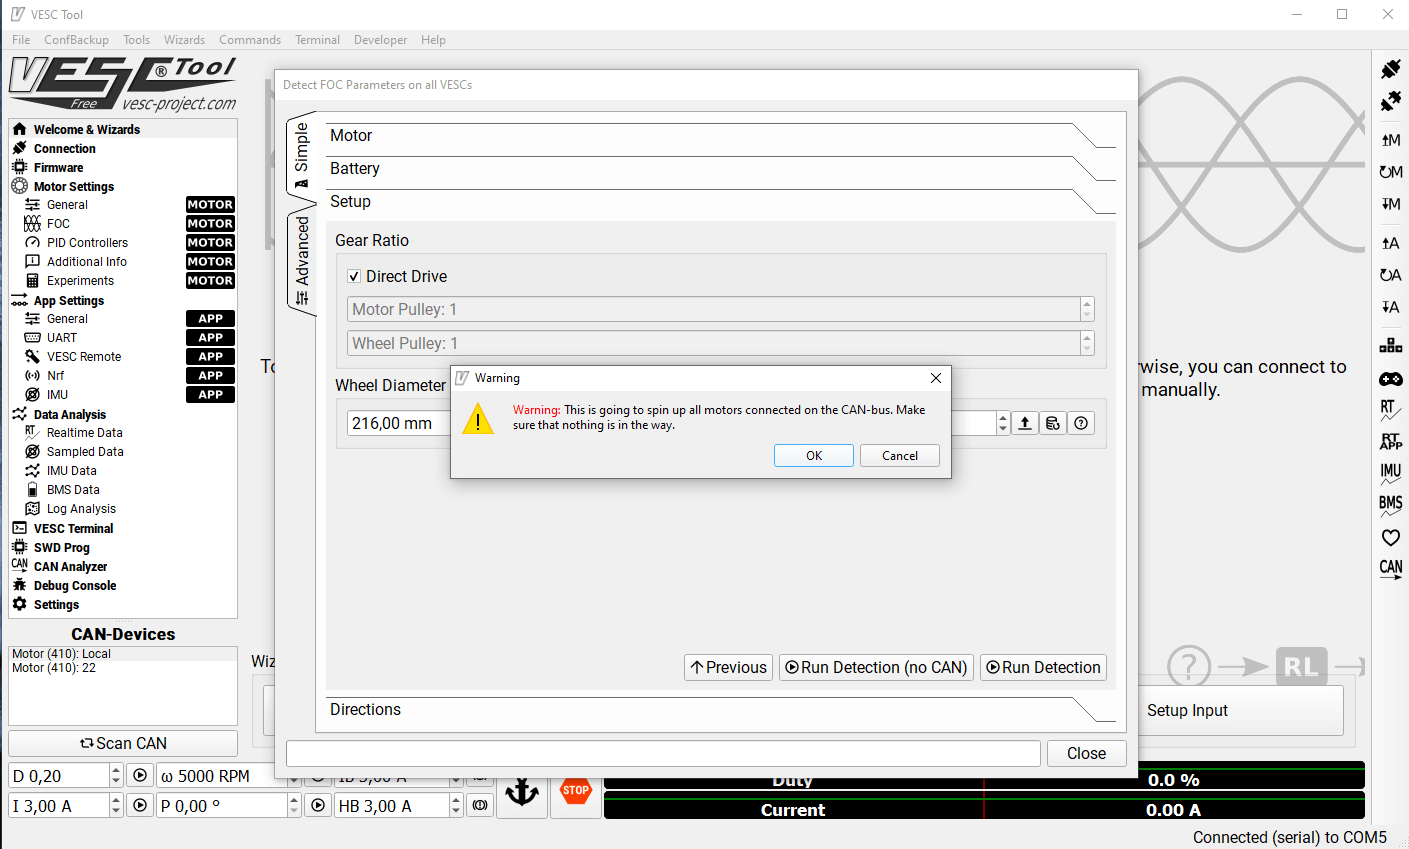

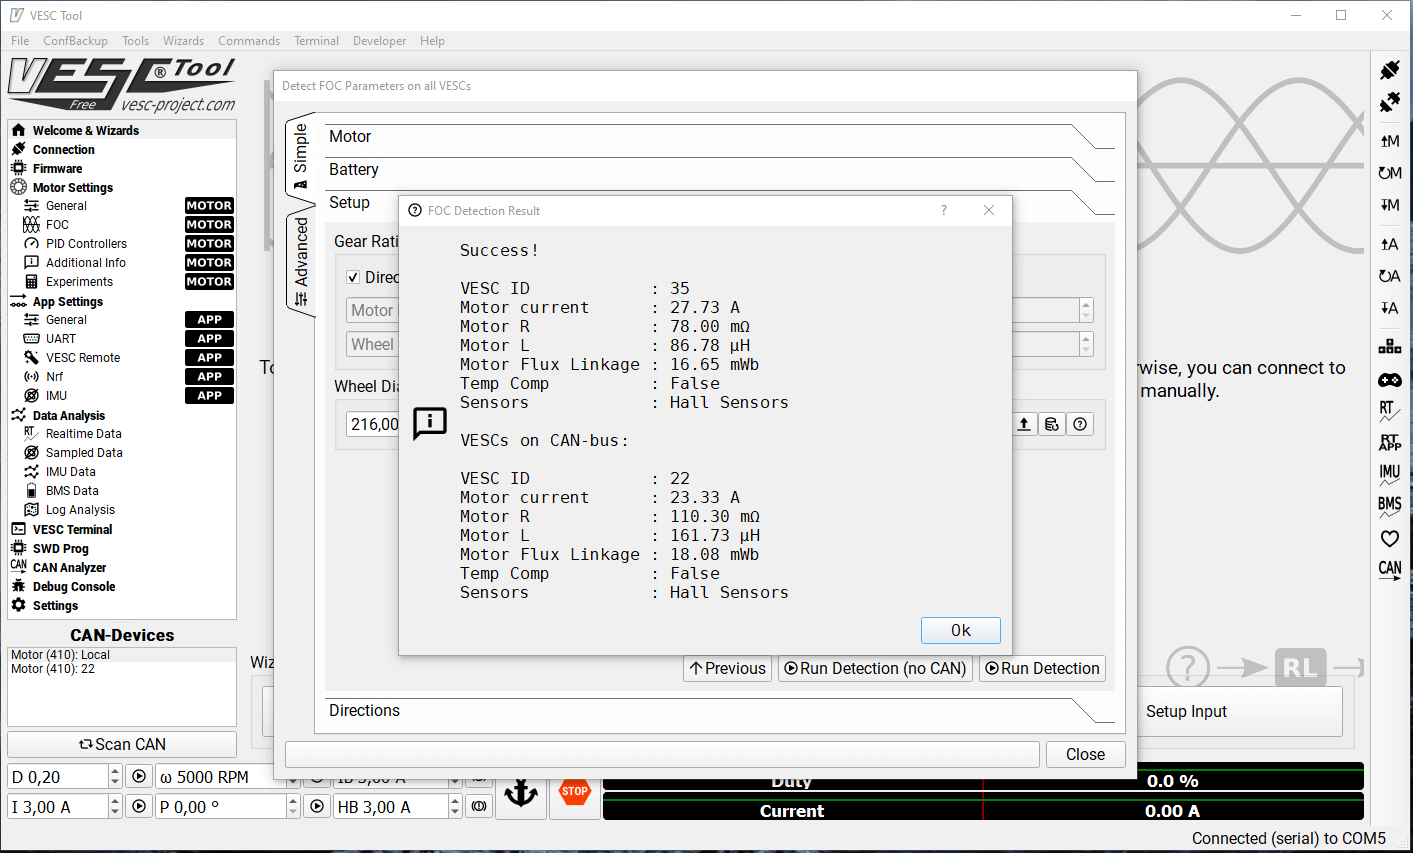

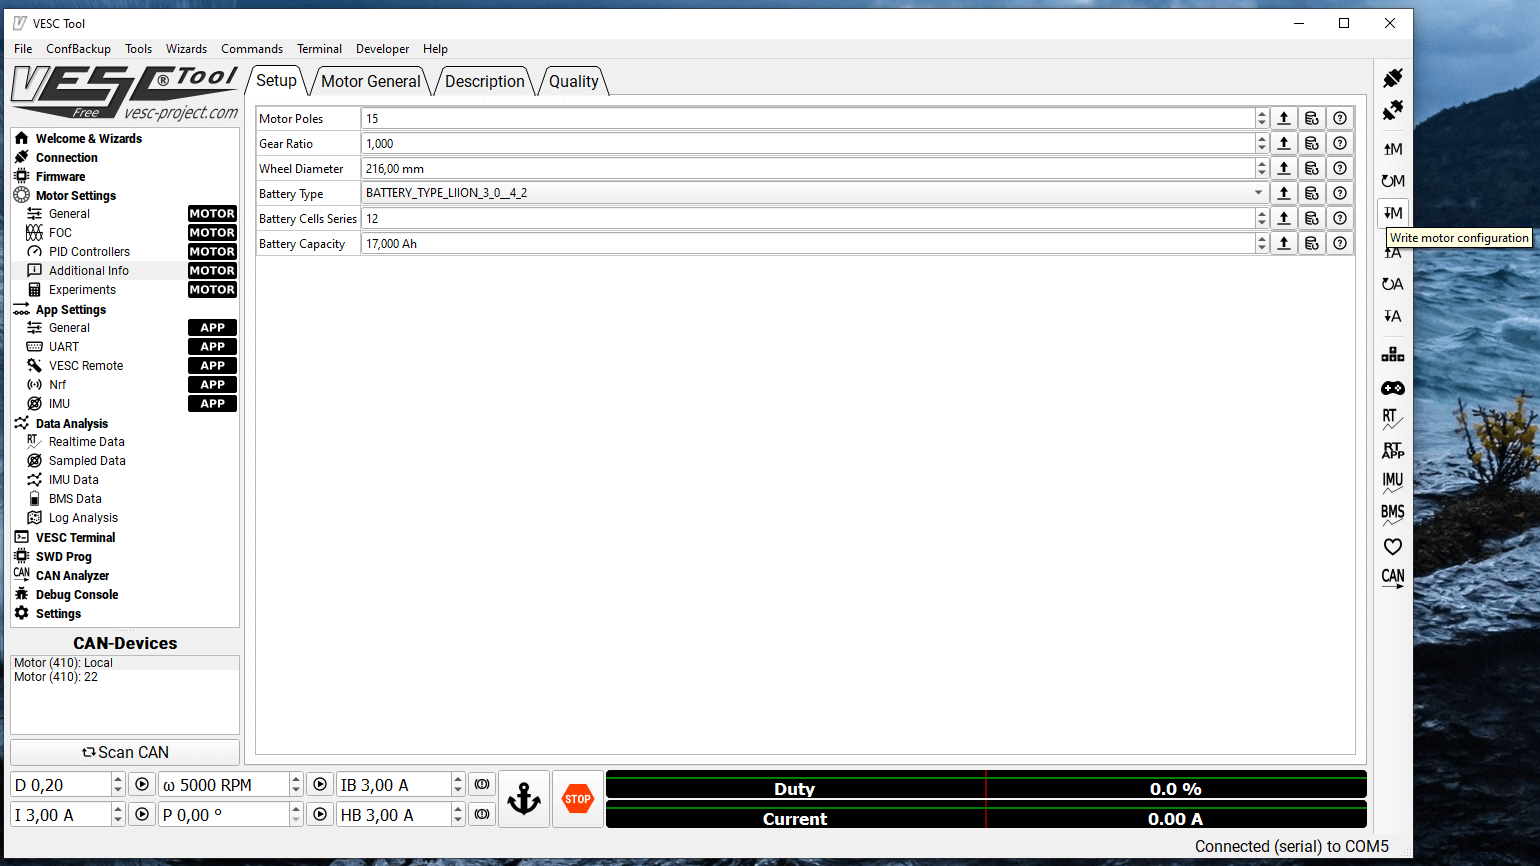

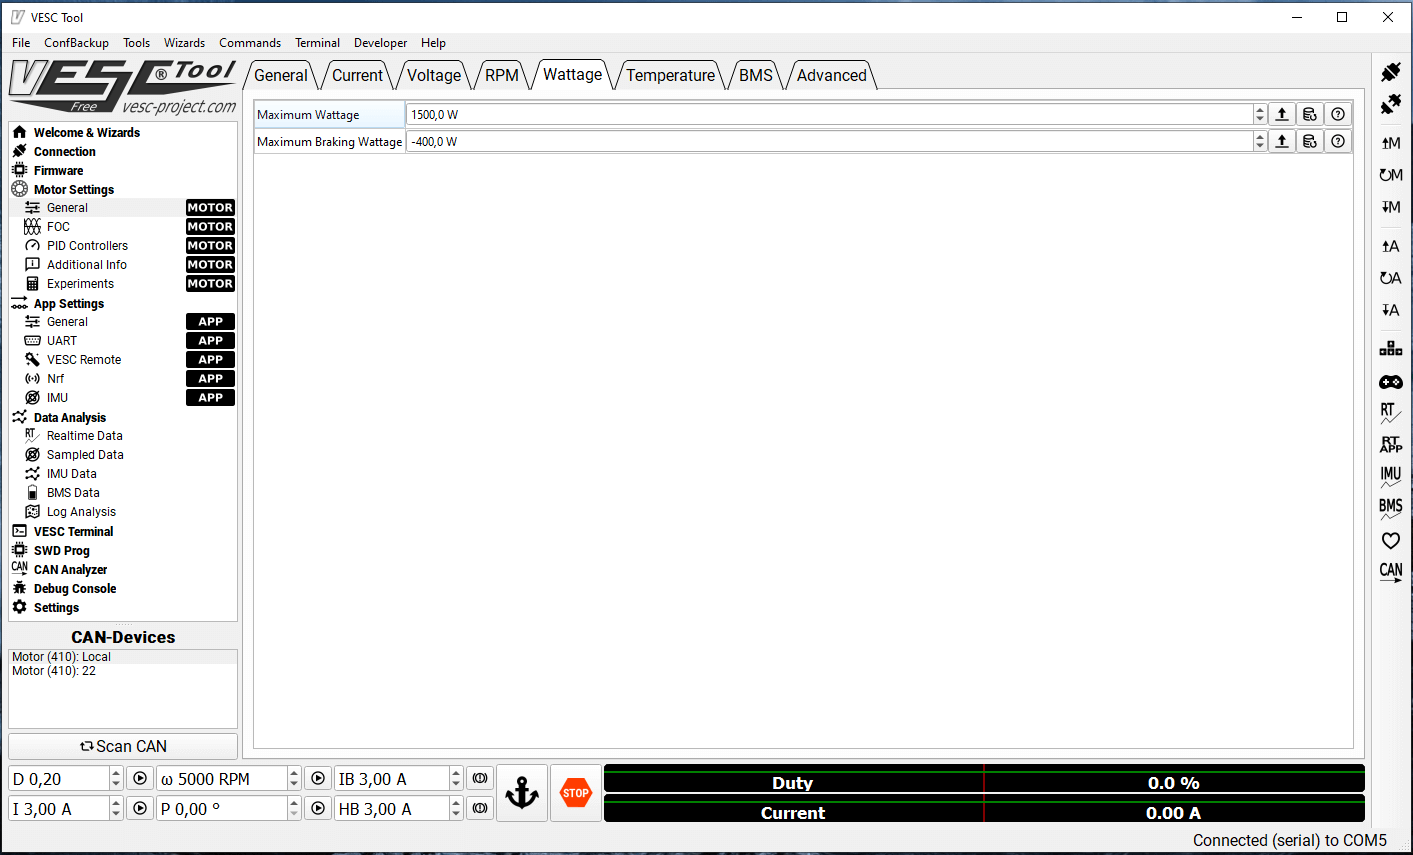
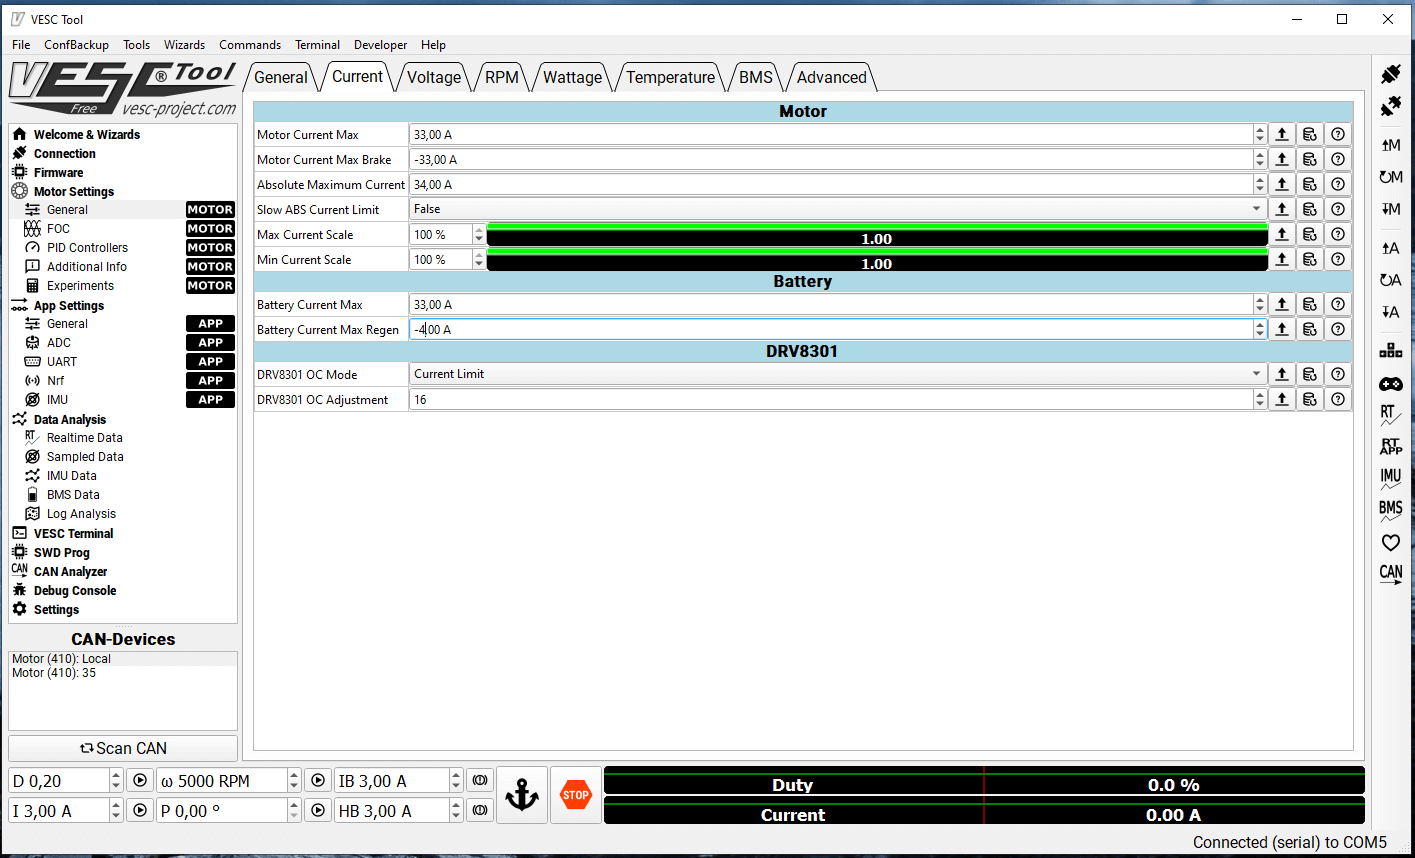
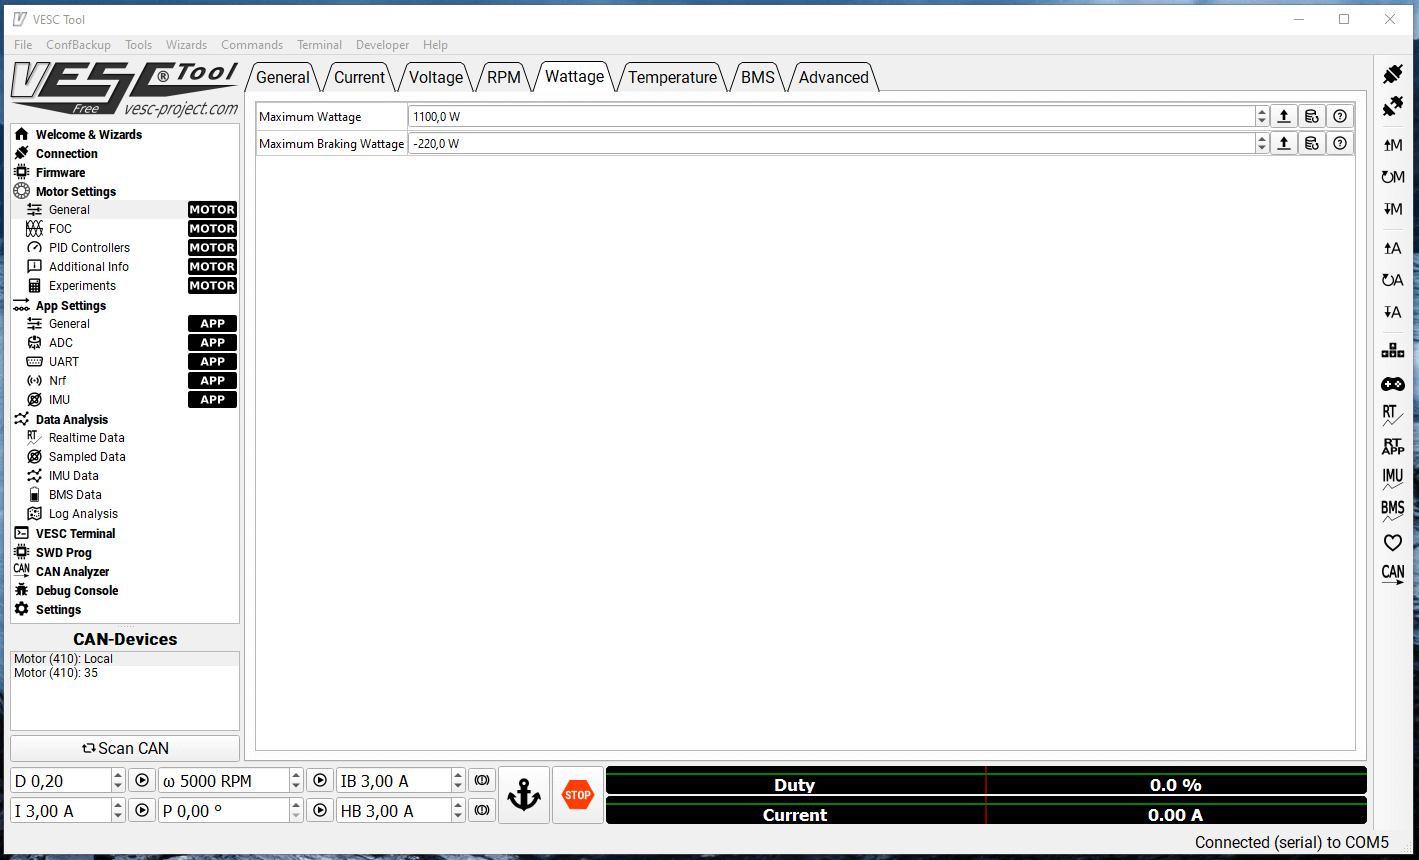


~~~~~~This post is constantly updated~~~~~~
So does the stock computer still talk to the escs?
there is no stock computer in xiaomi cause I am using Vesc 🙂
Are you gonna do a tutorial? Because I’m really interested in making something like this by myself.
Please, keep us updated!
And what is the cost of the mod?
between 400-1000$ , depends what part you will use and ofcurese some leftovers can be sold like stock battery mothebaord and bluetooth module 🙂
So what about the display on handles does it still show battery status etc…?
Really nice stuff! The stock motors must get very, very hot running them at such high power?
can you please do tutorial, i have all the parts and i want to modify my bike the same way, i can probably figure it out by myself but it would be really nice to be 100%, and you look like you have this all figured out! 😀
Hello pirate!
I am very interested in this project, are you gonna to do in the future a tutorial for that battery pack?
Does the stock dashboard work with VESC?
no
Congrats for amazing work !!
I’m really considering to use VESC in my m365 rear conversion… Would be amazing if you finally achieve to use stock speed gauge and stock switch.
Typo –> Wiring VESC to Throttle & Brake lever <– because when you talk about connecting gimbals the second one is brake lever (Blue, red, black) but you wrote throttle gimbal.
fixed, thx > Brake lever has 3 wiress : Blue ( Signal out ) / Black ( GND ) / Red ( 5V ) . Connect Blue wire from Brake lever to ADC2 on COMM port, then Black to Black and Red to Red.
I gotta say this is dope!! I am so amazed my this I can’t wait to see the finished product
Really Great work! Do you know how to connect raspberry PI and control vesc? For example auto braking and such
I have segnifikant problem with 7550 and original m365 pro motor witout loat it seems to work find but as i wantet testing it it sound like getting stuk or somthing i just use the whizzart and dosent change any parameter i have by now 14s but plan to go different 500w motor and 16s plz help i downt now anything about frequenzies or so sorry for bad engish
Hi Samuel, I am having this exact same issue… I am running an original M365 motor on a Flipsky vesc 6.6 (single) and seem to have the exact same issue as you…
I run the FOC motor setup and seems to work nicely, and when testing the sensors, seems really quiet. Picks up hall sensors etc… BUT…
As soon as I put load onto it and use my (thumb throttle (ASC1, 5v, ground) then it seems to run a lot of vibrations despite non-load sounding fantastic, with no vibrations at all…
Did you manage to find an answer to this or @pirate
How does one link the two ESCs together (master, slave)? Is it set in the VESC software? Any wiring required for that? And how do you get the signal from the brake and throttle to both, do you wire to both or wire to one and set in software?
Thanks
Hi andrew i first was frustratet but than tryet the now the 500w monorim motor becouse i wantet dual motot with custom battery also si i treyet first in diret bldc and now in foc wirh hall sensors it seem to run abit smoother but not that mutch and now i try a dual ubox vesc but i run into sum coutoff issues specialy with increaset thotel curve so normal settings it is, it run quiet as hell with the ubox but at full speet it keep getting cutouts so maby the original battery is to weack, the xt 30 connector or bms what i see now by my reserch is also a ubox problem i downt erlier find in my serching erlier for a cheap 75v dual vesc but it run the motor muth better than 7550 singel vor my testing so i will test different firmare run now custom firmware 100a but limmitet motor 30a and max 40a i will test normal firmare and no limmit firmare and i will also test 300a firmware maby it solve the cutout and maby i can make faster accelaration and then its perfekt no cogging no crasy sound as i wantet first i hope for the best and hope that i downt birke acetantly the vesc i dow t say buy the vesc maby go to somthing better reserth first better and spent more money and have a way better experience so tis was maby also a “cheap” mistake
try to use auto tune motor, then do some test without chaning settings. In my case it resolve isse ( I was even able to increase power witout power cutouts )
Thank you Samuel and sorry for the late response… I bought a MakerX that is basically the same as the vesc (75v/100a) and whilst the acceleration is still far less than my green time 48v 30amp controller (that lights up the front wheel, but is very loud) it’s dead quiet…
The top speed seems to be there… but would almost say that it feels like the phase amps are limited to 30a as opposed to be ramped up, like the ebike controller. It’s like @pirate saw when he compared the 500w scooter vs his 1.5kw VESC, the 500w absolutely wiped the floor with the VESC powered version… (https://www.youtube.com/watch?v=p6VTwSjfKYc)
So i testet now with my phone attachet in rt and wathed for the voltage drop and at higer speed it is realy high so maby my original batteri is somhow slightly deffekt i have the pro 2 so it shoud be a 10s 4p not the 3p waht is in the original m365 so i have to open the battery case and look vor every connecion maby i will canche the iriginal wiering to big 8 gauge waht i have use to make the connektion vrom xiaomi battery to external battery to vesc so all cabel is with 5.5mm bullet connector and xt90 antispart in the vesc so only original battery cabel is thinner like 14 or 12 gauge and xt 30 what i usualy dosent want do change in order to sell battery as used so this i have to overthink maby i hope vor the best but flipshit is out of the scooter vor all all same settings on the motor but with flipski it always have extreme cogging but with this its realy smooth but accelaration is by bothe not the gradest but ok i will tune it more and also motor an flipski got realy hot but with this ubox its mutch cooler on same short distance so i test longer distance later also to see temratur
Also i made a big mistake or a small? I set absolute maximum current to 40a becouse i thougt it would be the max constandt but its the max peakt so i got the cuttoffs becouse of that with the ubox i now set 120 no problems so far only when battery is lower than 50% so i will in a few weeks when the last 8 cells arrive becouse i have 12 26650 cells laying aruond becouse i furst wanthet hem but in the end i will make 21700 battery back but its going to be expendive so i have to sacesome money in the next few months to make the final battery pack but for now i habe original waht i rewier to an 5s 8p do i can suck up to 80a constant savey 26650 can up to 20a constant per cell ant the other 4×4 18650 high drain ecigarett cells what i buld first to make a speedpake kan esay handel also 20a conatant so i can test fual motor in a few weeks and can make an updade sofar i like the ubox now but i can have to test more like bldc i wantet to test becouse i always used foc maby this also gige me better starttouqe or whithe the new battery and more amp i soud be abel to pull of better from a near standstill
I downt know why flipsky 7550 evry motor setting and app setting is the same but motor cogging in foc startup whan load addachet and make loud scream noises in higer rpm so maby realy a hadrware defekt ir maby software? But atleast it now runs qiet and also i testet like 10km range motor is warm but not sa hot that i can coock an egg so 14s and 30a constan motor settings so up to 40 soud be no problem with this 500w monorim motor nice.
show some pics please 🙂
I emailed you Pirate. Please check inbox ??
Hi, yout mod’s are incredible !!! Actually i have this setup :
– 2 x 350W motors
– 12s4p in deck // with a 12s2p in a bag
– 2 ESC V3 original with xiaogen CFW 33A per motor
I want to pass with a vesc. Do you thing it’s better an safety than xiaomi esc ? Do you think it’s better ? If i understand i just to put a flipsky vesc Dual or 2 single, and a anti spark isn’t it ?
It is hard to say which one is safer, for sure vesc is more efficient and powerful. yep controller antispark or manual switch battery
Ok, this was the gamechanger for me. @Pirate, try this out buddy…
Set the “Max Motor Amps” to 65, Max Current to 100 (for amp spikes, to avoid cut outs)
Battery Amps (mine is 60 through BMS) I set to 50, yep, less than the max motor amps!!
And it goes like the clappers now… you can set the battery amps lower than the motor max amps and it works perfectly fine… now I get that erm… “exciting” torque steer feeling, no cut-offs and the motor holds temps fine (as long as you are not too crazy…)
I would highly recommend looking at this, for another vid possibly as your build is awesome… I saw this approach being taken by an eboard channel (90 amps max on 35 amp battery) and thought I’d give it a shot… literally turned from fairly quick, back to a rocket sled 😀 Cheers!!
Thnak you ??
Good sir, good post and very interesting, recently I have mounted a flipsky 75100 foc and I do not configure the regenerative brake on my bike and I cannot go over 55 km / h, I have a 60v 25a battery and a 1500w hub motor with 20 inches wheel … but what worries me the most is not understanding the parameters of the app and that I can’t get the brake to work :(. I would appreciate your help.
greetings jonatan
can i connect the original battery and bms to this controller? and what parameters should I enter then? Is there an application for the phone that will handle it, so as to be able to control the parameters, mileage, battery charge status?
It’s possible but you will have to write some C++ code and add maybe arduino. This is not asy task ,and it will not work plug and play for stock bms and vesc.
Hi Pirate, thanks for the article (this one an even the youtube tutorial / review). Just a quick information from you… Quite sure you can reply easily…
I bought recently an Laotie SR10 and as per your review the motor (JZ 1800 Watt) can handle until 2500 Watt (more or less).
Stock there’re 2 x 25A 60 volt controllers. In order to upgrade power and speed I can “just” swap with 2 x 42A 60 volt controller (same brand) or I need to take care of something else? Your advice is to use even two of this Vesc?
Thanks for your reply!
hey, when I connect BT module, in app i will see parameters for only one motor or botch?
Just battery 48v 20Ah = 119€
Controller 48v – 500w= 30€
Wheel monorail 500w= 109€
Throttle Gaz diy
49km/h best boost best burn easy 35%
?
Low-cost …. Not 1000€?
is it ok if i use 21700 battery cells instead of 18650? i mean it wont burn the battery controller right?
Sure, they still have the same voltage, just different dimensions and capacity. I would not recommend it as the 186500s have a better volumetric fit with the Xiaomi deck.
Does the 12s5p battery pack fit with the stock controller?
Pirate do you know how the motor windings are configured for both the M365 and Pro variants of motor? I have taken both of mine apart and took some measurements but I can’t figure out how they are configured. Here are the stats for my motors:
1S motor
370mT magnets/25mm magnet length/25mm stator depth/5 stands 0.5mm/154mOhm phase resistance
Pro 2 motor
365mT magnets/30mm magnet length/30mm stator depth/6 strands 0.5mm/110mOhm phase resistance
I checked the phase resistance with my multimeter (minus the leads) and manually with a lab bench PSU so I am 100% sure the resistance is correct. Can you explain why the resistance on the 1S motor is 40% higher? The Pro 2 motor has 6 strands rather than 5 but the stator depth is also 20% larger because of the 20% larger 30mm magnets? The rotor is the same size, the number of magnets are the same and I think the kV is the same so why does the Pro 2 motor have a much lower phase resistance? I saw your VESC stats from the auto cal and it said the inductance for the M365 motor was 40% higher but how does this impact the 40% increase in resistance because both motor speeds are the same. If possible please could you explain…