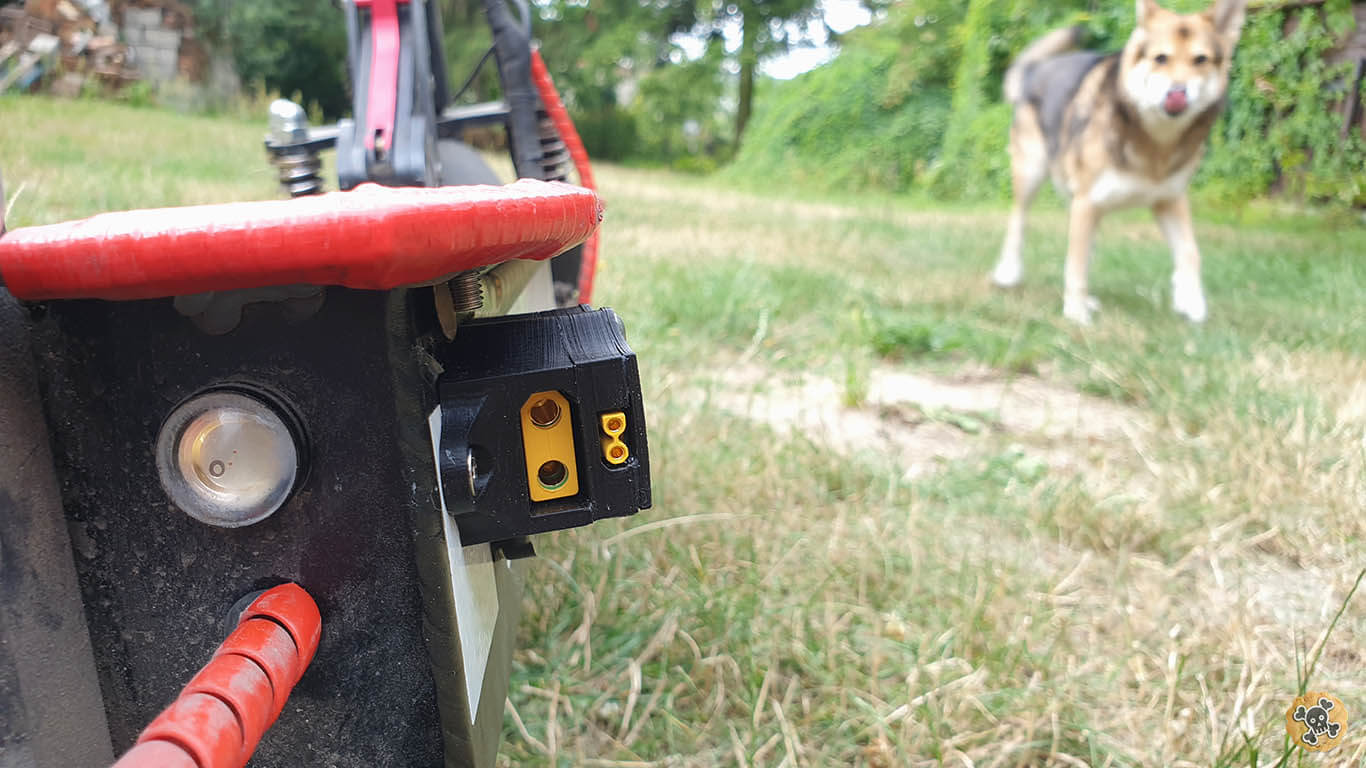
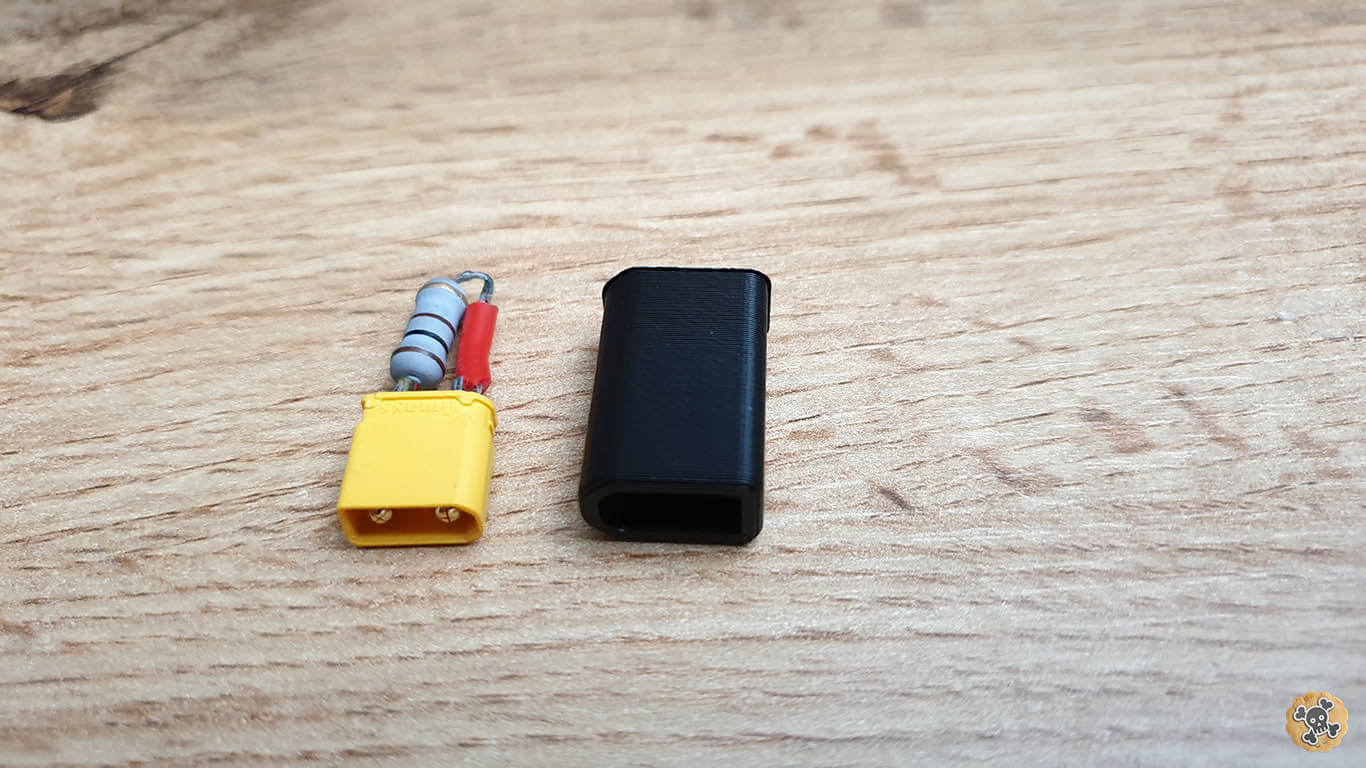
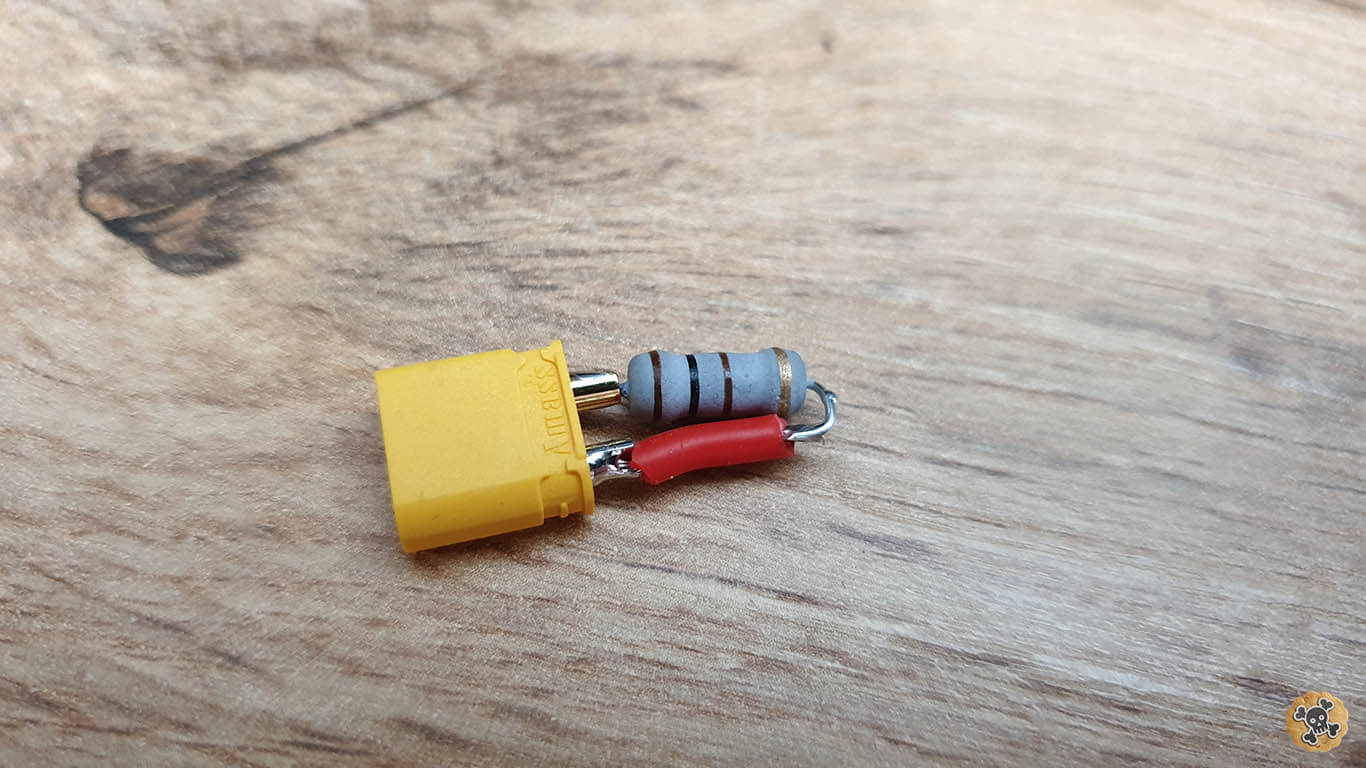
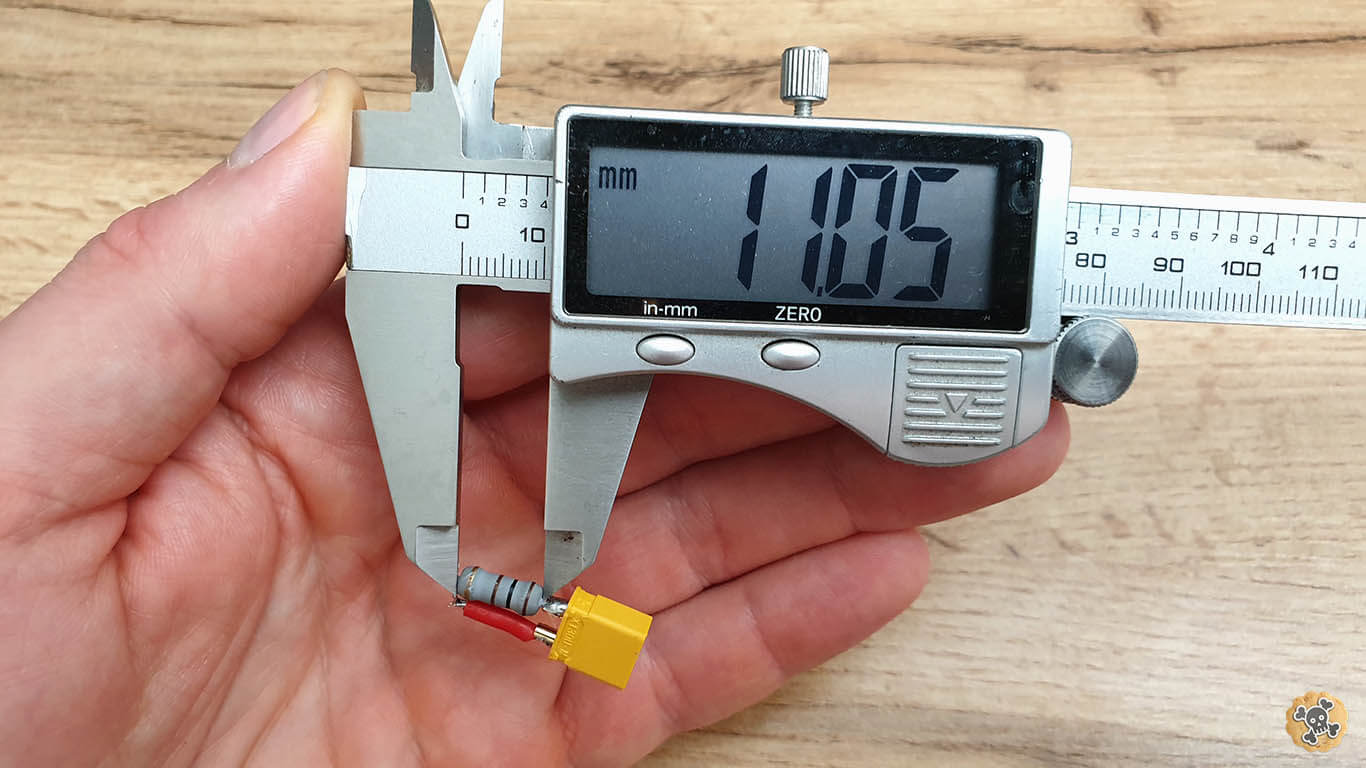
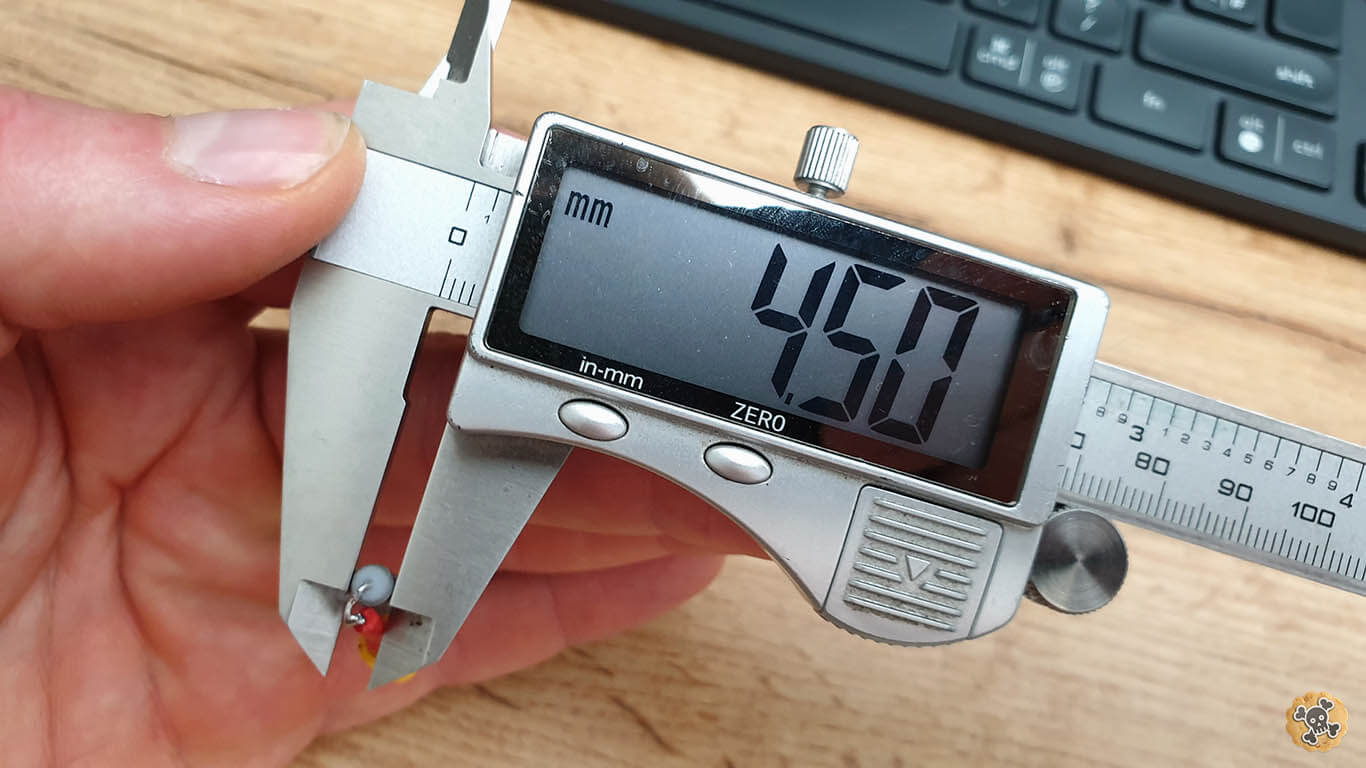
Loop Key is working as a safe switch , it’s connecting battery to other electronics like controllers/ lights etc.. . Dual loop key has extra XT30 connector with resistor between 30-100ohm which almost fully suppress high voltage spike , thanks to it when we connecting high current XT90 connector there is no any spark ( I noticed that Amass XT90s with anti spark got short life span , cuz built in tiny resistor cant really handle high voltage spike over 30v and burns after max 50 connection cycles) .
**After some tests, Dual loop key seems to work perfect after 100 power cycles , there is no any wearing sign on connectors.
!! Dual loop connection order !! . To power up your Ewheel , at first connect XT30 > wait 2sec > then XT90 connector > after it remove XT30 connector.
When loop Key is Useful
When any power modification is made , like new controllers or battery
We can Easily and Fast disconnect battery if some problems occur
To avoid any power drain ( we can storage more safely Ewheel for long time )
What do you need
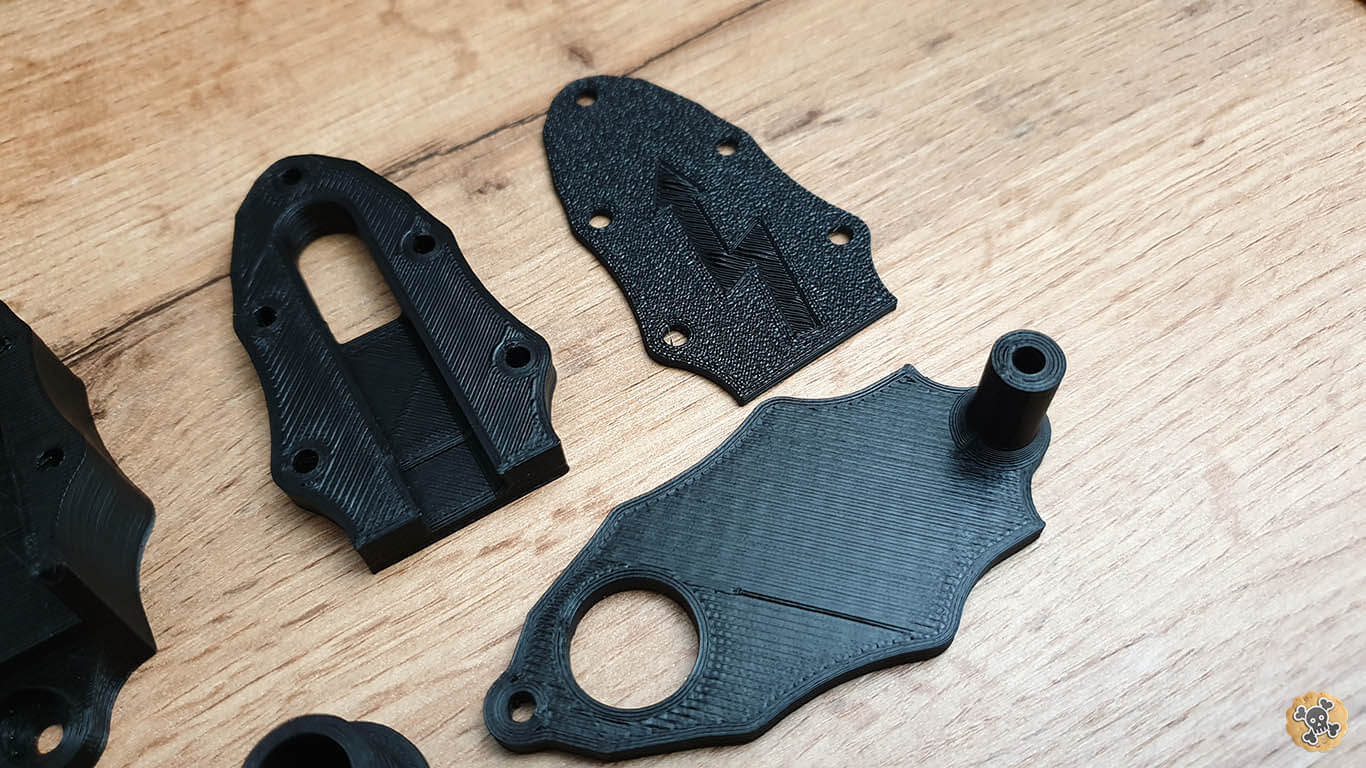
You will have to make couple printed parts similar to my ones , or you can find them in my Eshop
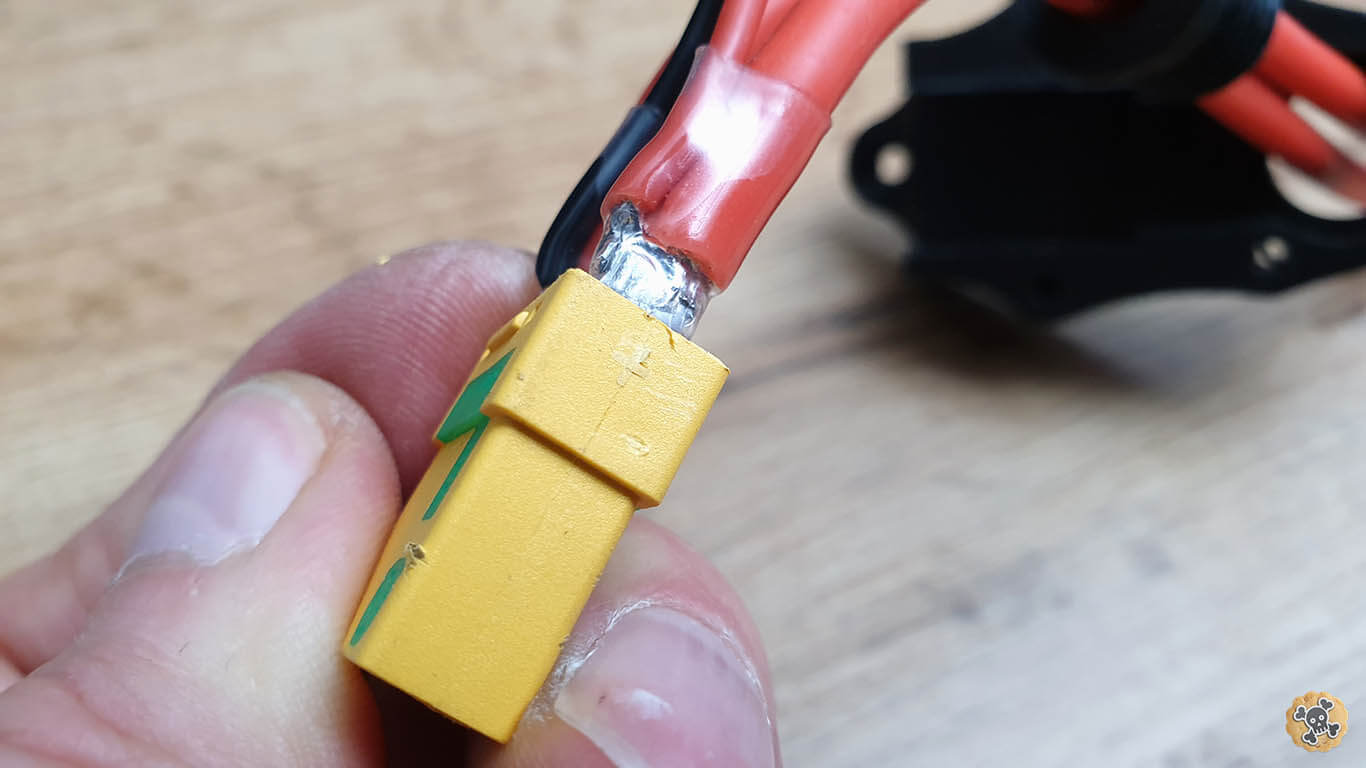
Genuine XT90s connector set
XT60 connector set x2
Genuine XT30 connector set
10AWG & 18 AWG wires
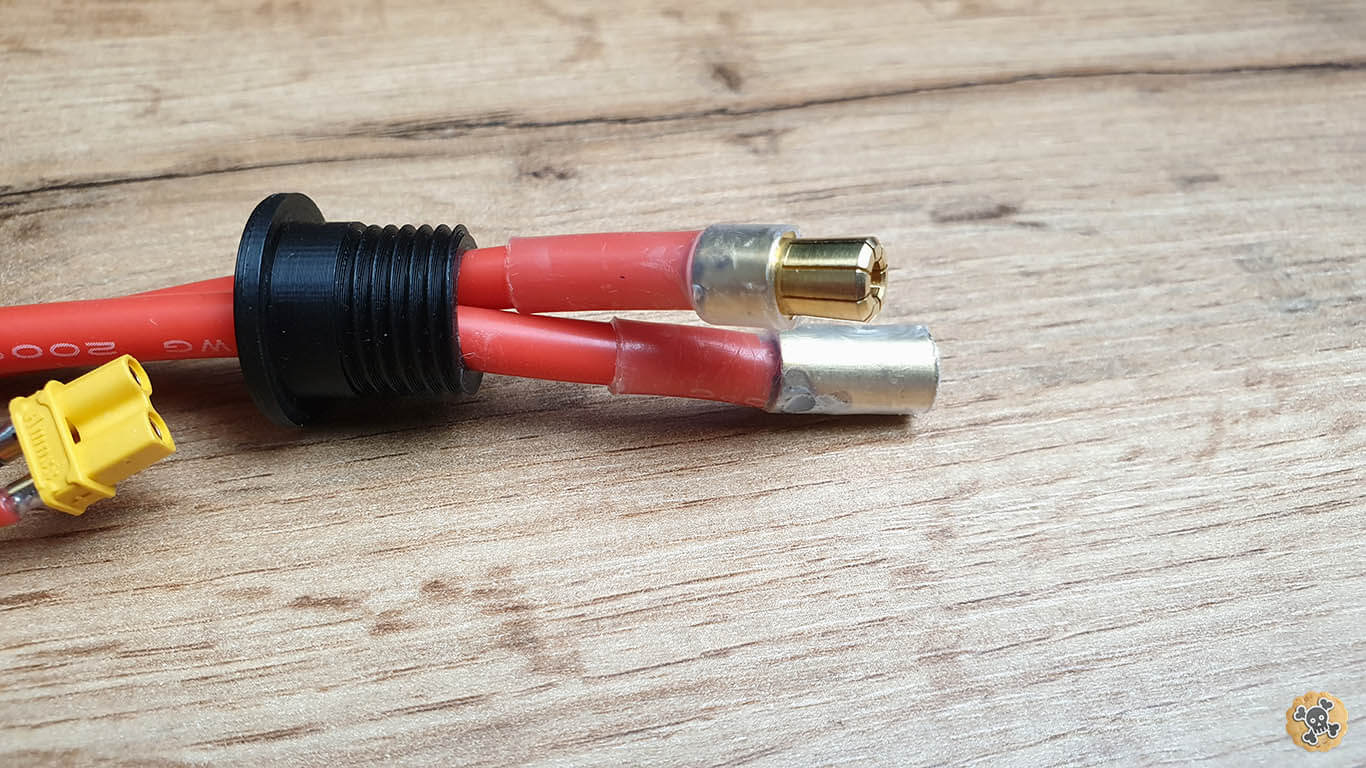
2x Bullet connector set 8mm
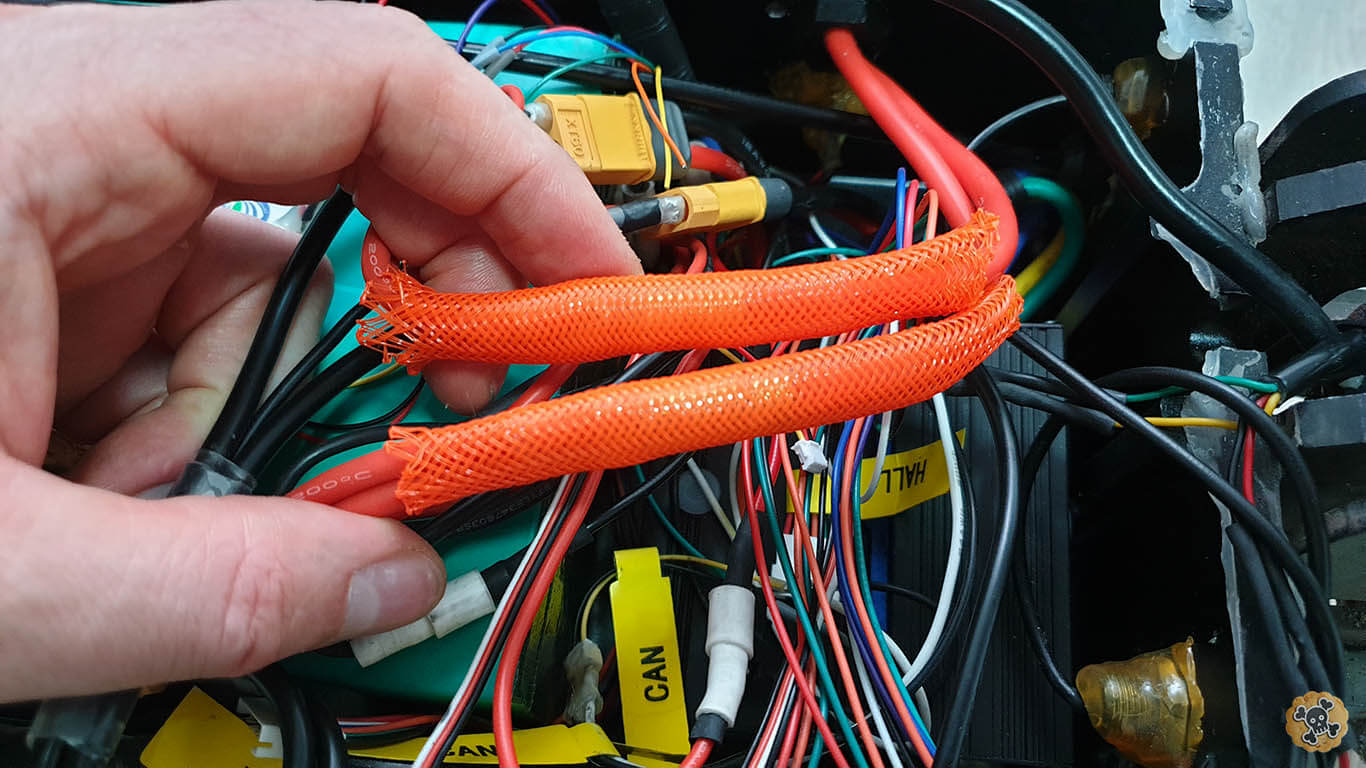
Extra shrink tubes and cover mesh
How to do it
This is NOT easy task, lots of soldering have to be done BUT I do recommend to try at least, great adventure and lots of experience will be gain.
Here is video for single loop key
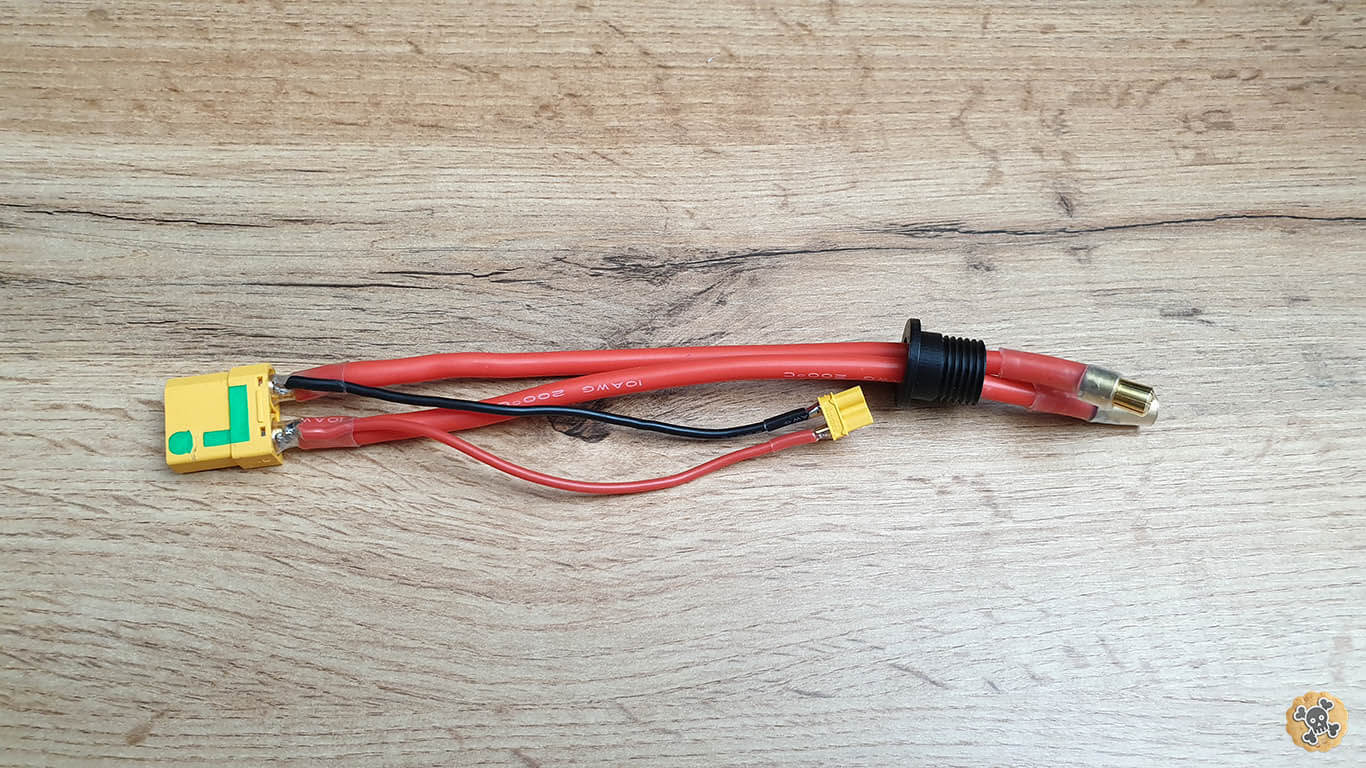
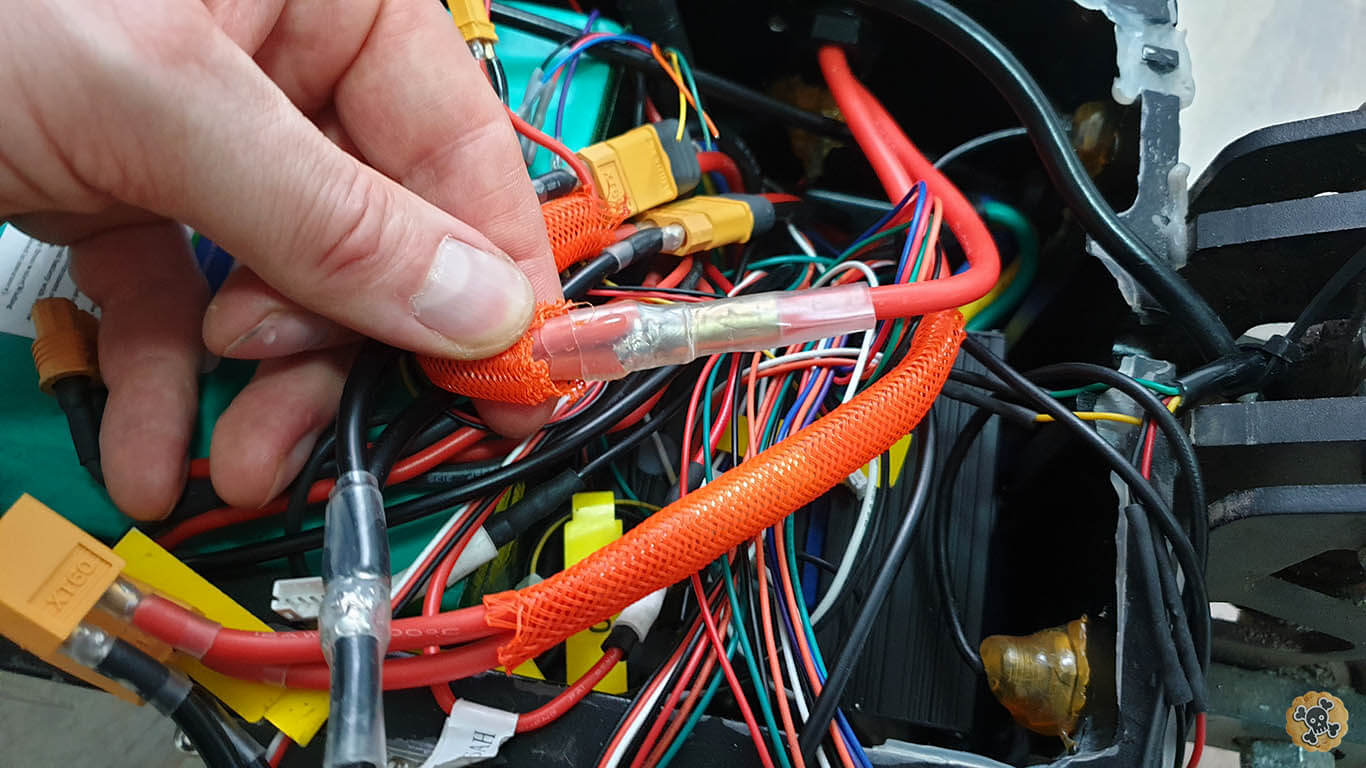
*** Dual Loop Key has extra XT30 connector which has to be soldered to xt90 and actually that’s it ***
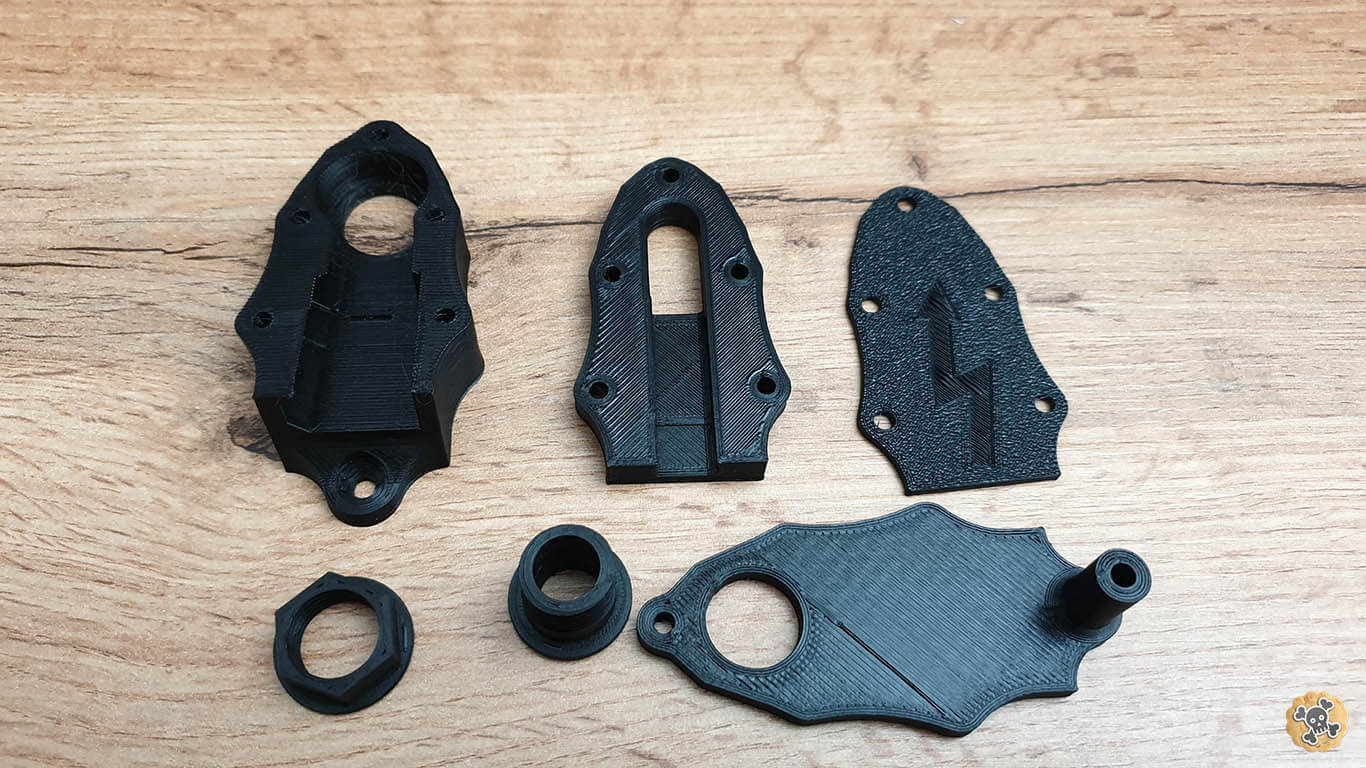
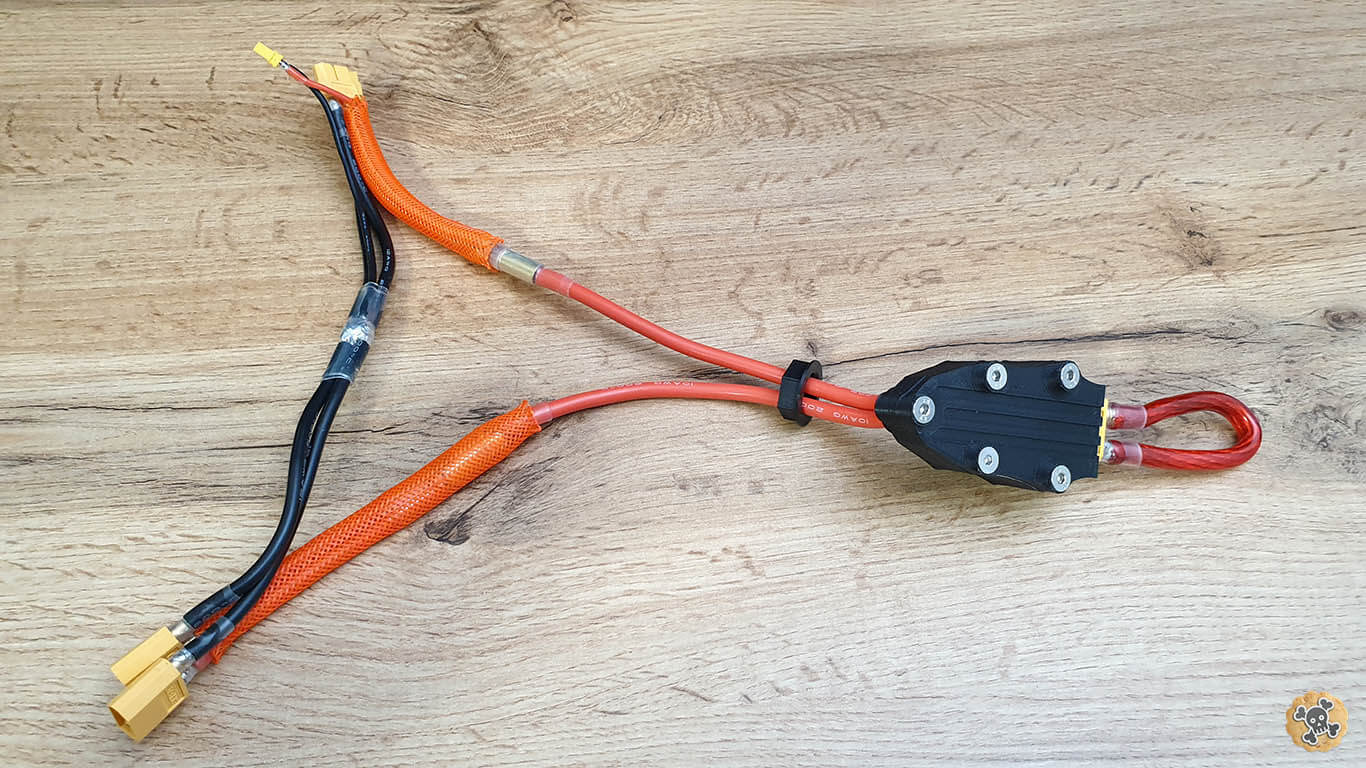
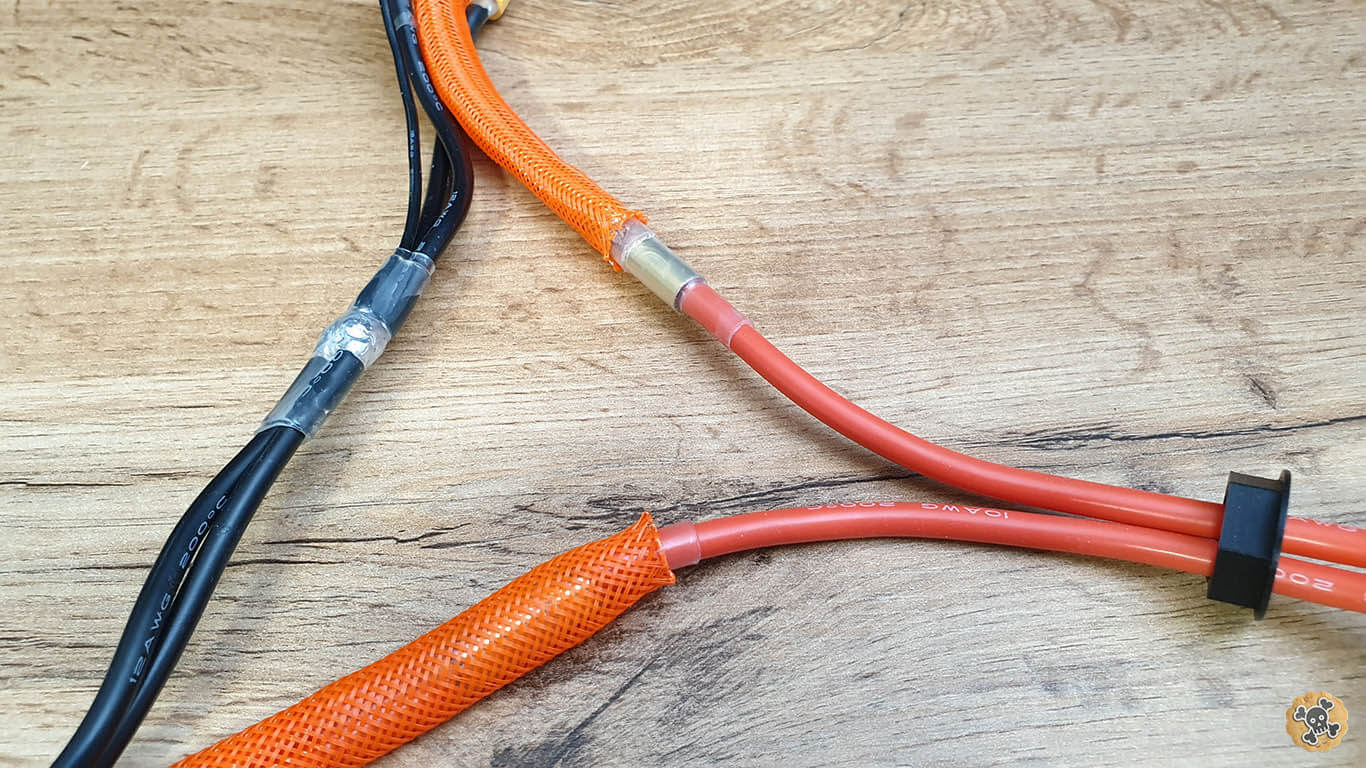
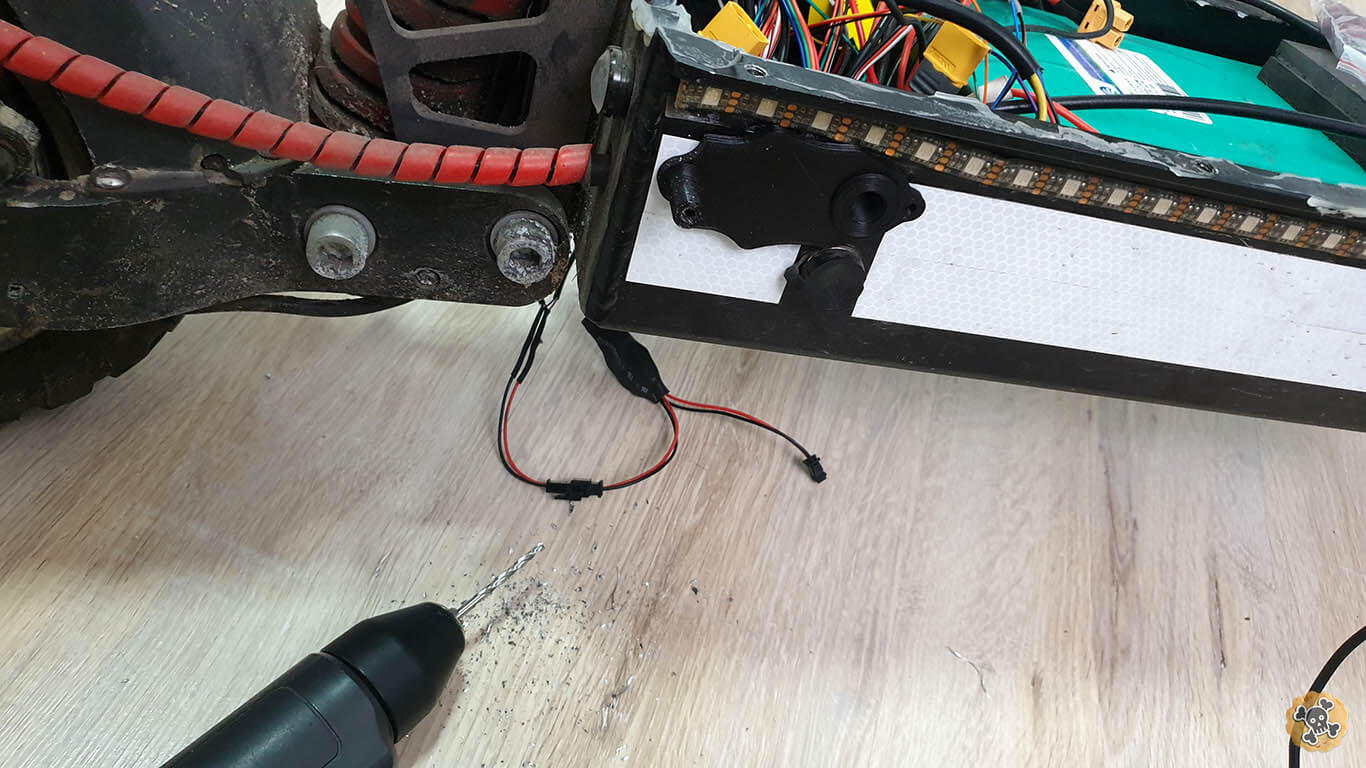
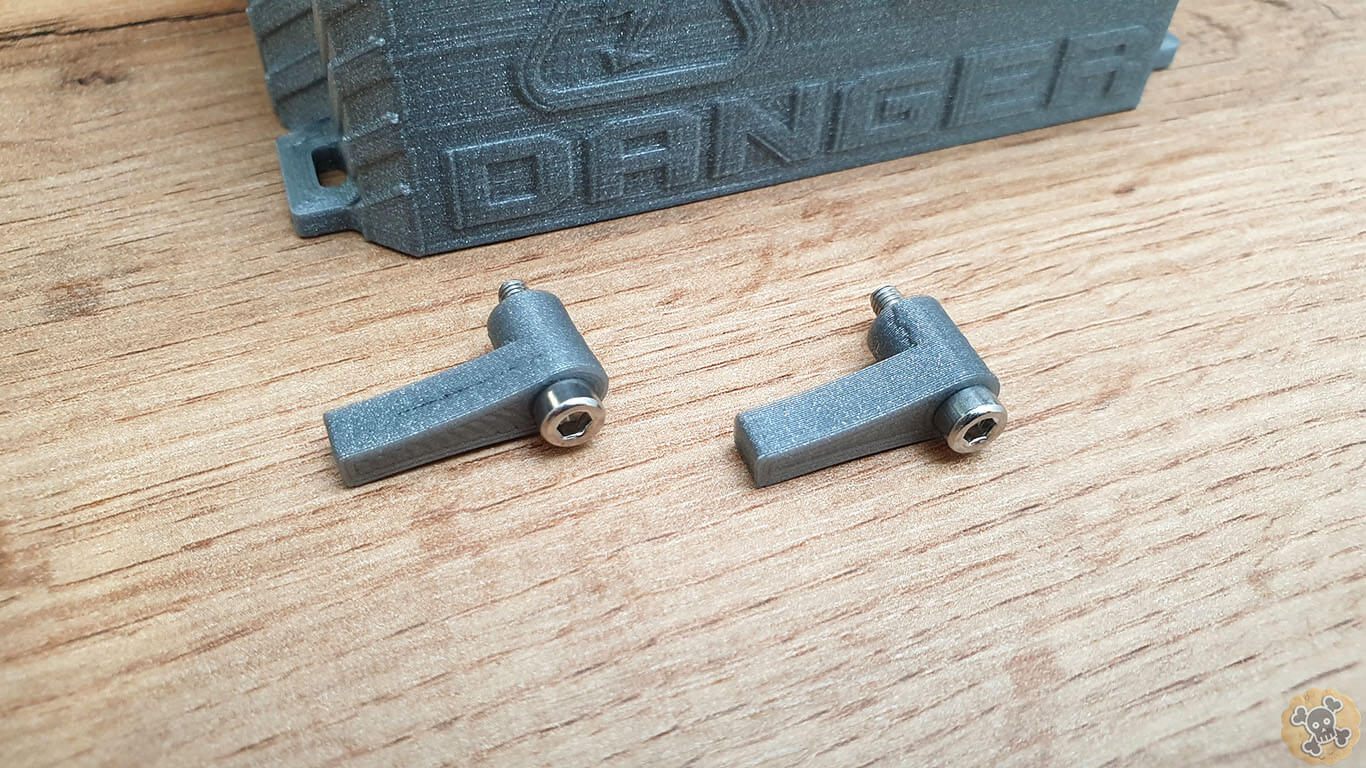
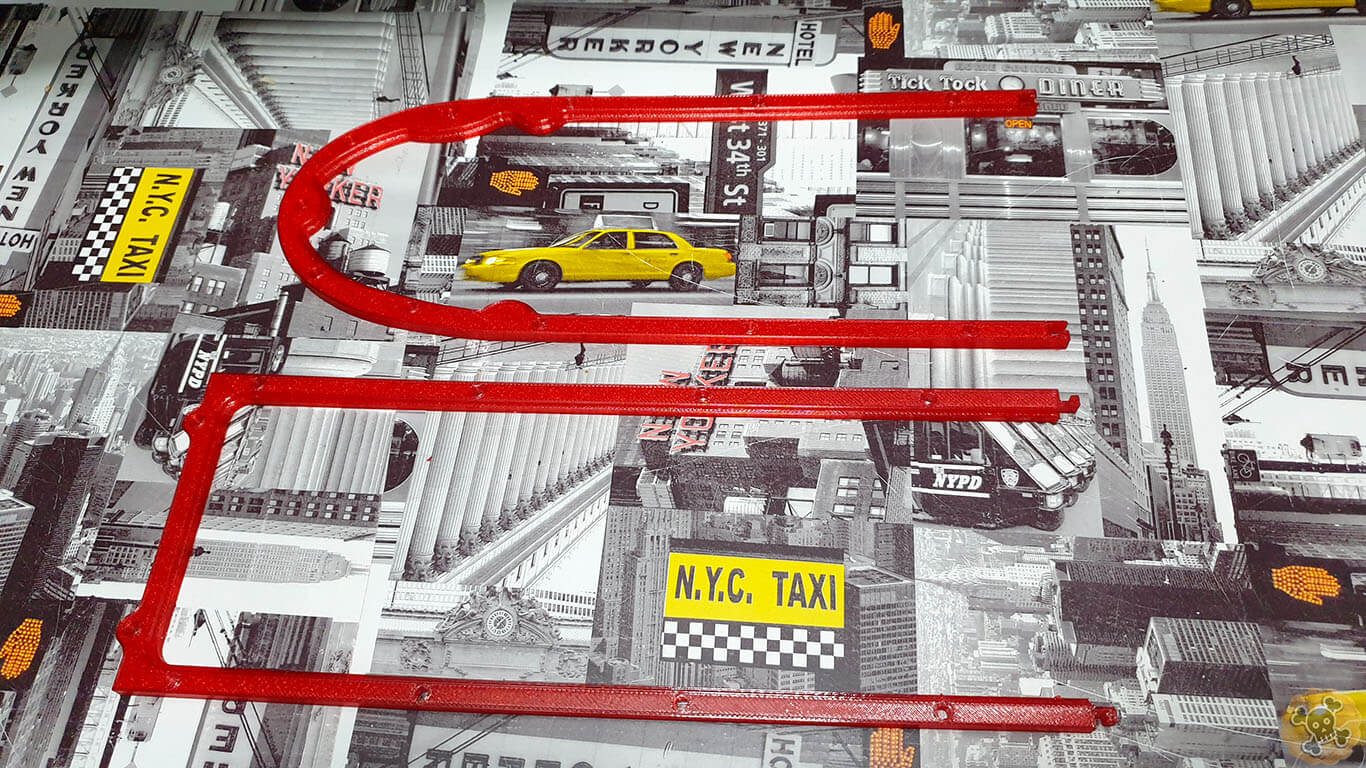
Short foto story for Dual Loop Key
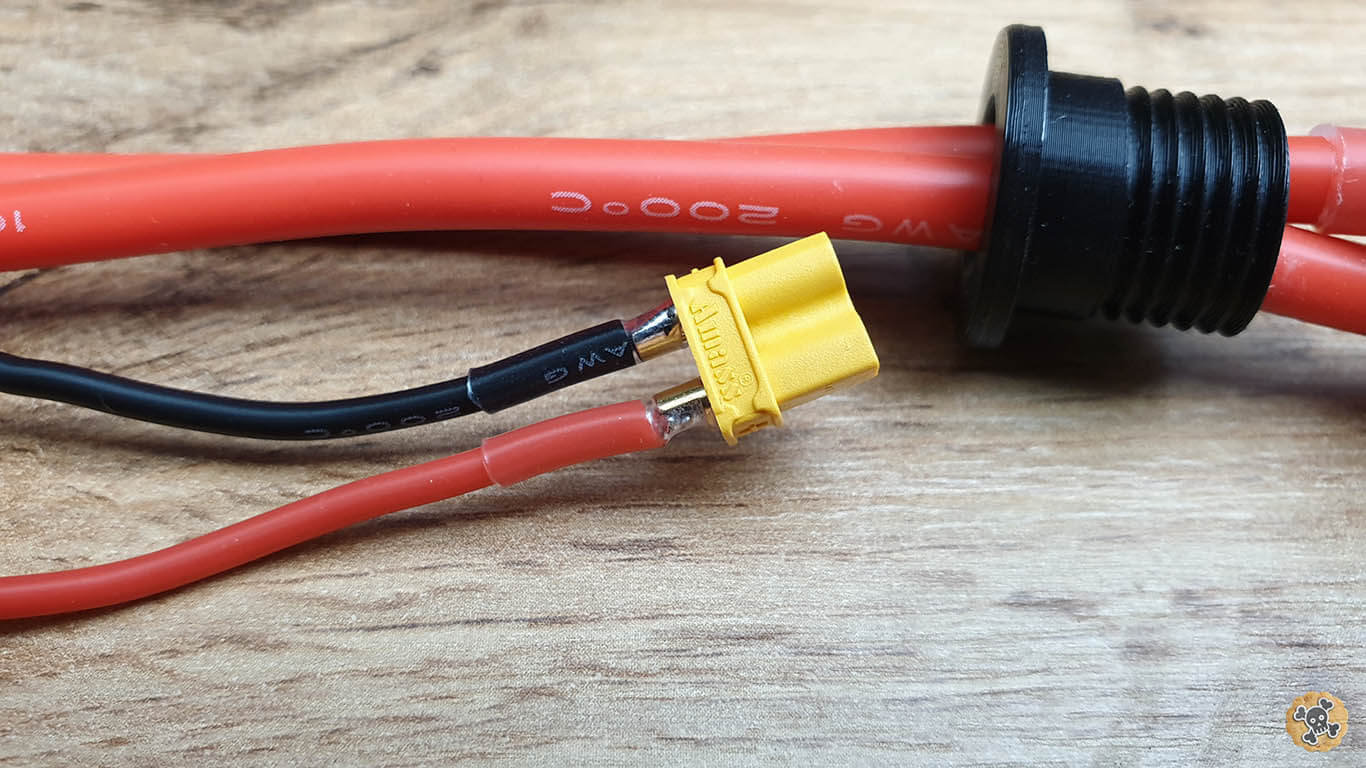
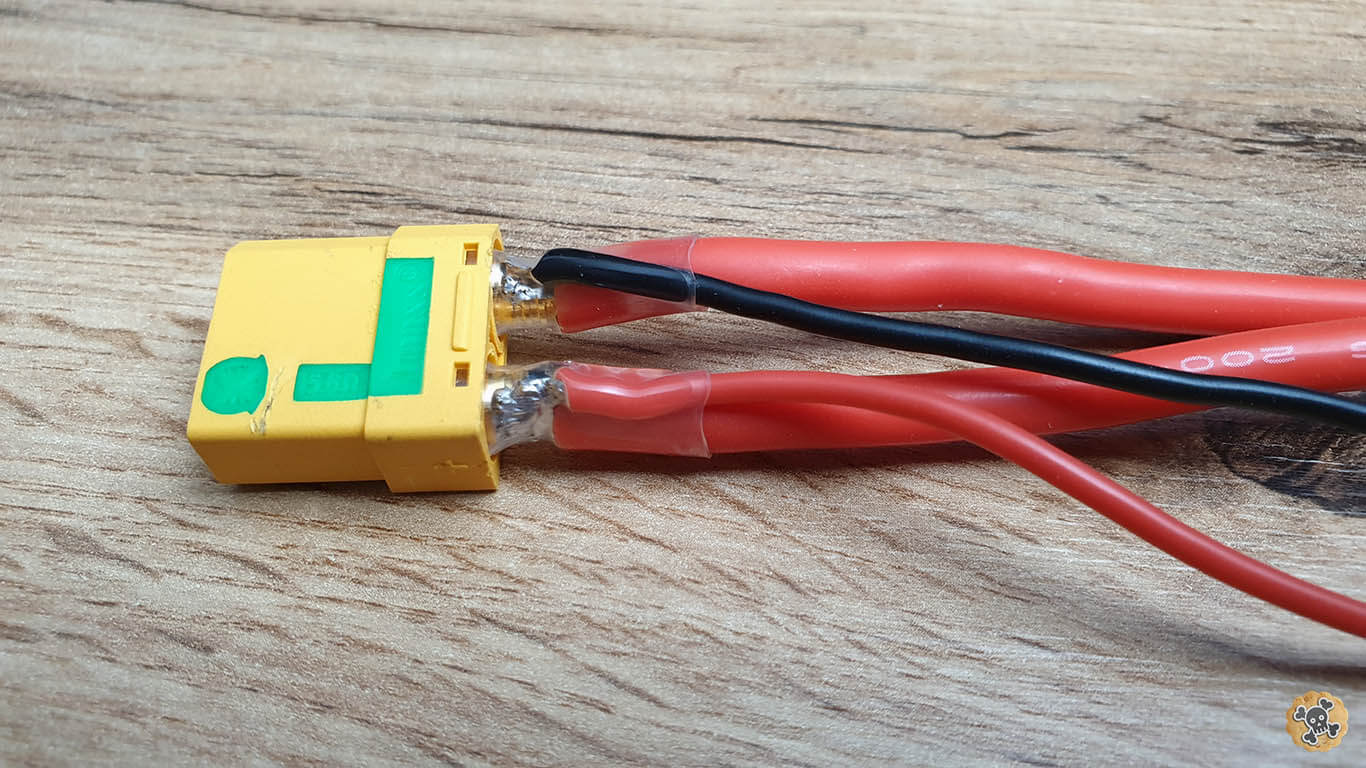
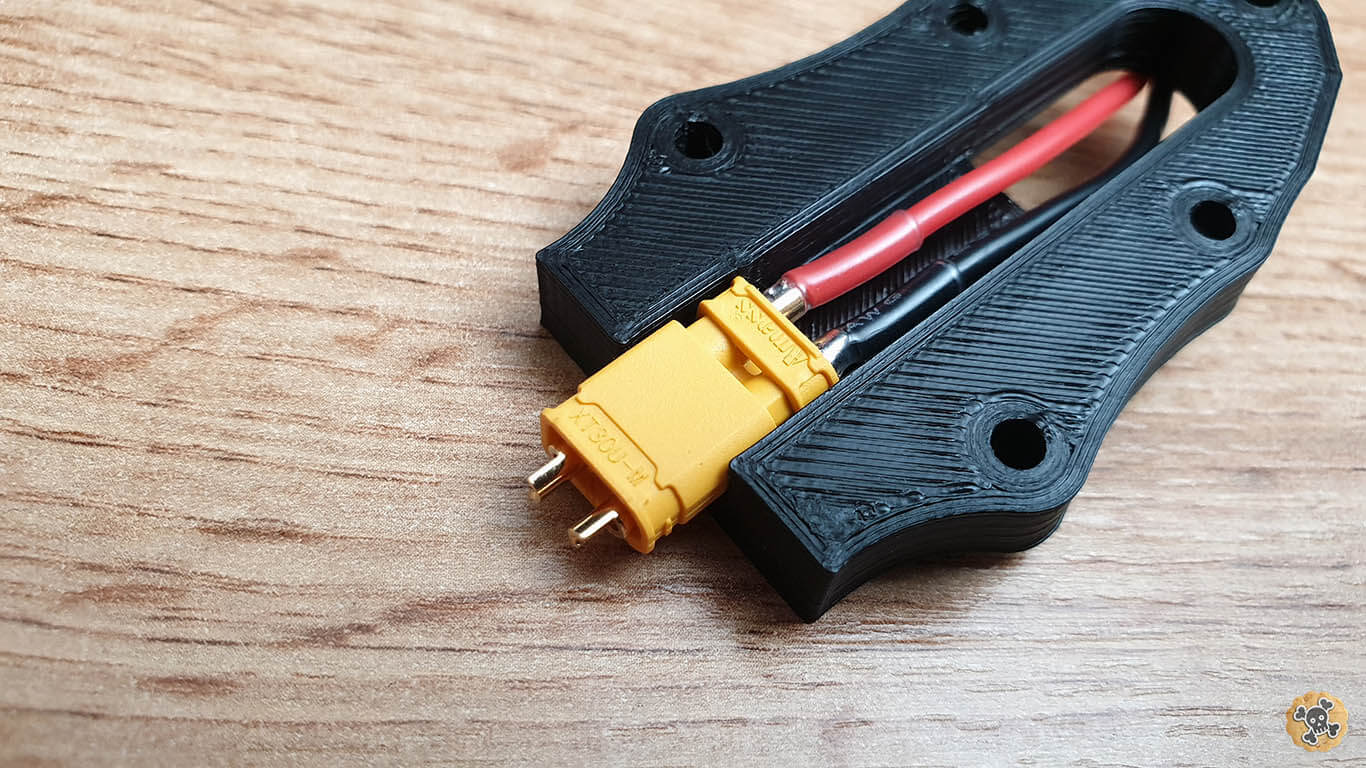
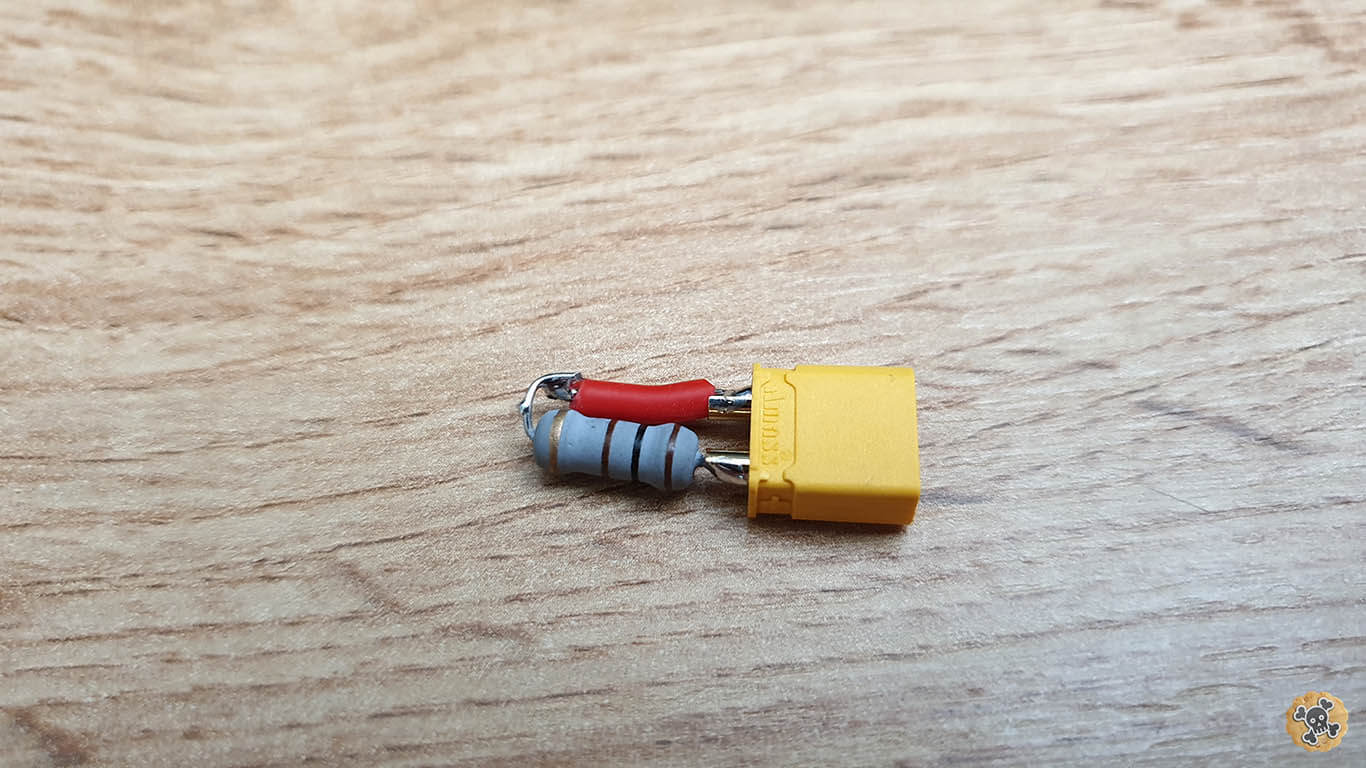
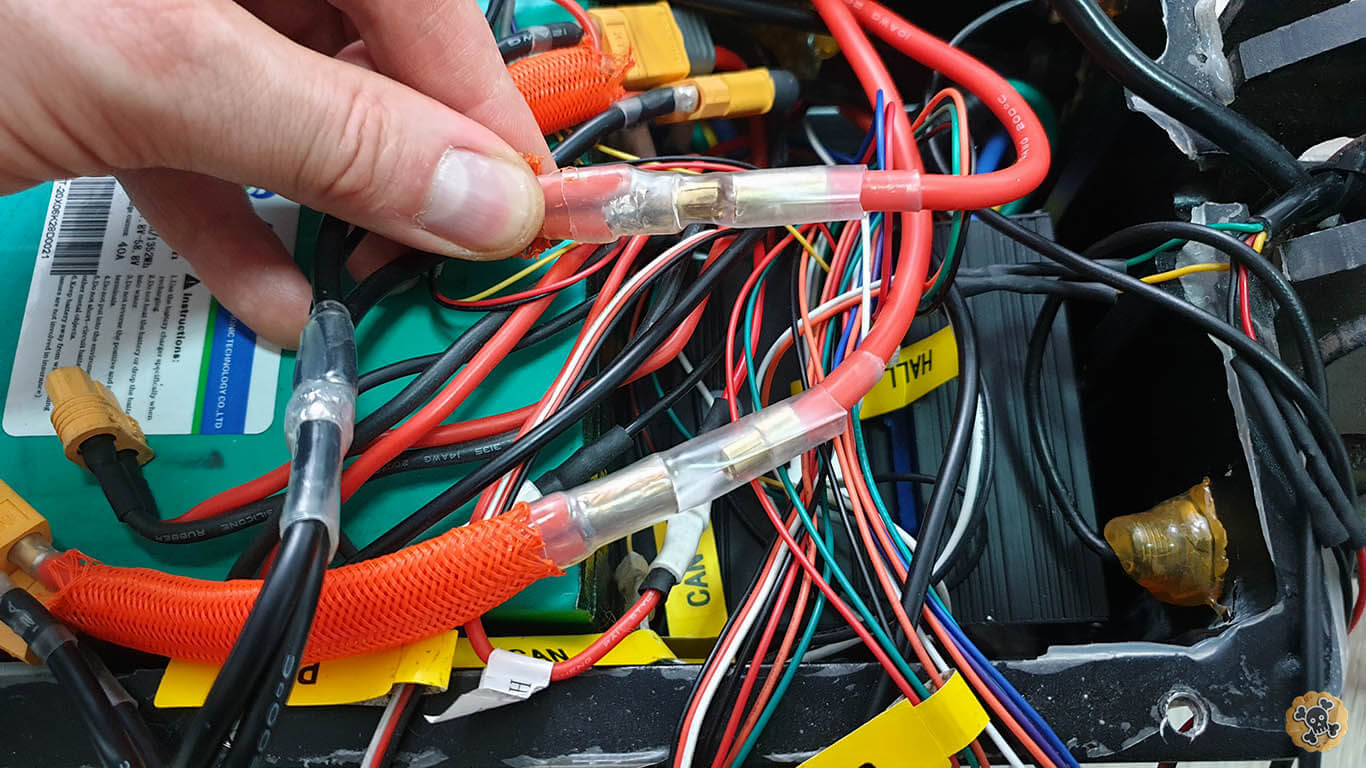
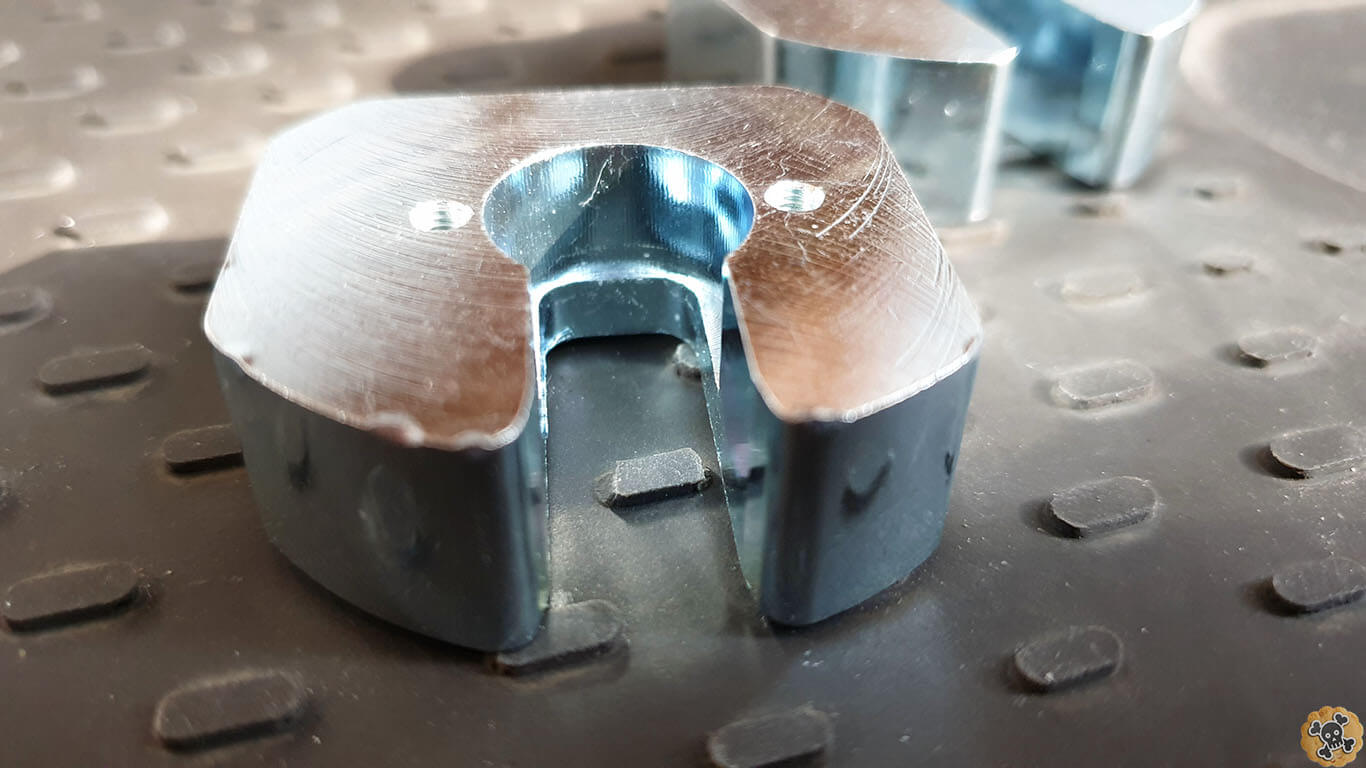
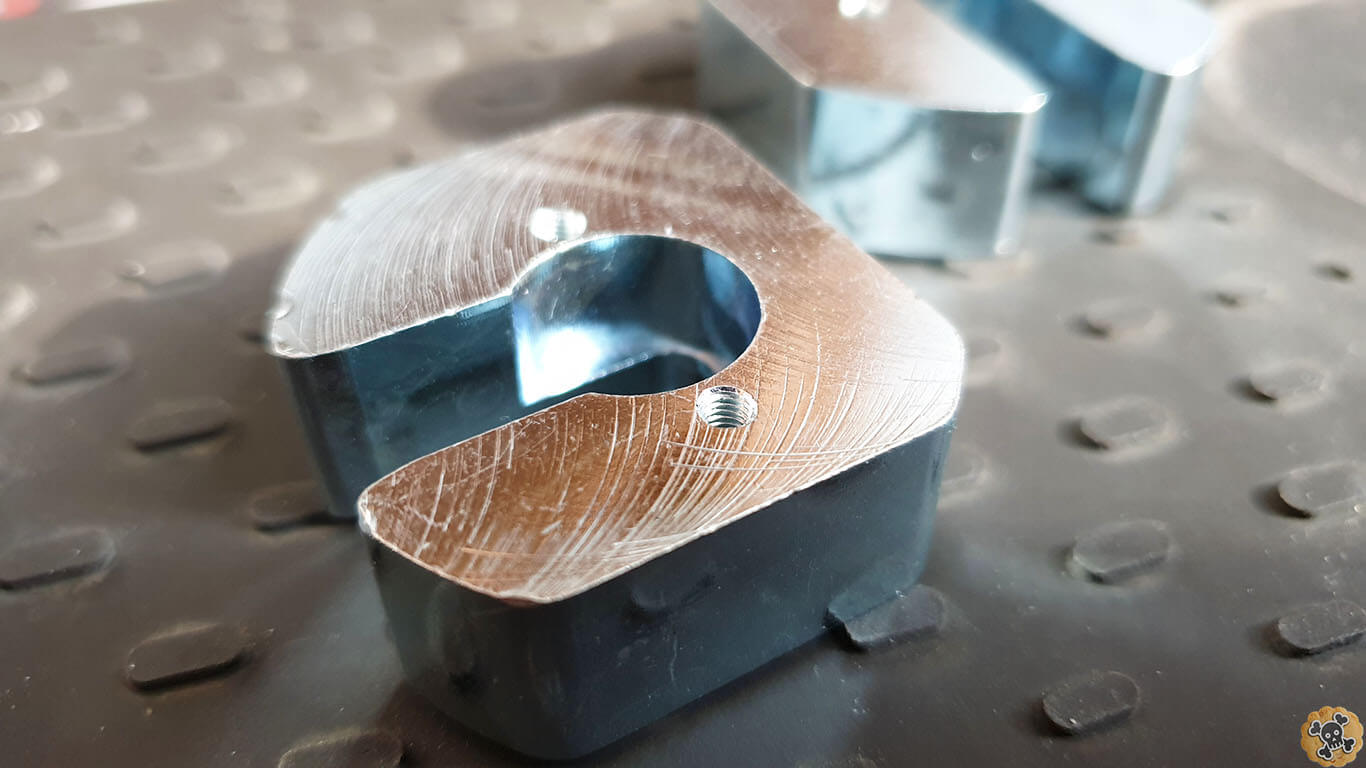
At first make wiring with XT and bullet connectors, the same way like I did.
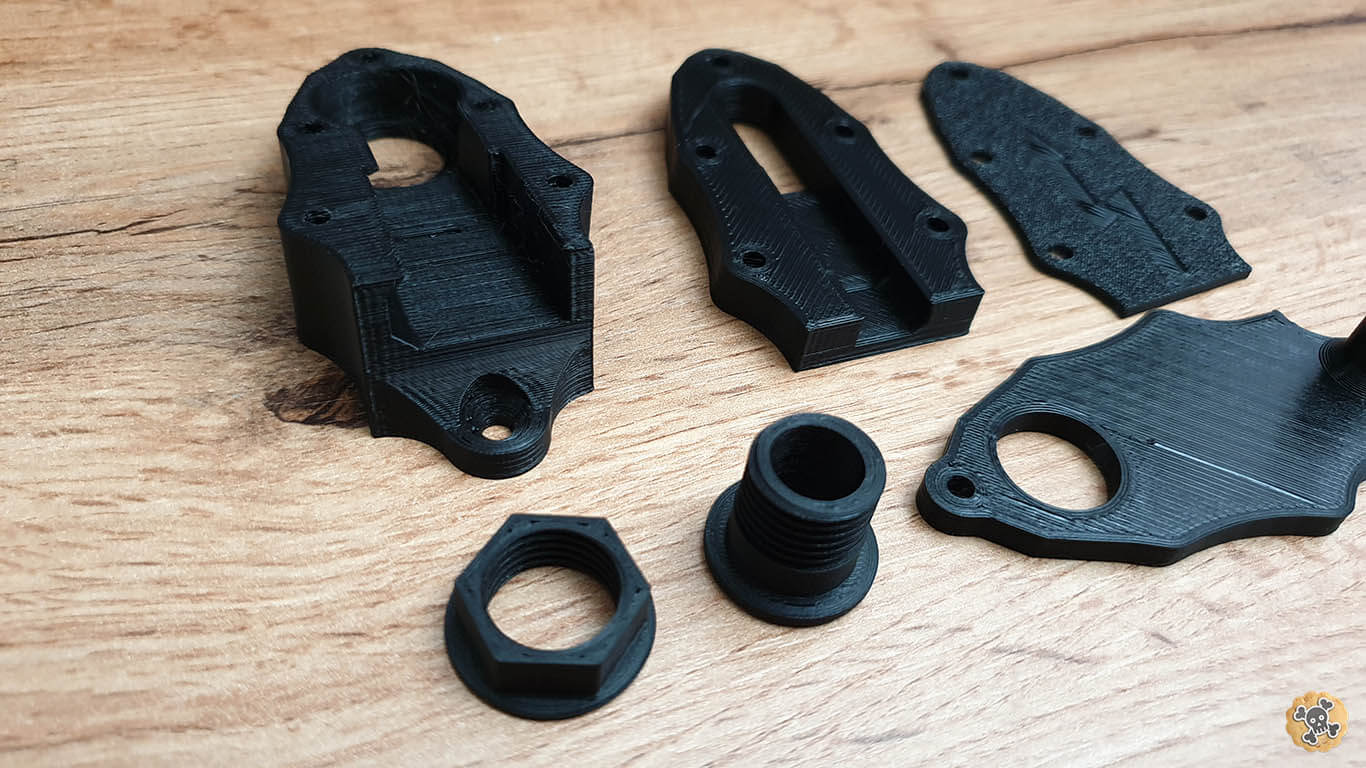
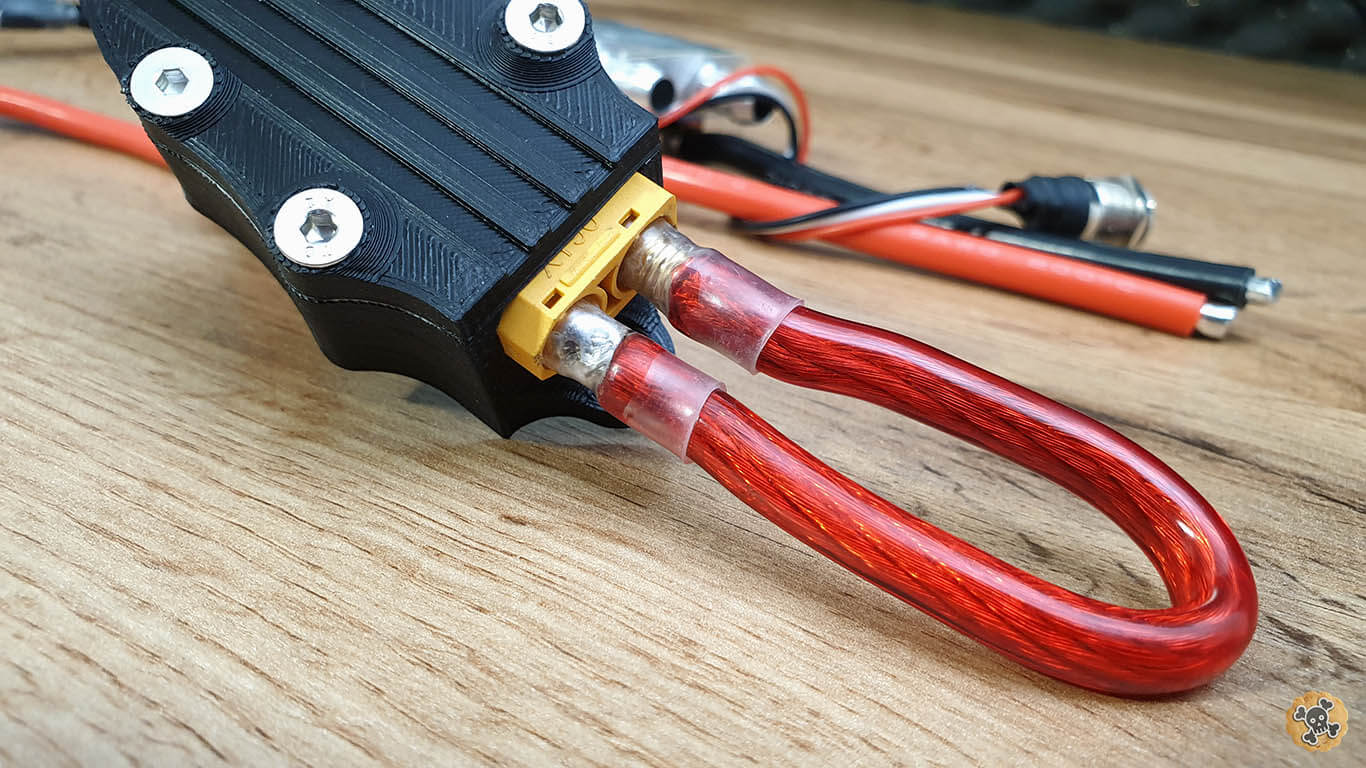
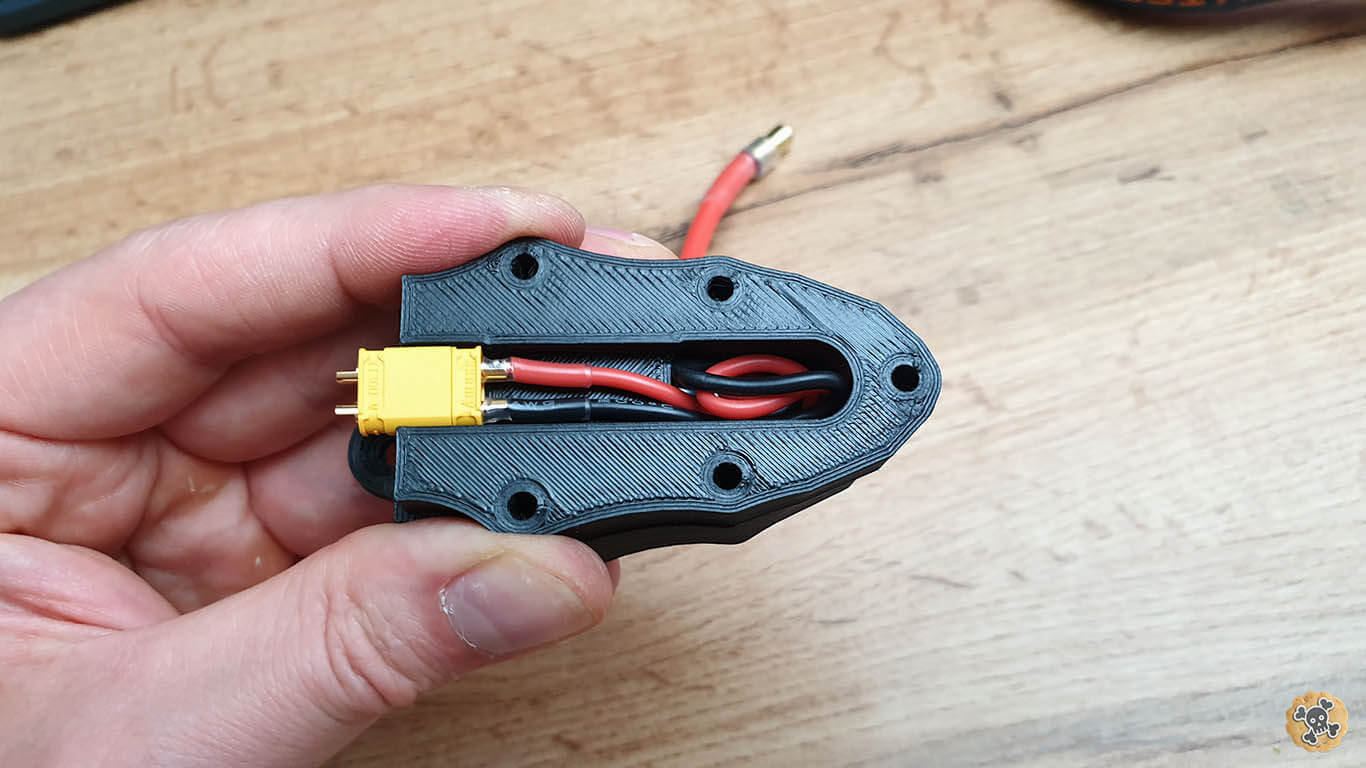
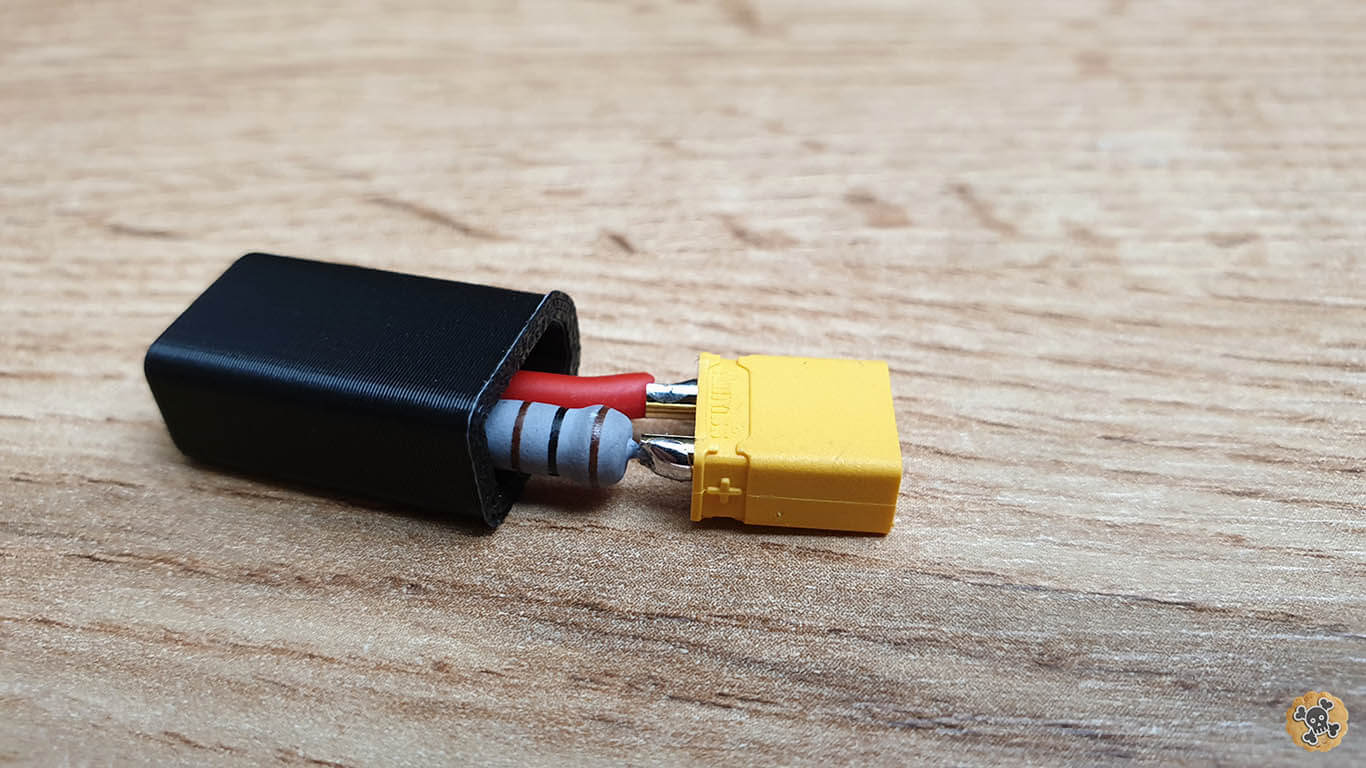
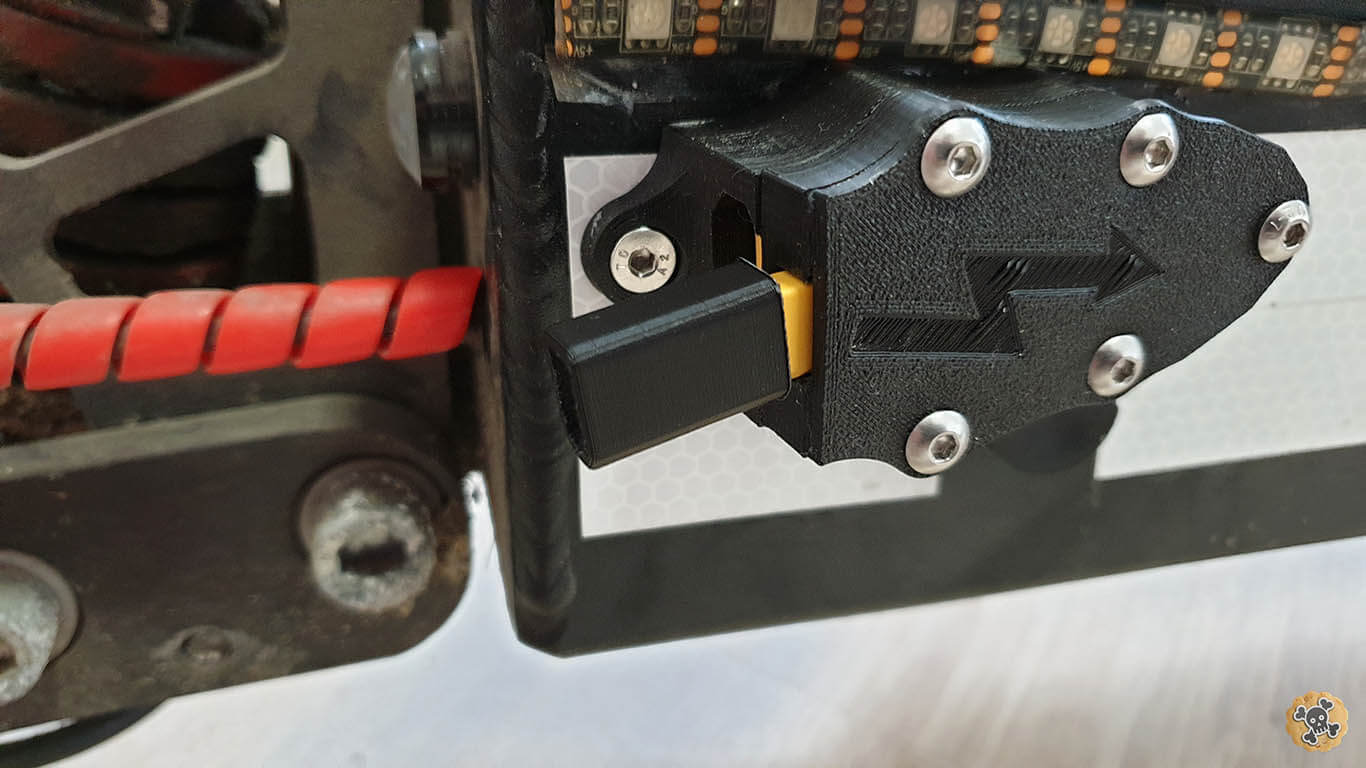
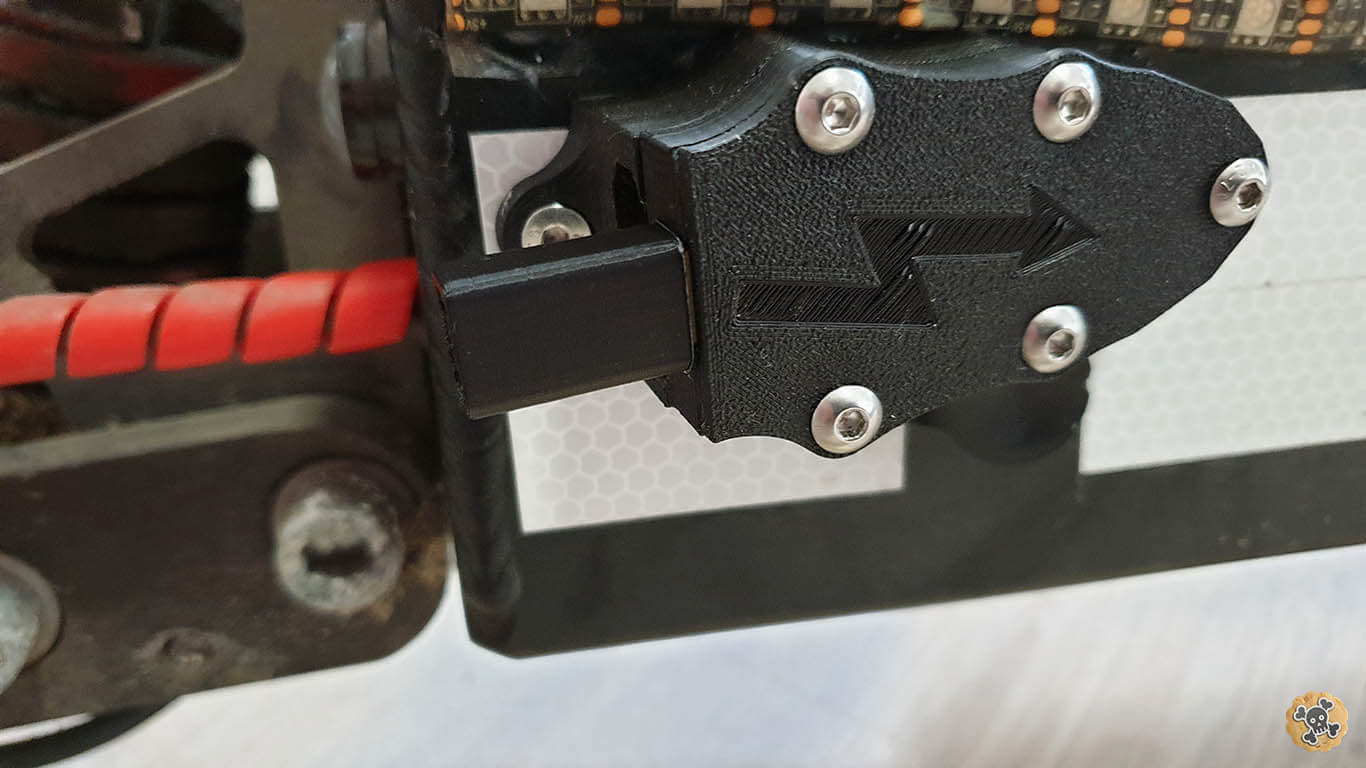
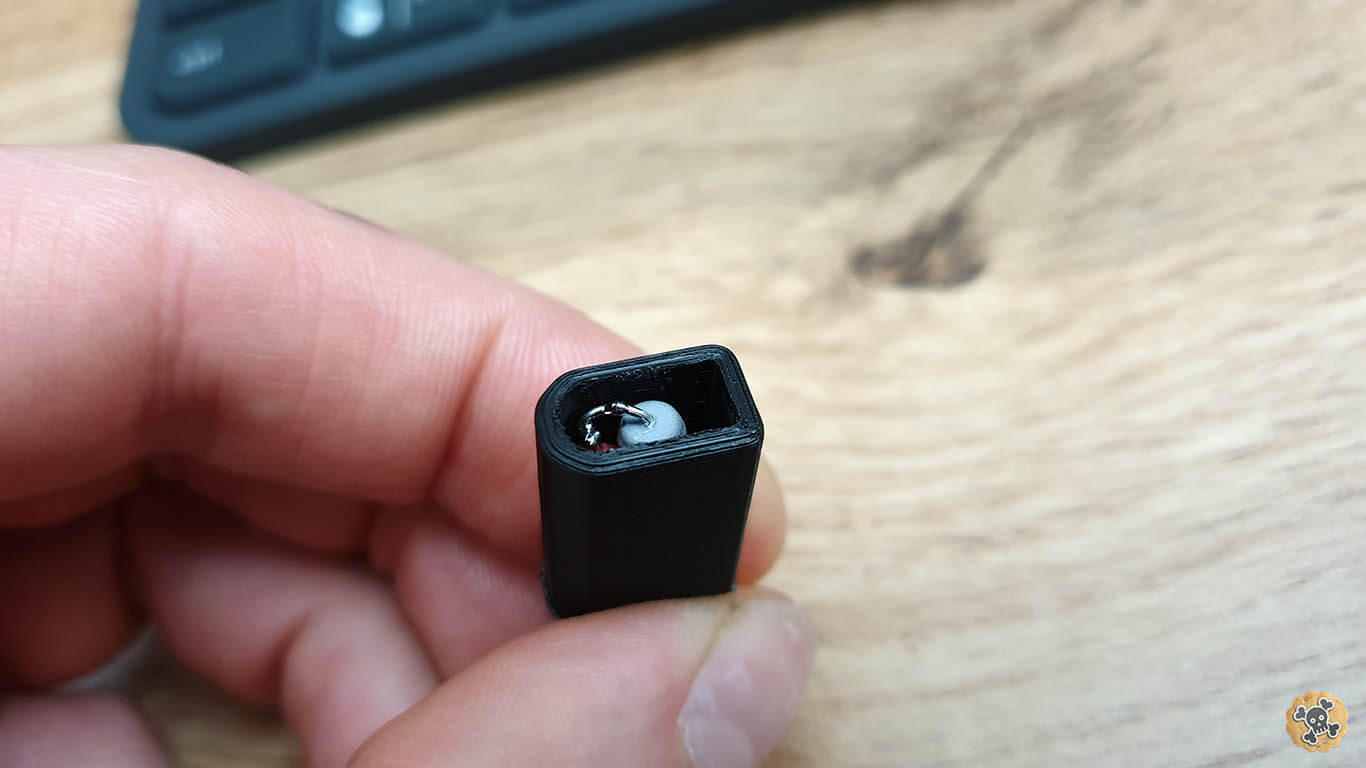
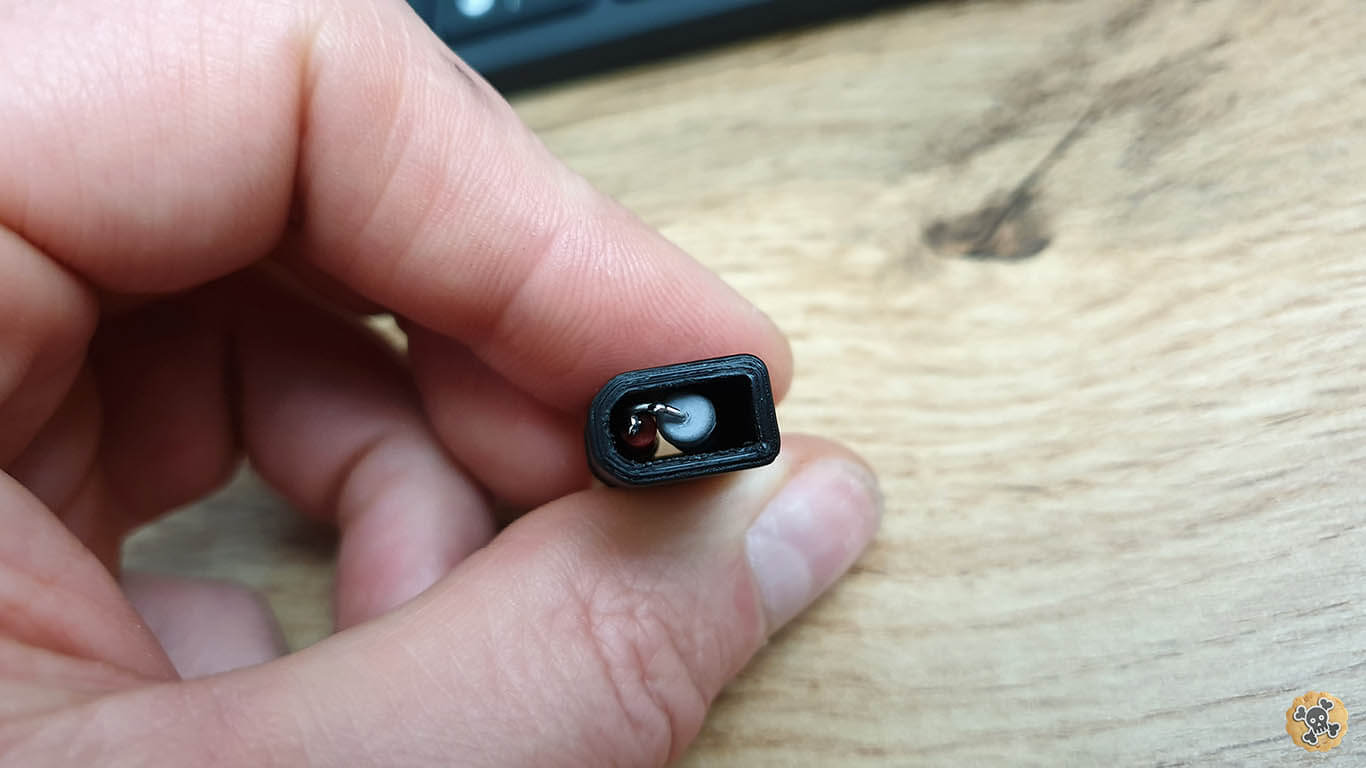
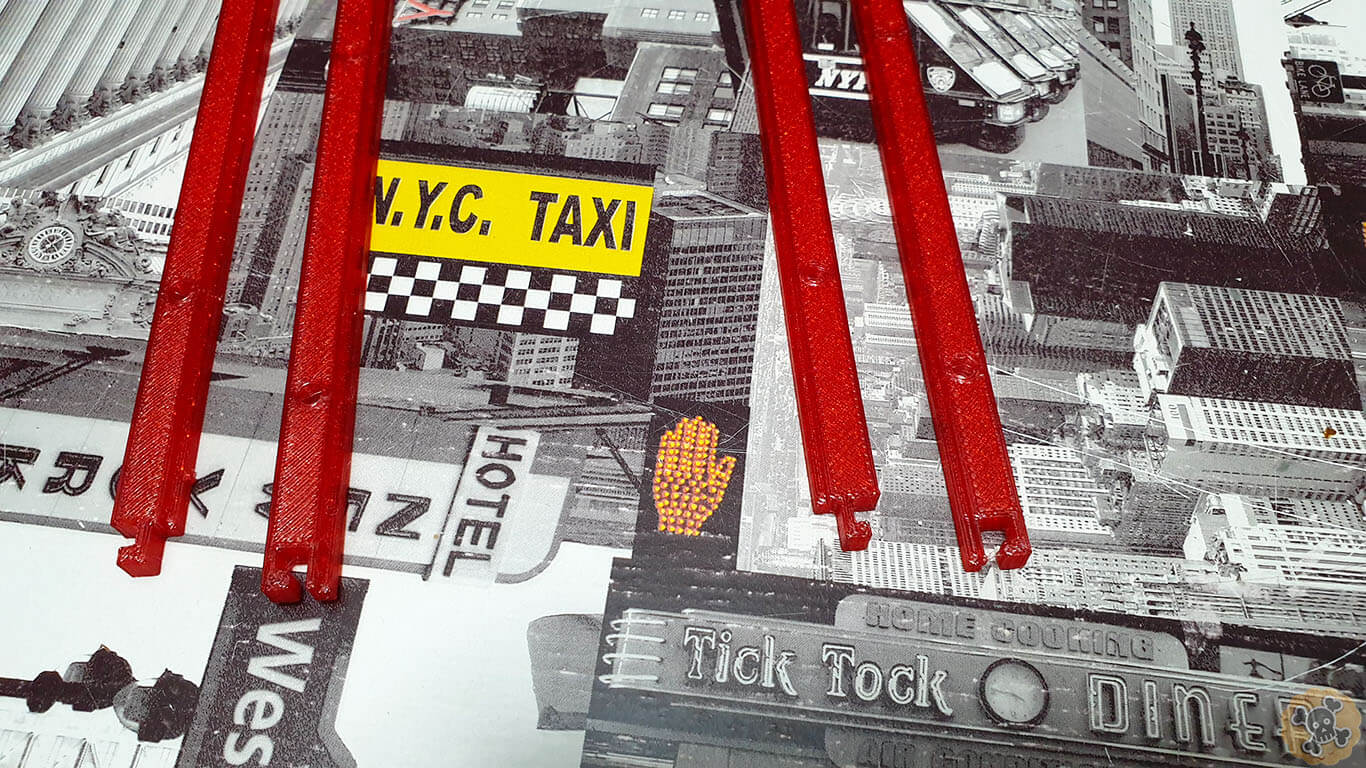
Slide in connectors to printed parts
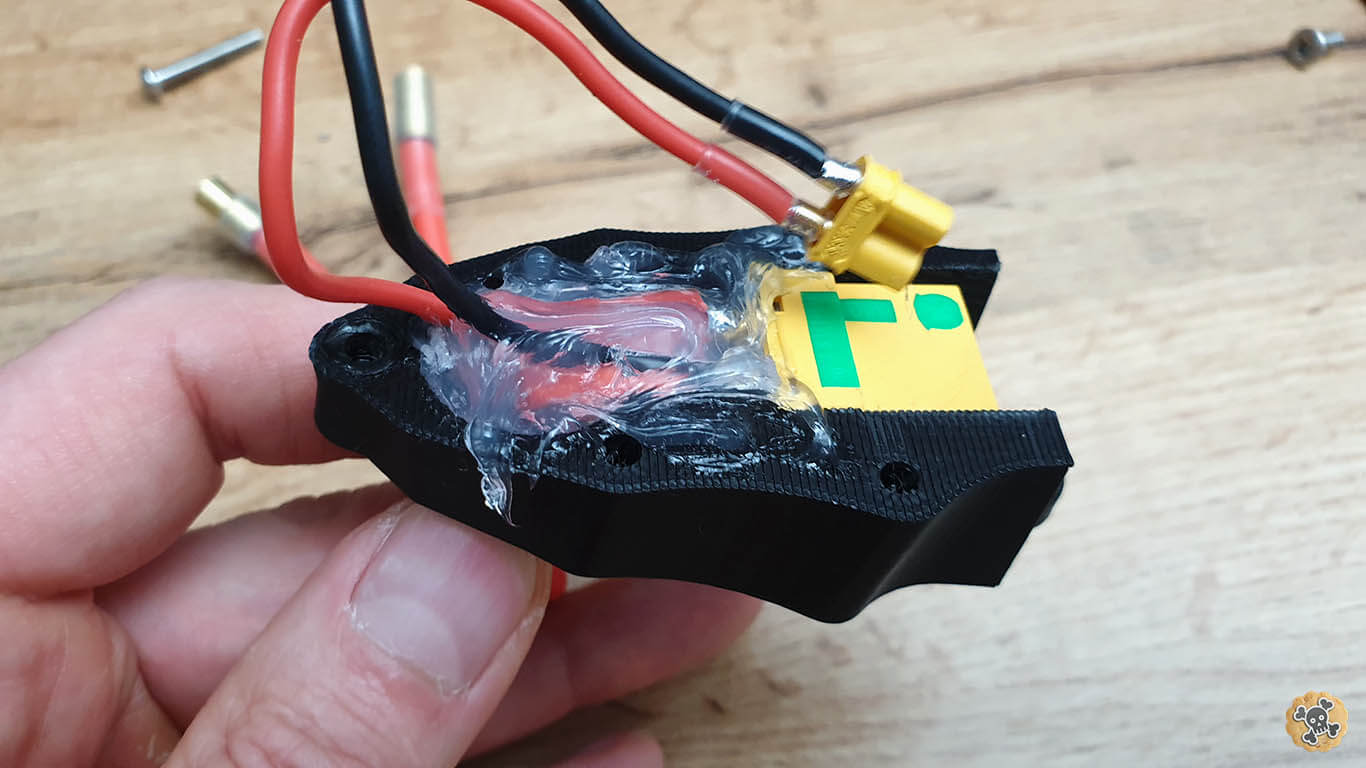
Between printed parts & behind connectors add lots of silicone , you can use simple kitchen siliocone ( it will work also as a glue when dried out )
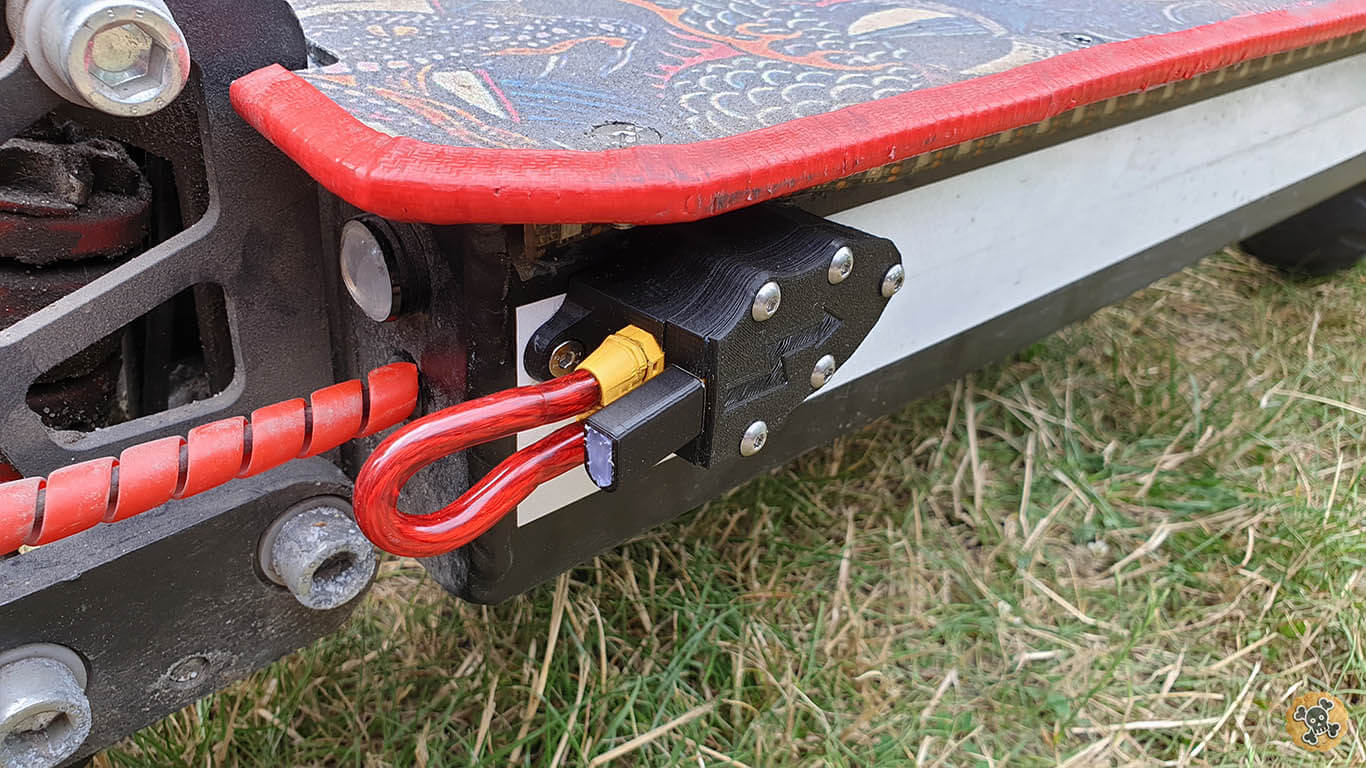
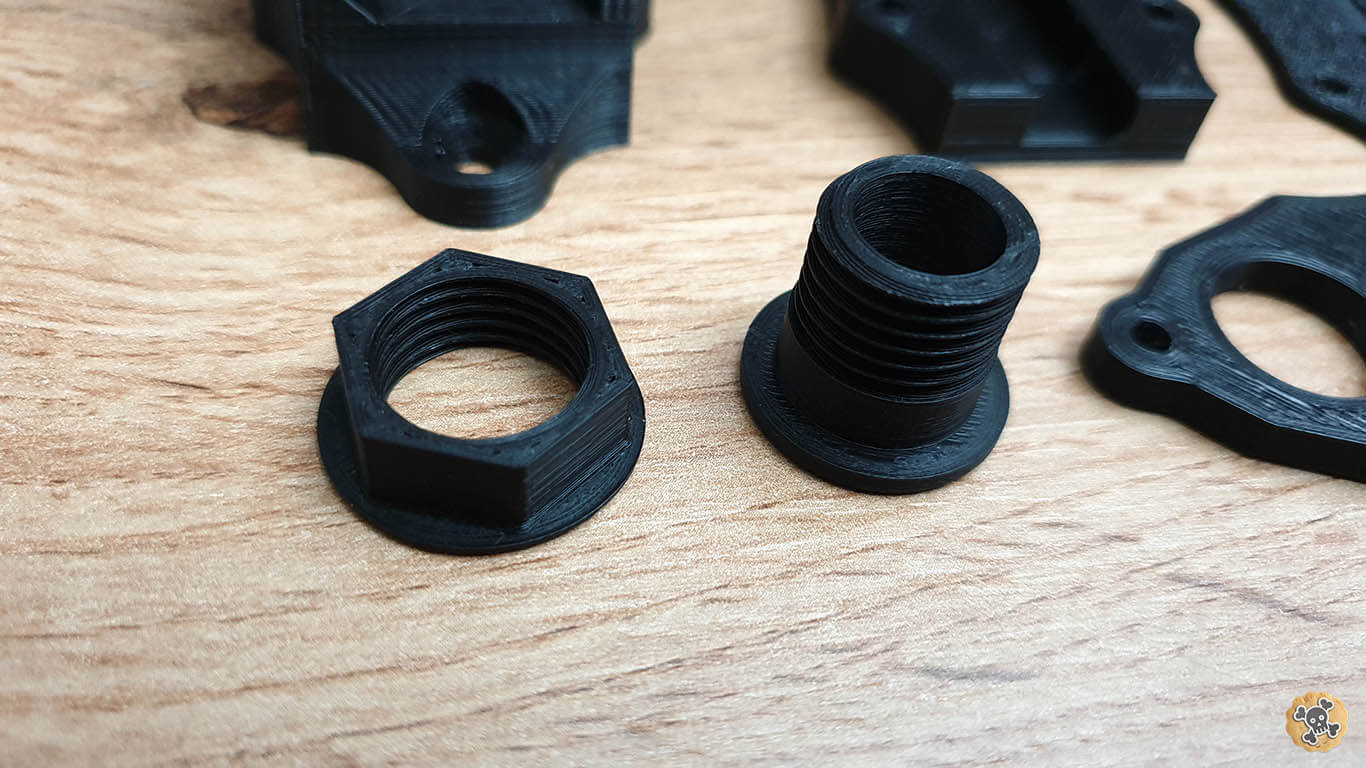
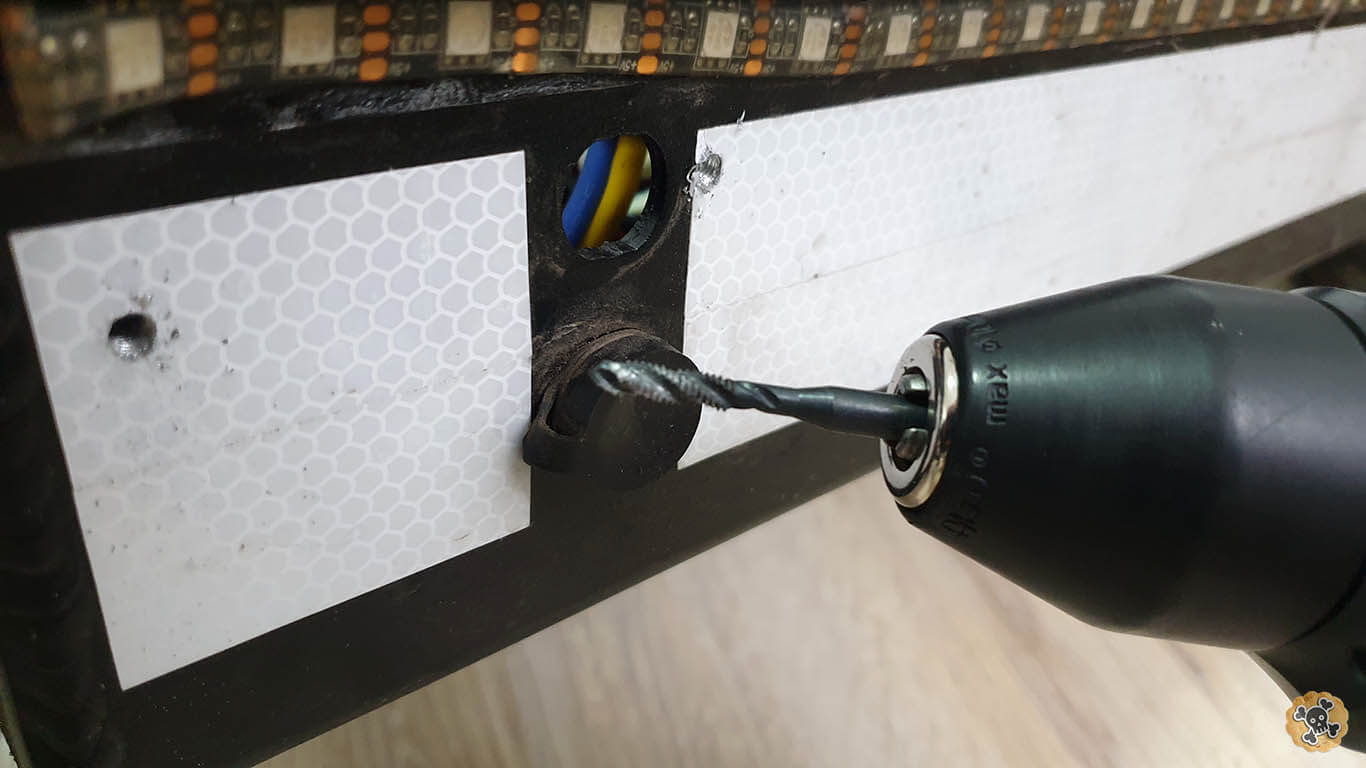
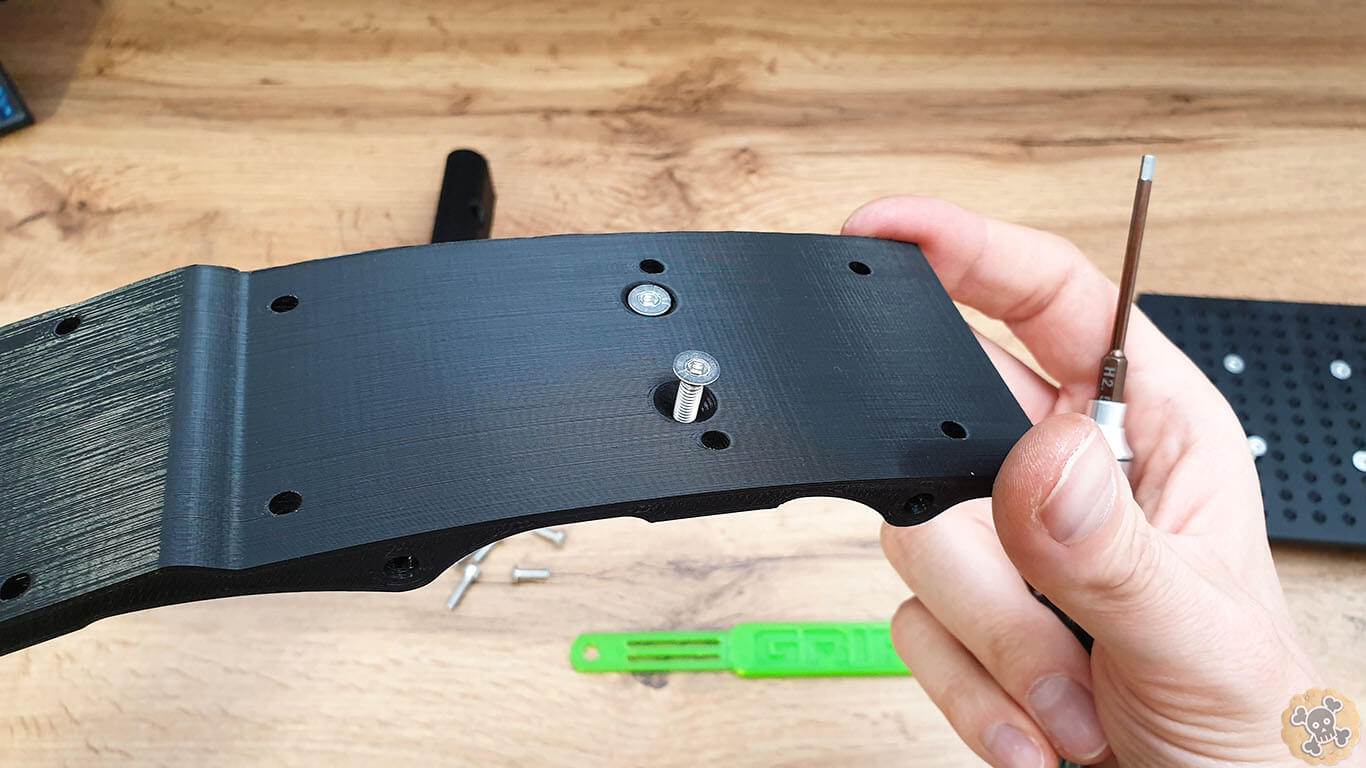
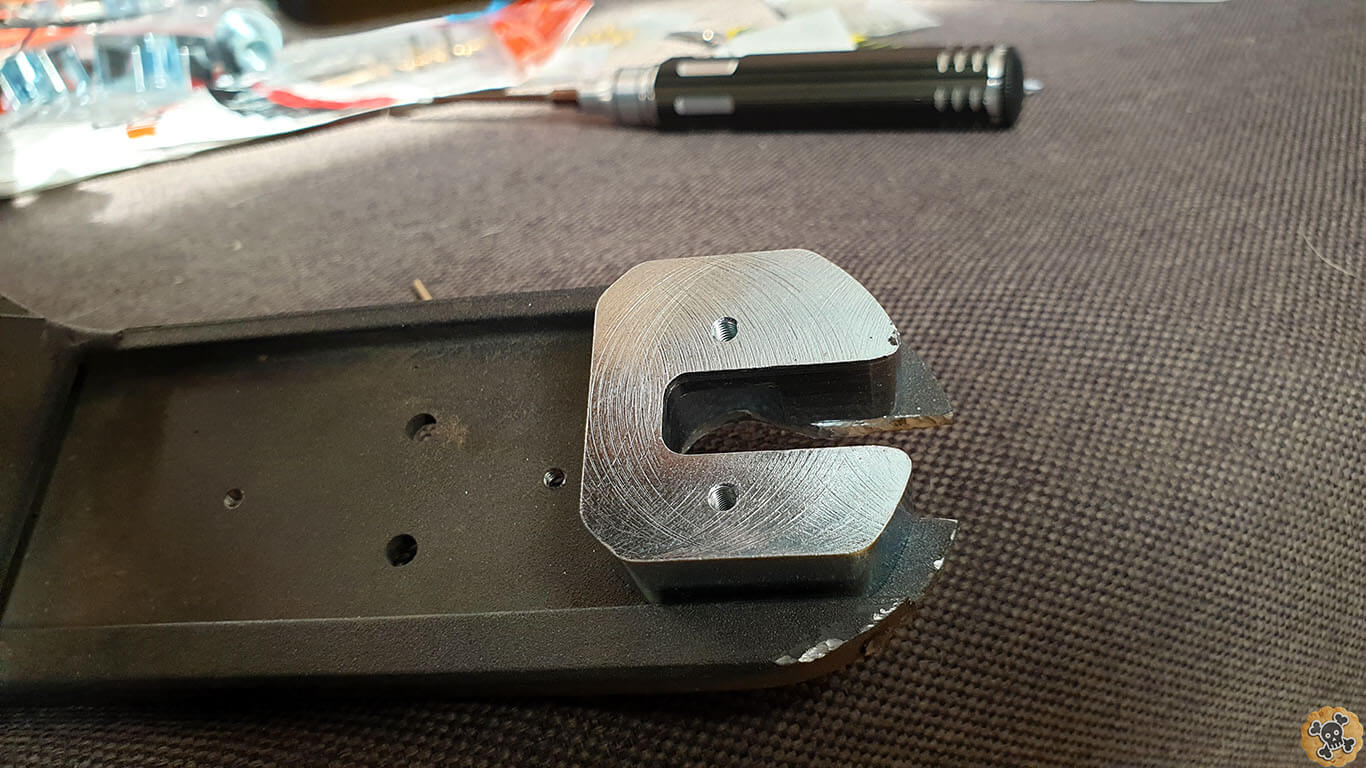
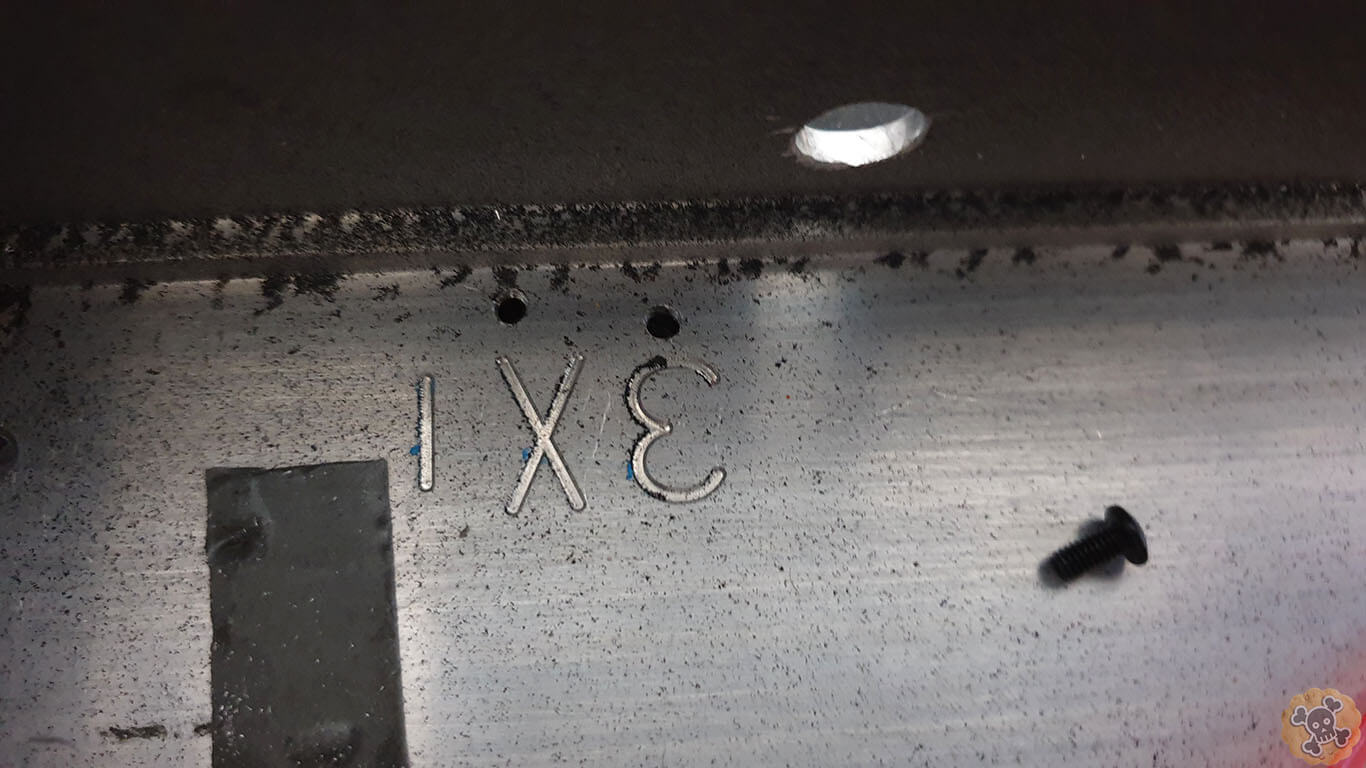
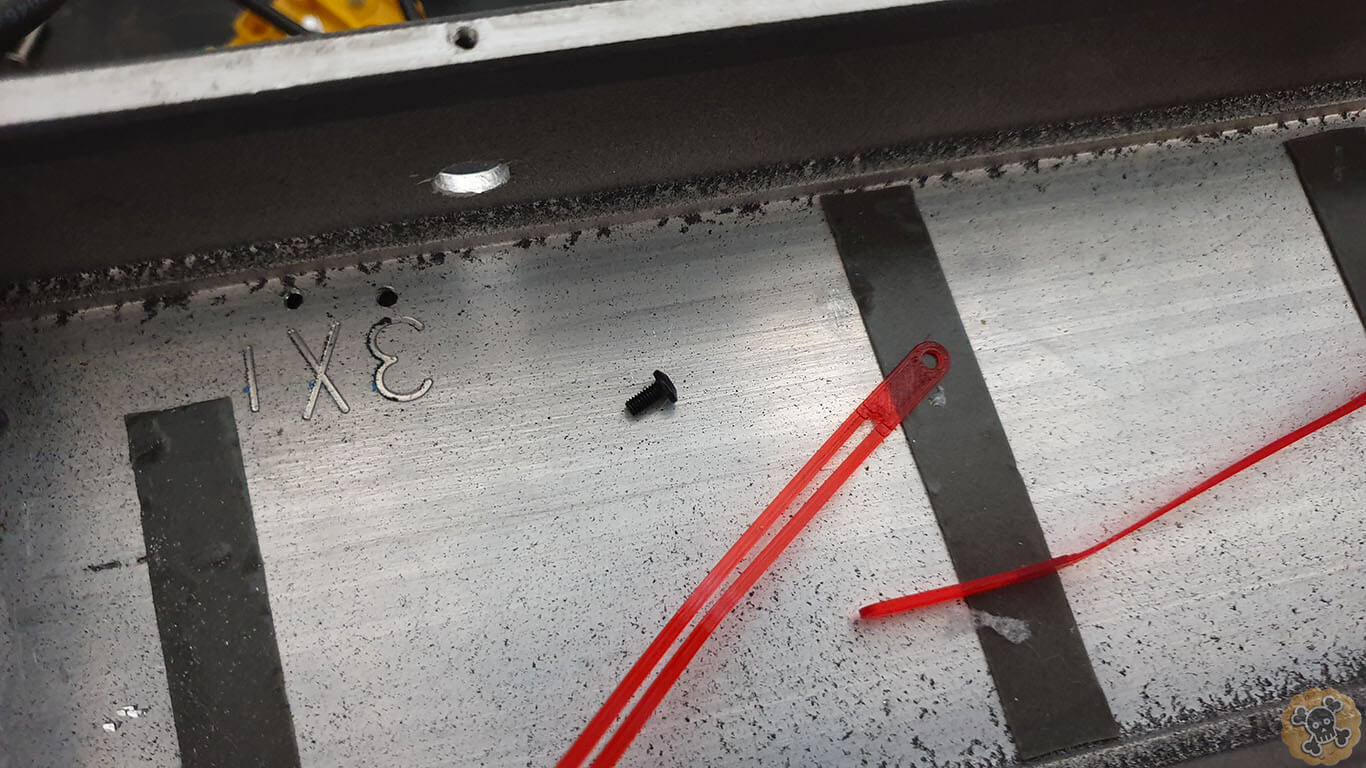
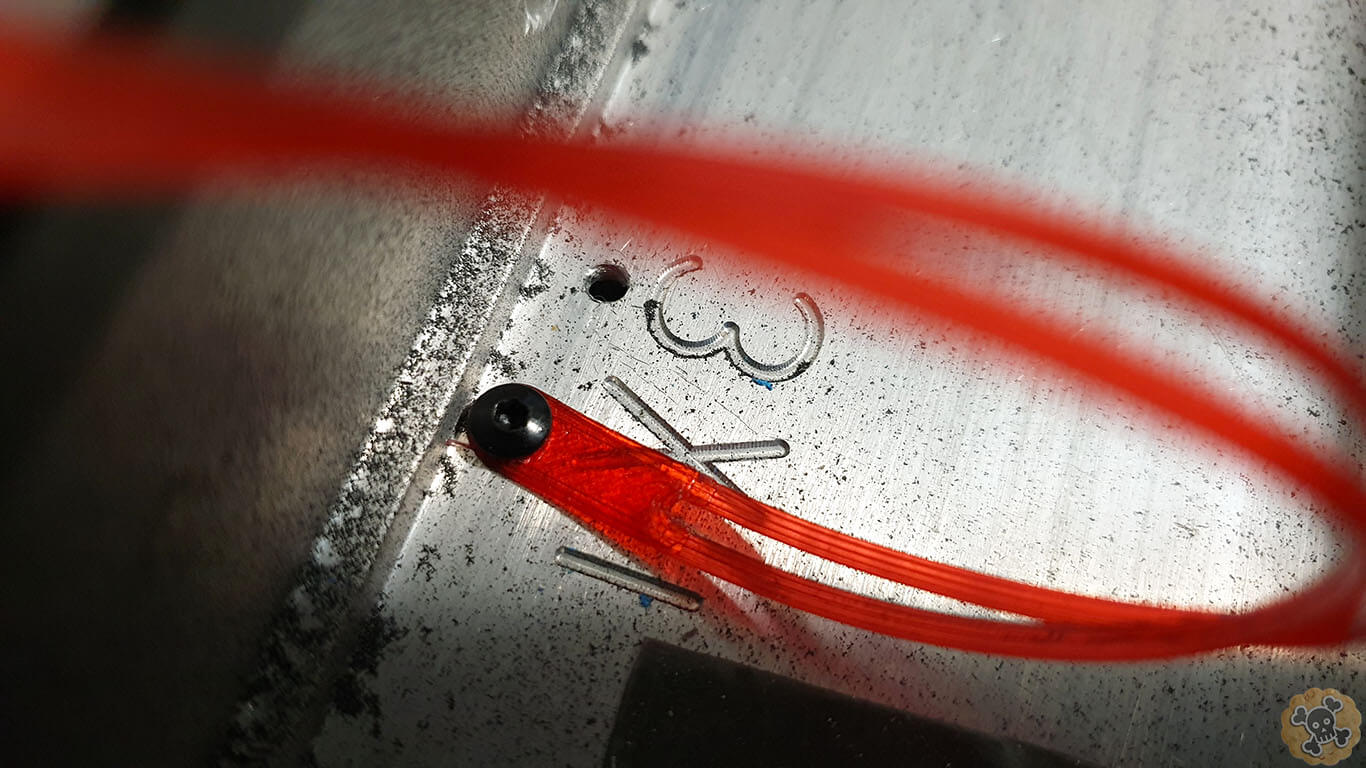
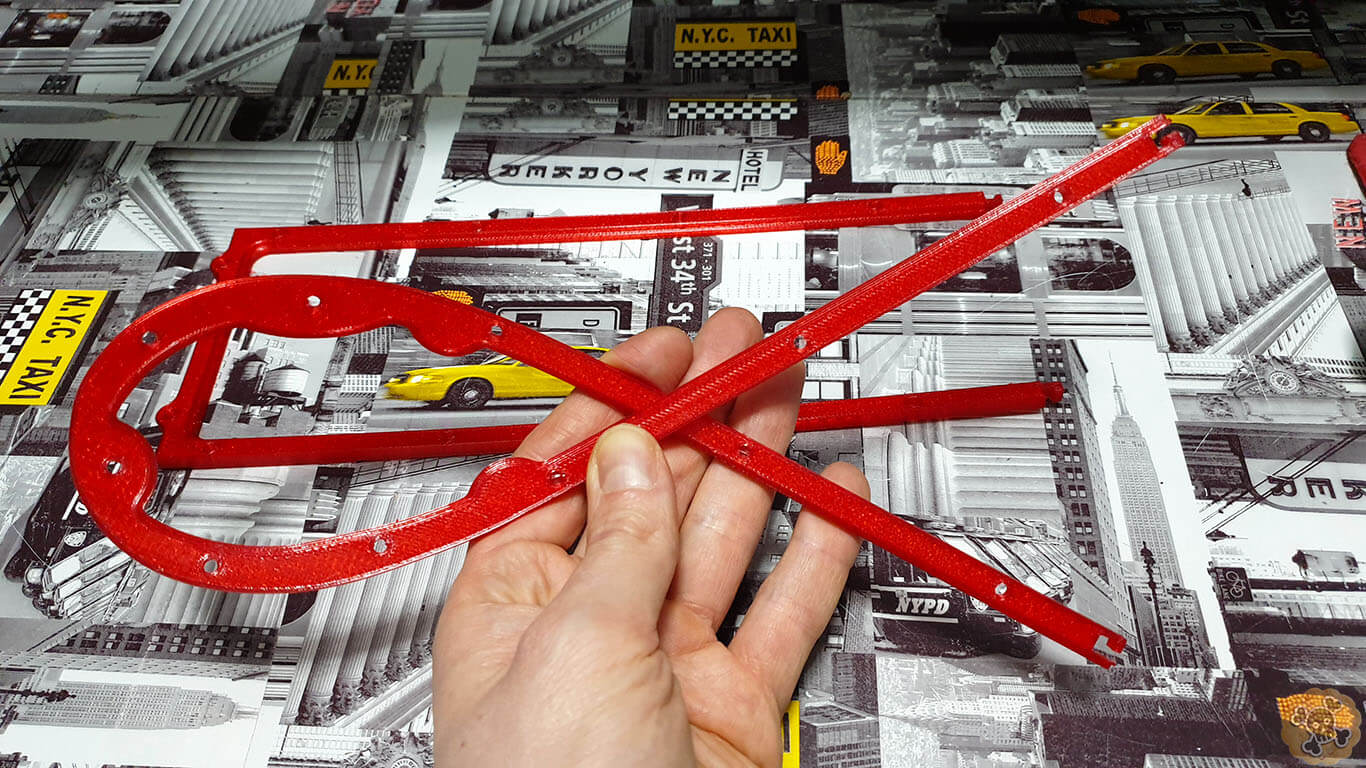
Use ” Printed drill plate ” to make 2 holes for screws m4 , you have to use drill bit 3,5 and then make thread M4. Those 2 extra screws will secure pretty good Dual loop key to the frame.
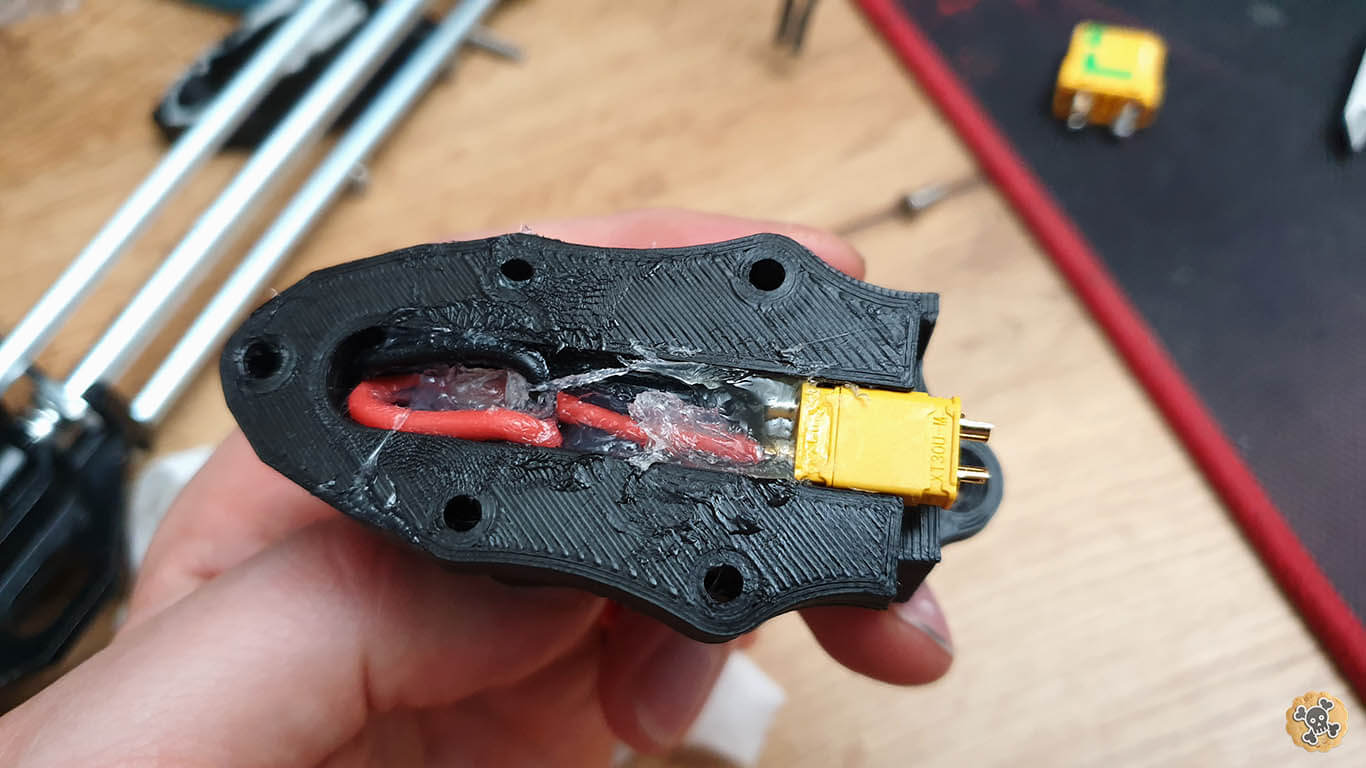
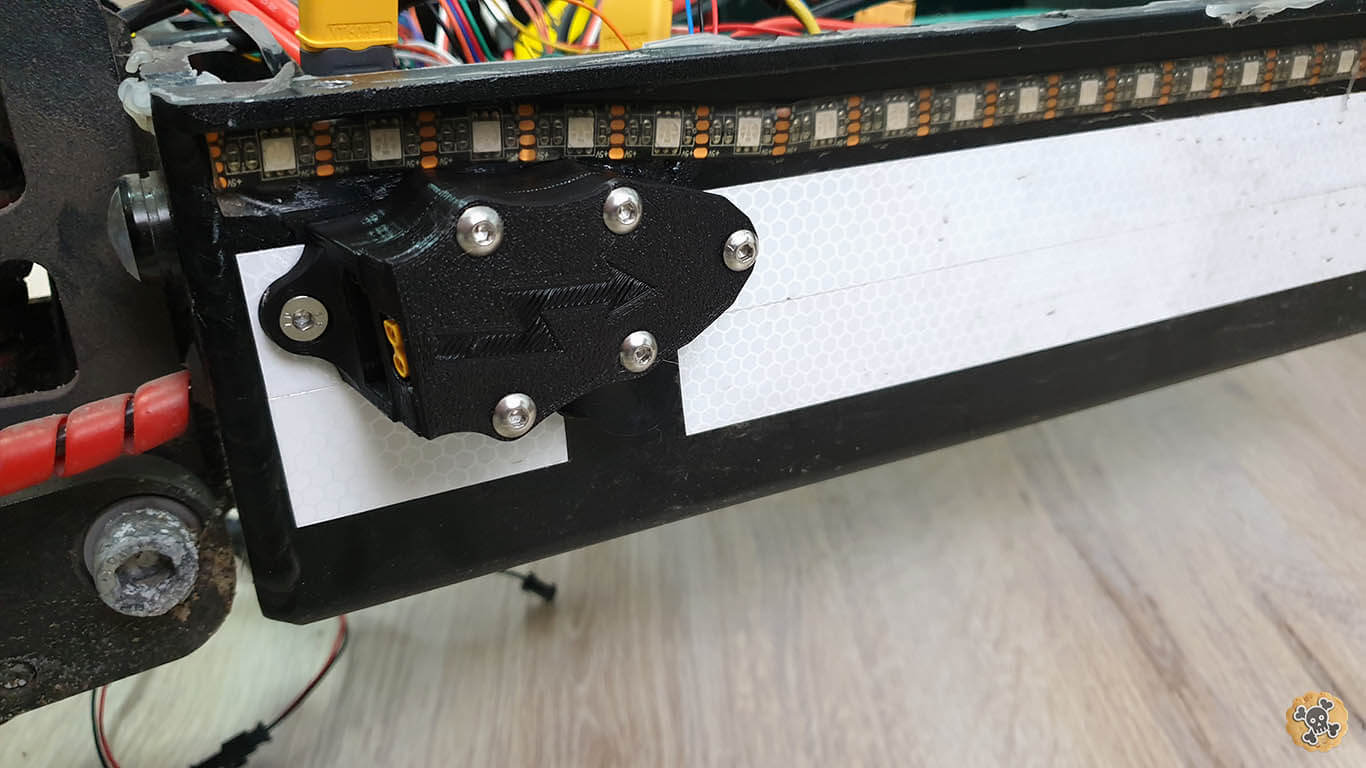
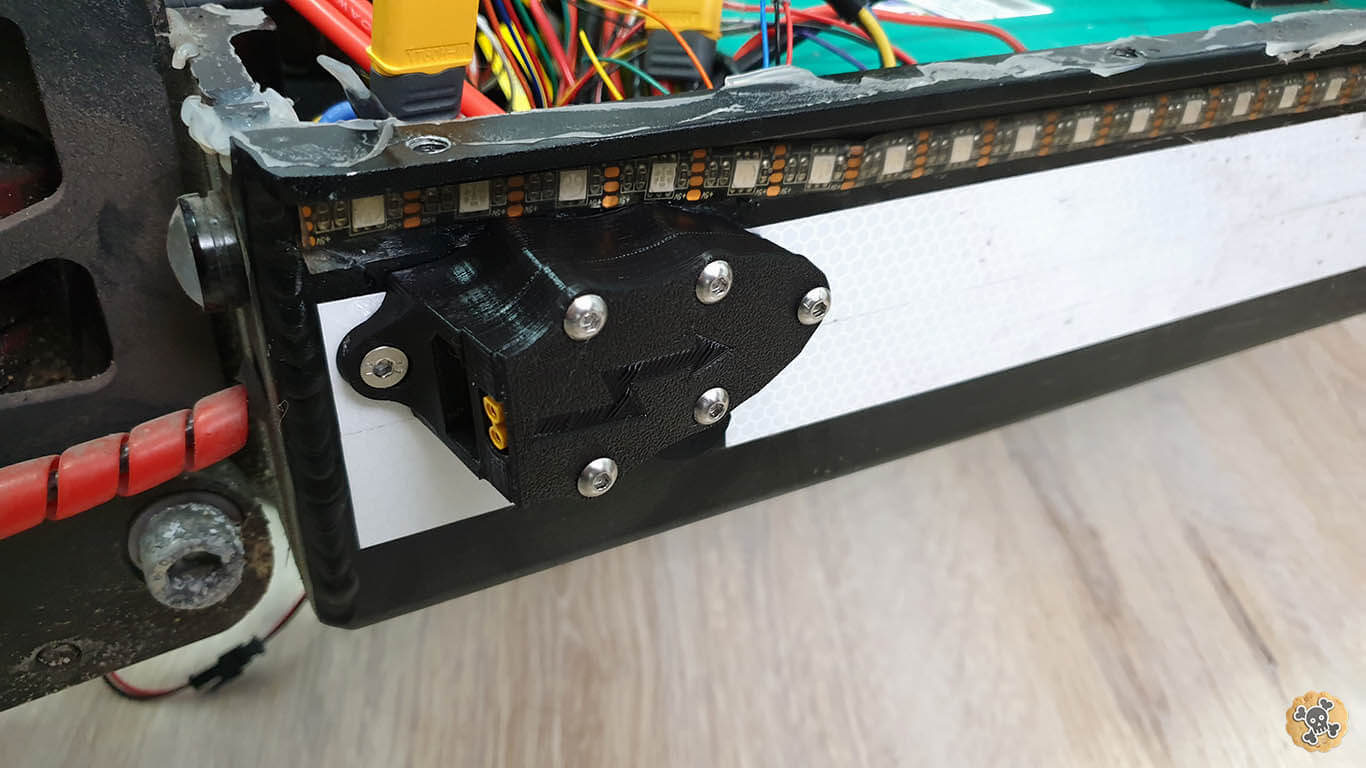
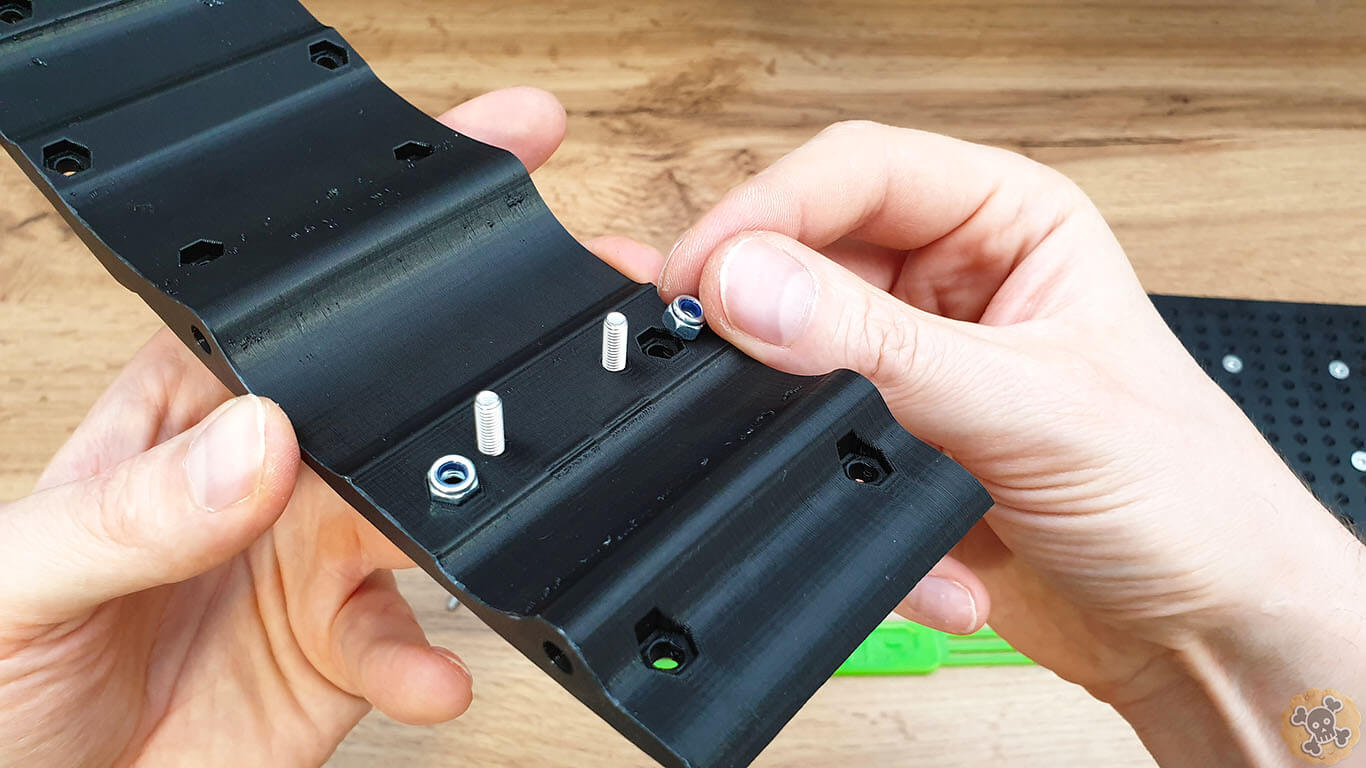
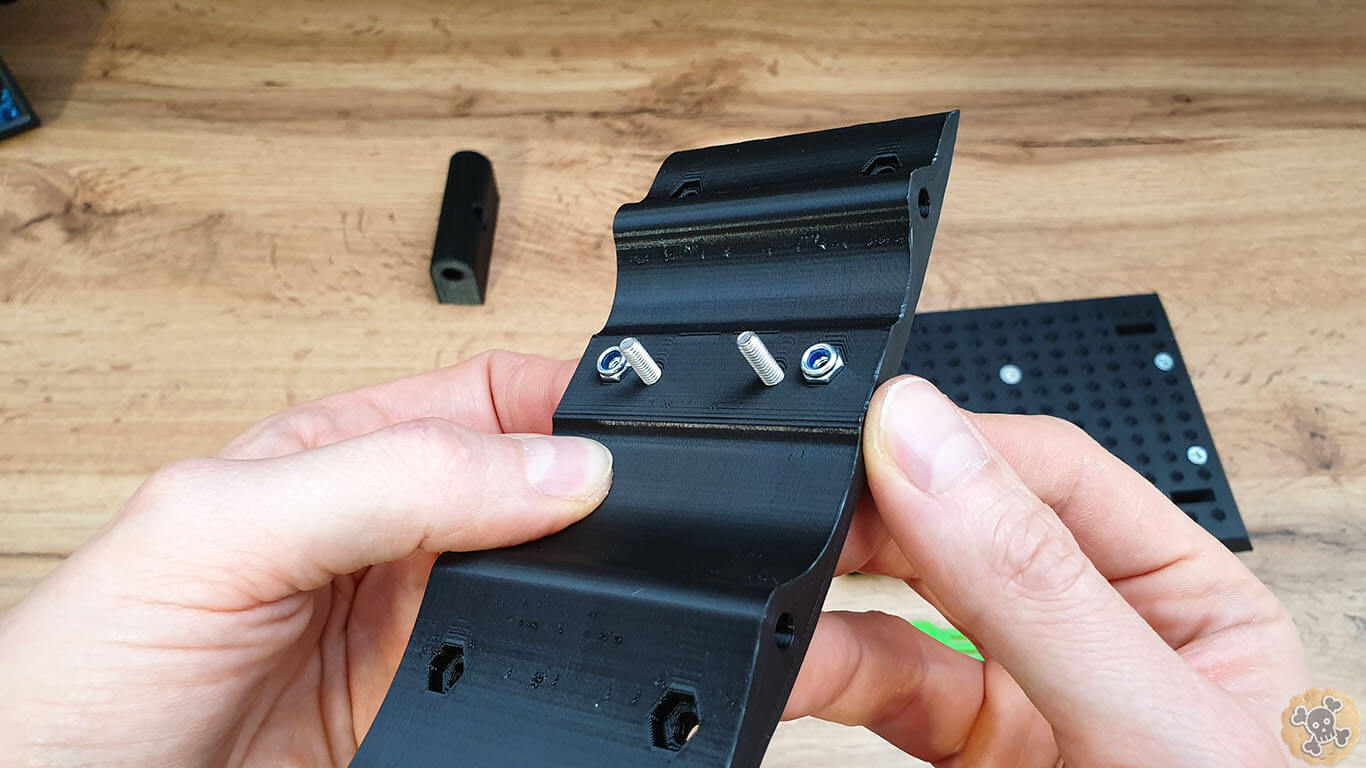
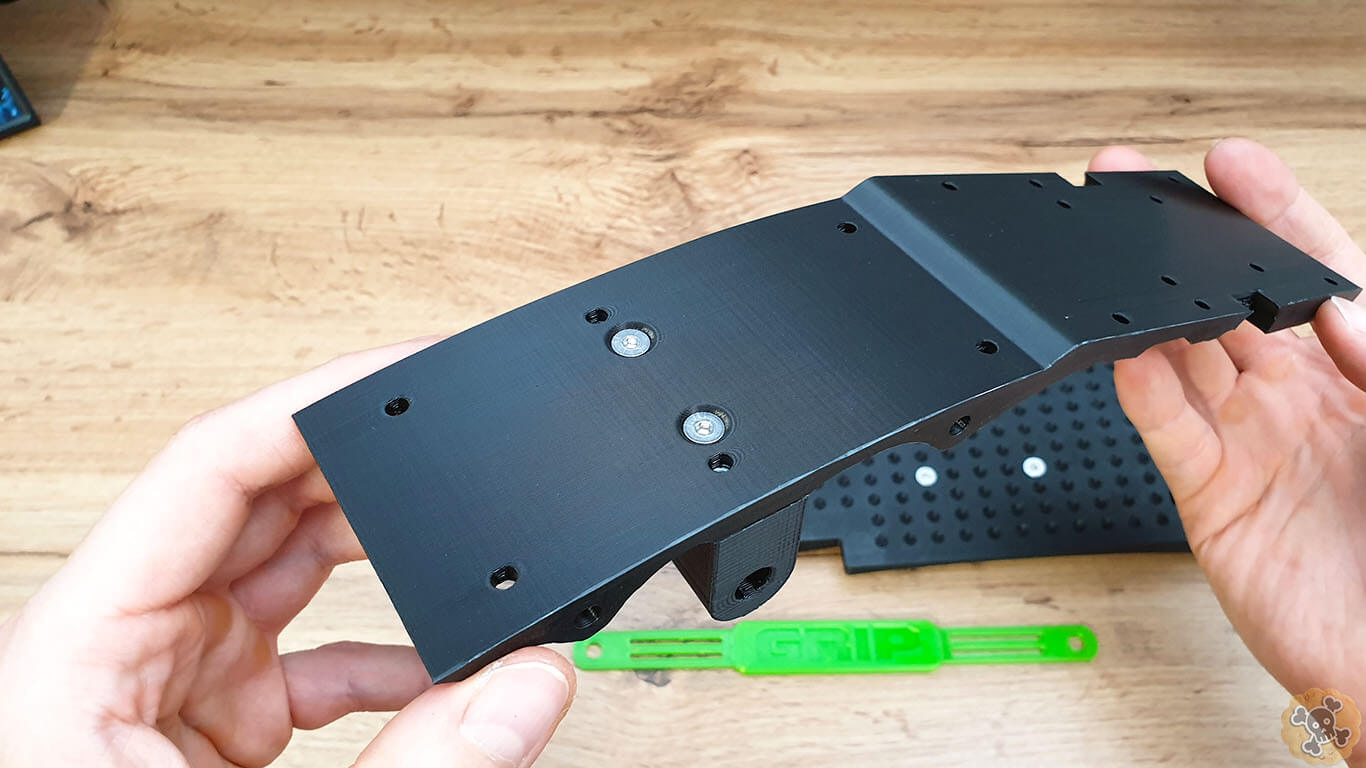
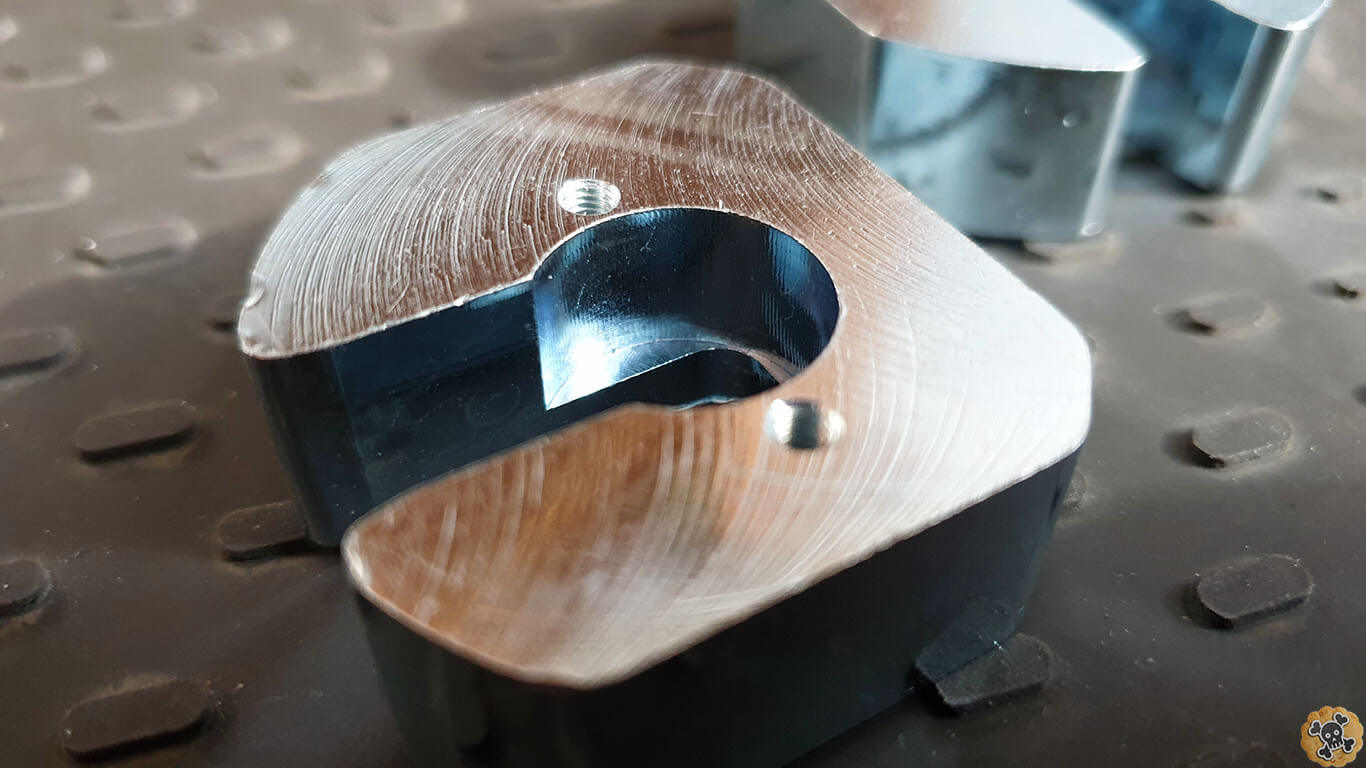
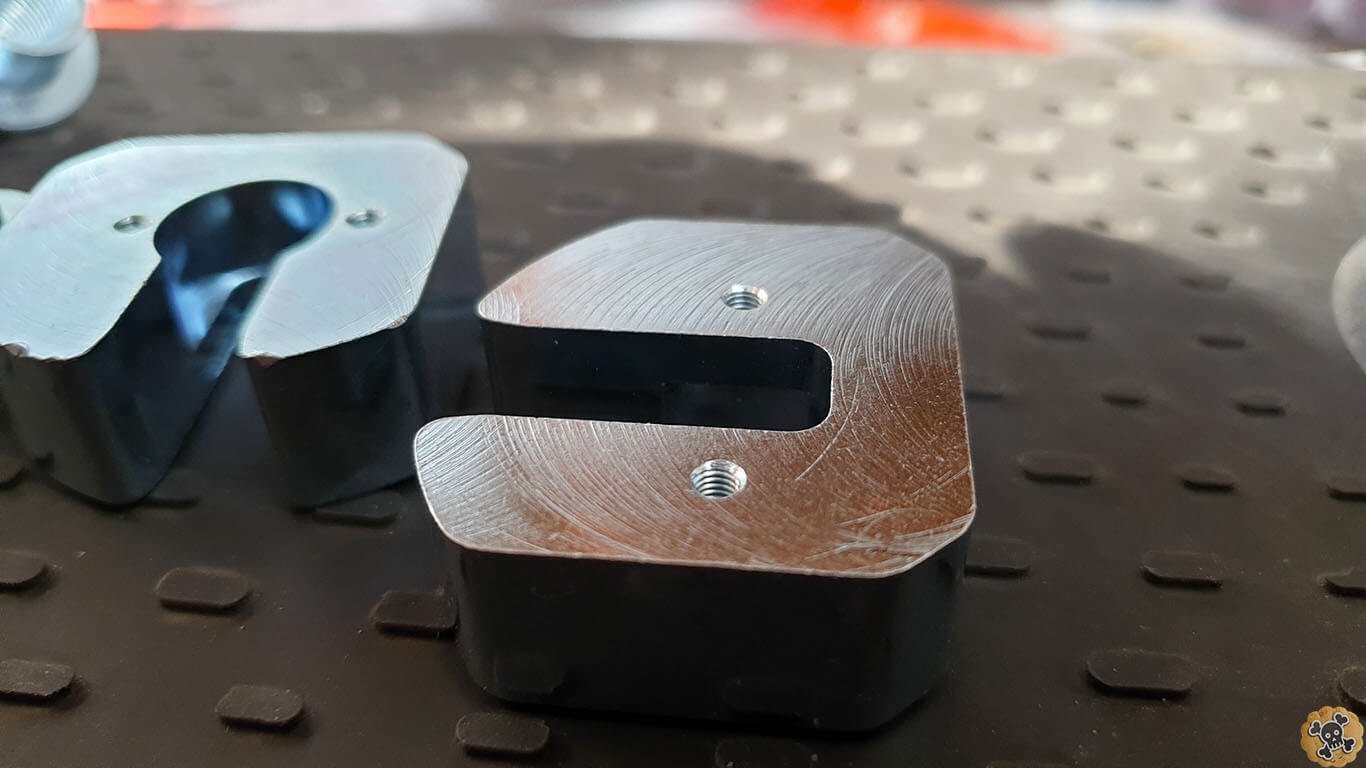
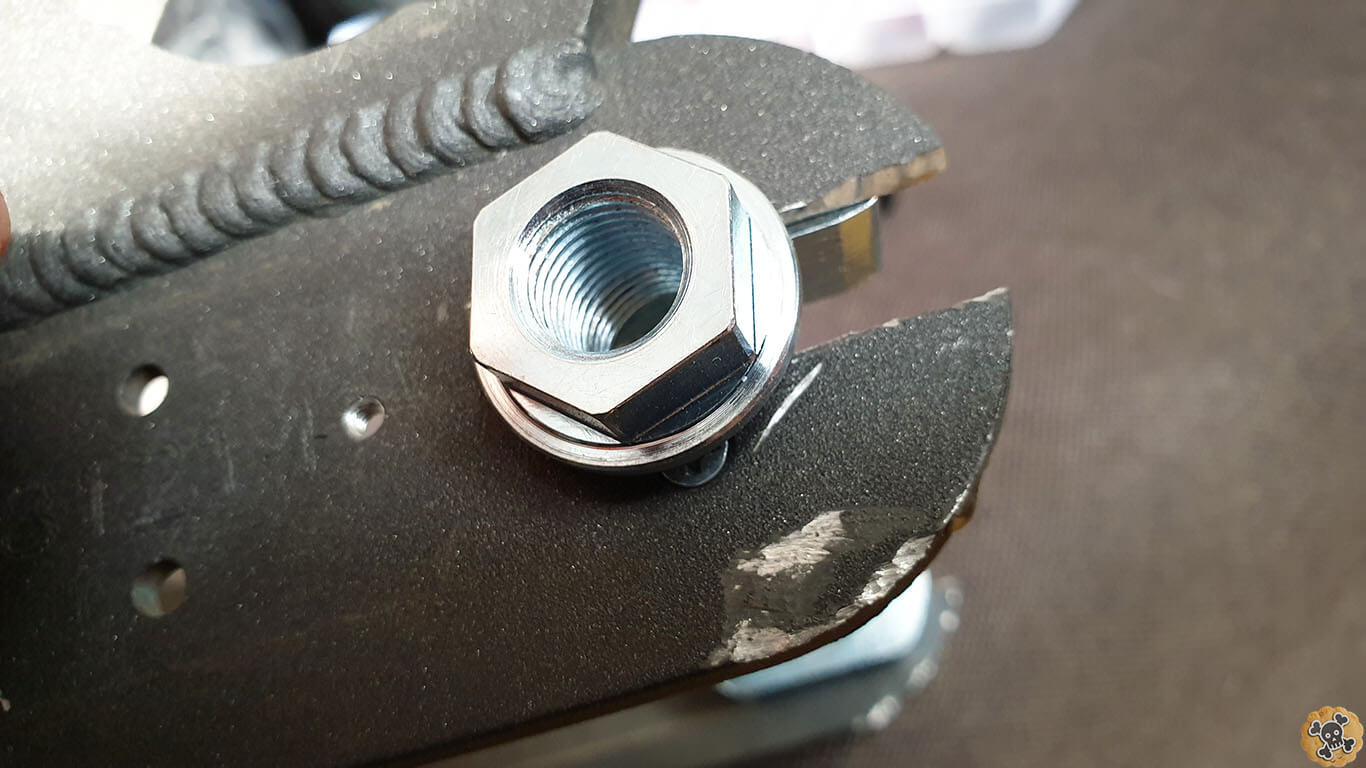
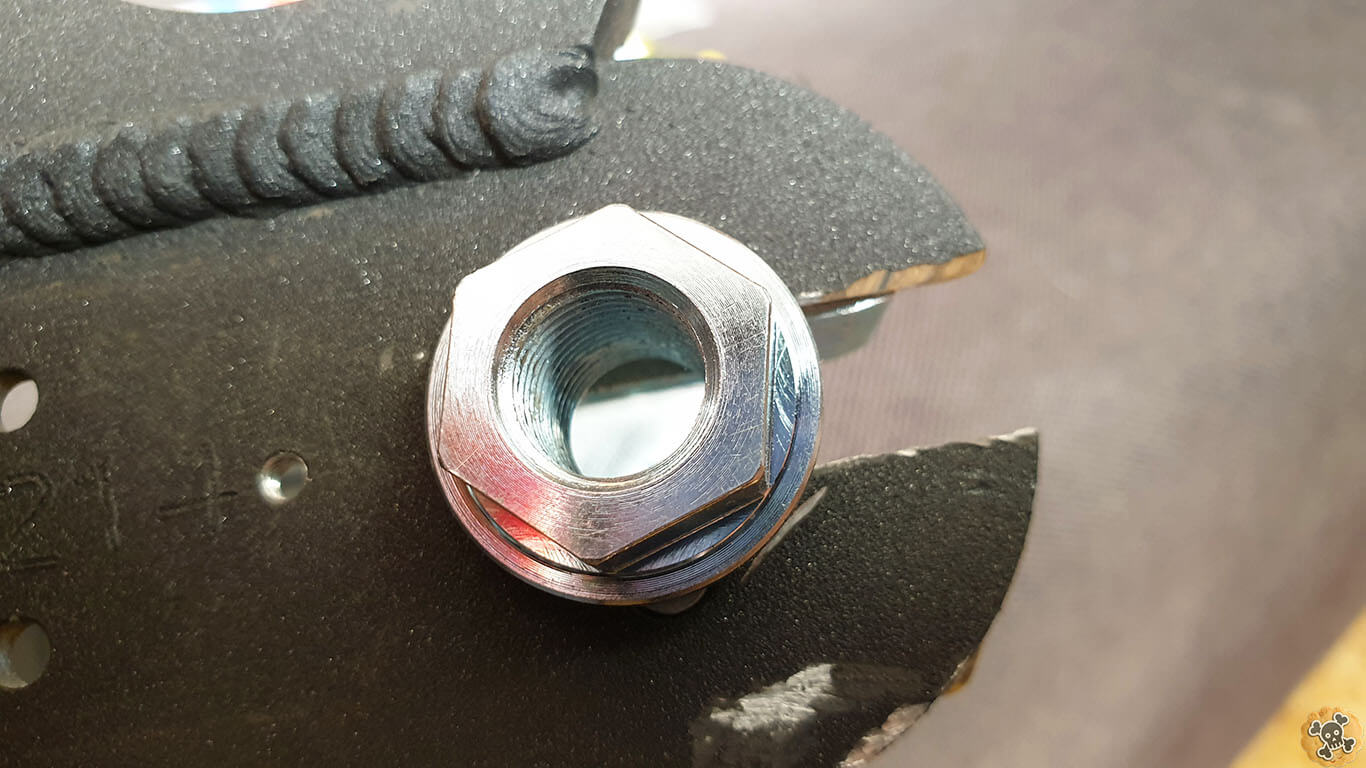
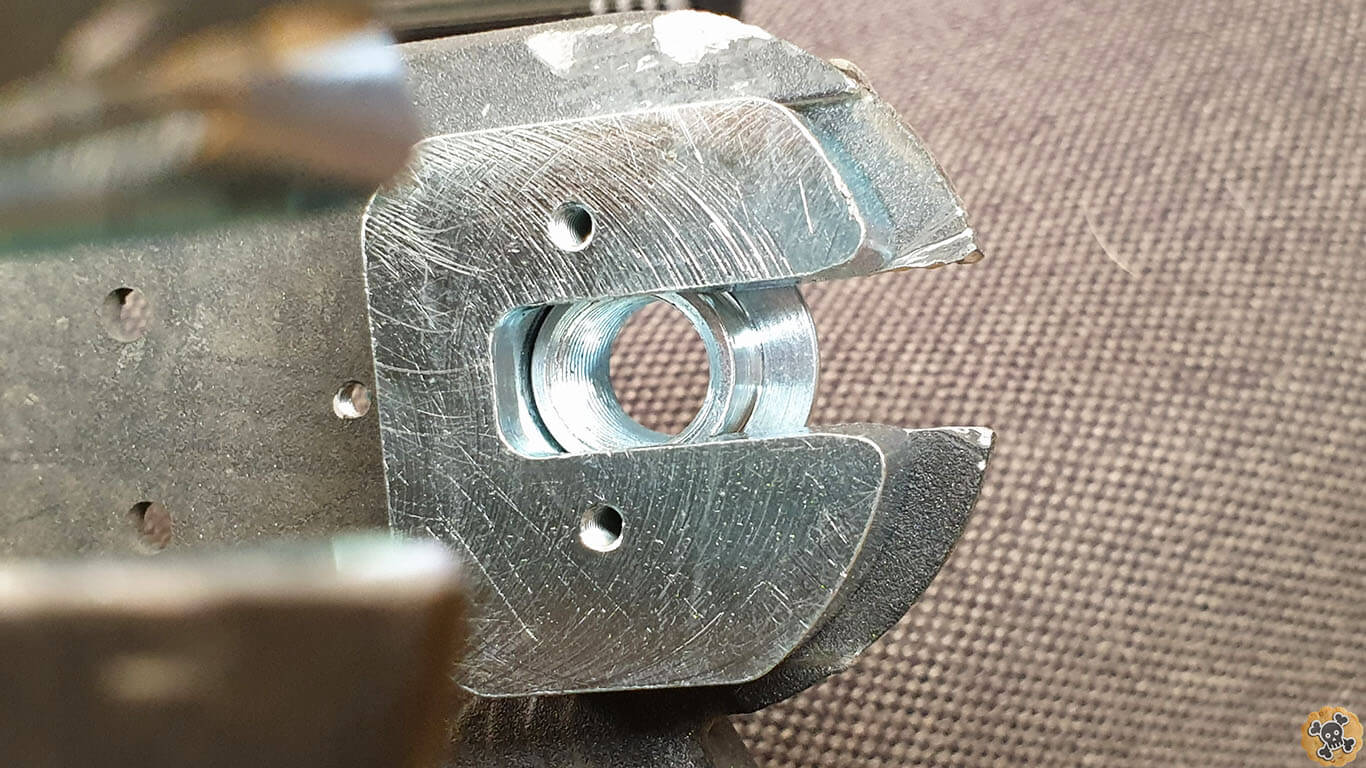
Between Dual loop key & Frame add some extra silicone, and tighten all screws & printed nut on the inside.
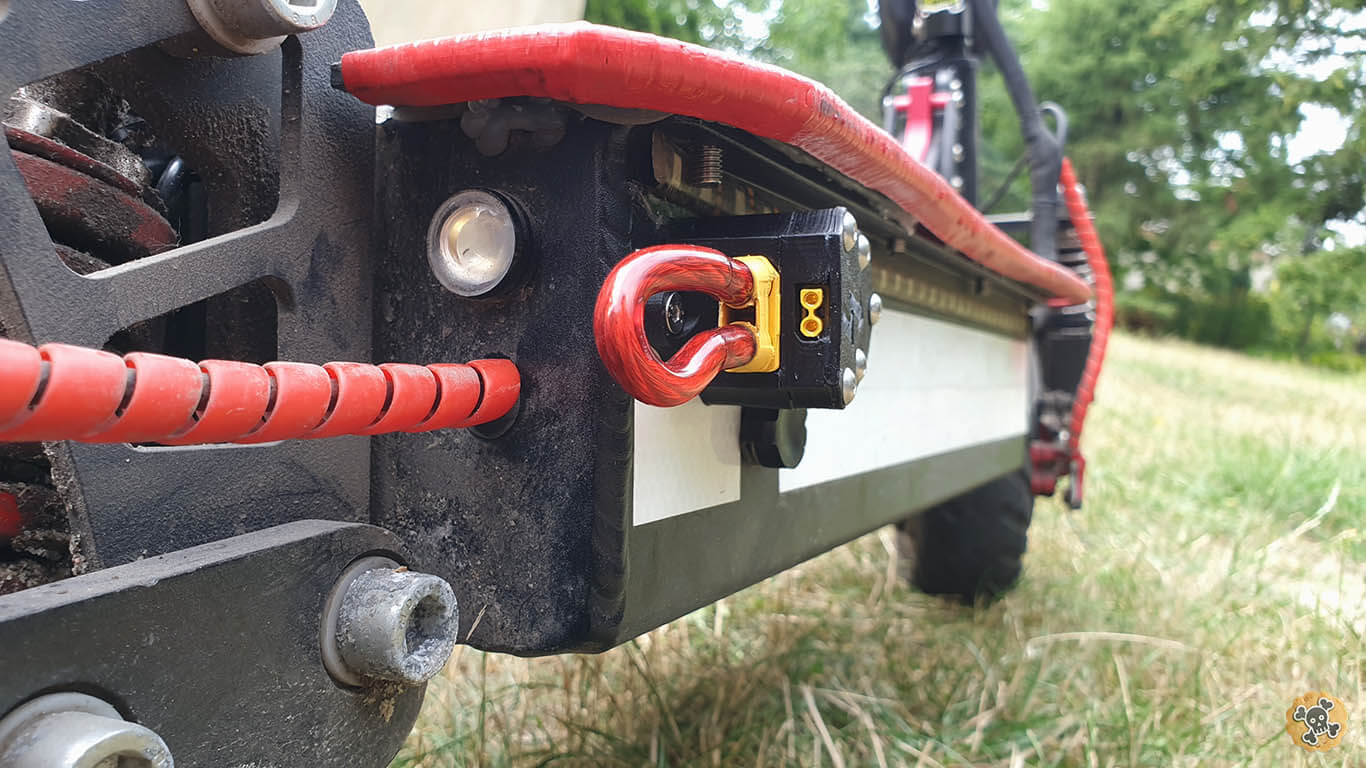
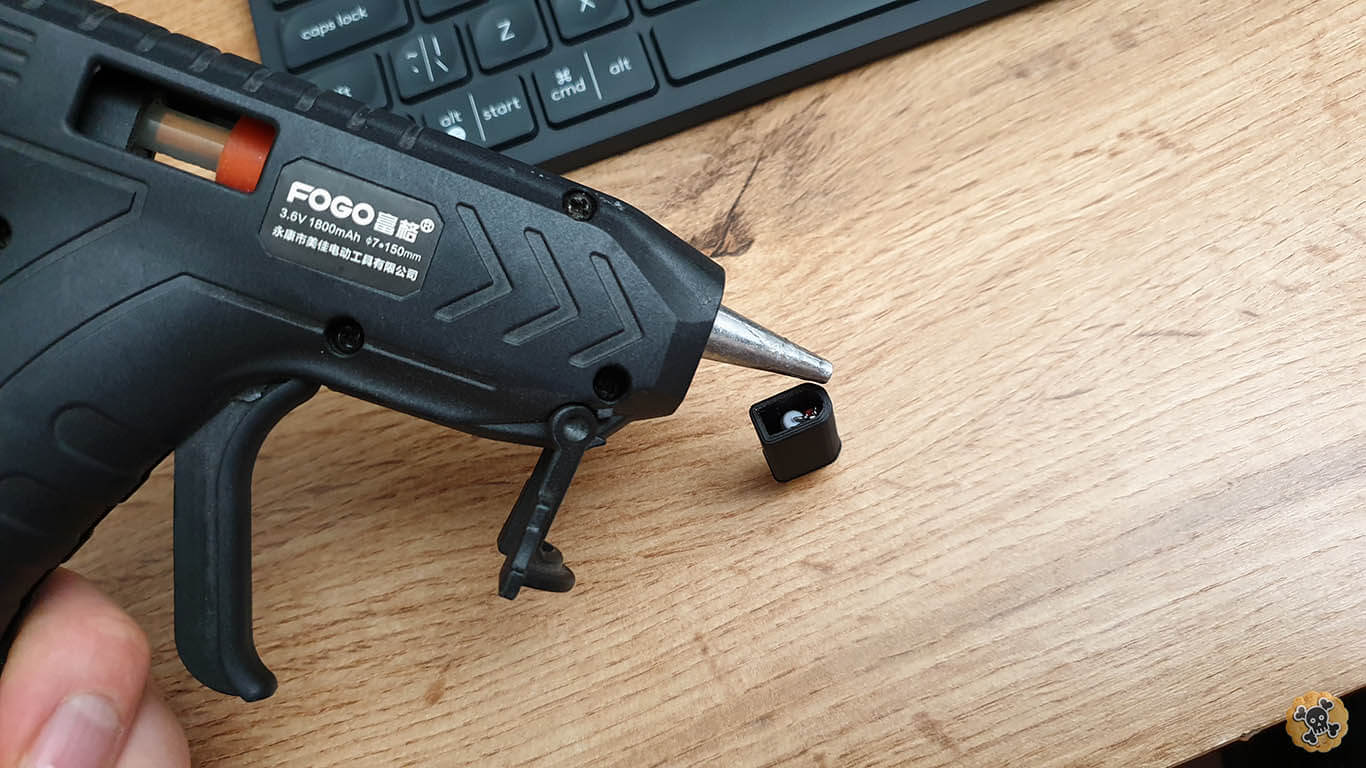
Now you have to solder big resistor between 20-100ohm to XT30 connector, slide in to printed part , then connecto to dual loop key and check if all fits. If so, add lots of hot glue inside printed part.
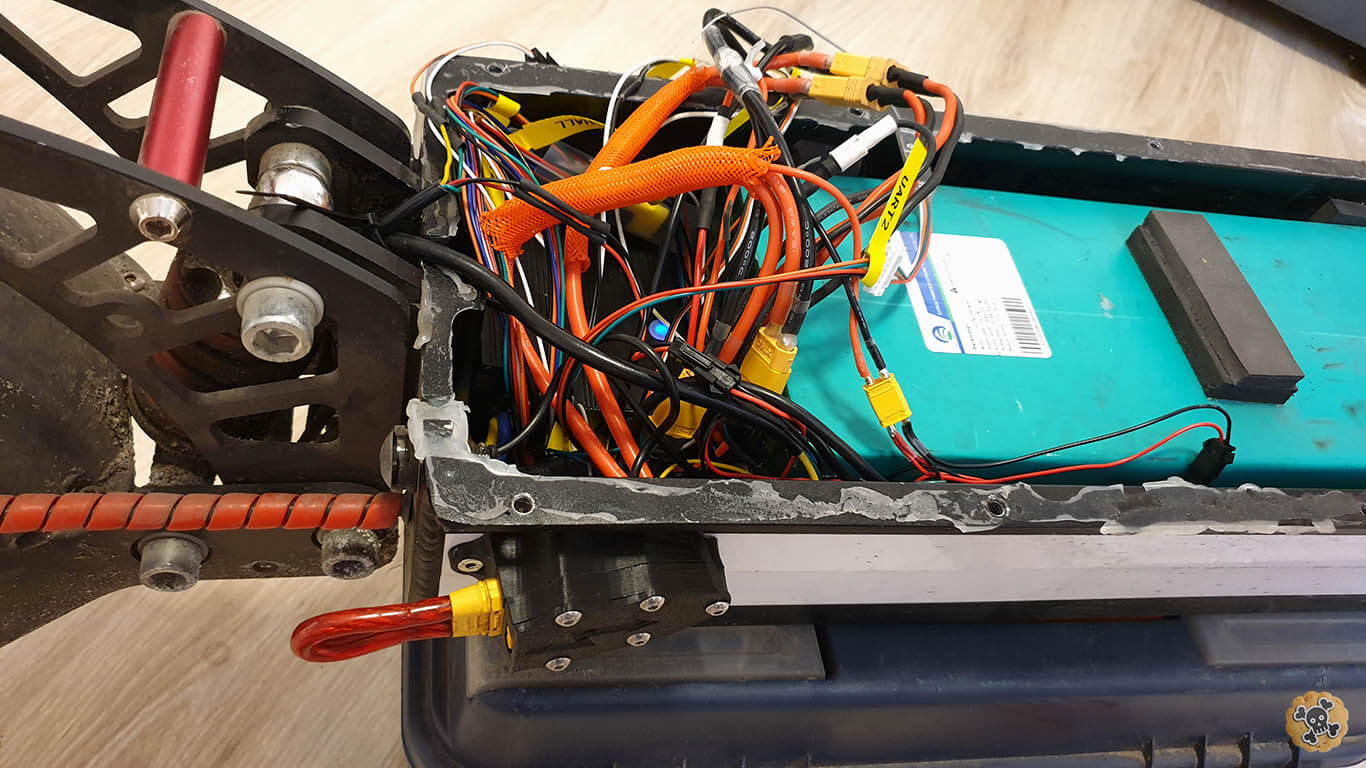
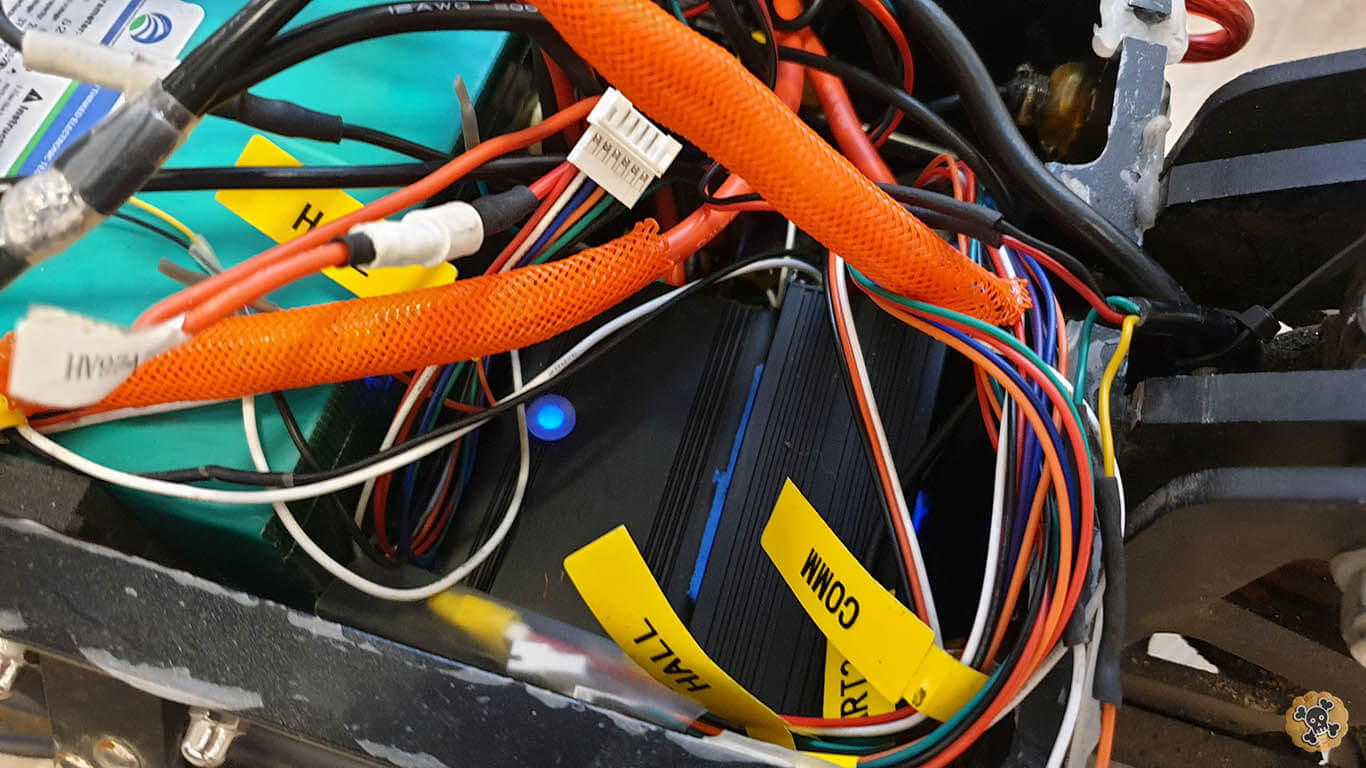
Check couple times all wiring and connect battery & controllers to dual loop key
!! Dual loop connection order !! . To power up your Ewheel , at first connect XT30 > wait 2sec > then XT90 connector > after it remove XT30 connector.
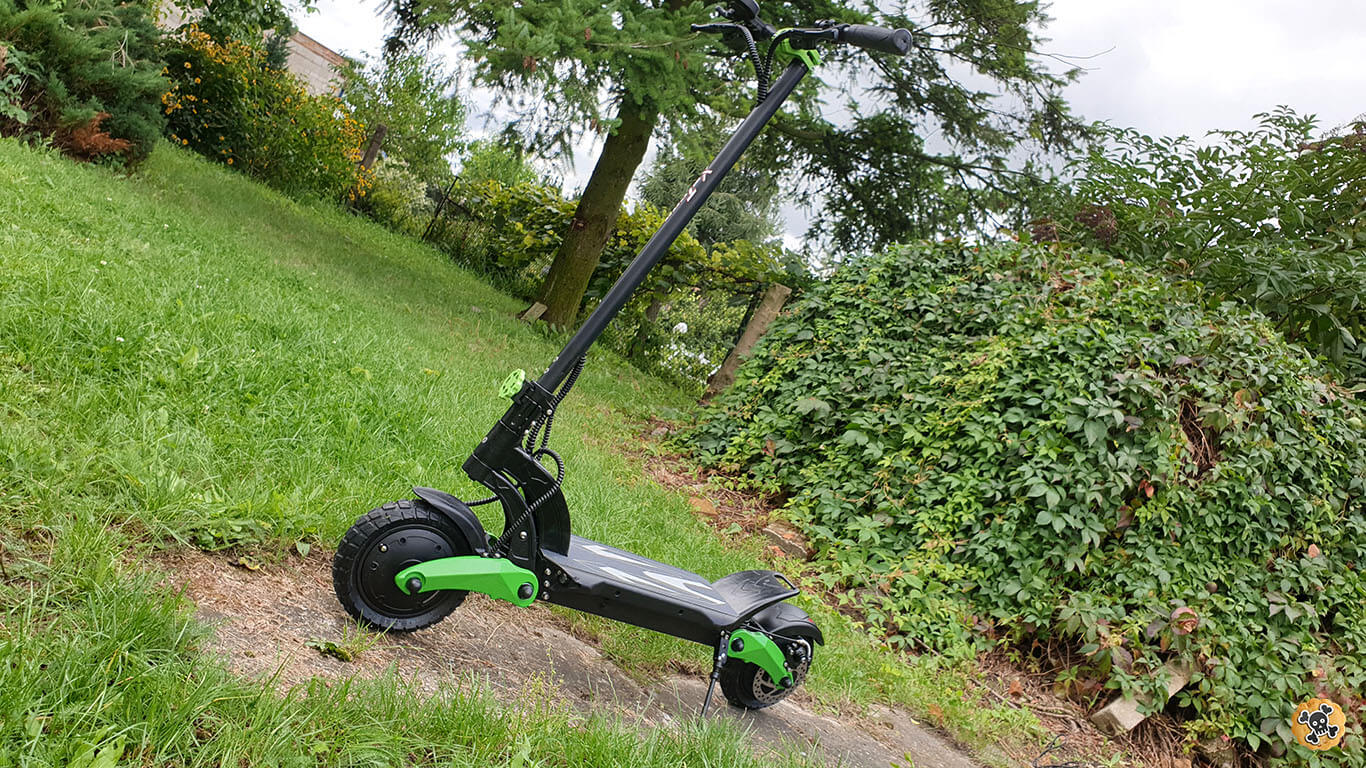
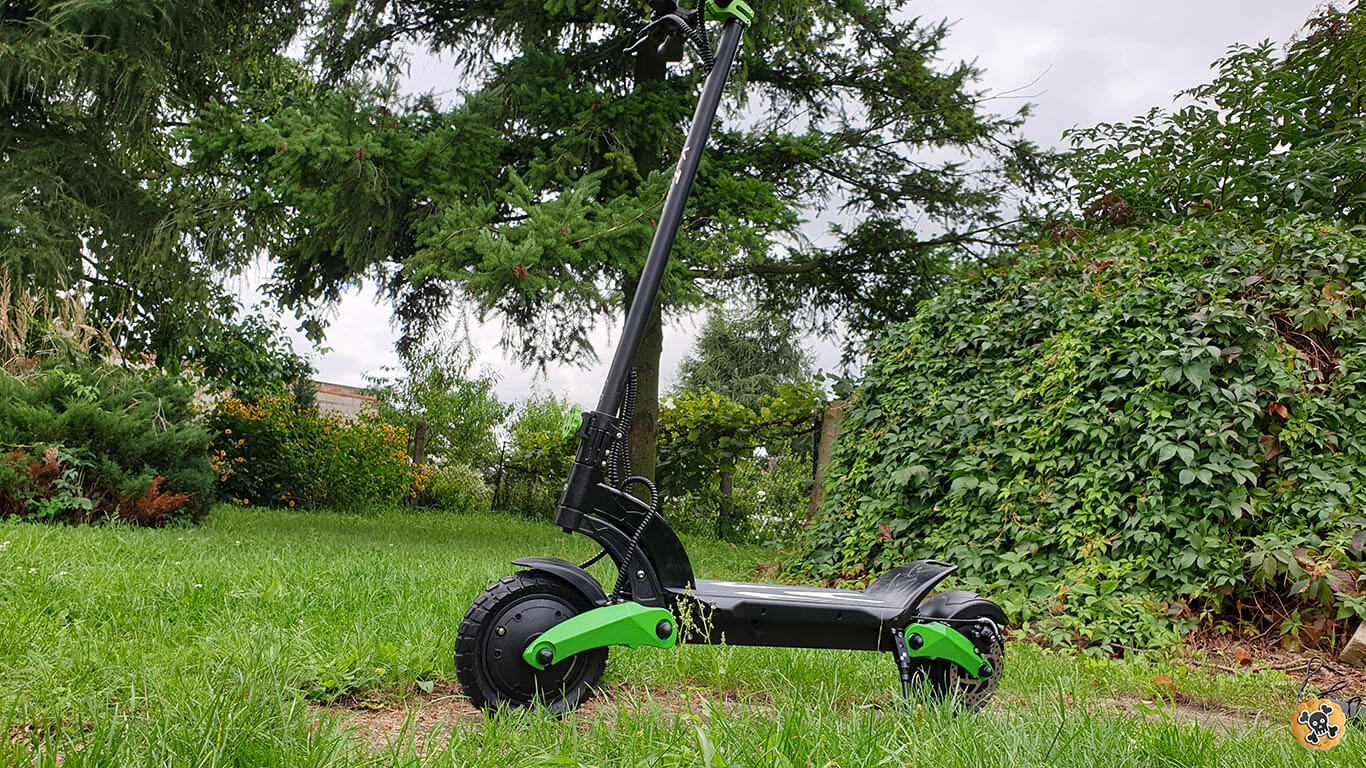
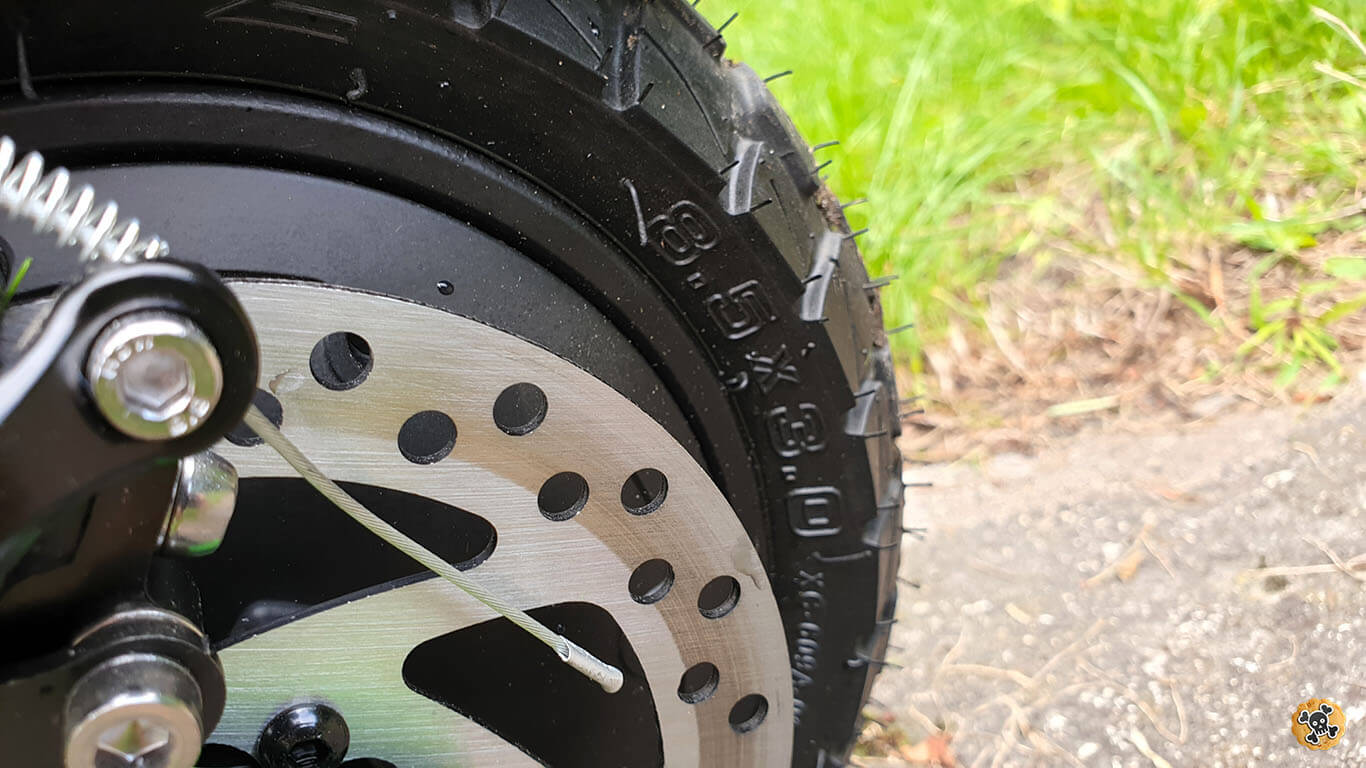
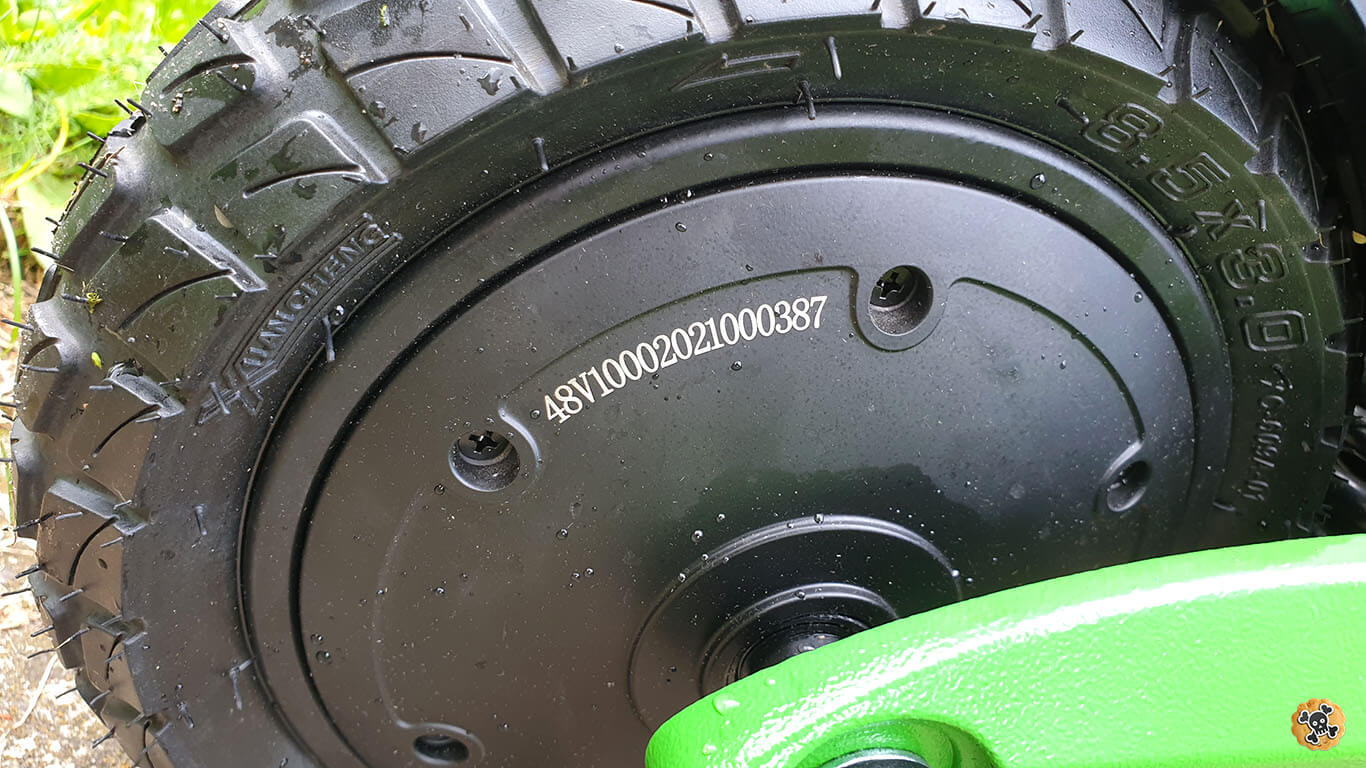
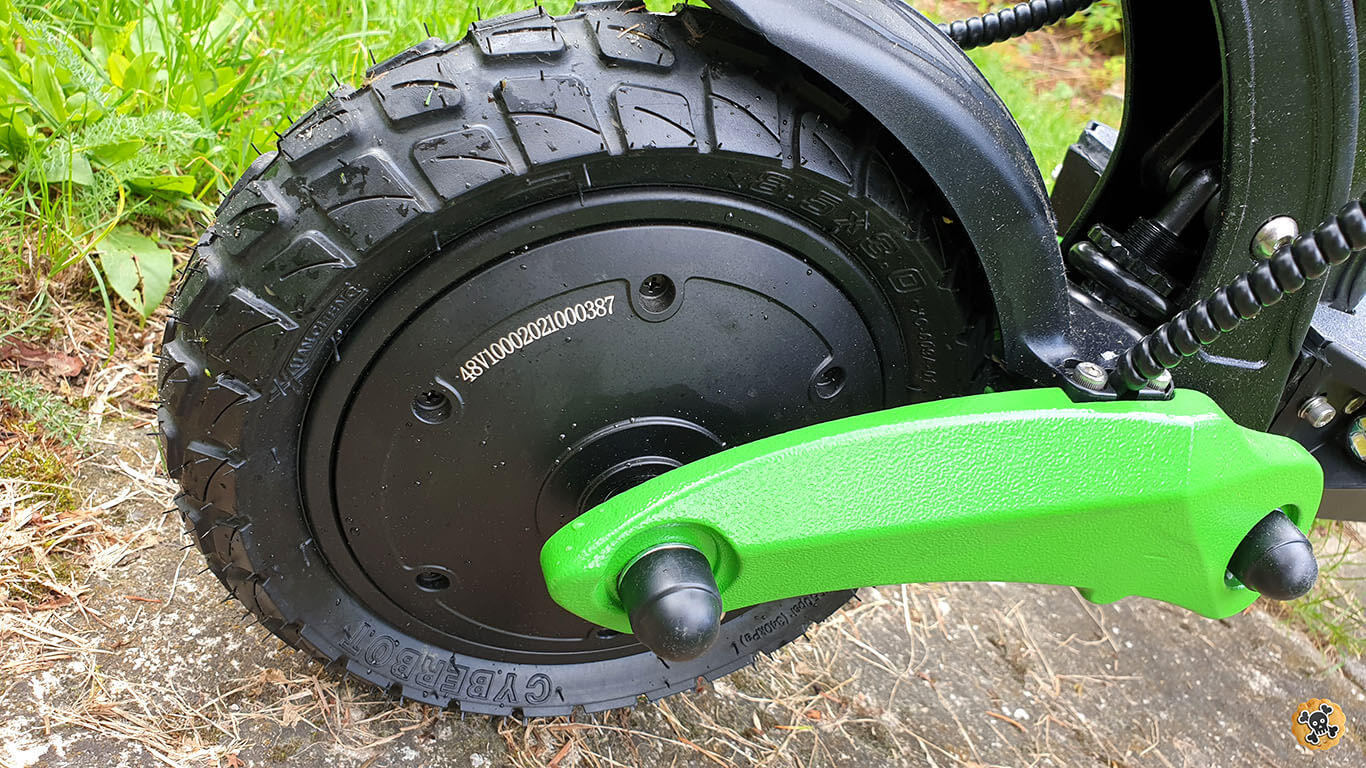
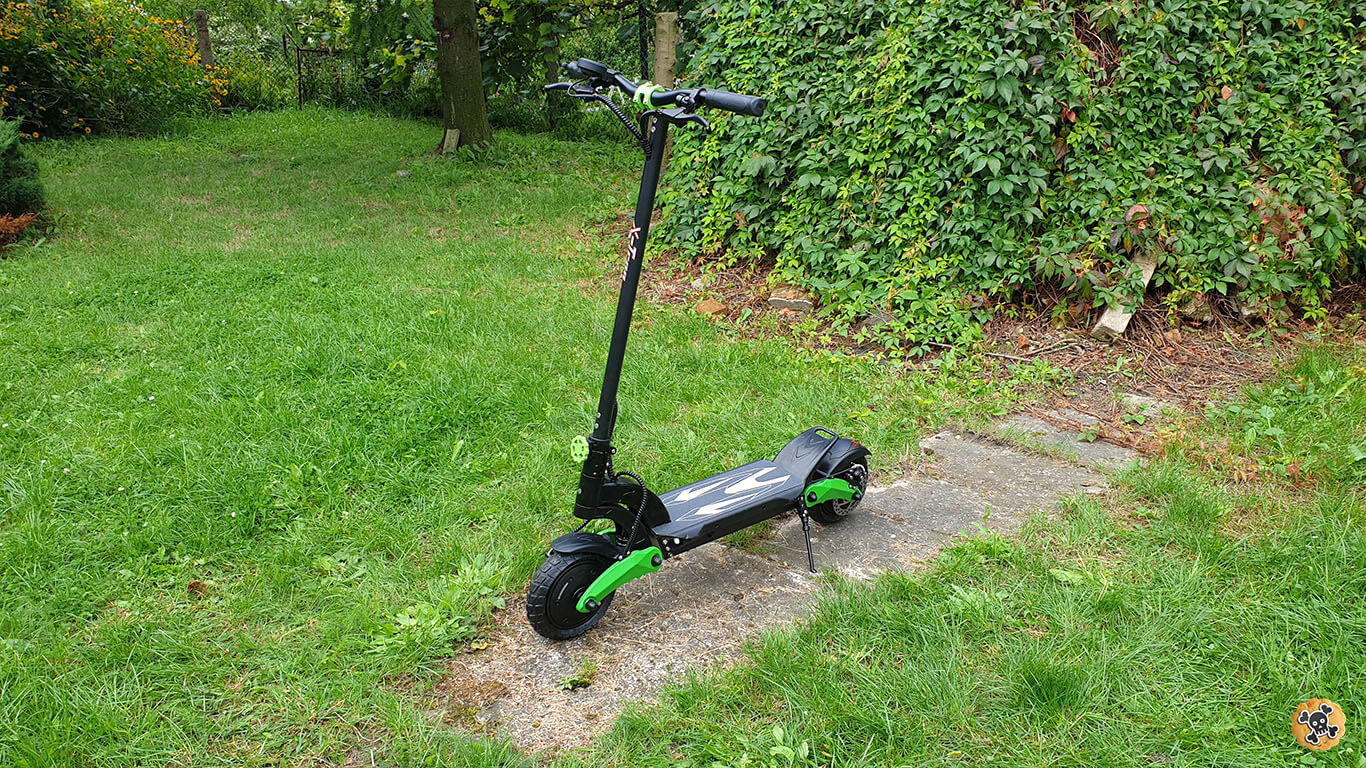
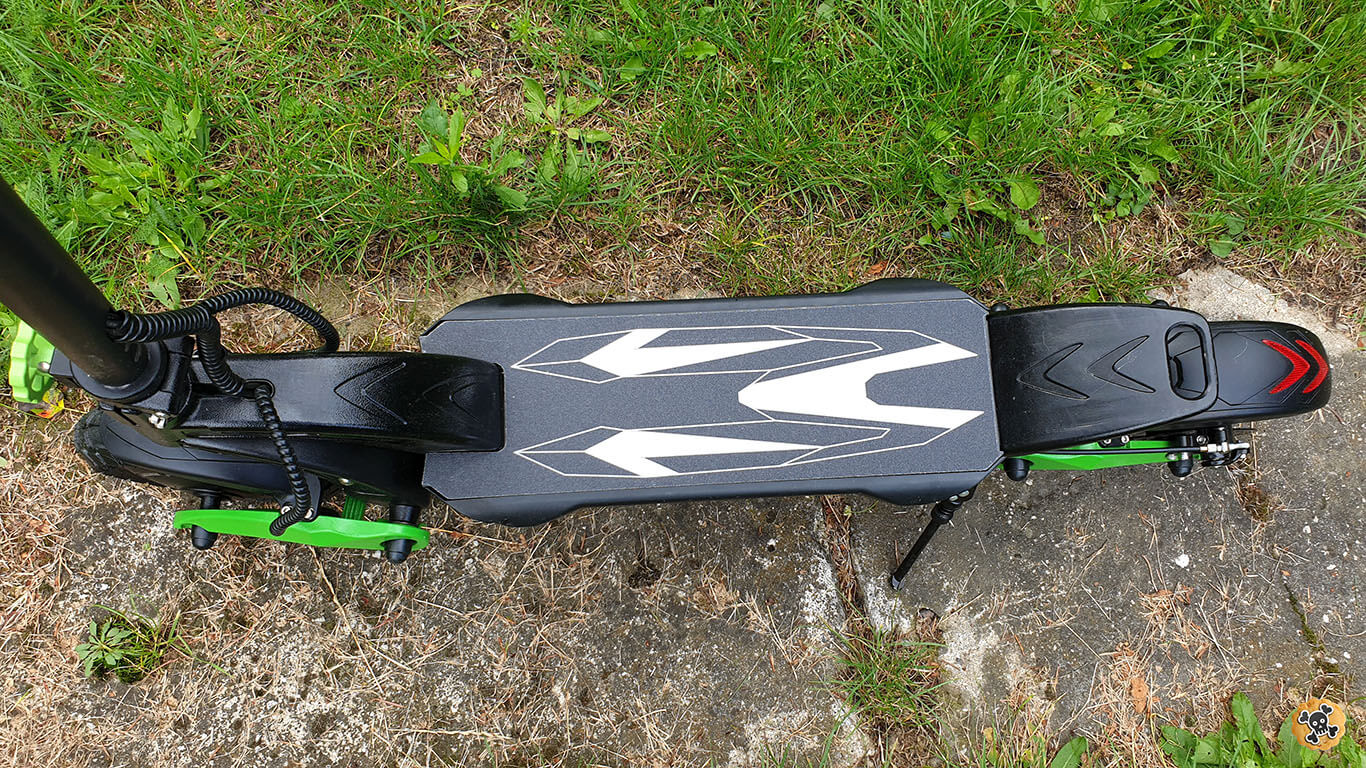
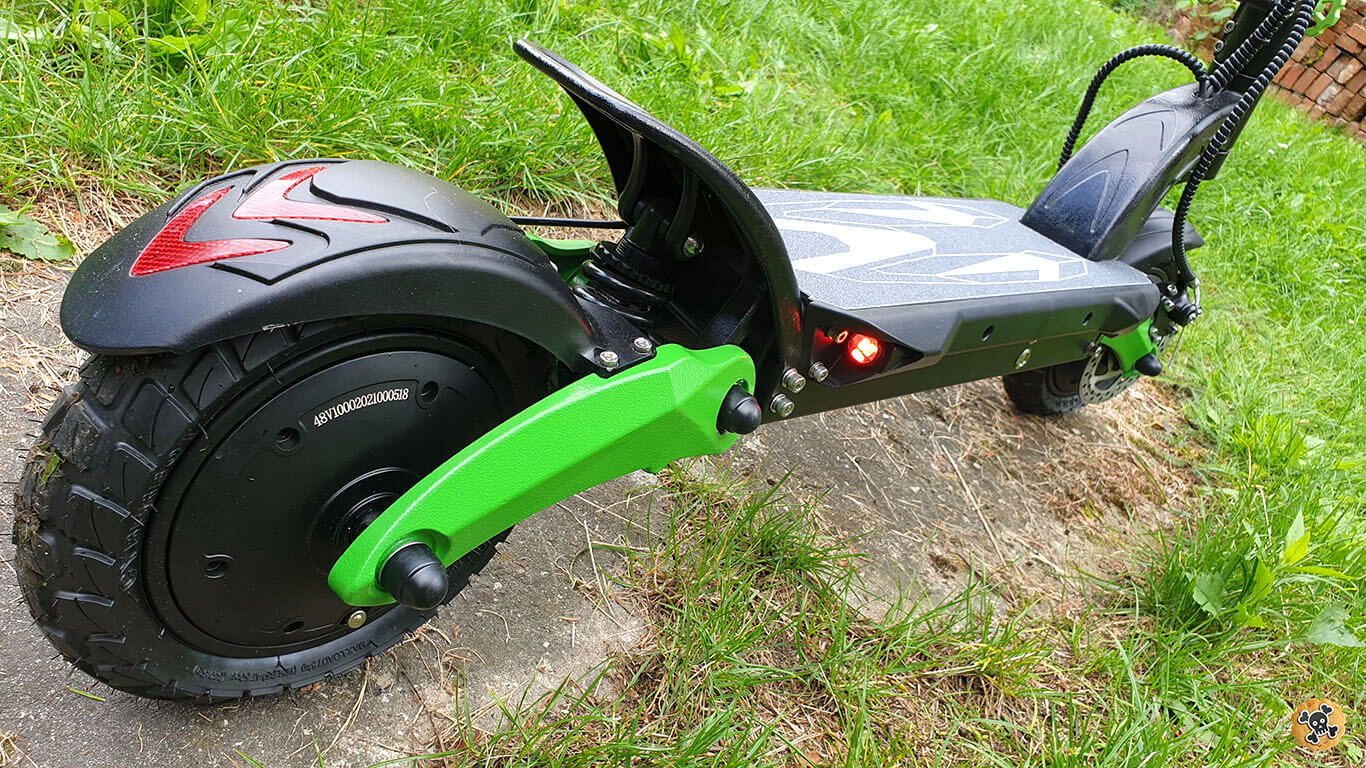
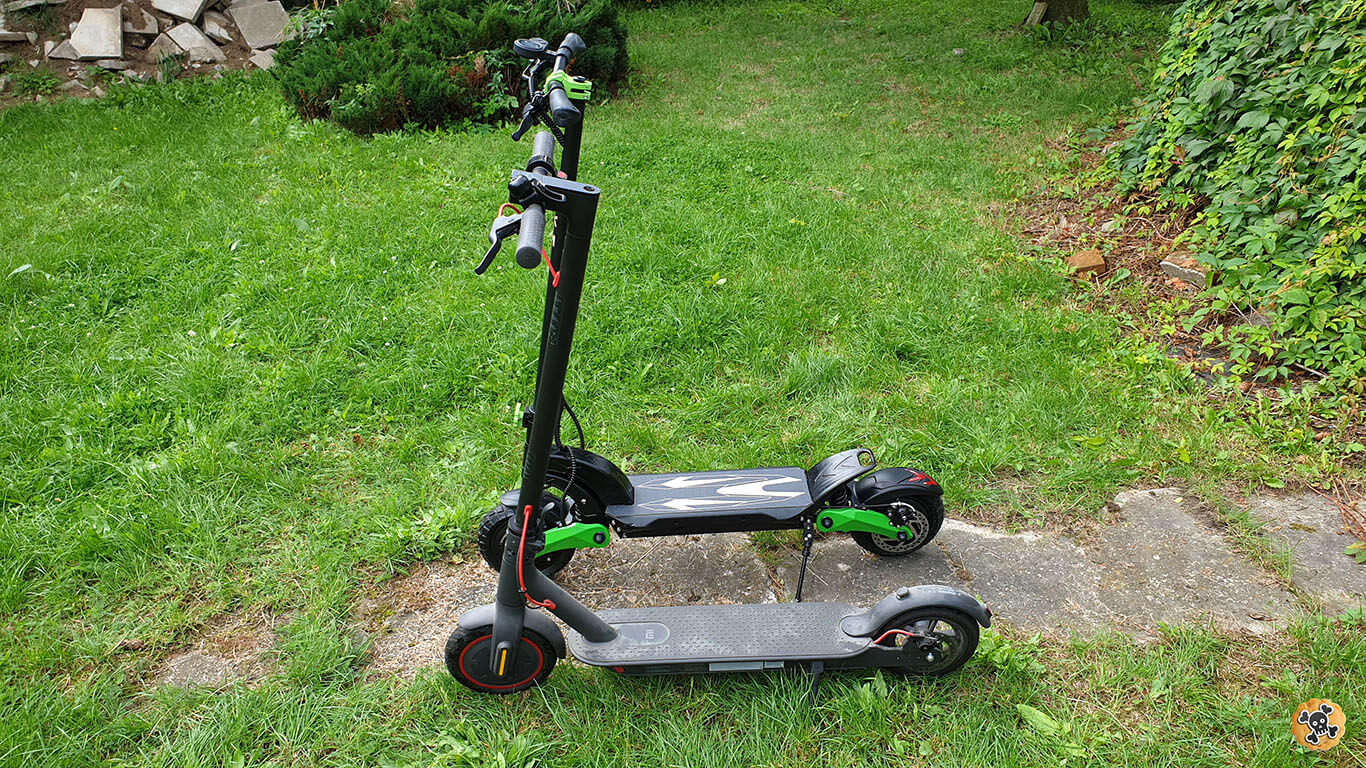
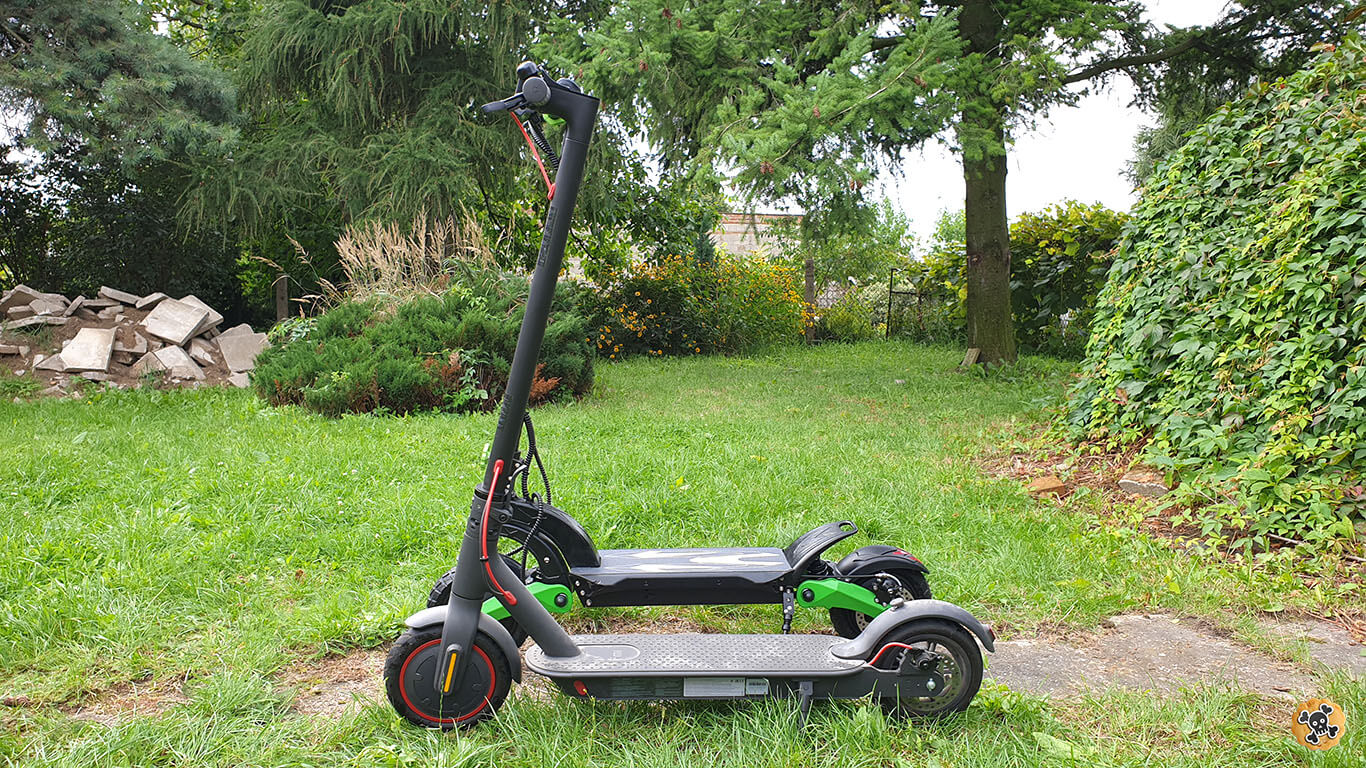
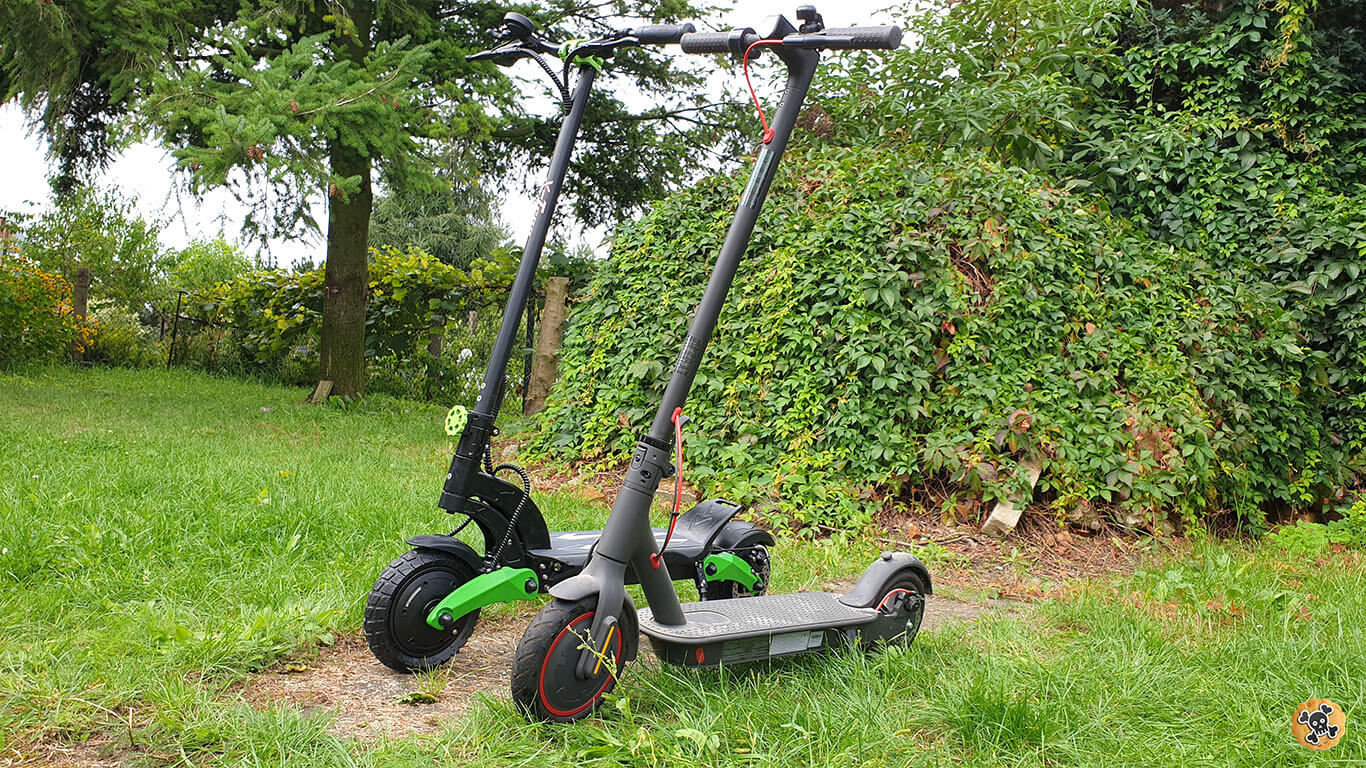
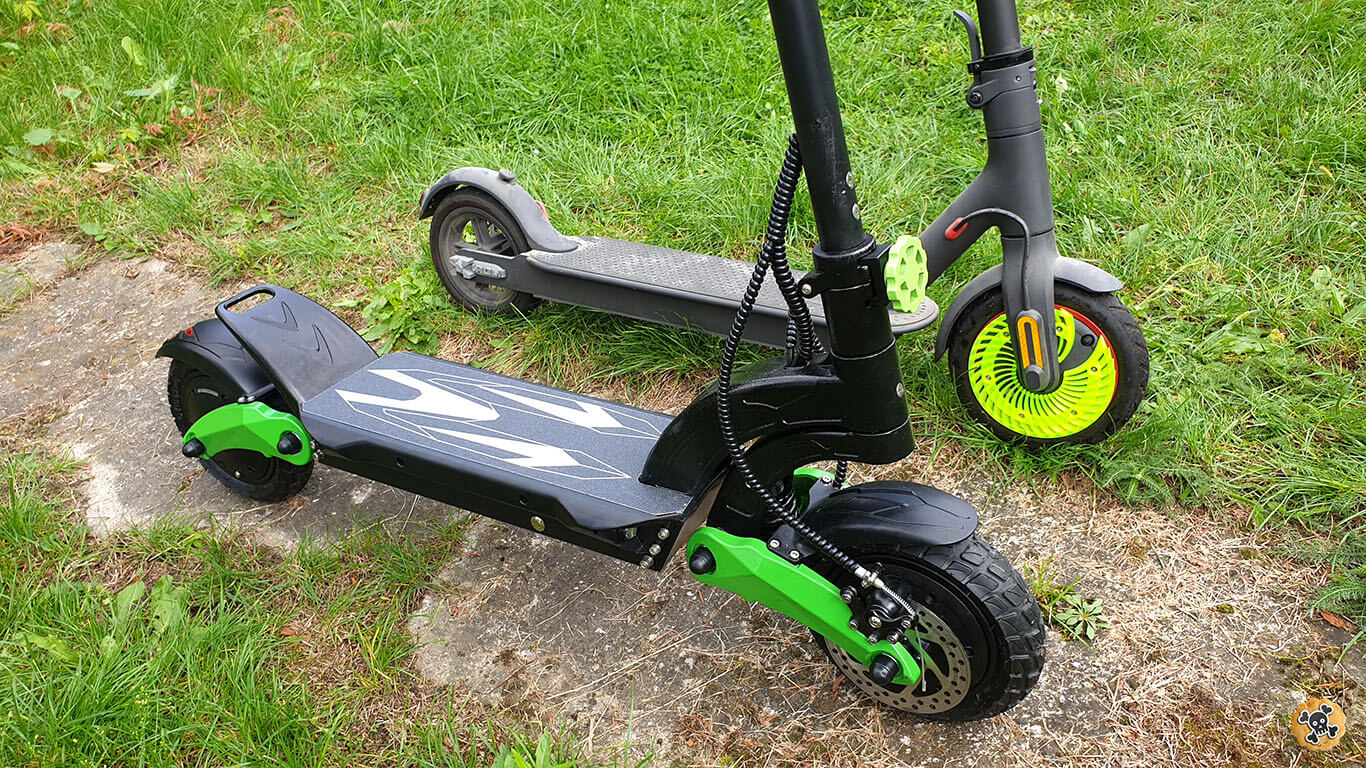
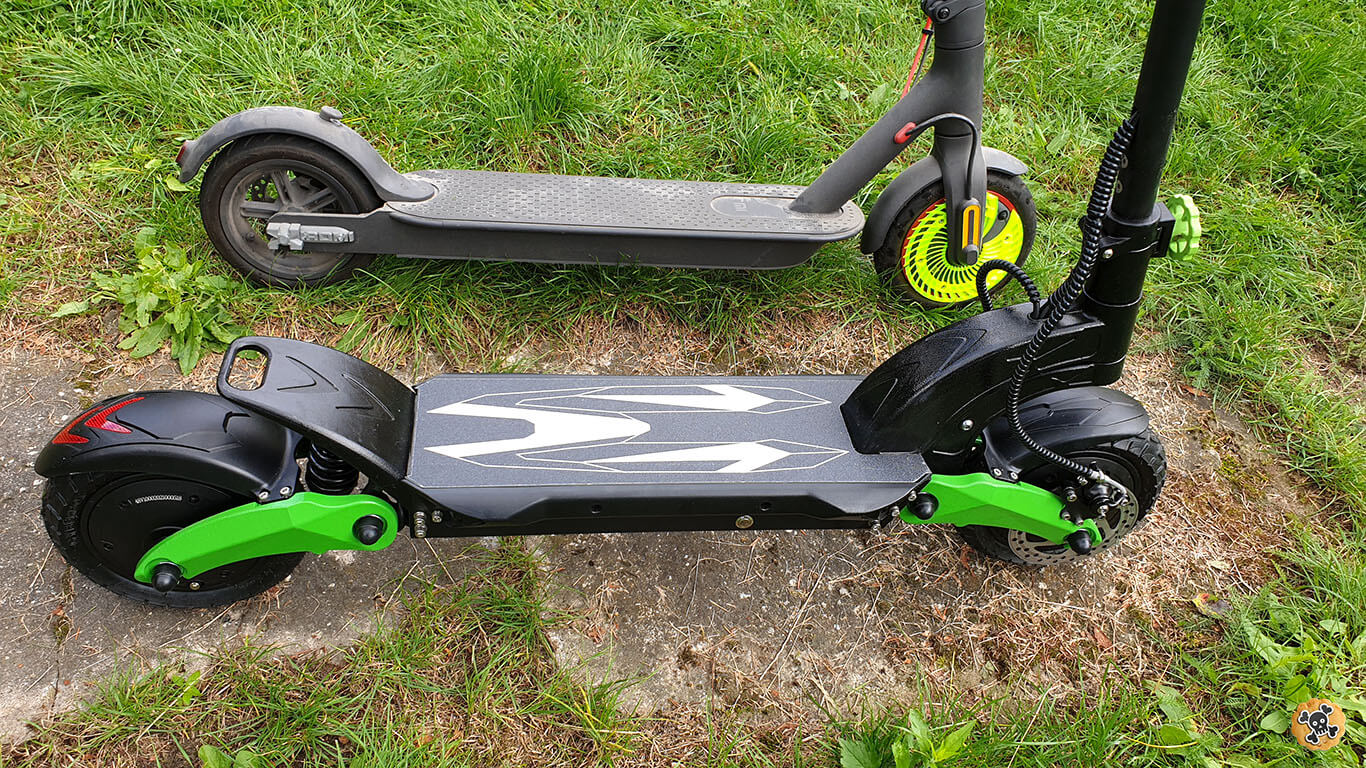
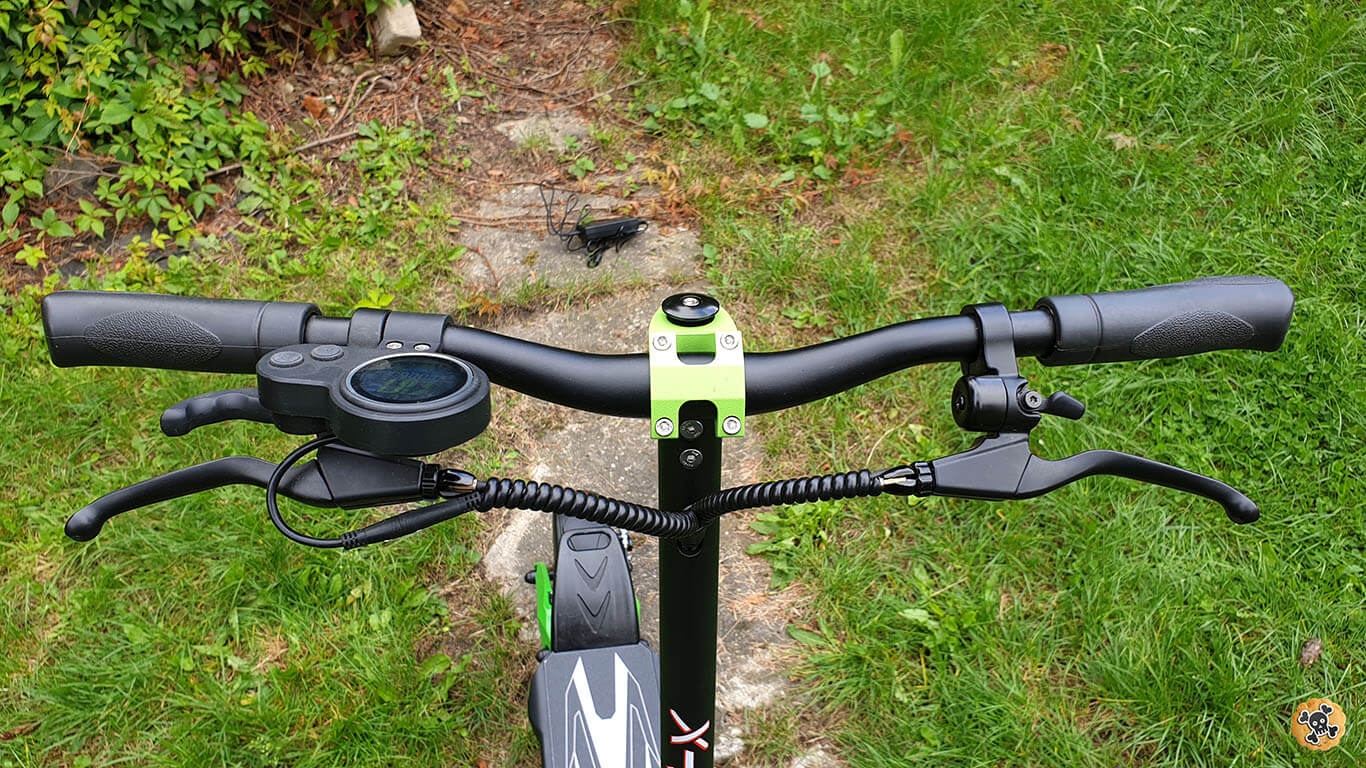
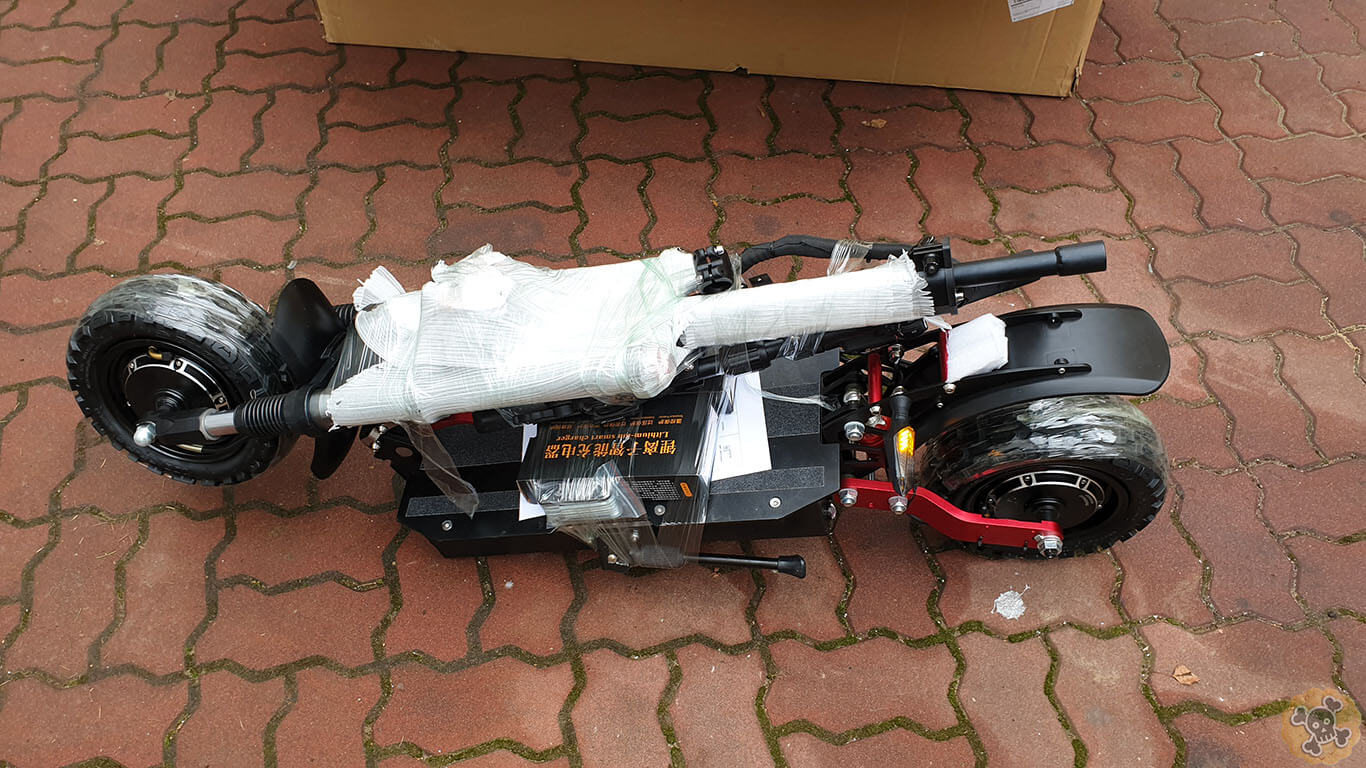
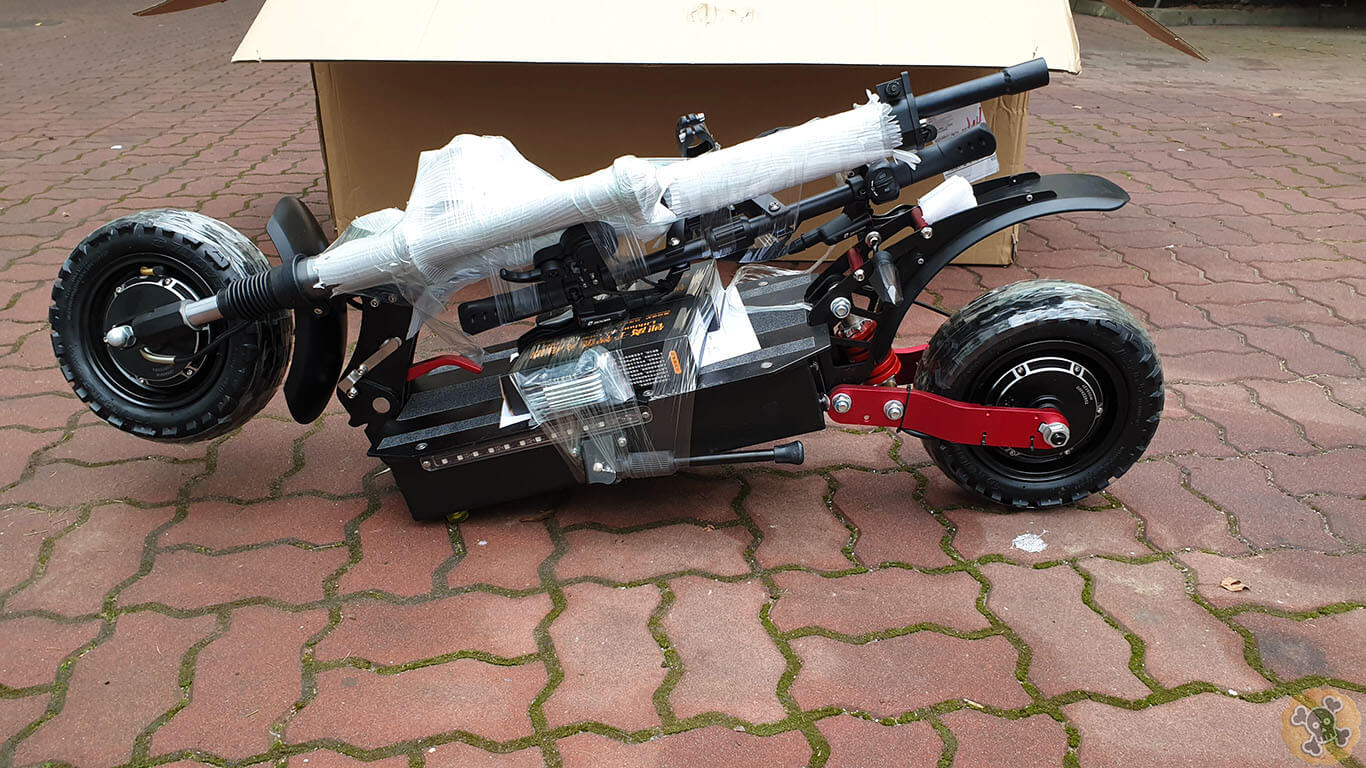
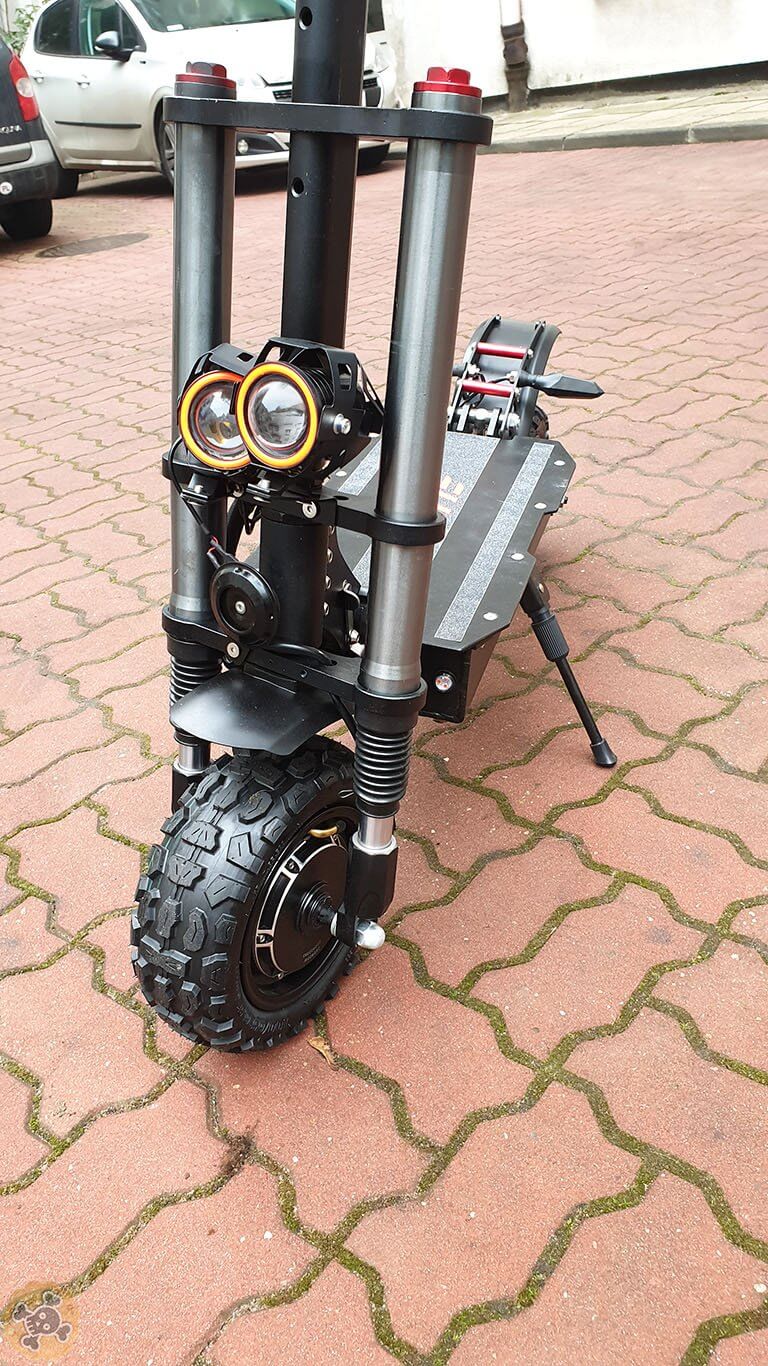
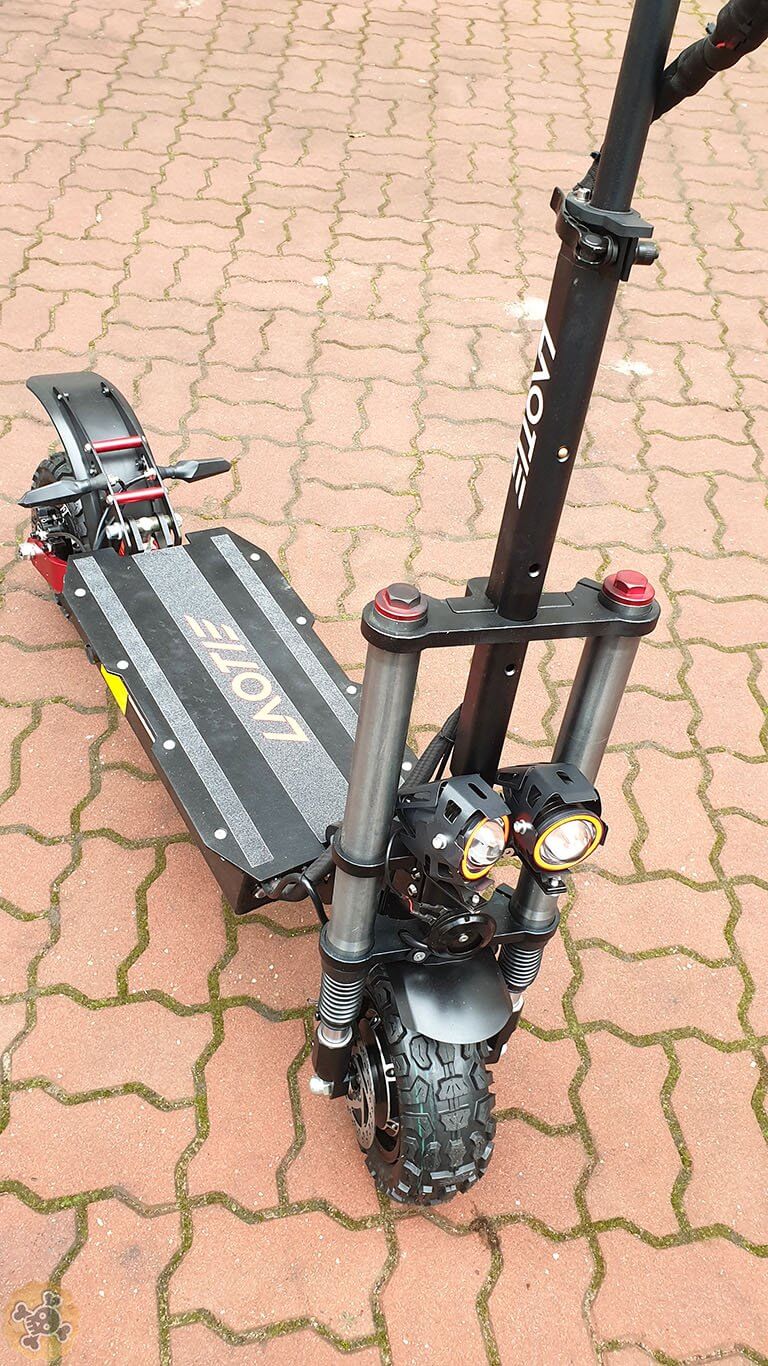
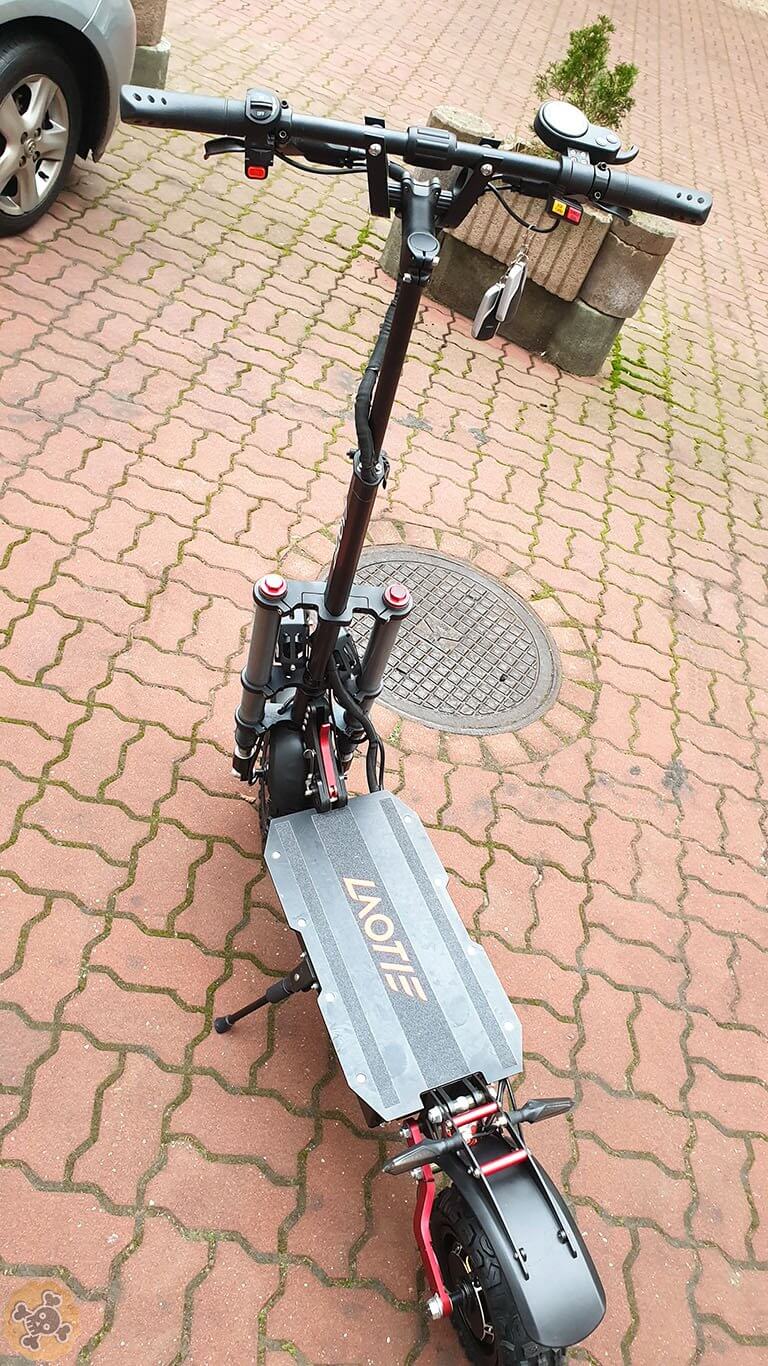
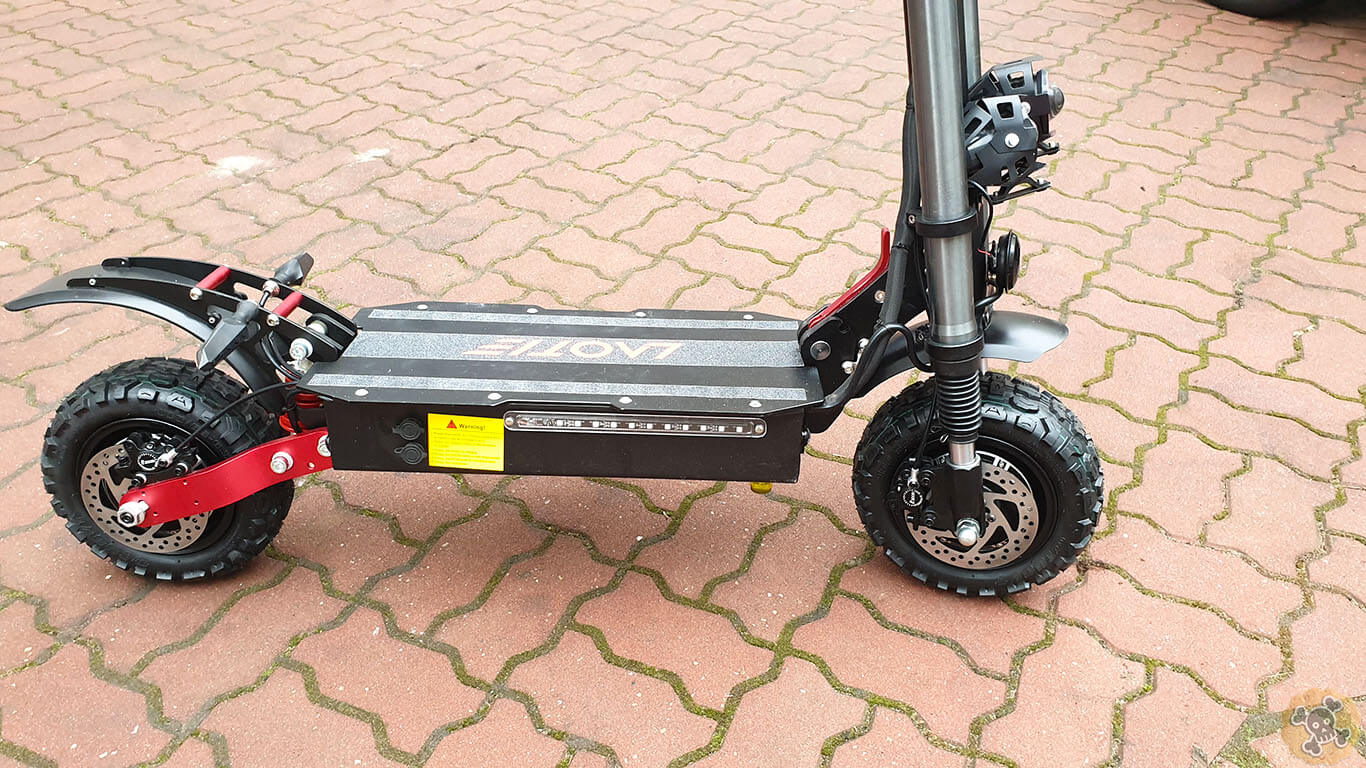
First look on CyberBot Mini ( X Tron 08 ) and you can san see motors which looks like Xiaomi ones and the best Escoot suspension so Swing Arm System . Scoot is little bit bigger than M365 but is not very heavy , even if we consider it’s 2wd with big battery 48V 20AH.
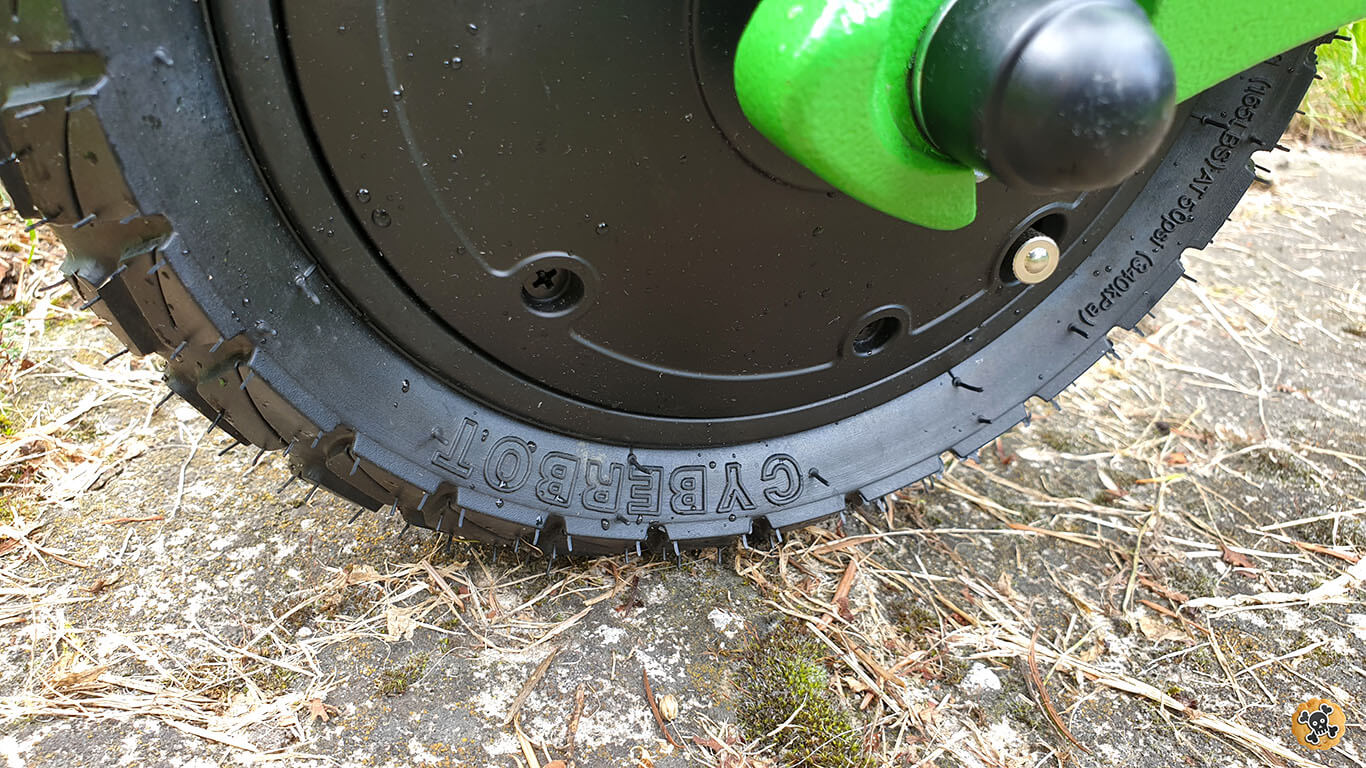
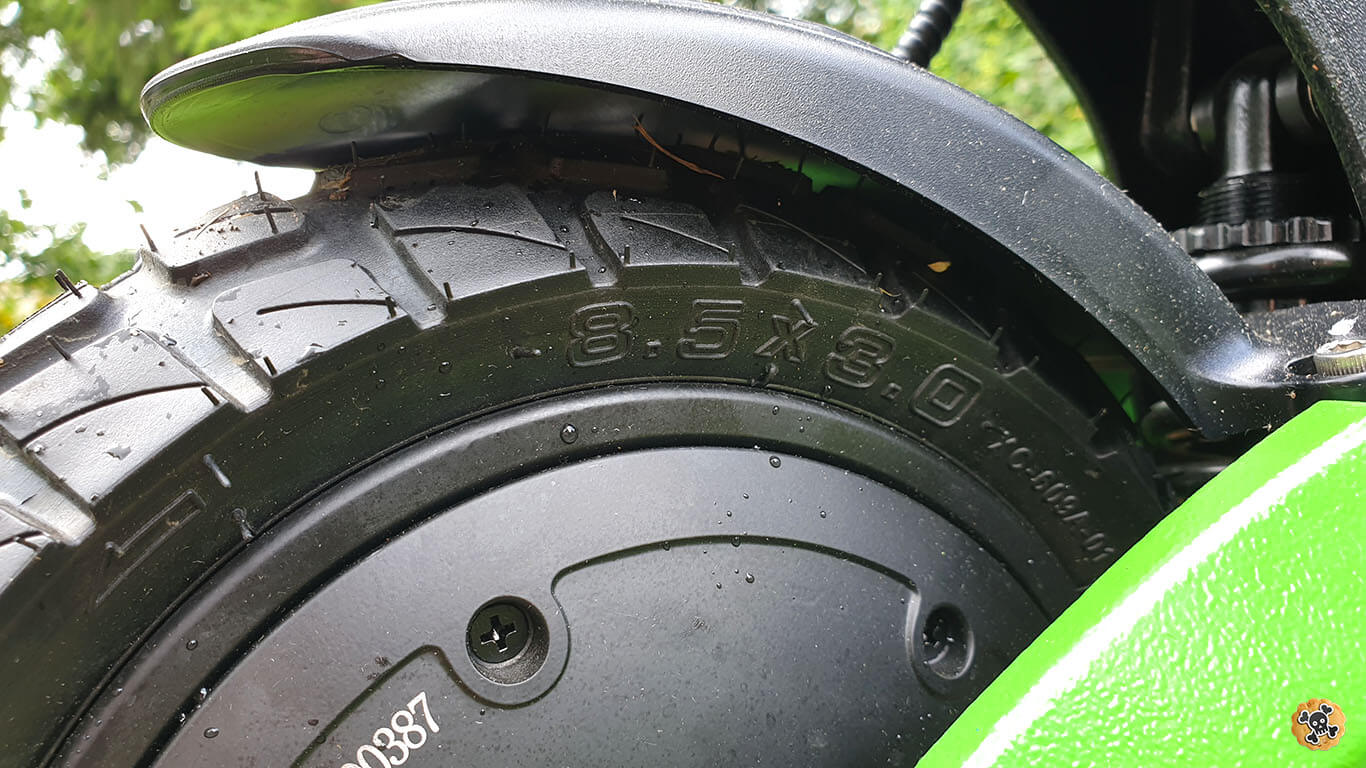
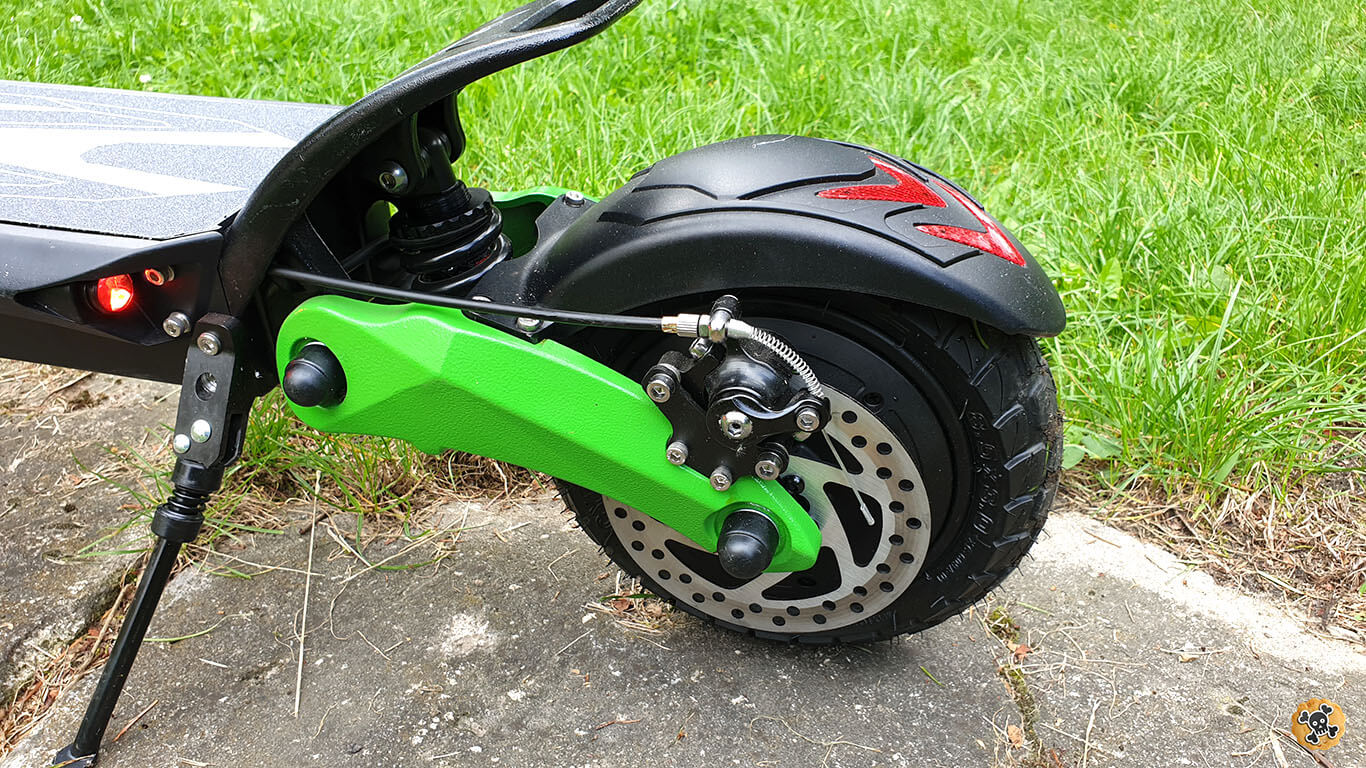
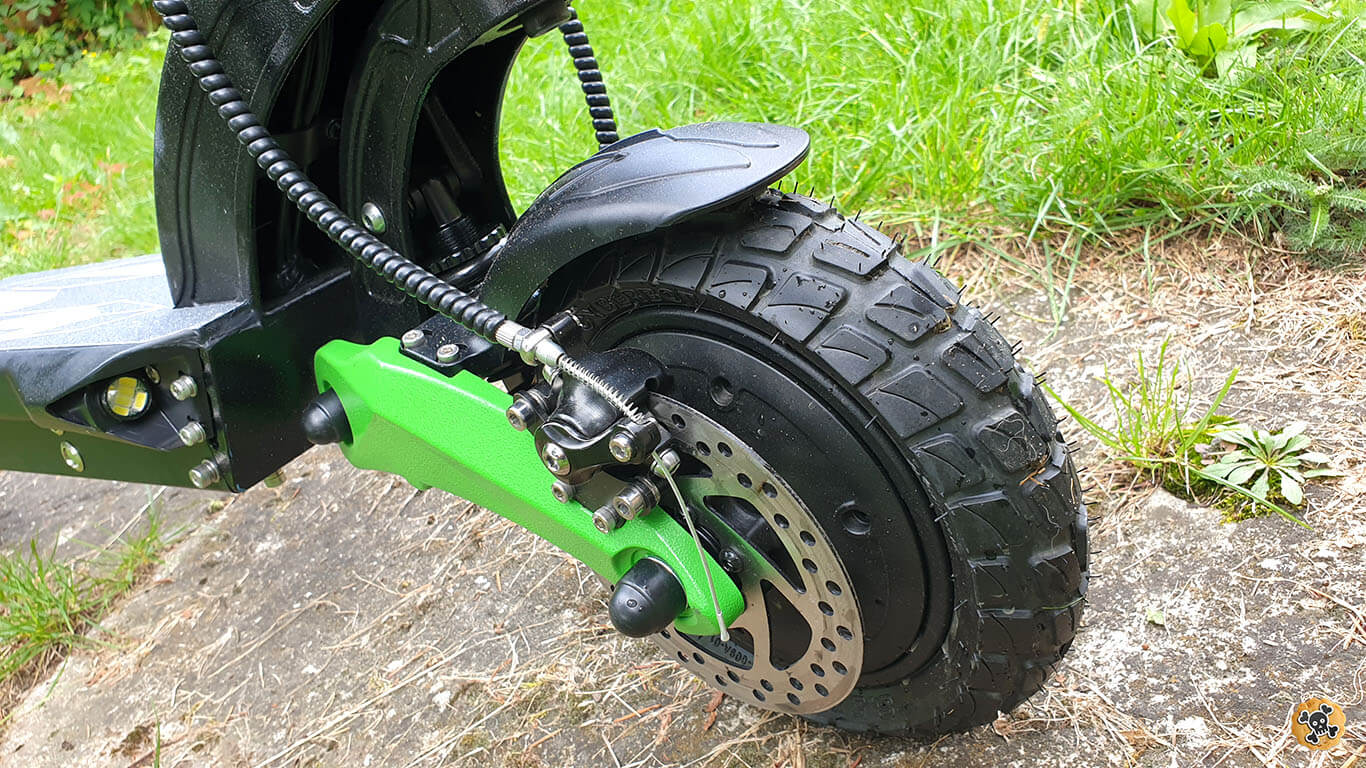
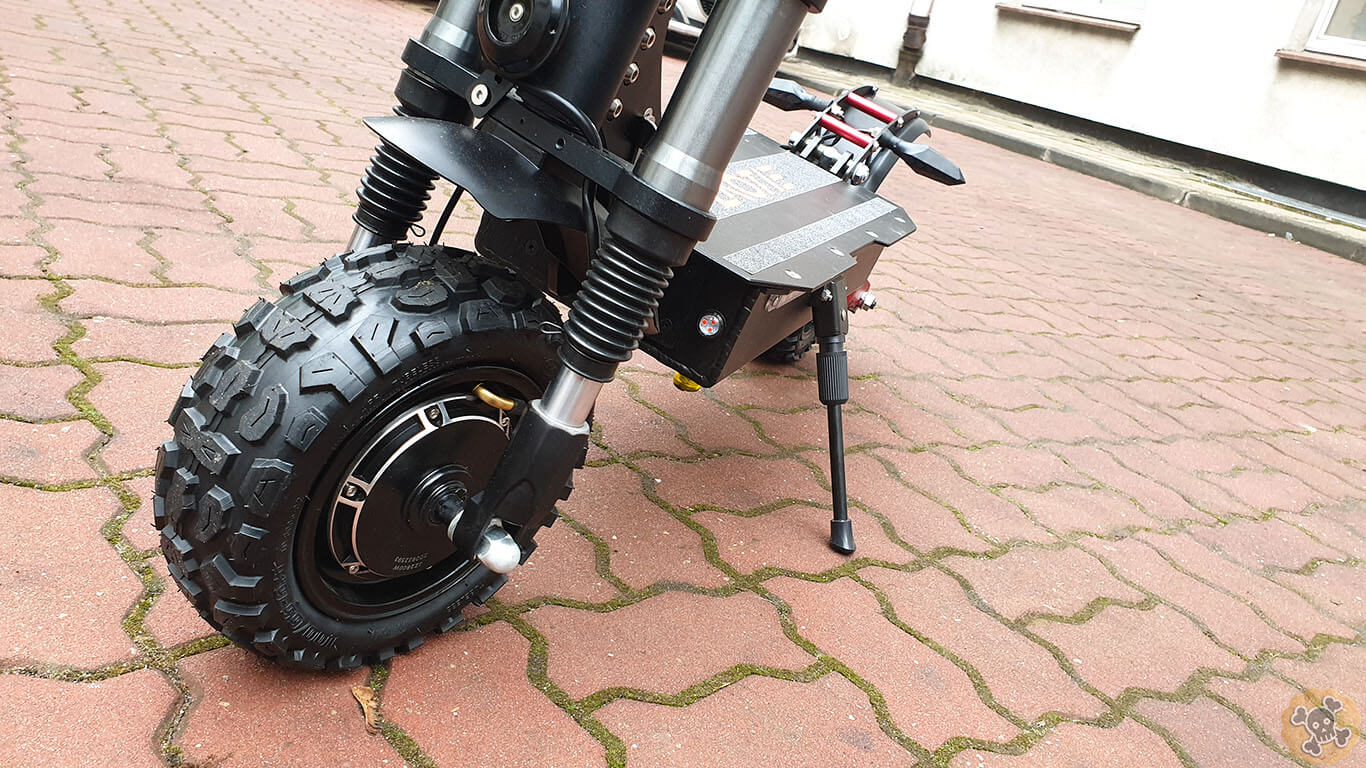
I am pretty sure motors could handle even 1200W peak, looks like M365 pro ones . First punch and you can feel great power out of the box, ofcourse 2WD make it next lvl compare to stock Xiaomi. Tires are 10″, looks way better than stock Xiaomi ones 😉 . mechanical brakes are Not bad But still not the best .
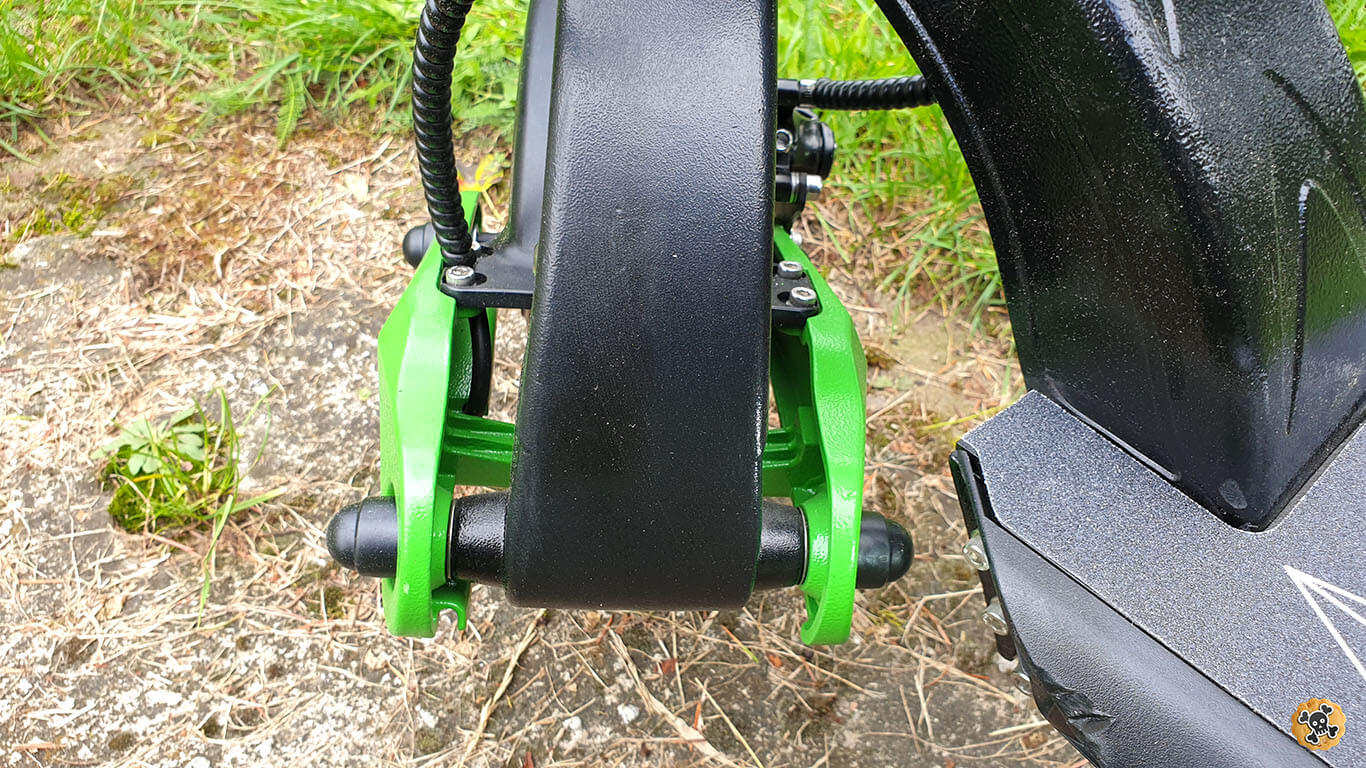
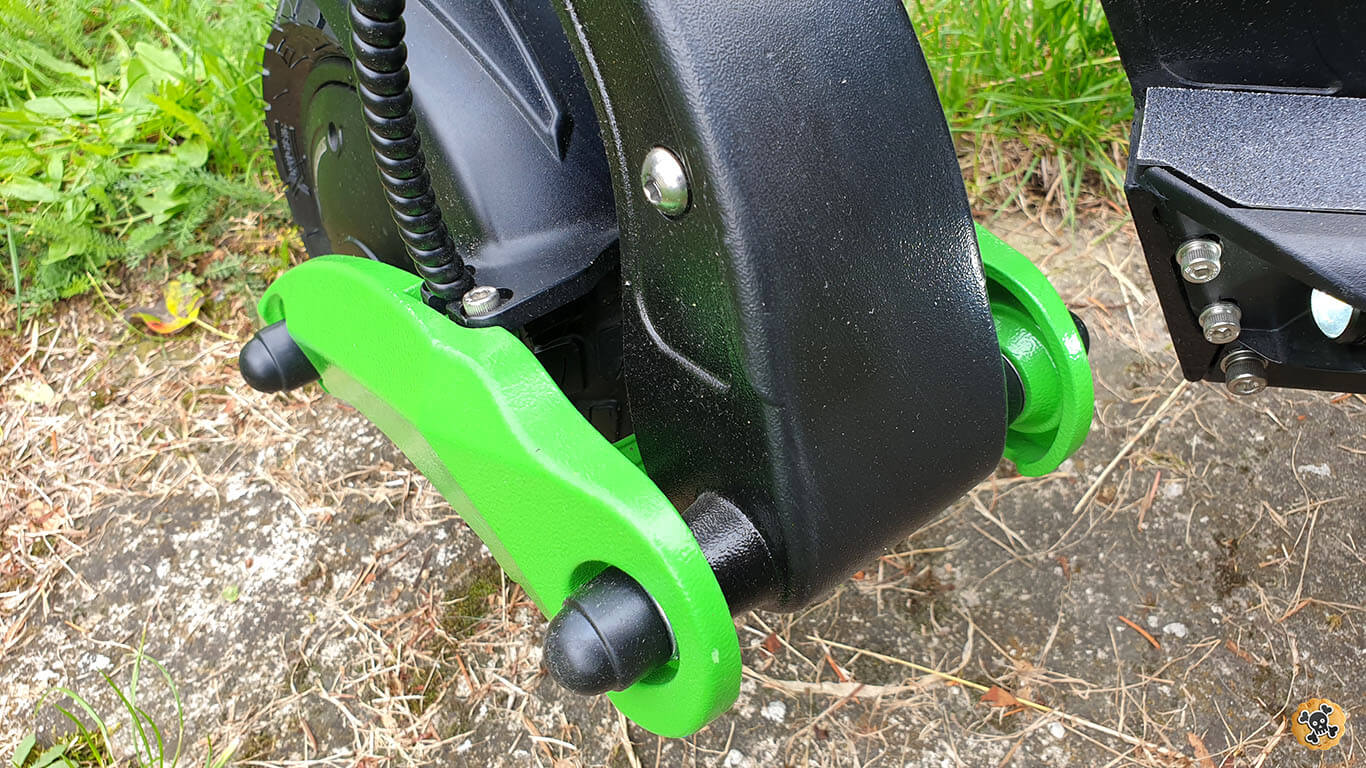
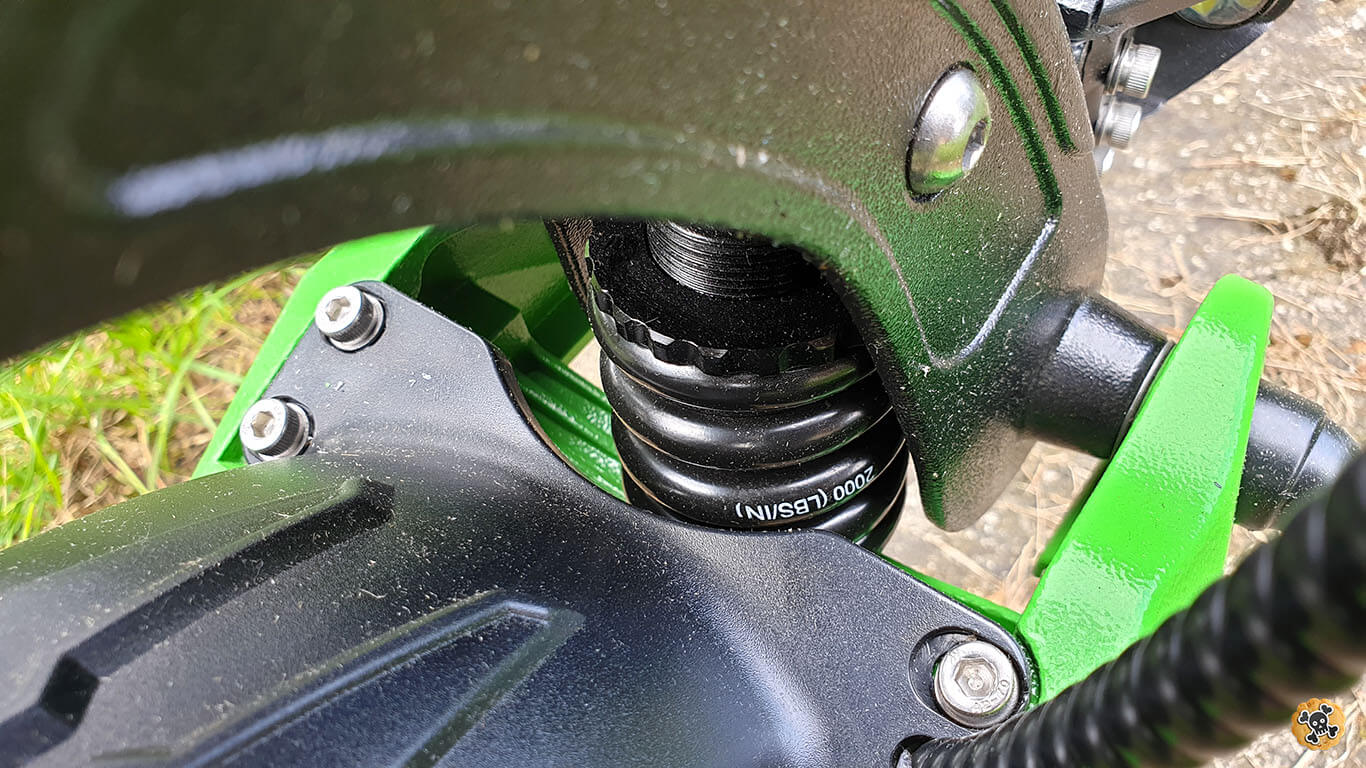
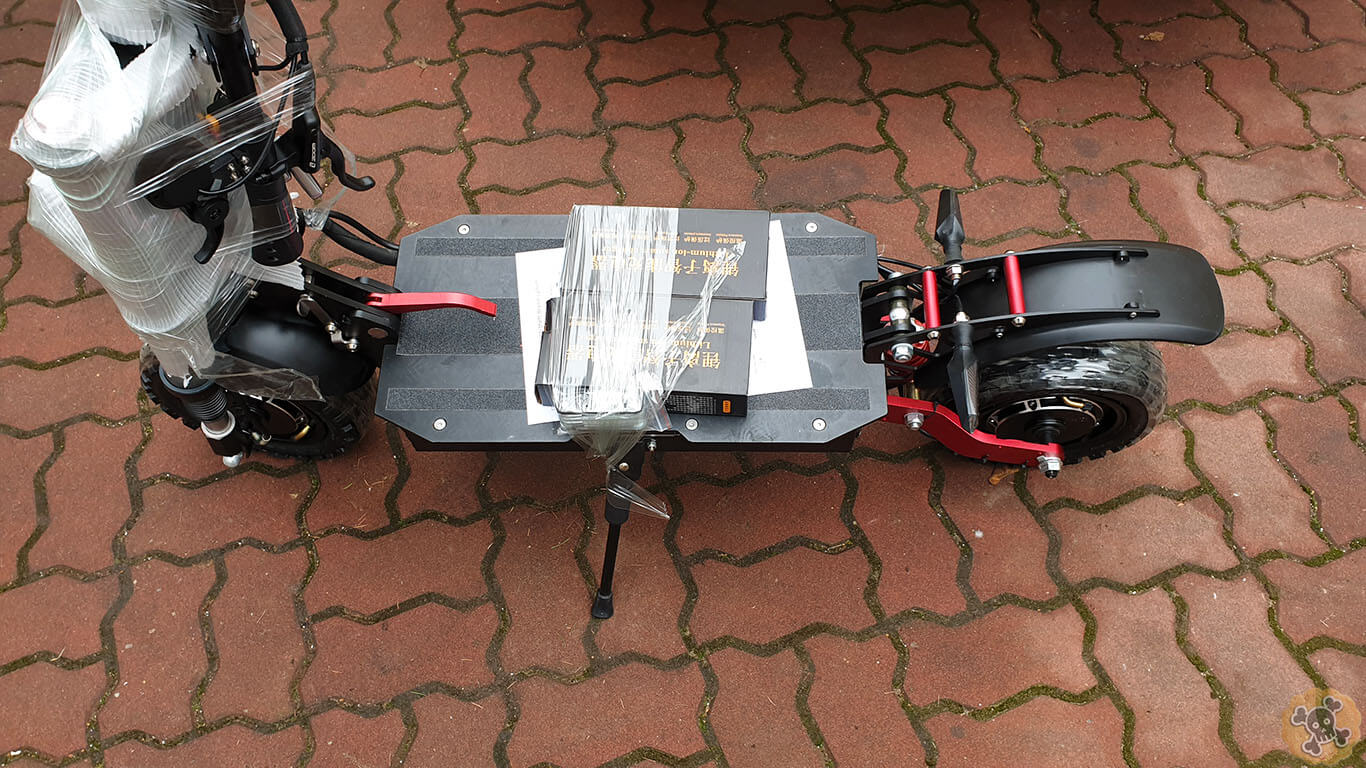
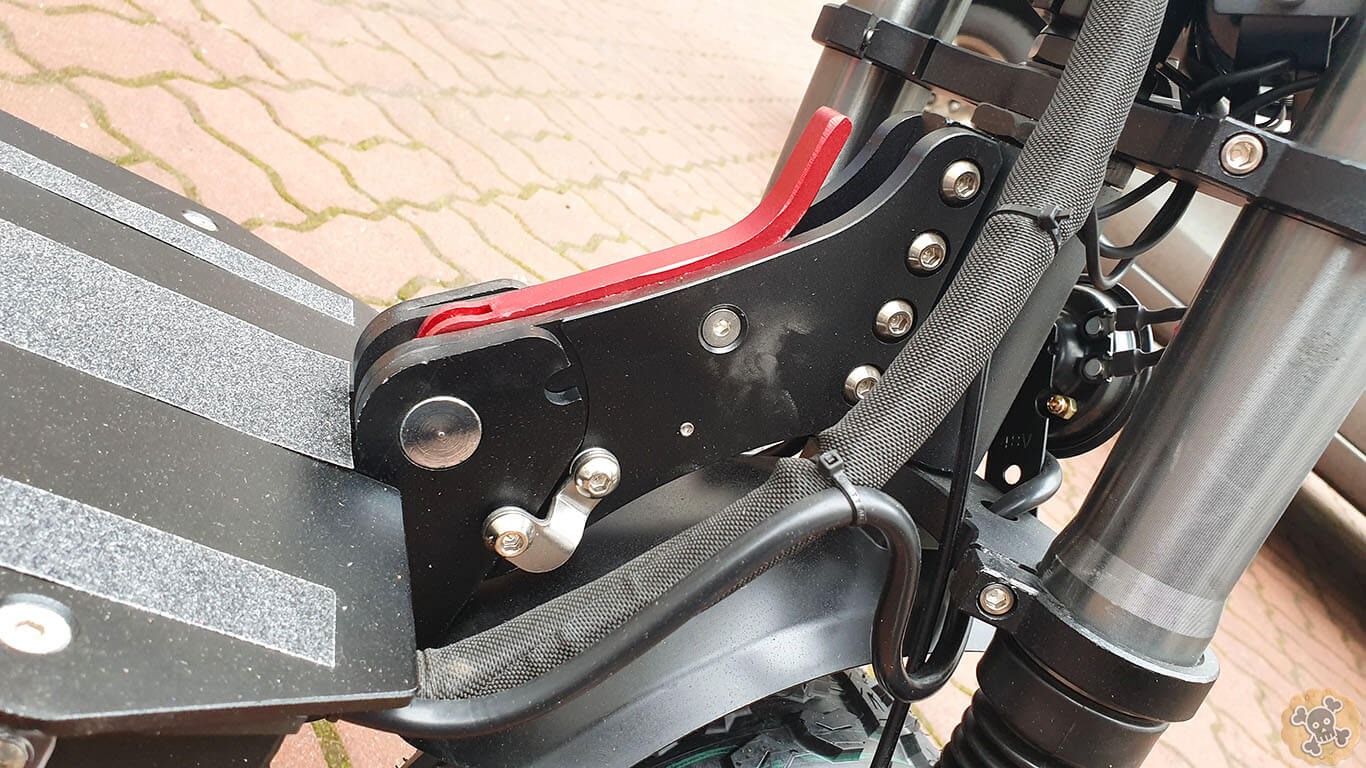
Frame looks actullay awesome, seem to be quite rigid so I have no complains about it ( at least so far ). Suspension is one of the best , actually this is main reason why i decided to get this scoot. Crazy soft and comfy to use, also we got KS EXA shocks with spring 2000lbs so it’s even better.
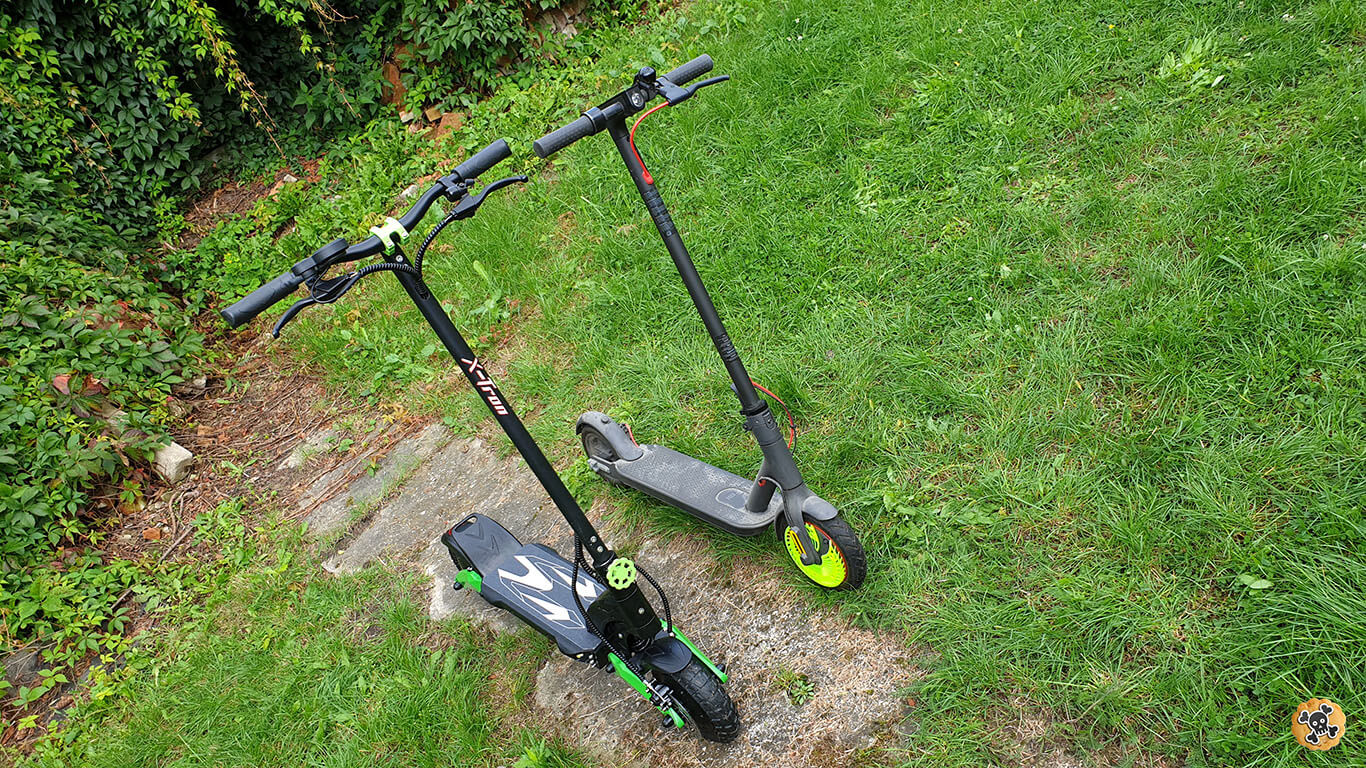
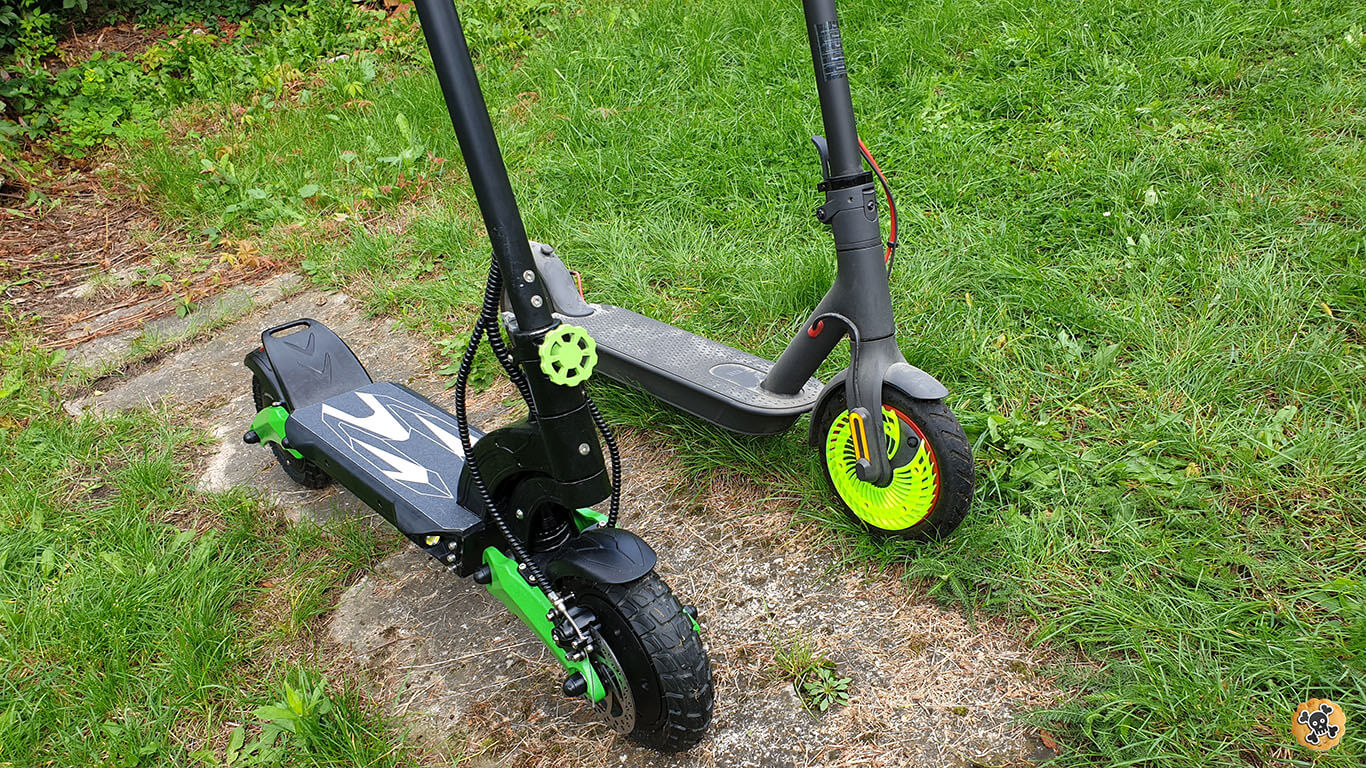
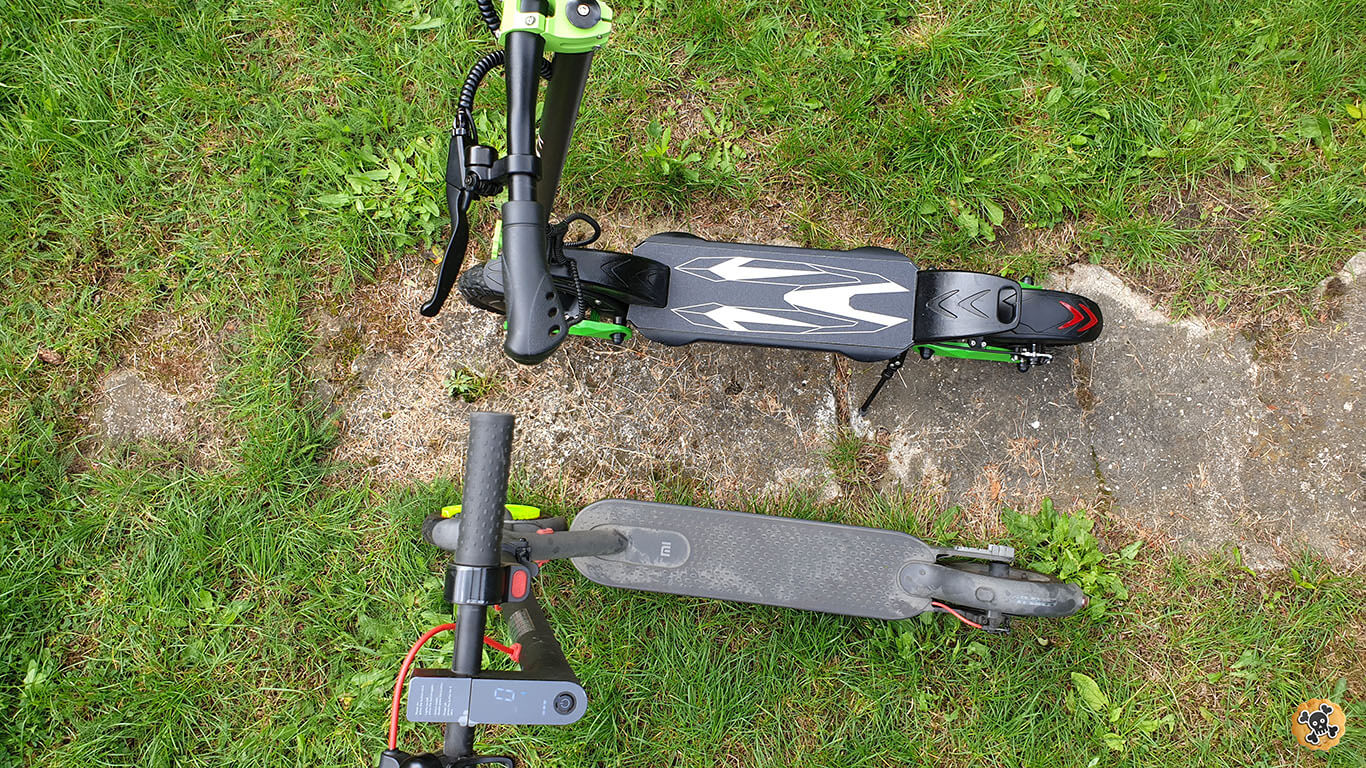
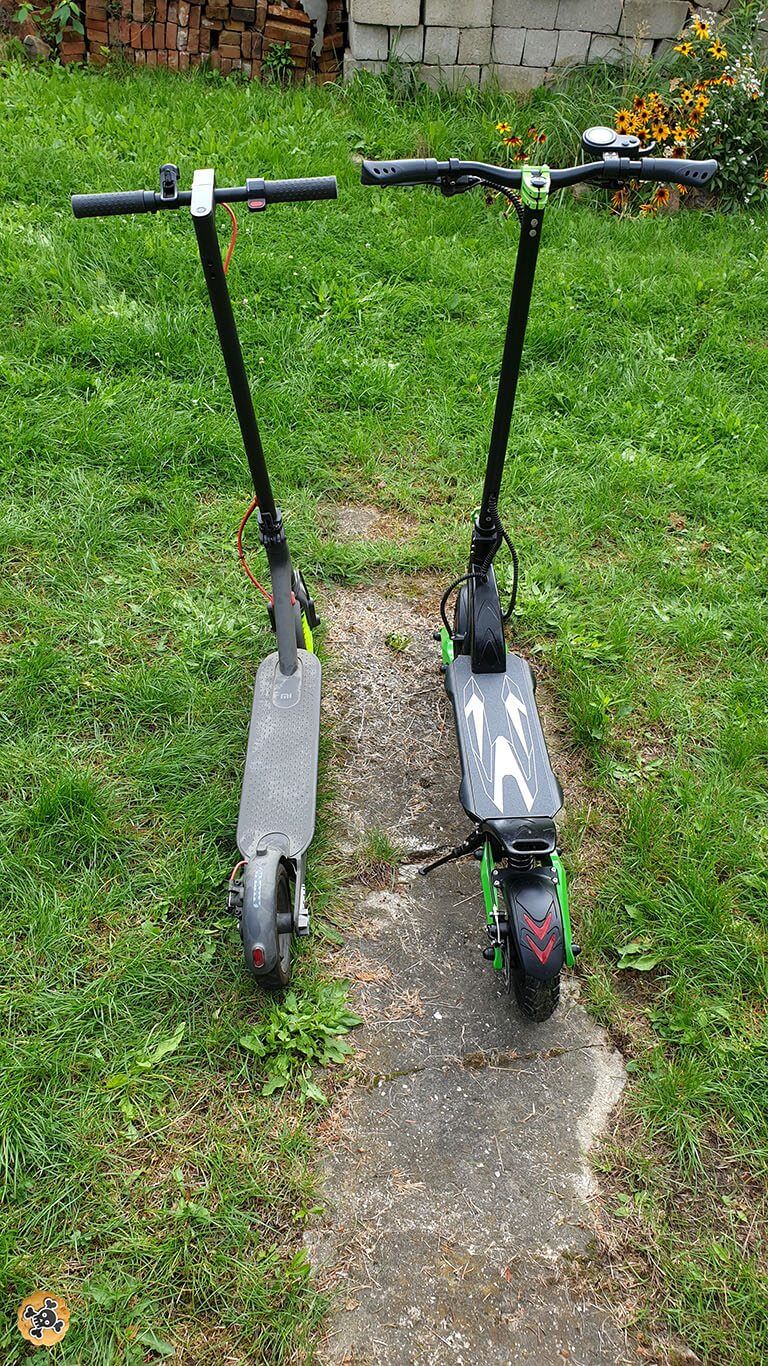
M365 Pro vs CyberBot Mini
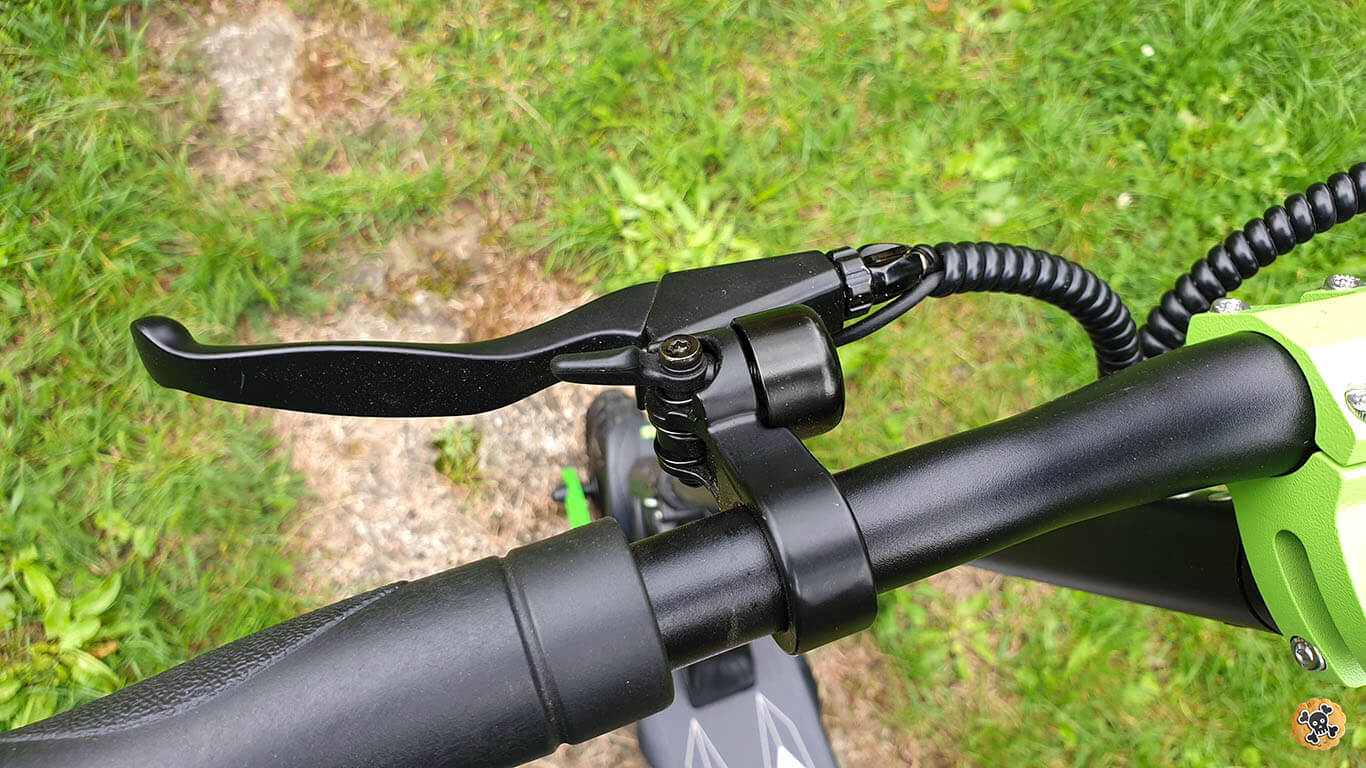
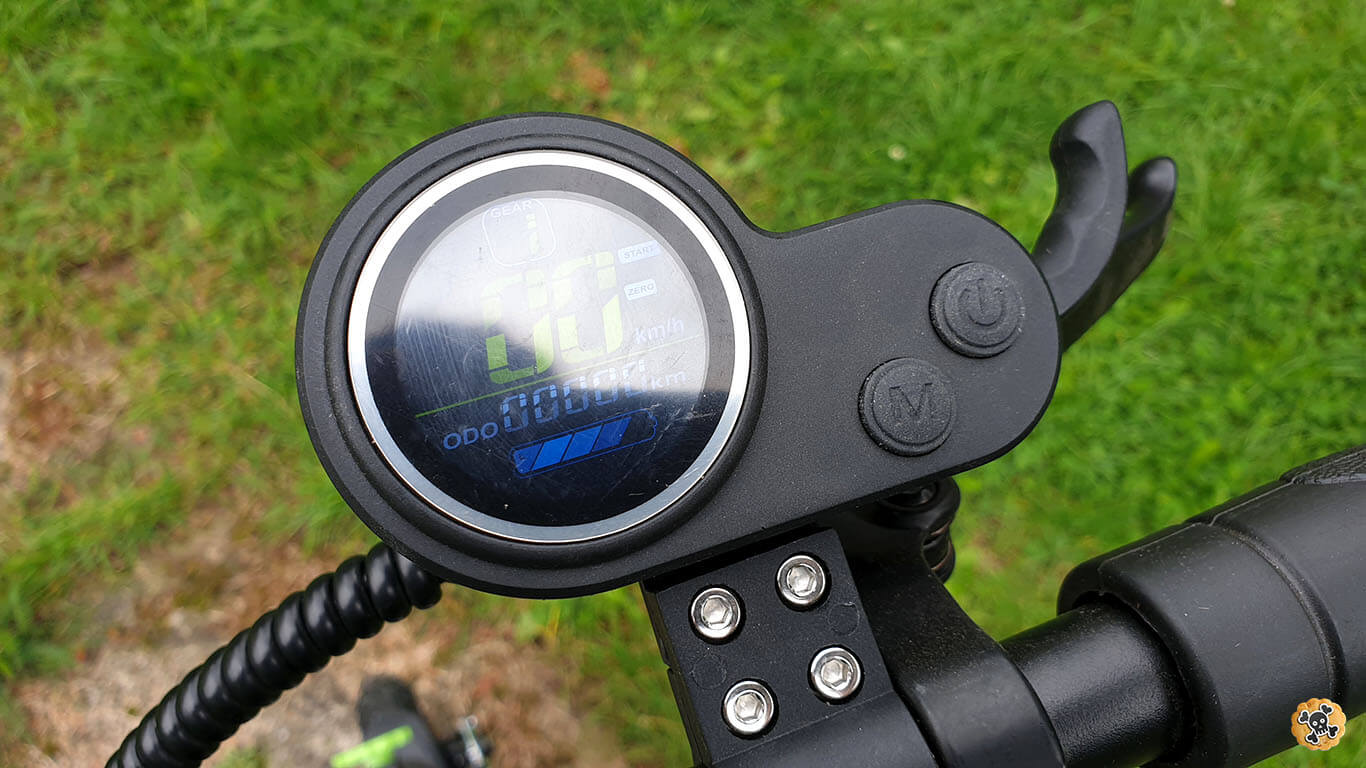
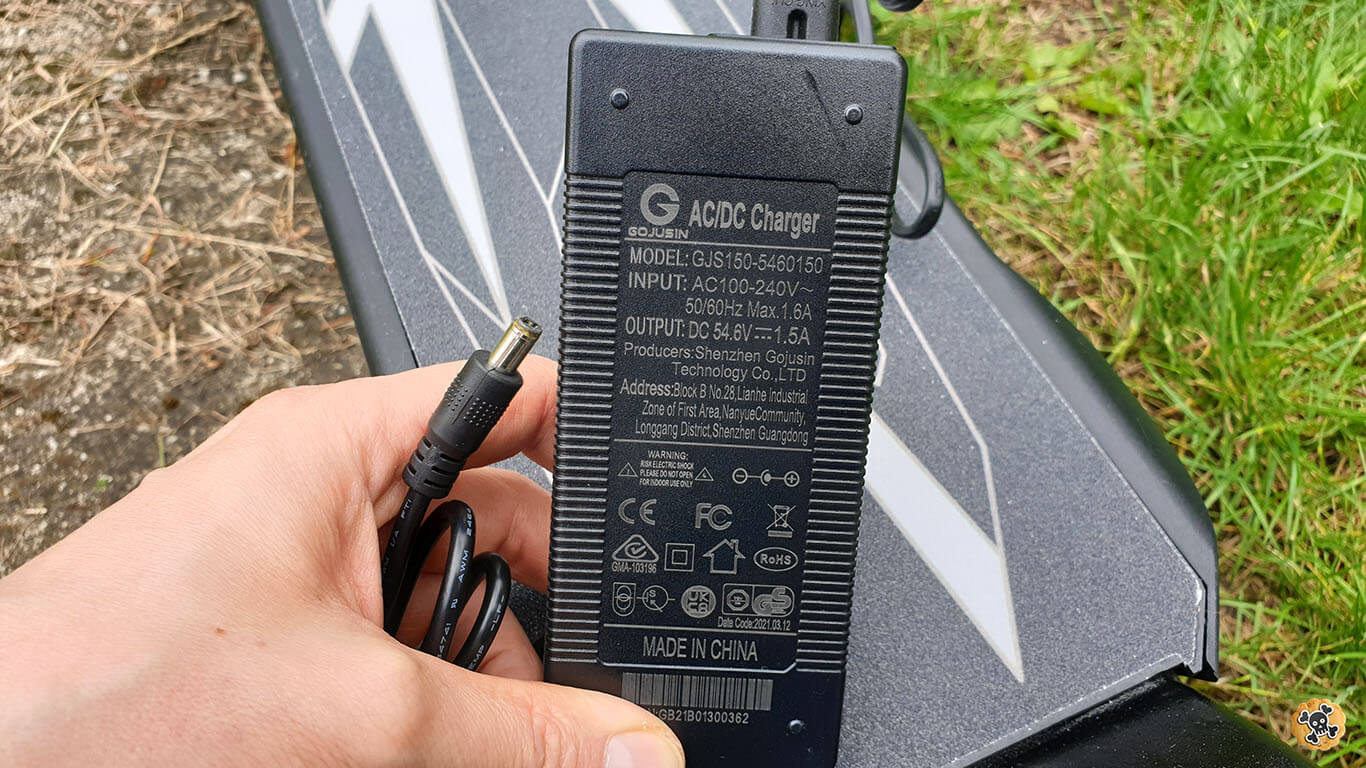
On steering bar we can find standard stuuf, and included charger is 2A
Videos:
?????? This post will be updated after some proper test ??????
?? Do you ? Pirate ⁉ and want to Support ‼ ?? Banggood bit.ly/PirateBG ( buy what U like from link ) Ali s.click.aliexpress.com/e/_dTN231Y ( buy what U like from link ) Or just leave some positive comment and make my Day ??
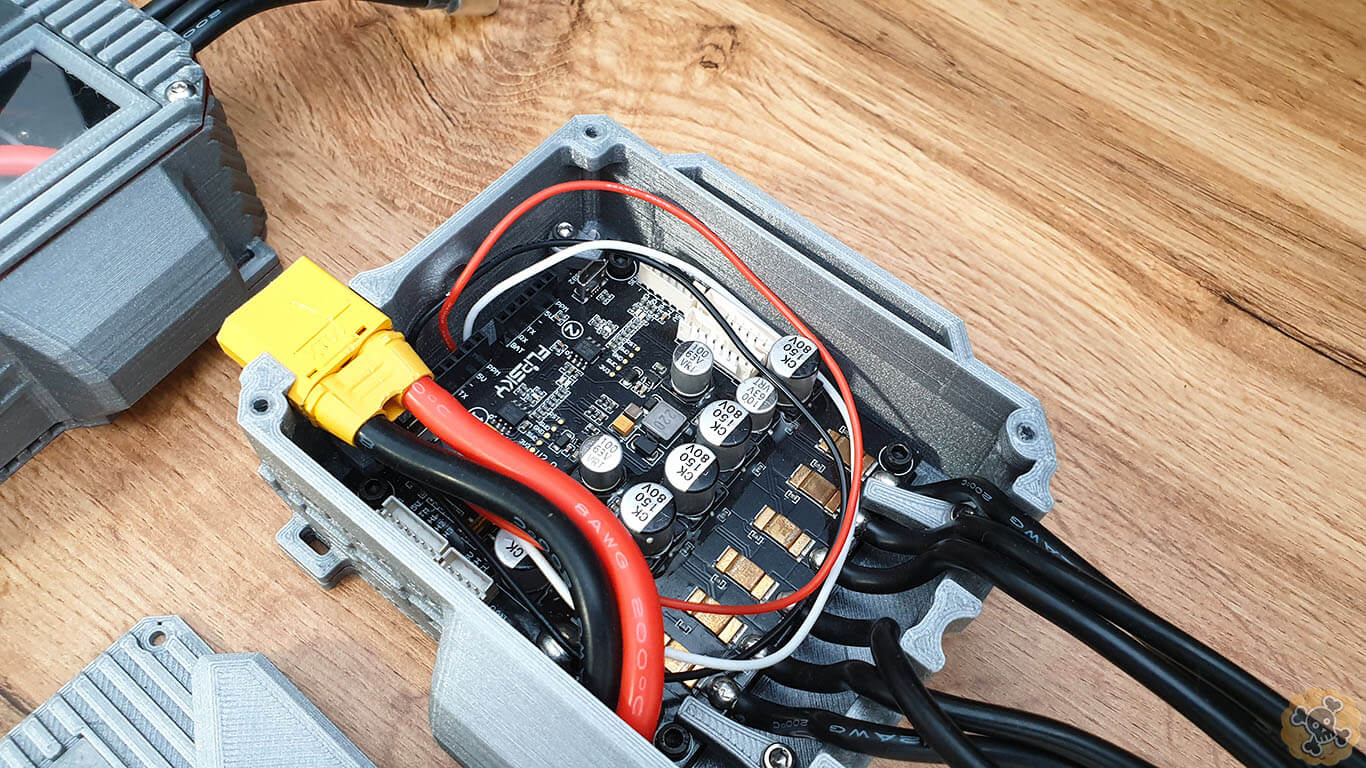
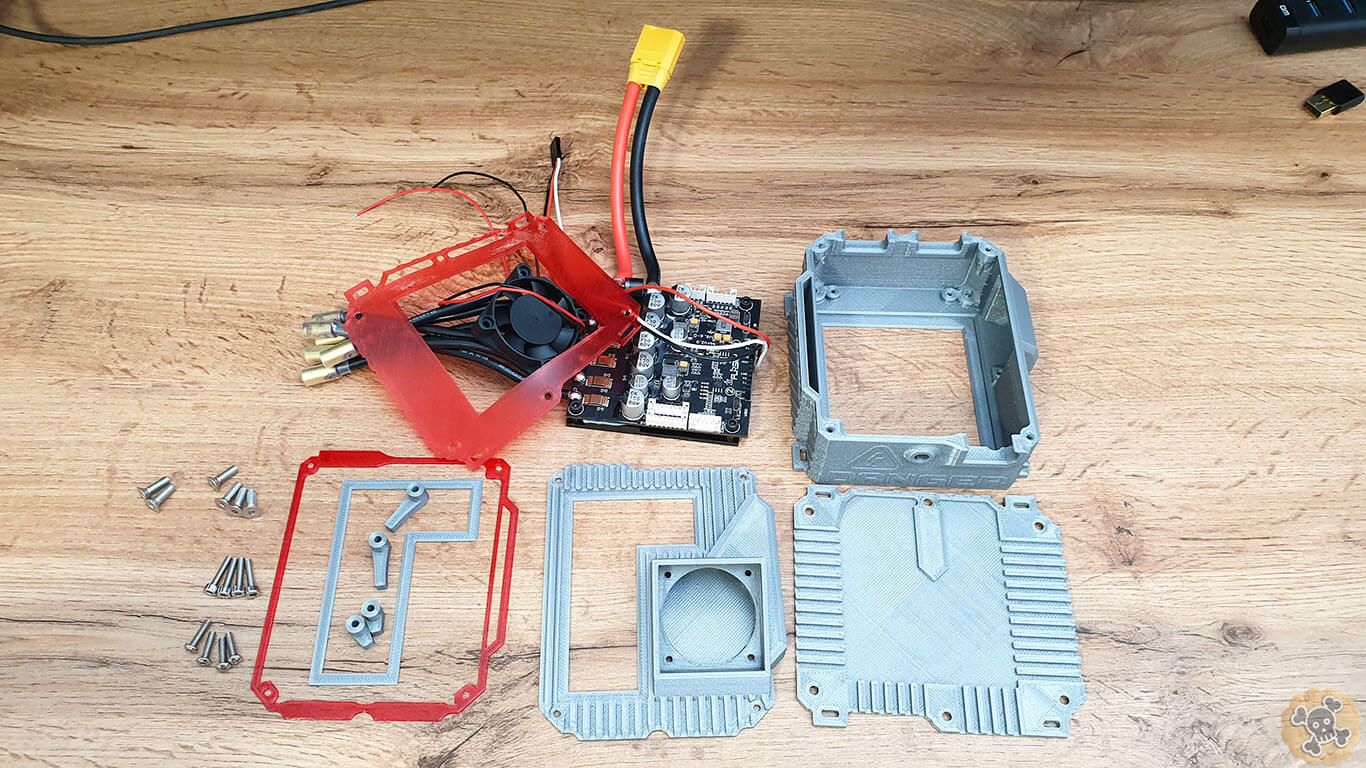
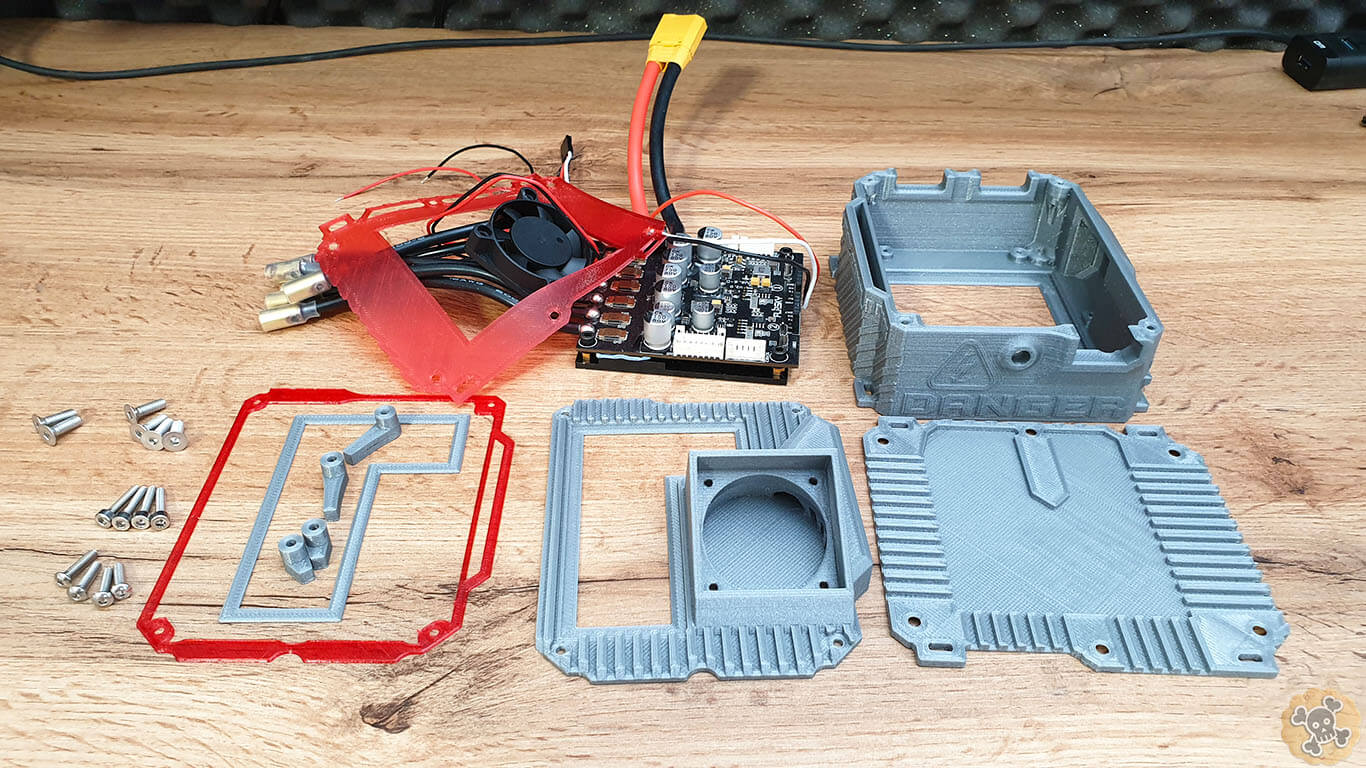
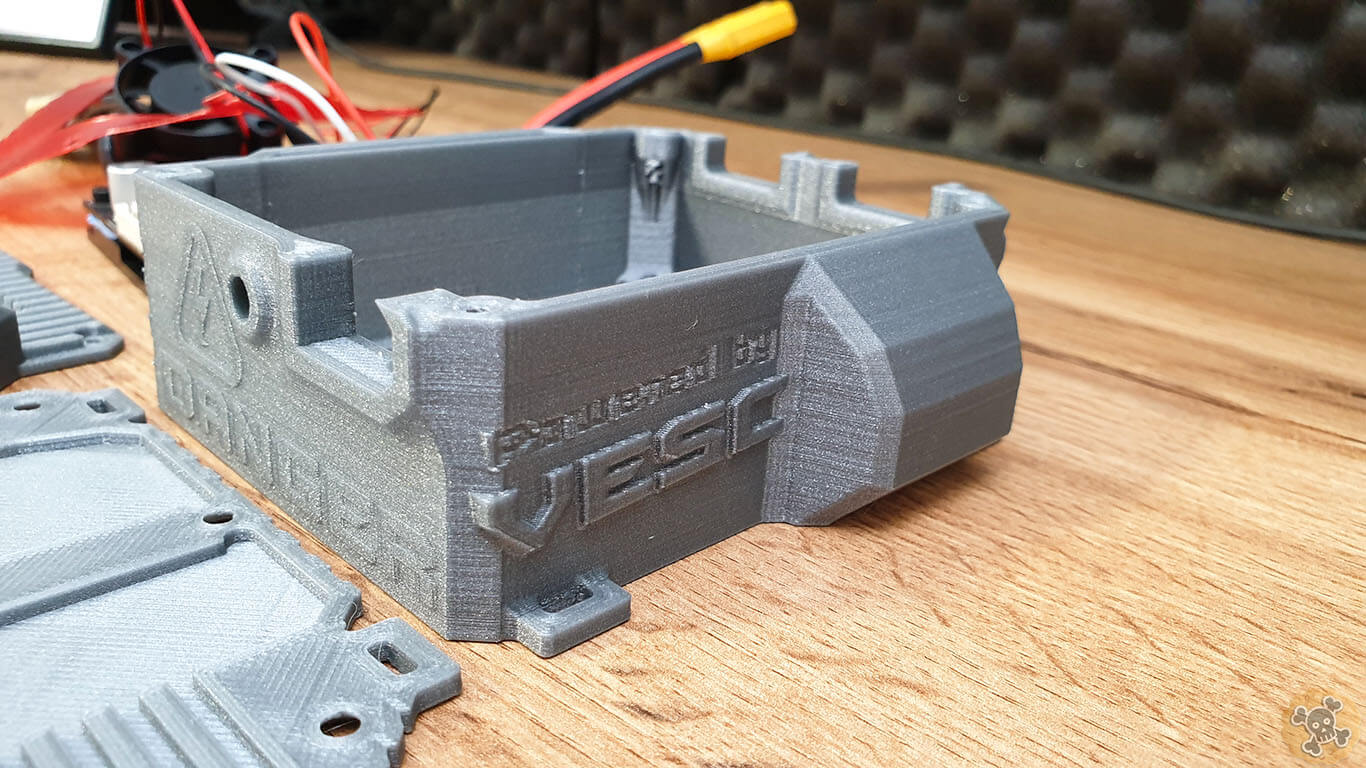
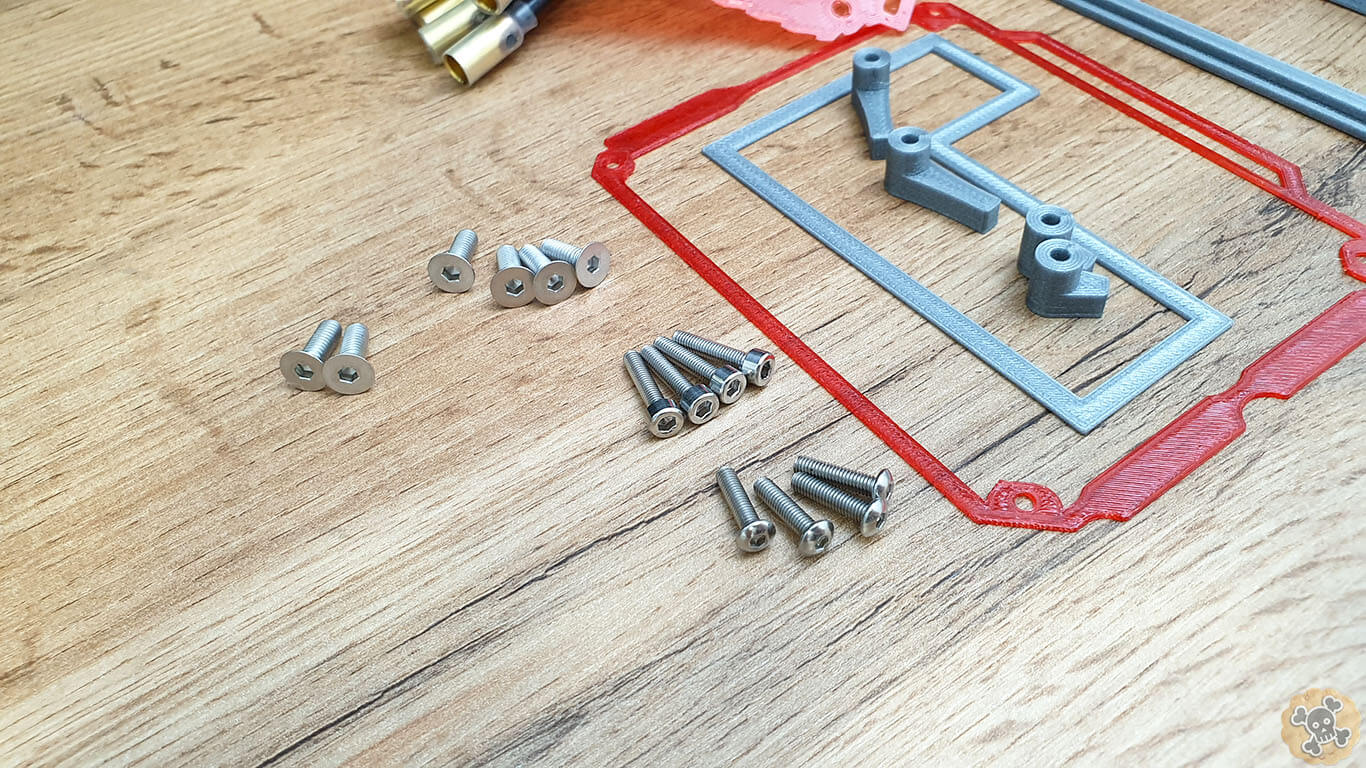
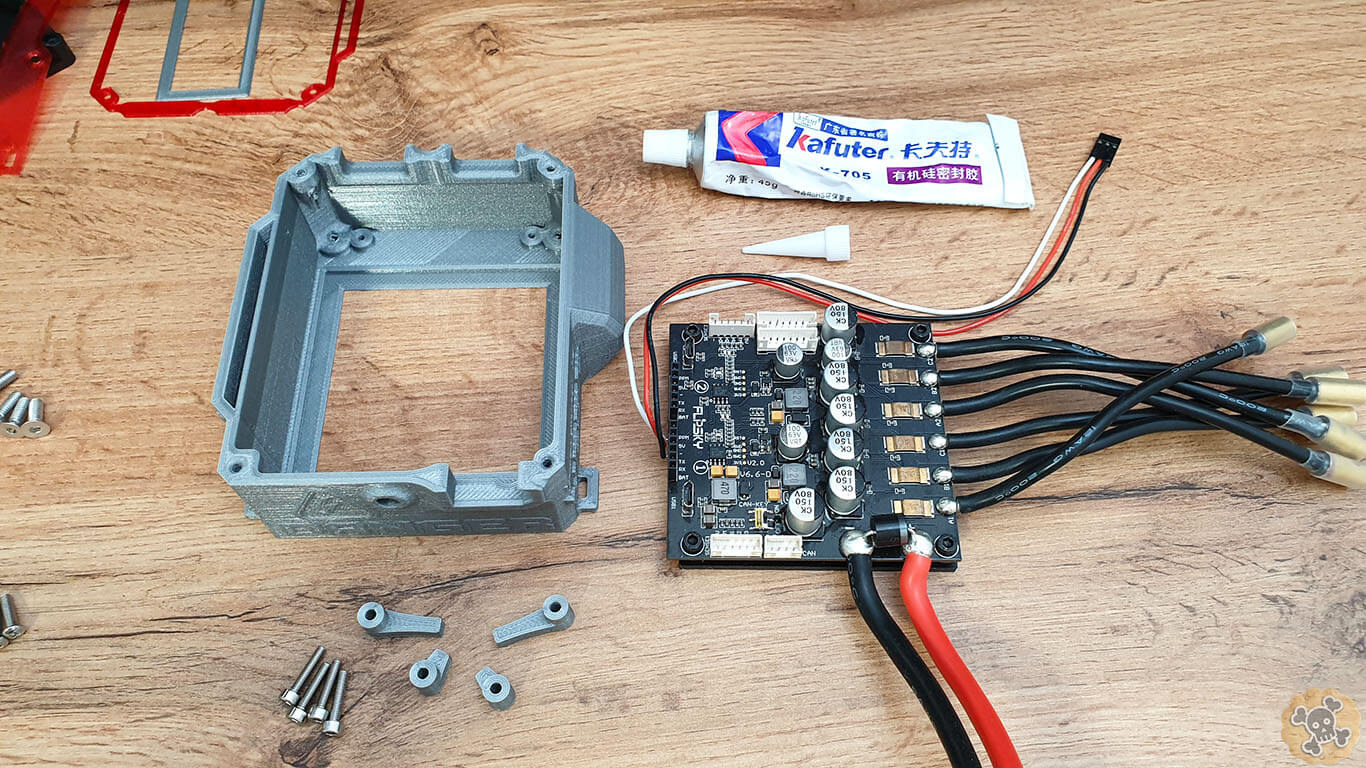
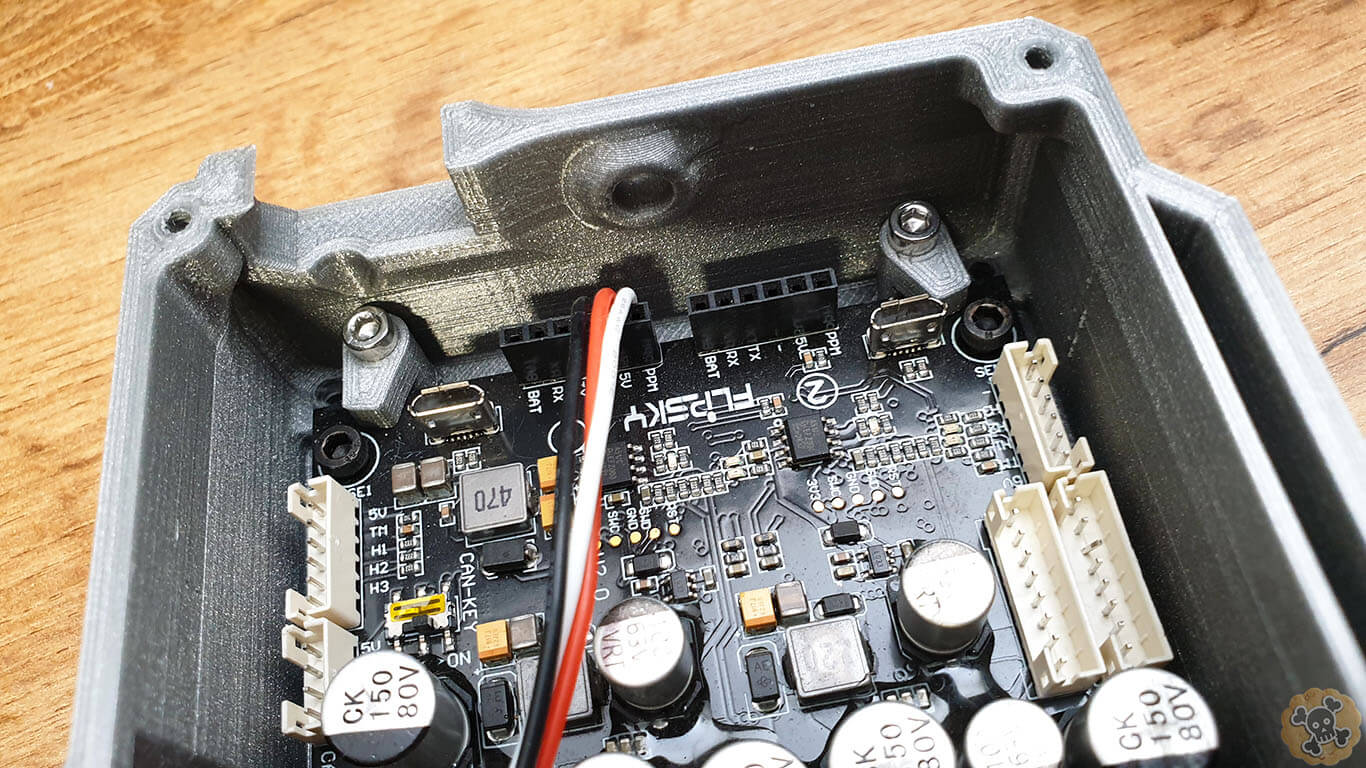
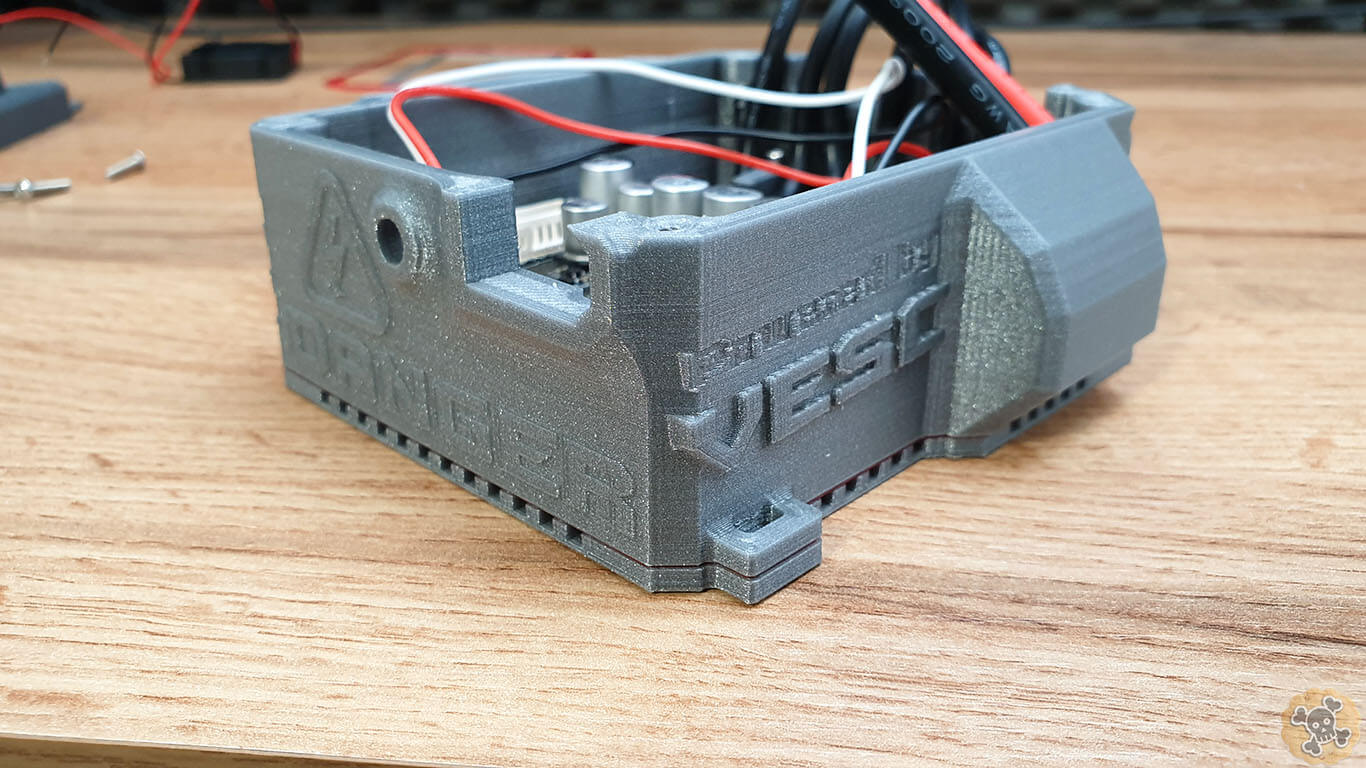
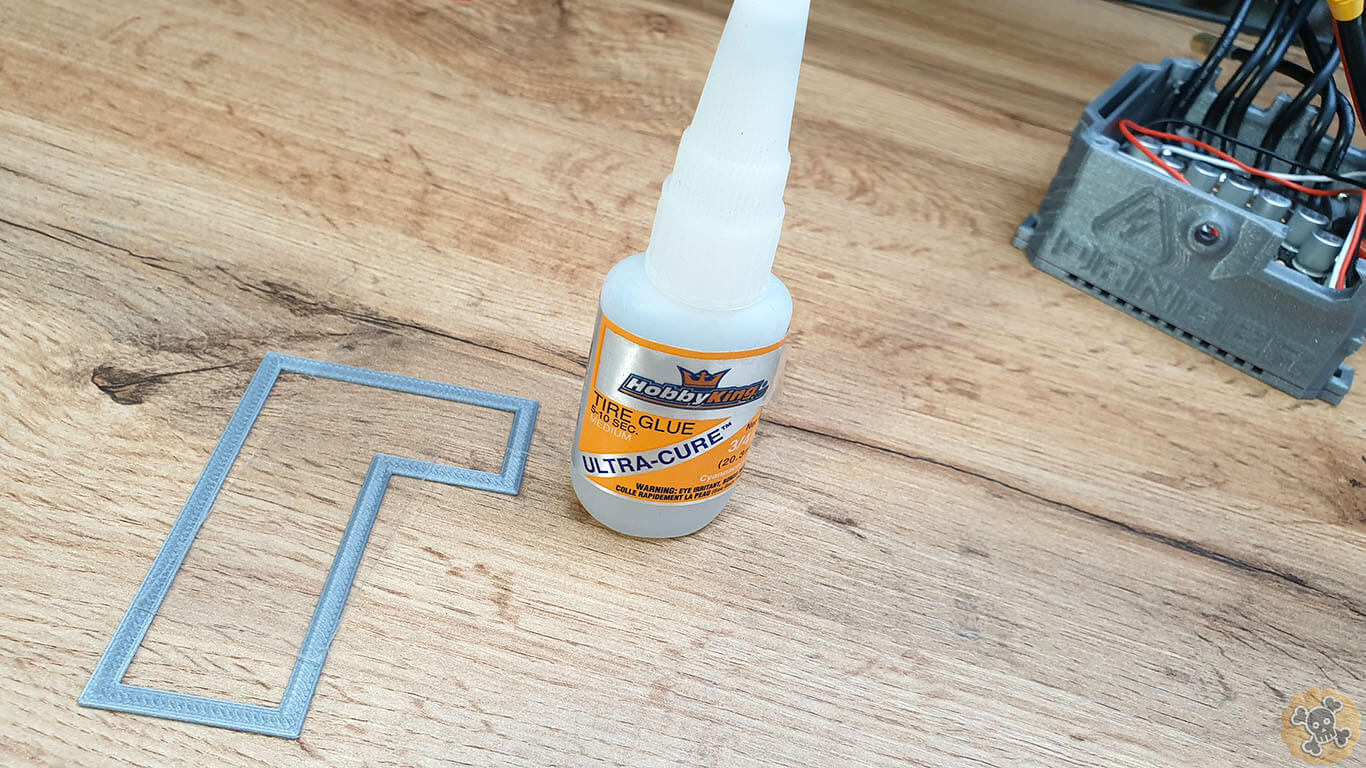
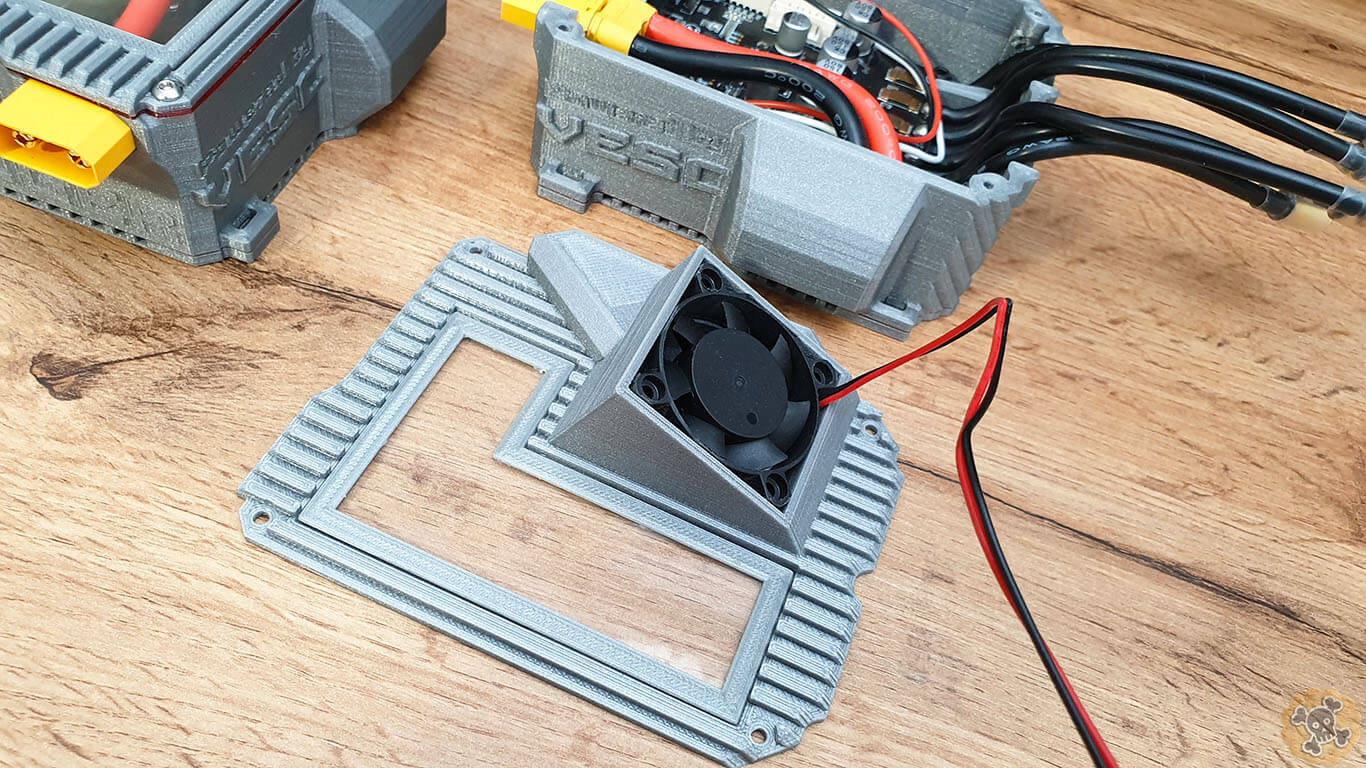
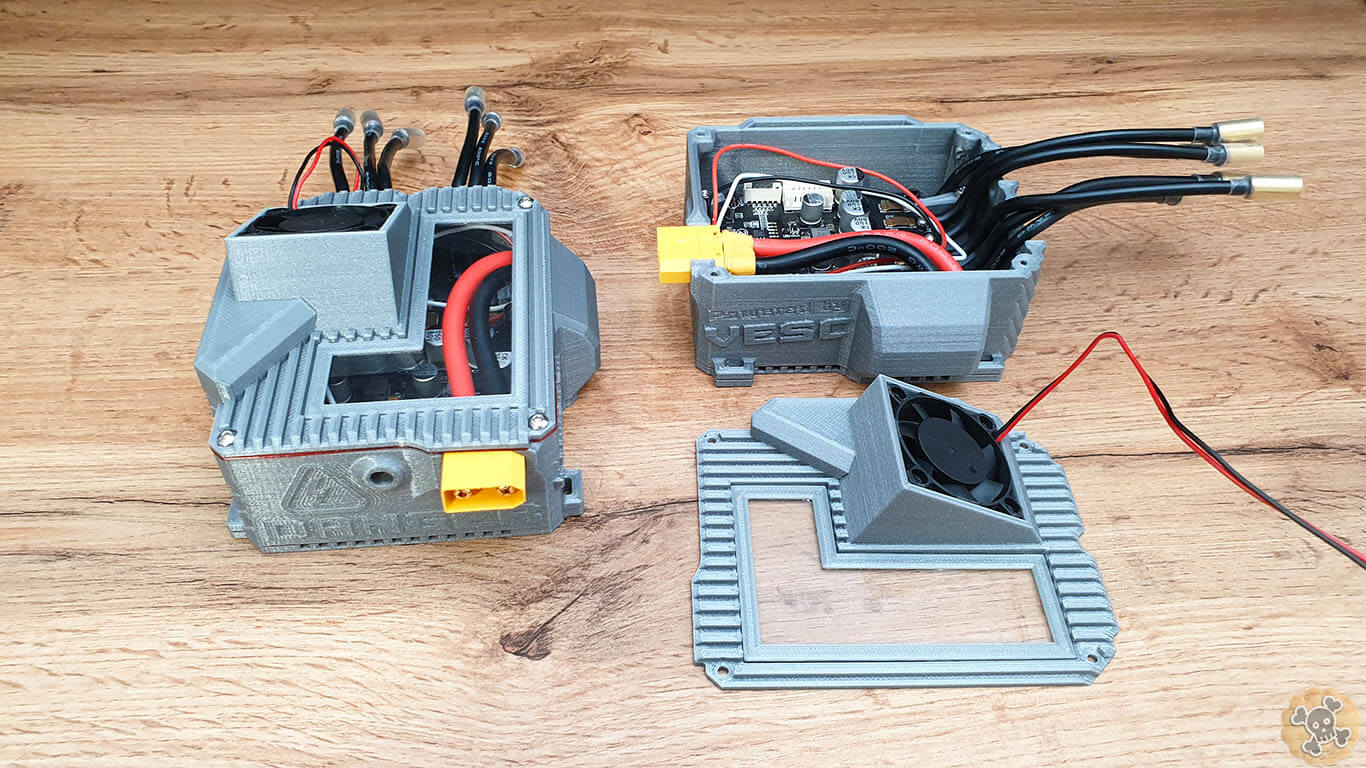
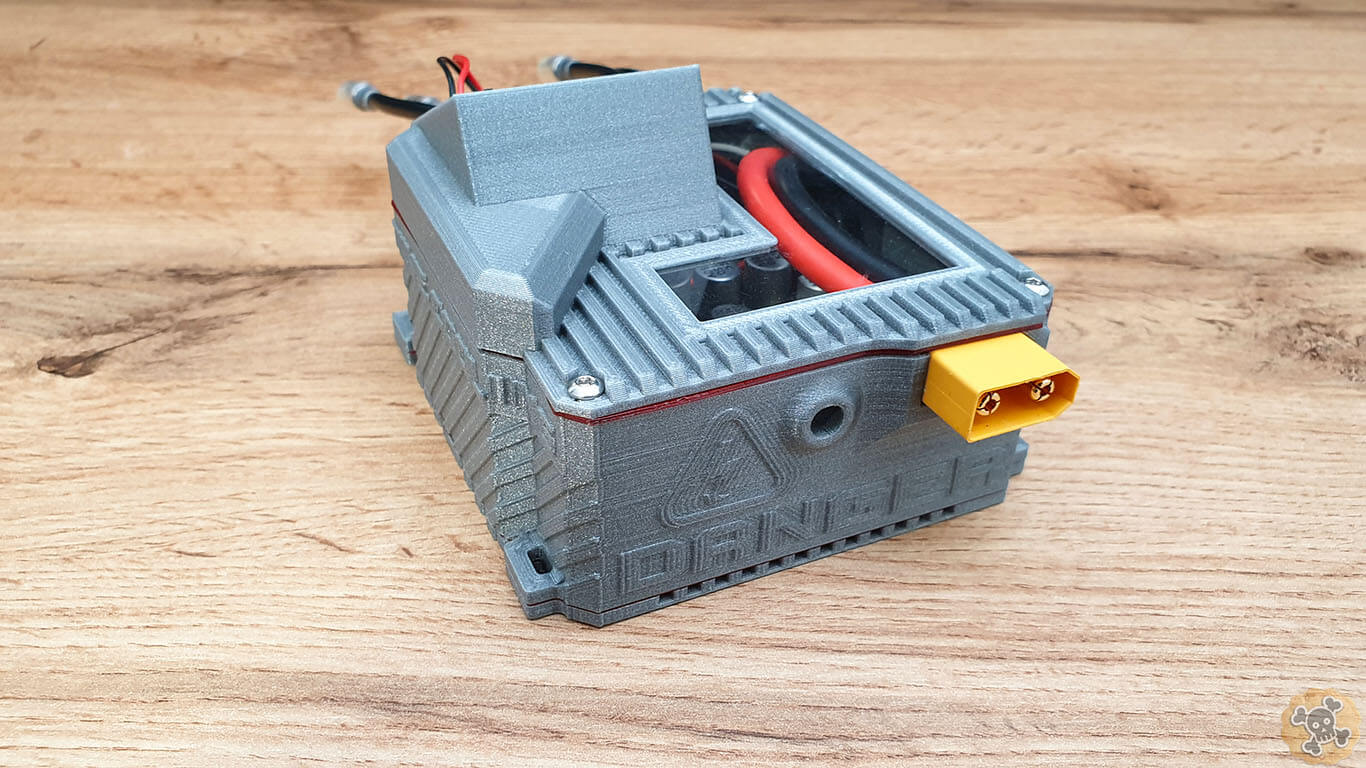
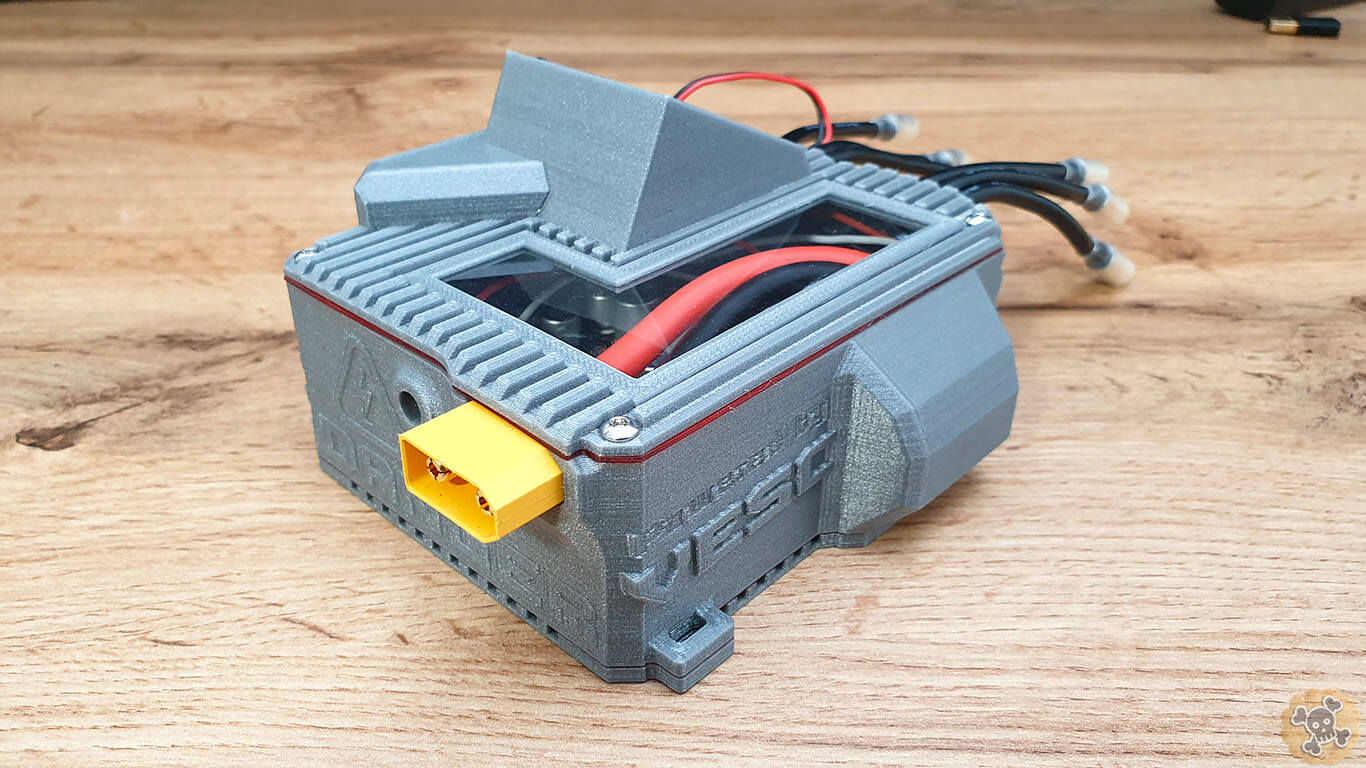
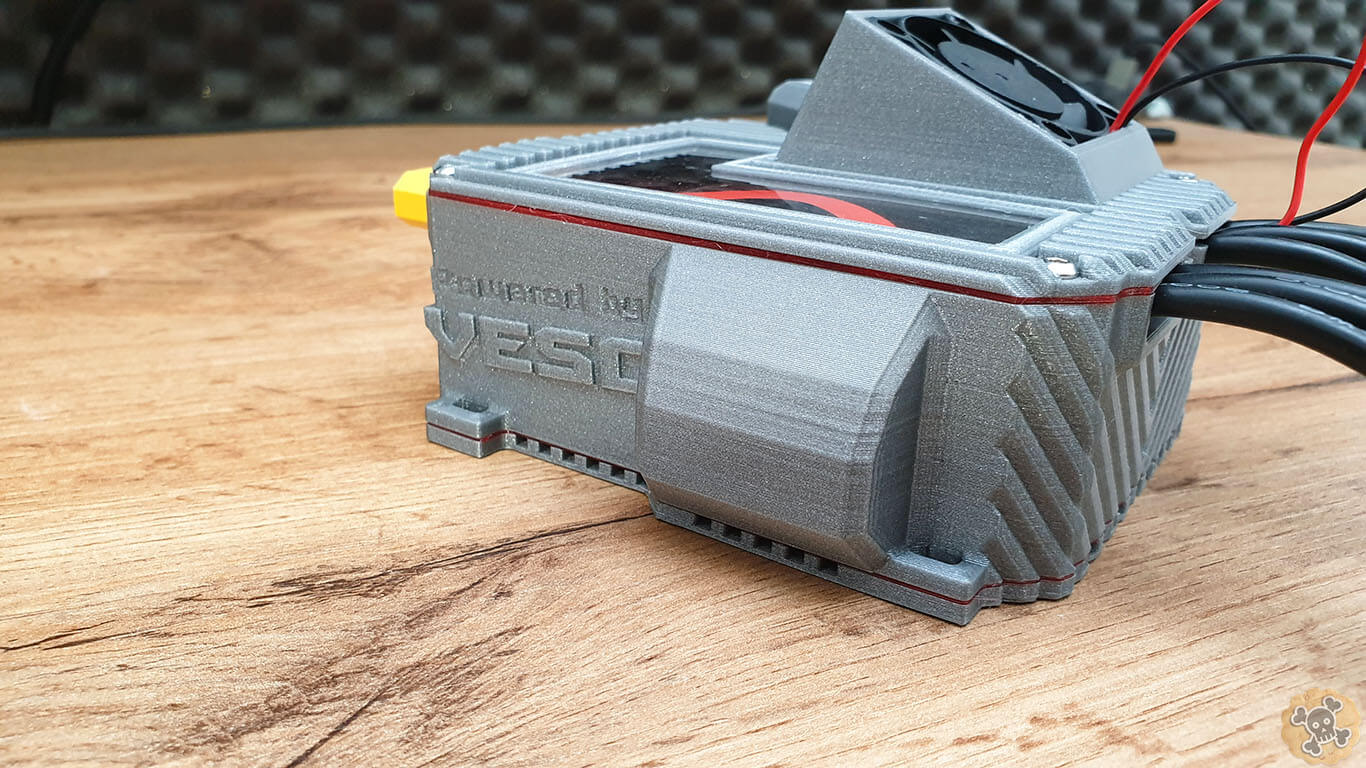
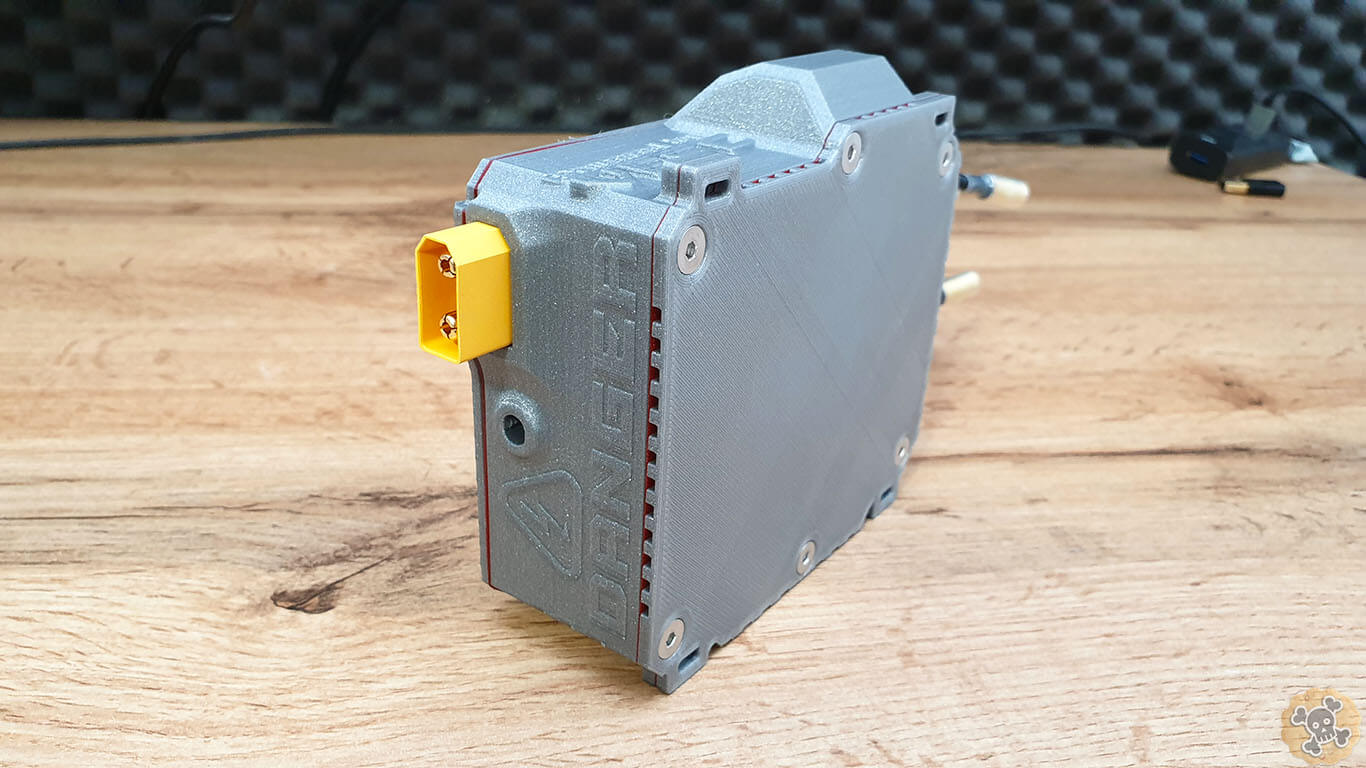
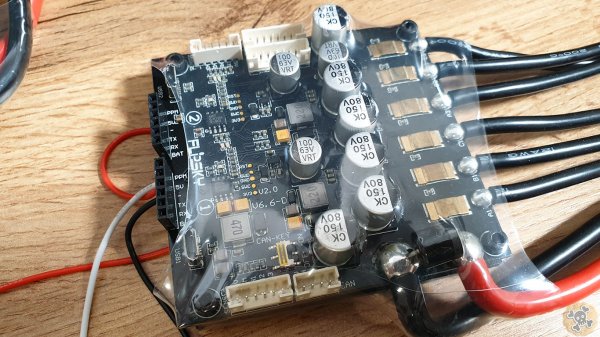
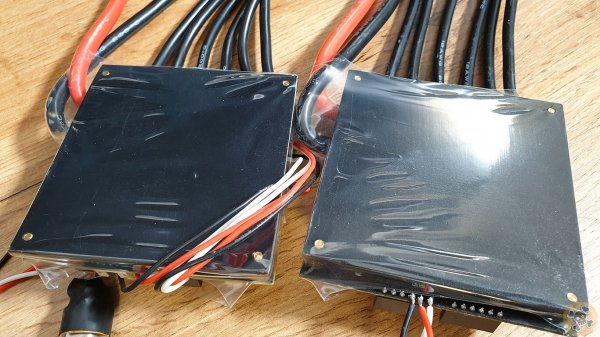
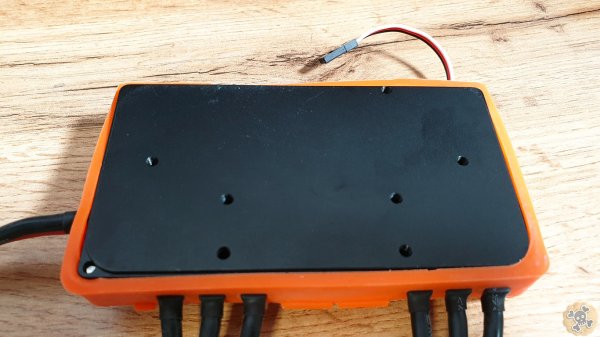
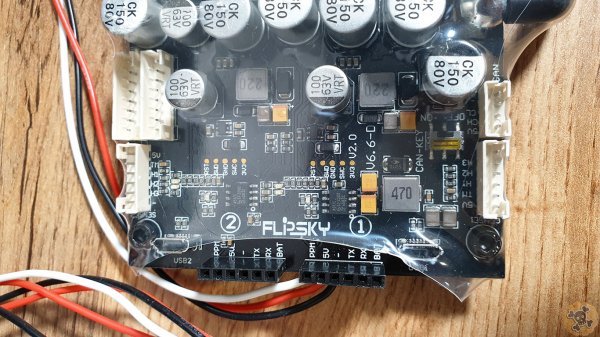
Vesc 6.6 Dual Mini is one of the cheapest and most powerful controllers for the price, I been using it for quite long time without issues so I decided to make case special for it.
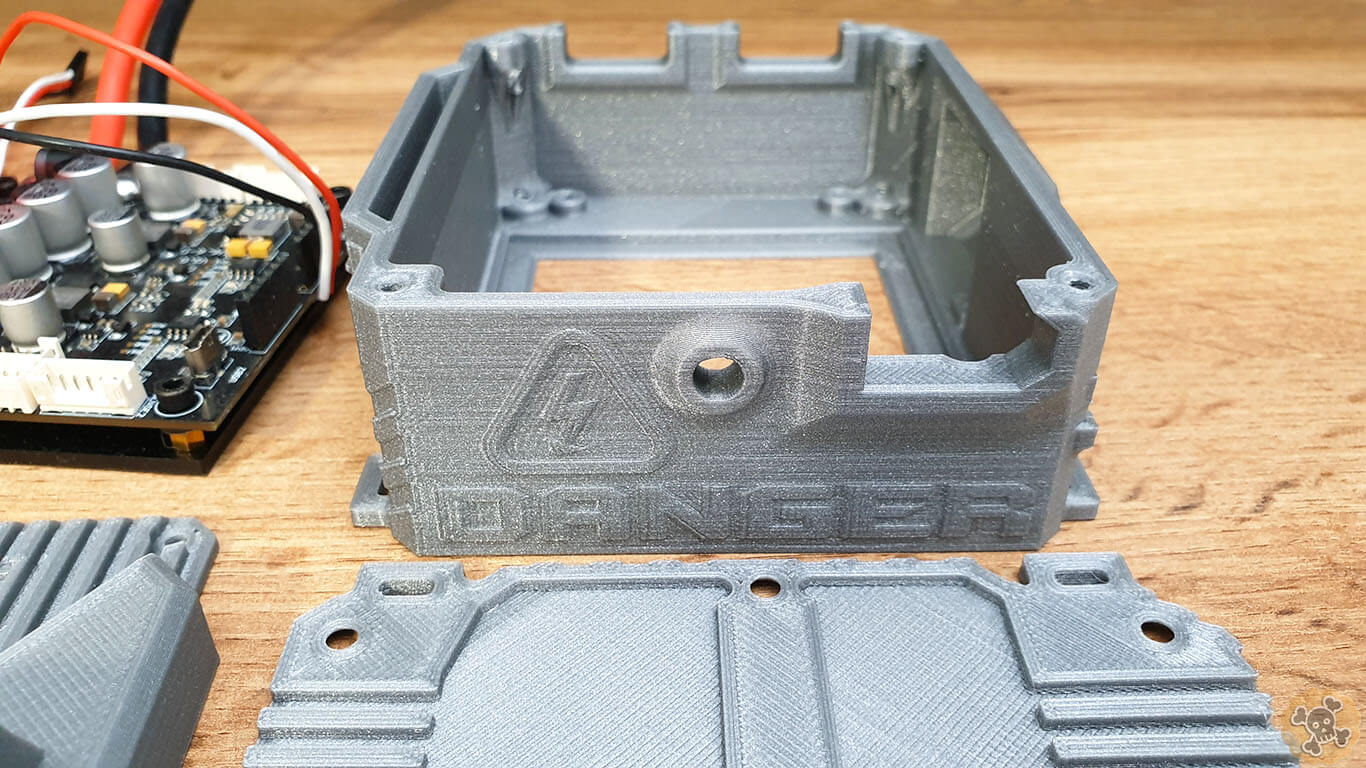
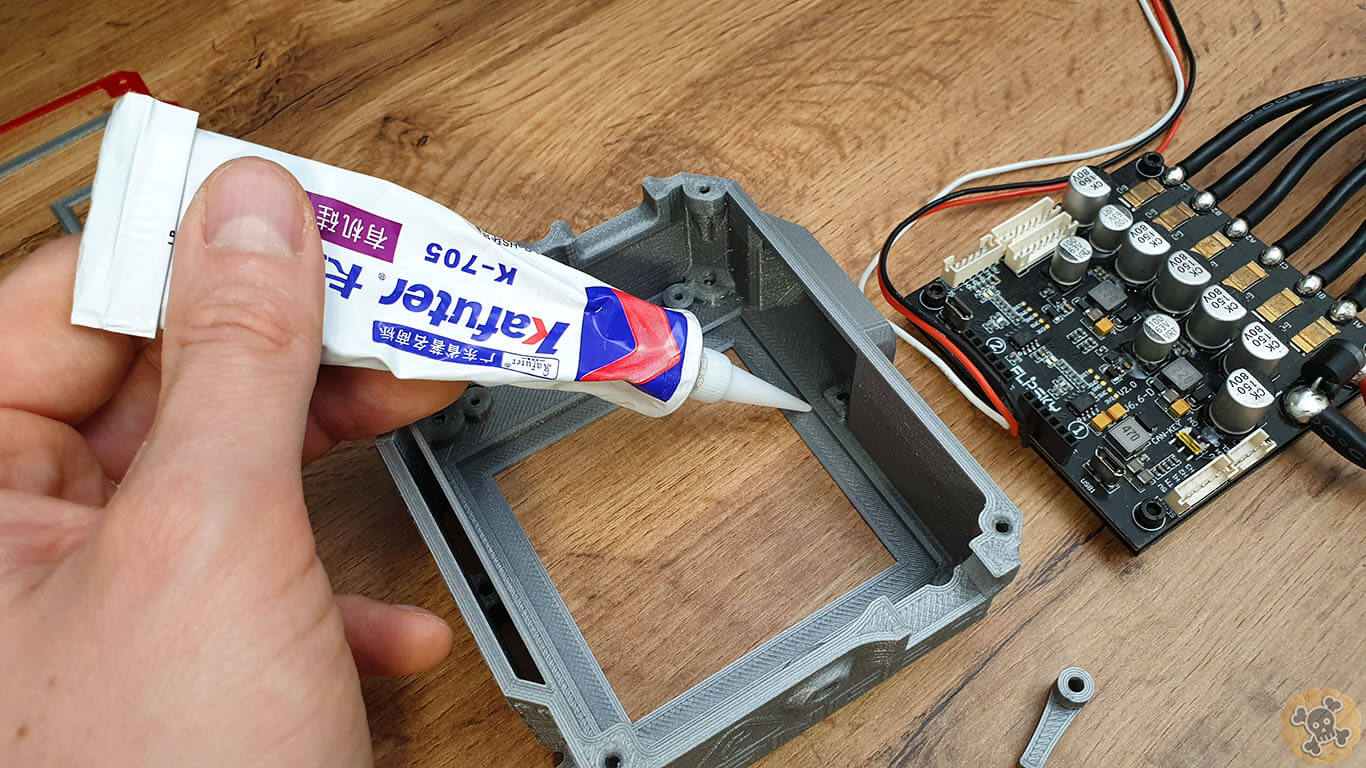
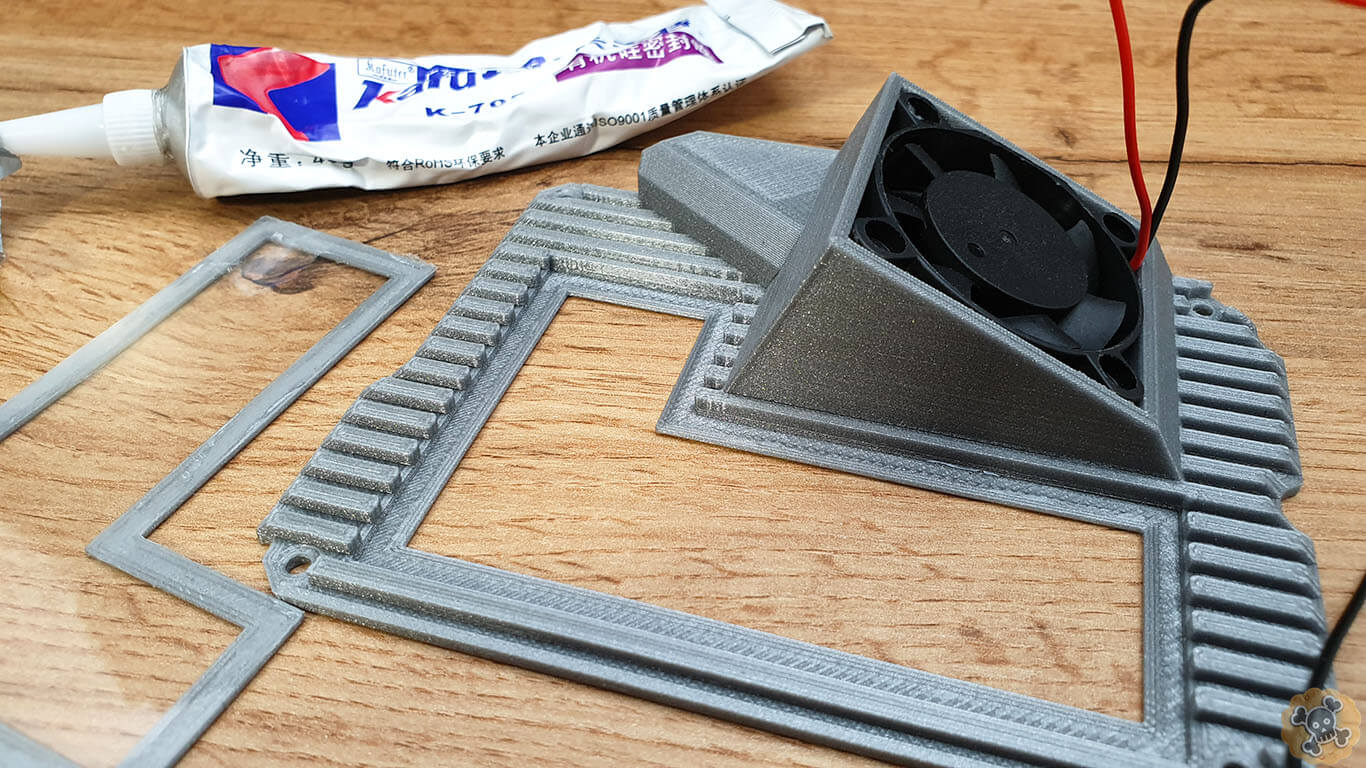
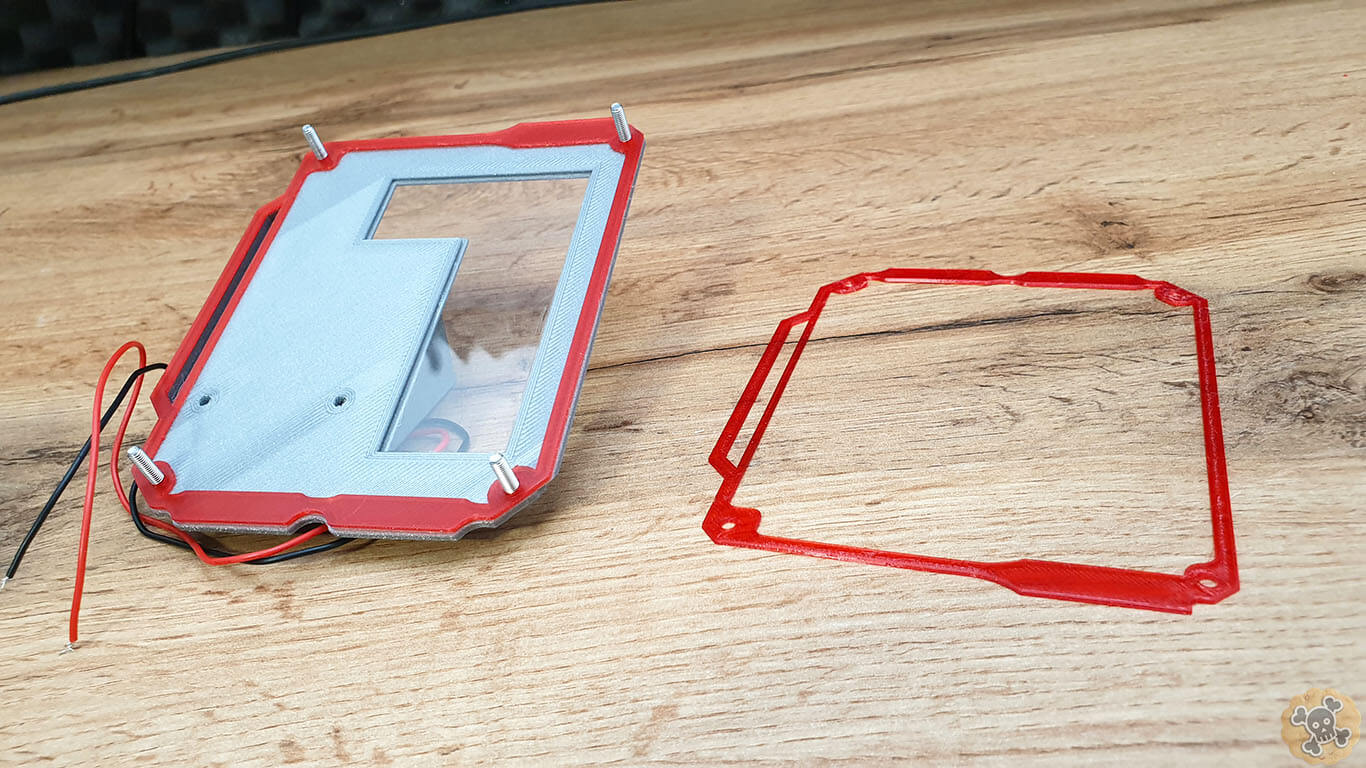
We need to seal space between Vesc and case, add a little bit of kaufer
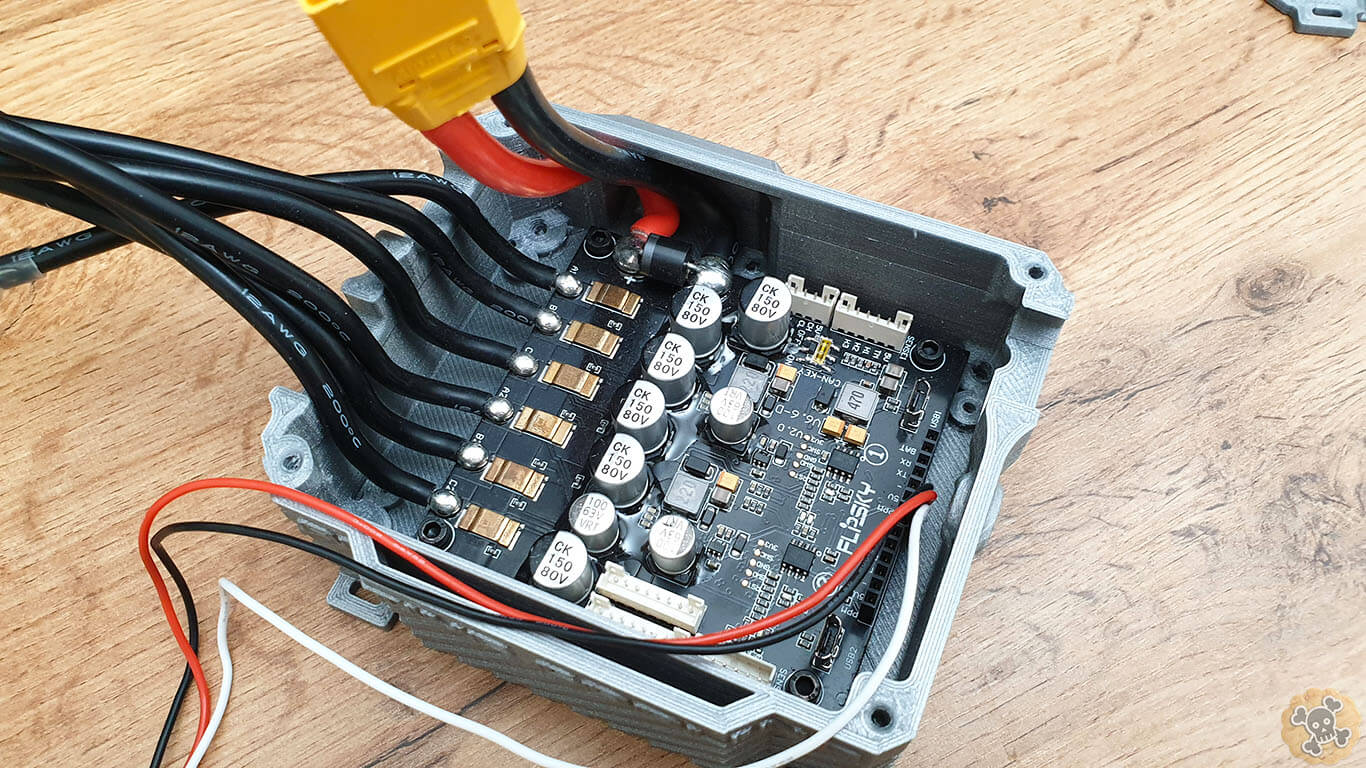
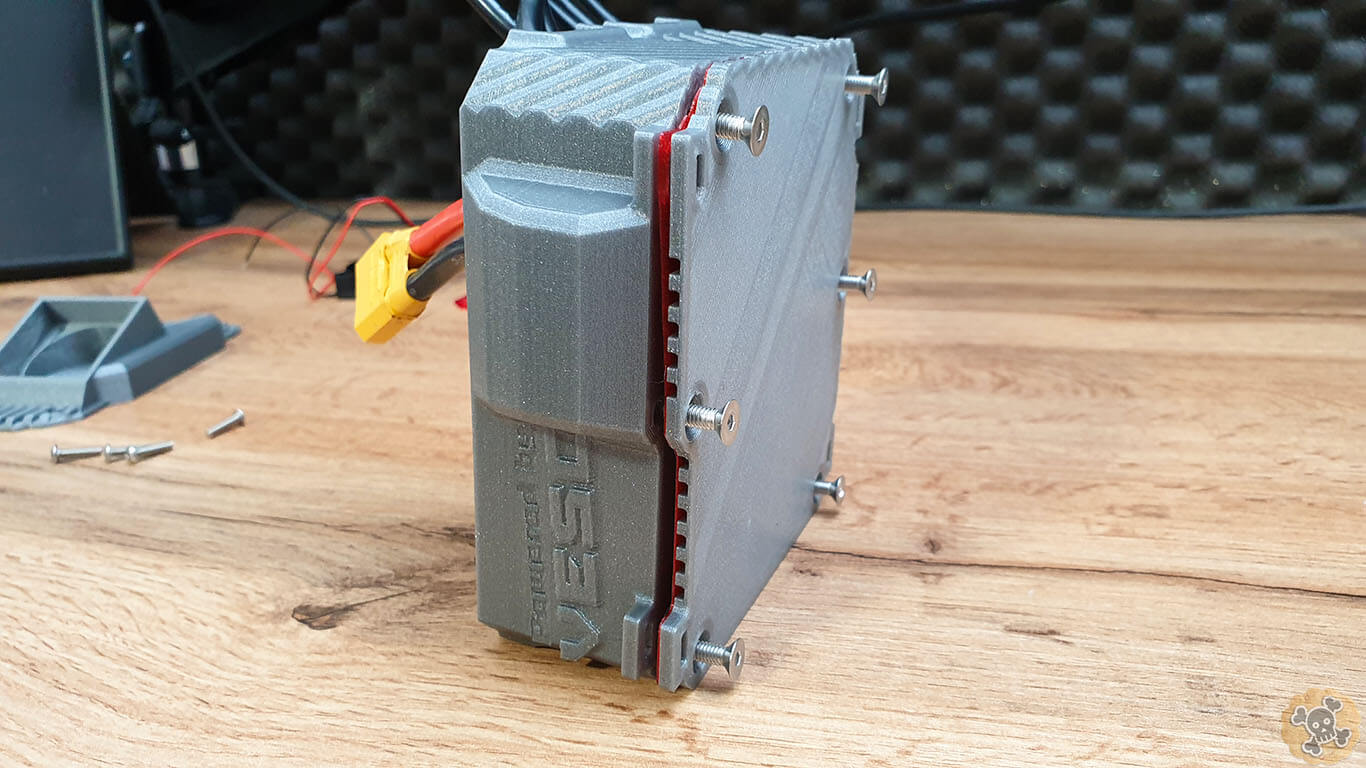
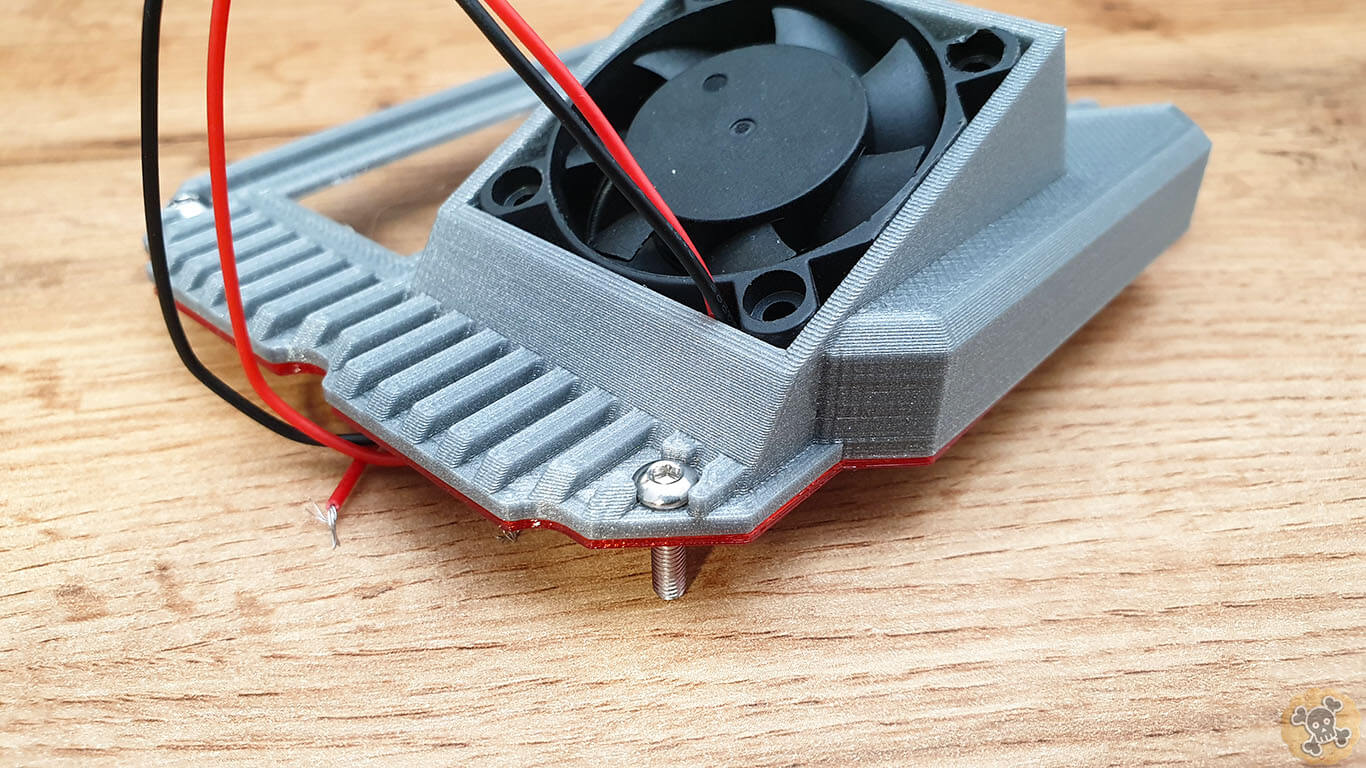
Now us 4x M3 17mm and secure the VESC to the case as you can see on pics
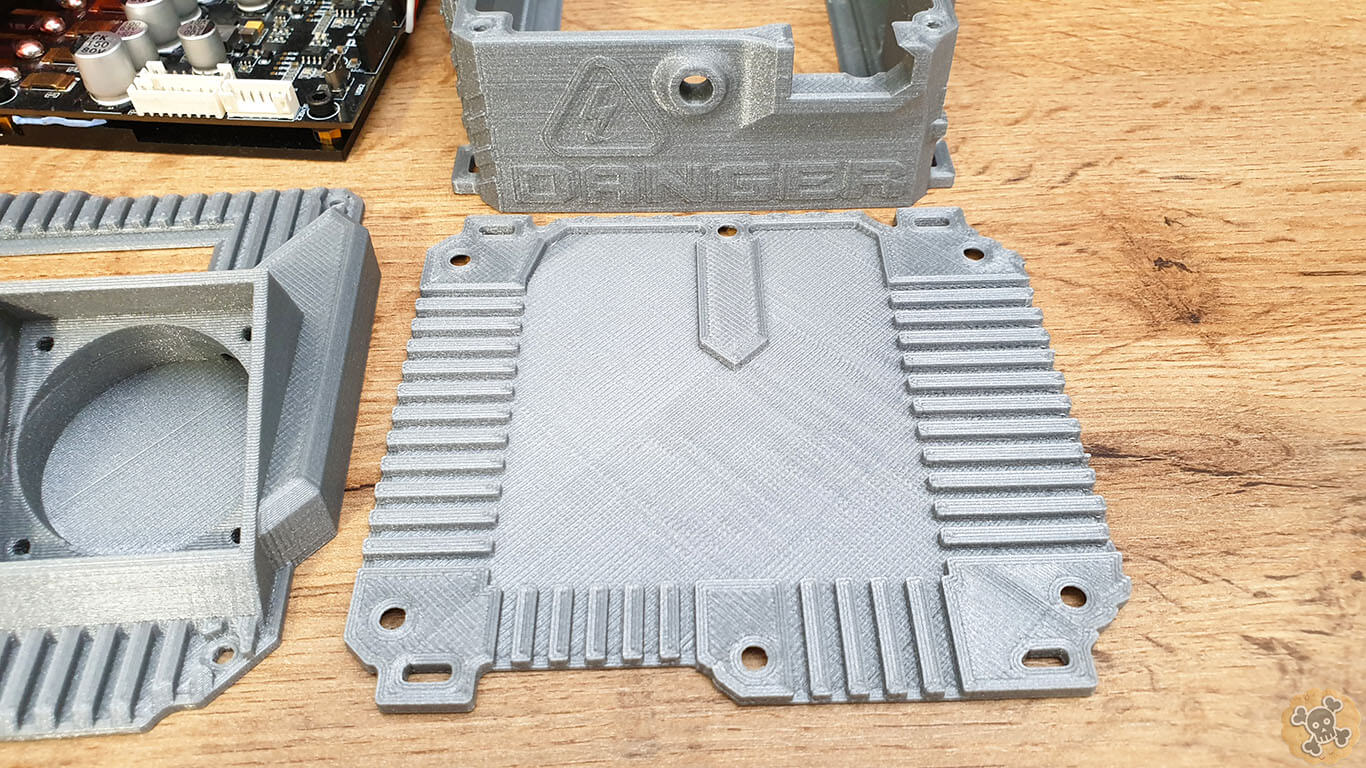
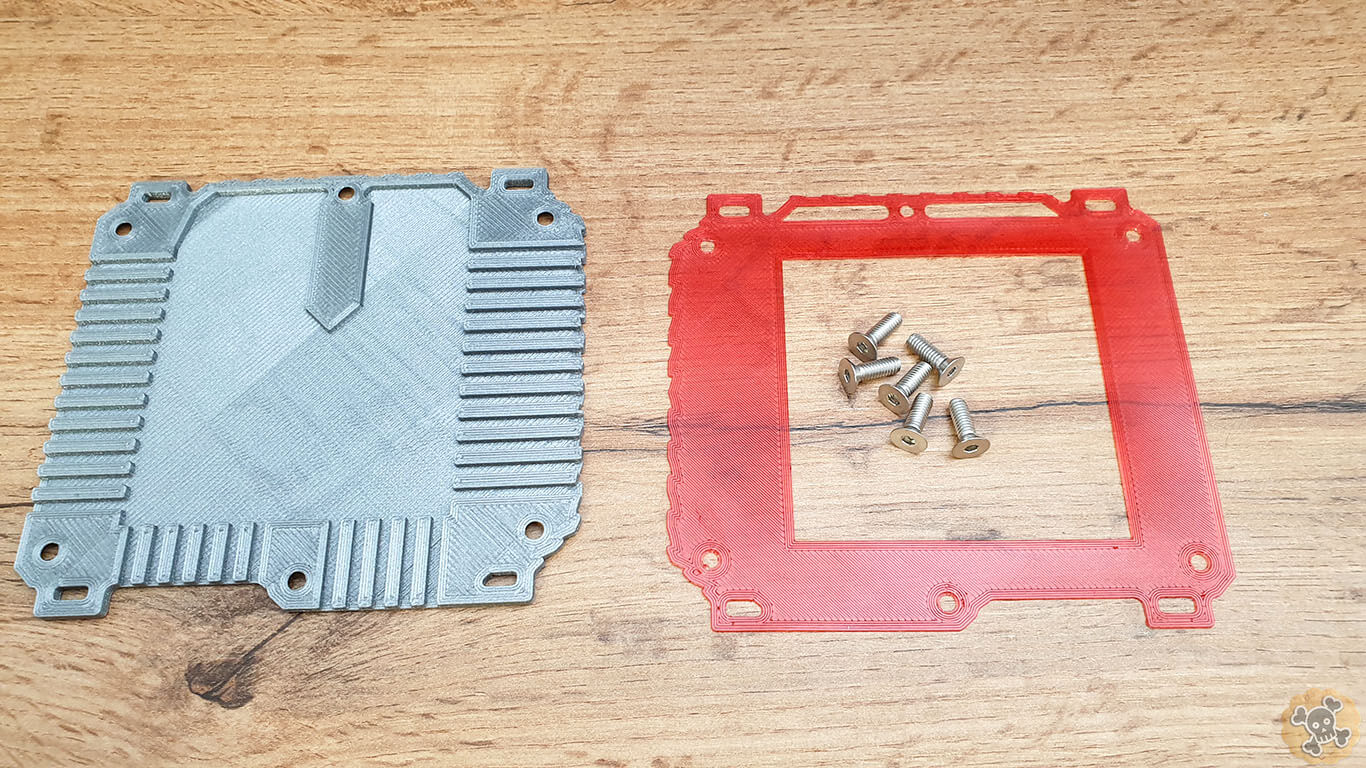
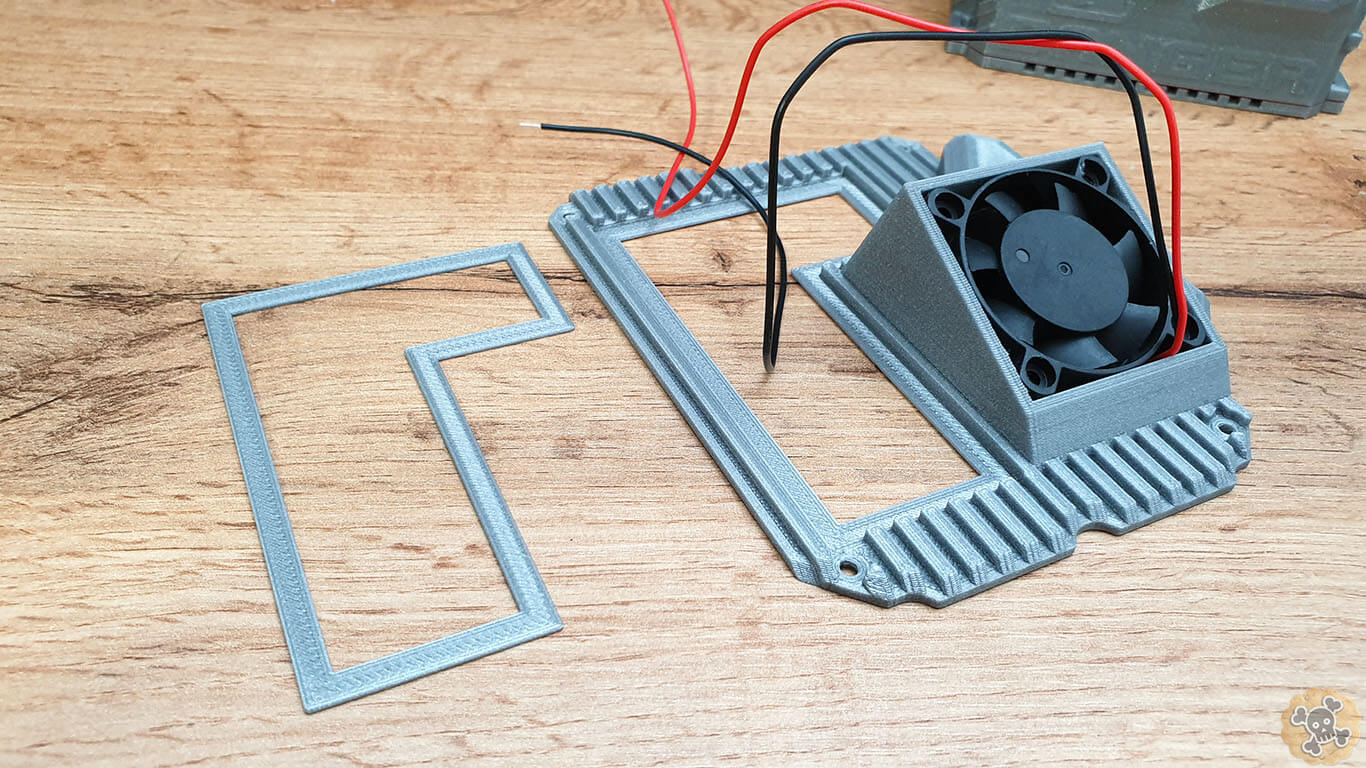
Use 6x M4 12mm countersunk , bottom part & gasket
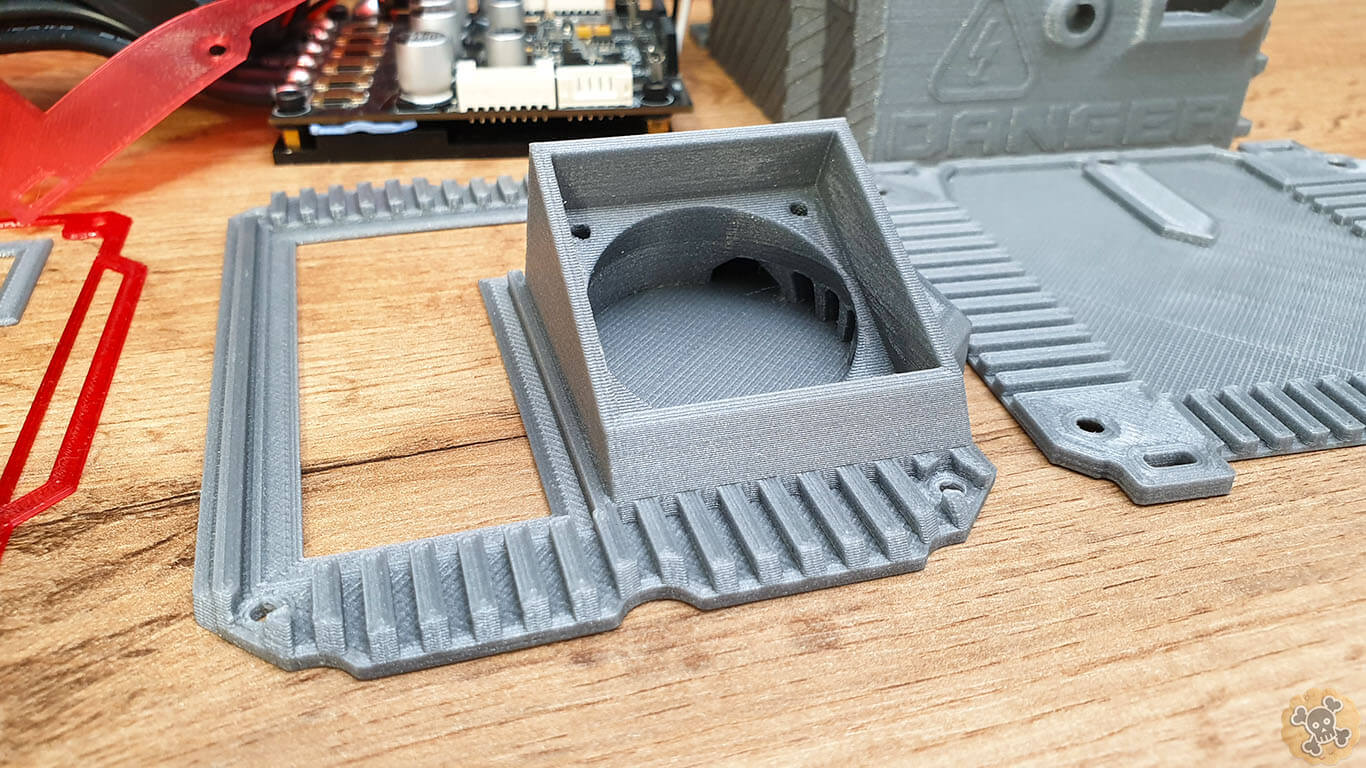
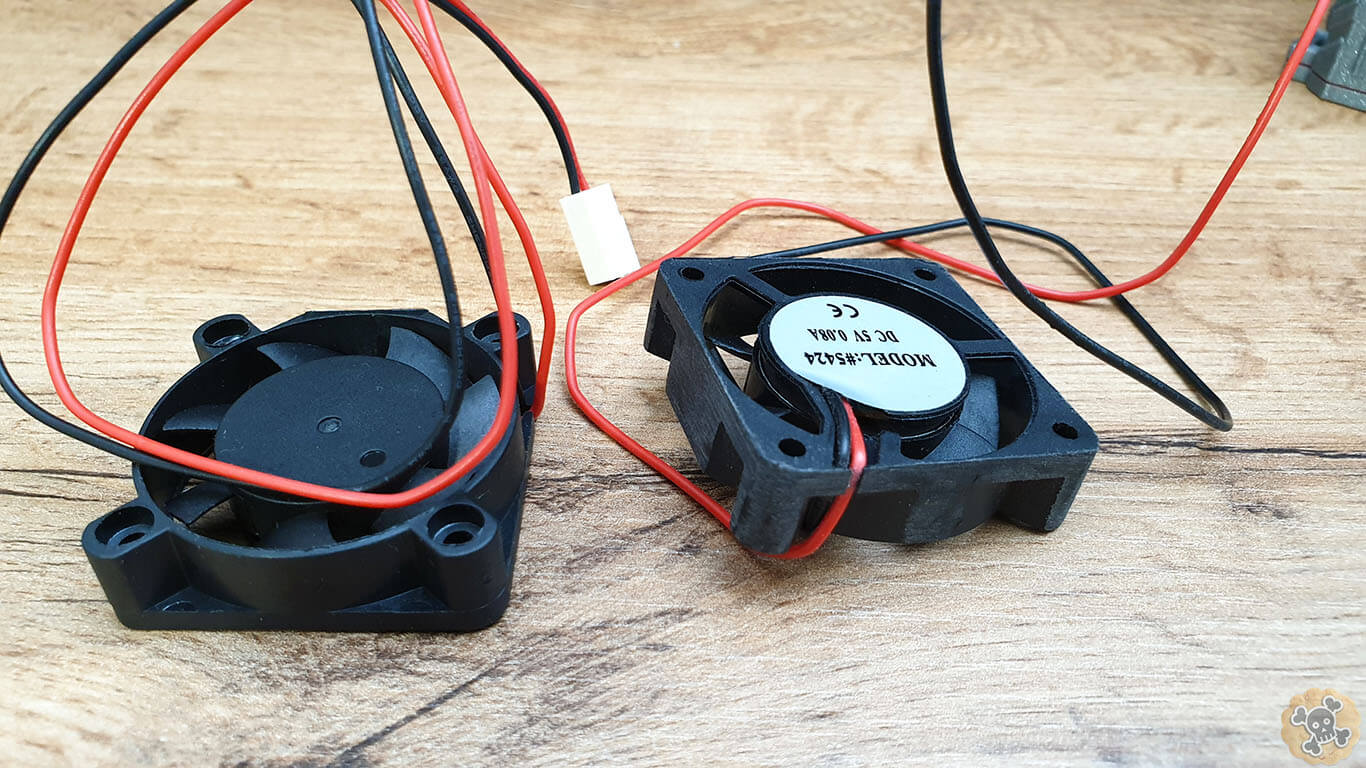
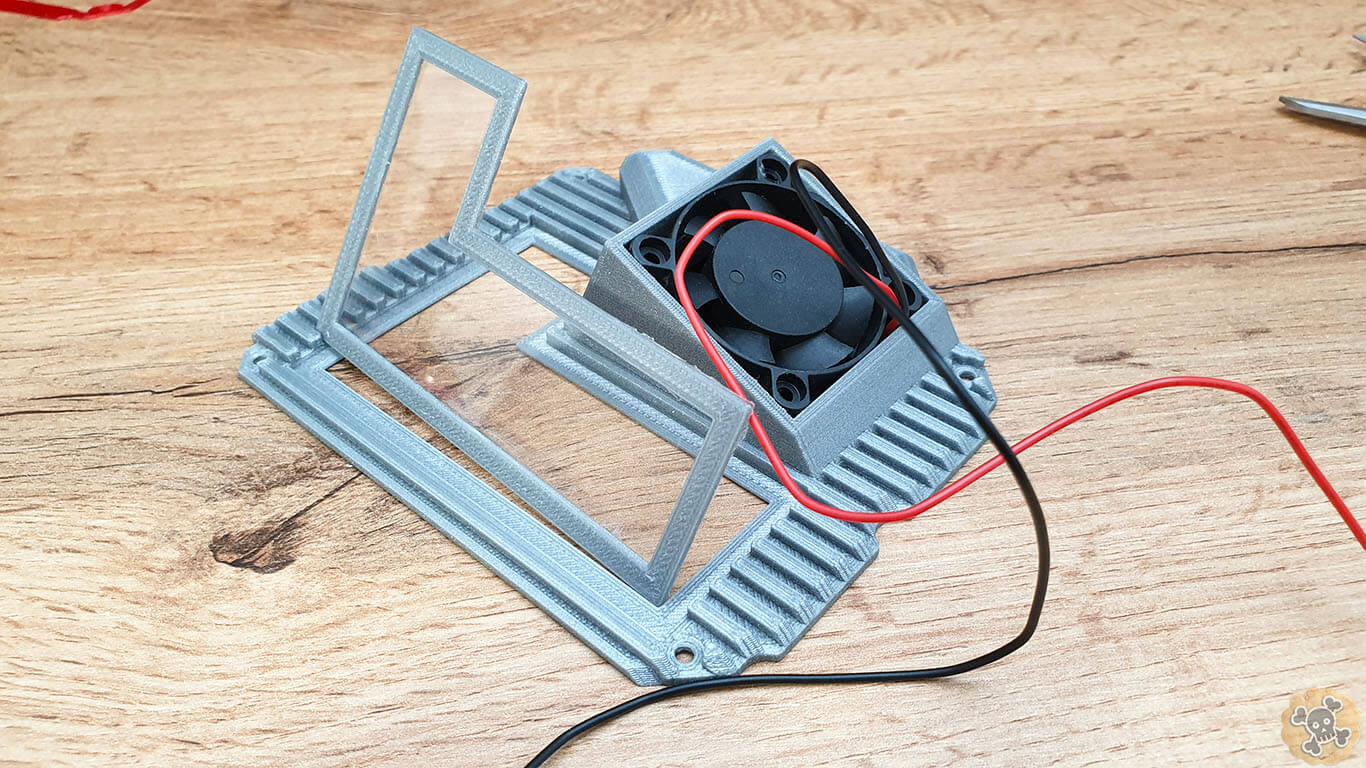
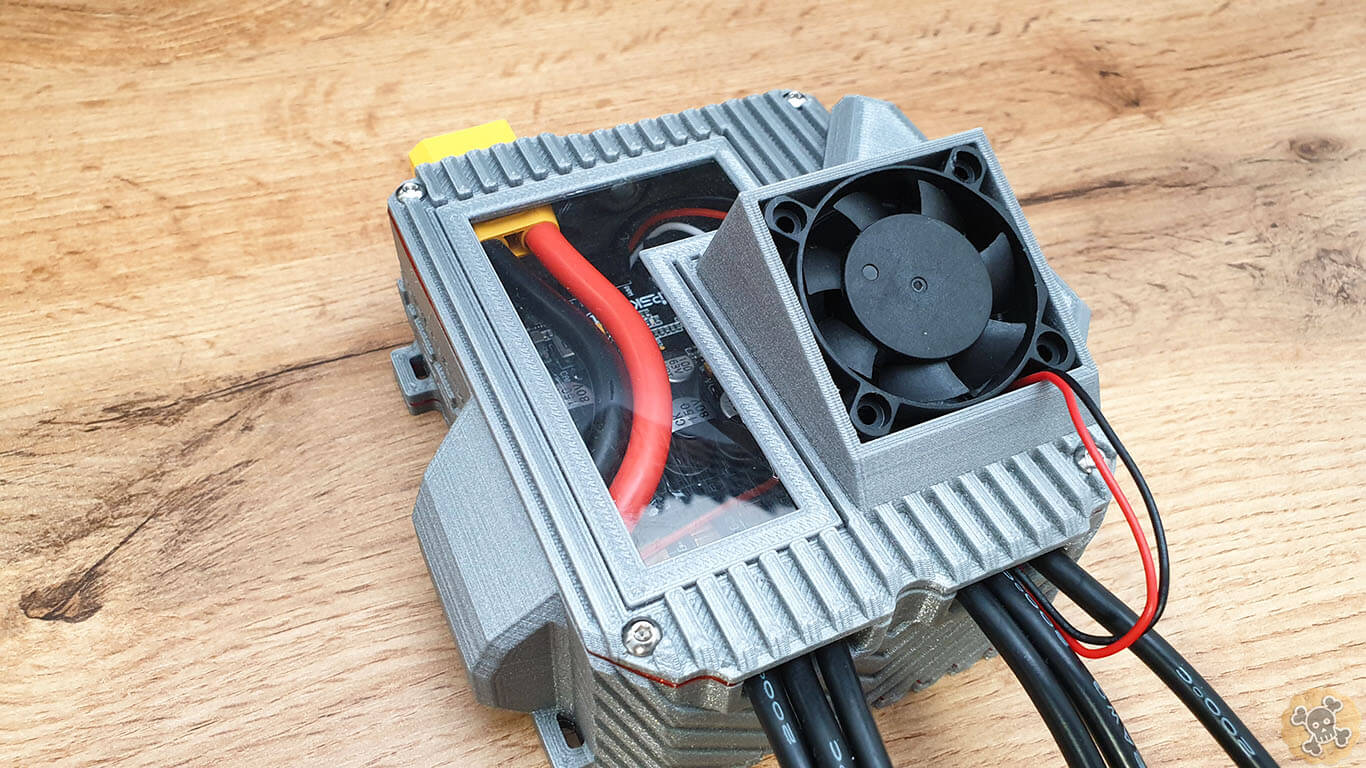
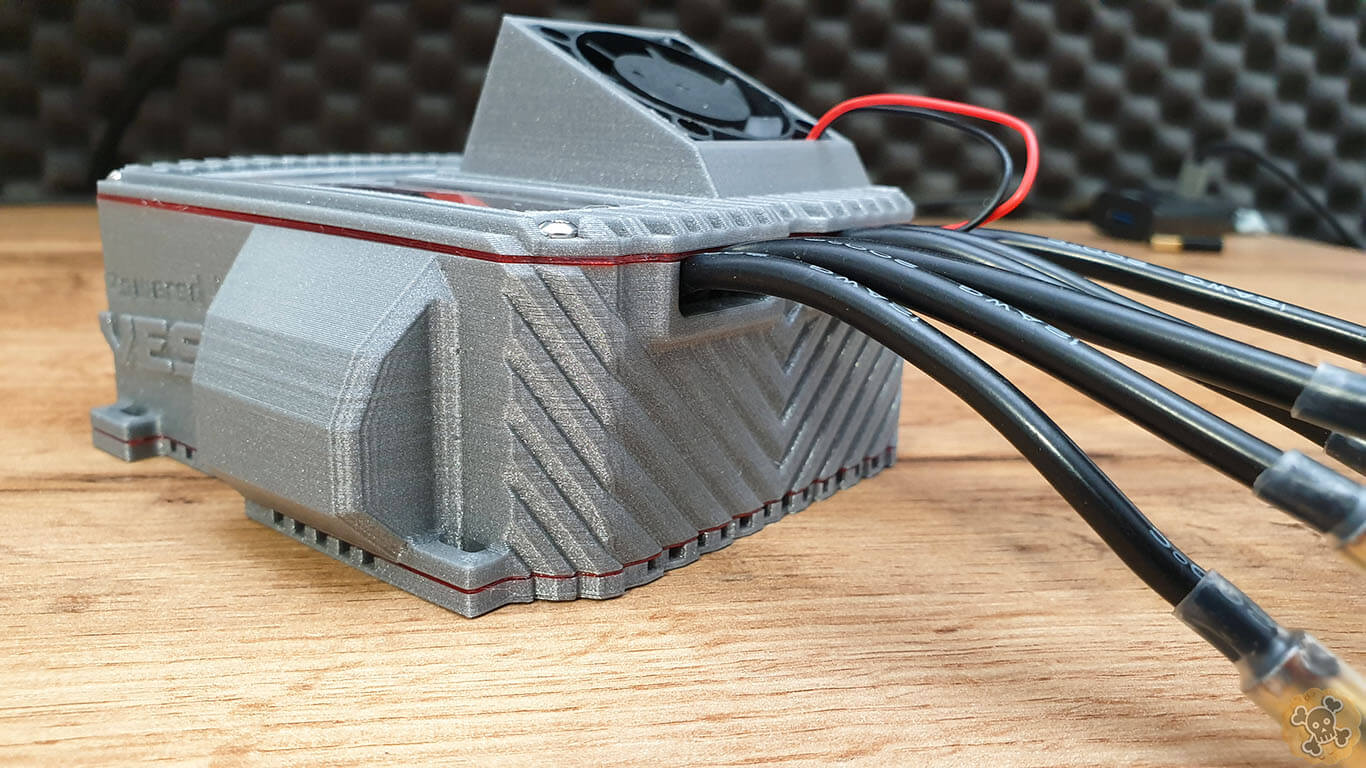
If 40mm fan will not fit easily, grind walls of the fan a little bit.
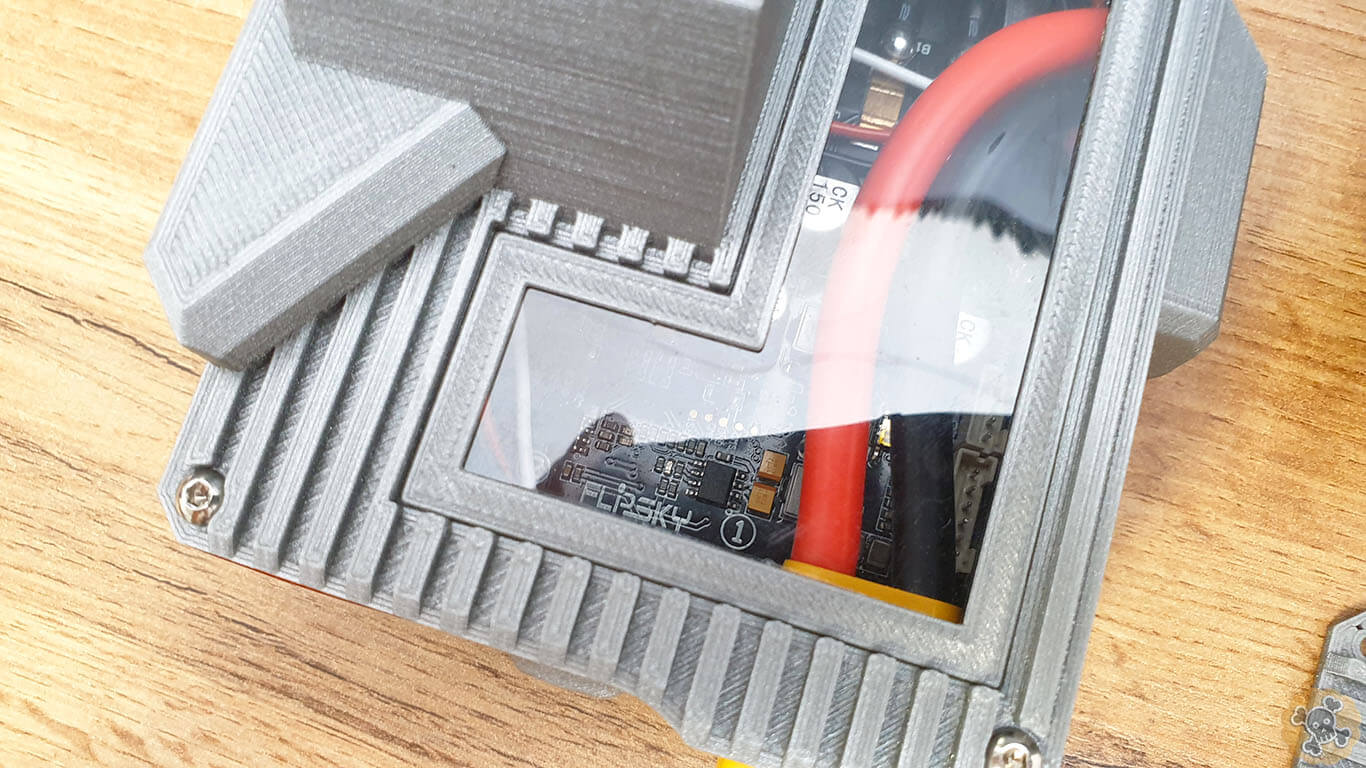
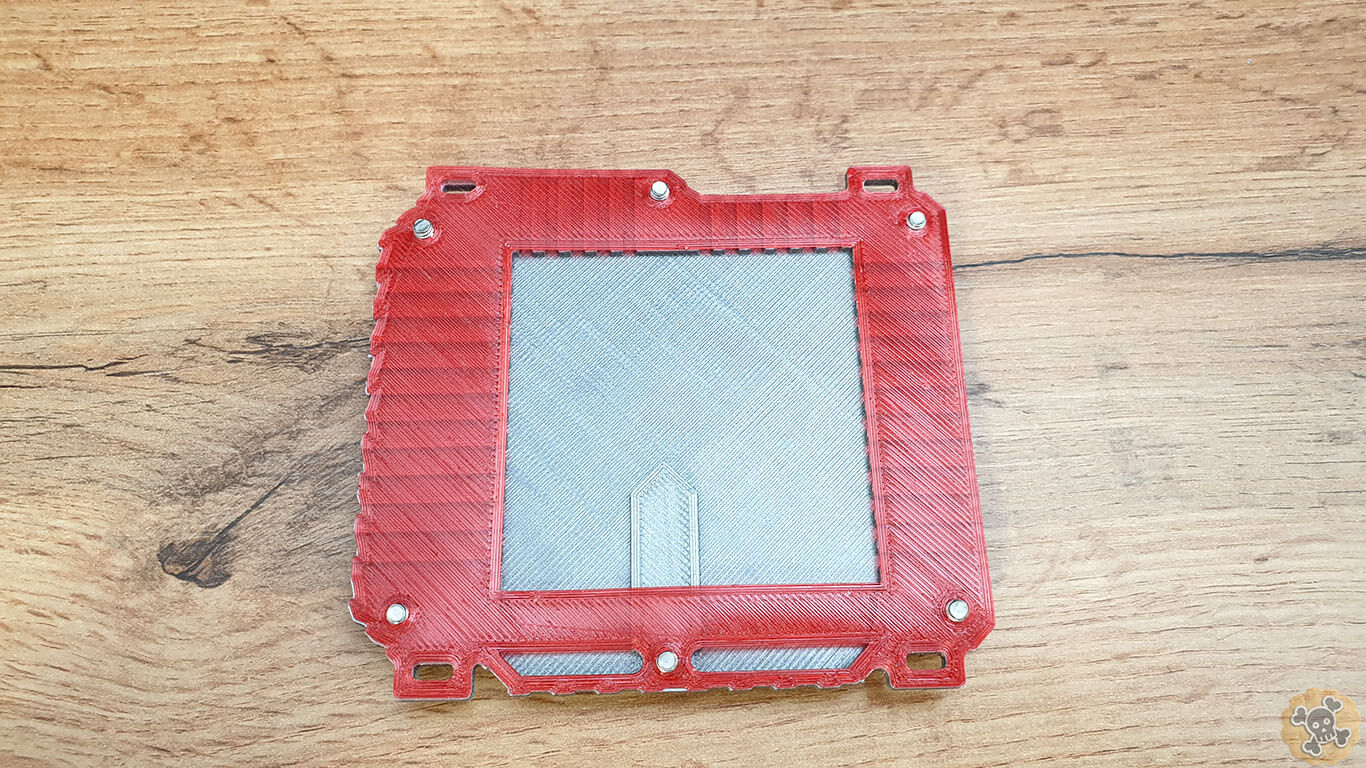
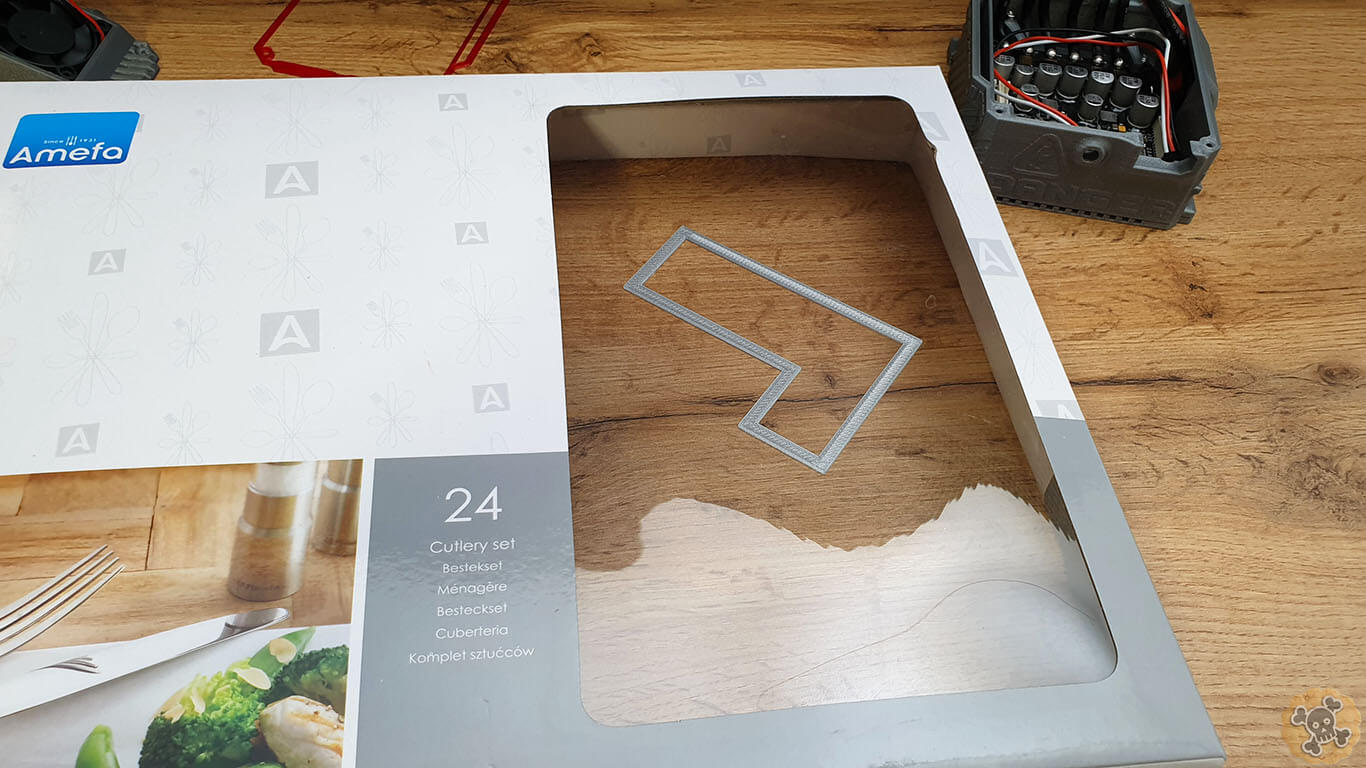
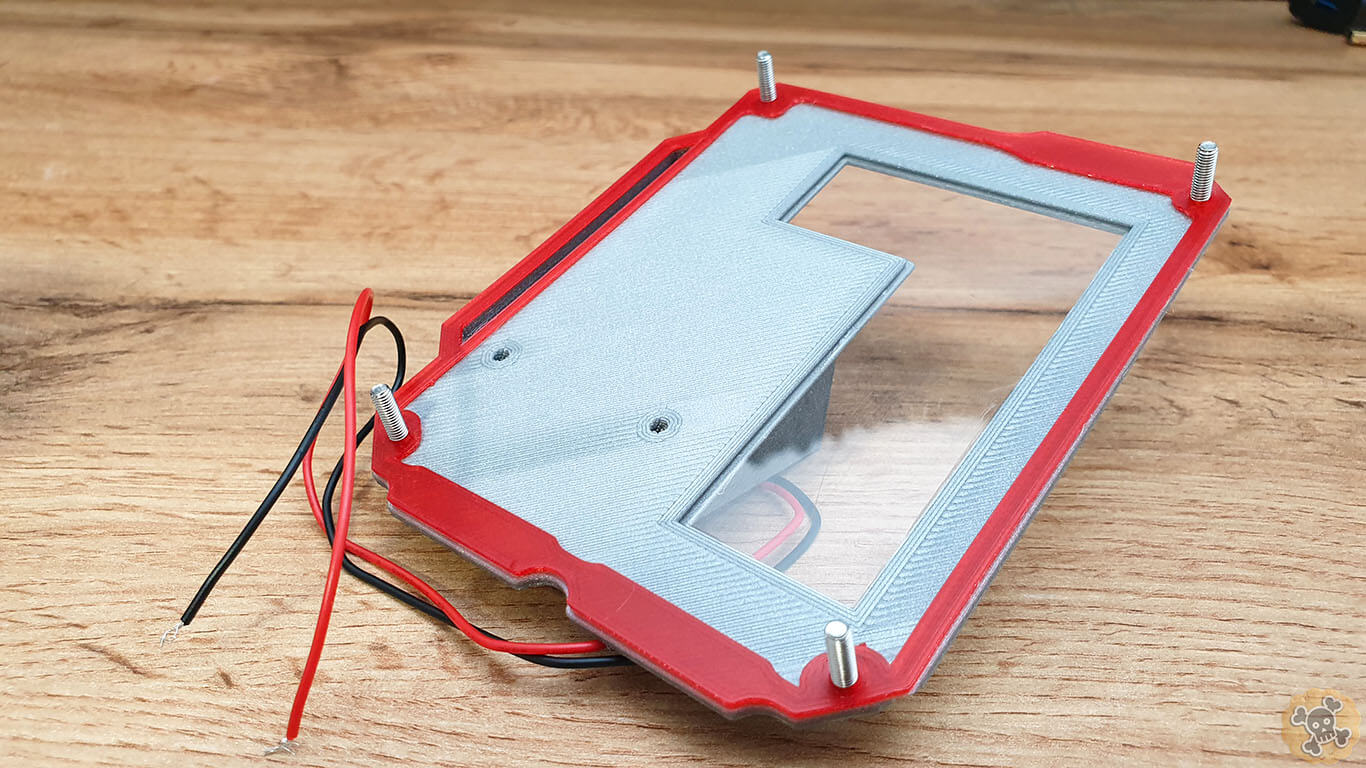
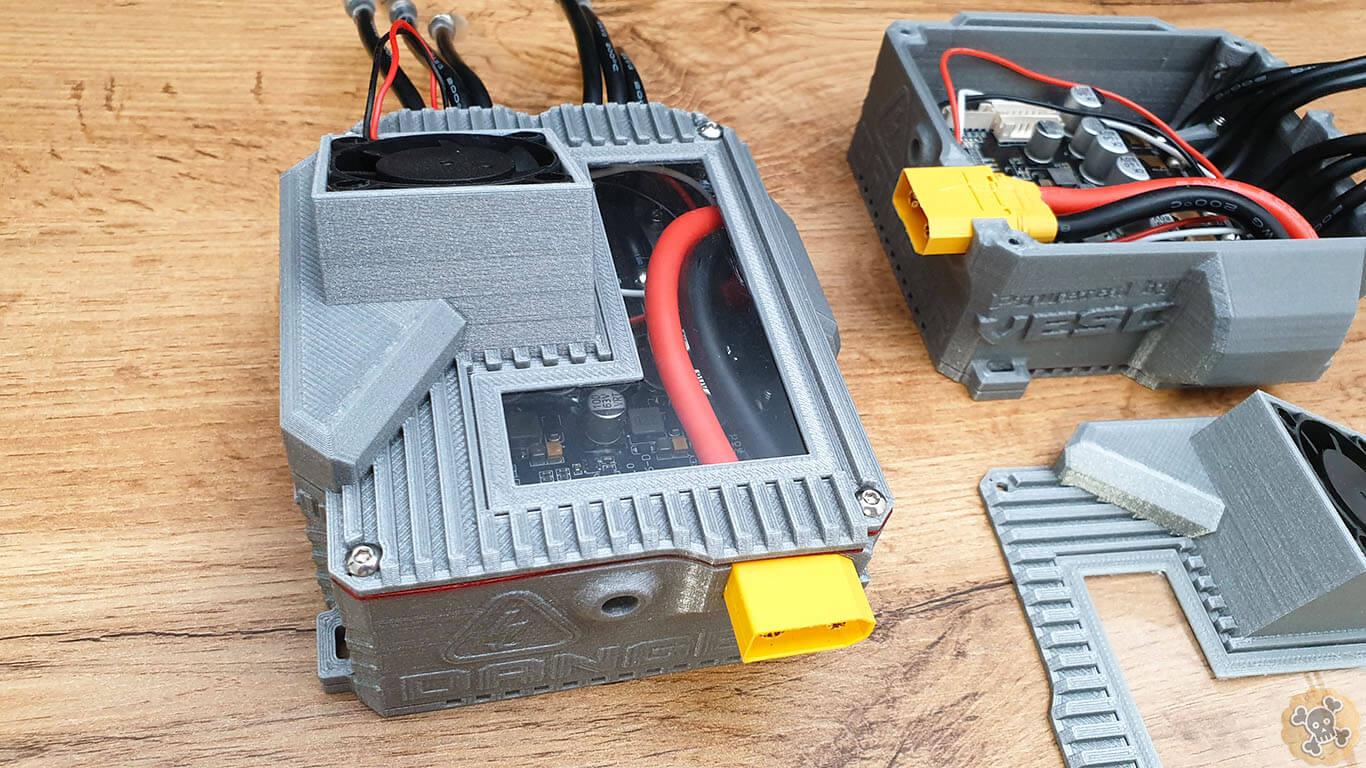
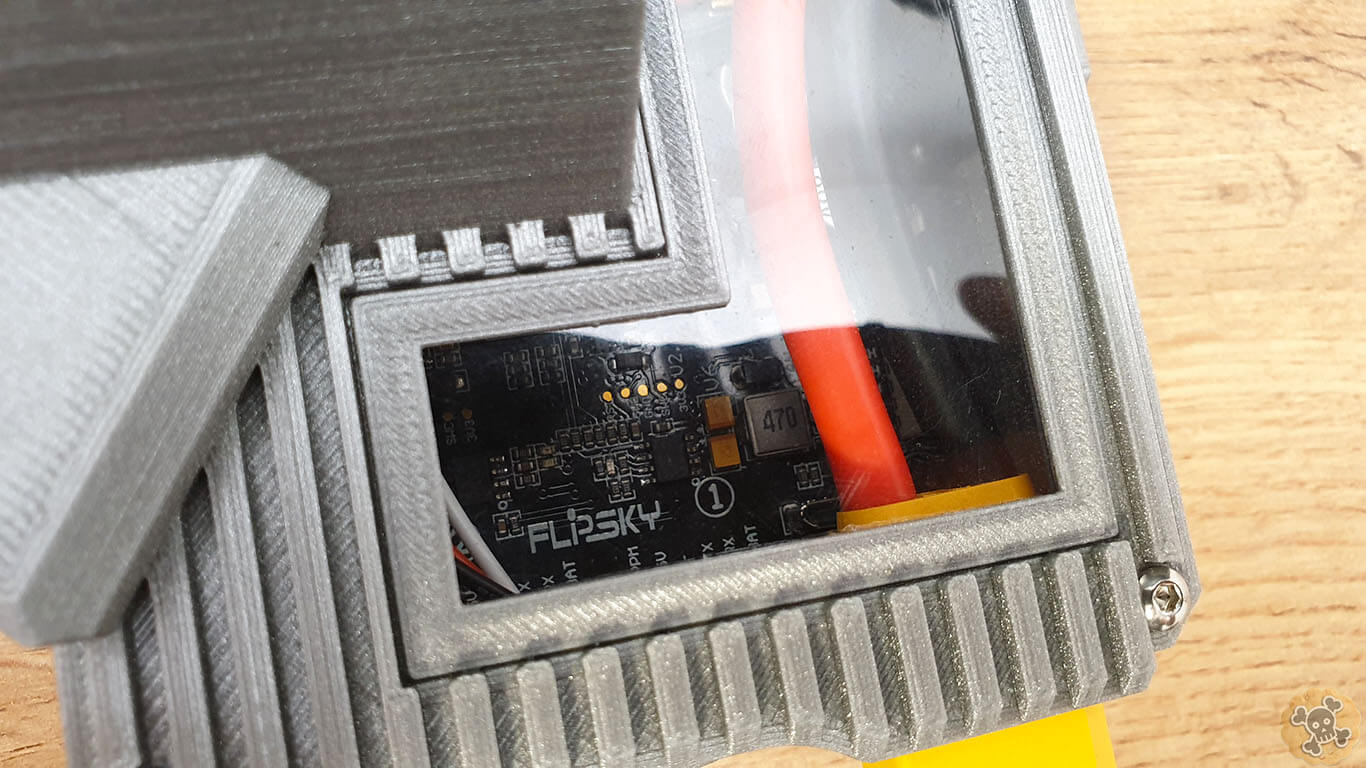
To make window I used some transparent plexi from old box, but I do recommend to use some HQ 1mm thick plexi glass. I also used super glue which is bad idea cause it can damage easily thin pelxi, go with sticky silicone kaufer or something.
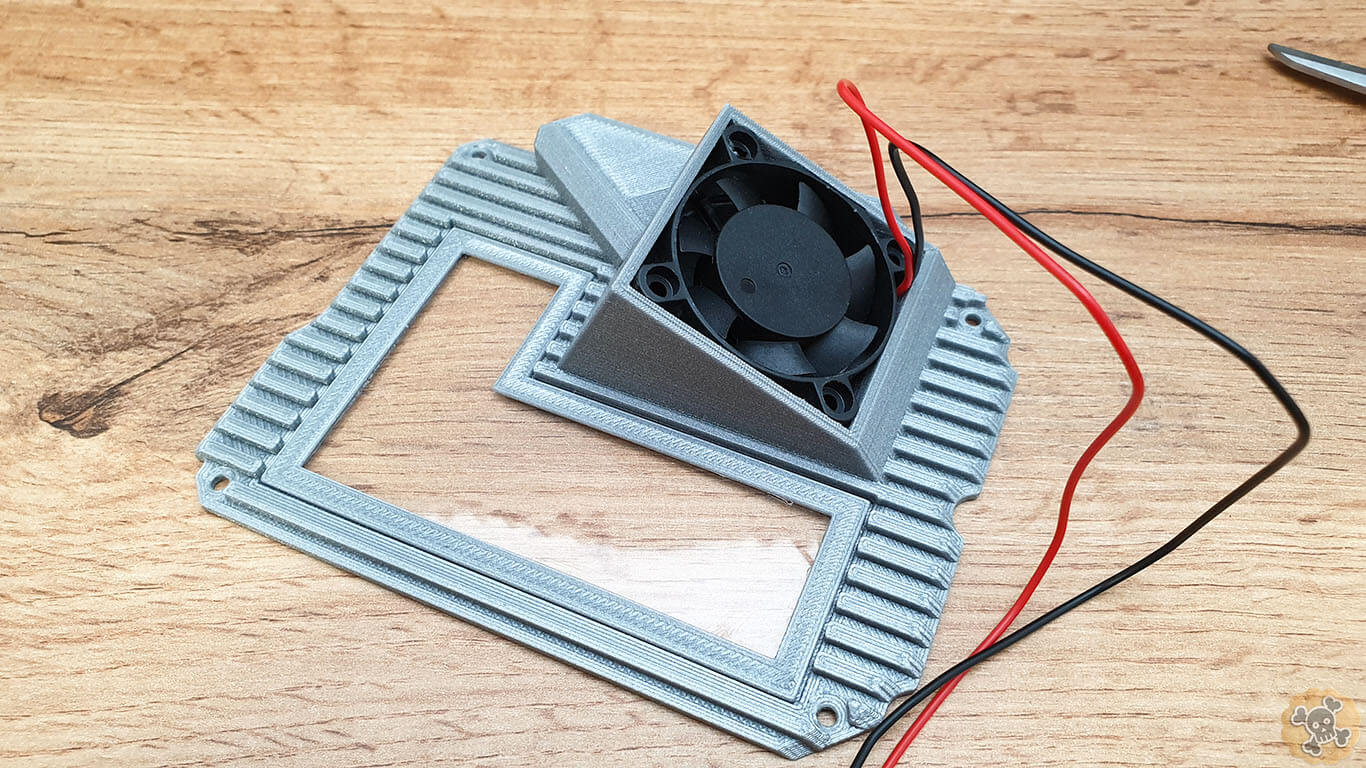
And there we got a window, on vesc are 4 leds so inside cause will be quite bright 😉
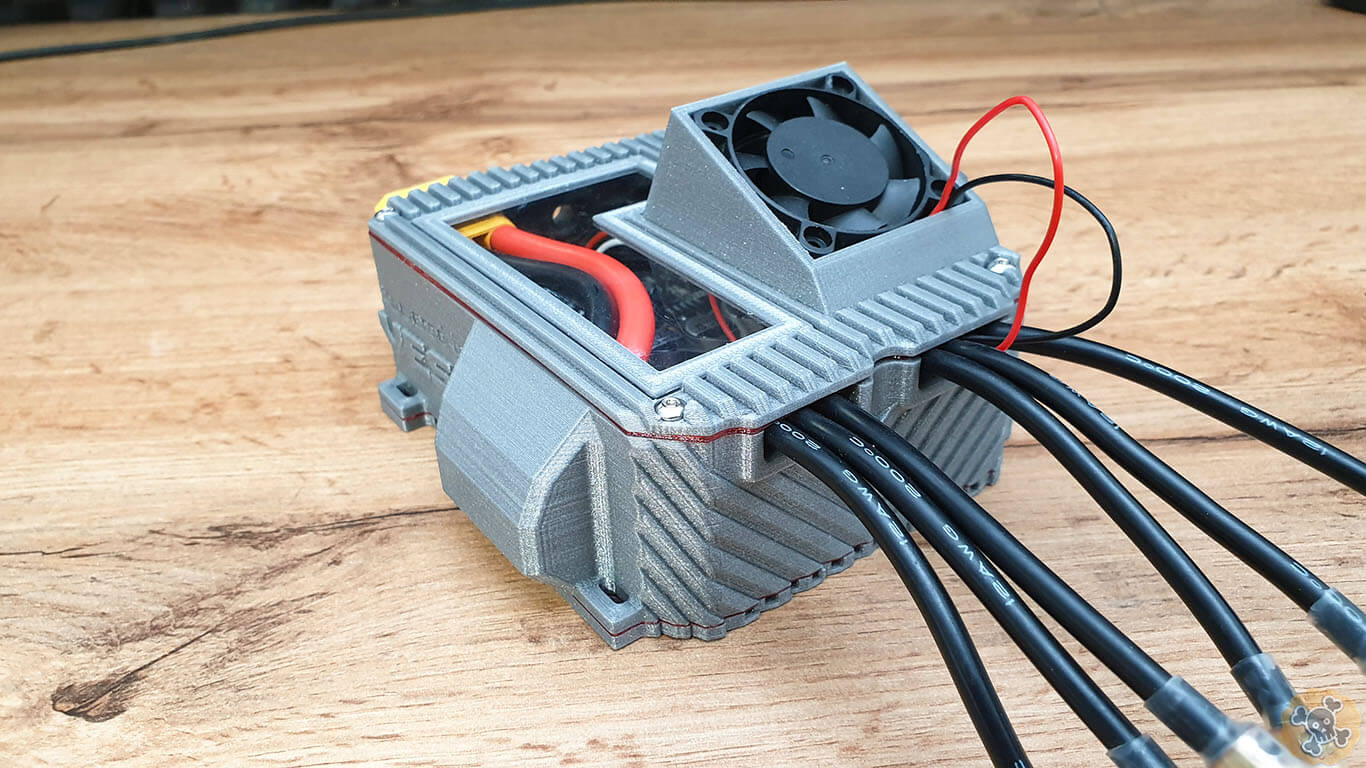
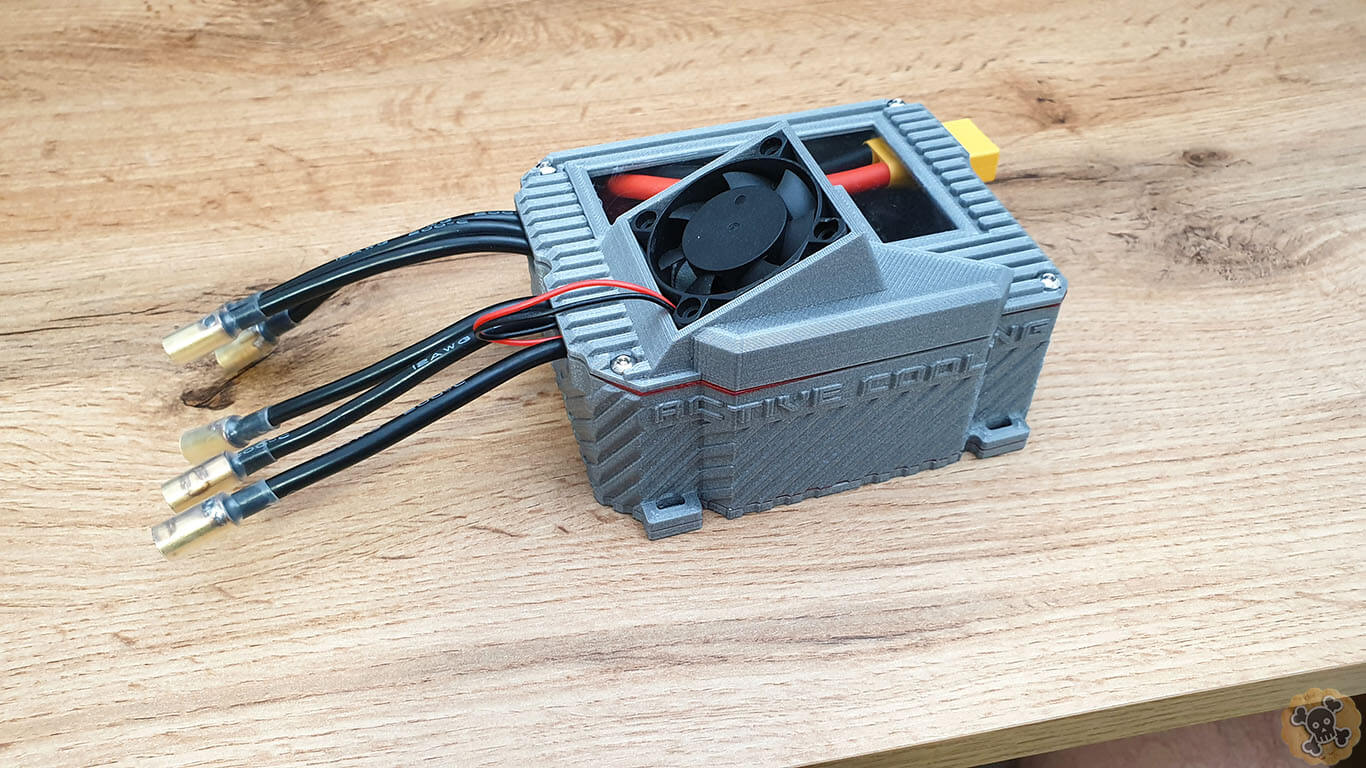
When you finish wiring, connect 5V fan to one of the UARTs on Vesc ( add some capacitor between 5v + & – as a low pass filter )
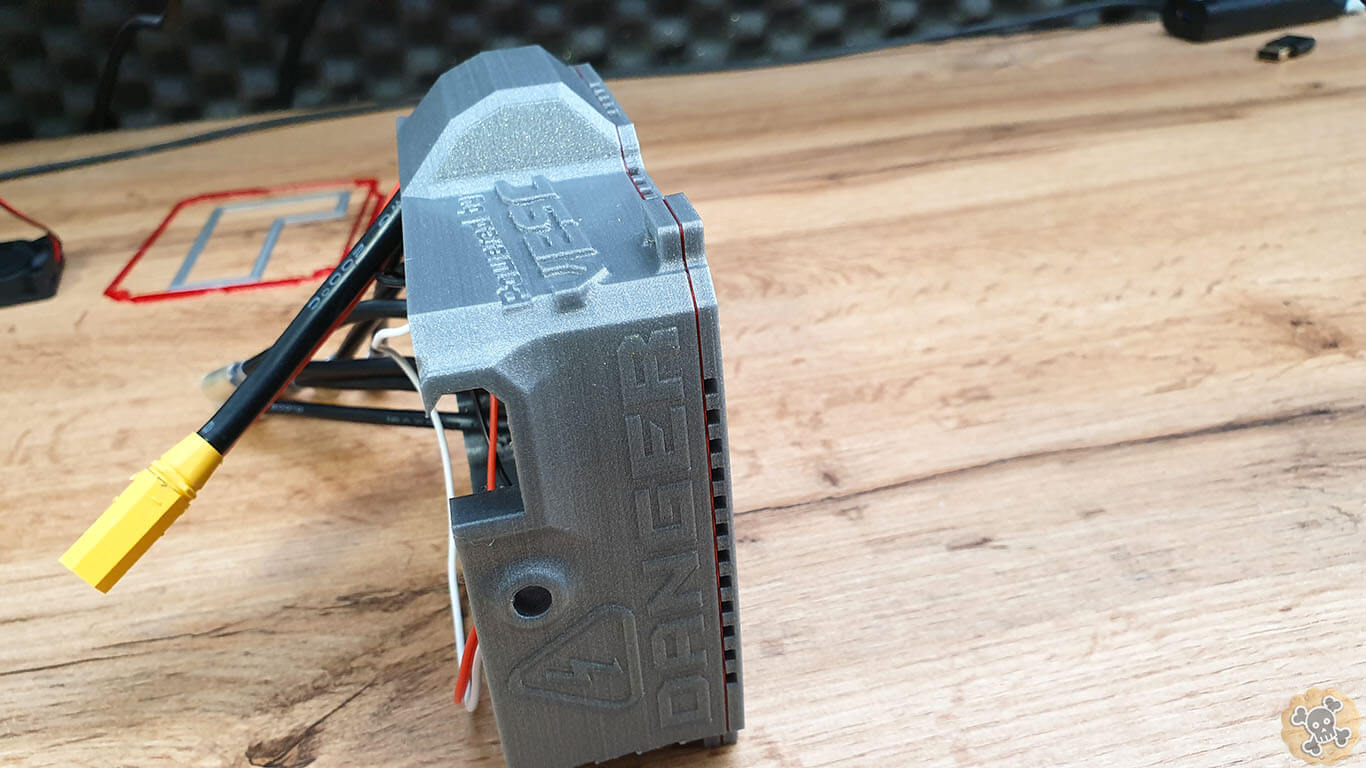
You have to admit it Looks GOOD 🙂 , my Patrons www.patreon.com/pirateonpatreon will have couple versions of top lid and newest versions 😉
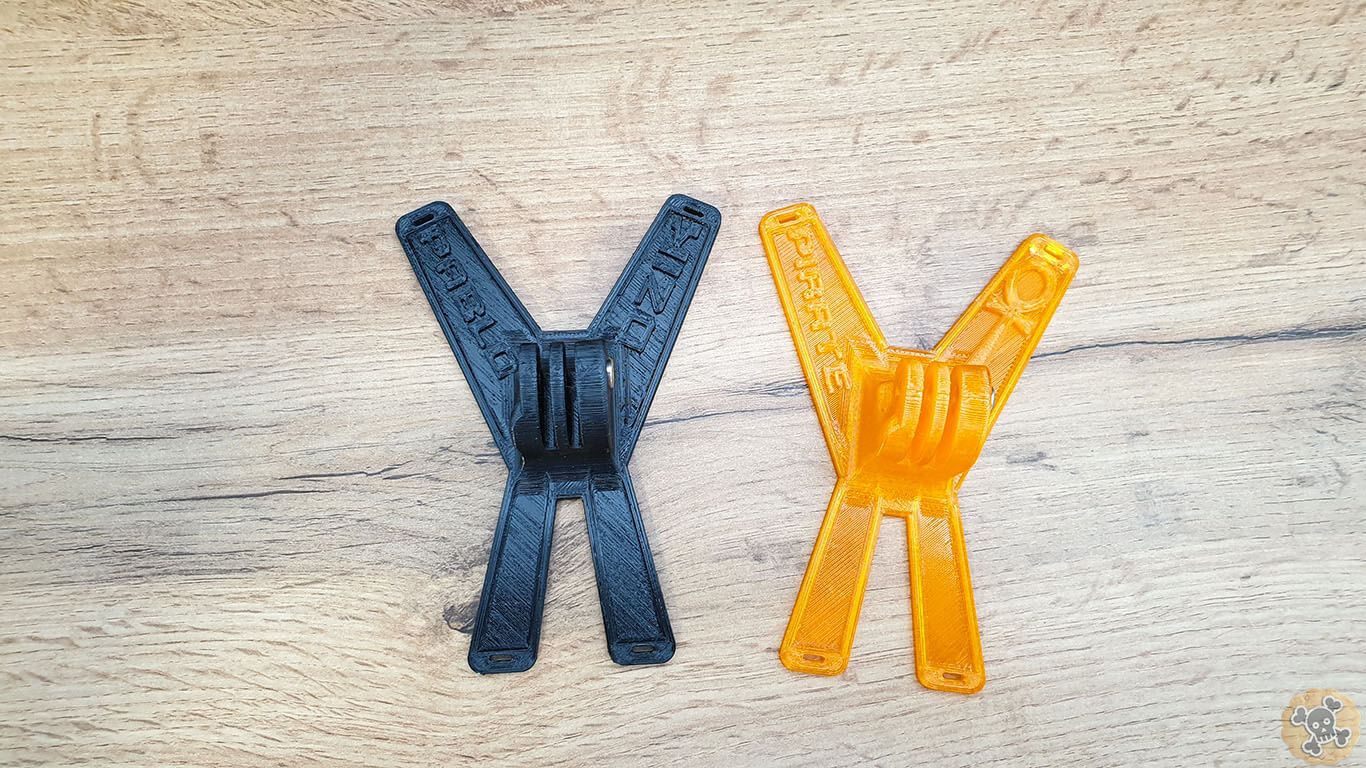
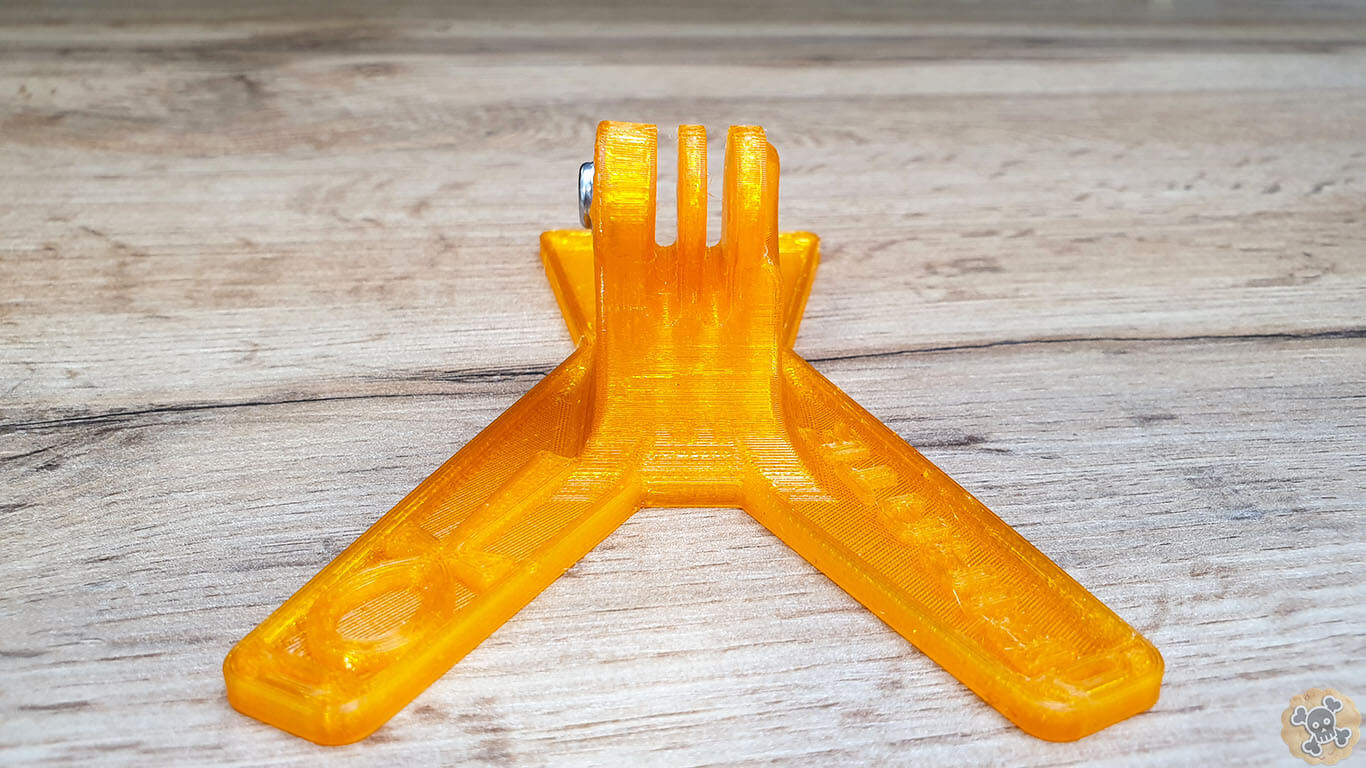
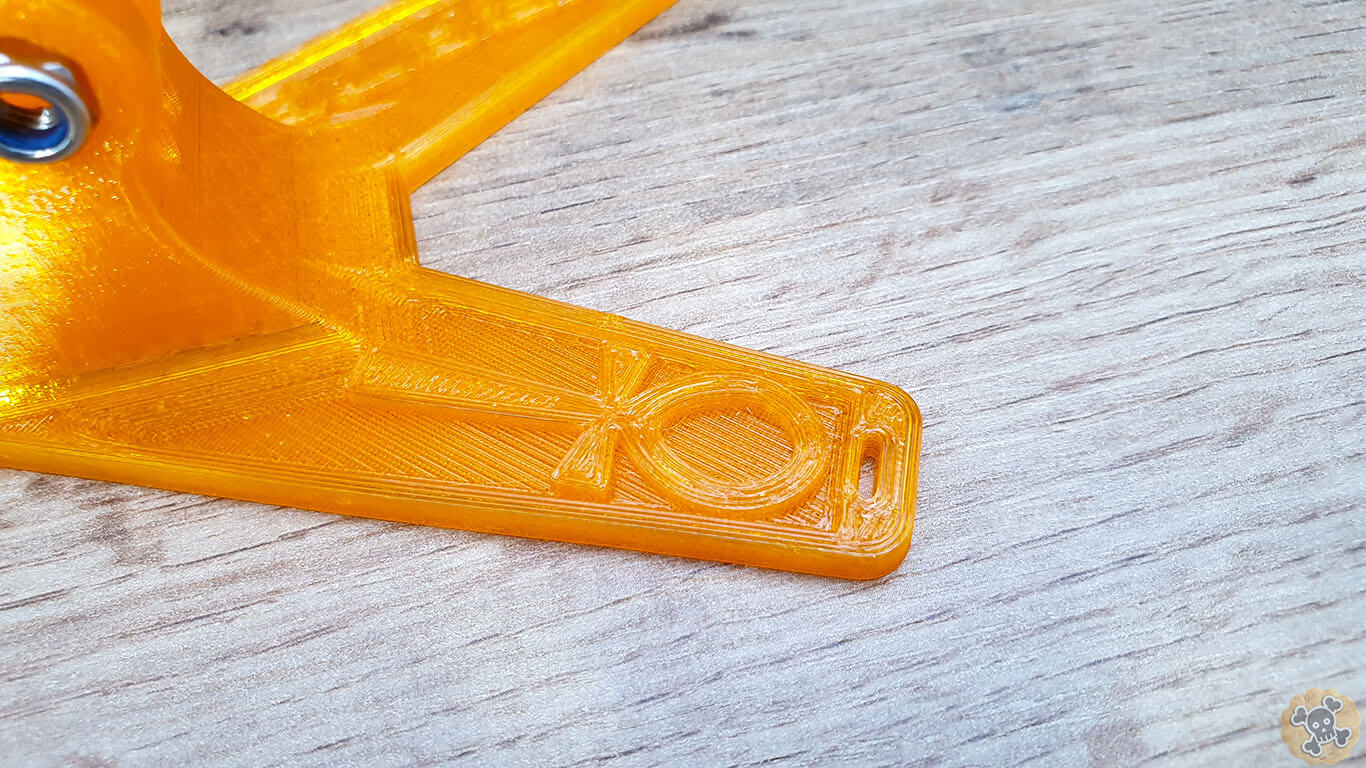
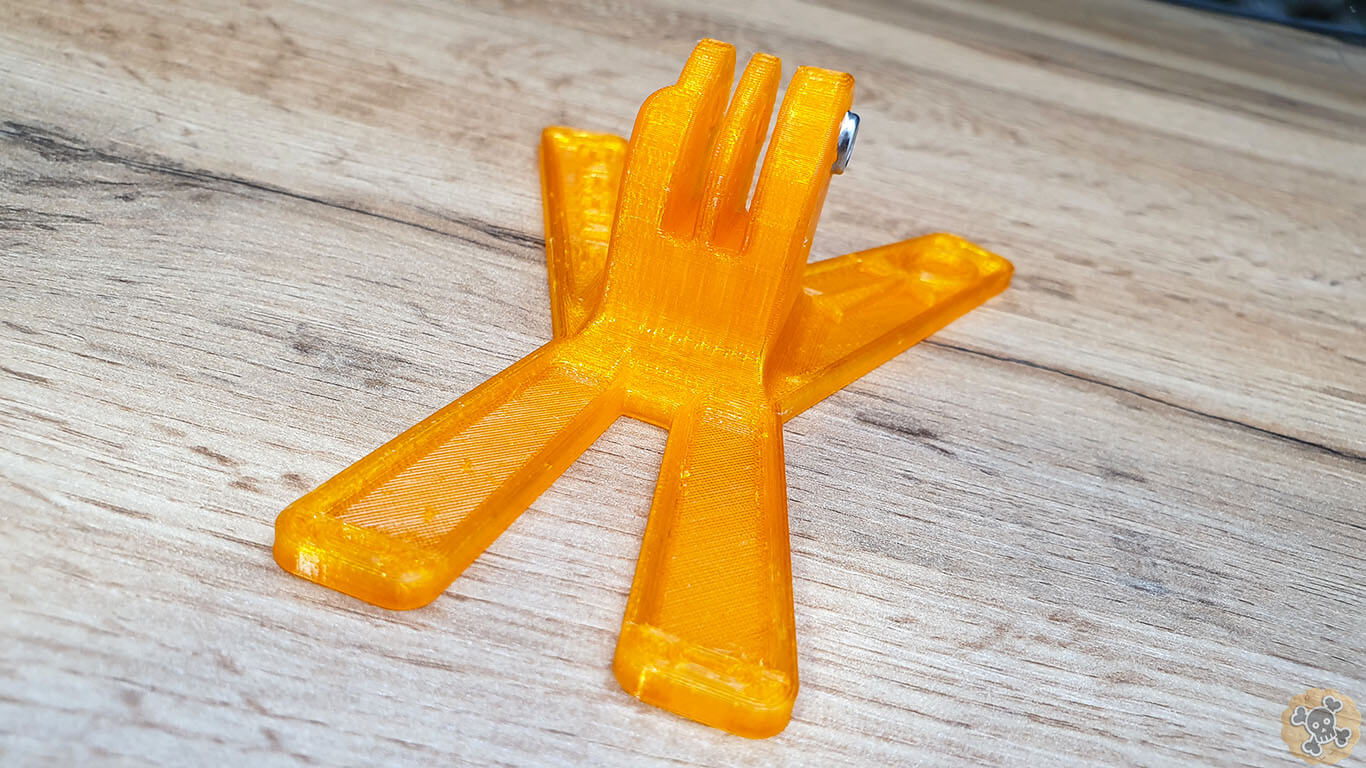
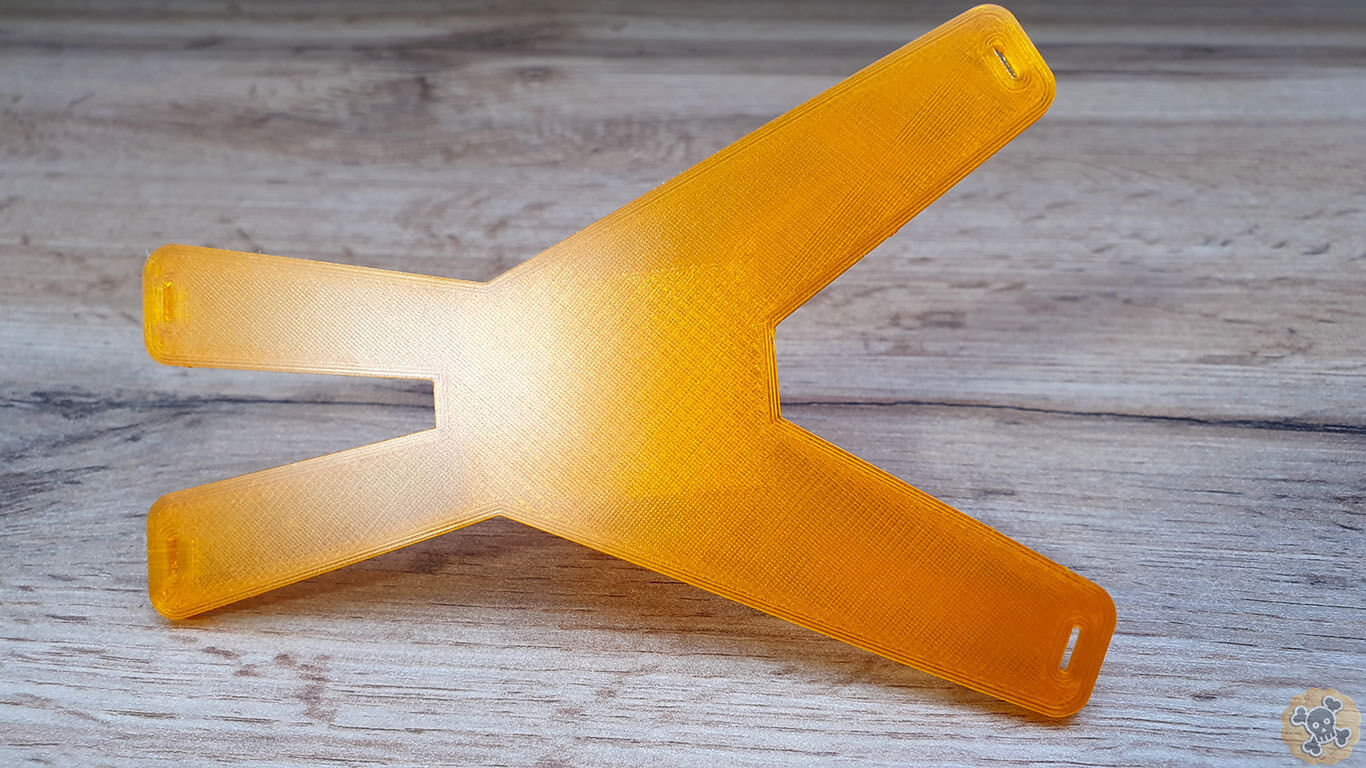
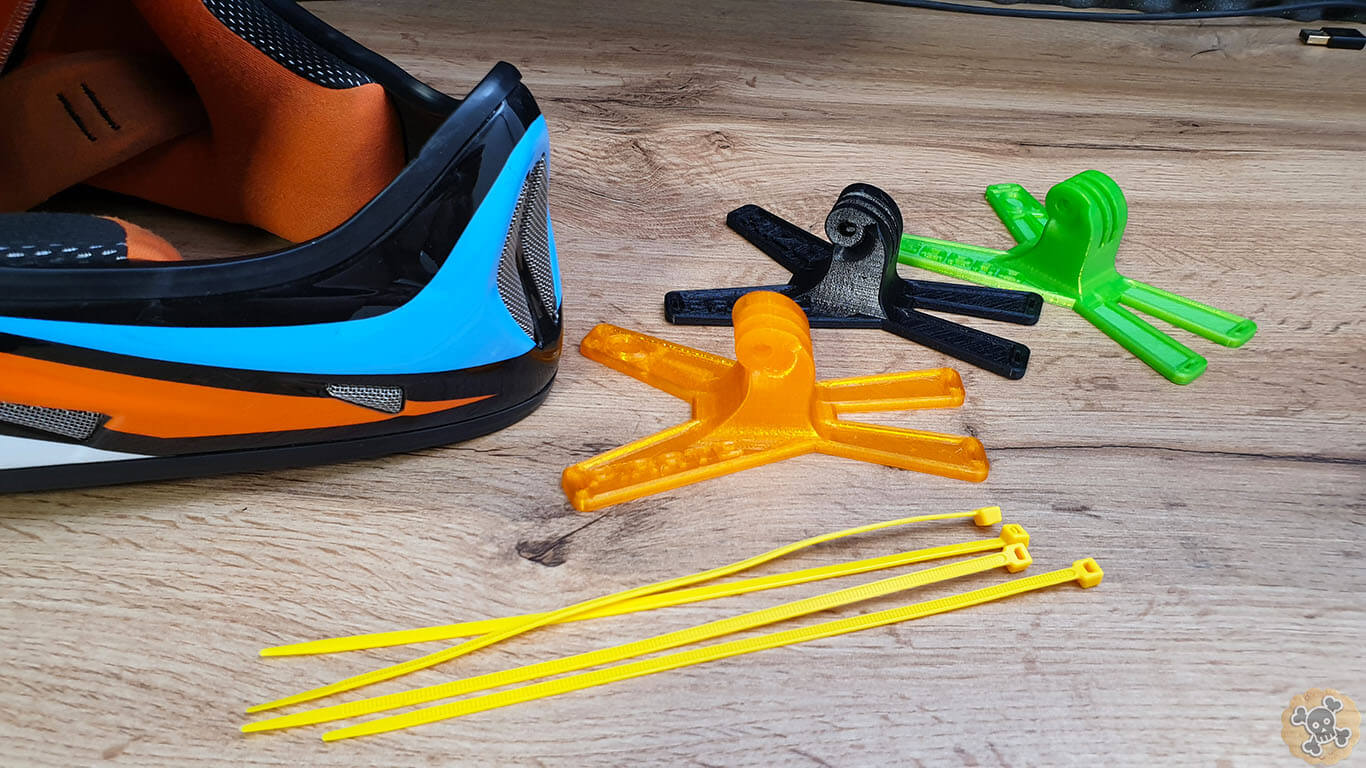
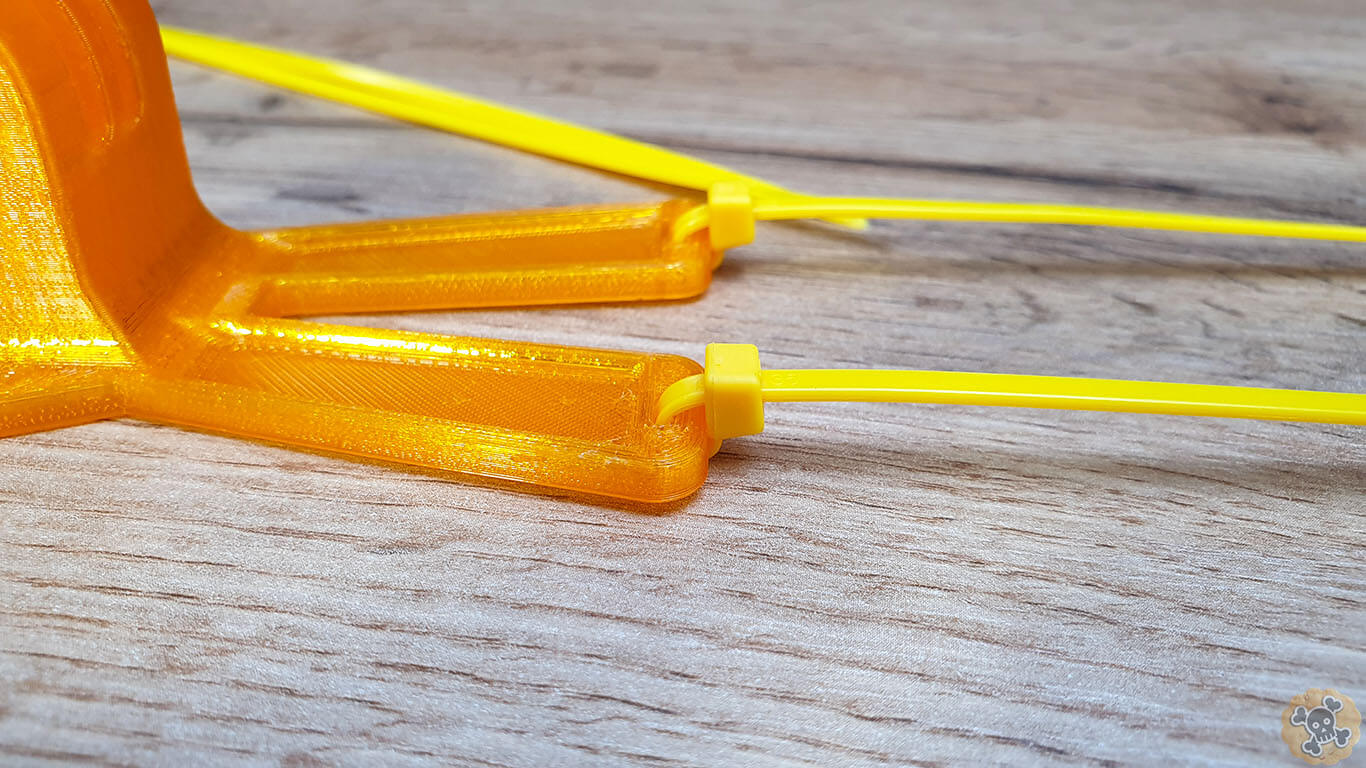
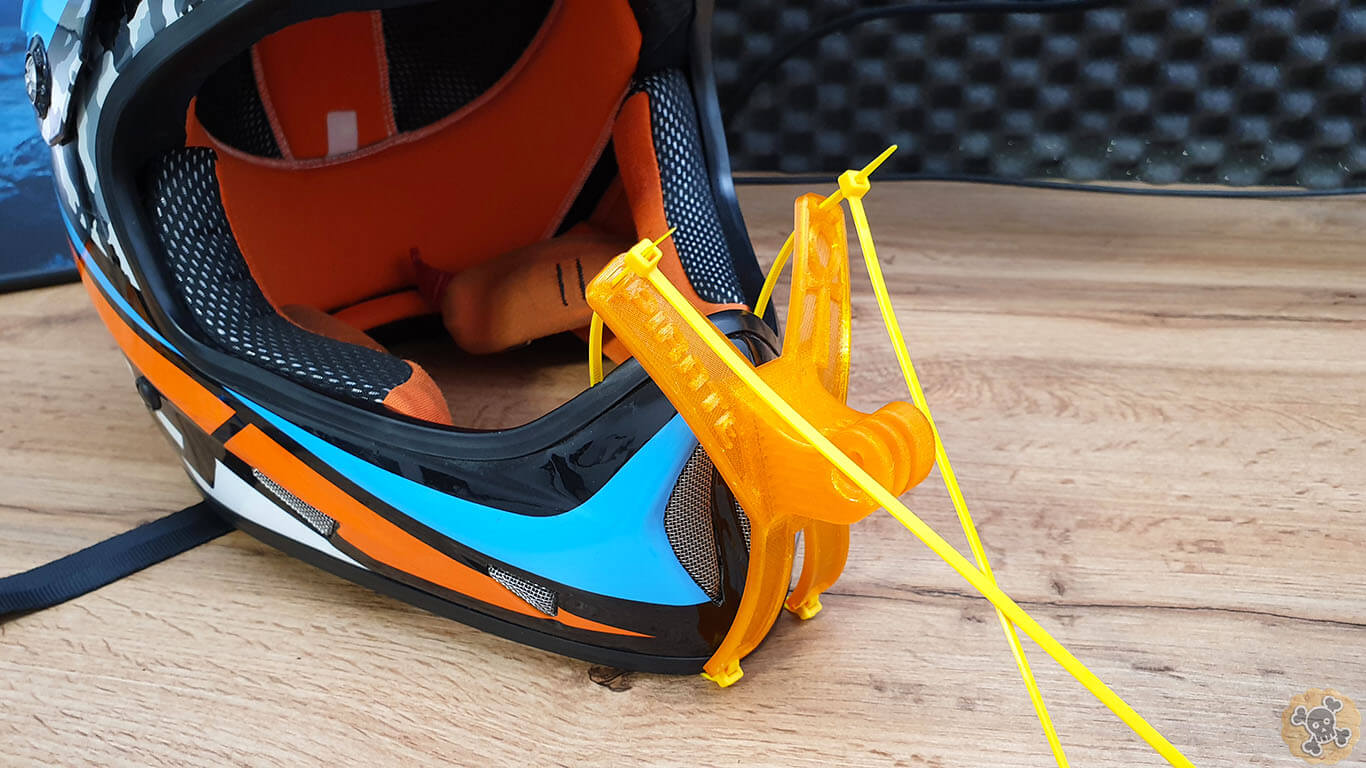
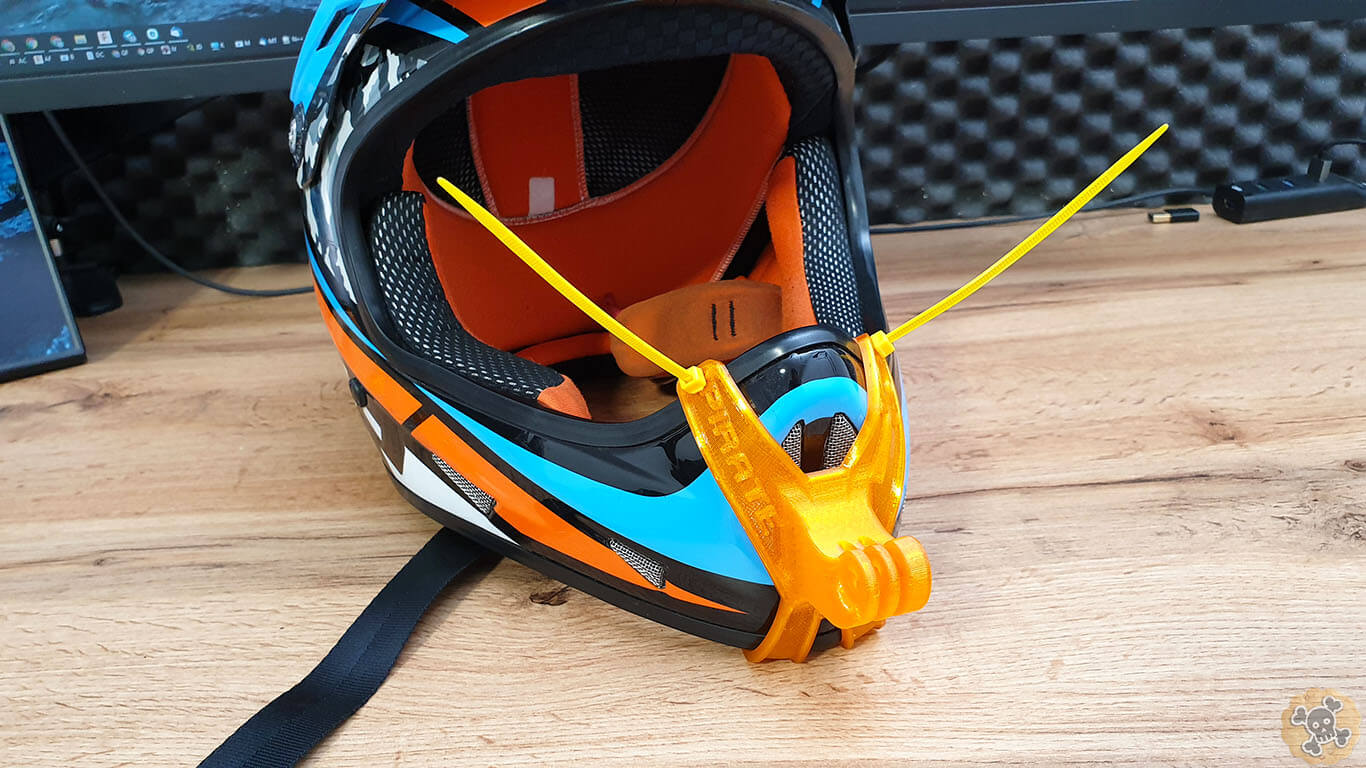
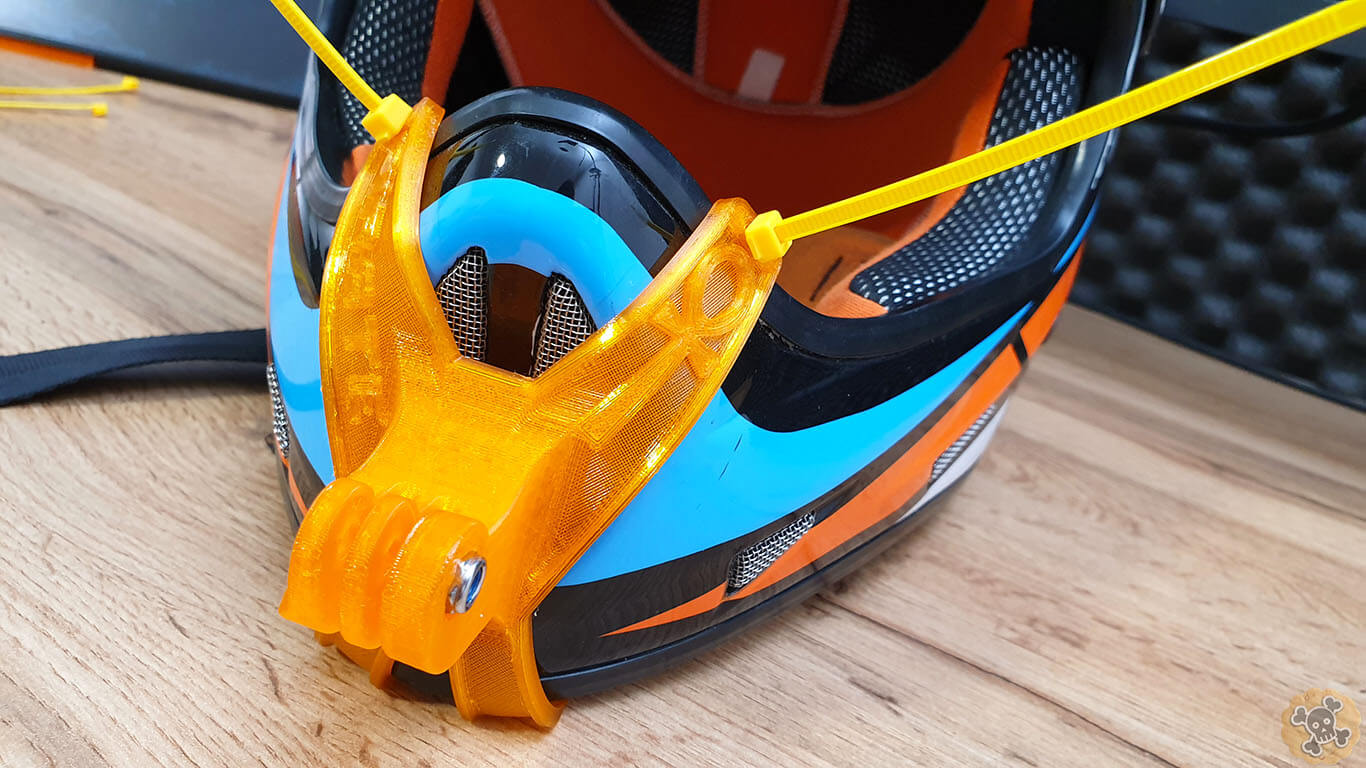
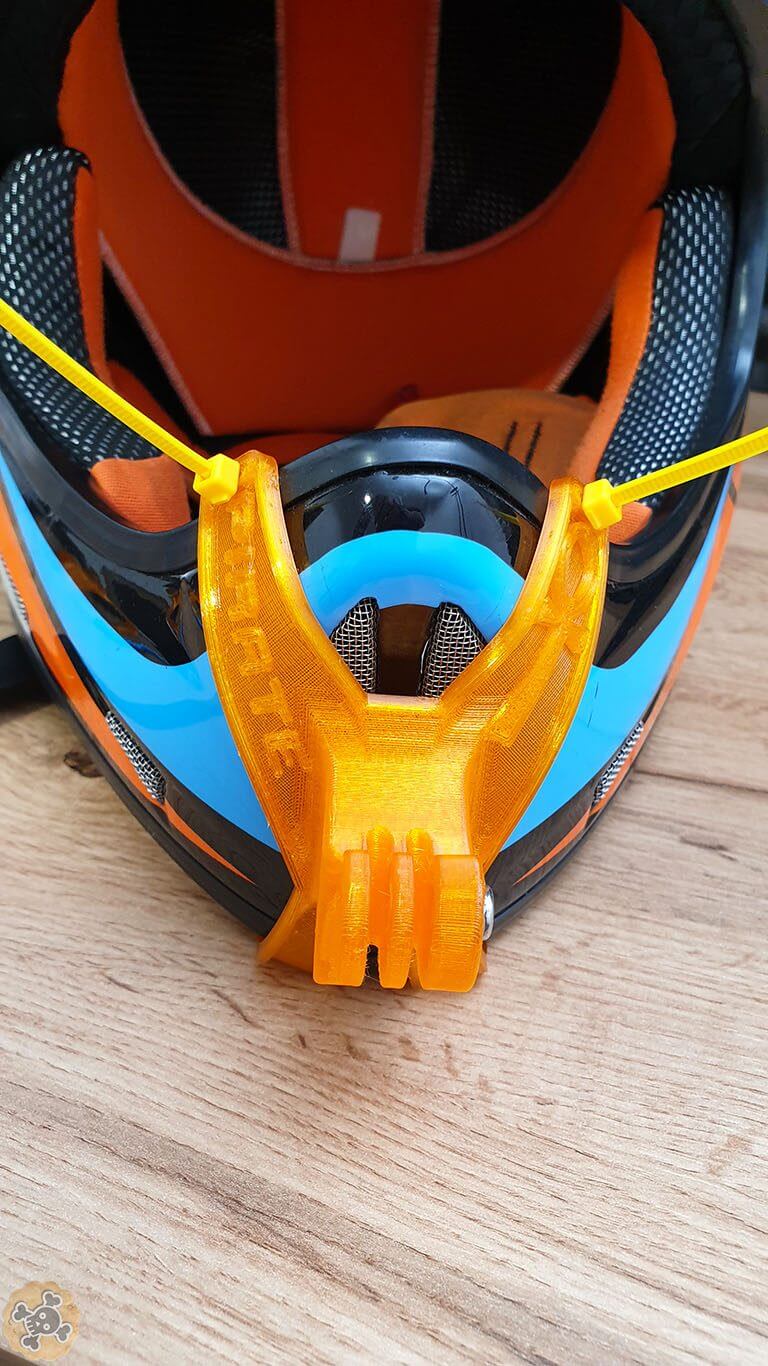
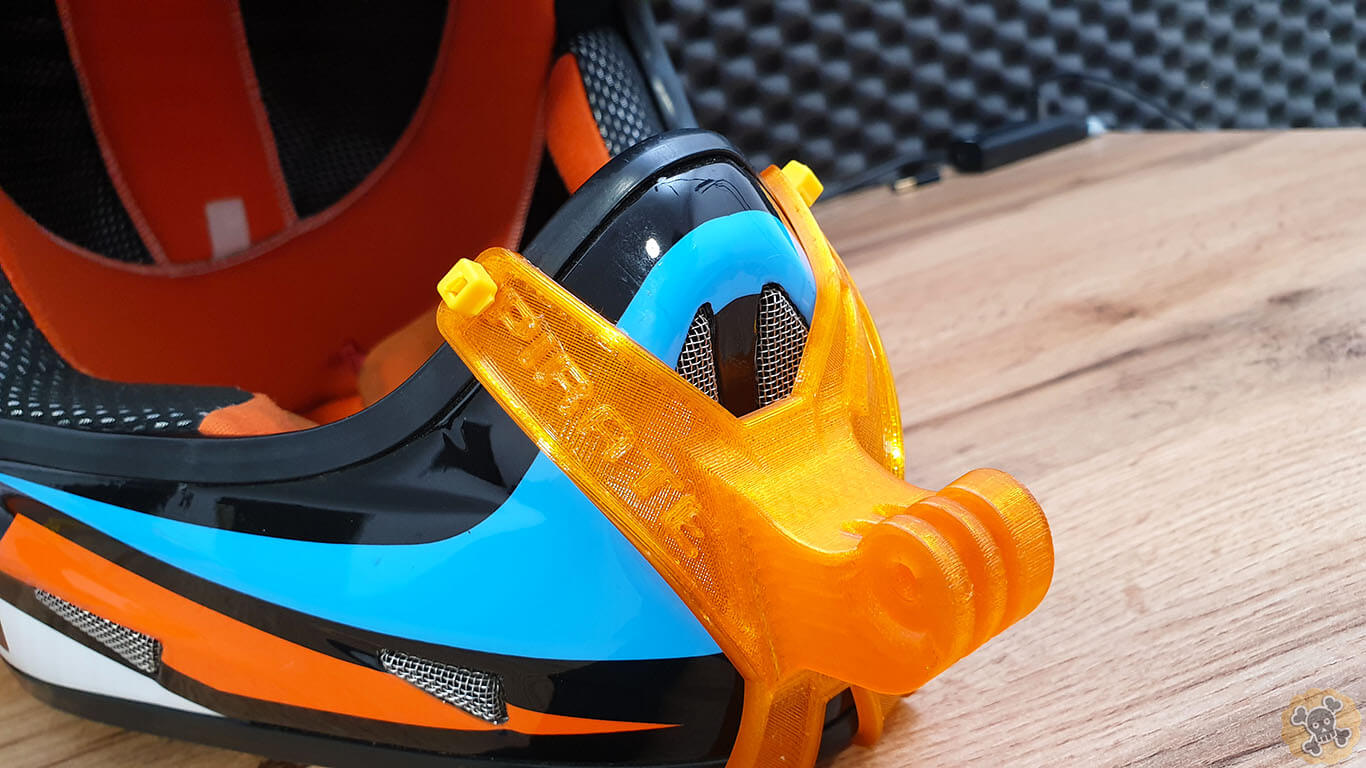
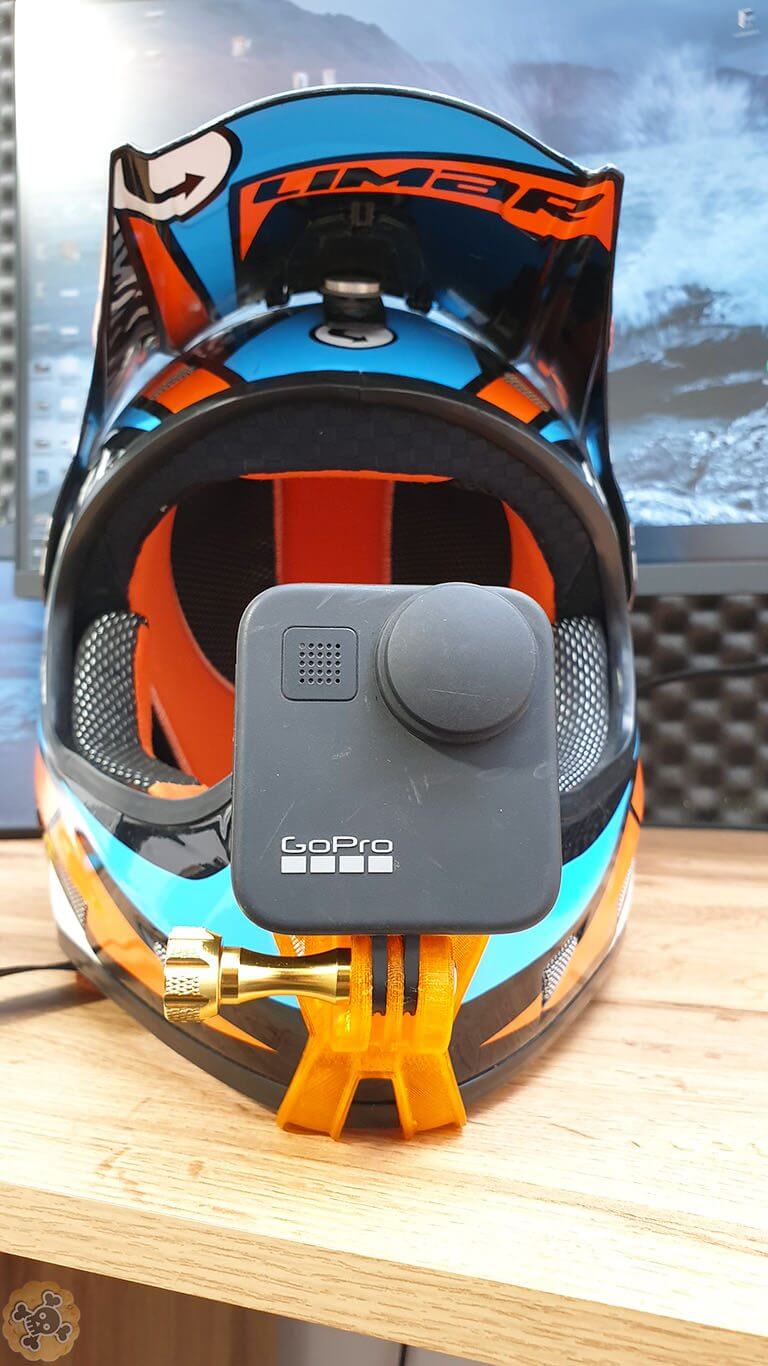
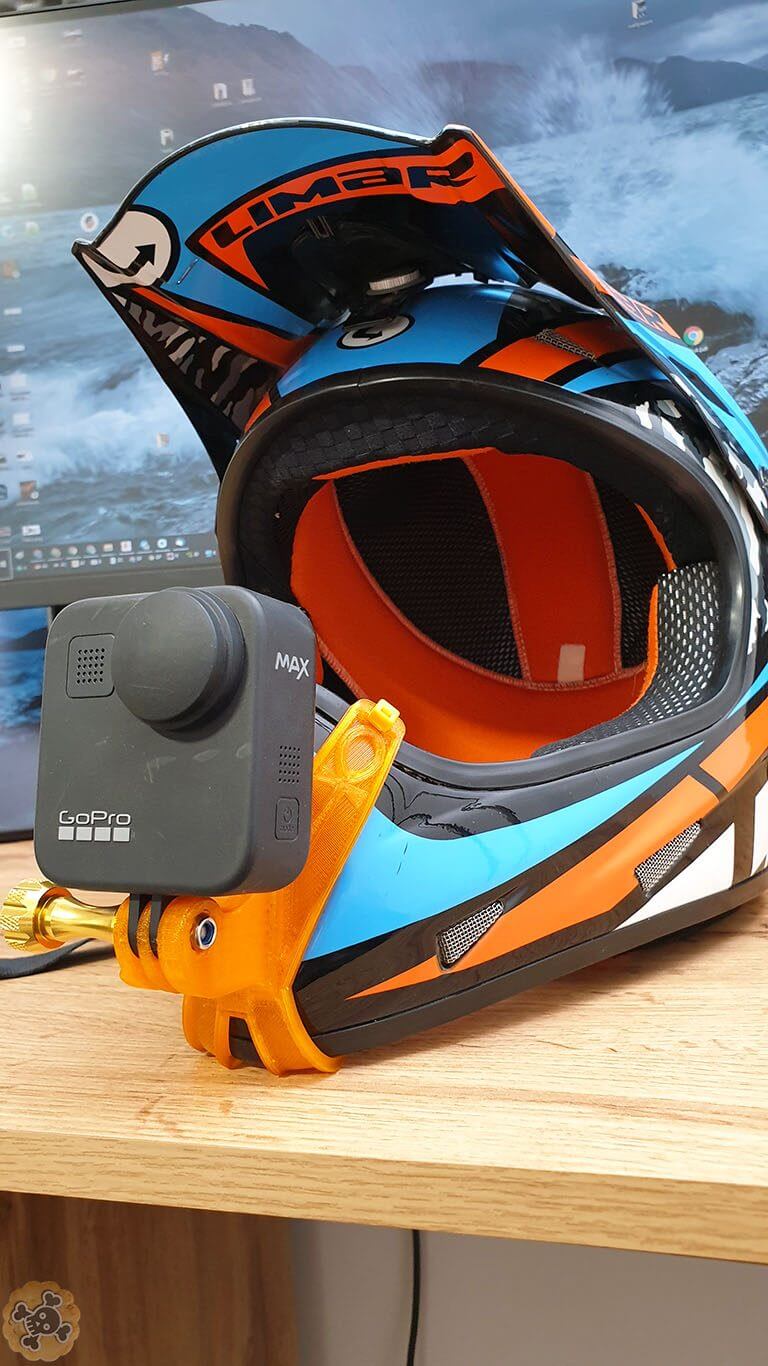
To make almost all my latest videos , I used my GoPro Chin mount for Full Face hemlet. It should fits on most of full face helmts and it’s super easy to install it. I used before some chinese chin mounts but they didn’t survie long , even those more expensive 40$ + , so I decided to make my own which can handle A LOT ?
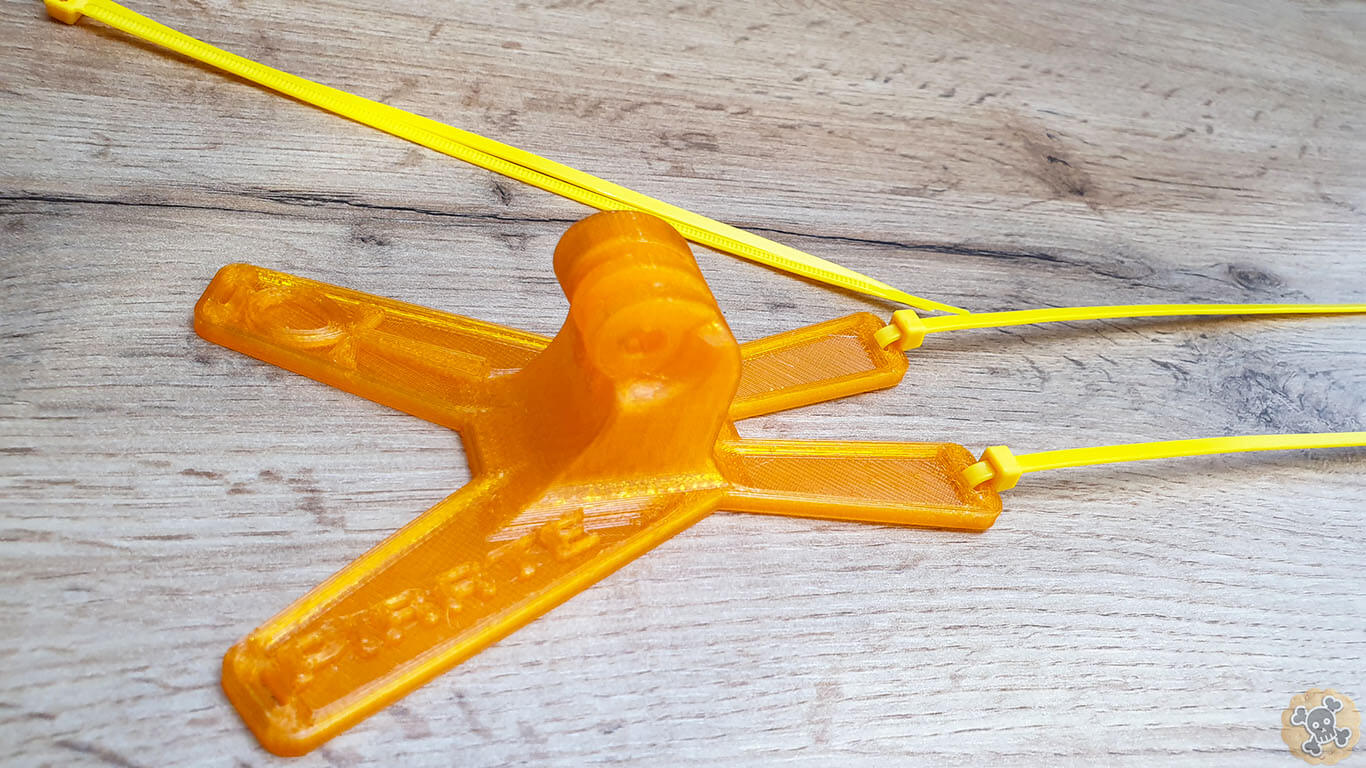
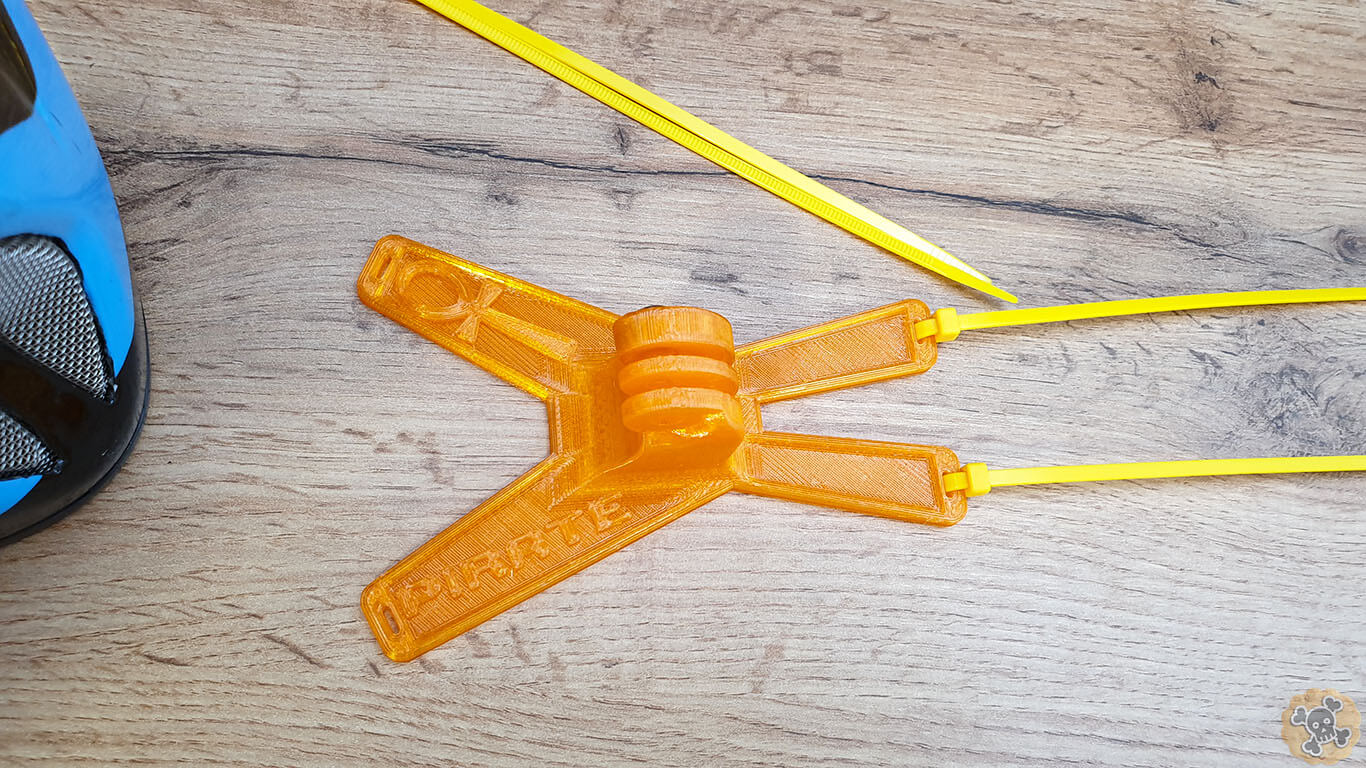
I used super flexible and strong filament, also I can do some special things like add on chin mount your own Name / Brand and/or symbol. Here you can see my and Pablo adapters .
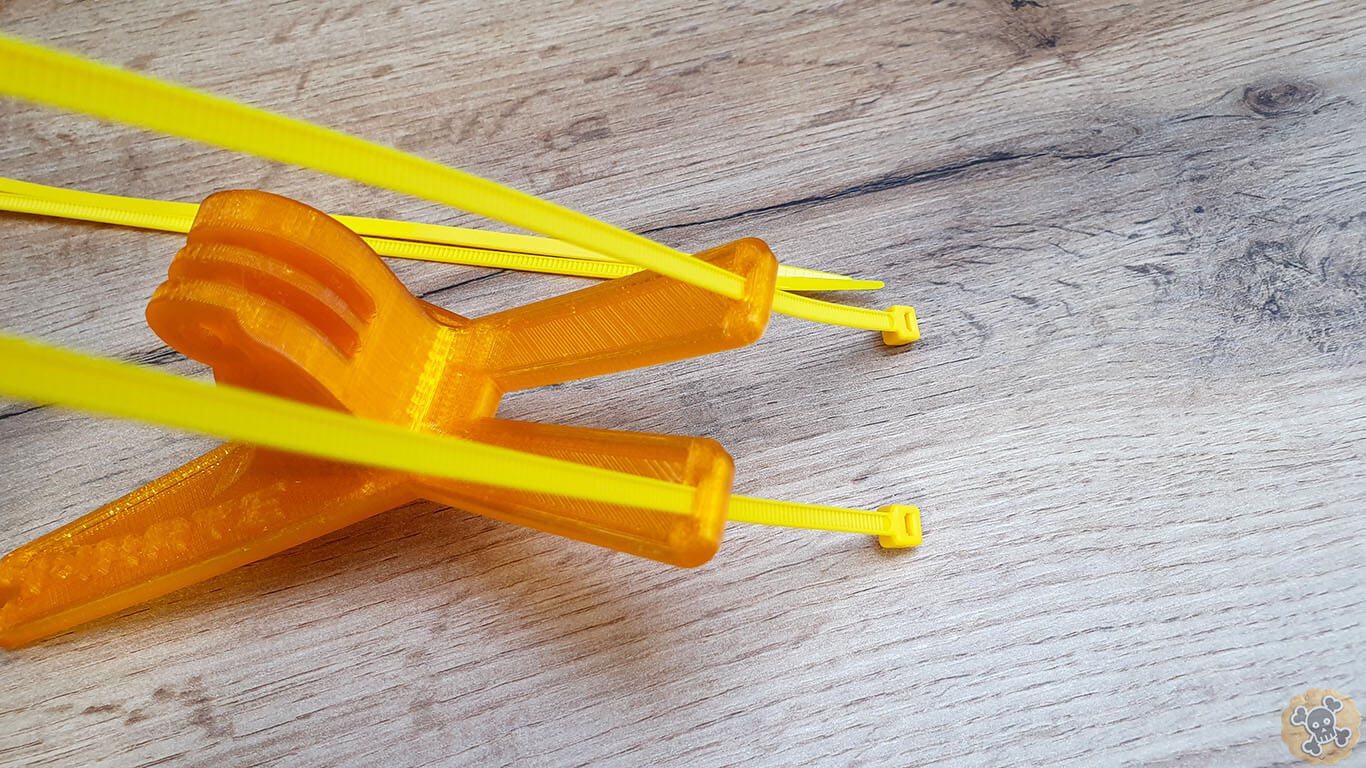
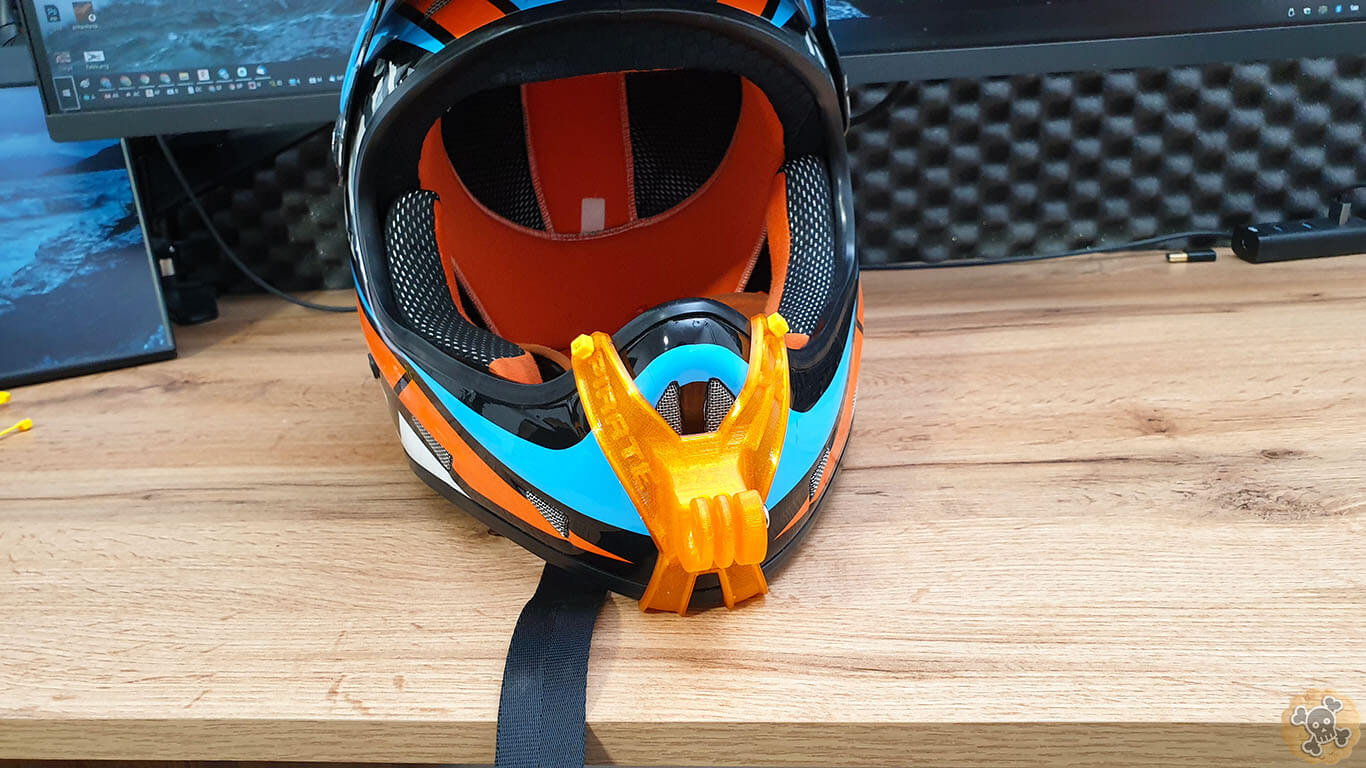
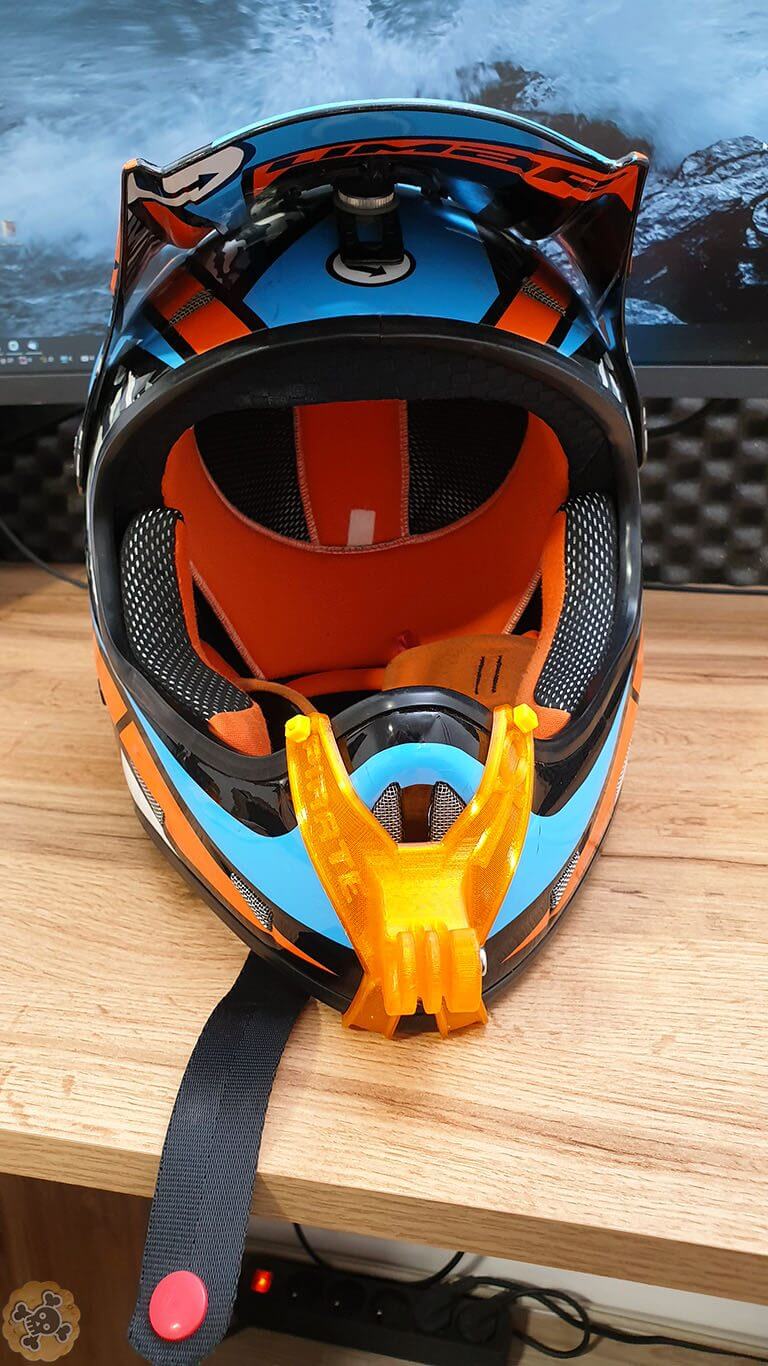
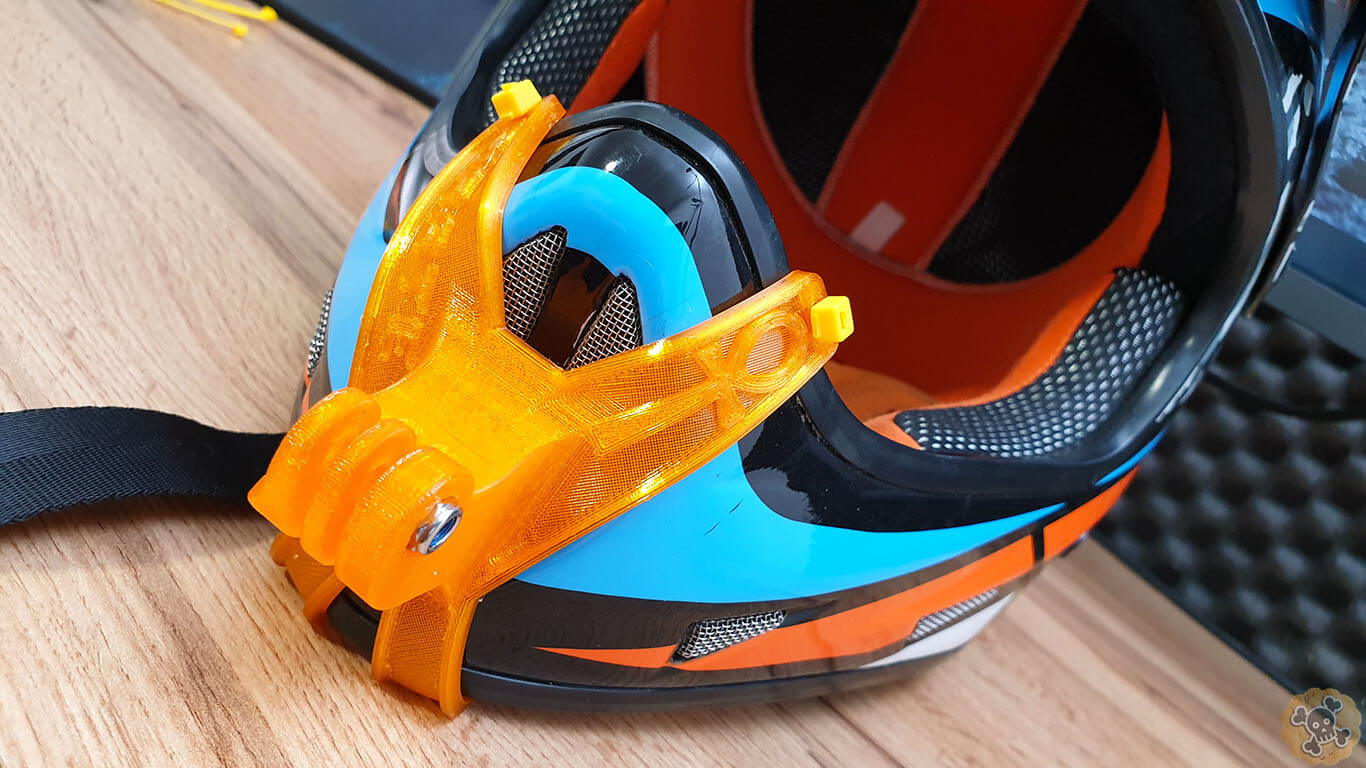
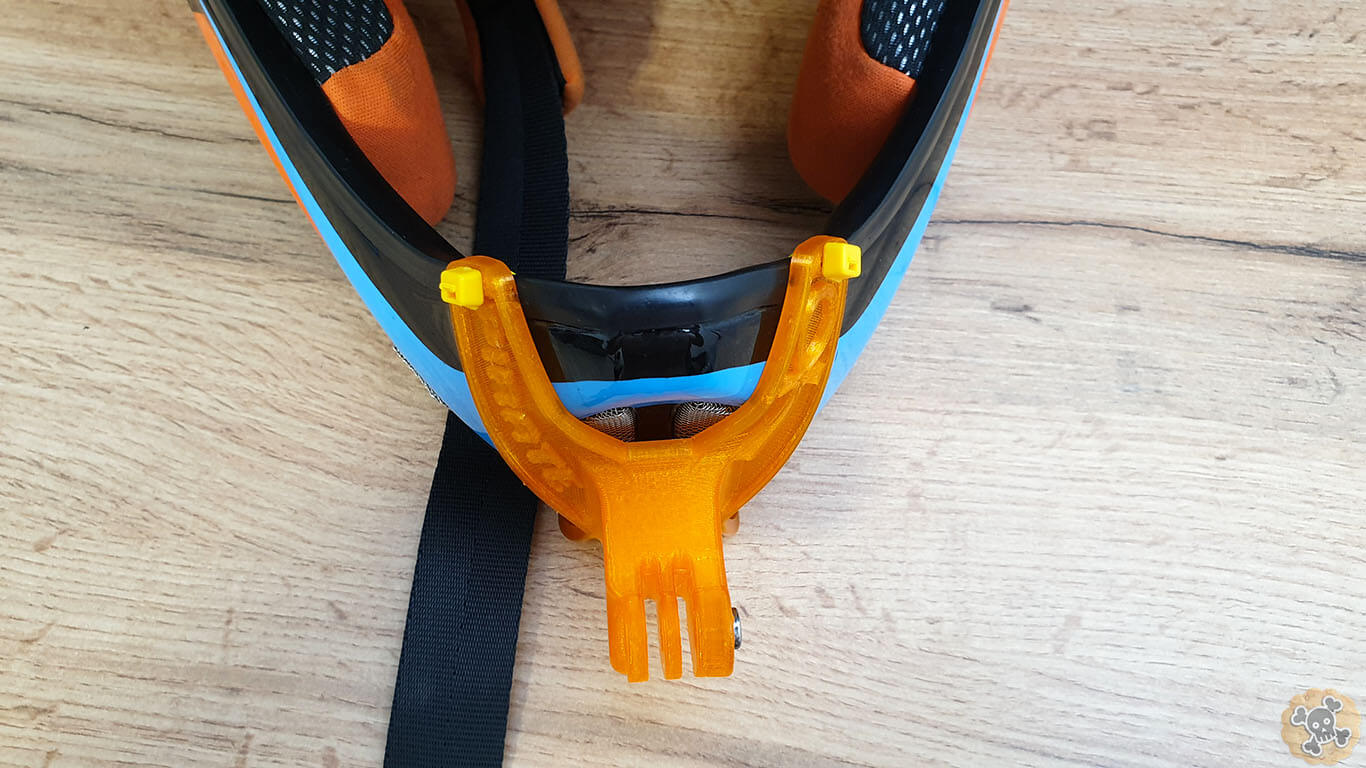
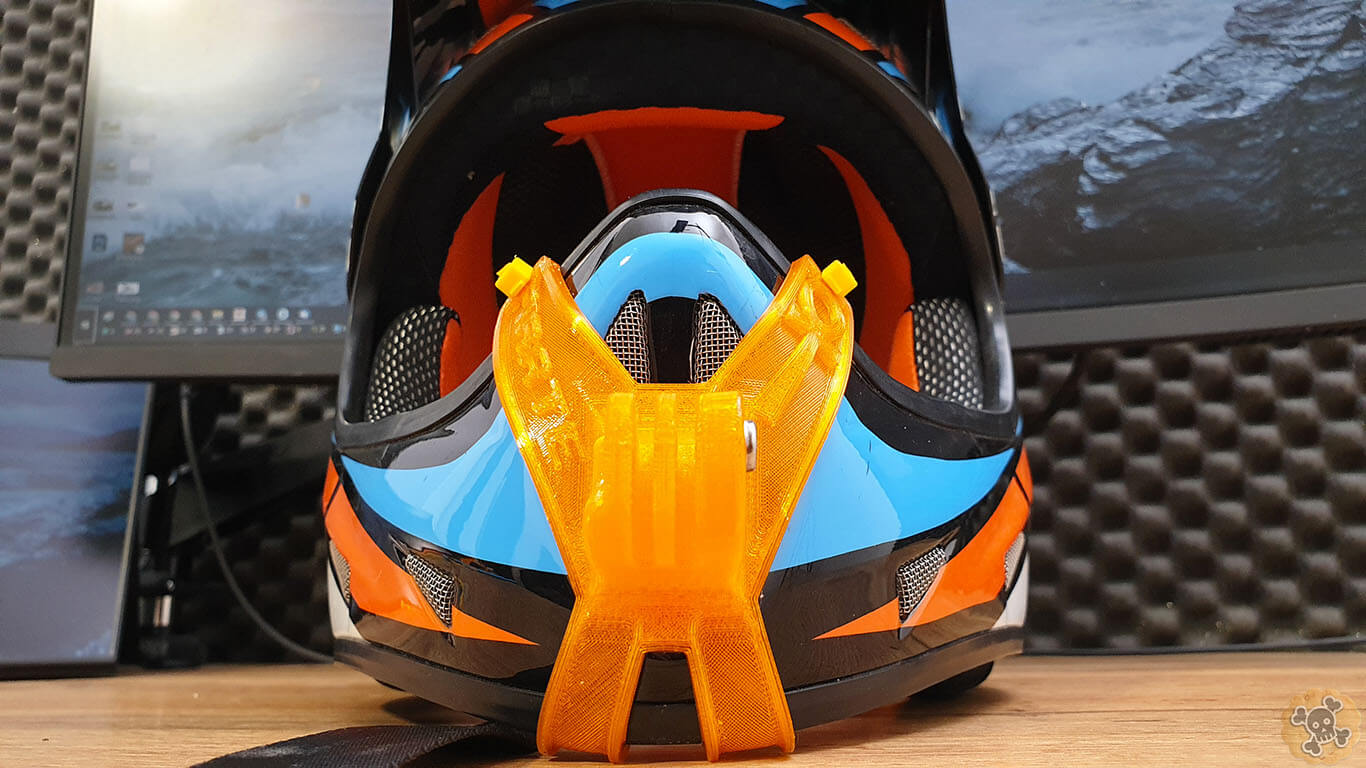
It is super easy to instal it ( no worries good quality zips will not break , I am suing this set with heavy gopro max for over a year ) :
Before you cut off zips, tight time as much as possible
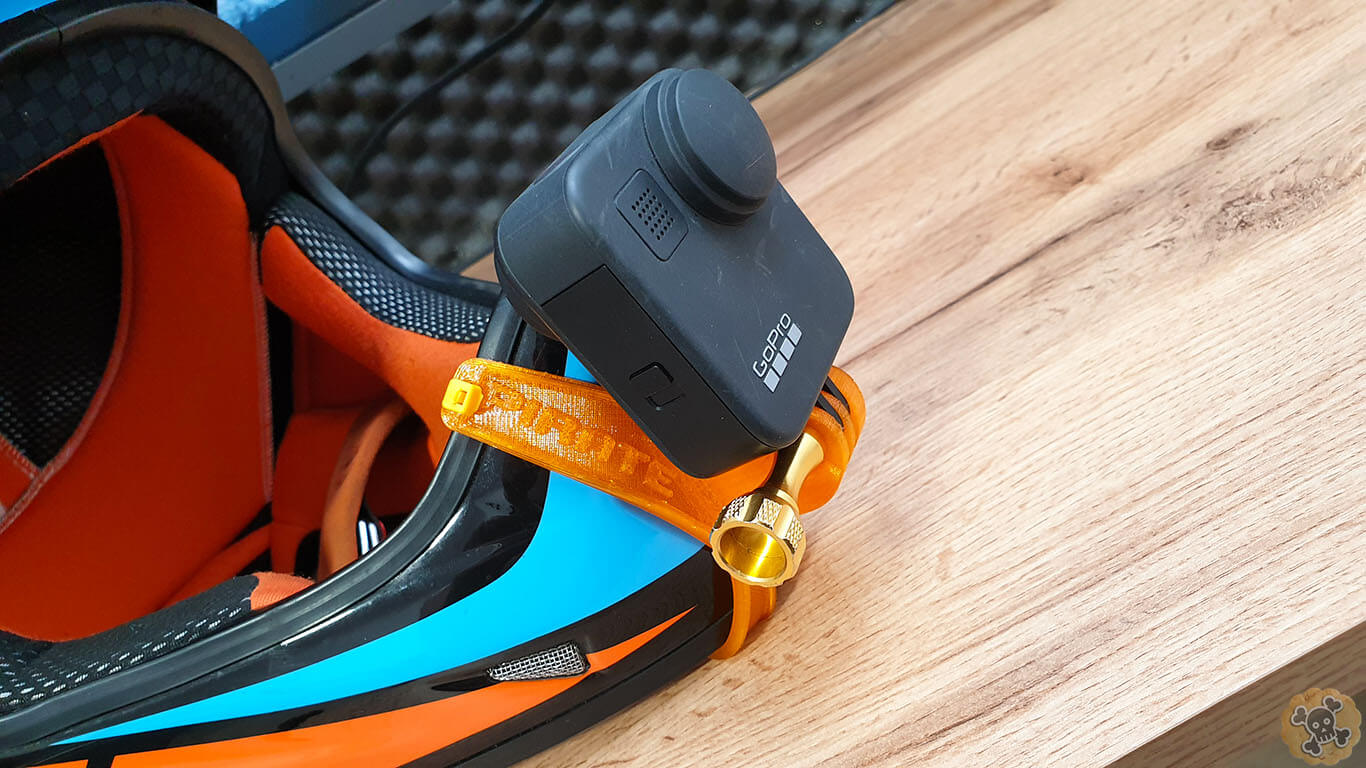
It will work with Gopro camera series like 4-8 , max and other similar cameras.
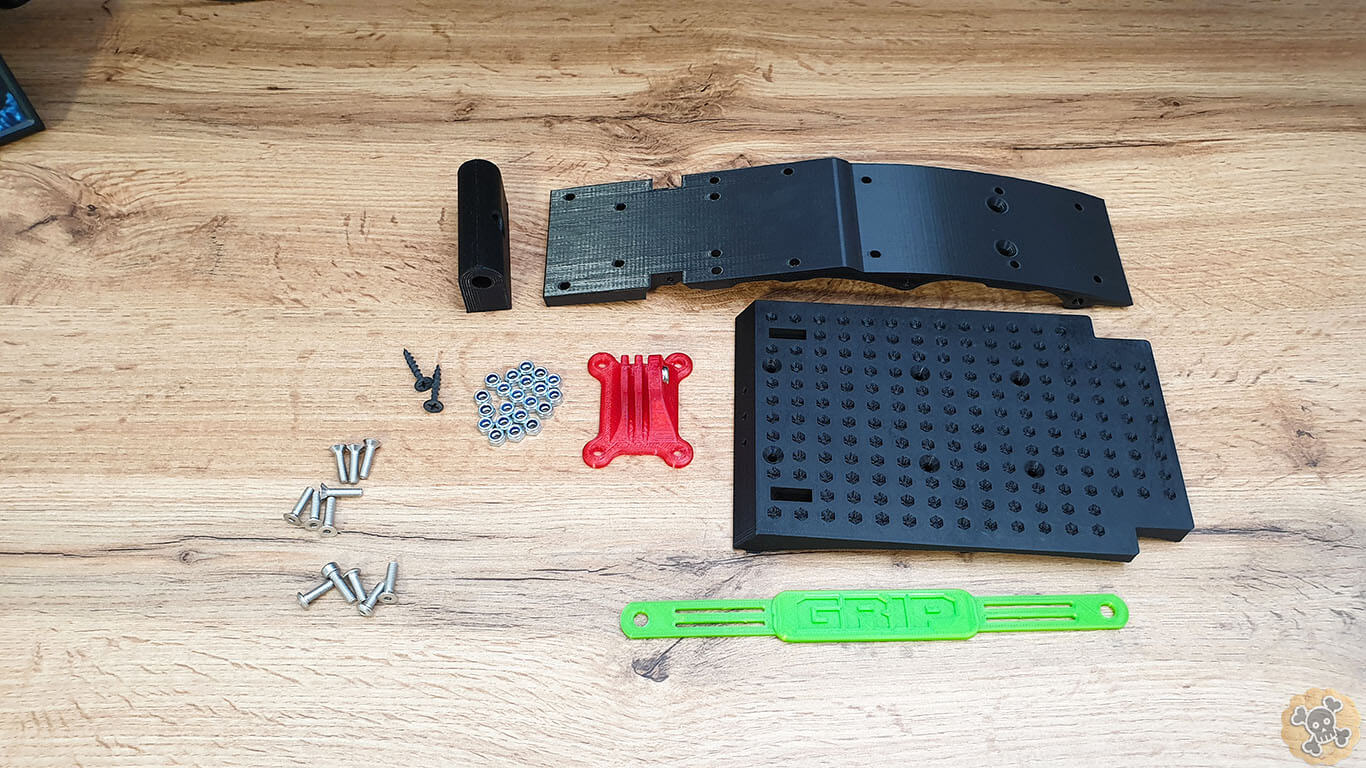
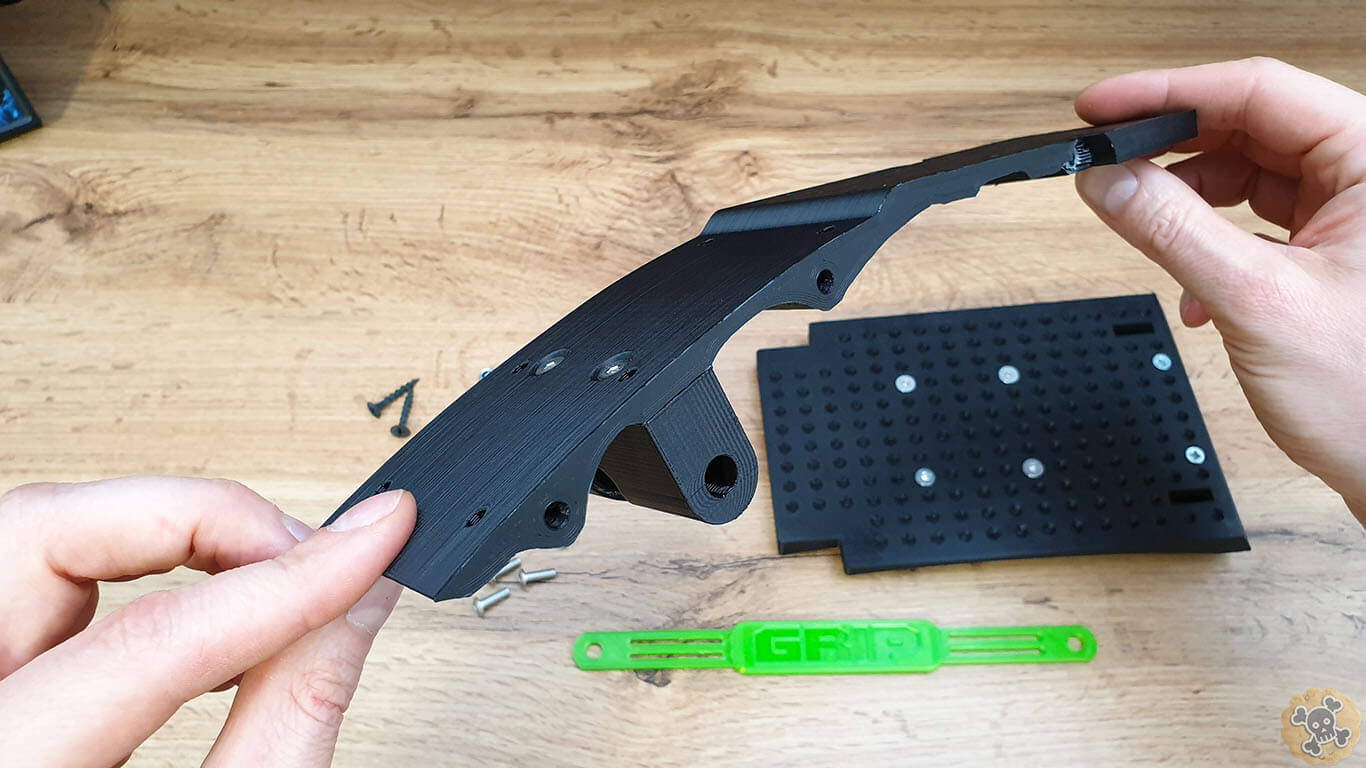
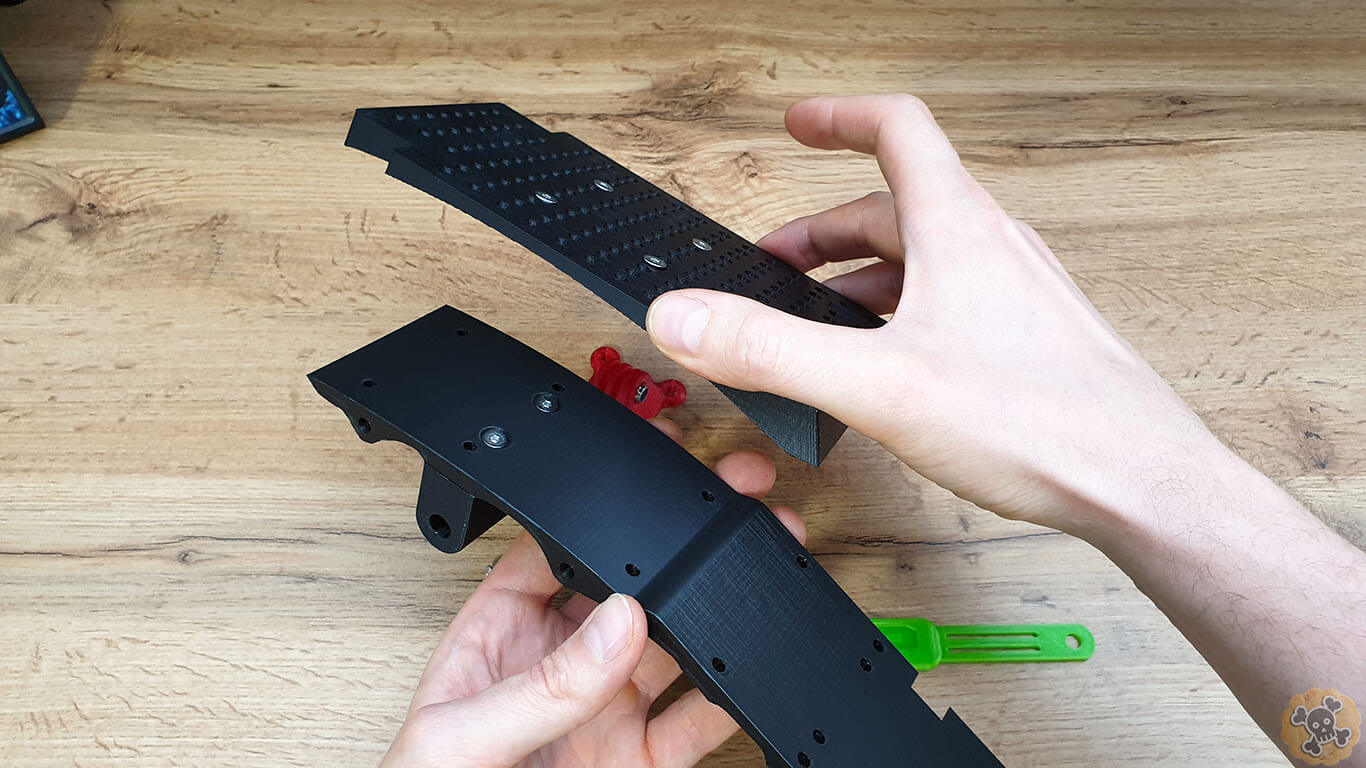
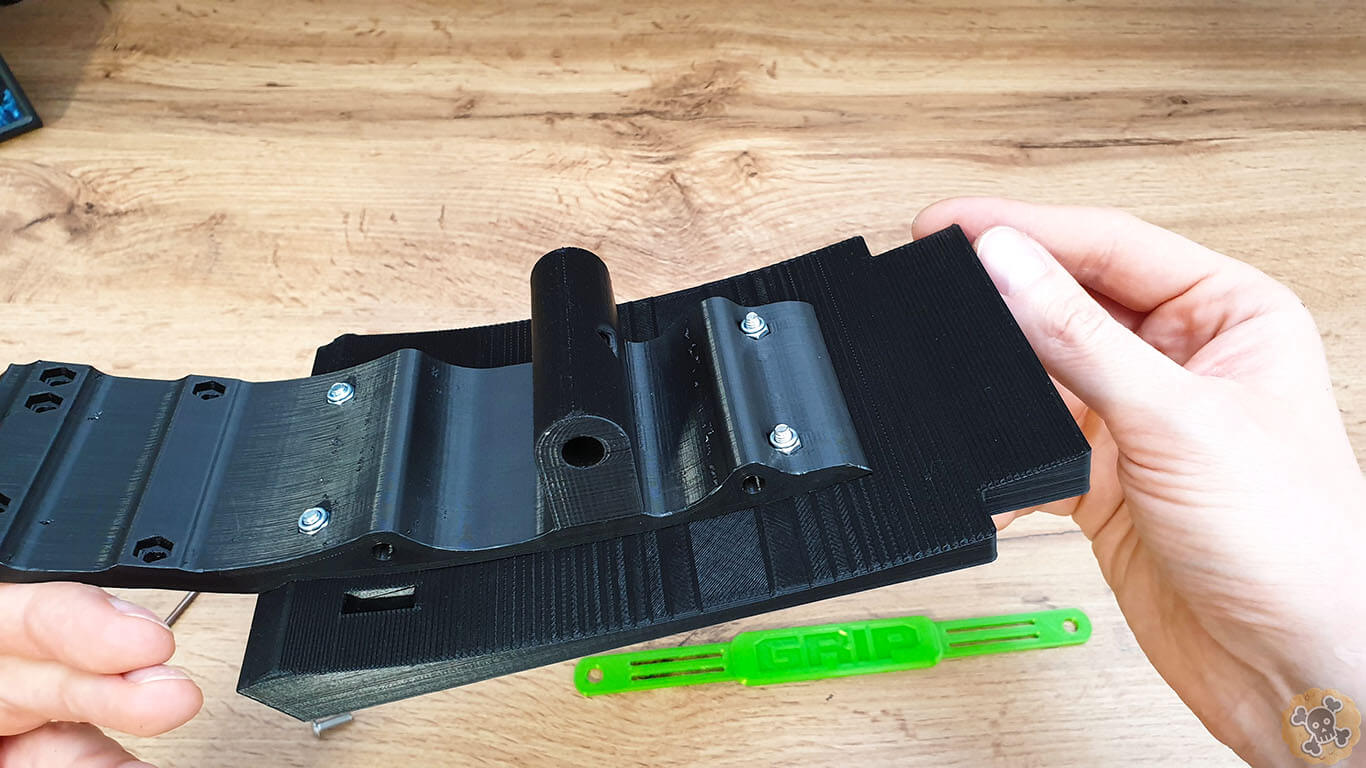
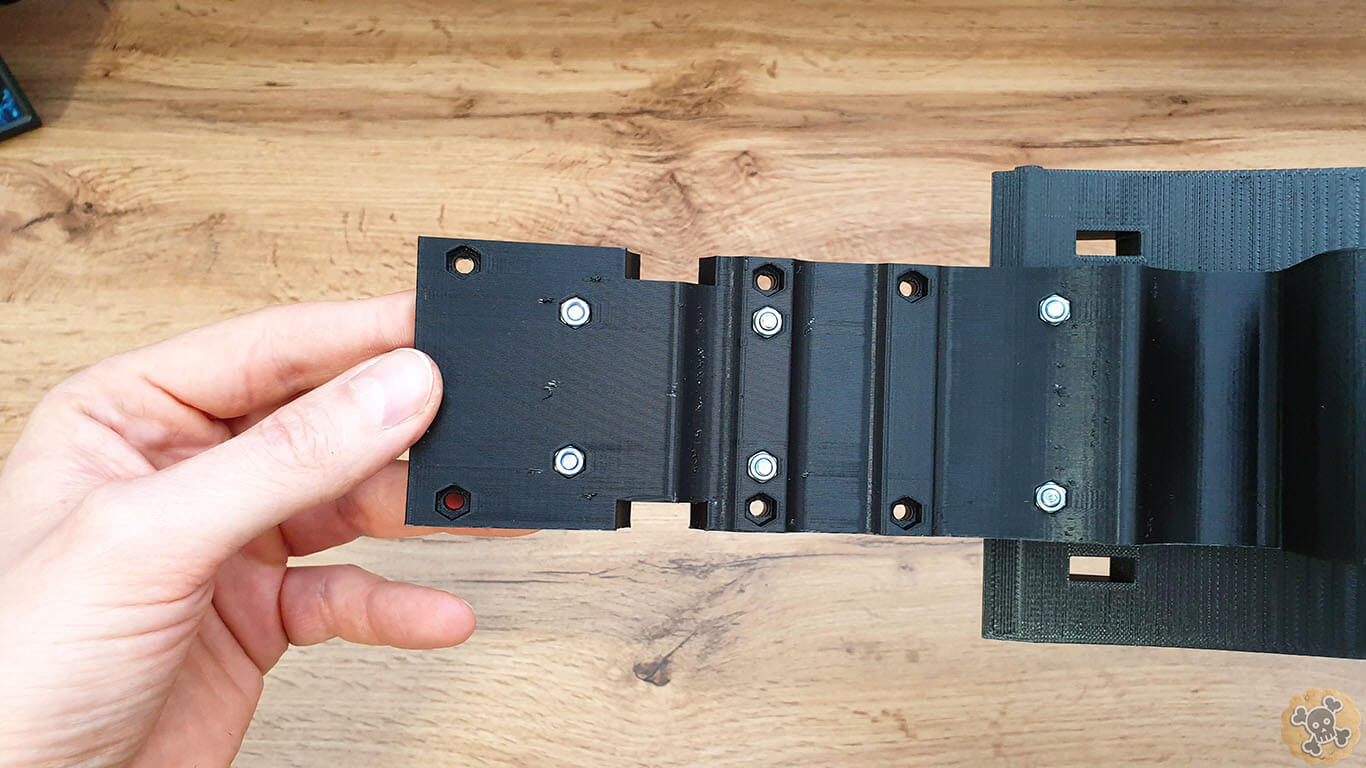
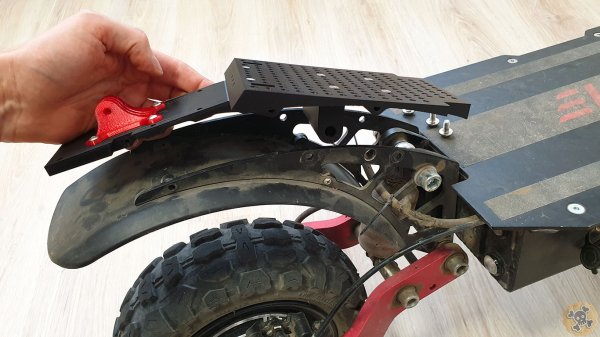
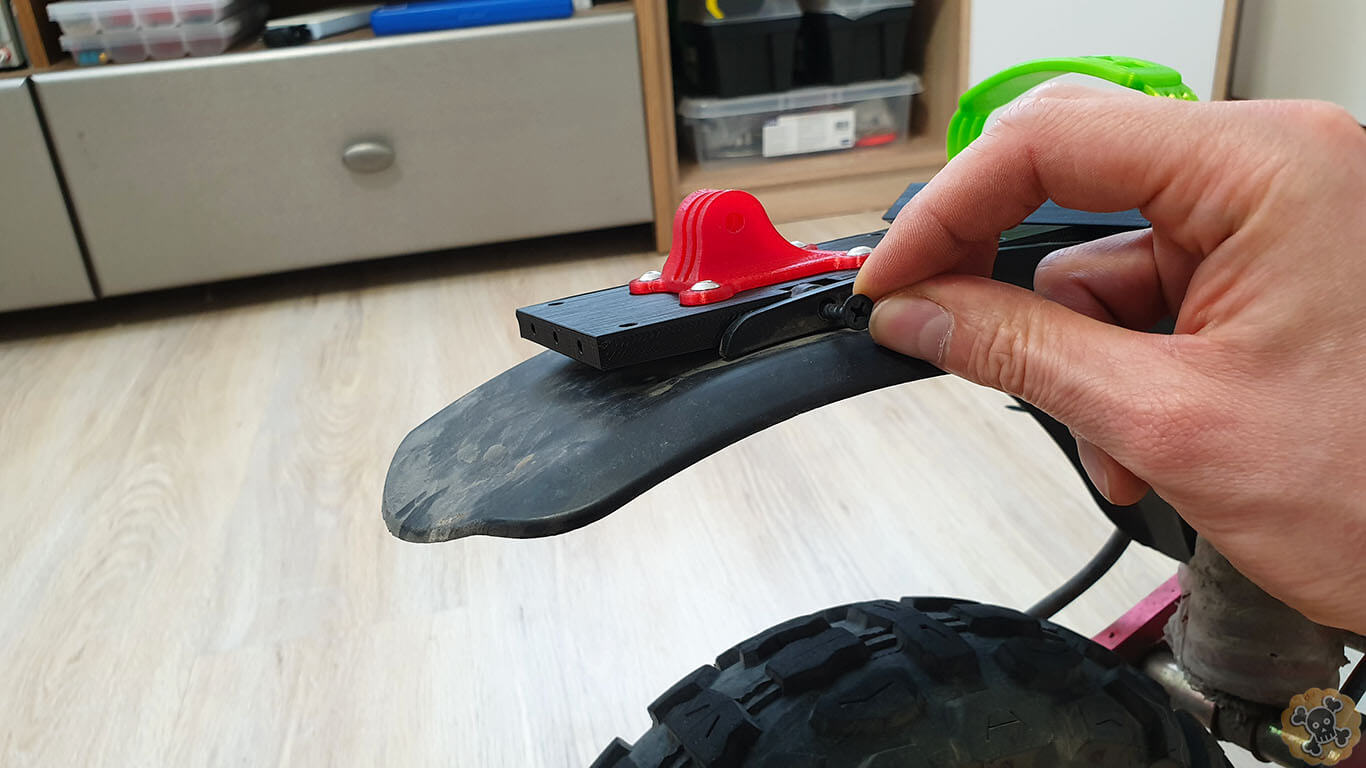
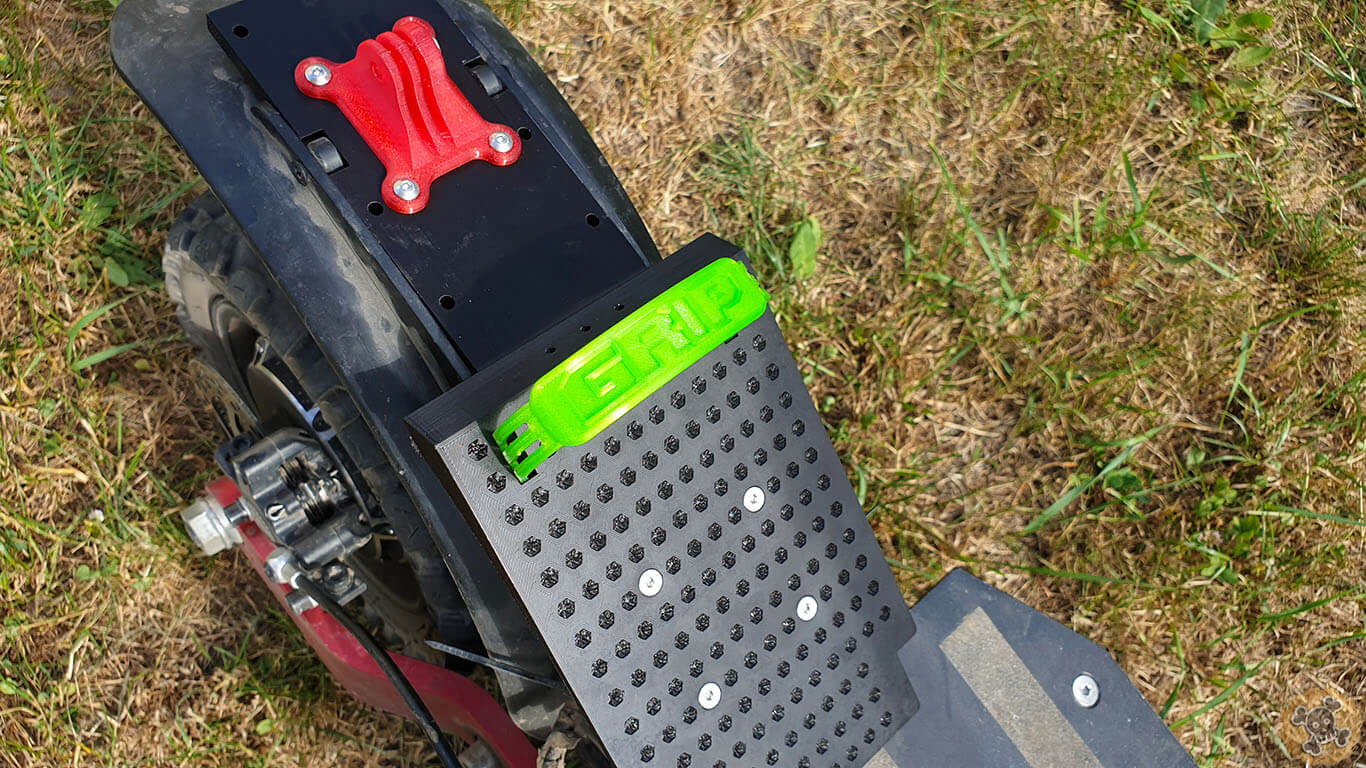
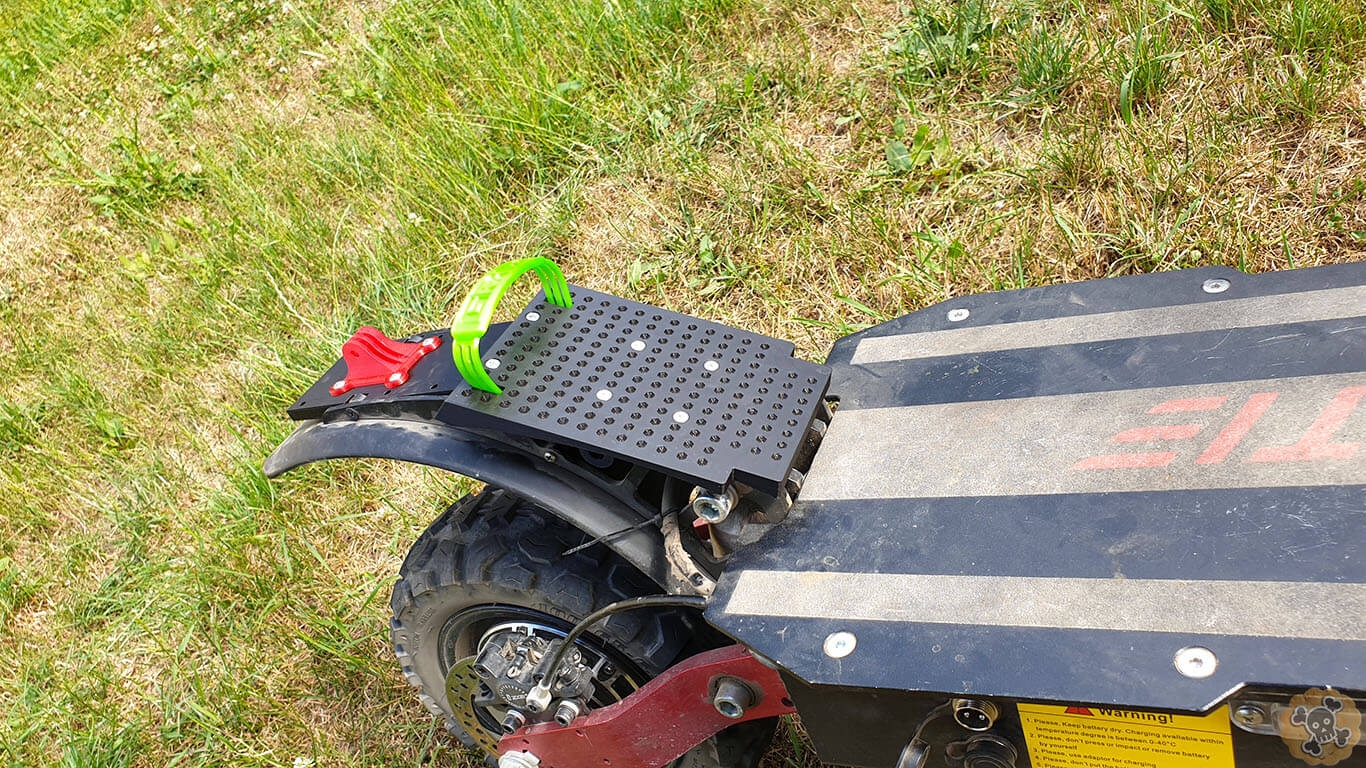
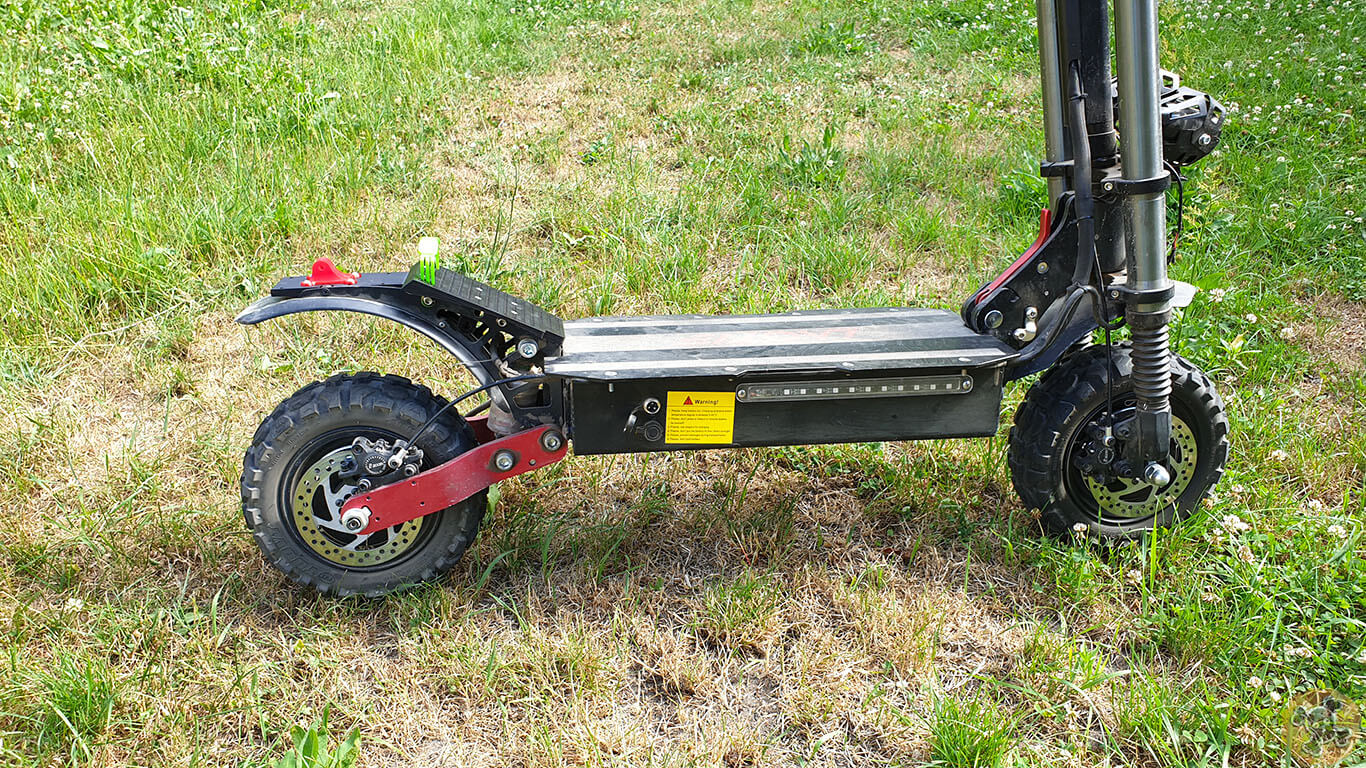
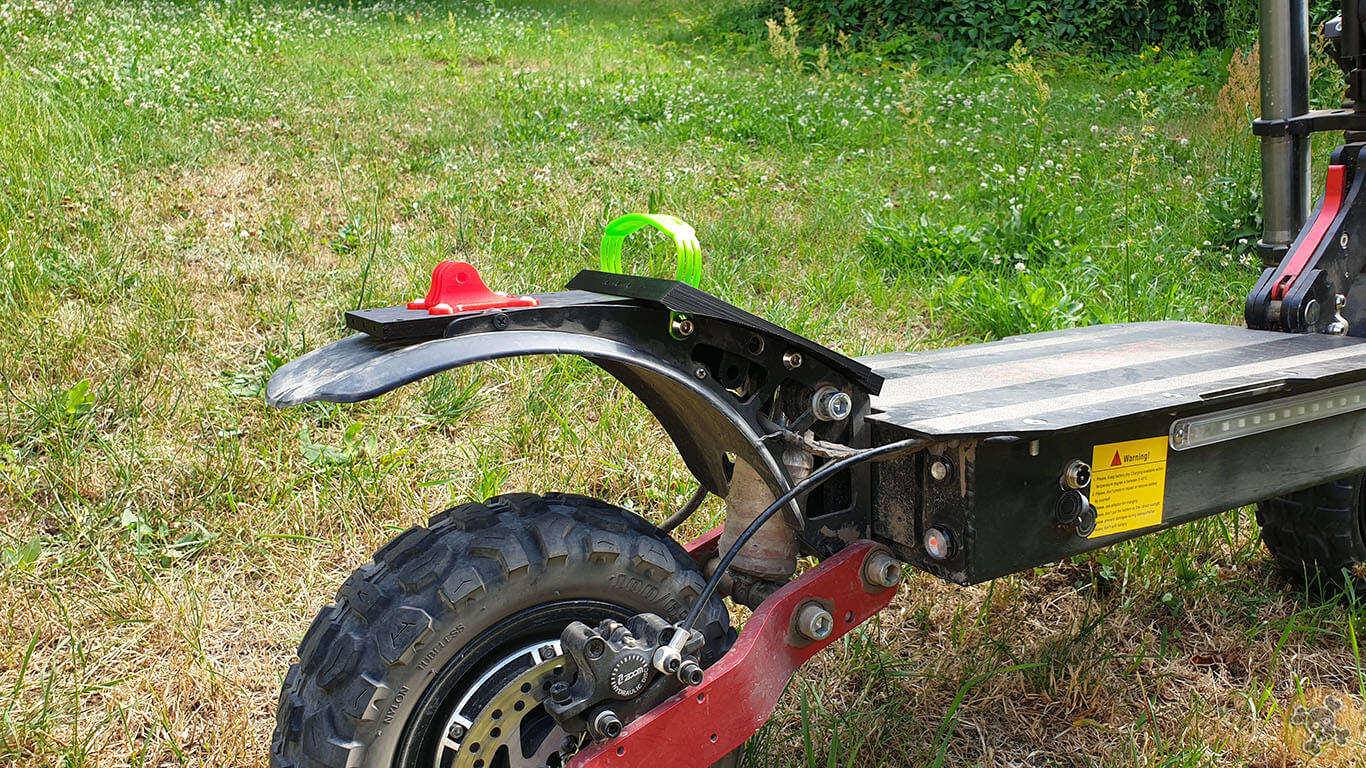
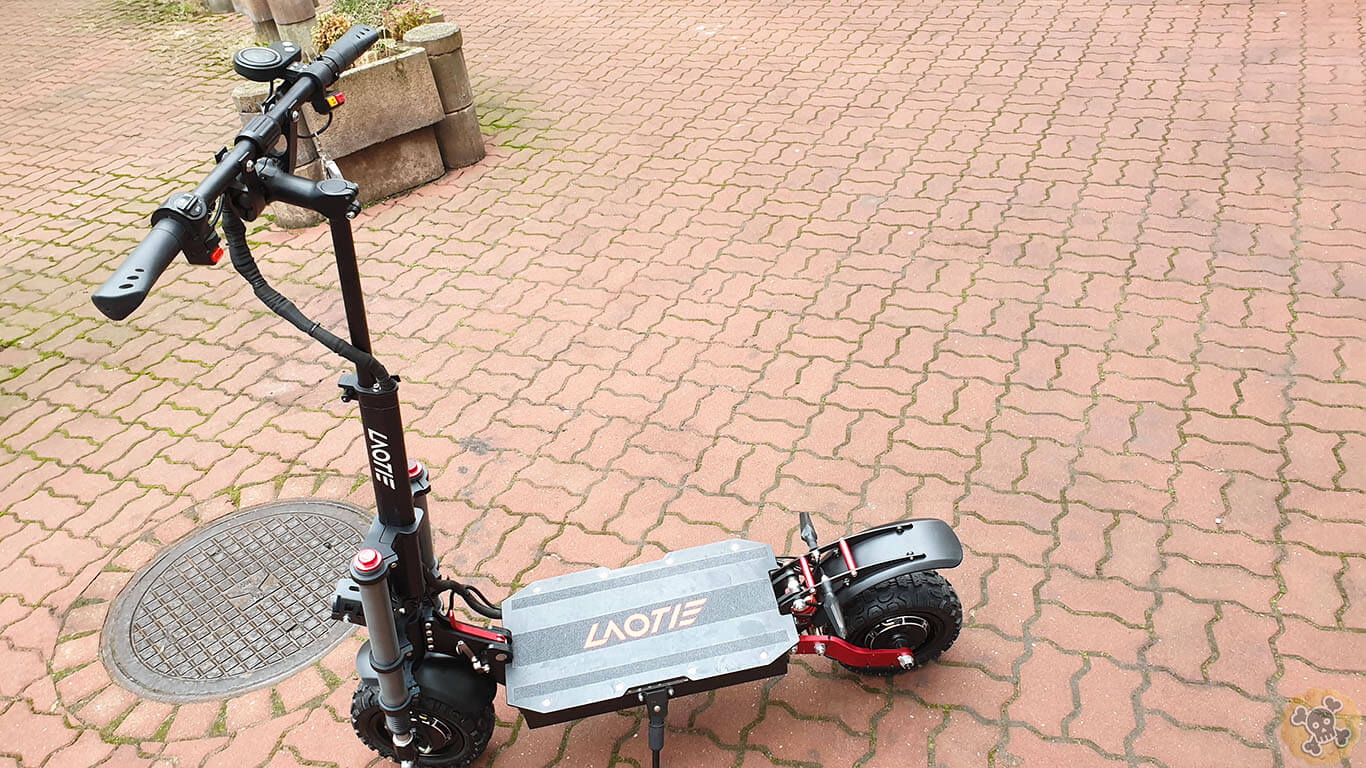
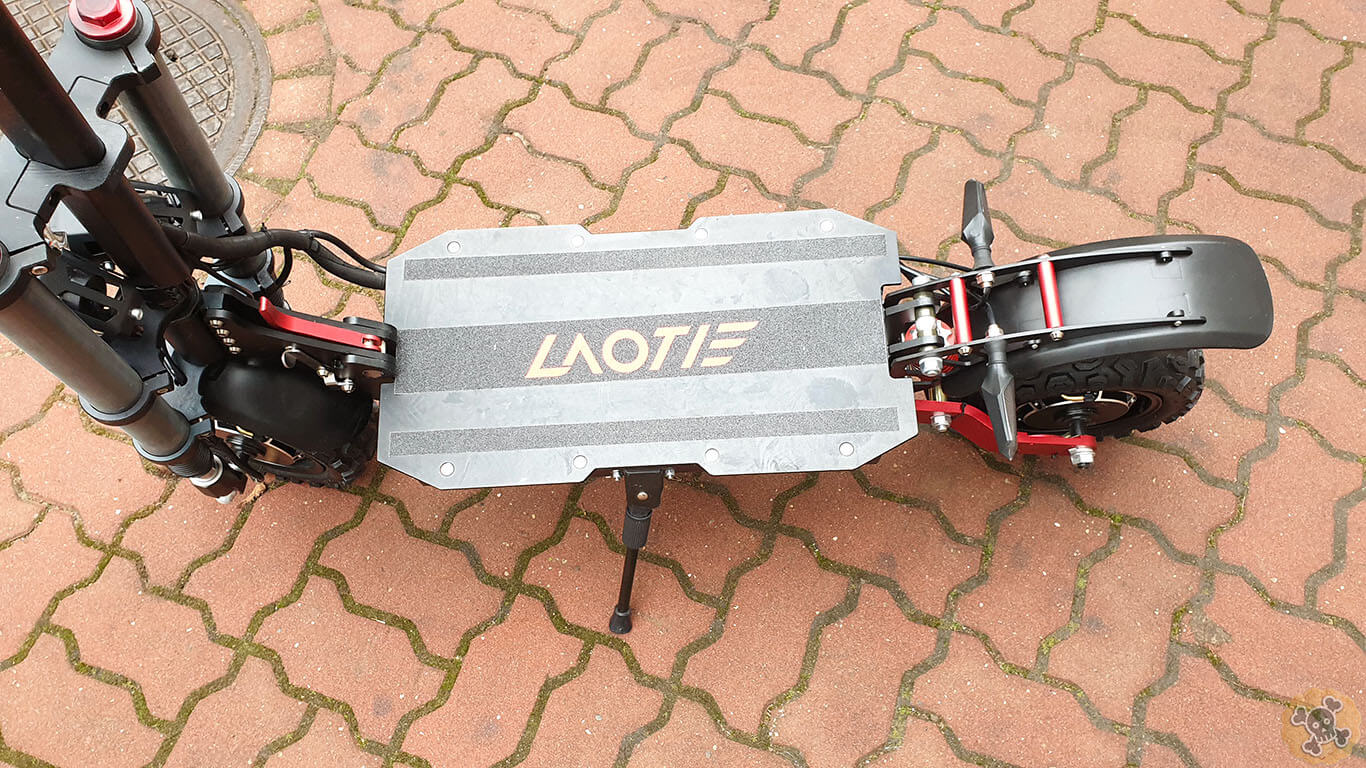
Why Footrest ? It makes ride comfier and extends life span of steering stem and front folding mechanism . It extend lenght of the deck so we got more space which actually makes scoot feels more stable and the most important , now almost whole body weigh /force is going on foot rest. I mean by that , when you adding throttle you push steering bar towards you to stay in balance but it bends steering stem and lots of extar force is going to folding mechanism. But when you place foot on foot rest , you can much easier stay in balance cause all forces are going to foot rest.
Footrest V1 is compatible with Laotie ES18 / Es18 Lite , Ti30 , Boyueda and other with similar frame design.
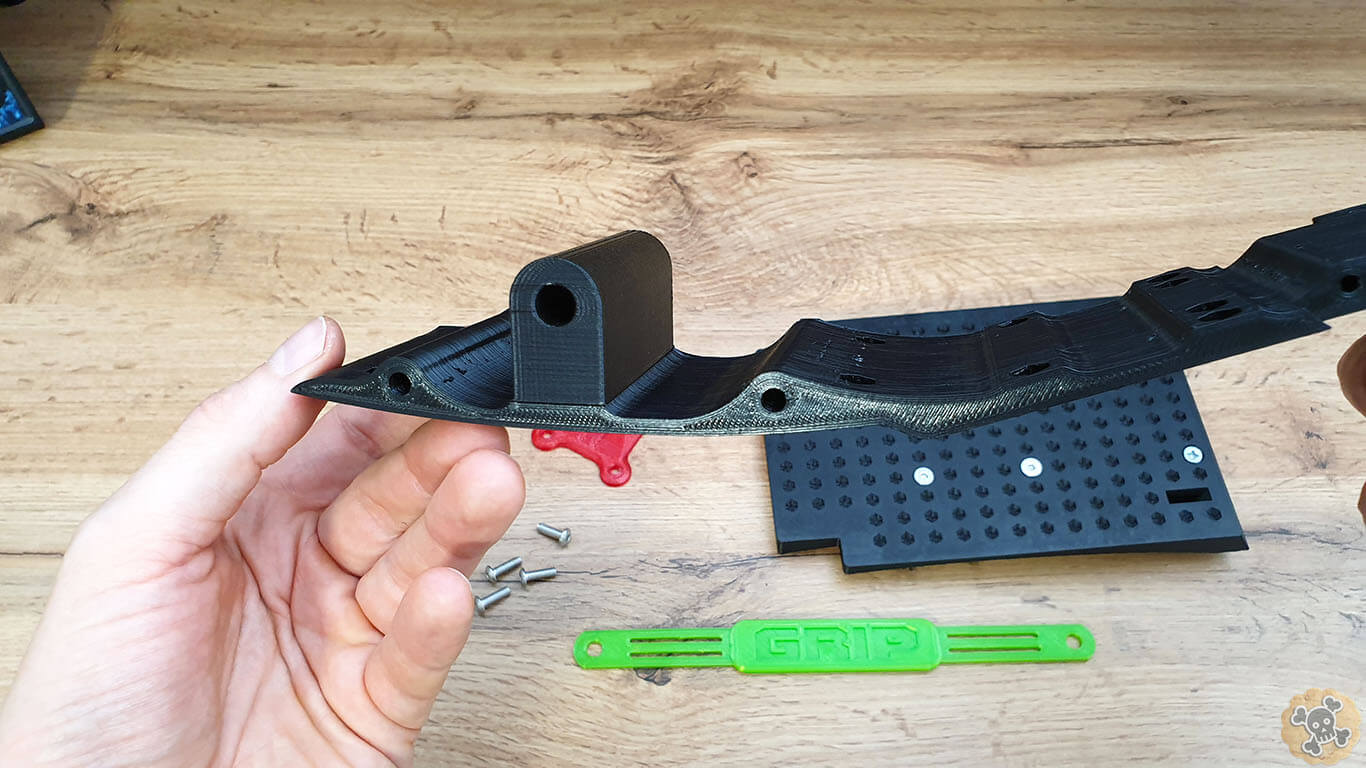
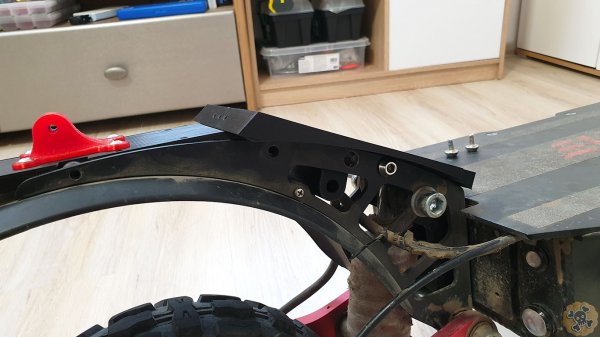
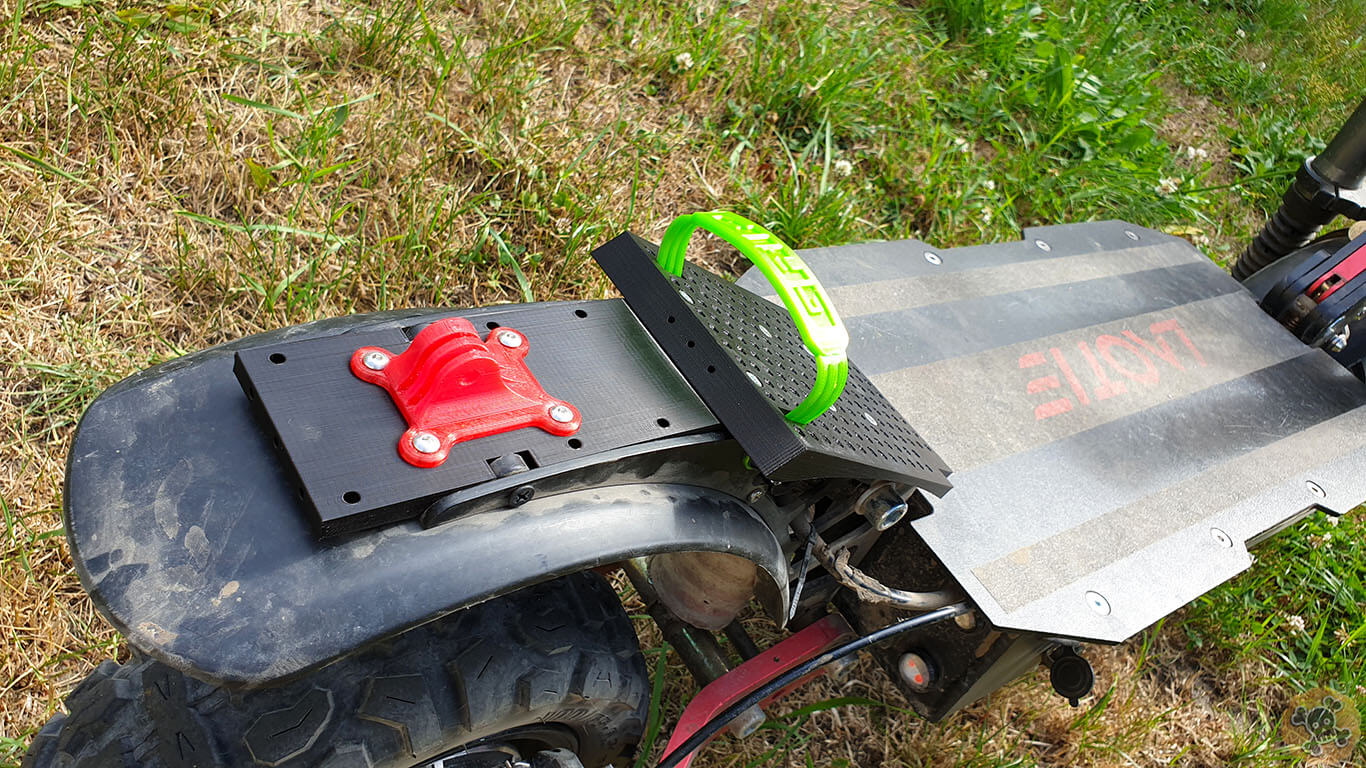
Place 2x countersunk screws & 2 nuts on Main adapter
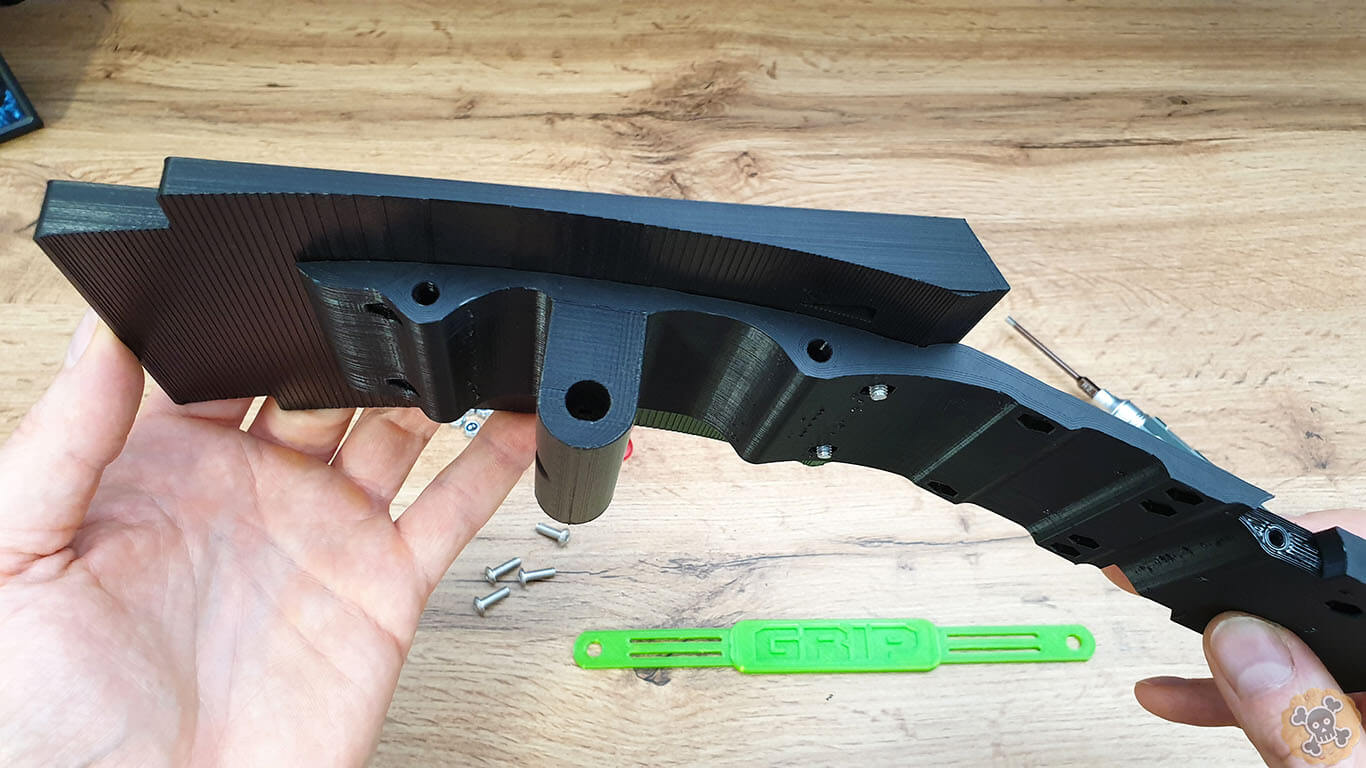
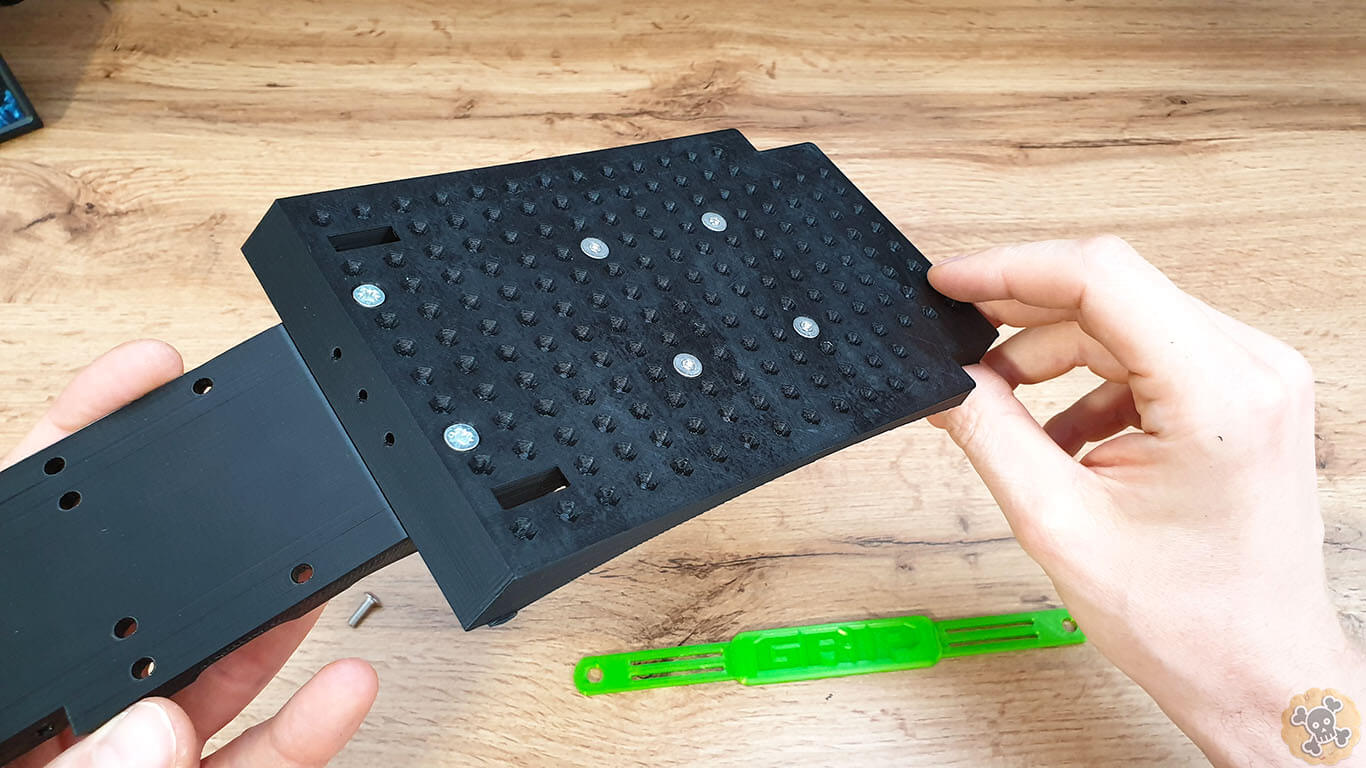
Place blinkers adapter and tighten it by 2 countersunk screws which you placed before ( do not tighten it too much otherwise palstic thread can be damaged )
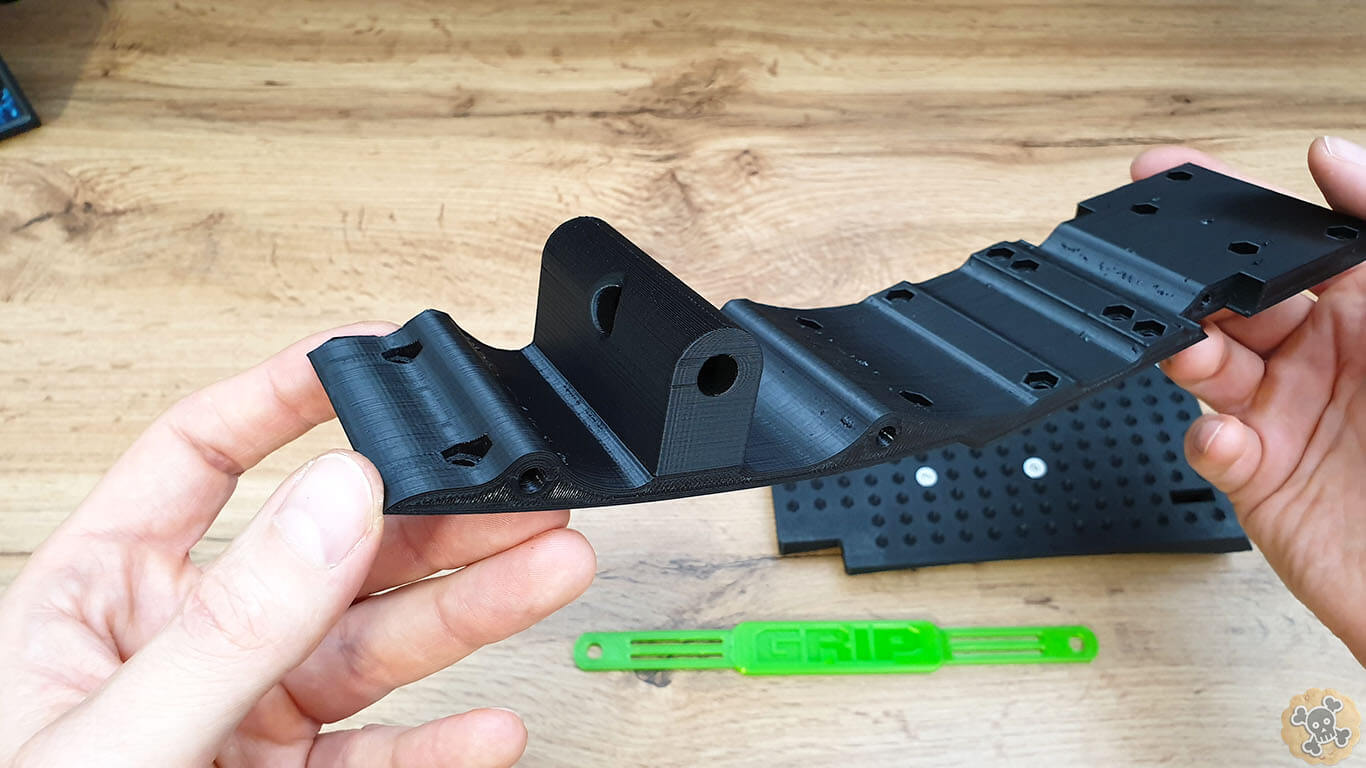
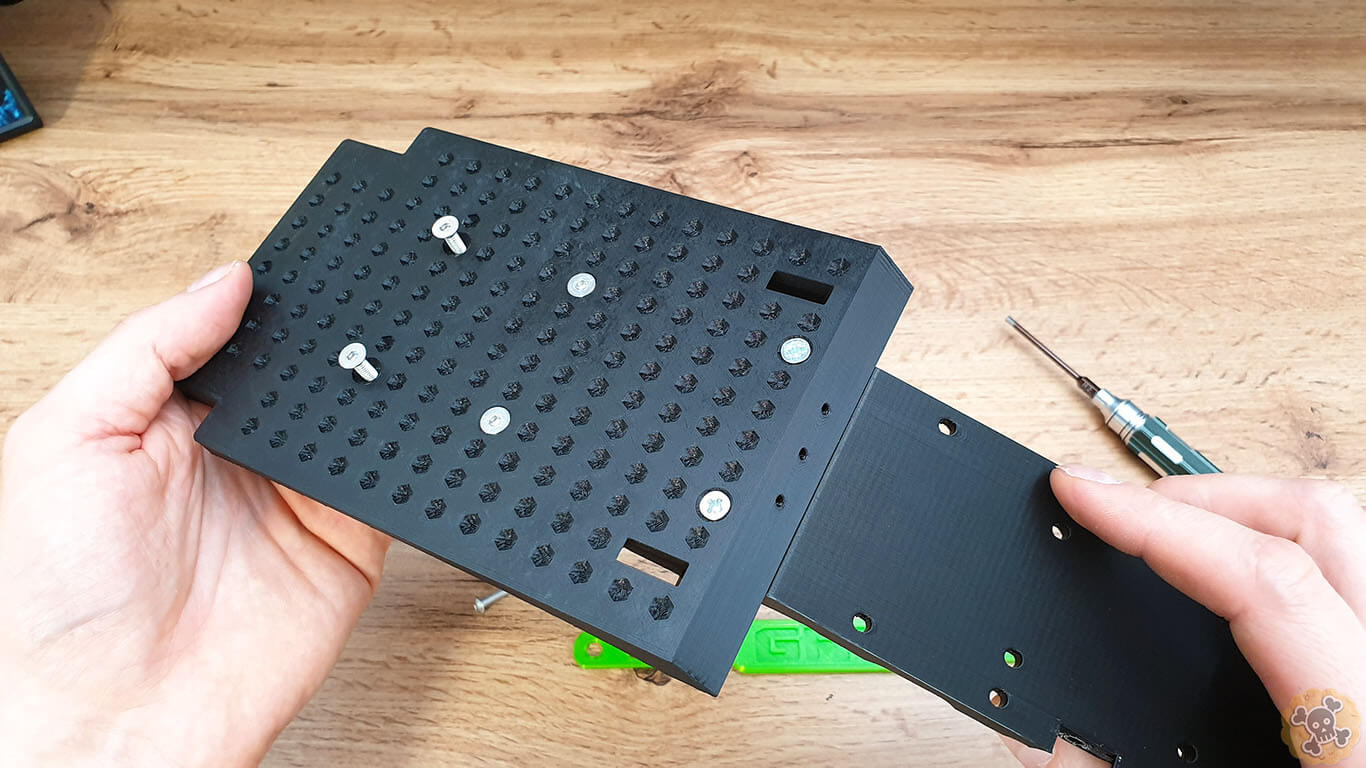
Now prepeare 6 countersunk screws and Top foot rest. I do recommend at first tighten 2 middle screws and then place 4 other screws / 4 nutz and tighten it .
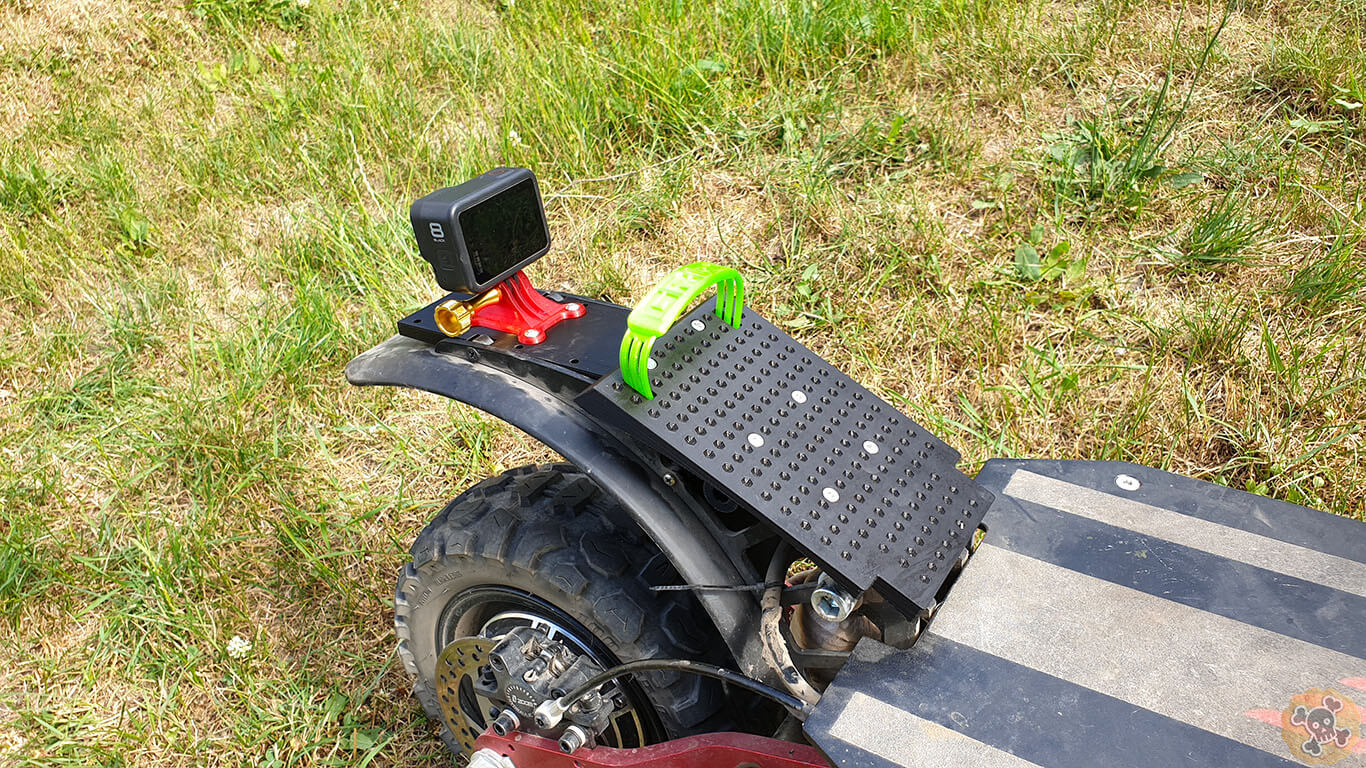
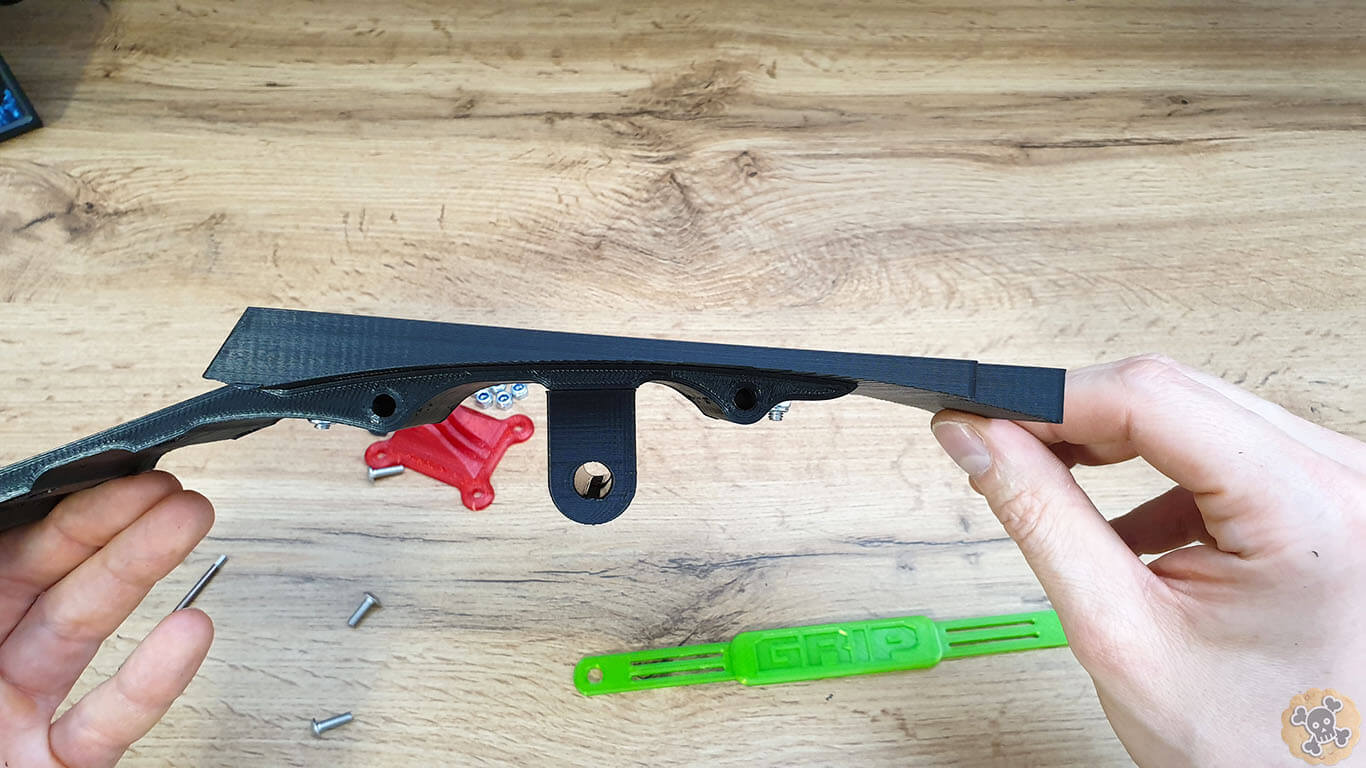
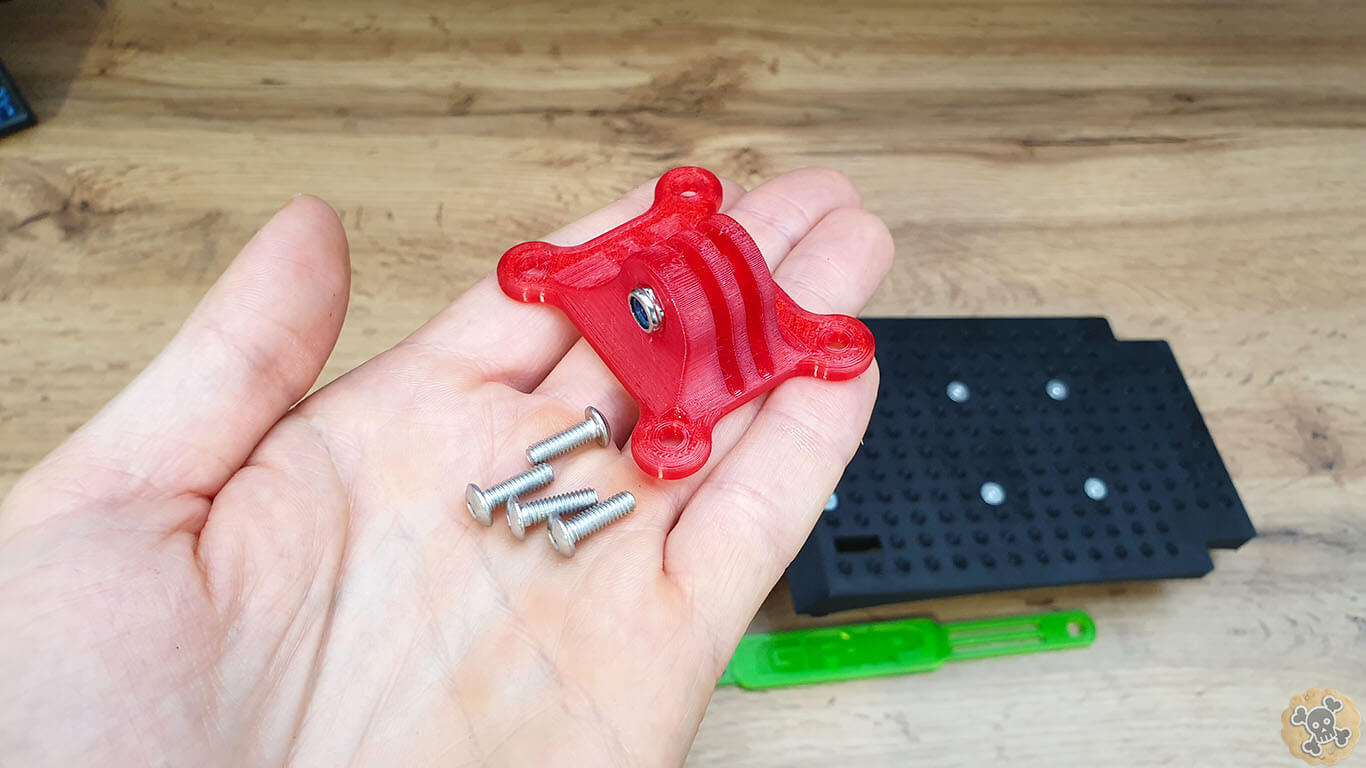
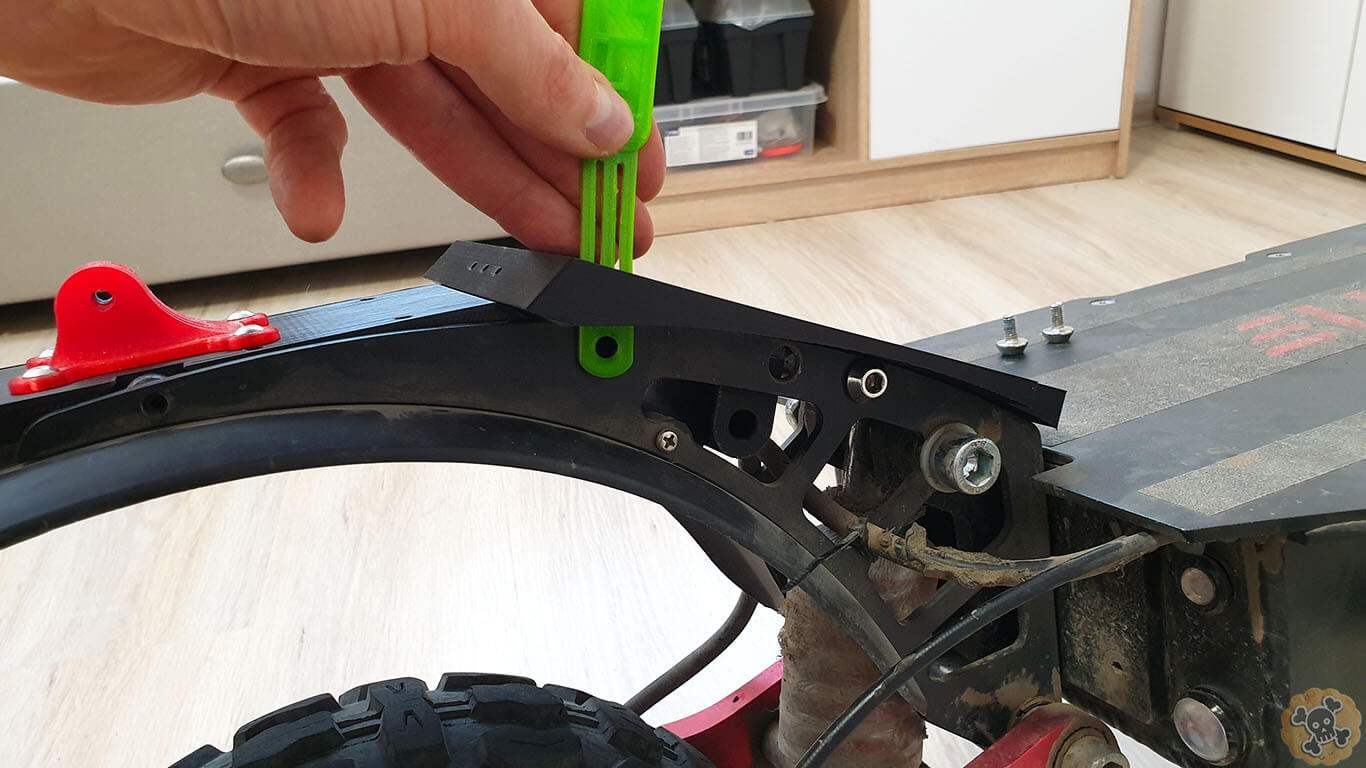
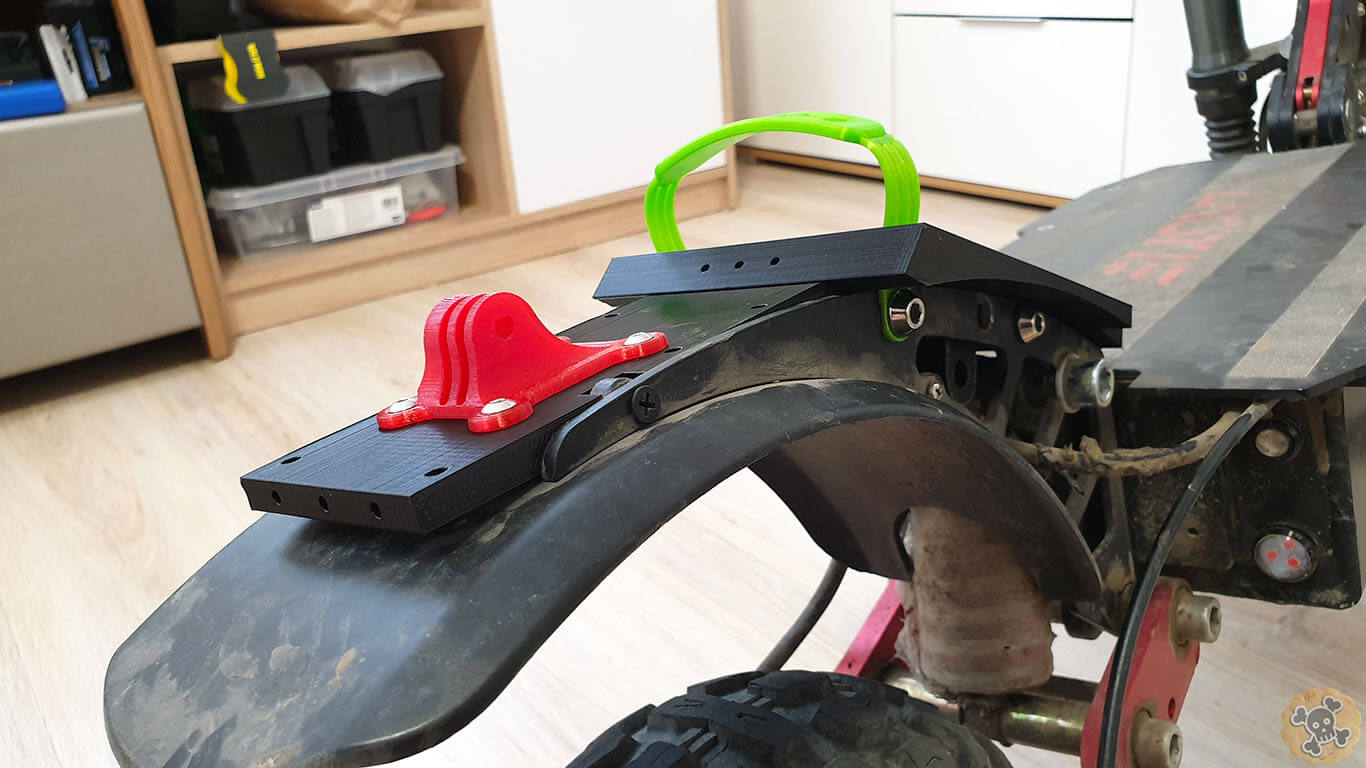
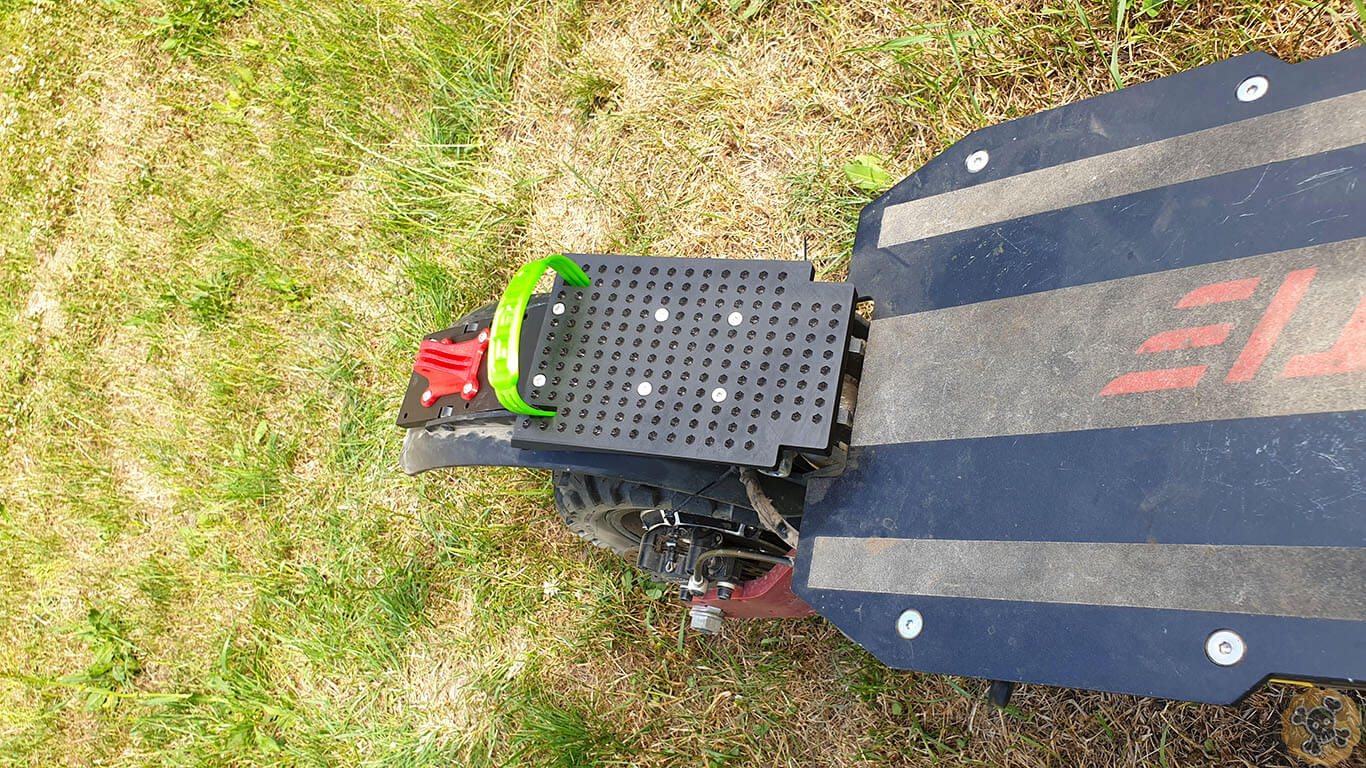
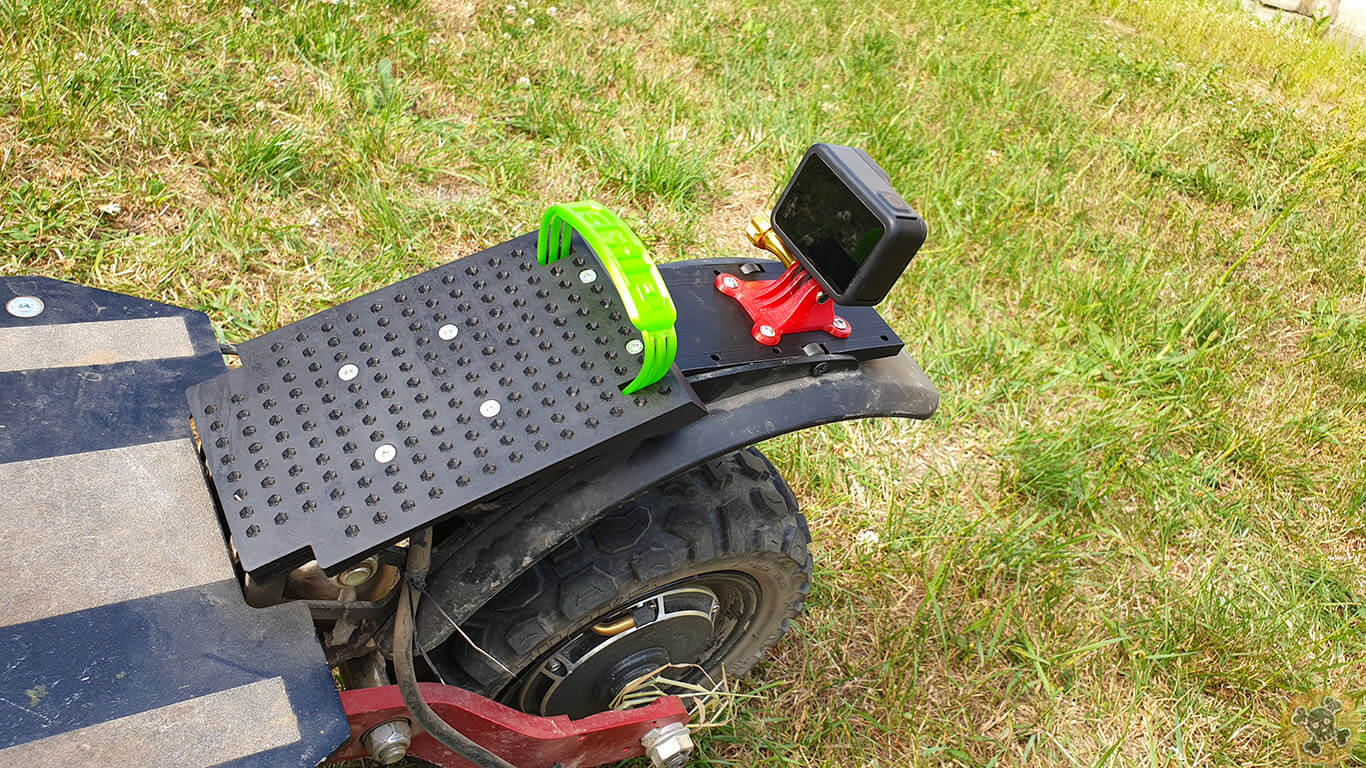
If you have GoPro adapter mount it as you can see on pictures,
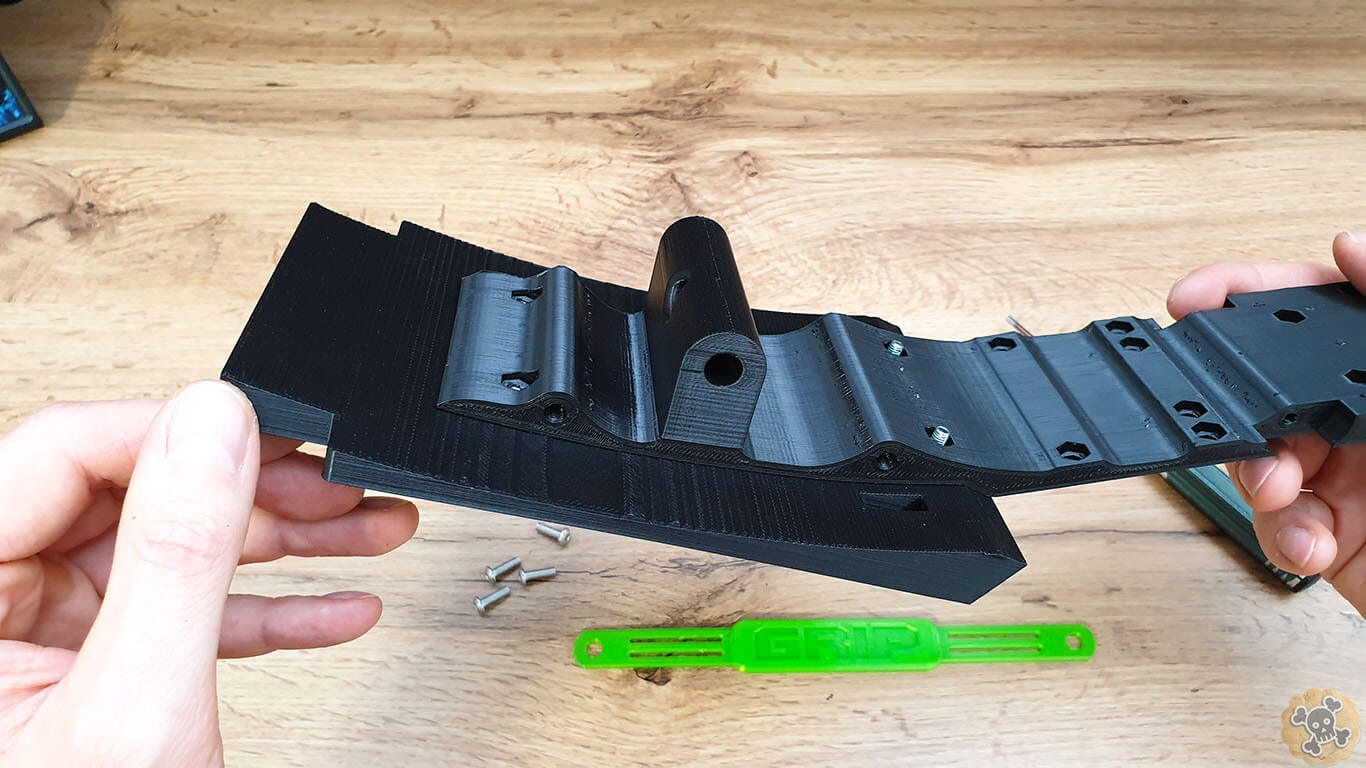
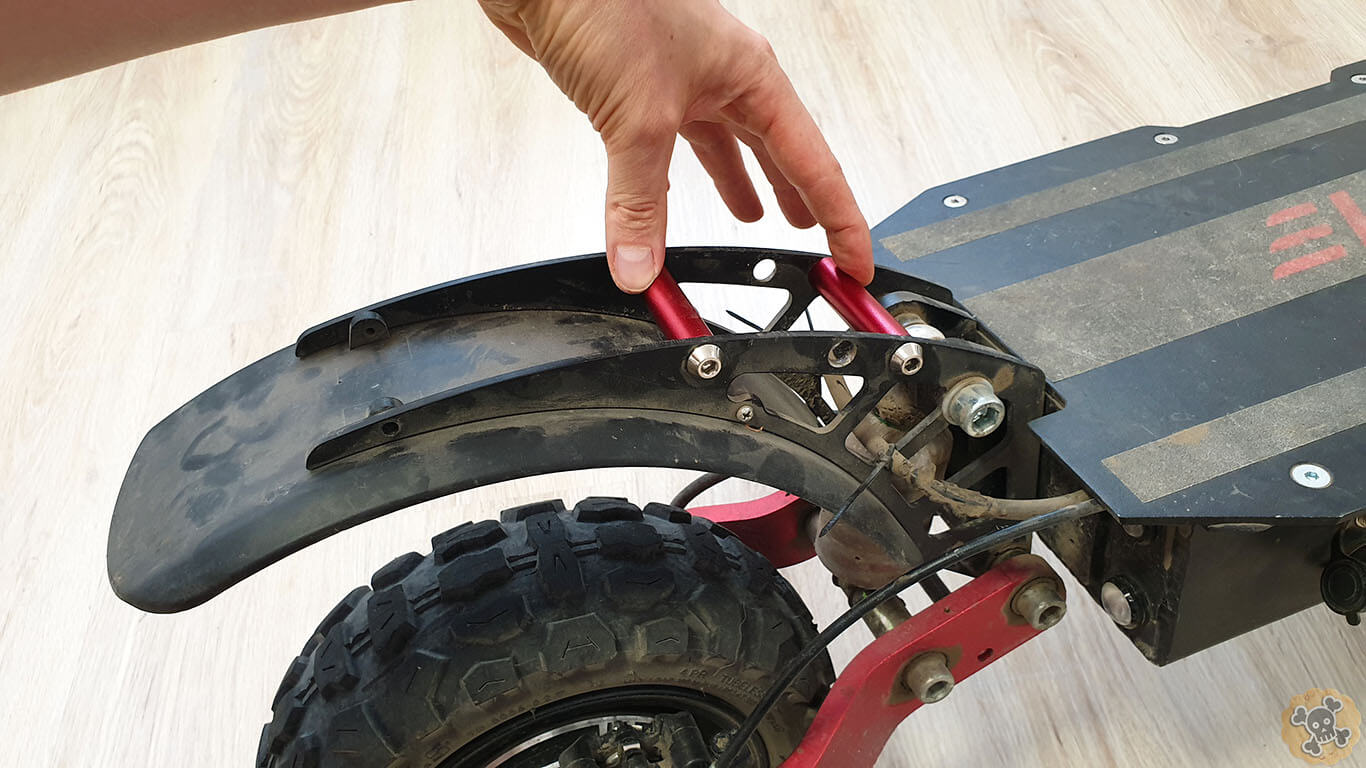
Remove old red spacers and resr 2 screws
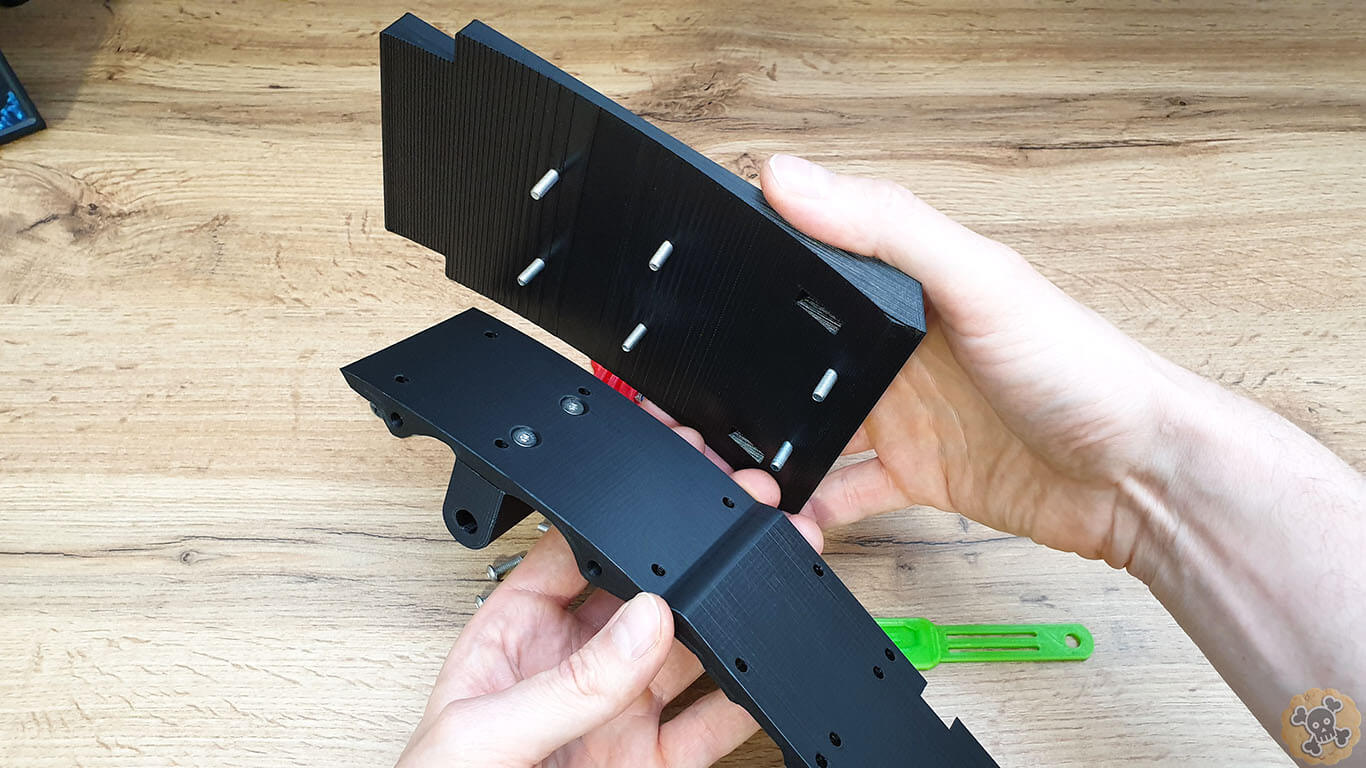
Place Foot rest , and tighten for now only 2 front screws ( use stock ones and do not tighten it too much otherwise palstic thread can be damaged )
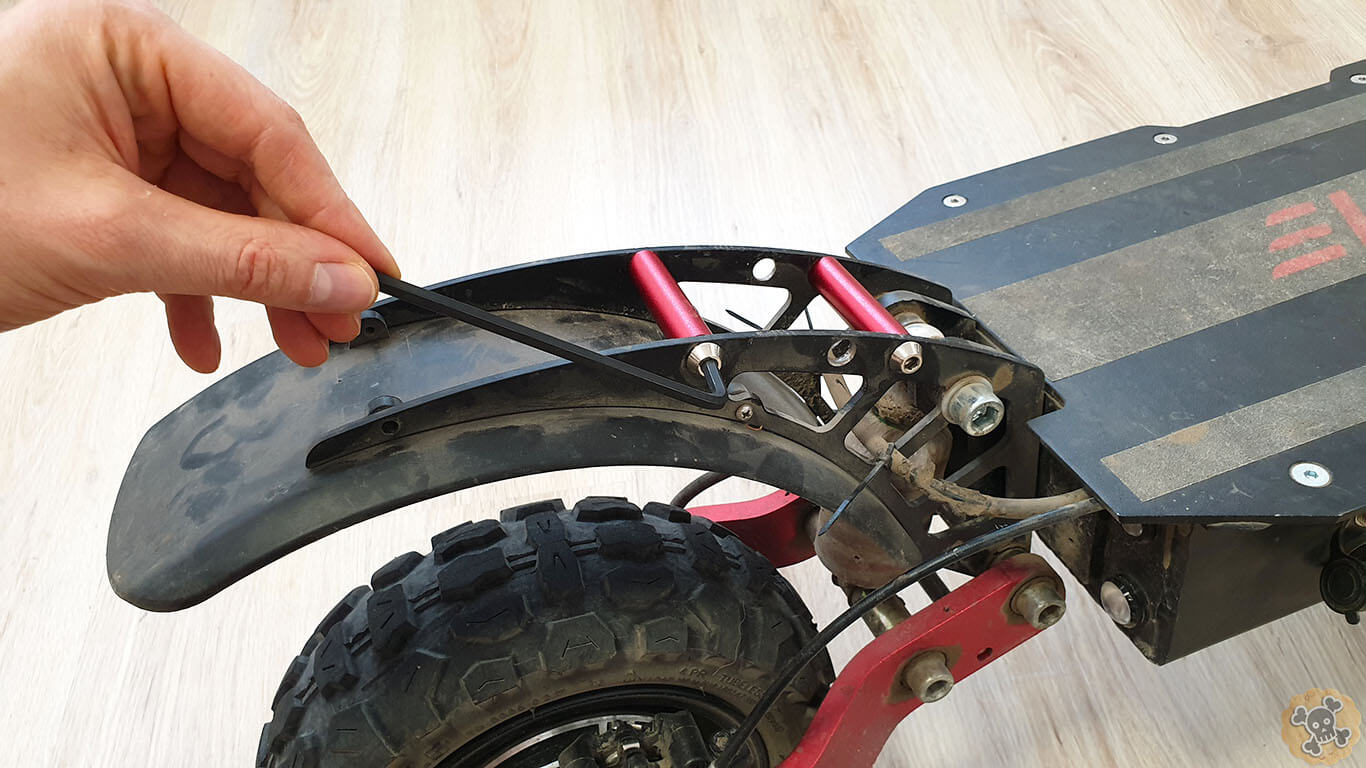
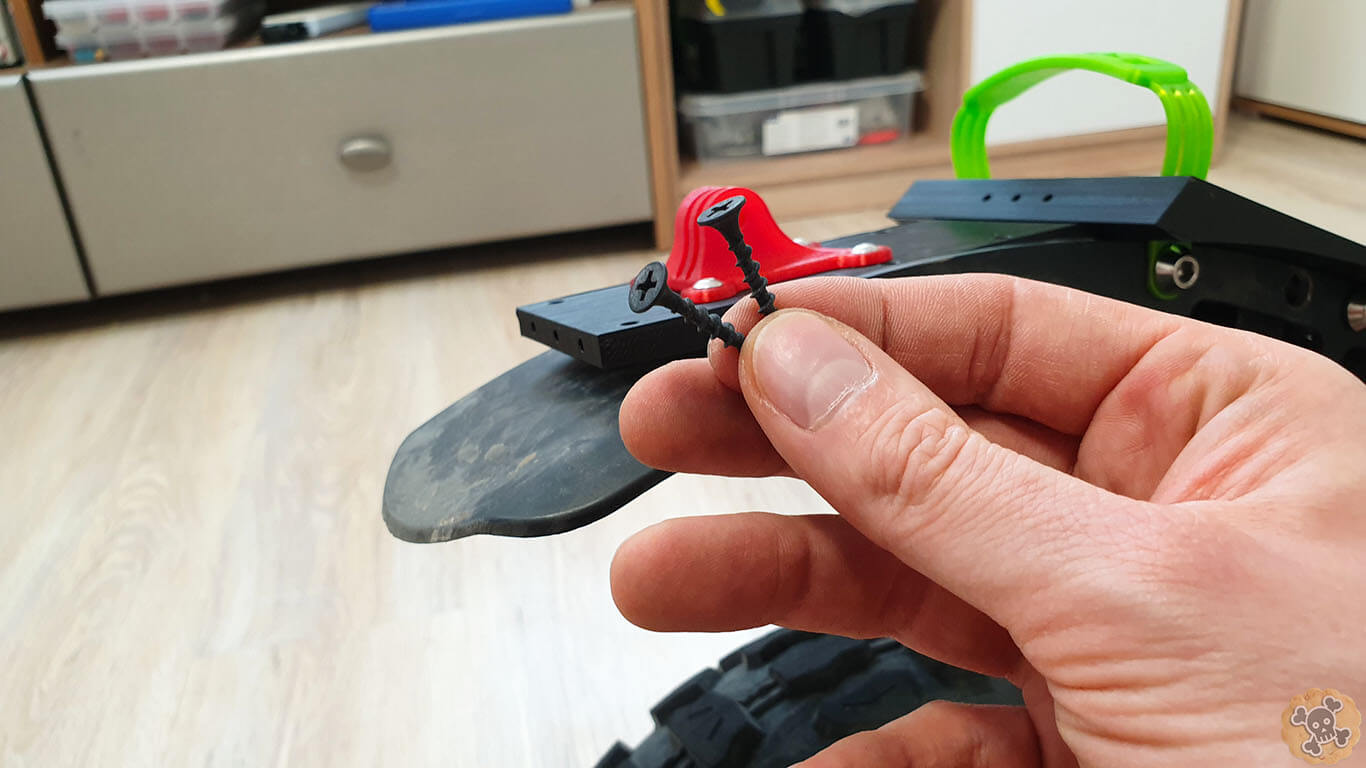
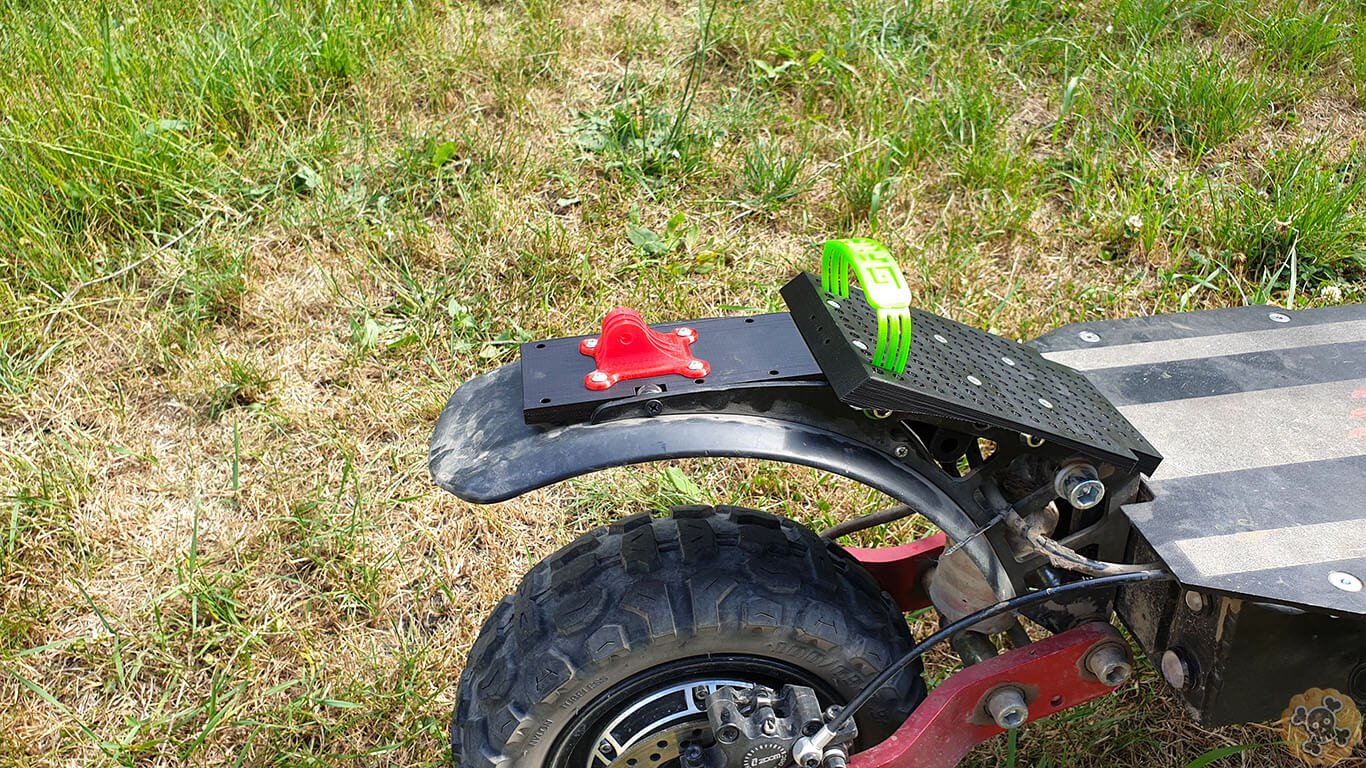
If you have Grip then install it as you can see on pictures , if not just tighten it by using using stock screws. ( do not tighten it too much otherwise palstic thread can be damaged )
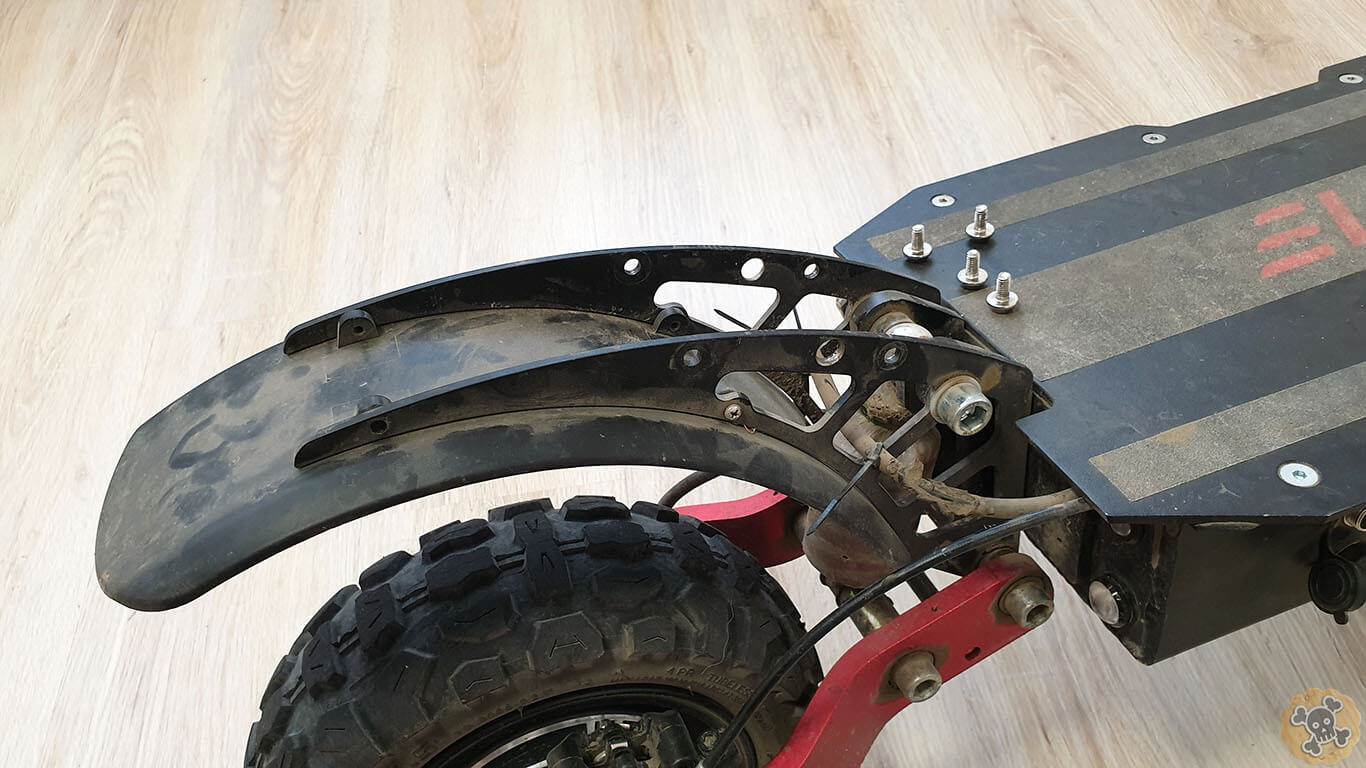
At th end use 2 black screws and this is it 🙂
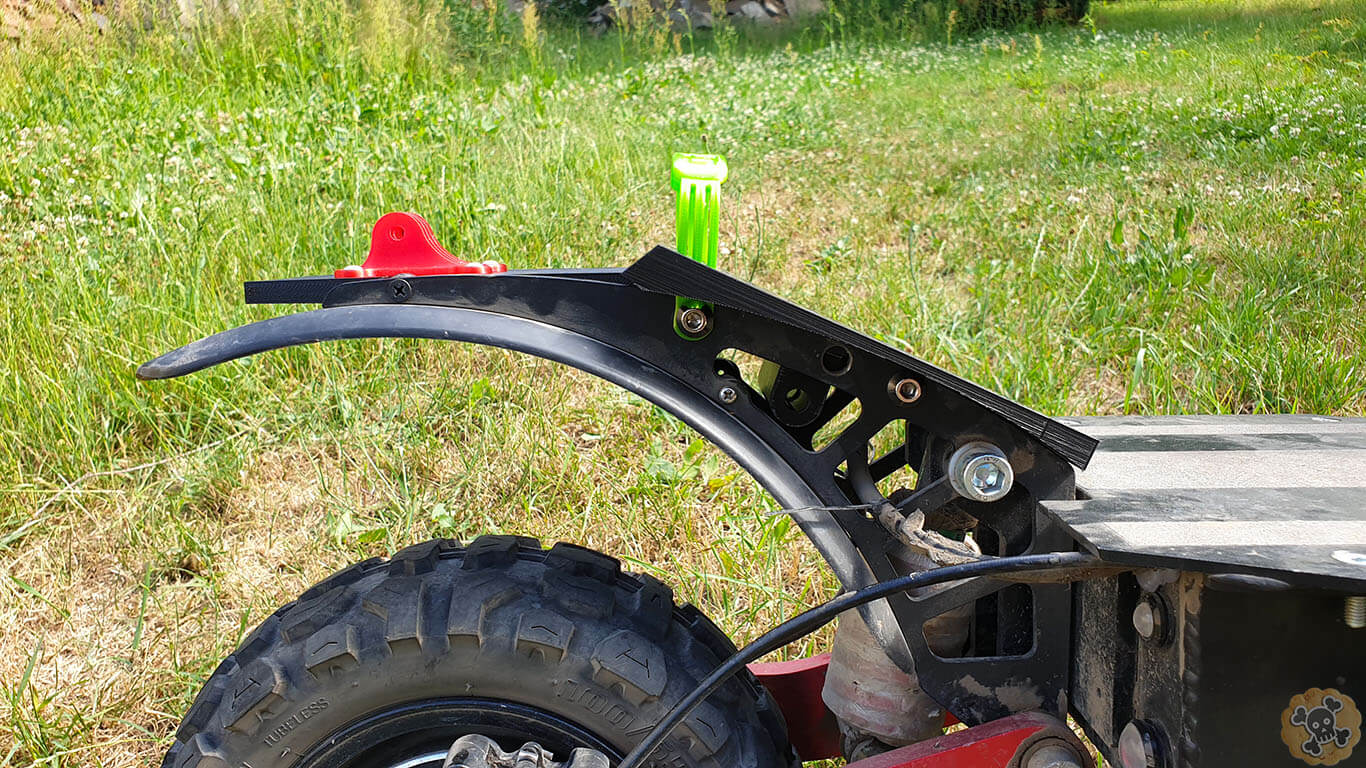
Me and Pablo been testing it for over 2 months,s coots crashed couple times but fot rests are in one piece , no cracks so I can recommend it . Print time is around 28H , so it takes quite long time but I doing it for qaulity, not for mass producing.
Soon more adapters will be out for this project, thank you all for any support ???
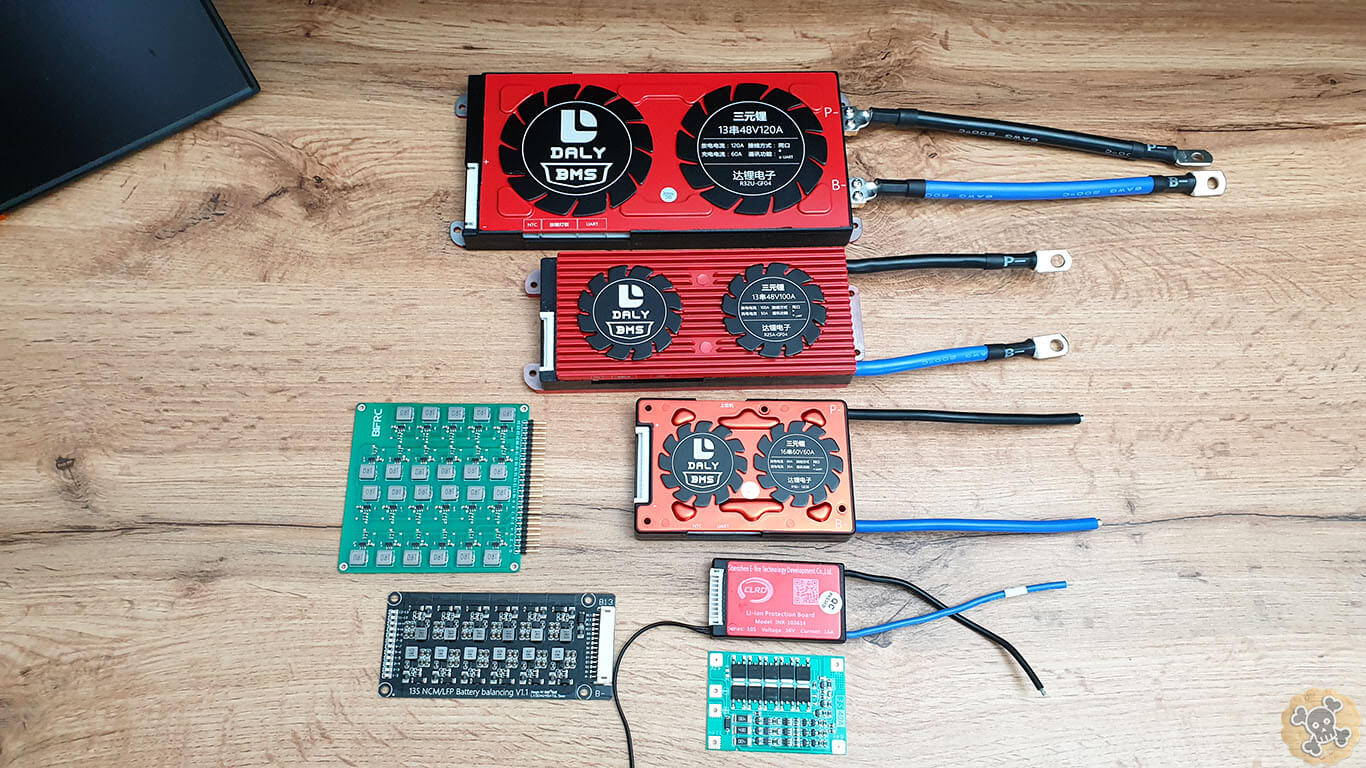
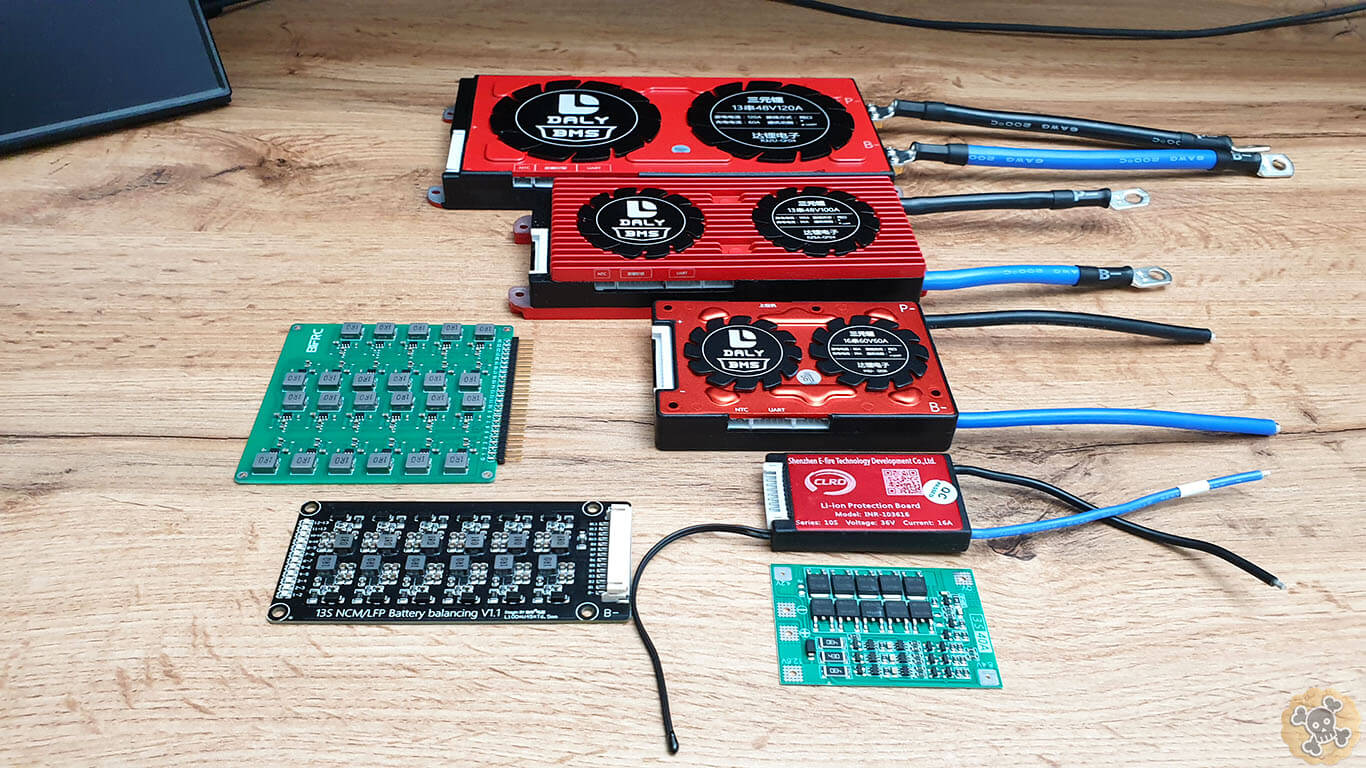
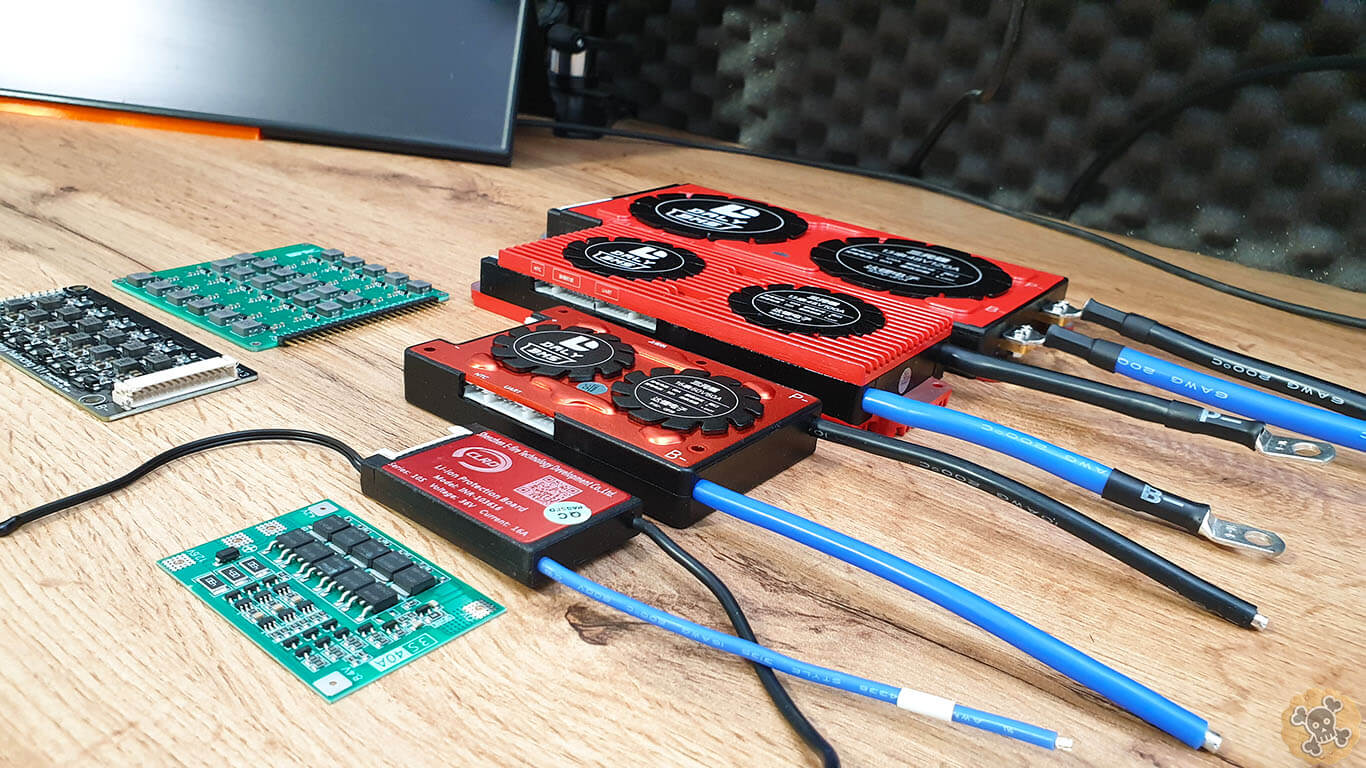
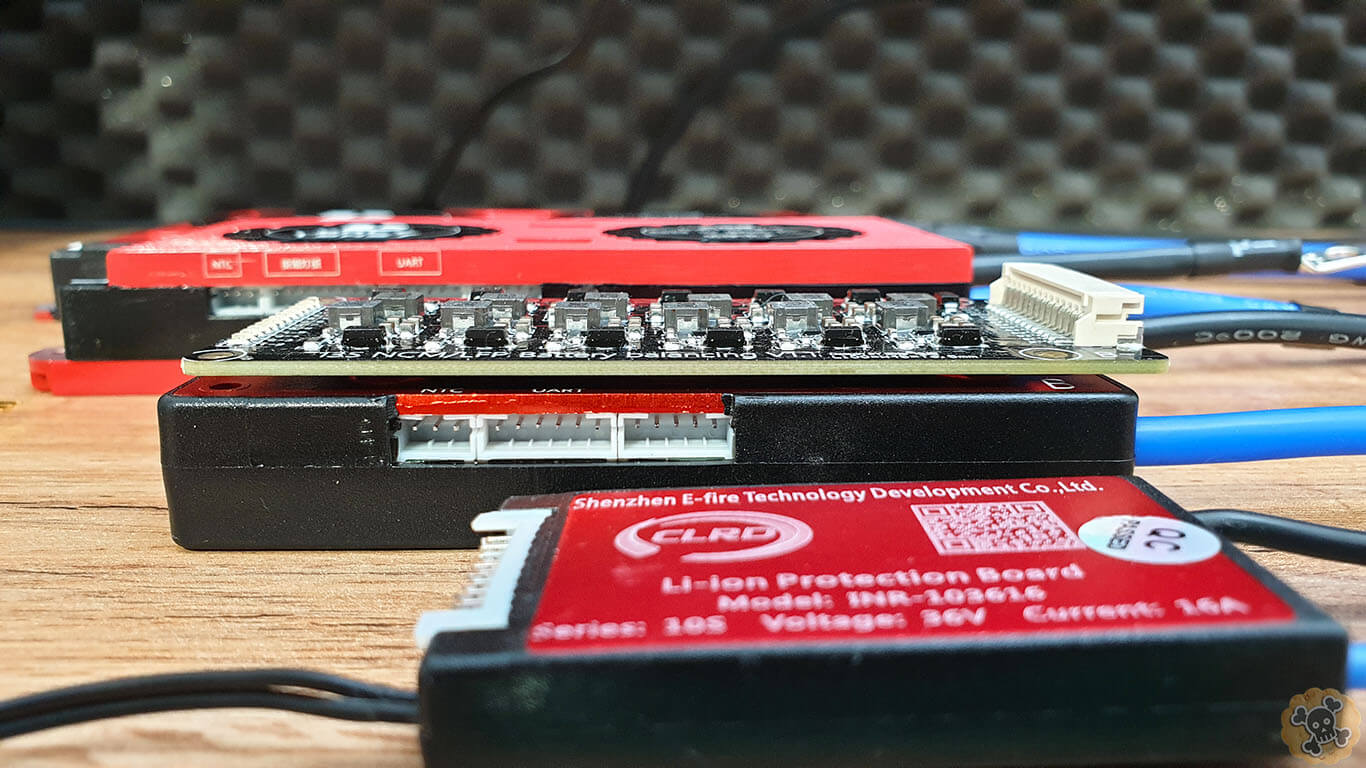
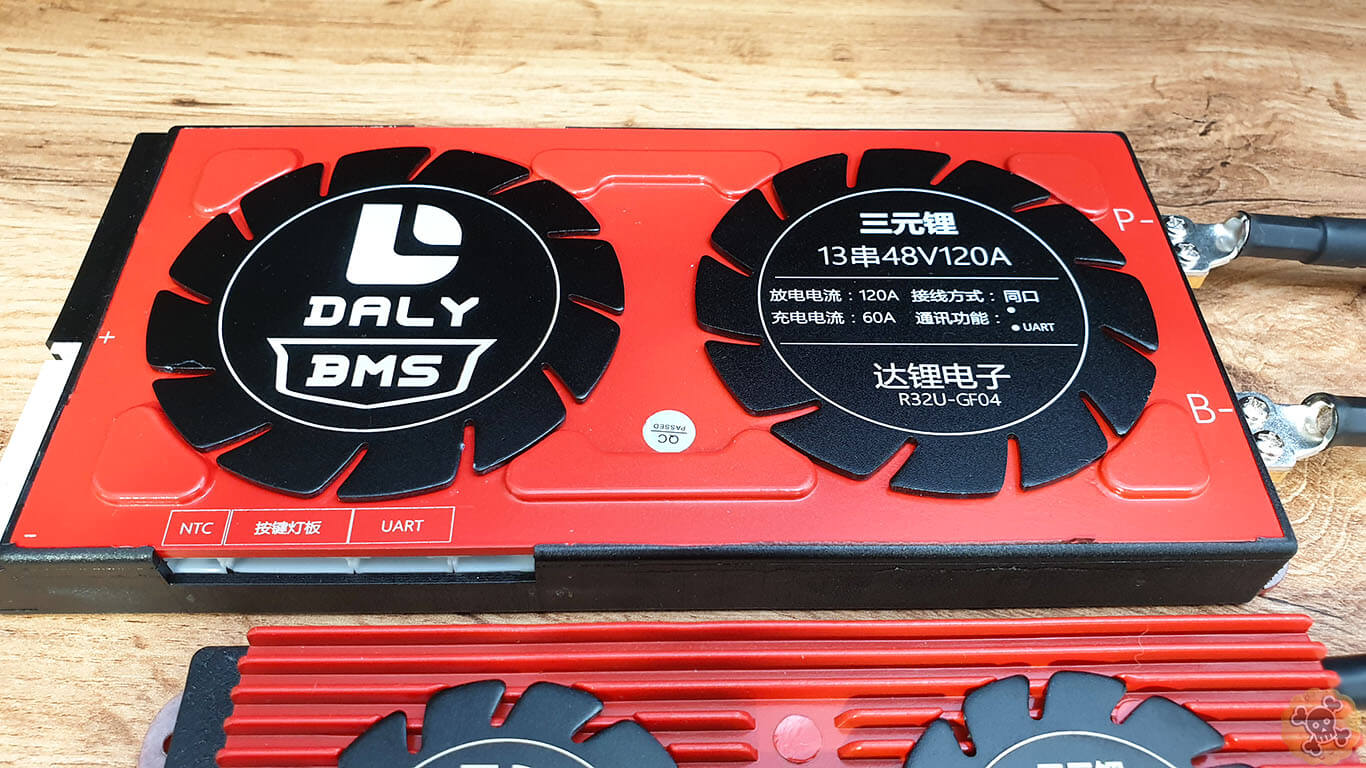
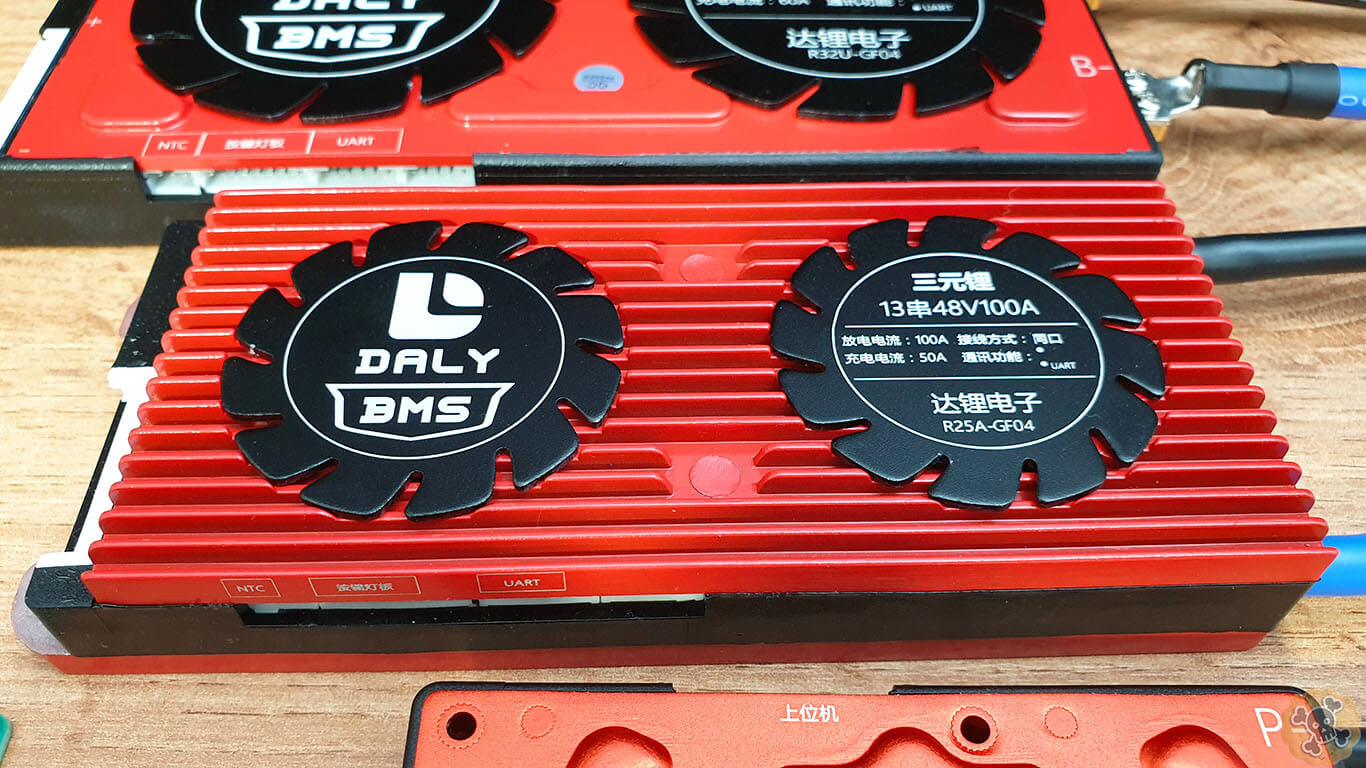
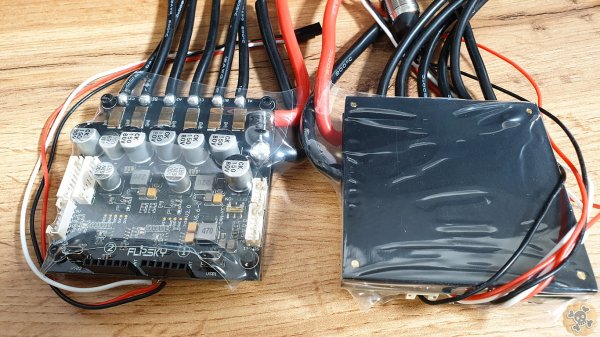
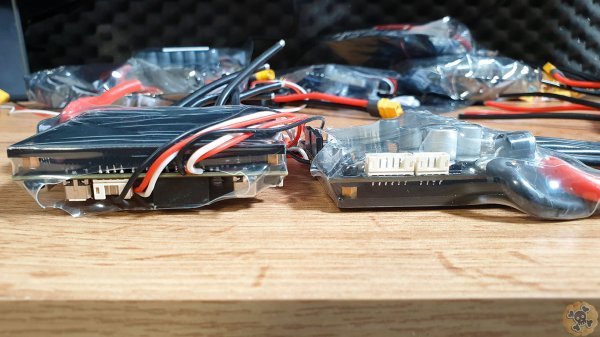
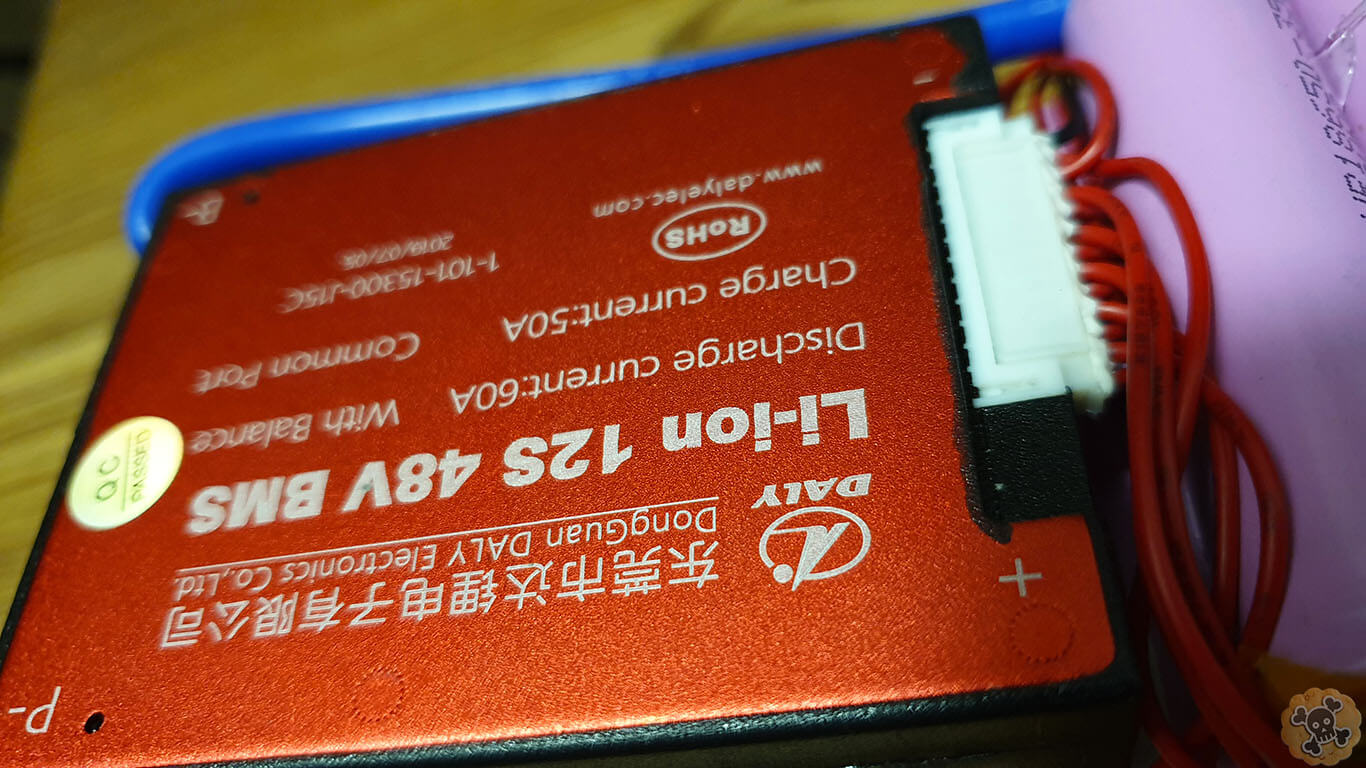
BMS & Balancer board works almost the sam way, but they are quite different, both can be used for simple or complex projects, so which one suits your project better ?!
1st thing, what ” Balancer feature” actually means ?, it’s blancing every single cell in your battery pack to be at the same voltage ( this is SUPER important ) . Just imagine that you got 3S Li-ION battery pack , after fully charge balancer will ensure that every single cell has exactly the same voltage, like: 1st Cell 4.2V / 2nd 4.2V / 3rd 4.2V . Without balancer after couple charging cycles you can expect that cells could have huge voltage difference like 3.8V / 4.1V / 4.5V , so cell 4.5V is already overcharged and permanently damaged, also cell with lower voltage like in this case ,3.8V has lower discharge power so voltage sag will be huge ( Li-Ion cells discharge current is lower when voltage is lower, so cell at 4,5 can drops to 4V with current output 10A , while cell 3.8V can drops under 3V with current output under 7A ). As you can see balancer is super important, thanks to it you can get , best possible life span of your battery pack and highest possible discharge power.
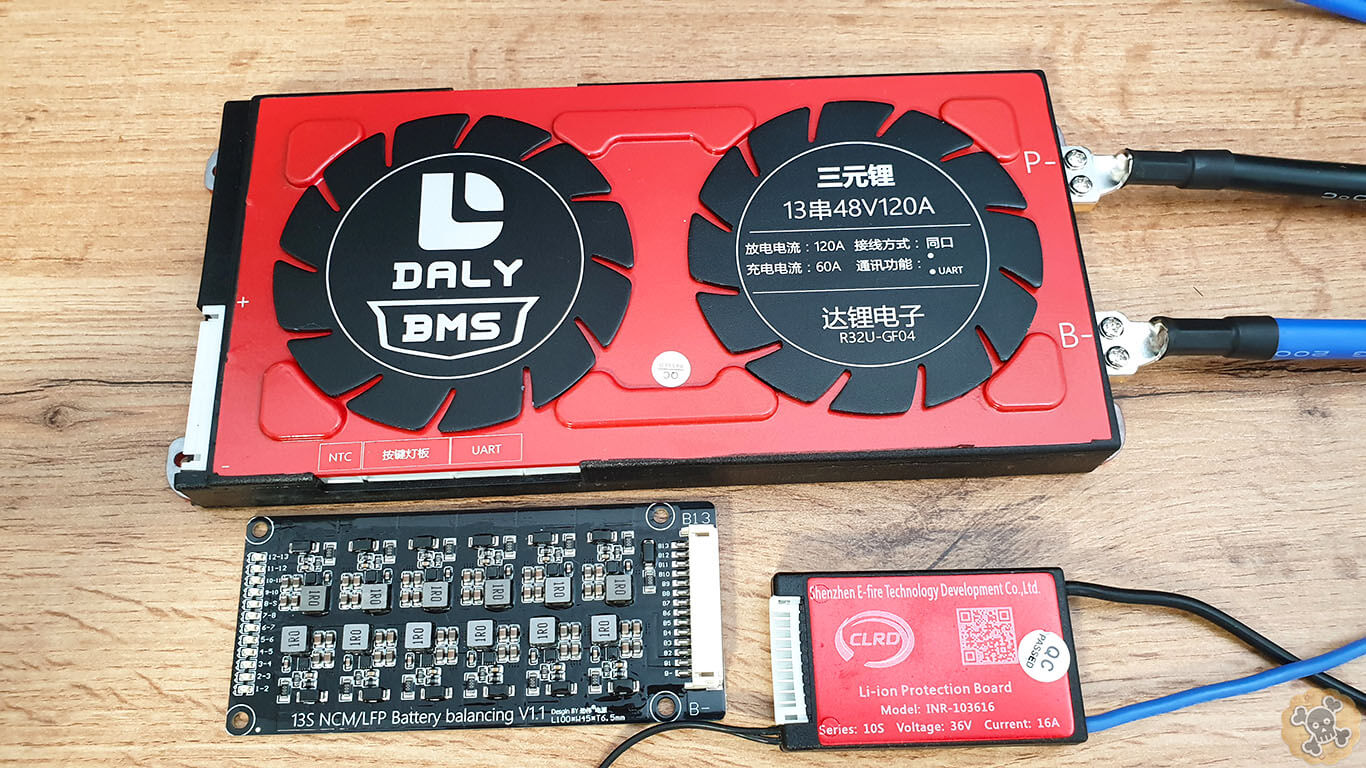
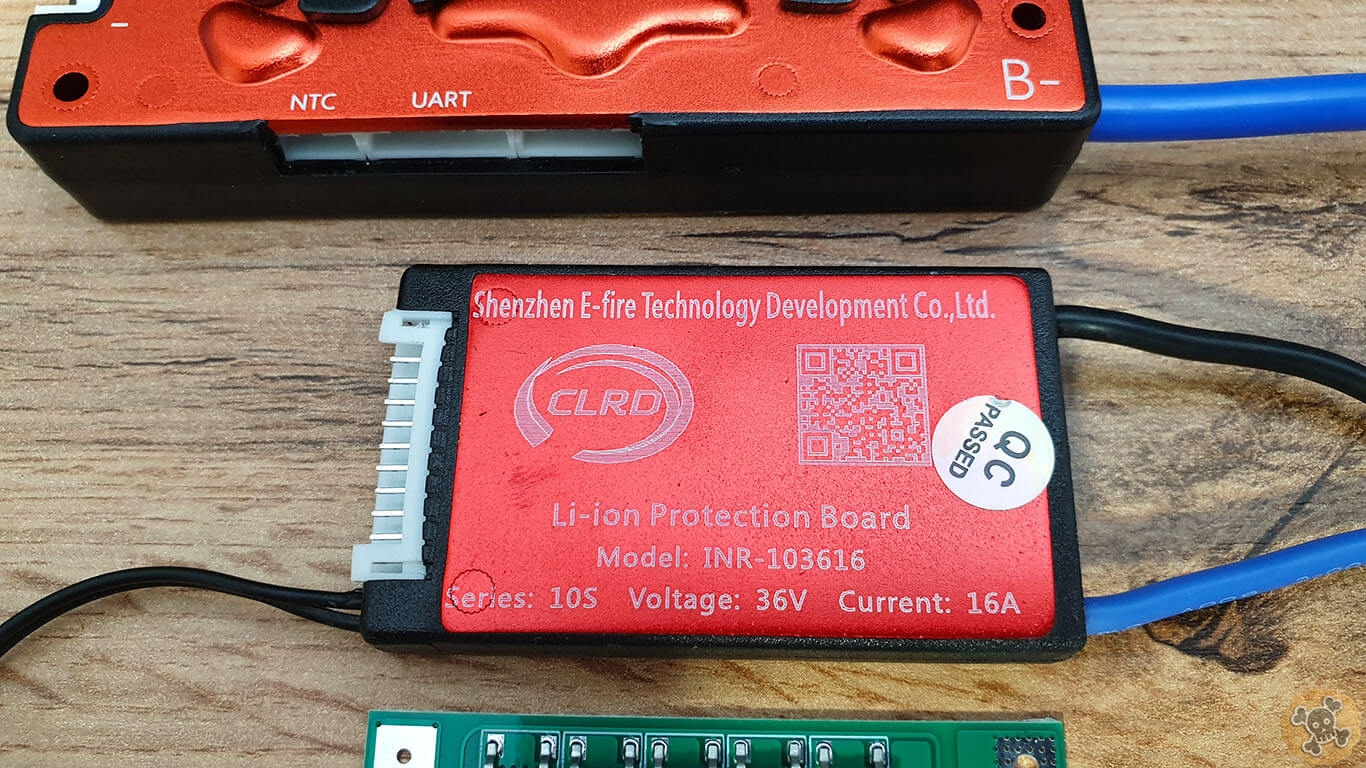
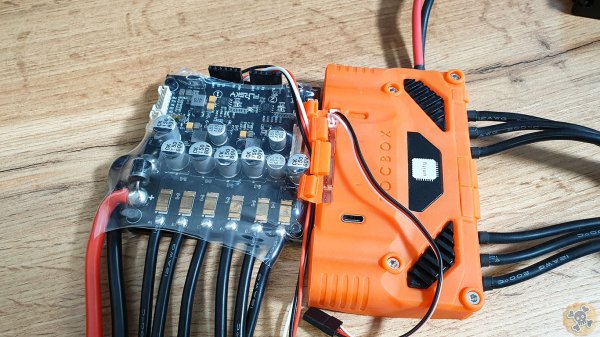
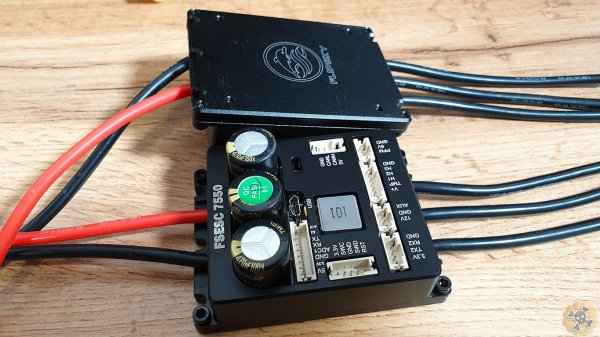
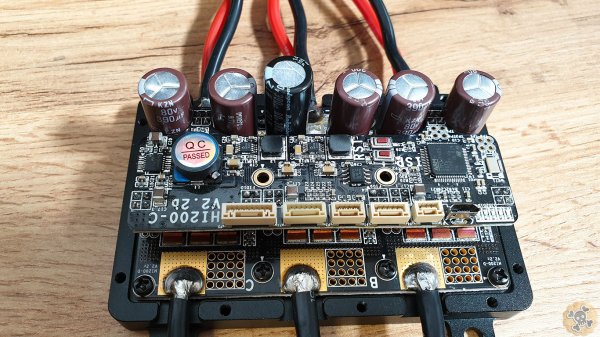
Size comparison BMS vs Balancer board (black /green flat board only with balancer port )
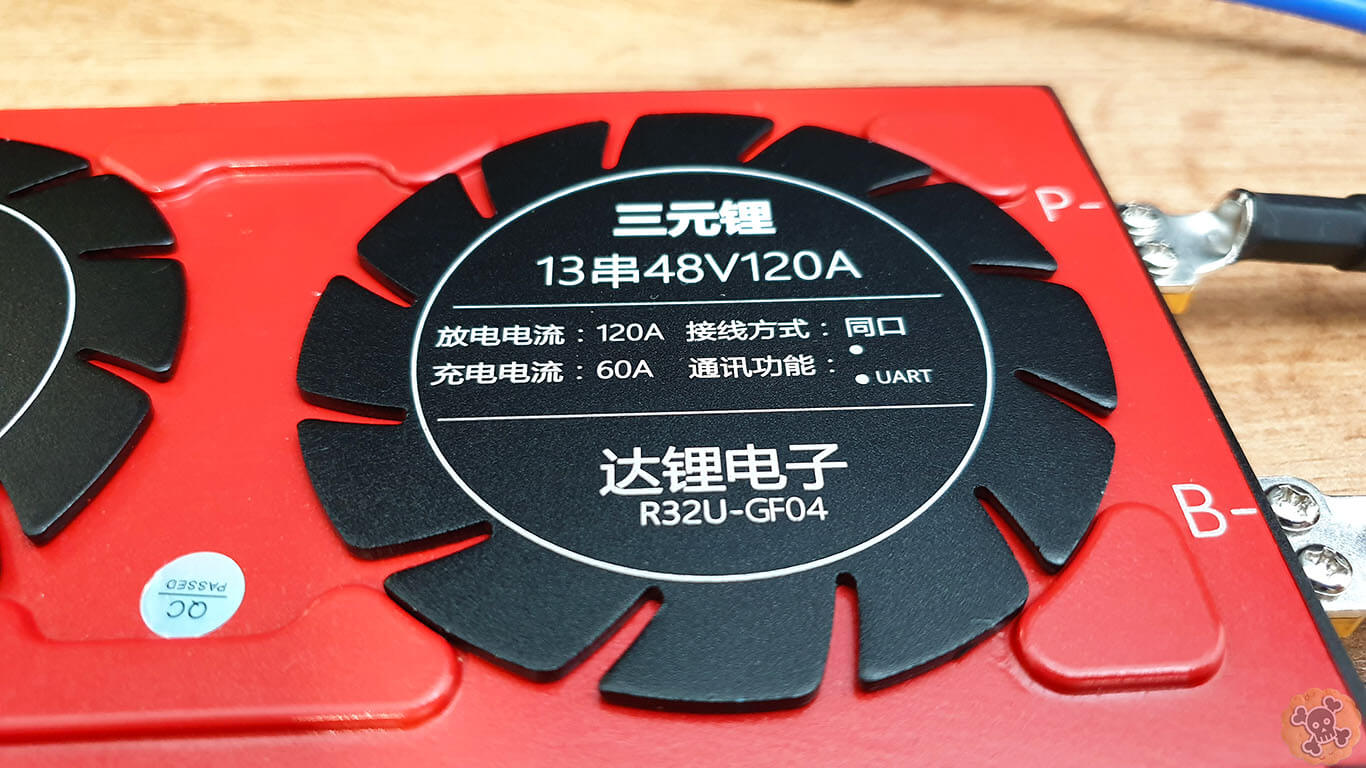
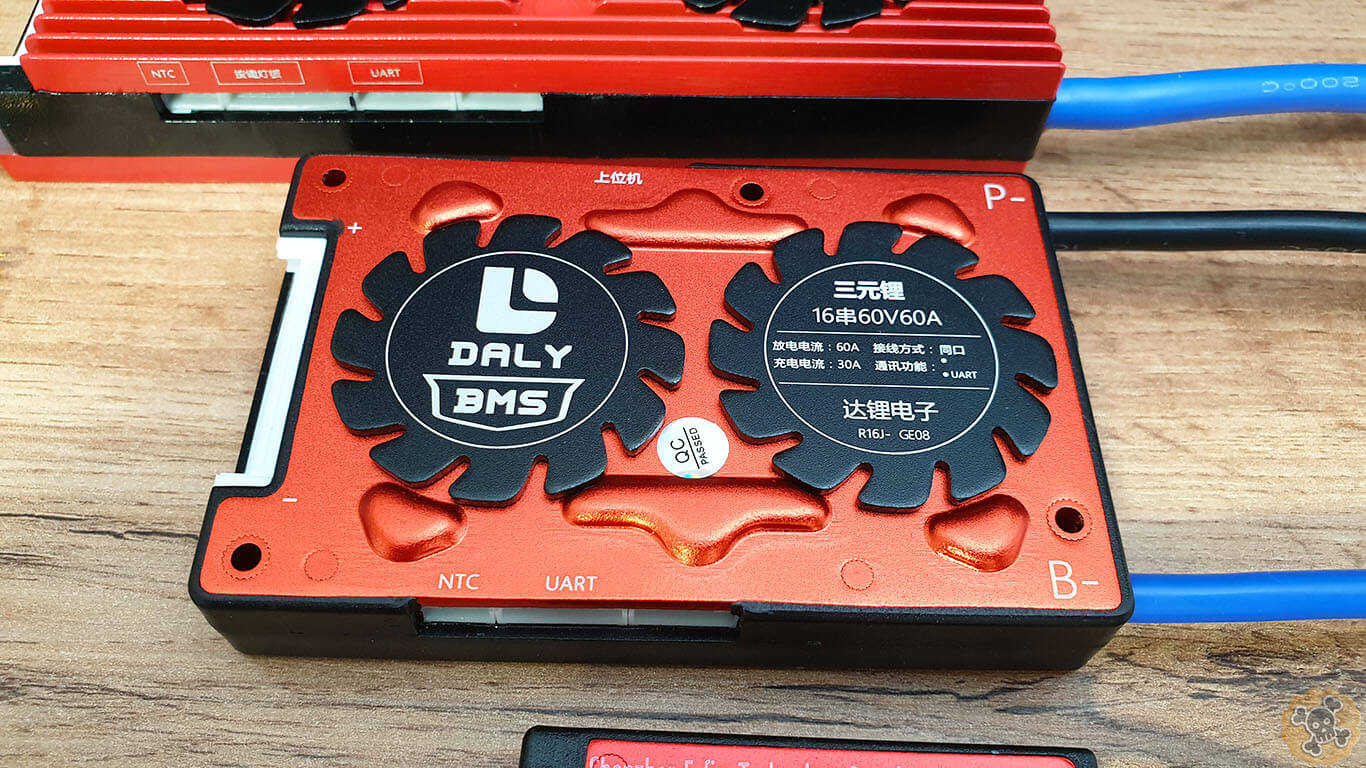
BMS is Battery management system , it’s like fully featured brain of the battery, High quality BMS will fully care about battery pack:
It will prevent form overcharging and deep discharging ( if charging voltage will be too high, BMS will stop charging process. If voltage will drops too much, power output will be turned off ).
If output/input amprage will be too high then power input/output will be turned off to prevent battery damage.
If there will be short circuit , BMS will be turn off power output to prevent battery damage.
If BMS has temperature probe and battery pack will reach high temperature then power input/output will be turned off to prevent battery damage.
Advanced smart BMS have unique features, like max power input/output can be set (very useful for various projects ) also end cell voltage point can be set. If you would like seriously extend life span of Li-Ion cells then set min. voltage to 3.3V and max voltage to 4.05V , you will lose actually only ~15% of overall capacity, compared to fully charged Li-Ion cell ( 2.5V-4.2V ) but the most important, life span will be 2-3 times greater.
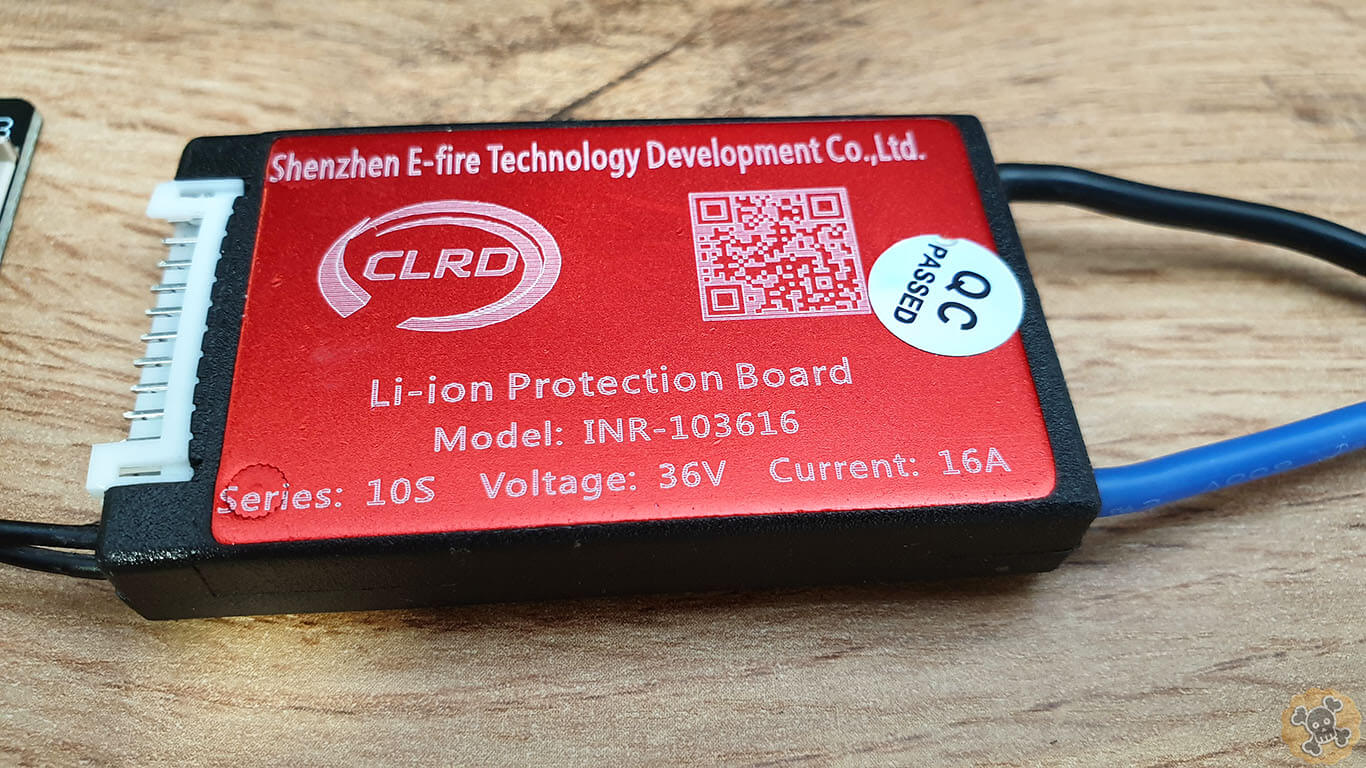
1st con , You have to buy BMS for specific voltage, like for 10s battery pack you need 36V BMS ( min 25V / max 42V ) . Ofcourse you can buy BMS which will work with various packs like 2s-30S BUT it’s crazy big , heavy and expensive .
You have to buy BMS for specific current , if BMS will be not able to handle amperag then can overheat and damage battery pack or will constantly turn off power output.
Balancing process usually is super slow , current can be only 10<>70ma
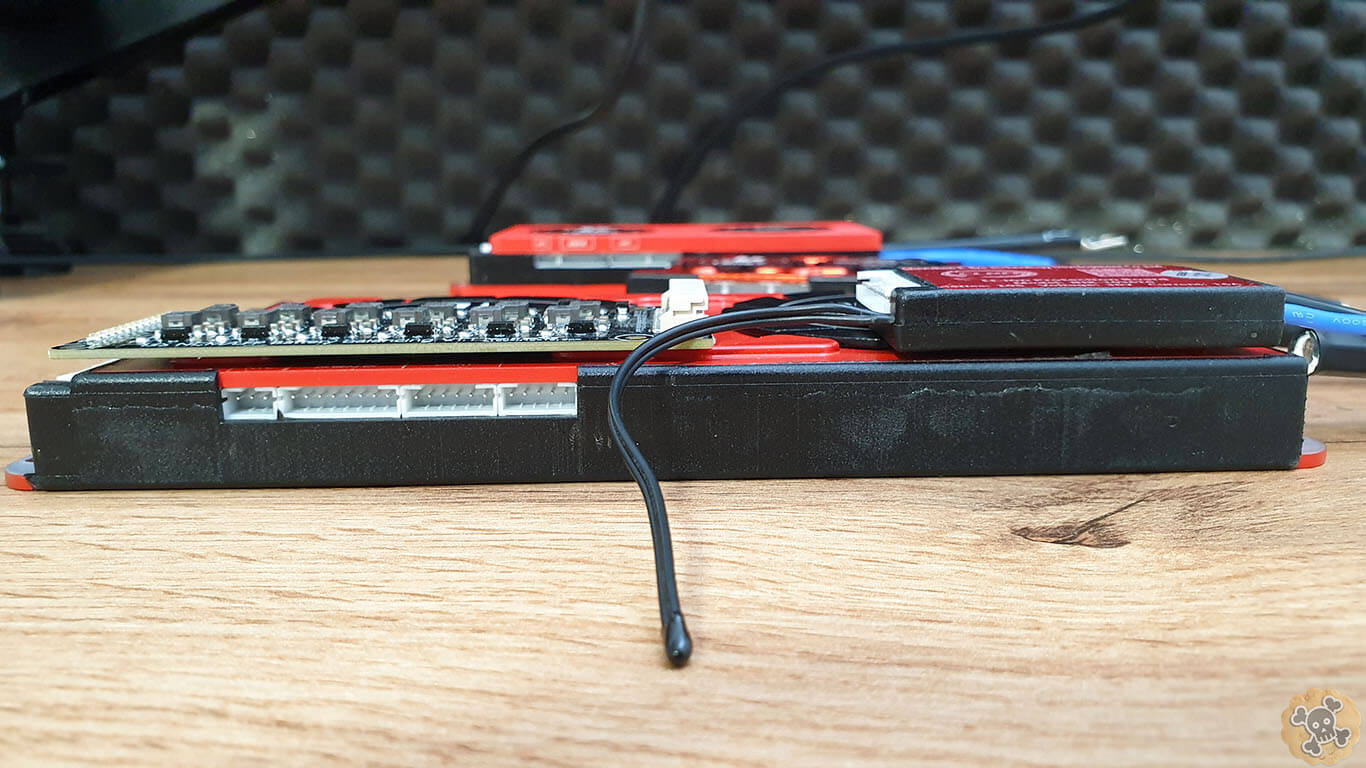
BMS is way bigger than balancing board and can be really heavy, especially when you need high current one.
HQ BMS can be quite expensive , from 30$ to over 1000$ . Price depends on 4 factors ( Quality / Voltage / Current / Features )
Balancing Board can only balance cells, so it’s like Zombie without Brain xD
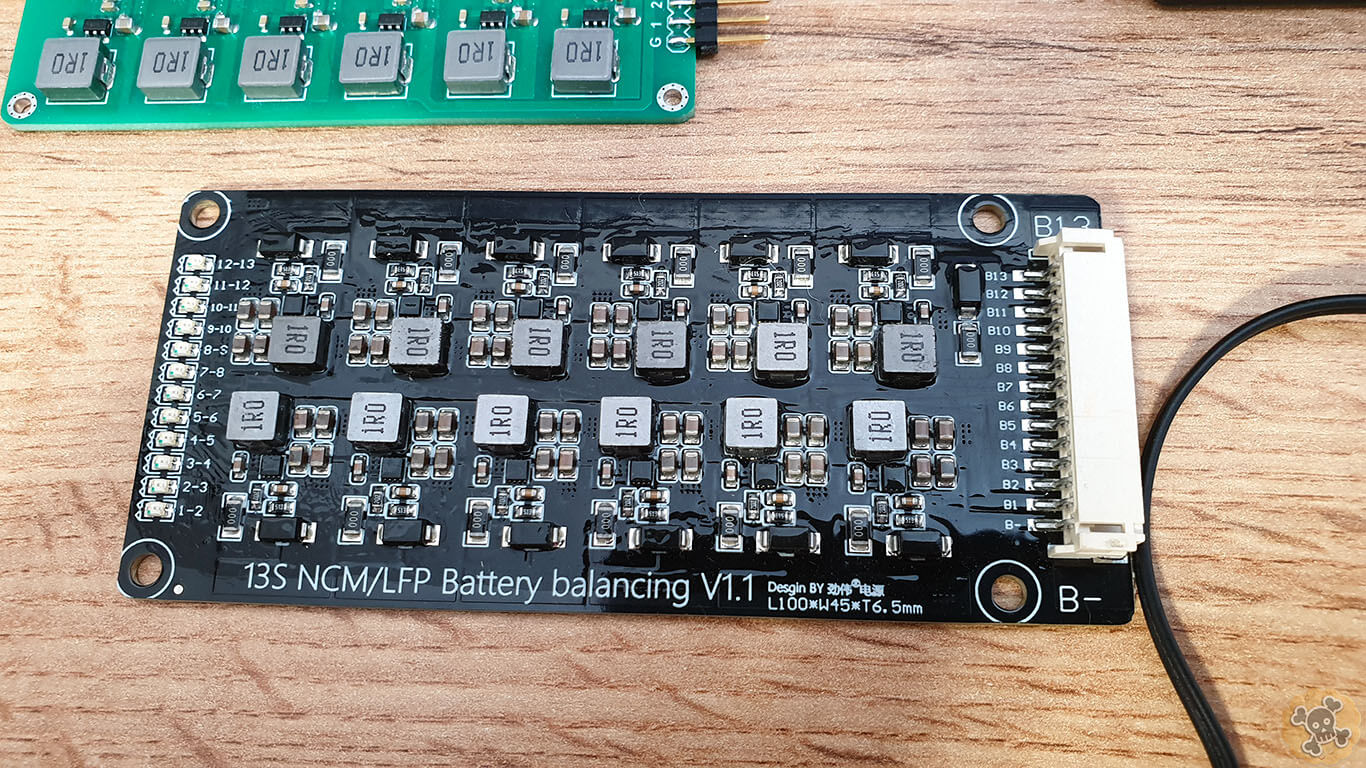
HQ Balancer board can balance cells with high current 500-3000ma ( perfect for High Capacity packs )
Tiny/slim size and low weight , perfect for projects where is lack of space, also balancer board can be installed outside which is not bad idea cuz we can check easier what is capacity of cells in series ( it can determine health status of battery pack )
Balancing board can’t prevent form overcharging or deep discharging, it’s recommed for users which can set end voltage in controller ( should turn off if voltage will be too low ) or in charger ( buy for specific voltage like for 10s you need 42v and it will not charge over this value cuz this is max voltage output )
No short circuit safety, I recommend to add FUSE which can handle choosed current and/or hardware switch for safety reason.
No overheating protection
As you can tell Balancing Boards are for Adavanced users cuz are more problematic but a lot weight and space can be saved, while BMS is more like Install and Forget. In my Case I will use both, for my M365 2wd 4KW with installed 12s 5p 21700 battery pack built in to deck I will use Balancer board ( lack of sapce ), the same for super light powerful Ebike ( low weight ) BUT for Edirtbike I will use BiG and poweful BMS ( safety reson )
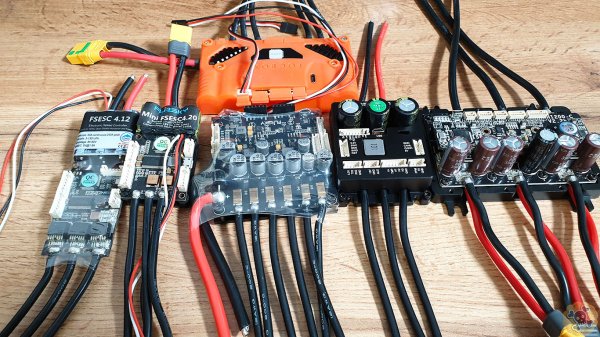
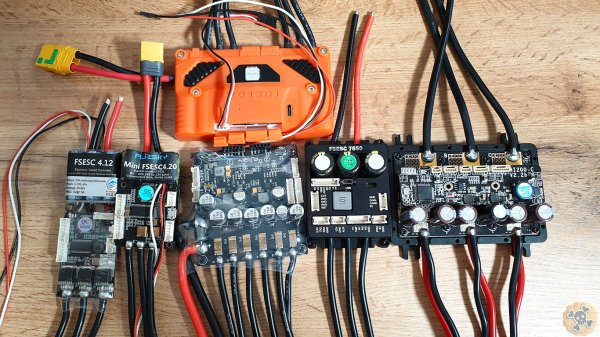
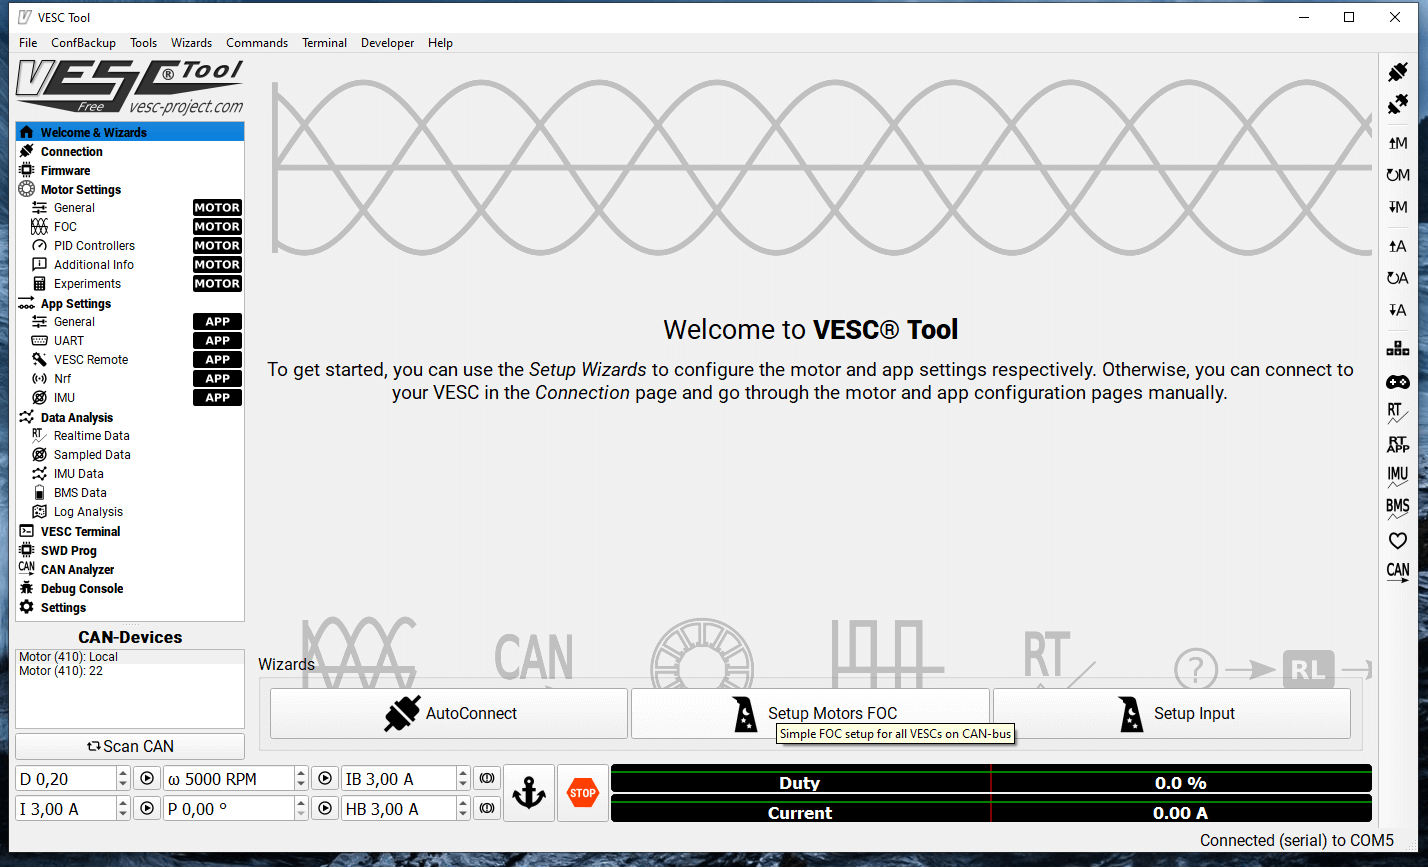
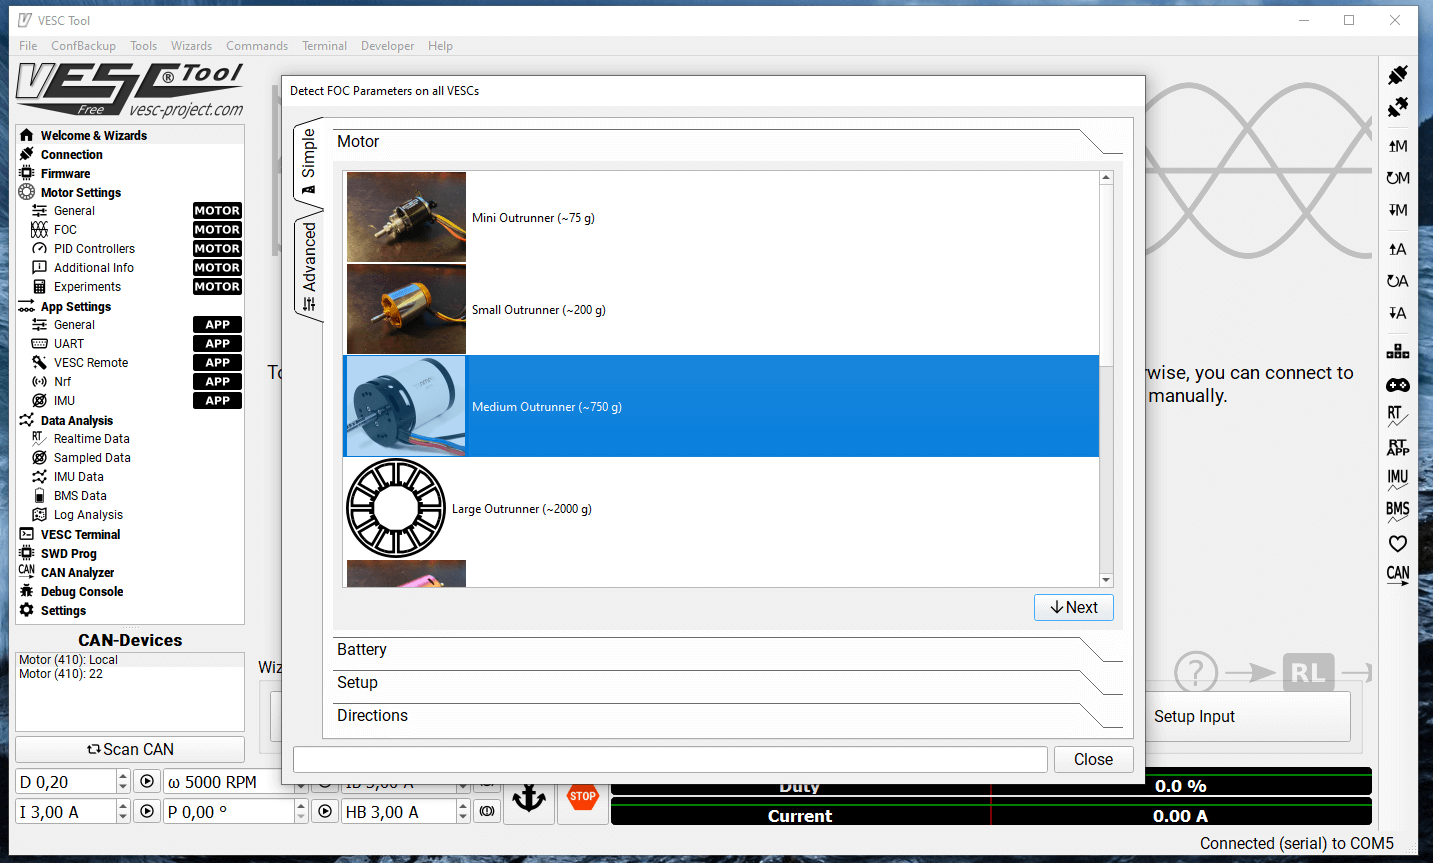
Vesc is one of the best available controller on the market, Small size / High power / Advanced features. If you want to mod you scoot then this is good start, but on the market we got couple different versions so let me tell a little bit about them.
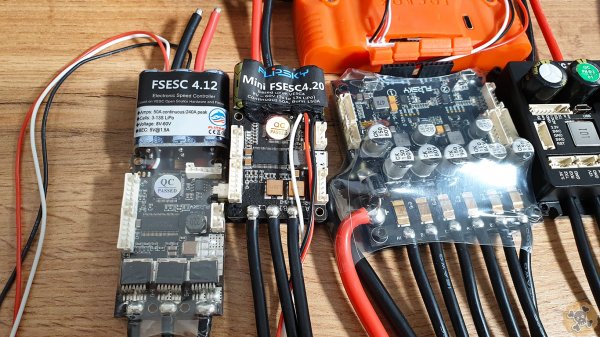
Vesc 4.12 Anitque , but still work
Vesc 4.2 Great start
Perfect for low power but advanced projects, Like Ebikes / Esk8, Escoots etc..
Max safe voltage is 36/42v so 10s battery & not more than 50A /1500W . Risky but should work with 12s so 43/50,4V & not more than 35A / 1500W.
Max safe voltage is 12 so 43/50,4V & not more than 100A / 5000W ( I tested it with peak 300A 6KW per motor and was working quite nice ? ) . Risky but should work with 13s so 46,8/54,6V & not more than 80A / 3000W.
M365 is great scooter , super light and quality is just legend so I decided to make a true BadAss sleeper , it will looks like random M365 but there is nothing random Inside ? . Power up to 3000watt speed up to 40km/h , 2WD , Advanced Brake system , Weight under 20kg 🙂 .
Actually i will make versions
Cheapo 2wd on Pro frame with: vesc 4.2 ( real power up to 2,5KW ) , 12s 5p battery ( ~17.5AH ), speed 40km/h+ range 50km+, weight ~ 20kg
Beasty 2wd on Pro frame with: vesc 6.6 ( real power 3KW+ ) , 13s 5p battery ( ~17.5AH ), speed ~45km/h range 60km+, weight ~ 22kg
Kraken 2wd on Pro frame with: vesc 6.6 ( real power more than 5KW+) , 13s 5p battery ( ~17.5AH ), speed 50km/h+ range 50km+, weight ~ 26kg
The best thing is that price is the lowest one that you can find on the whole market, just speak with Goran ( super nice guy, he made it and he got other HQ parts !)
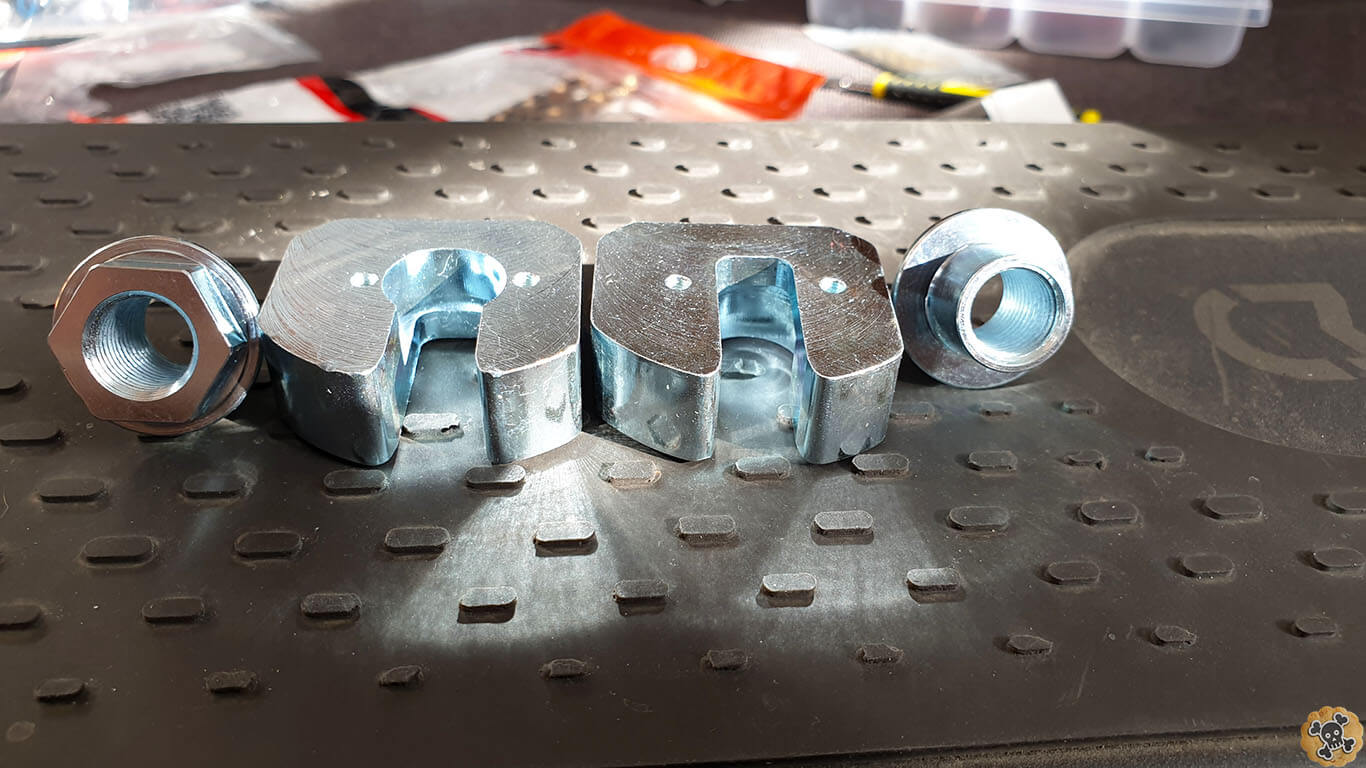
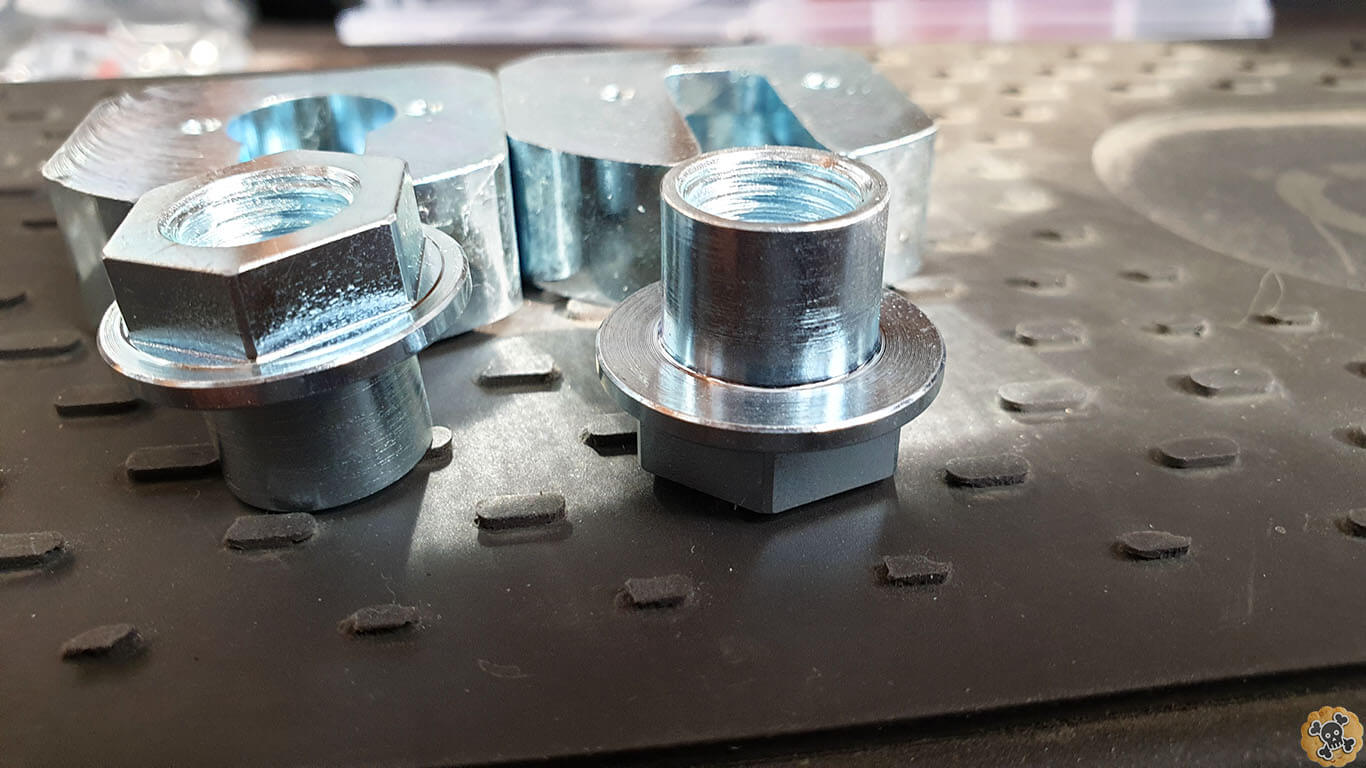
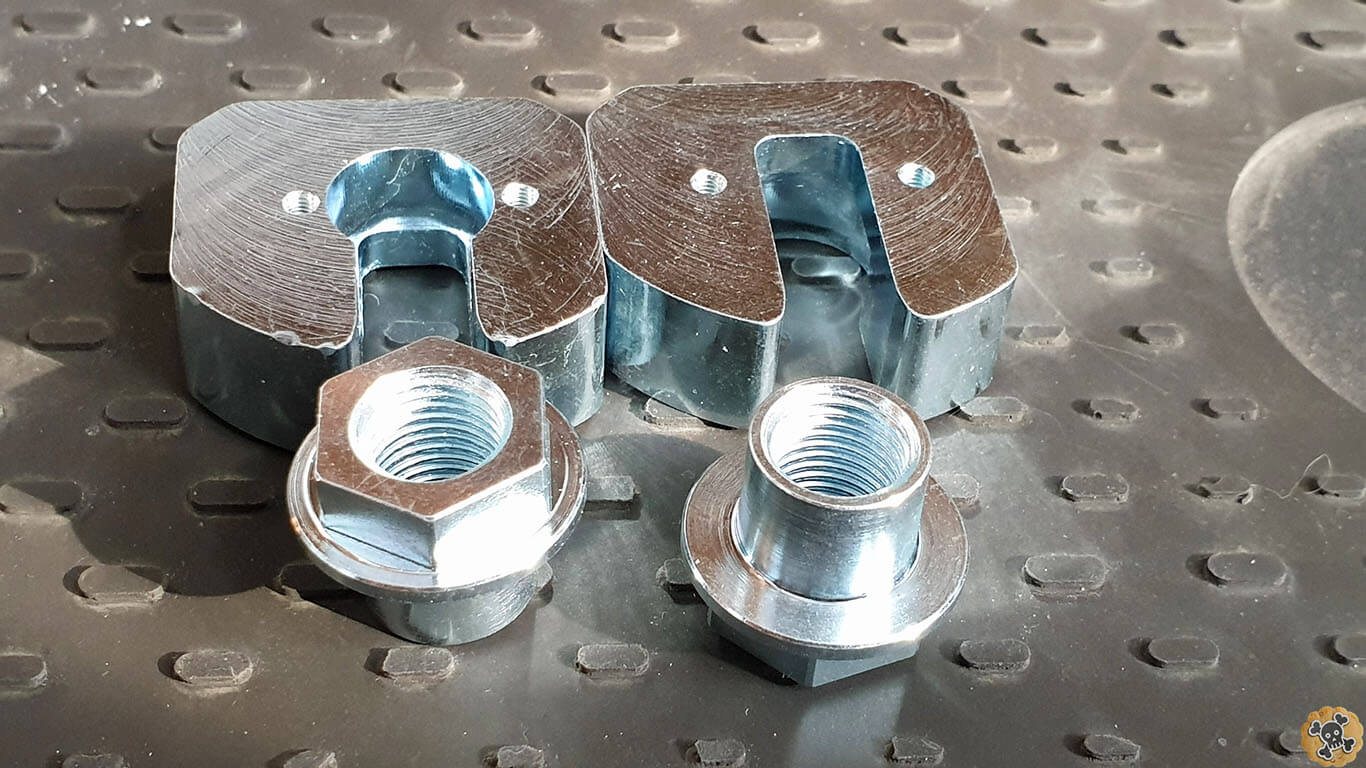
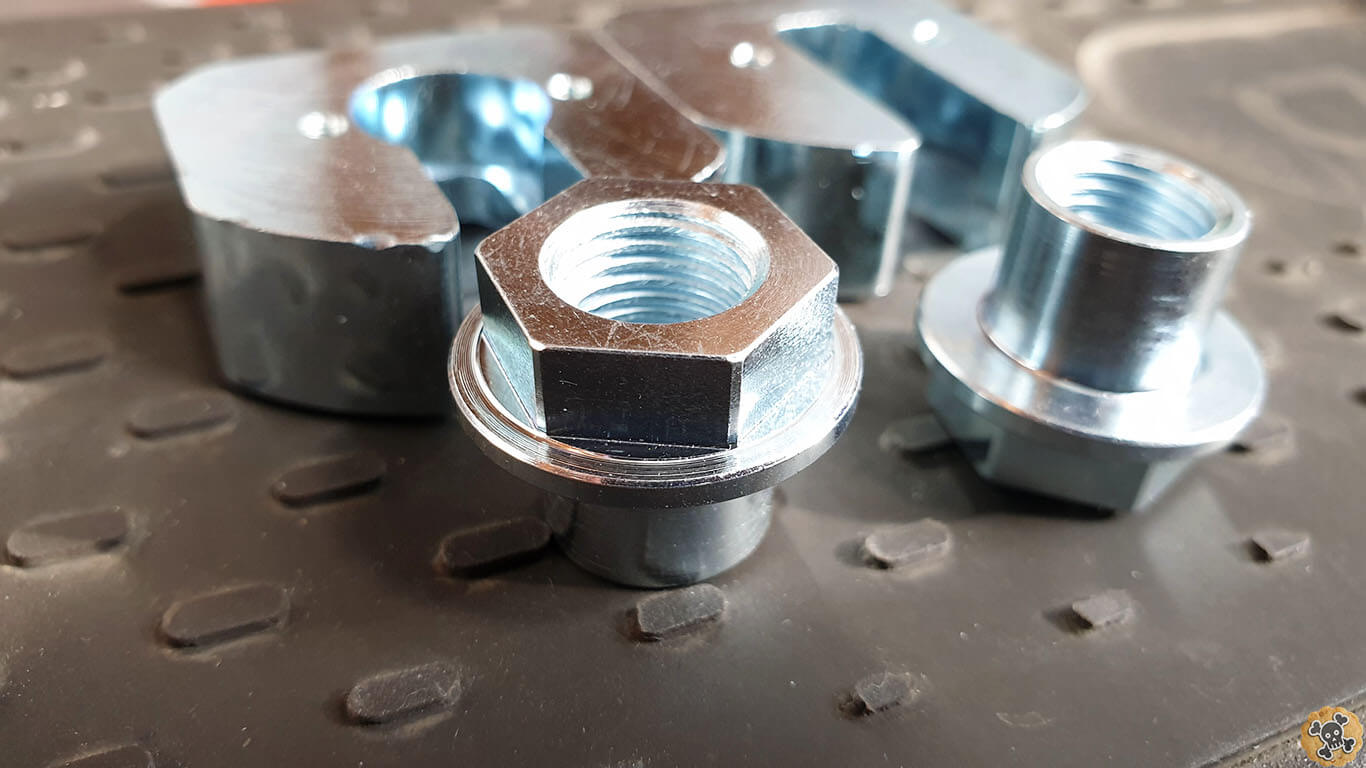
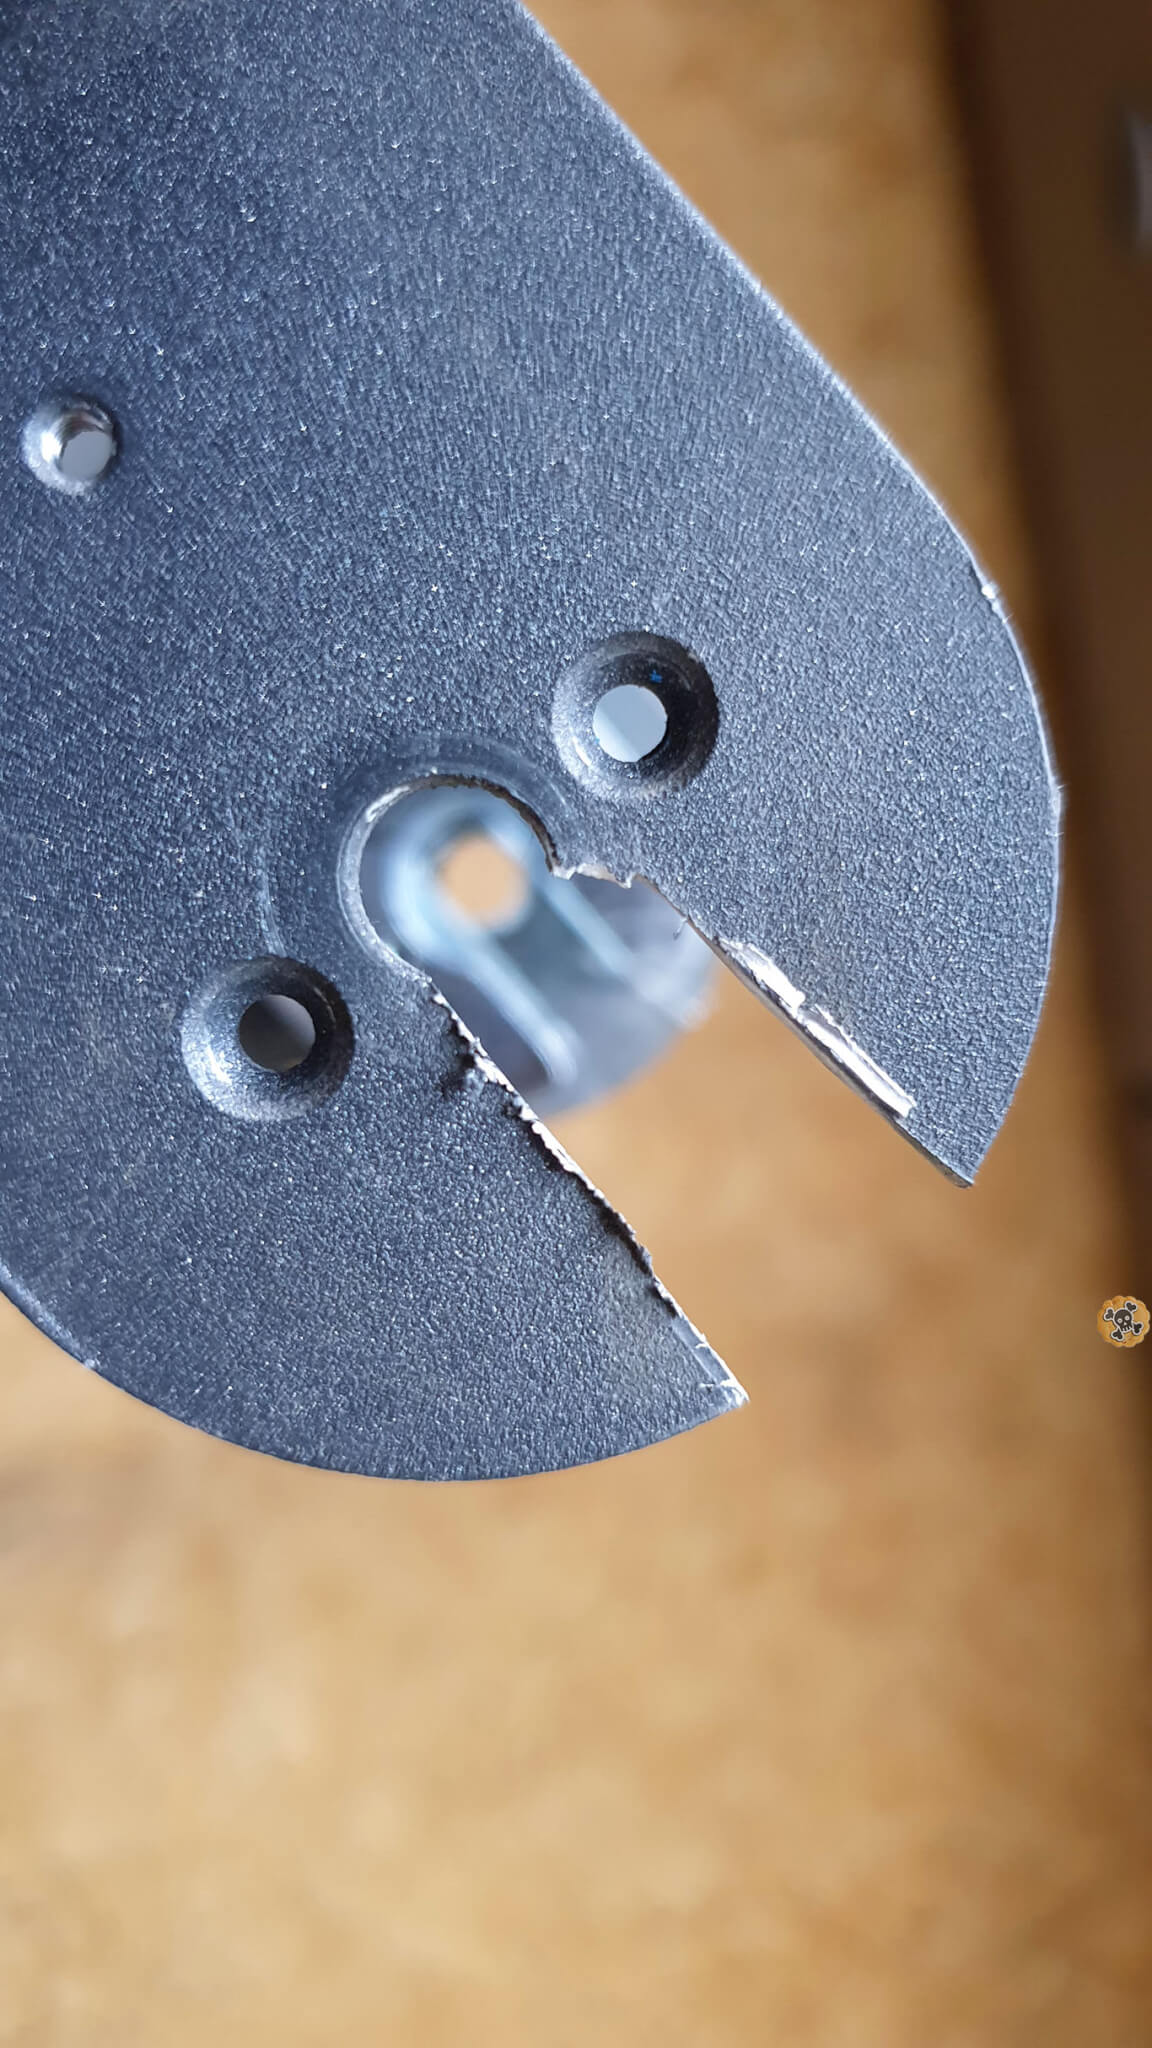
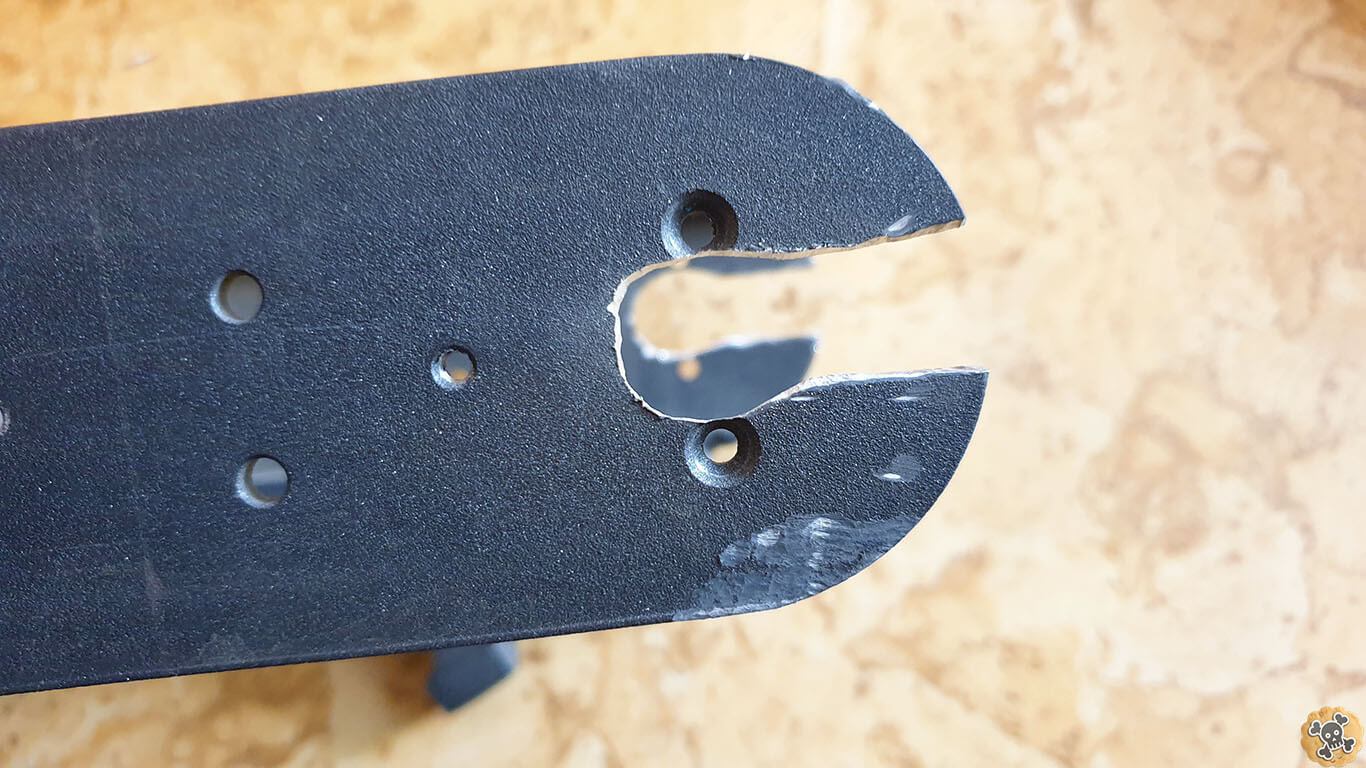
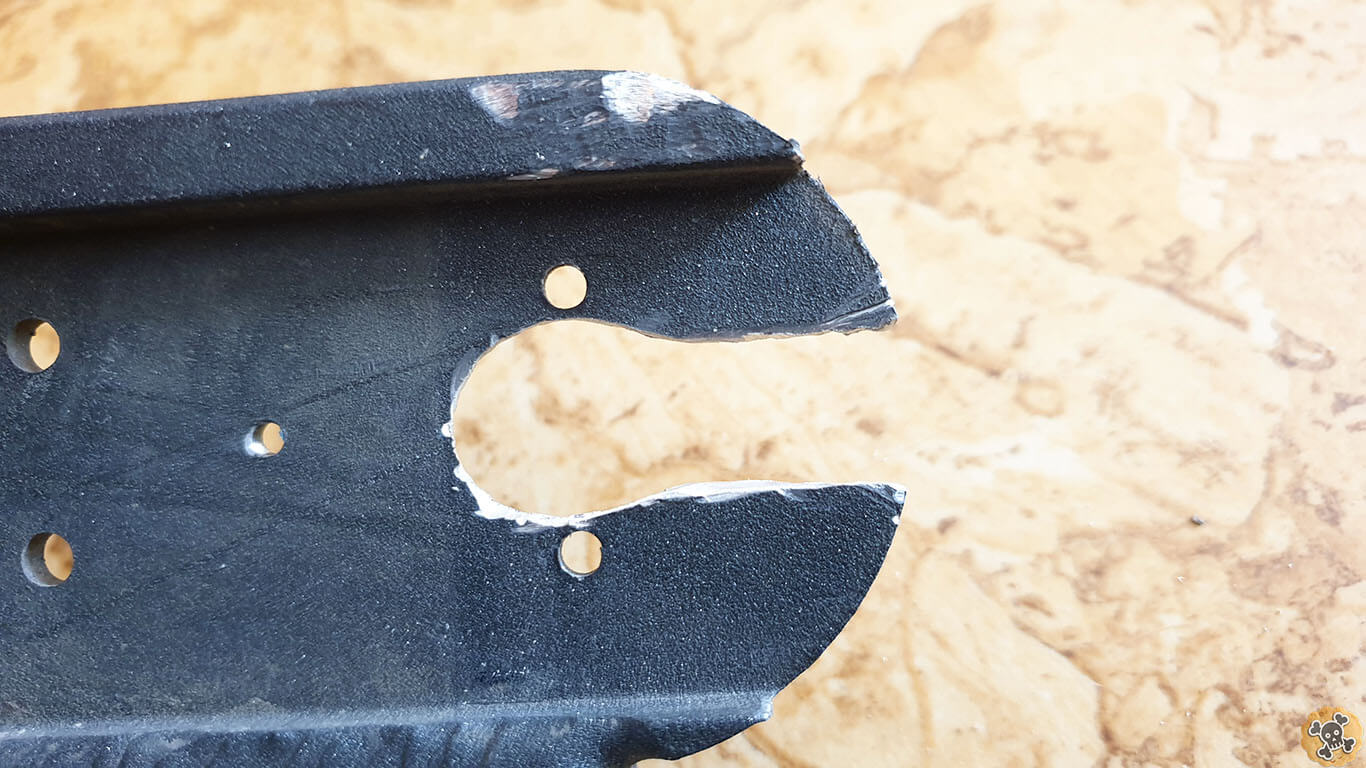
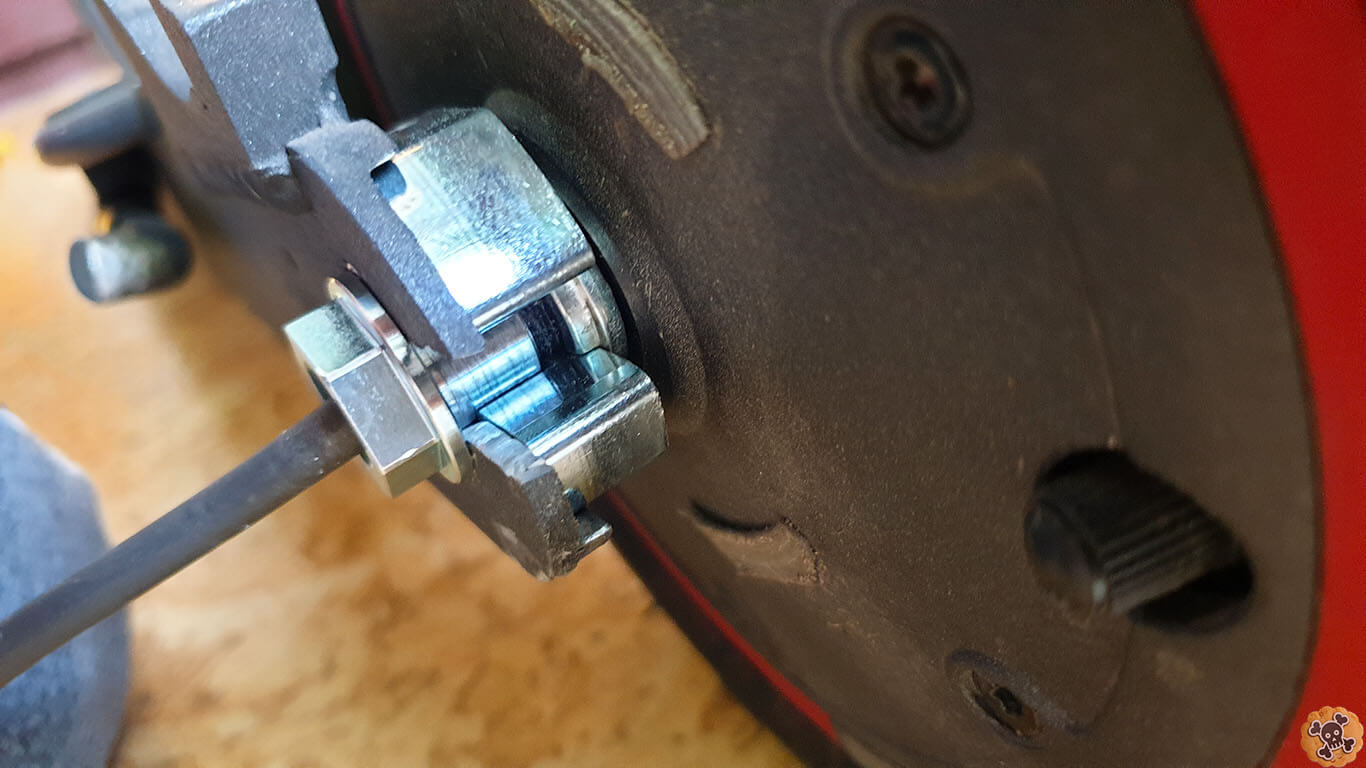
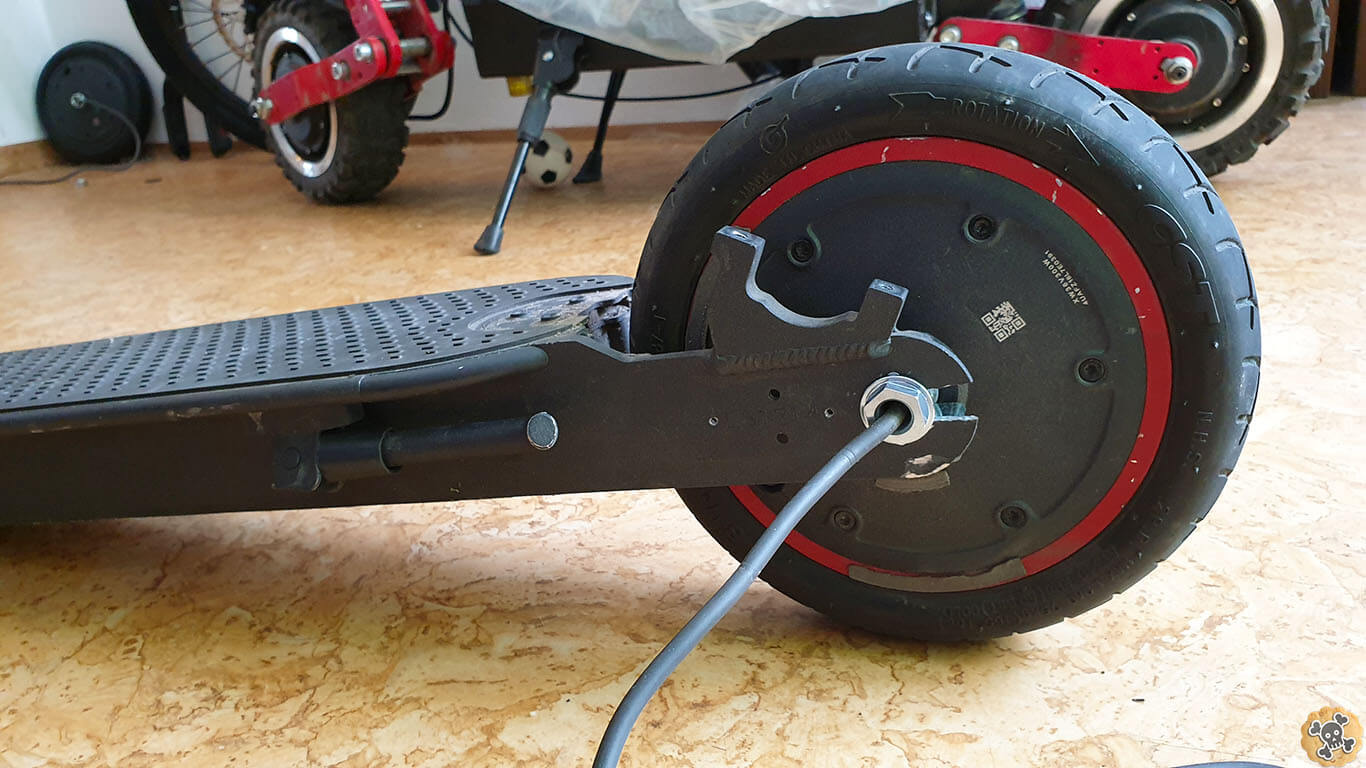
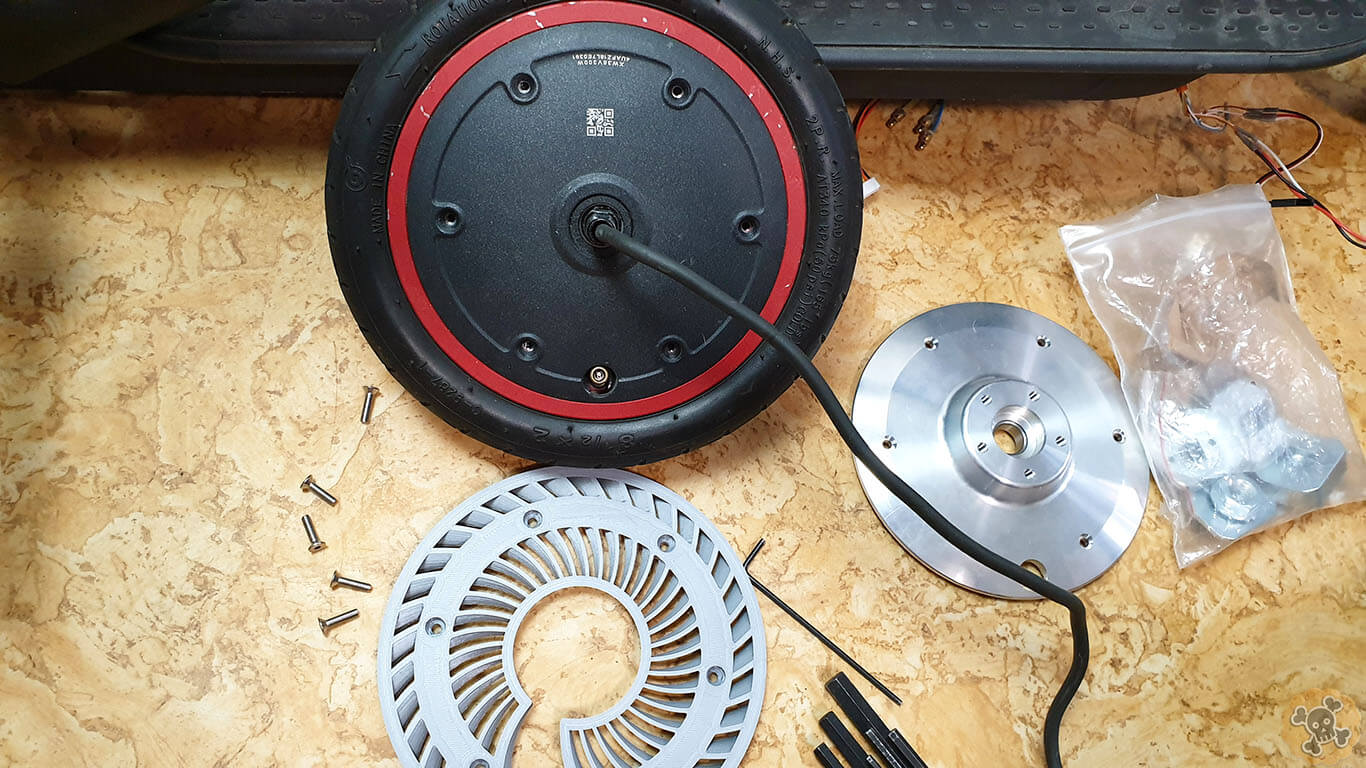
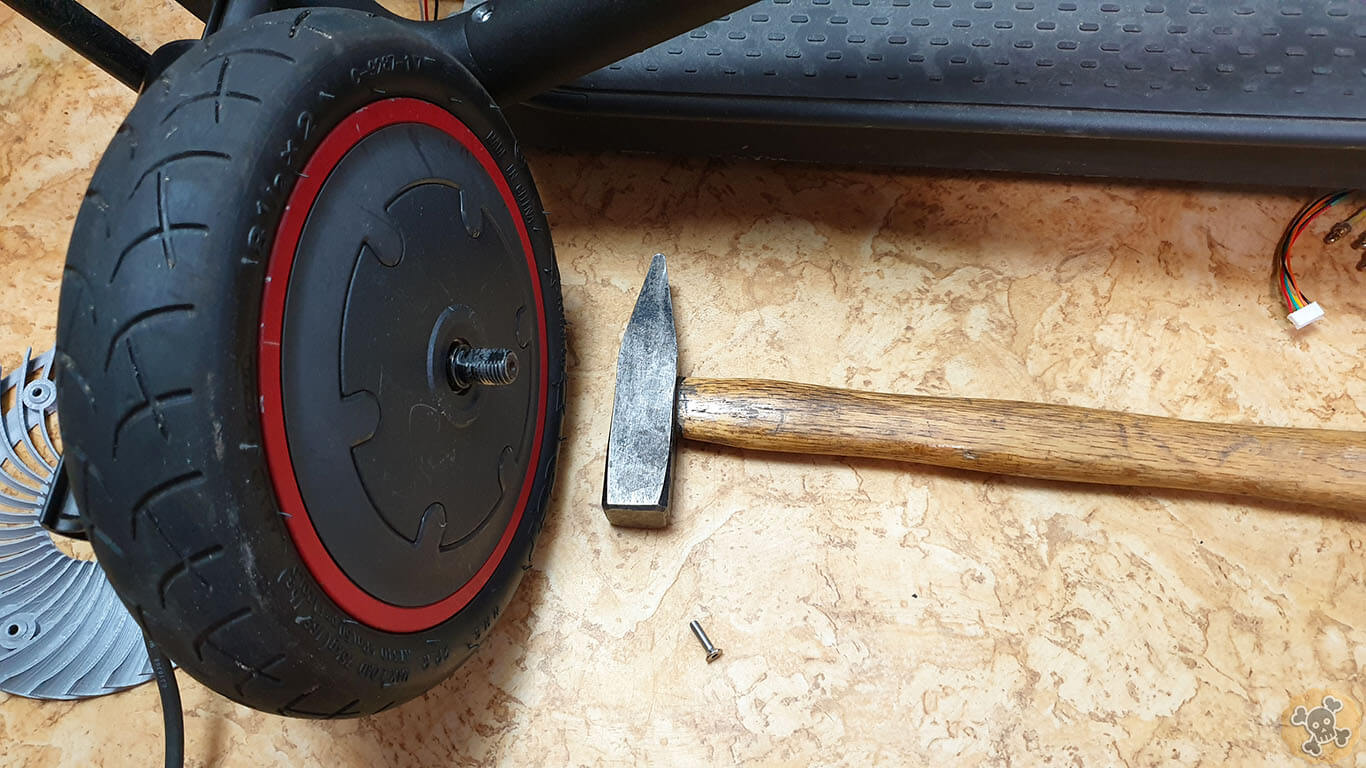
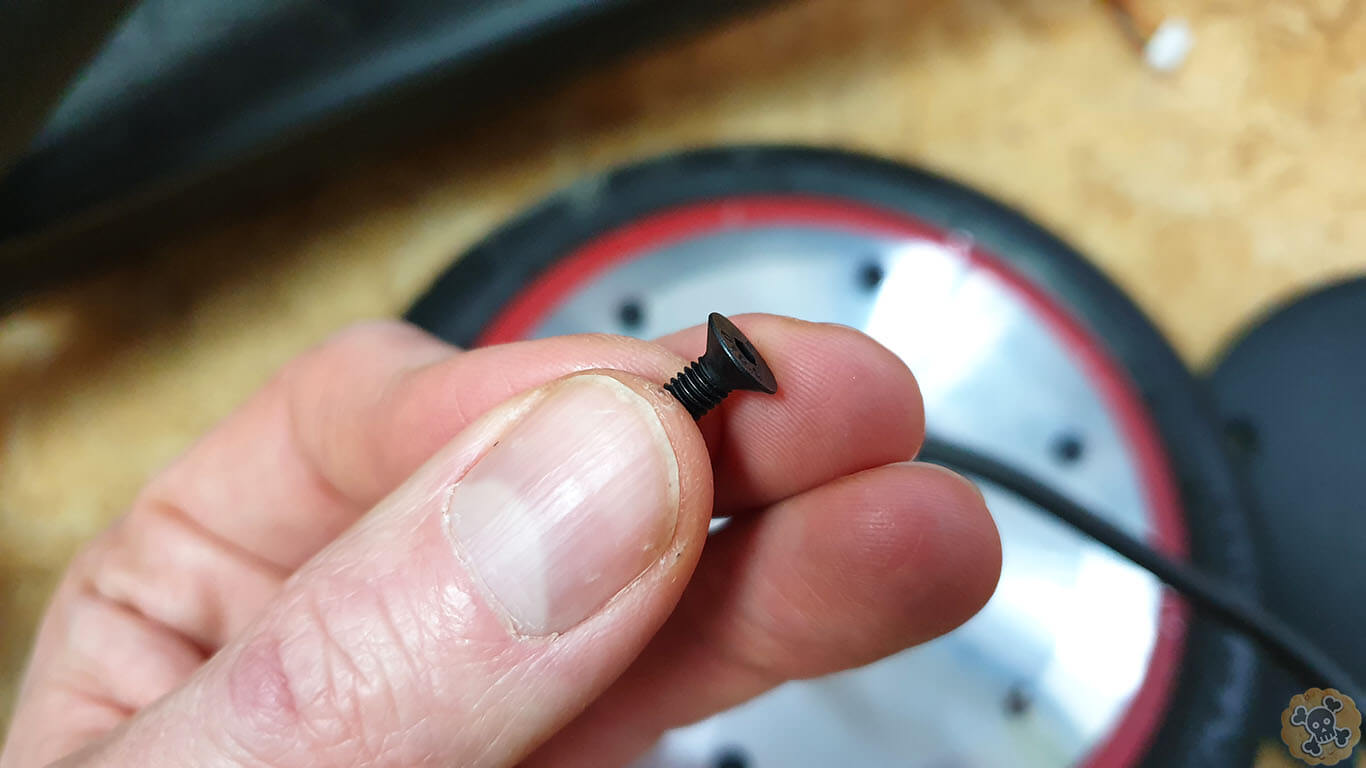
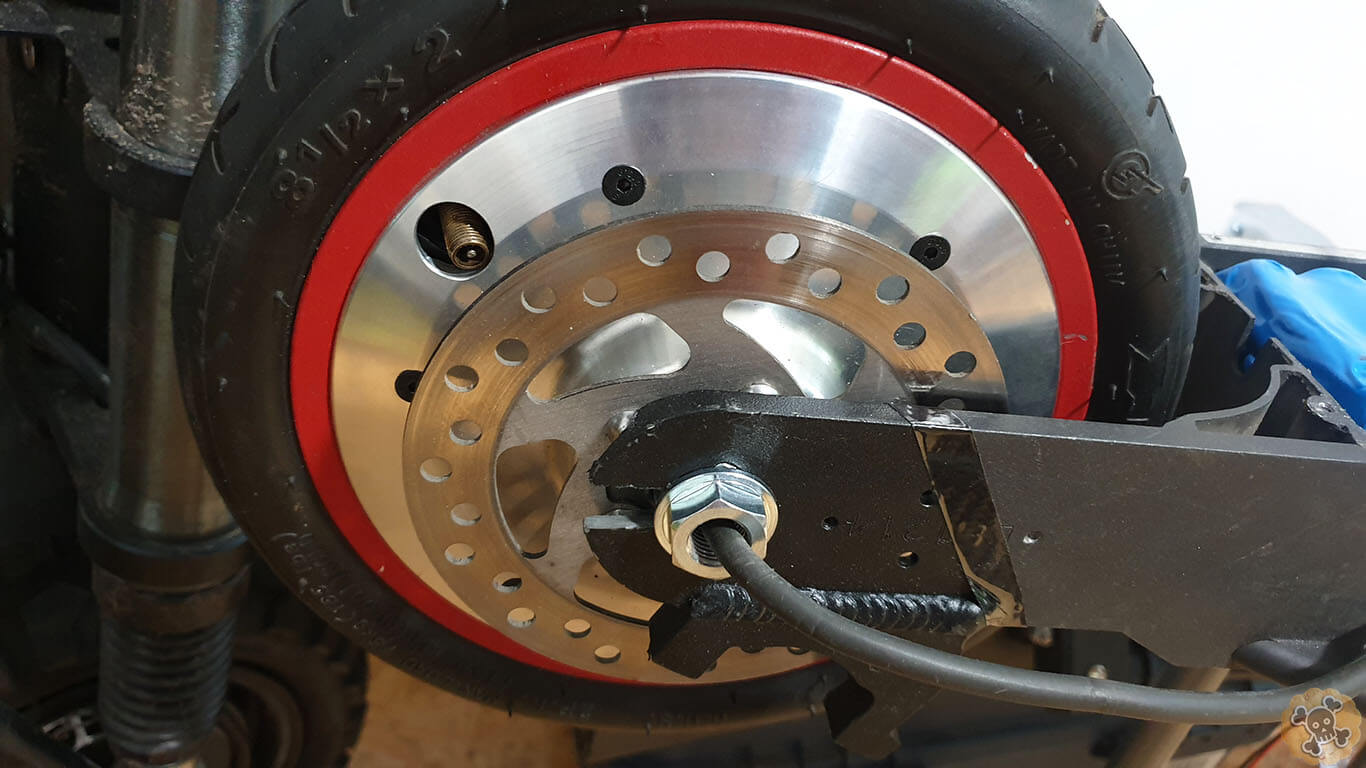
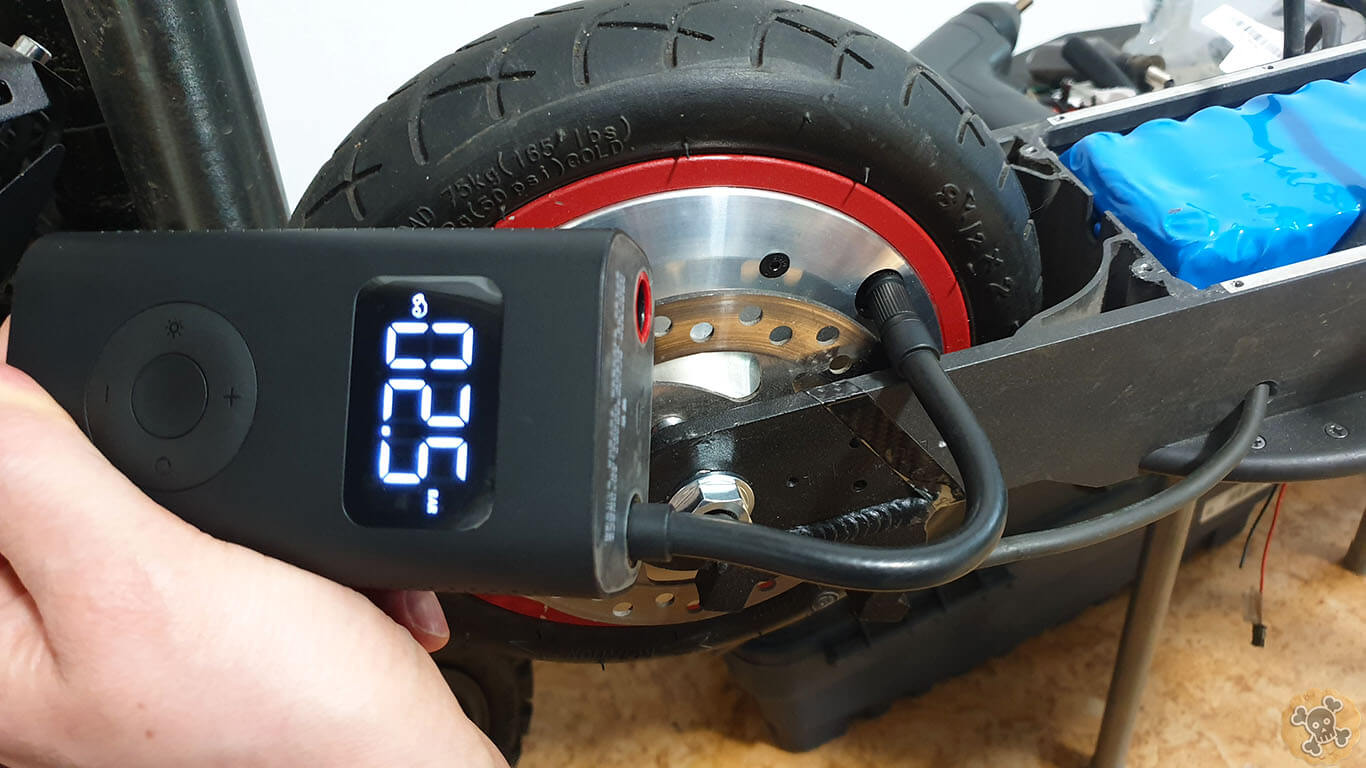
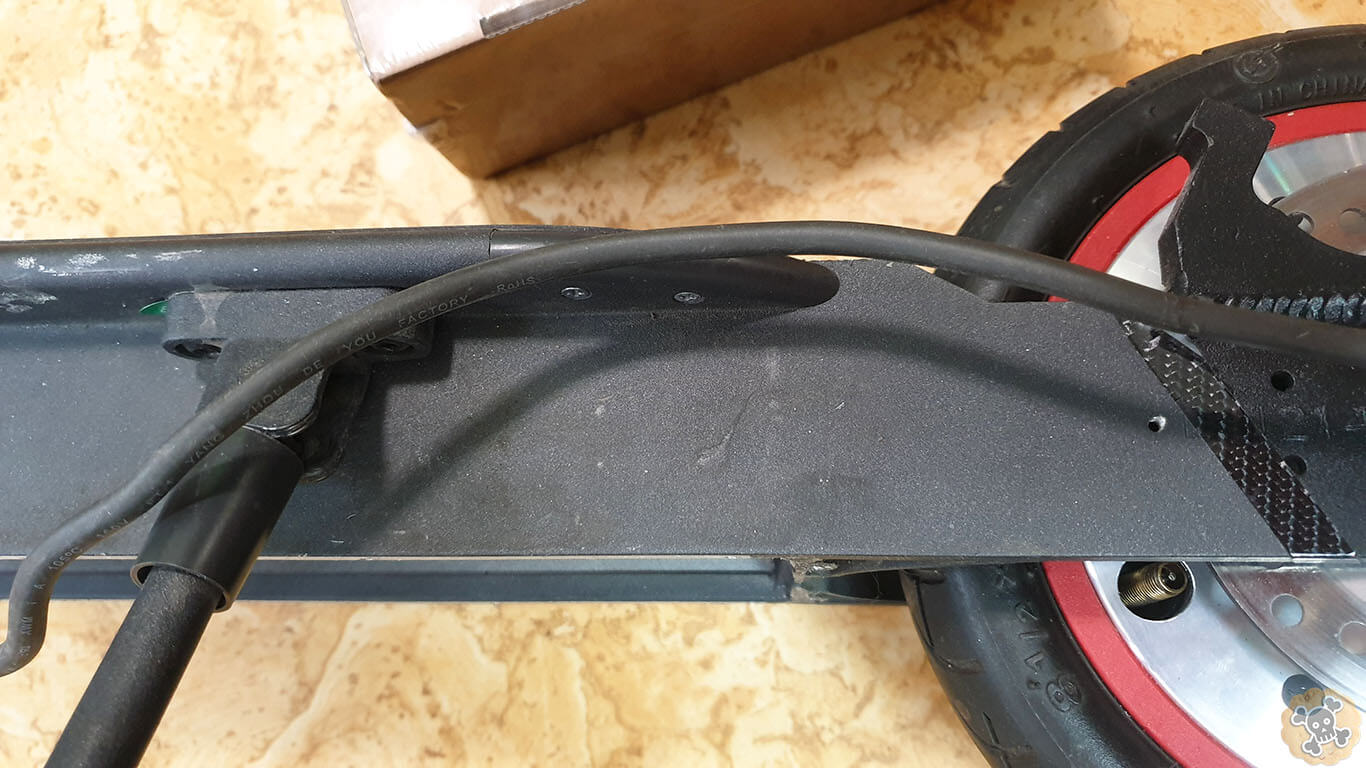
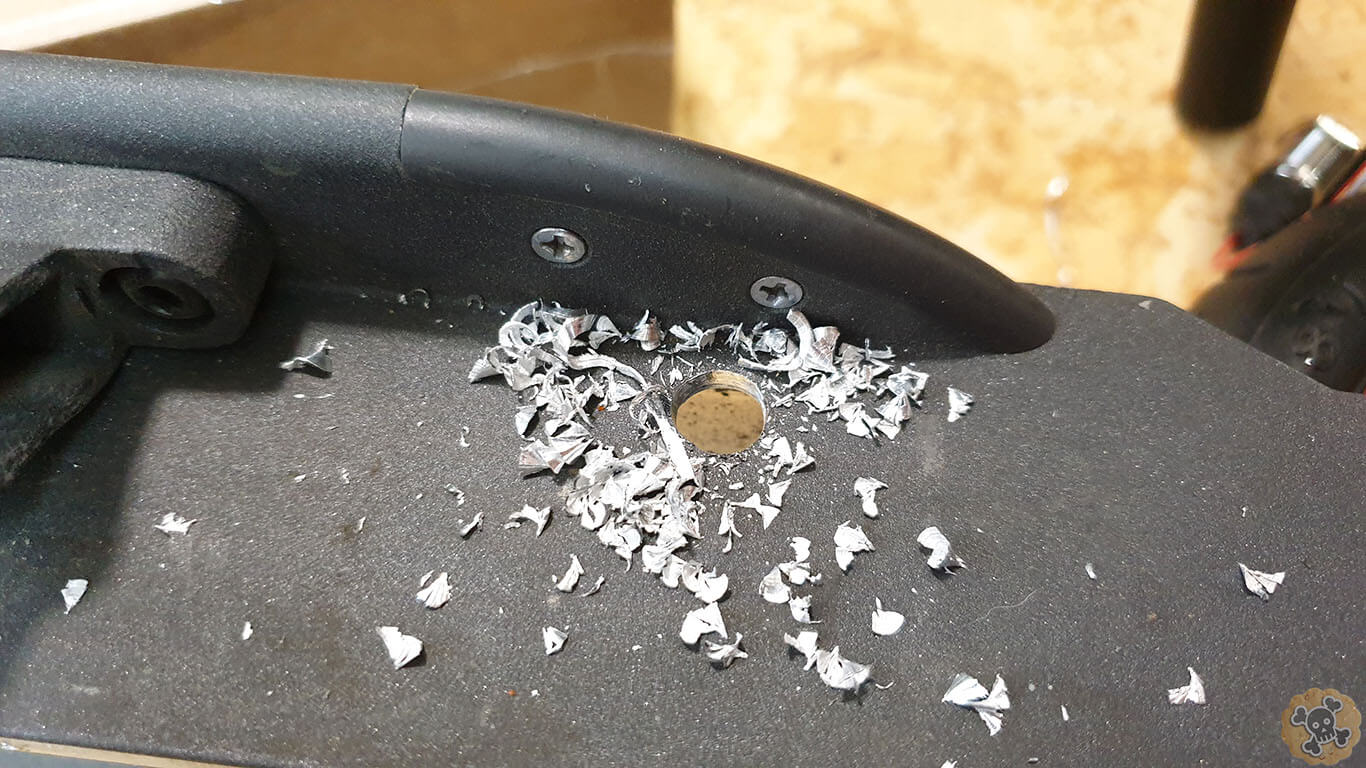
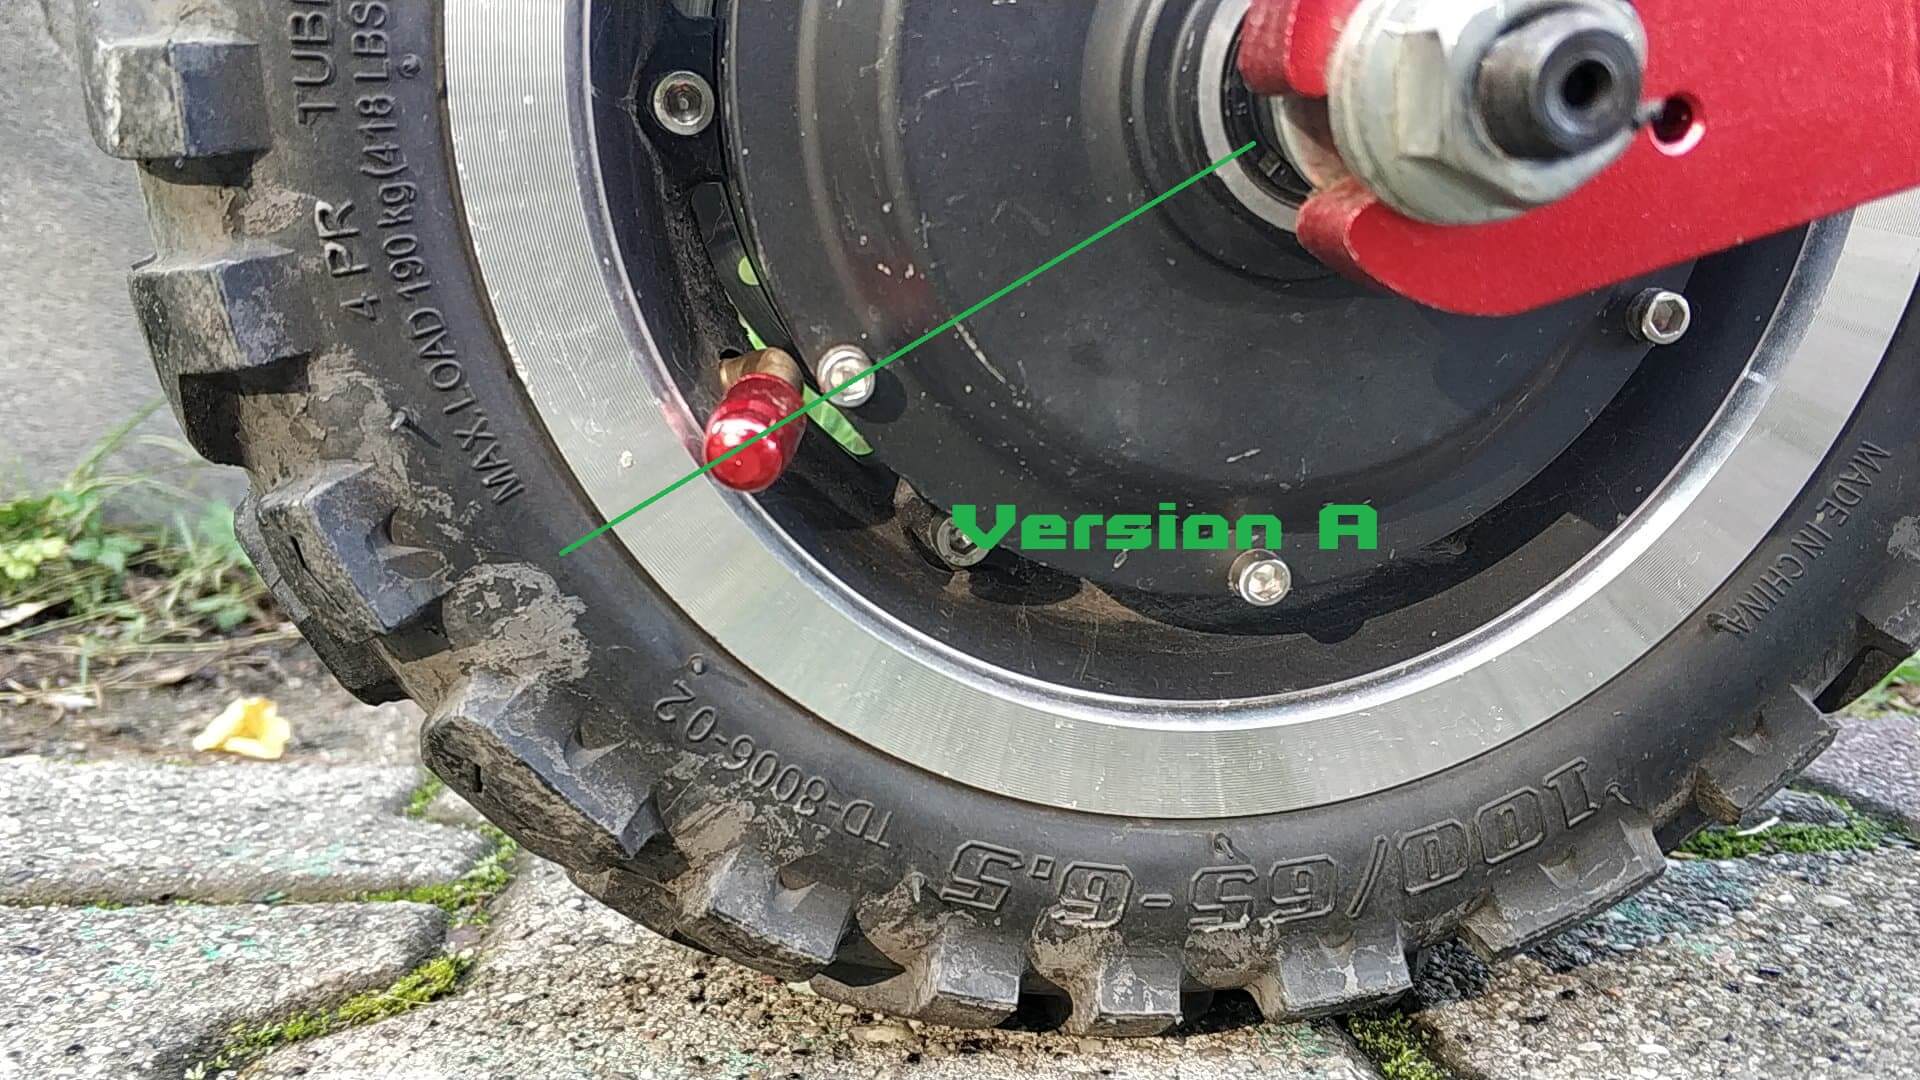
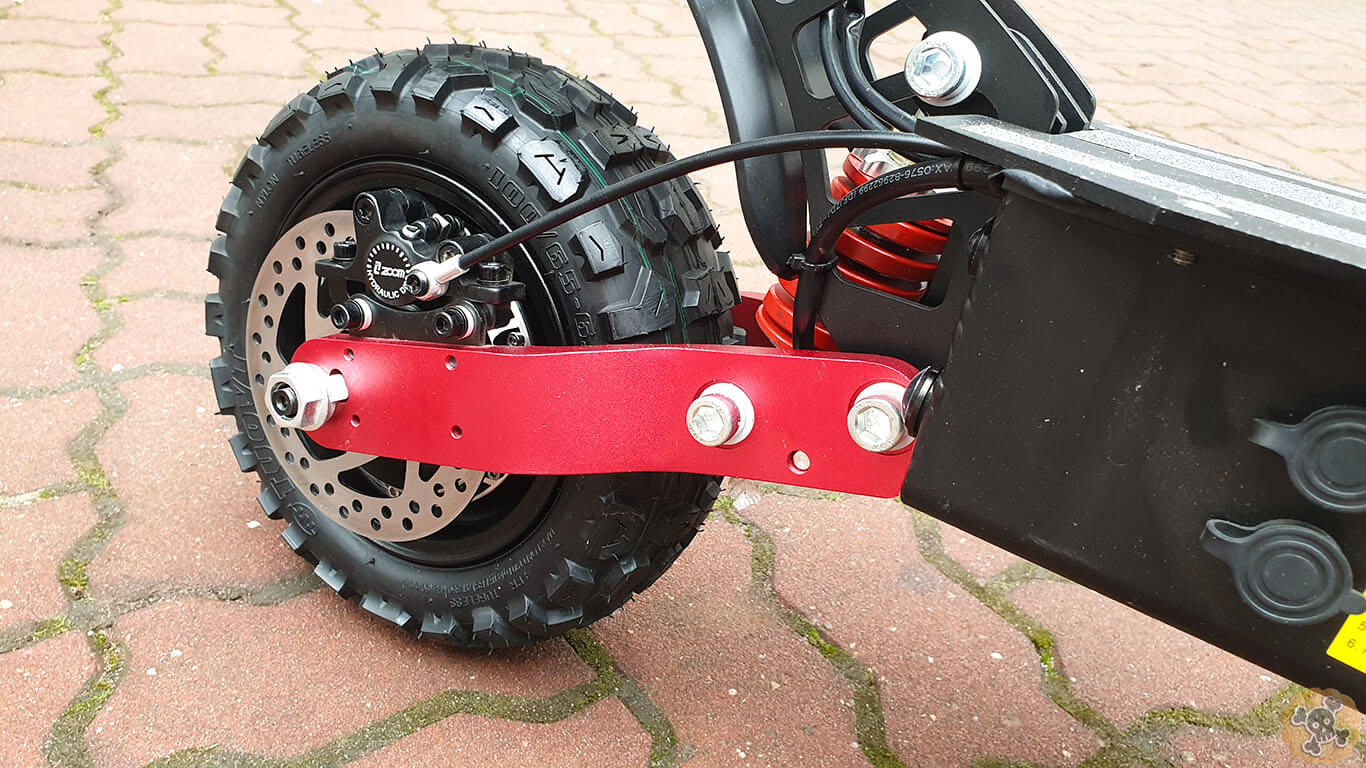
Now important thing , if you got M365 PRO just cut one rail on side where you got disc !!!! ( just drill bigger 15mm hole and it’s done) . I didn’t have at that time 15mm drill and hole looks really bad 😉
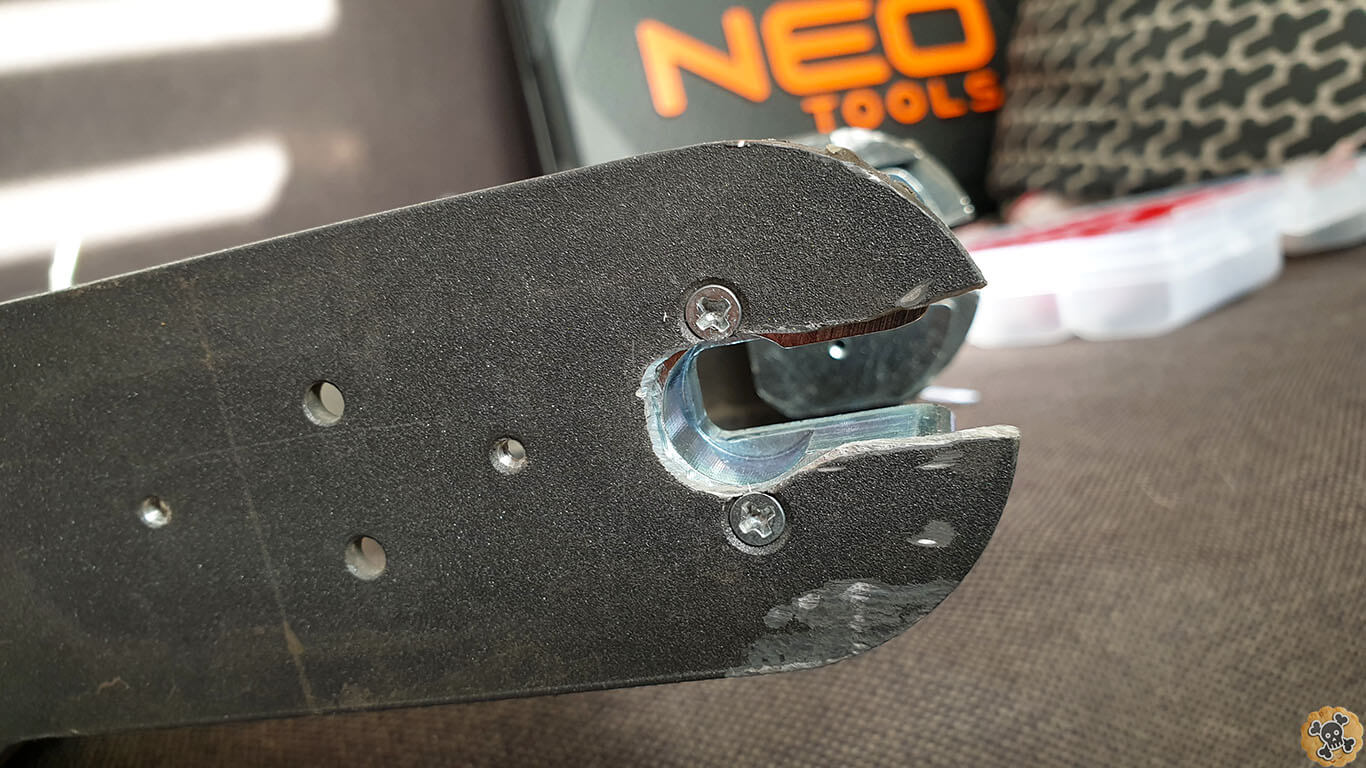
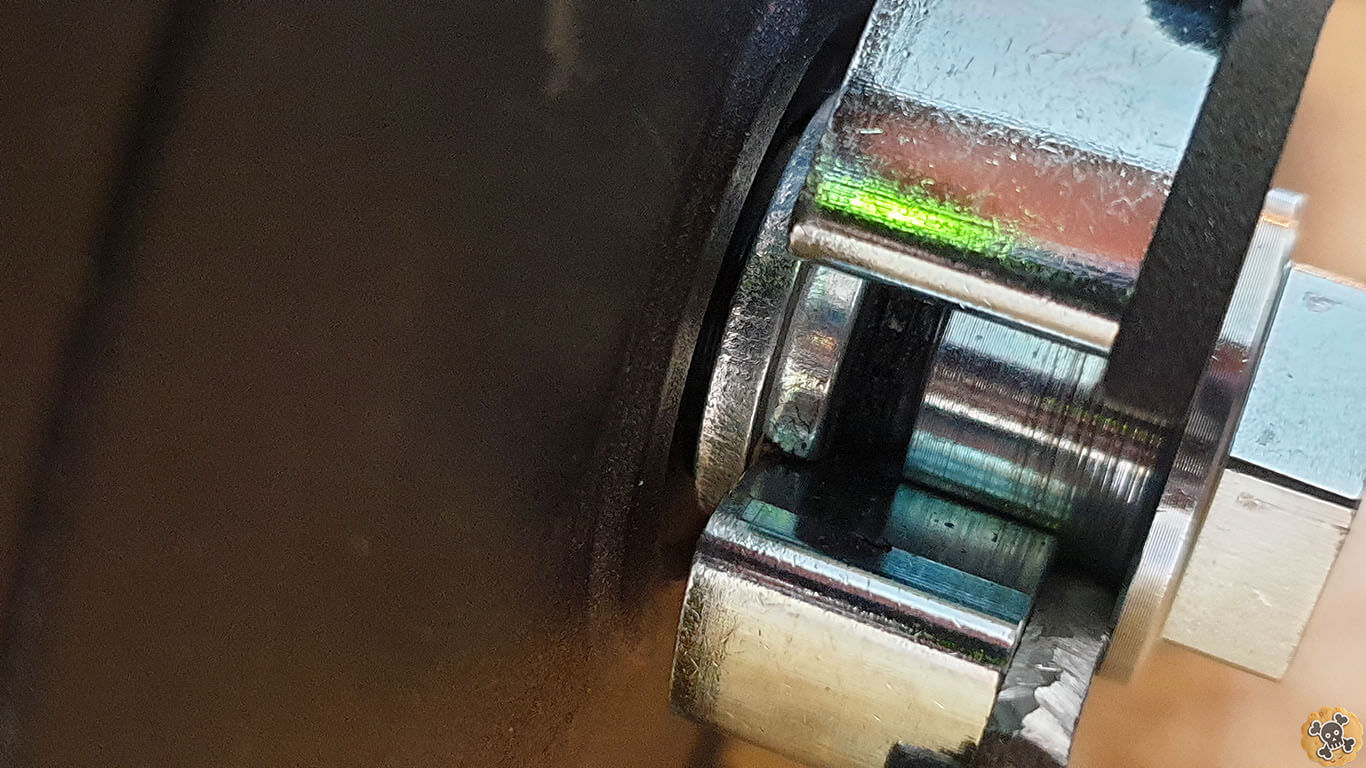
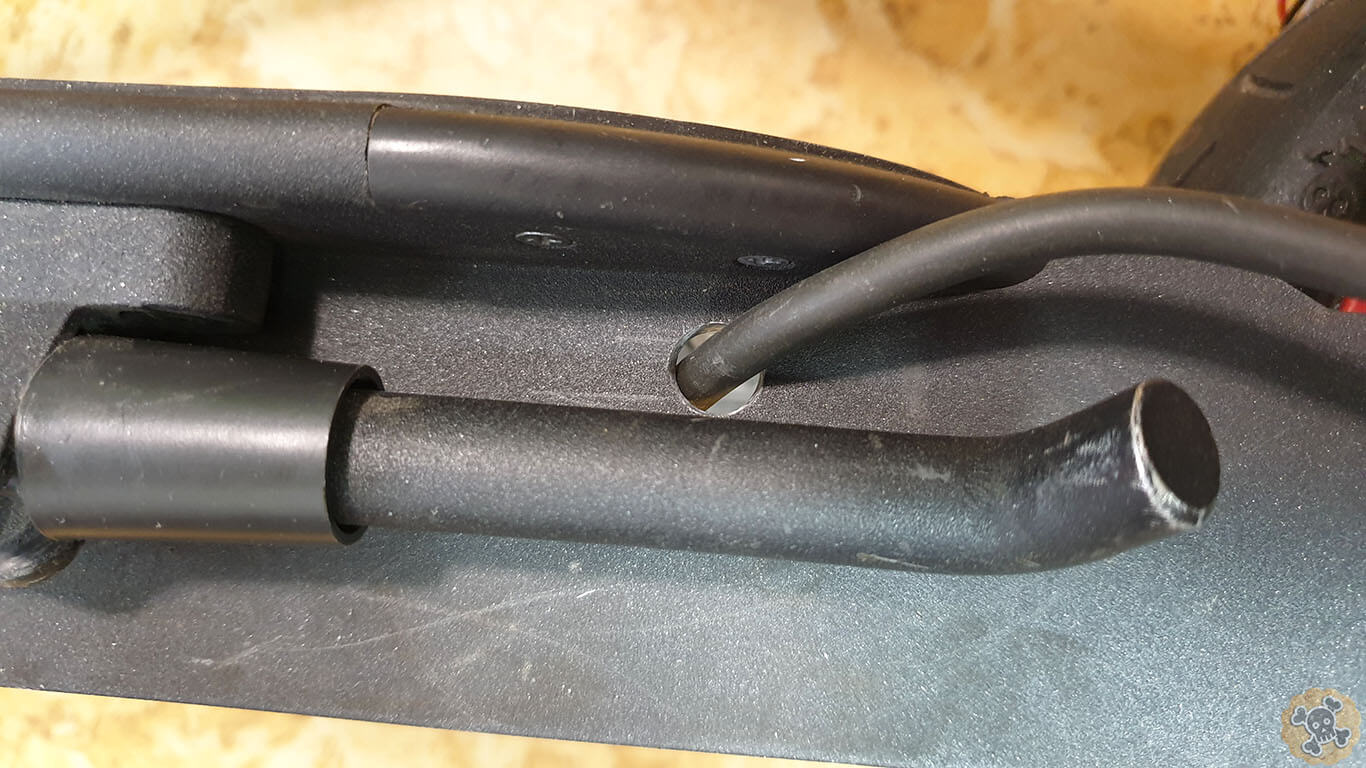
Adapter fits just perfect, you don’t need to be worry if this is not straight cut ( like in my case, looks like some maniac done it by using kitchen knife ?? ). because adapter is hold by 2 screws which holds stock adapter.
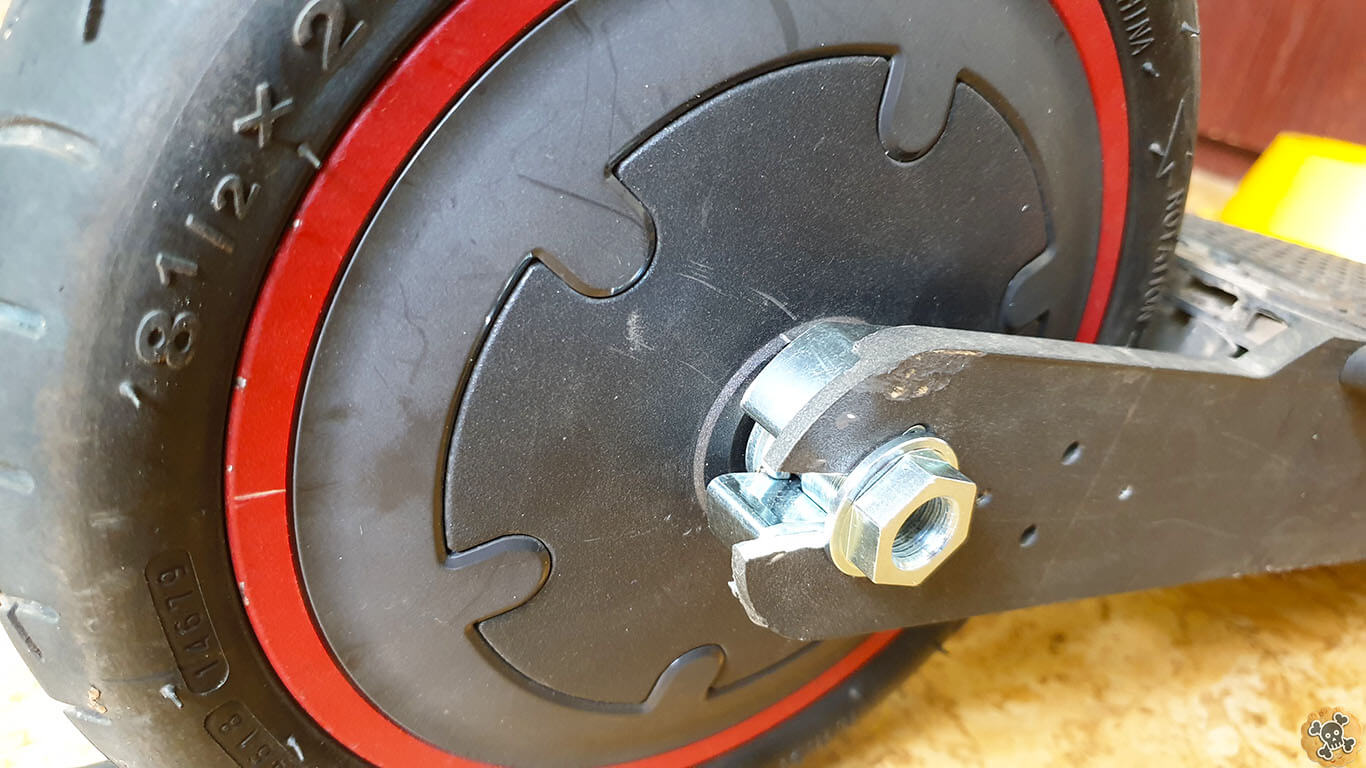
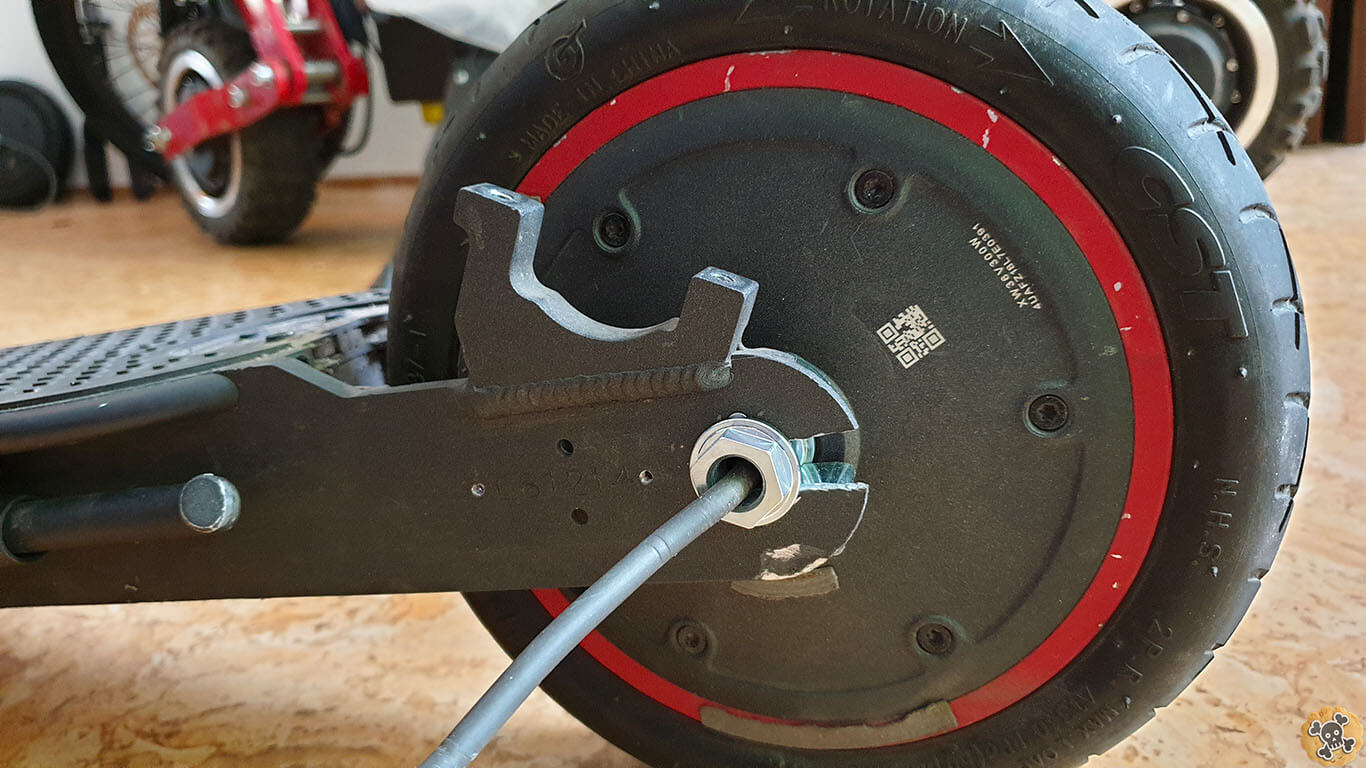
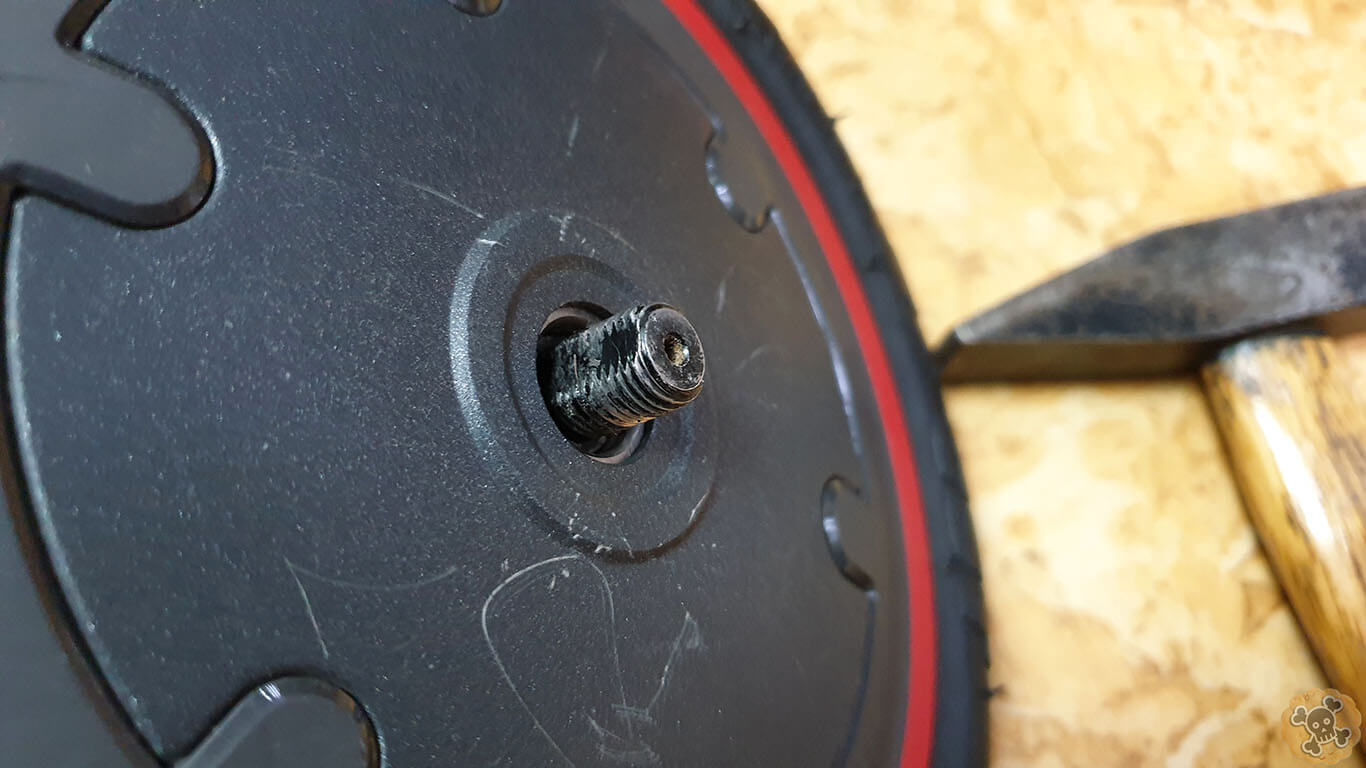
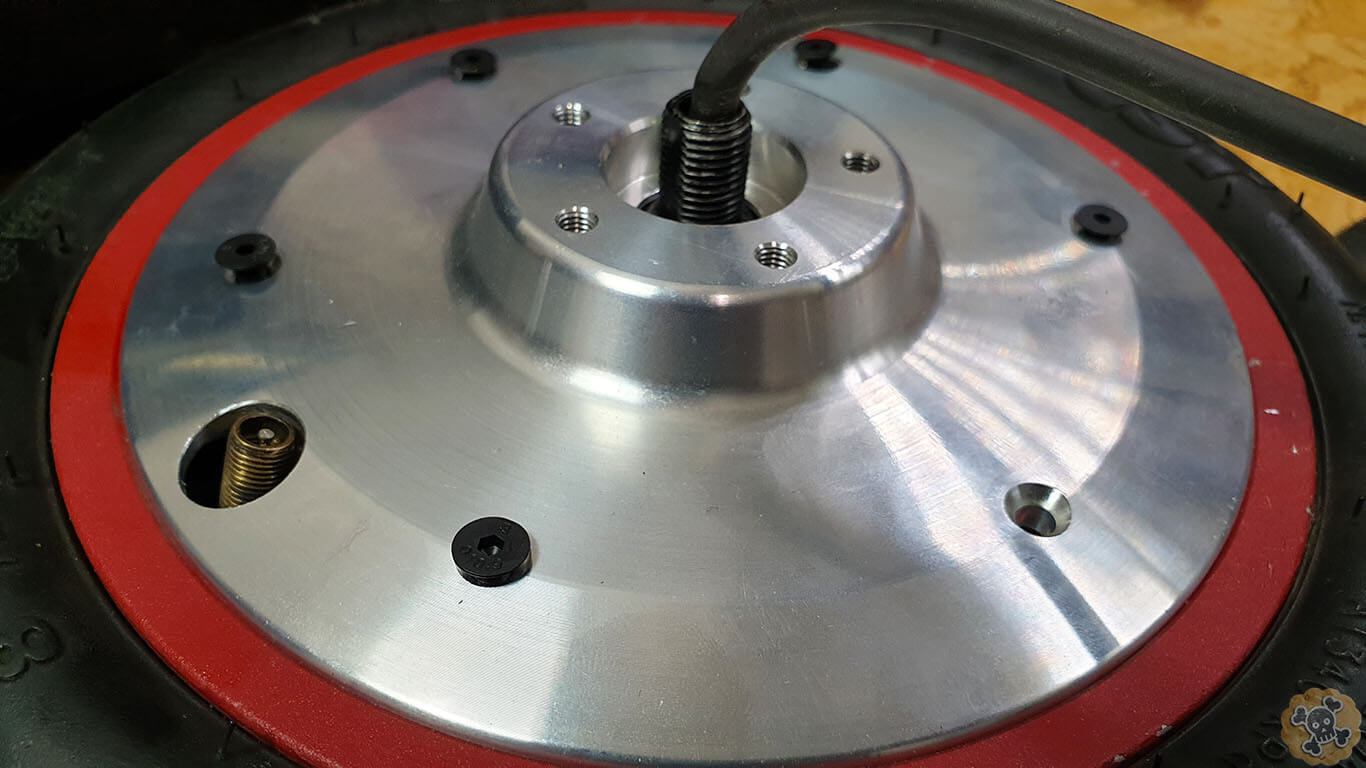
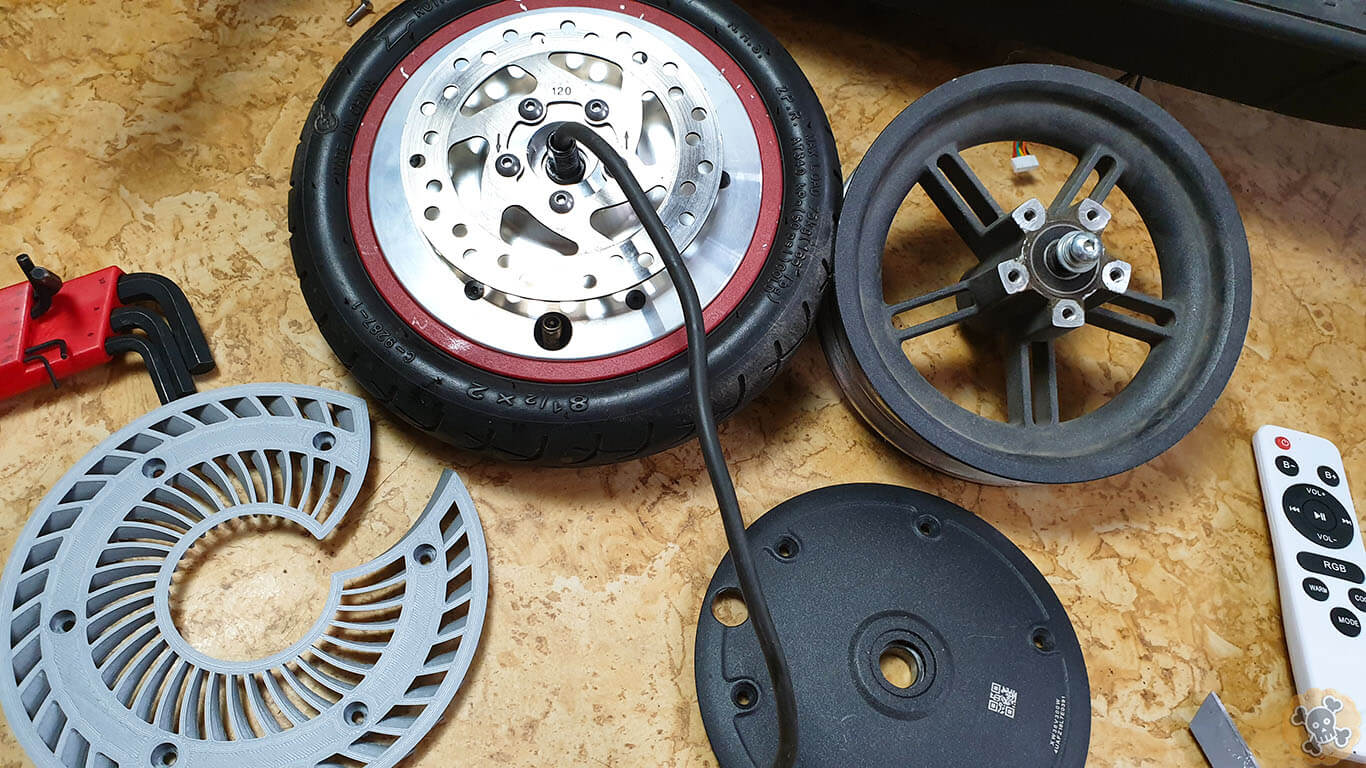
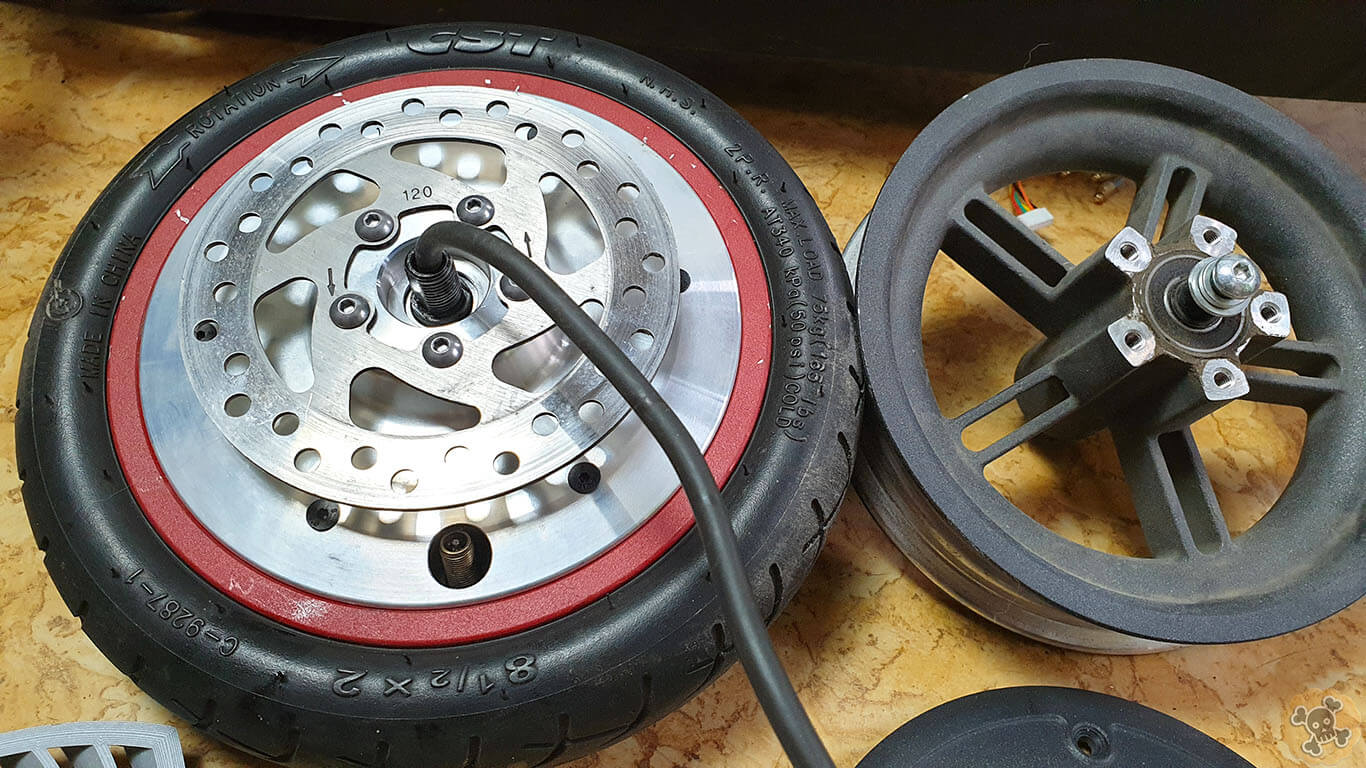
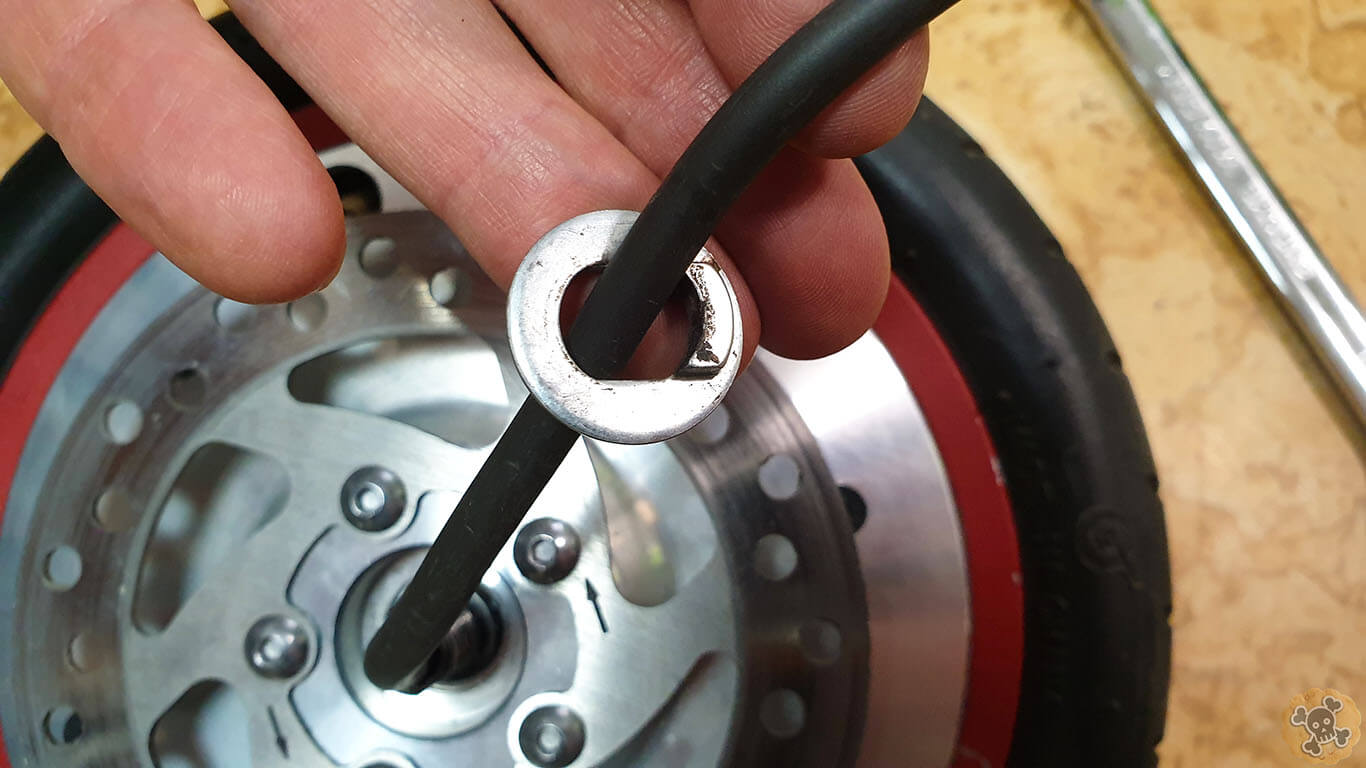
I installed wheel, it’s straight and Man it looks awesome, 2WD M365 !! Now I need to figure out how to rearrange motor cables ? ** don’t forget to add old motor side washer
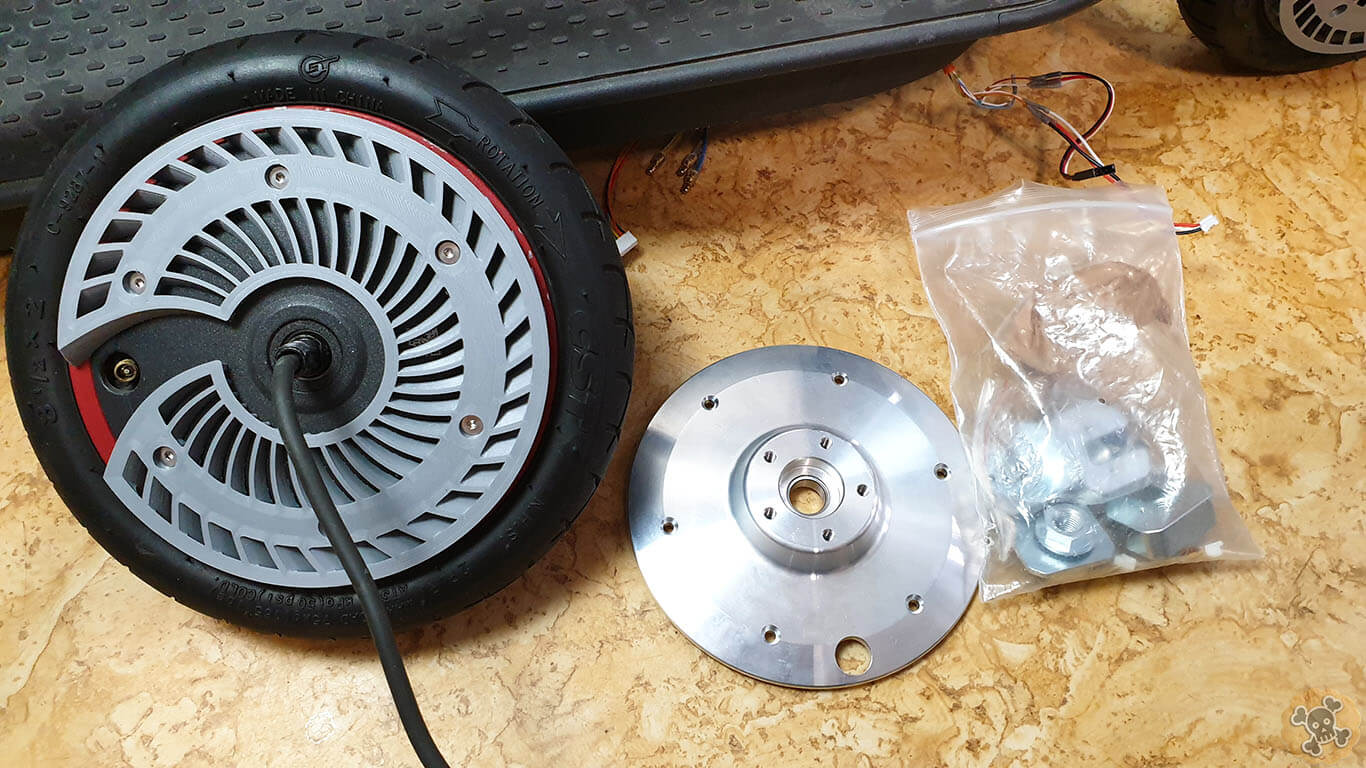
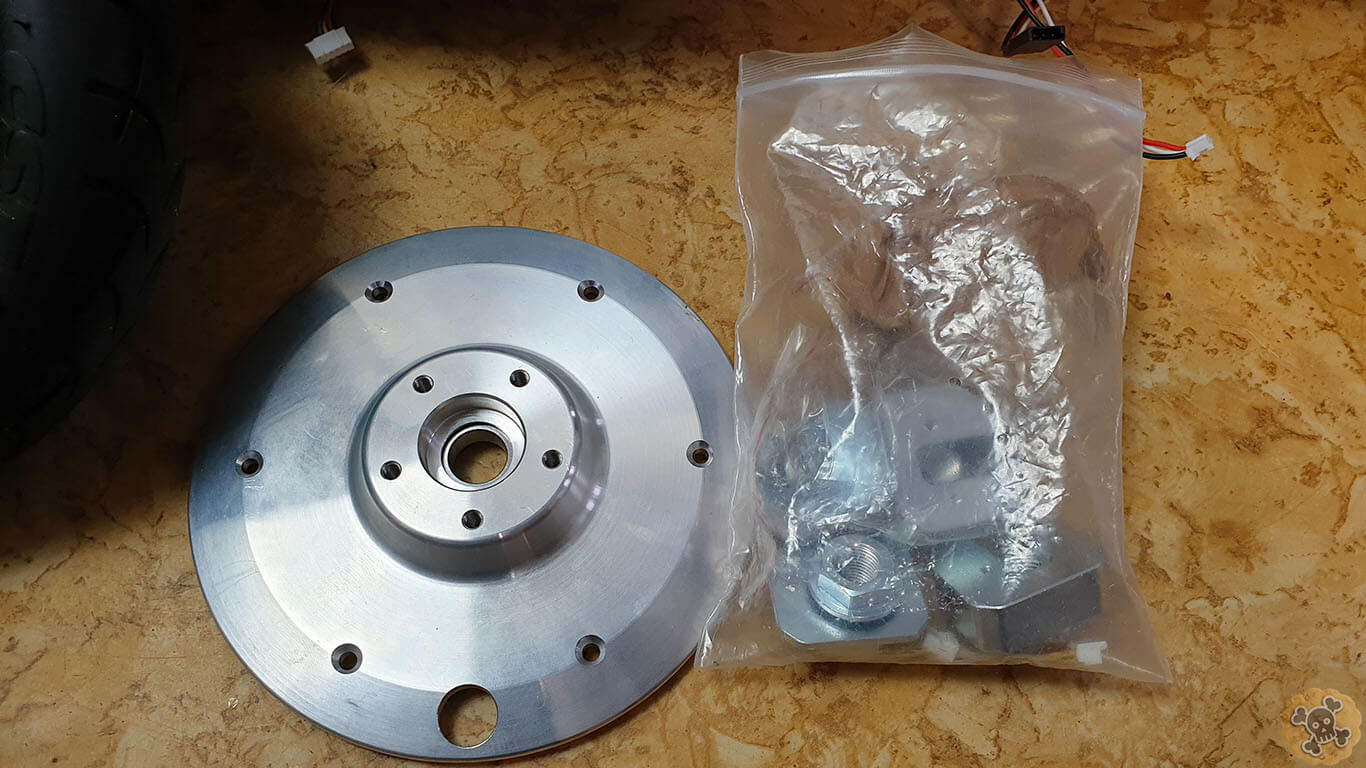
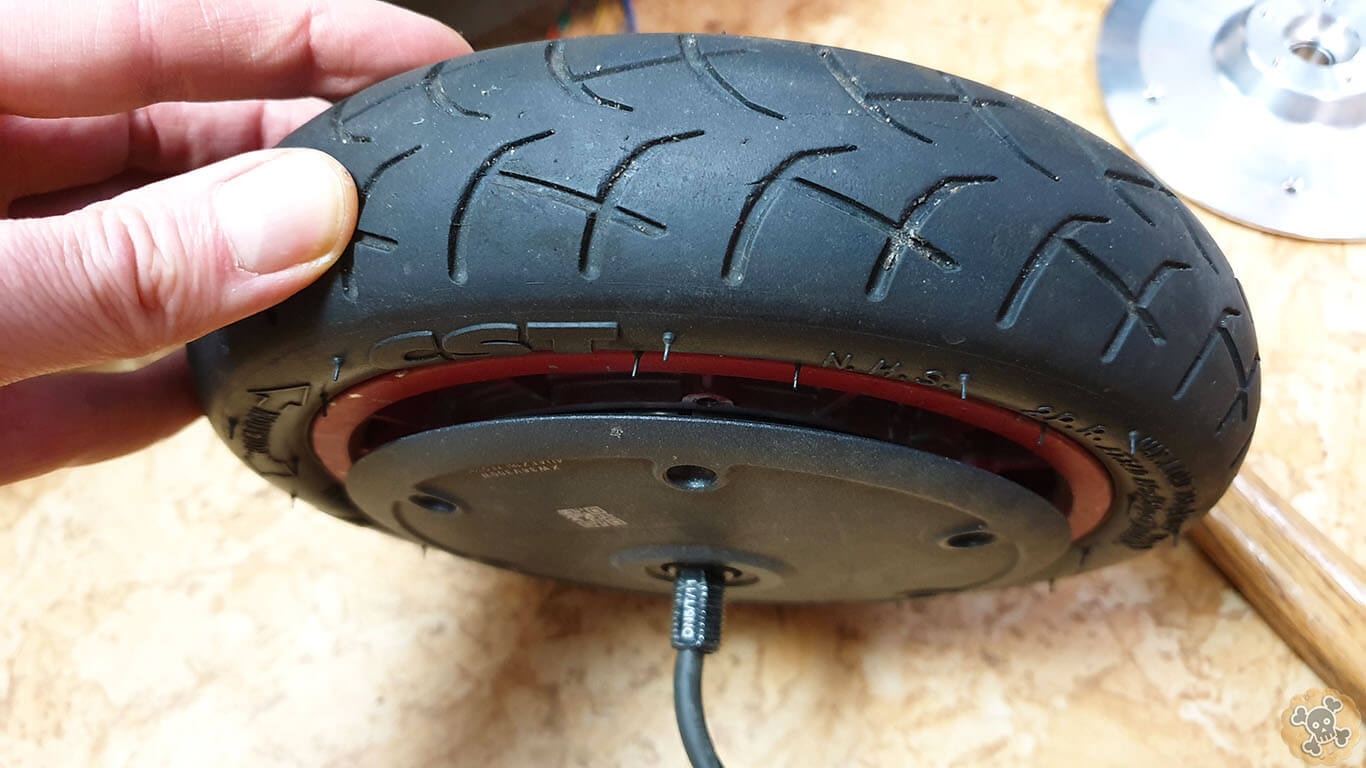
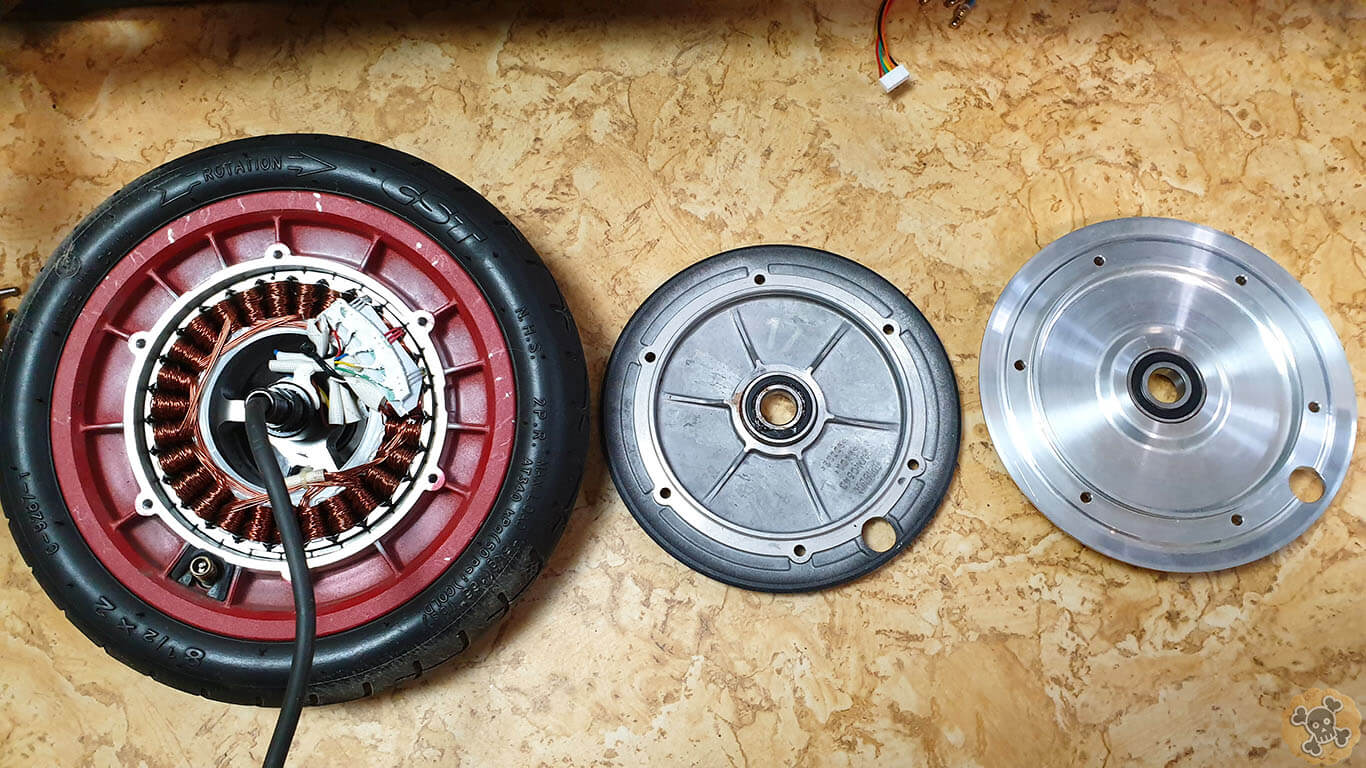
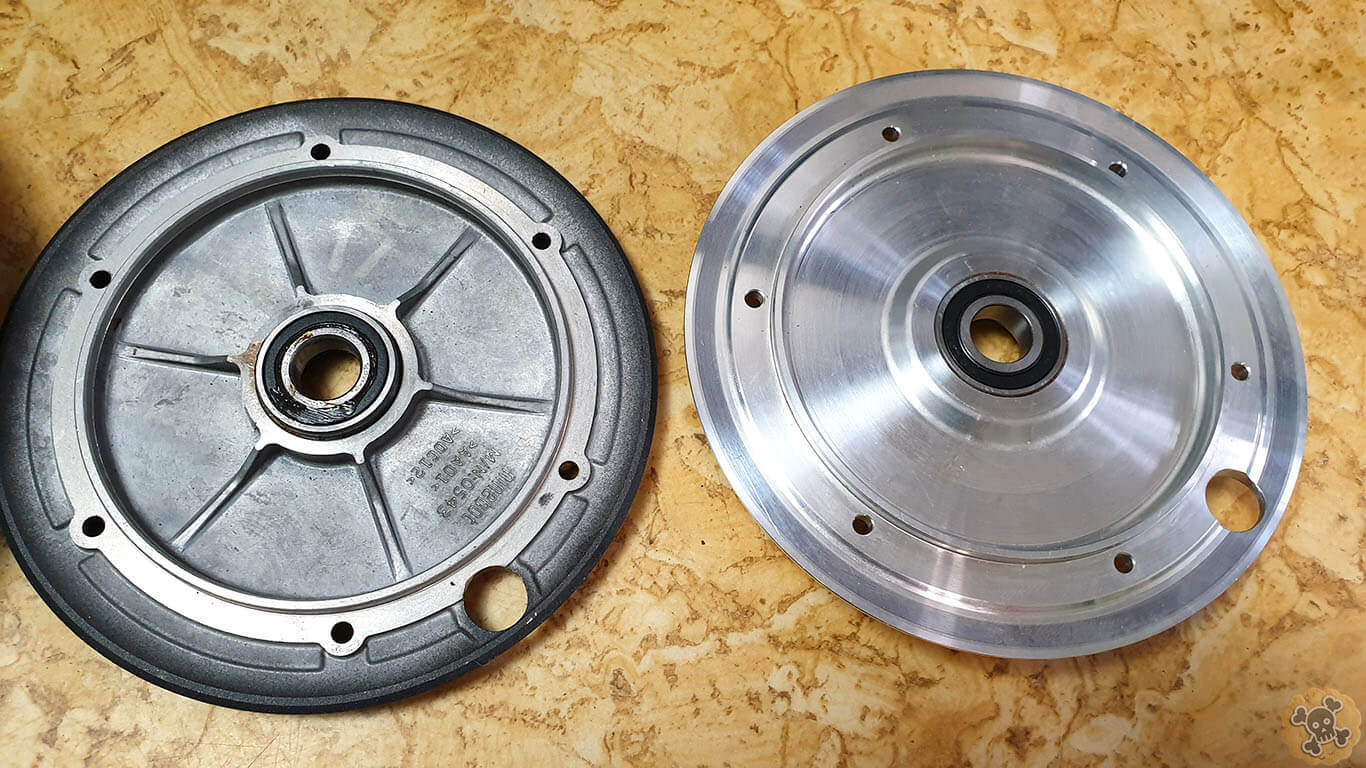
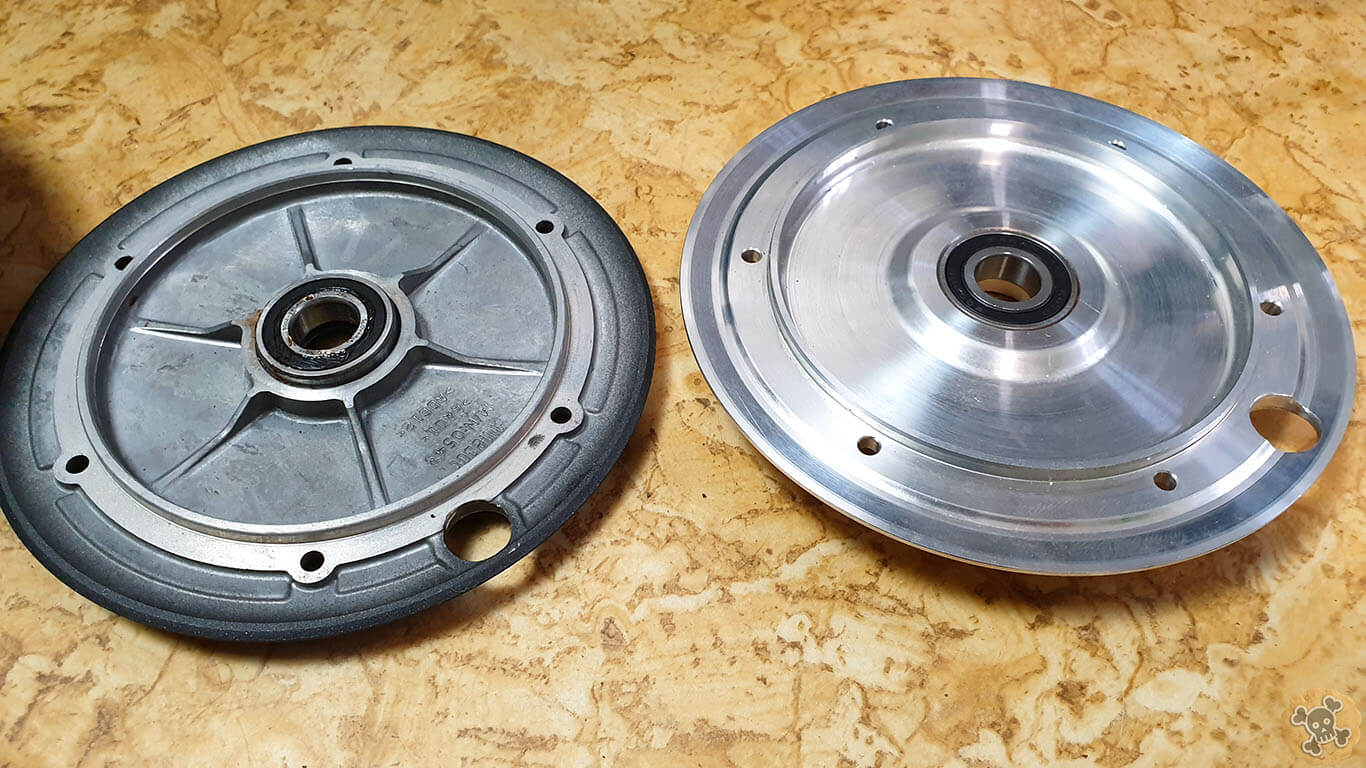
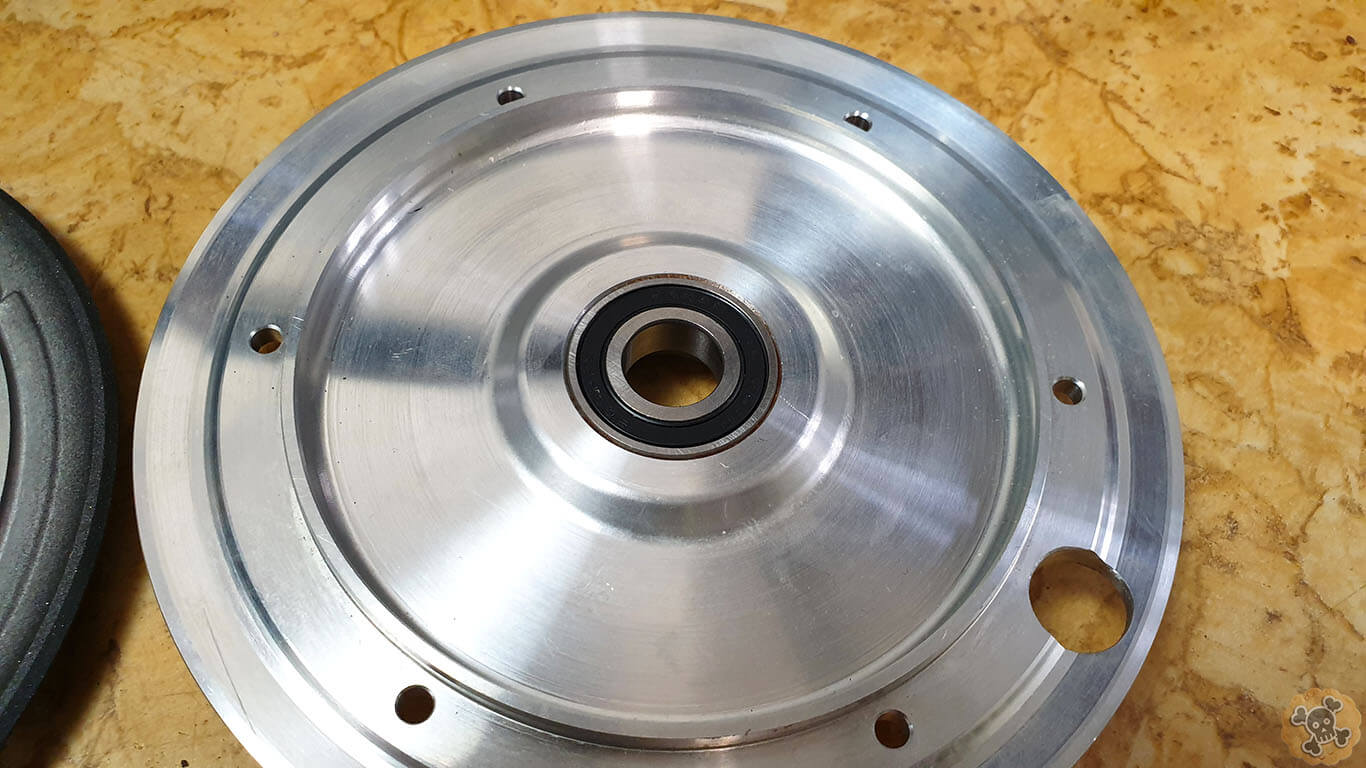
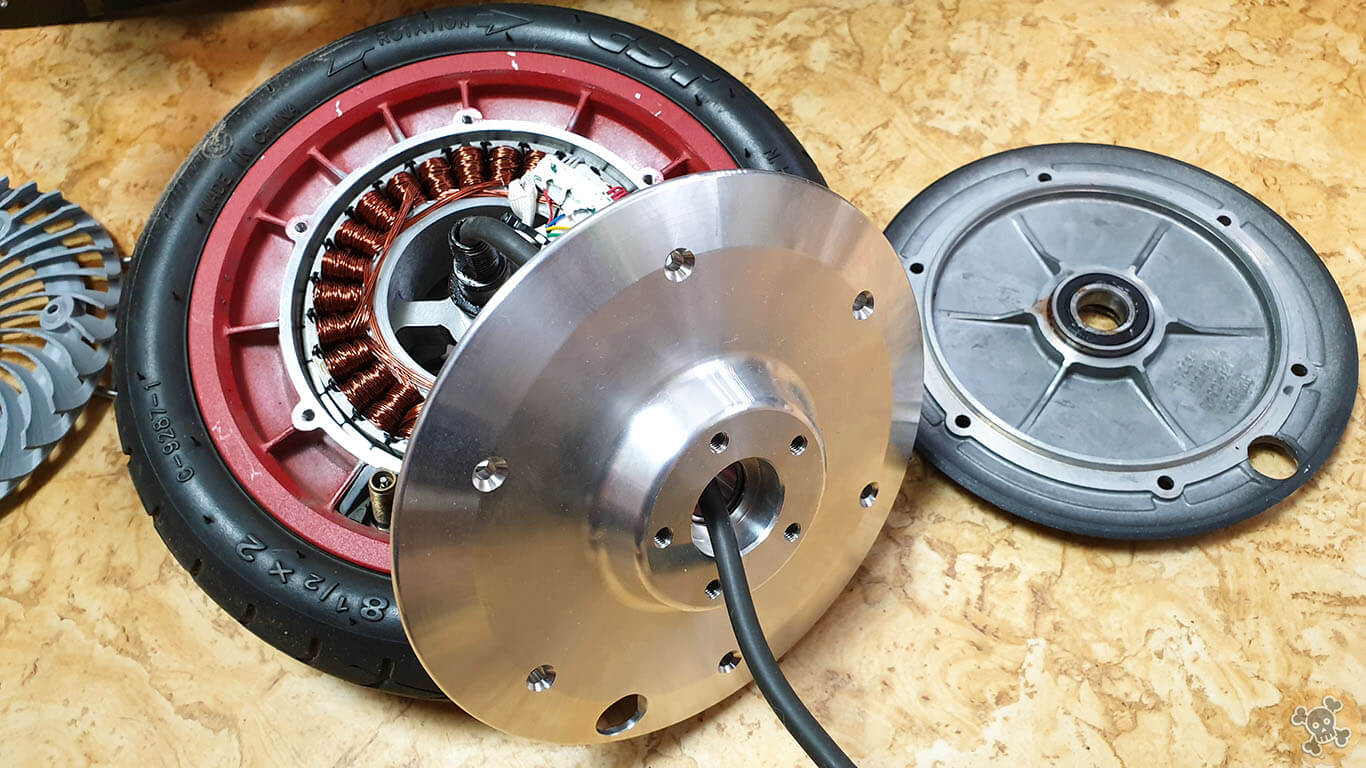
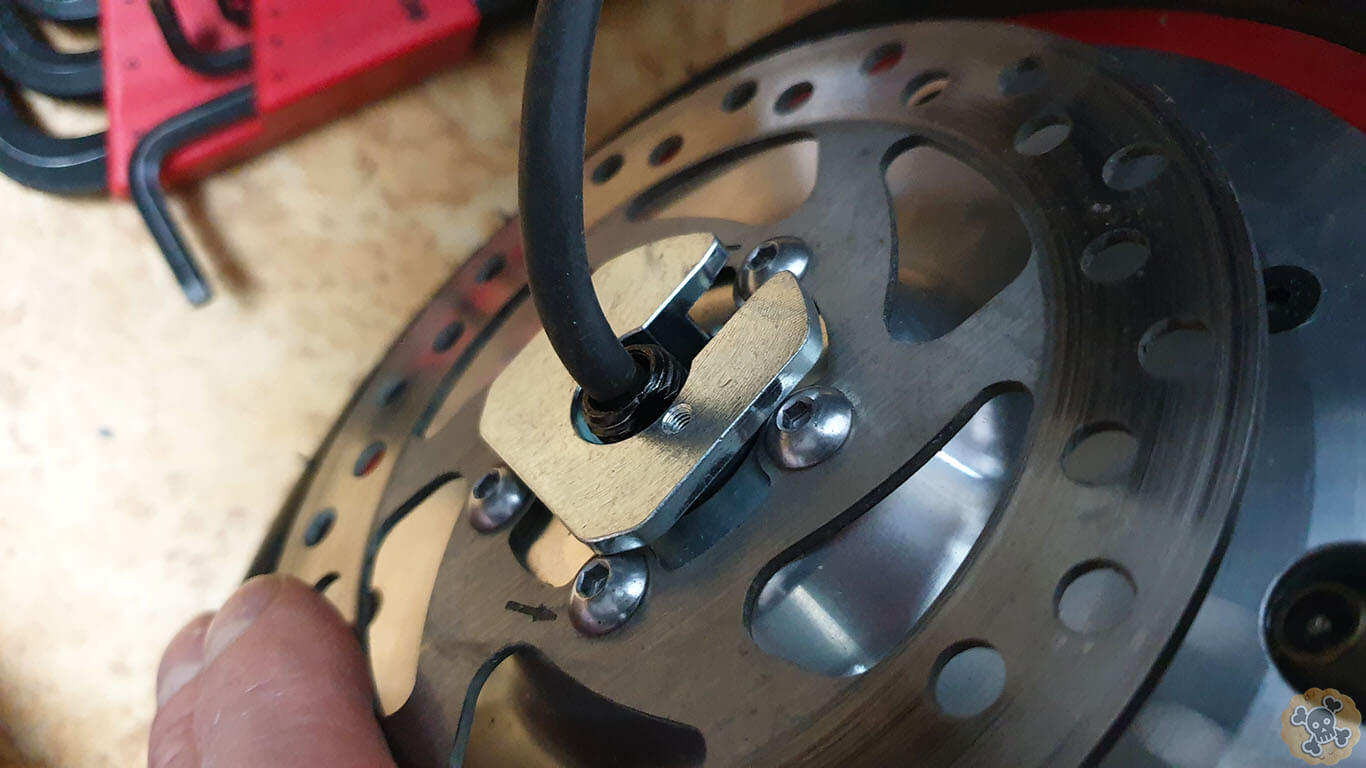
There is also disc motor adapter from Goran, thanks to it we can install disc on motor ( if you want mechanical braking system then it’s like must have ). Super easy to install just remove old side shell from motor and place new one. Quality of this adapter is pretty Insane, ?? Thank you Goran ??
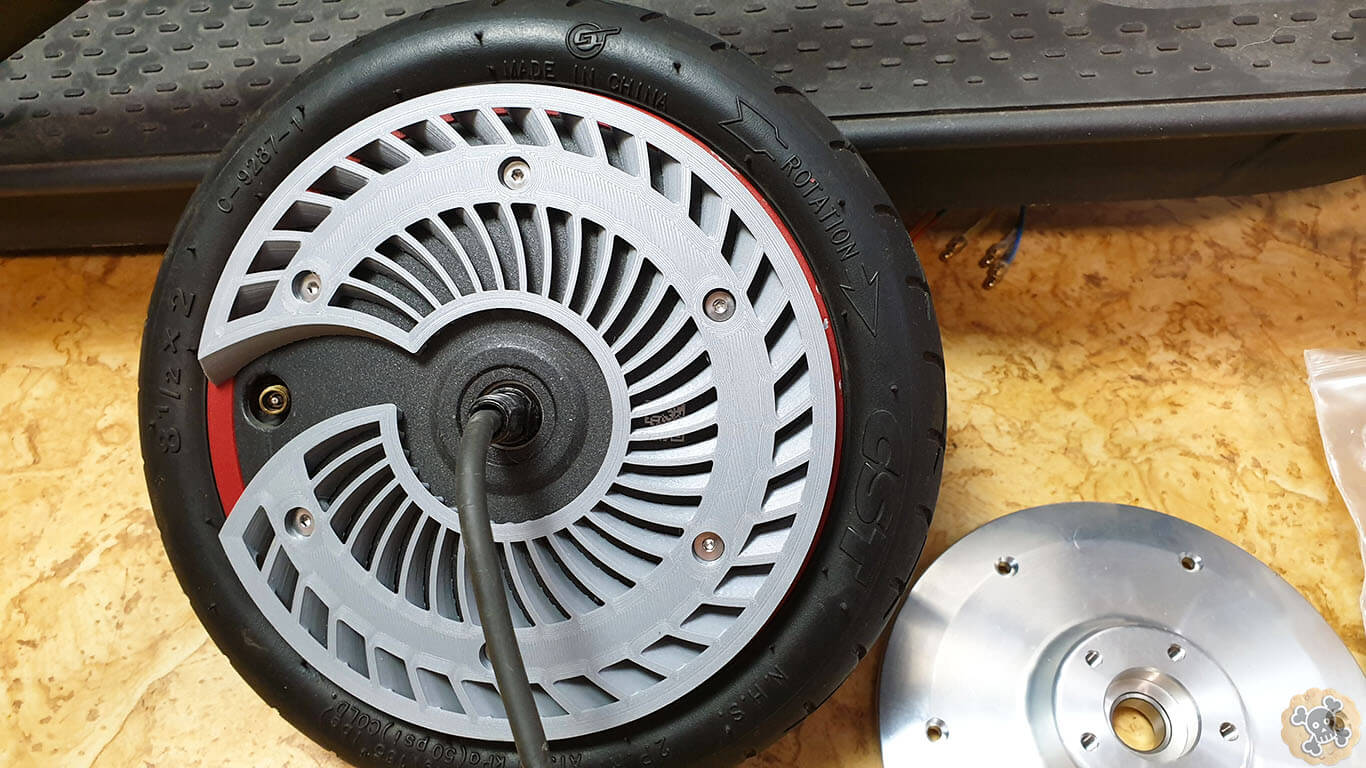
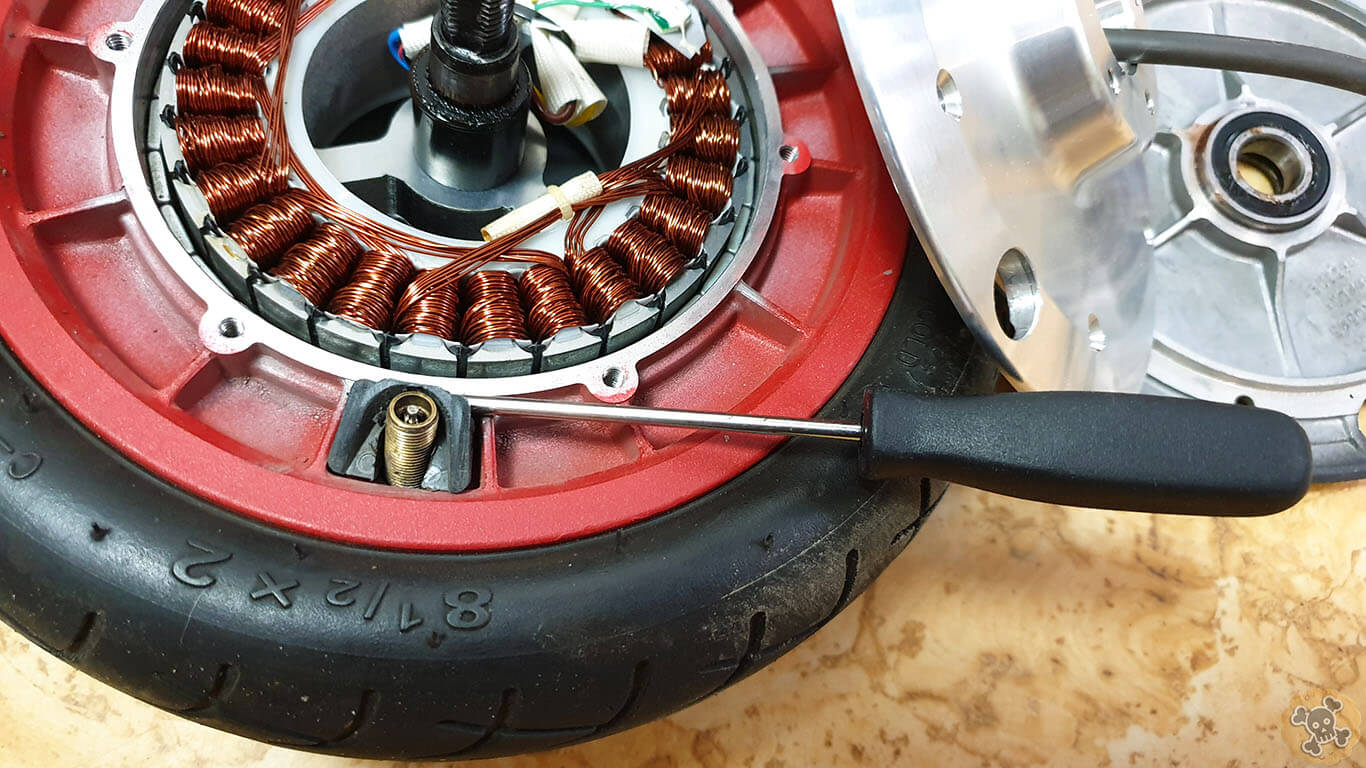
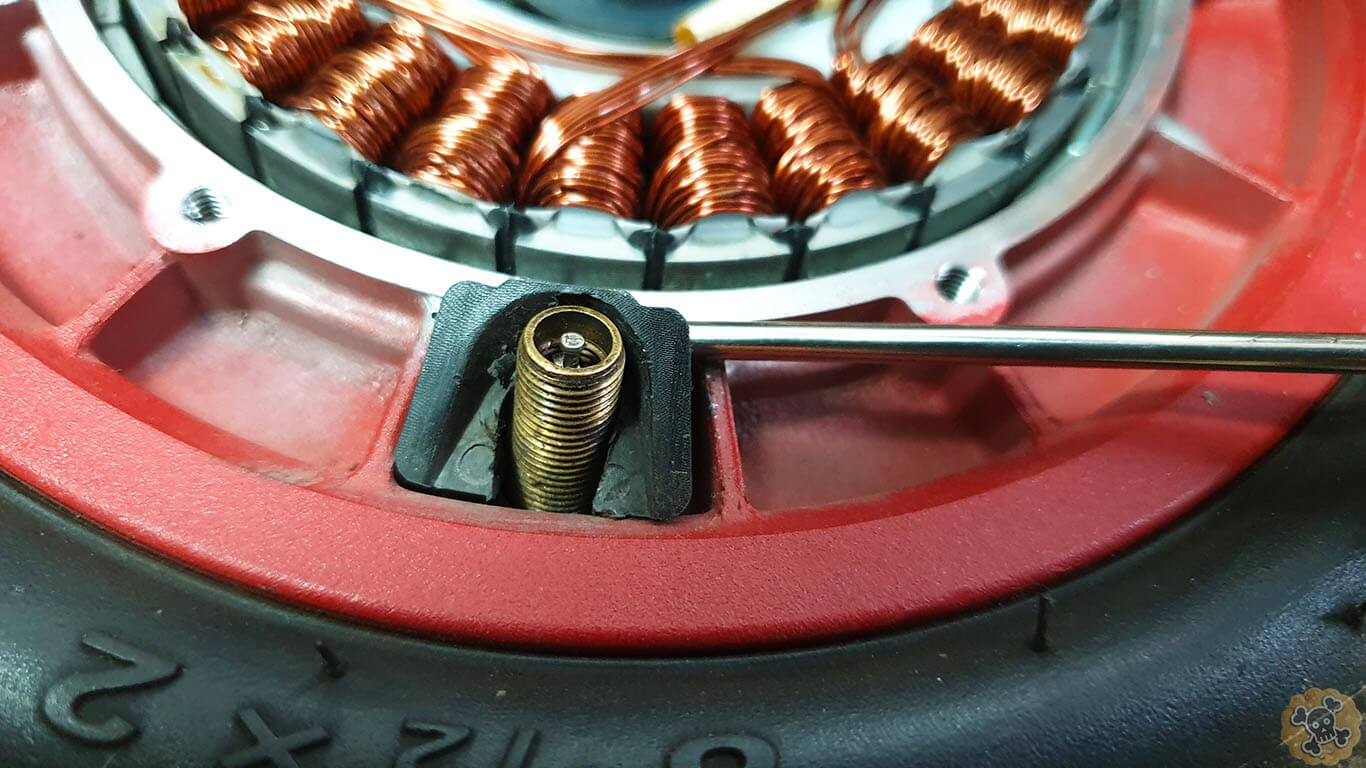
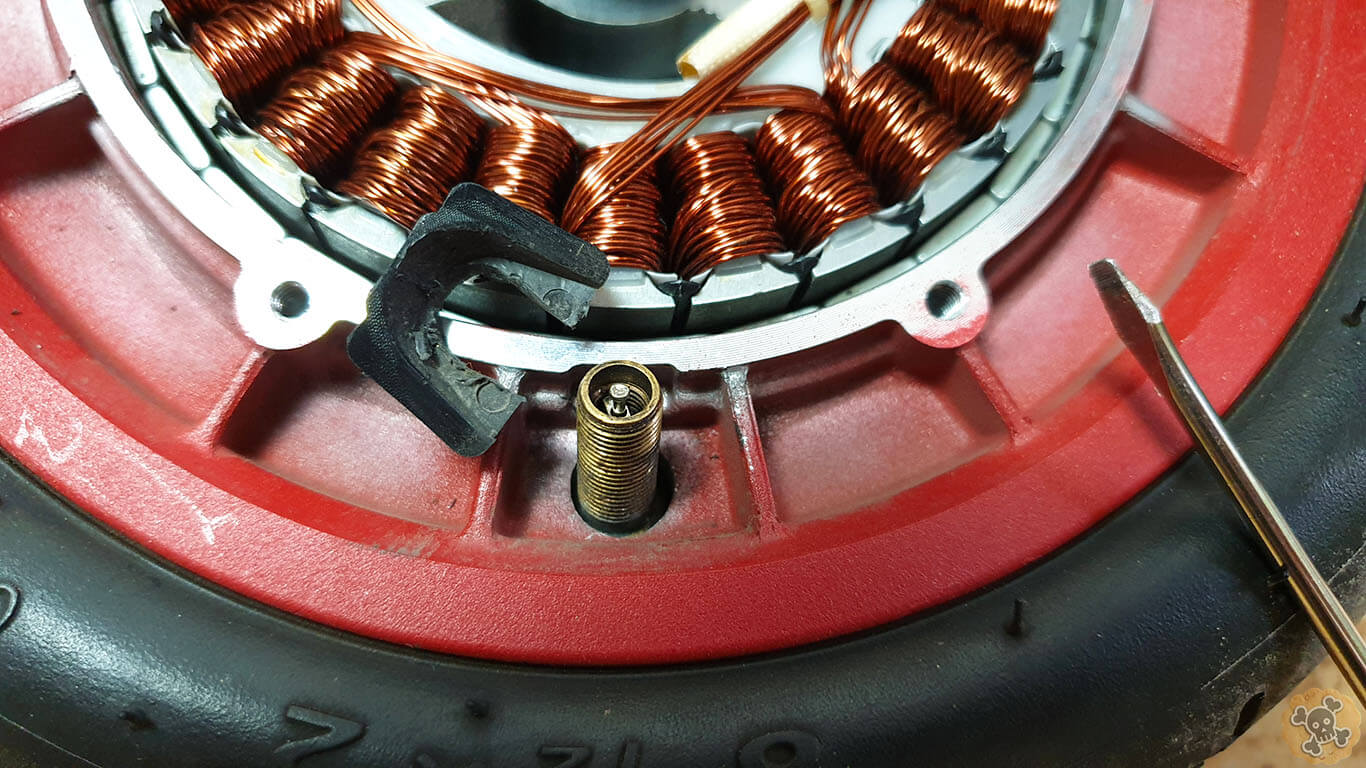
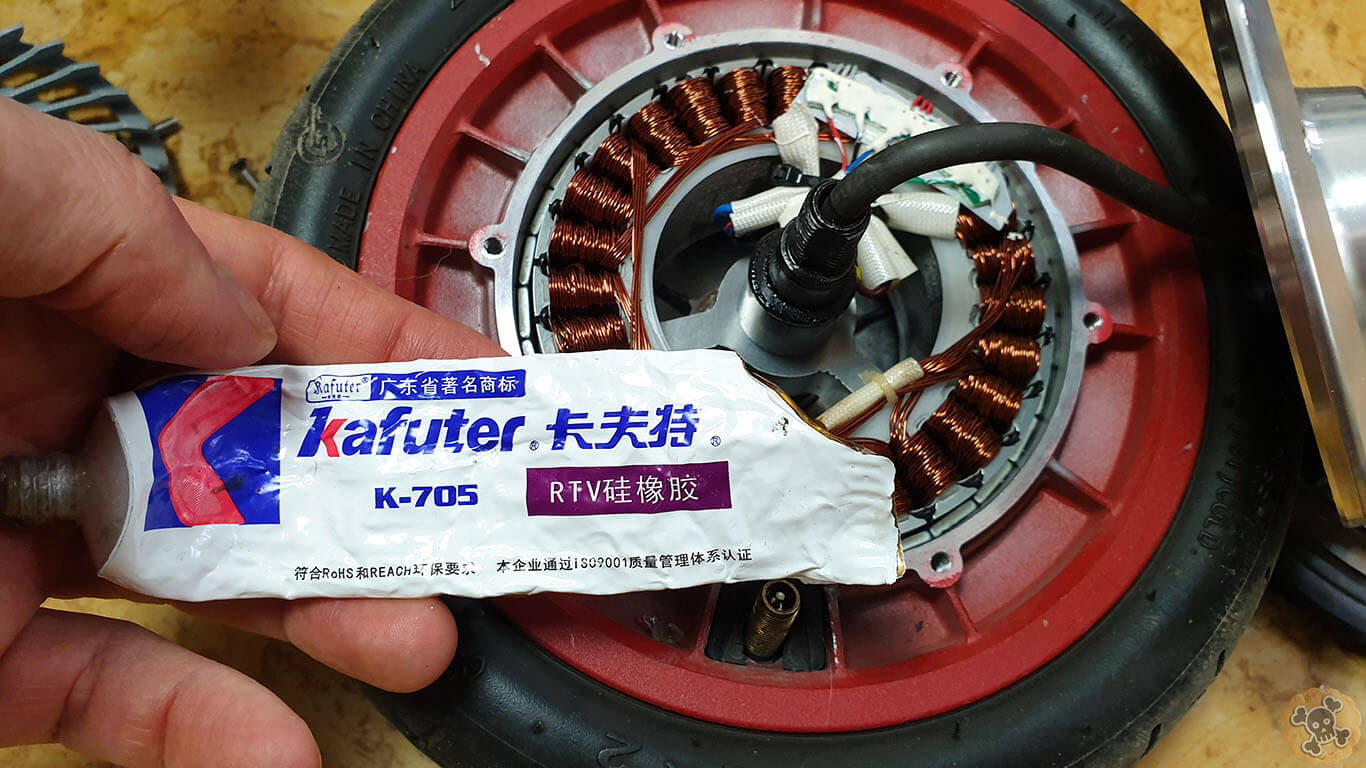
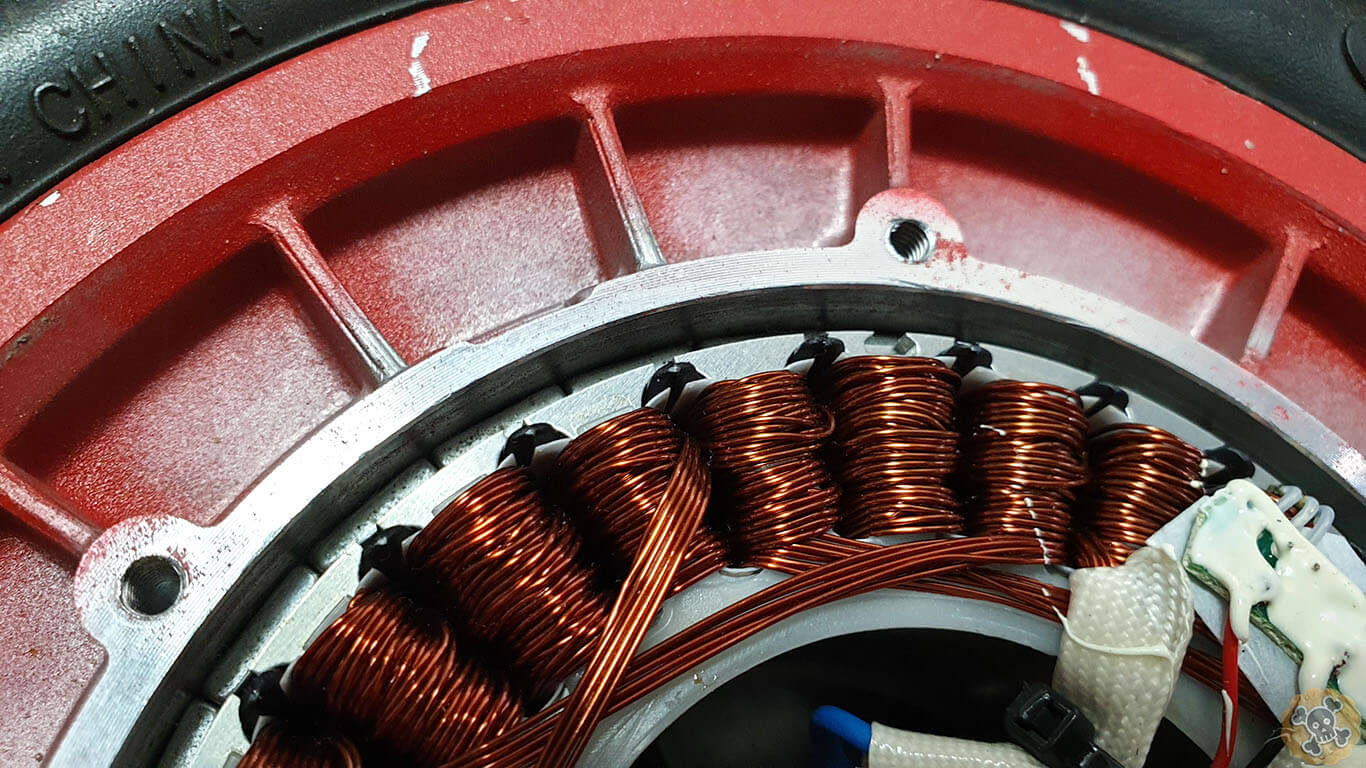
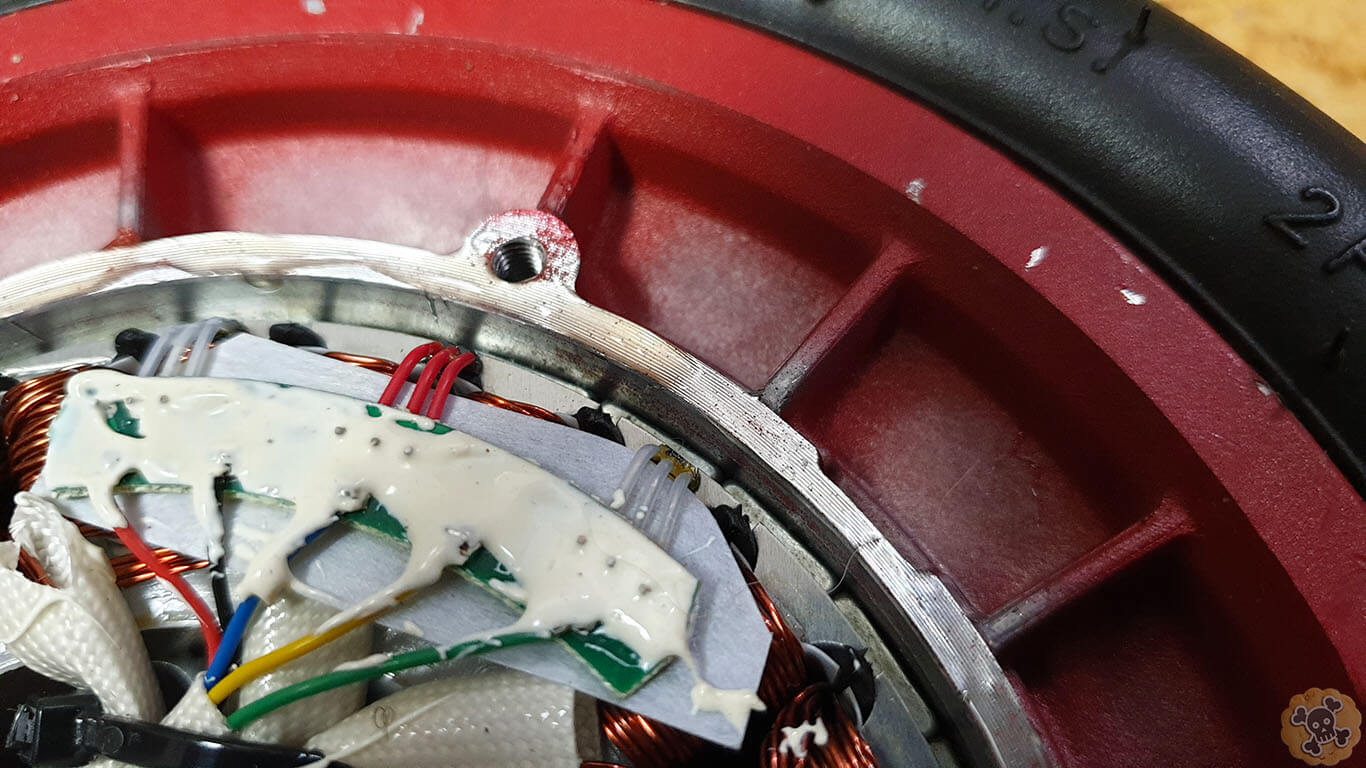
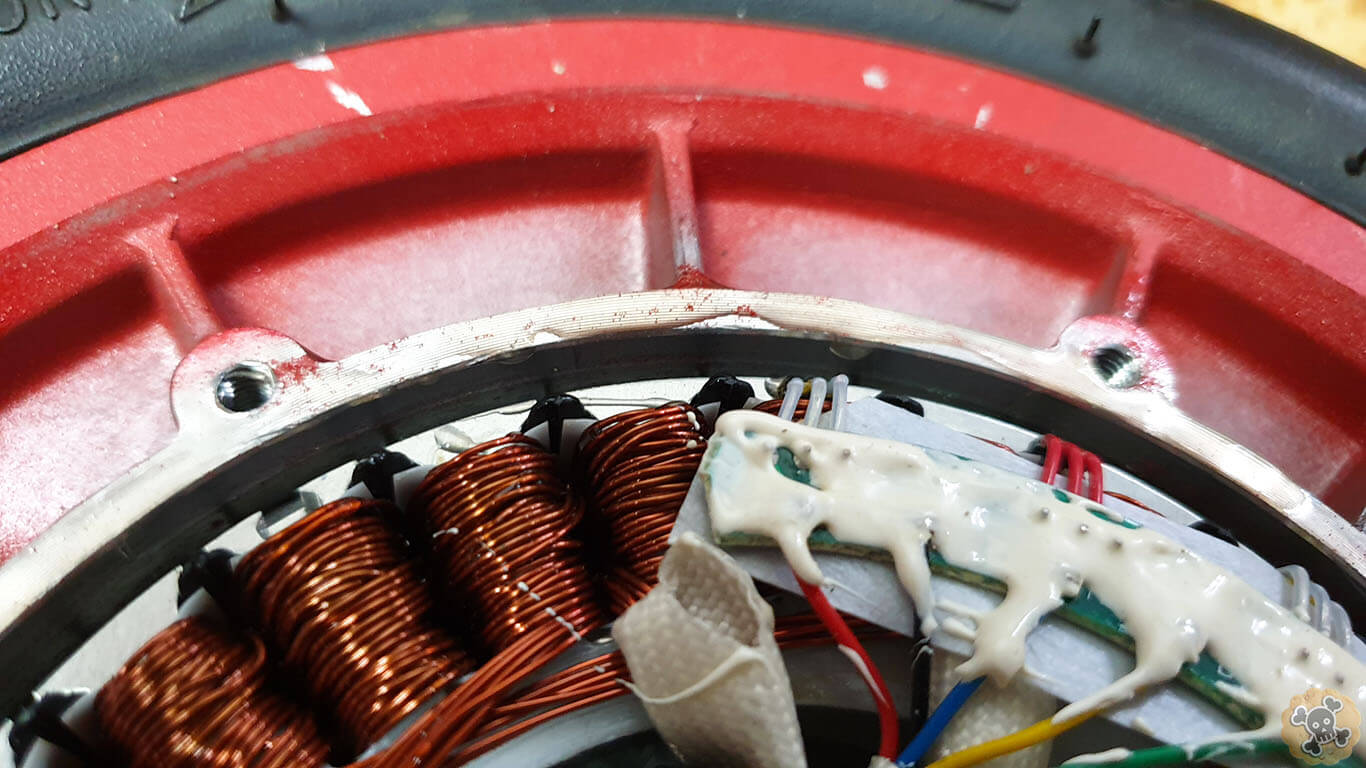
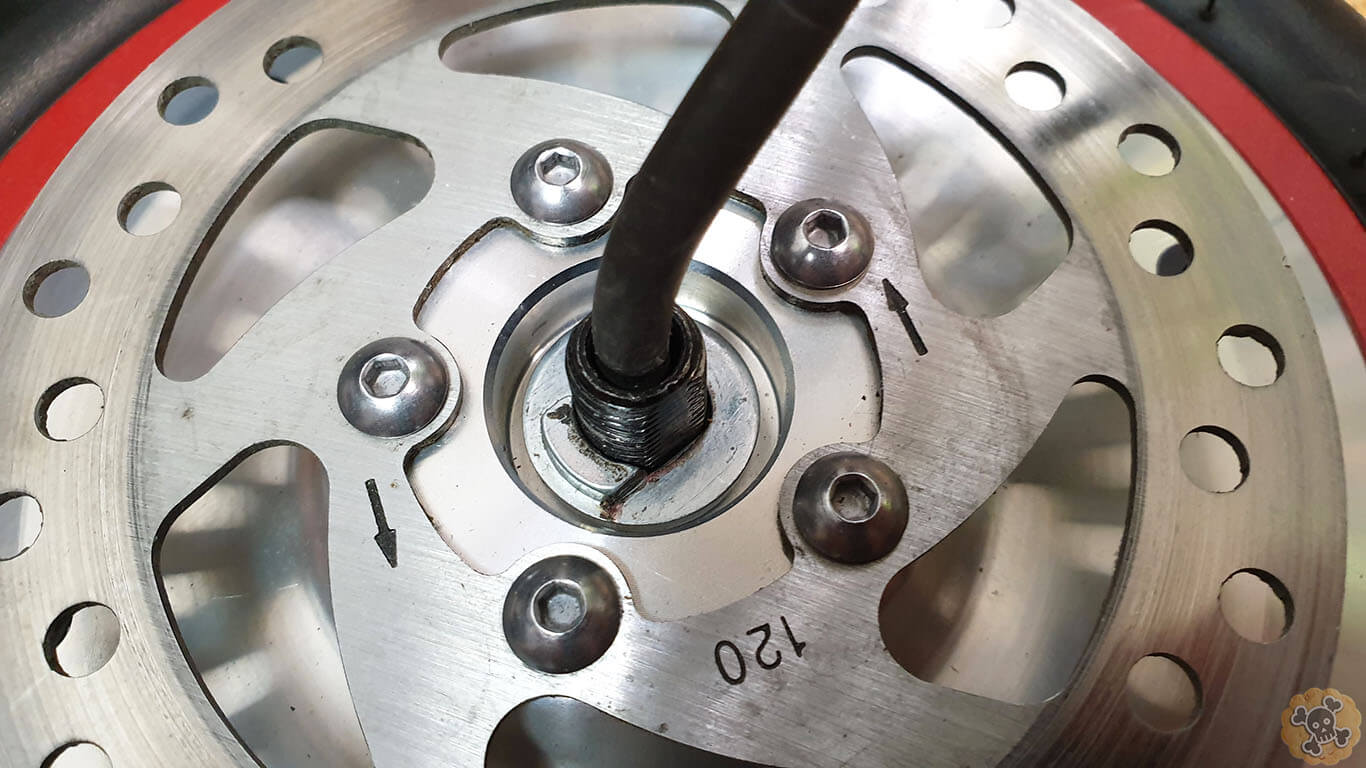
Some users saying that we can remove this black thing , so it will be easier to remove the tube but I decided to leave it like it was. To Seal motor I recommend to useKaufer K705 Silicone s.click.aliexpress.com/e/_98tkOJ , use it only on round edge as you can see on my pics.. . Worth to mention is that if you want to use new disc adapter then you need also new adapter for motor mount, but no worries Goran will know what set to send 🙂
I had to drill 10mm hole for motor wire on left side above kick stand
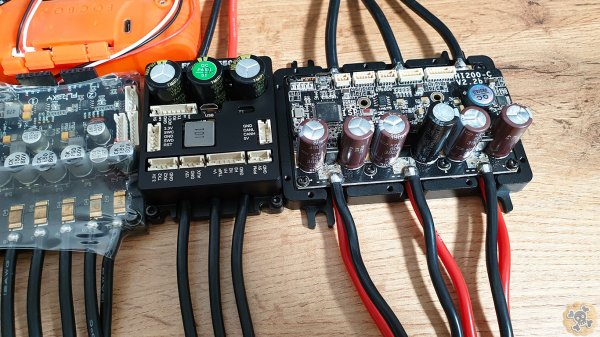
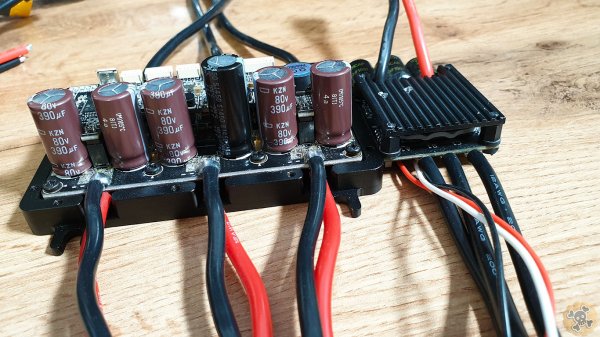
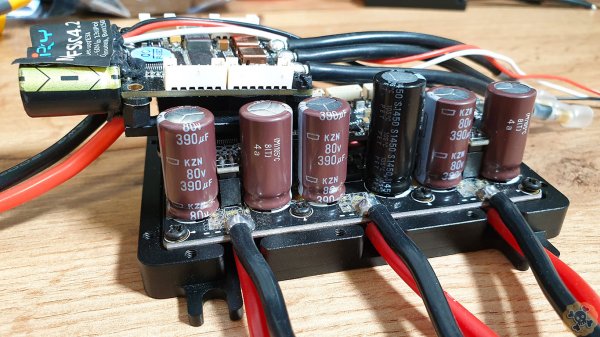
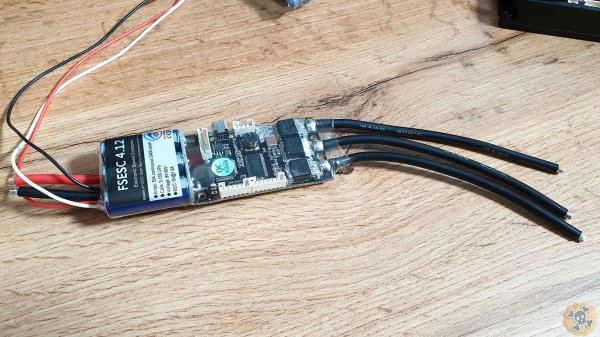
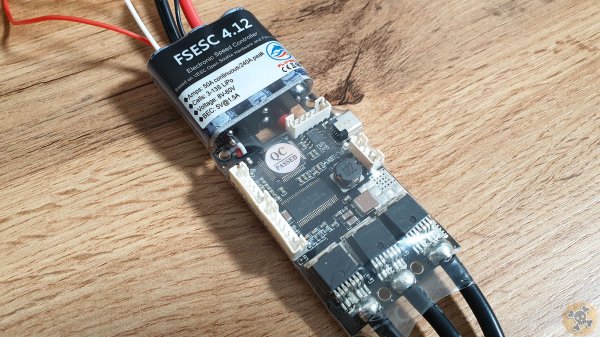
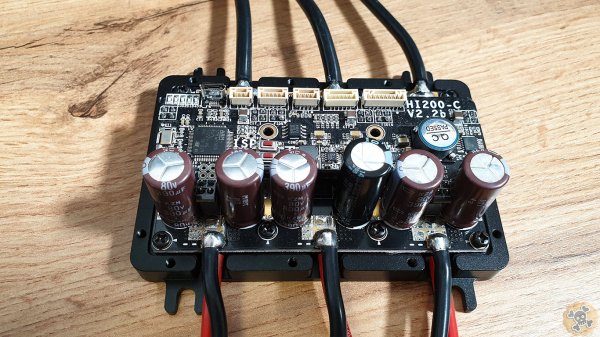
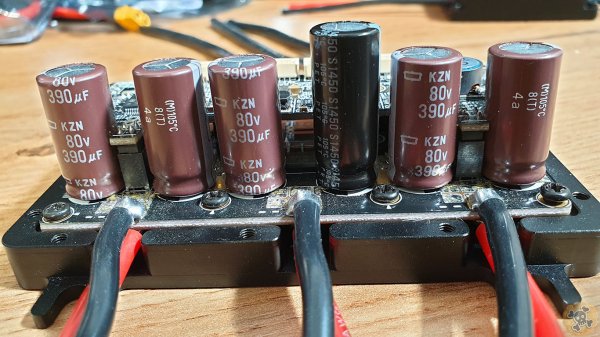
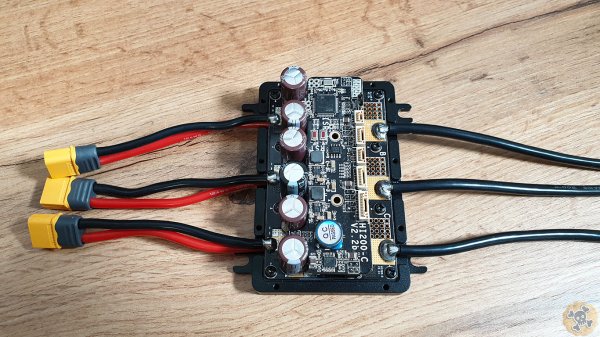
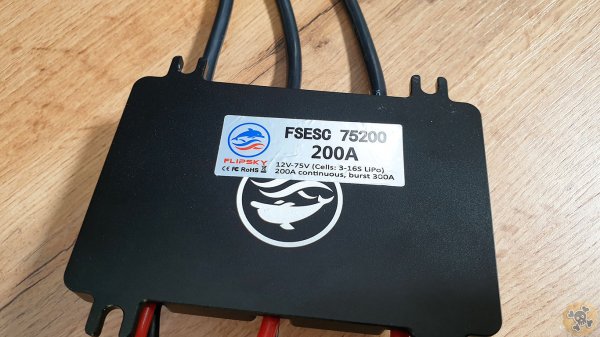
Vesc Controllers
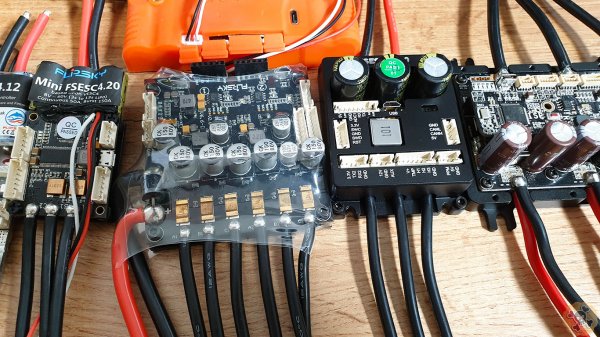
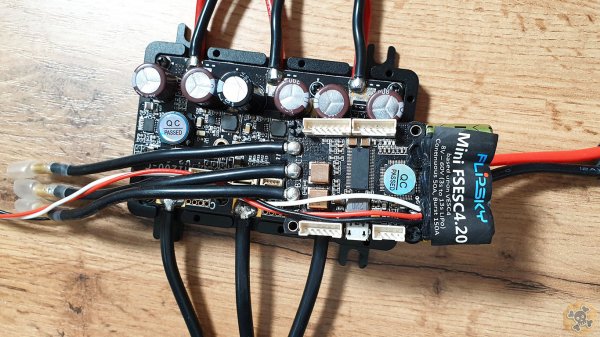
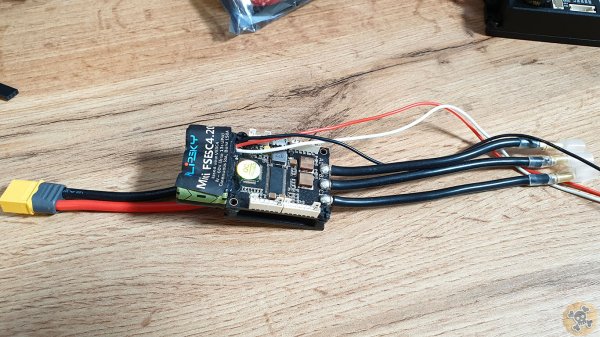
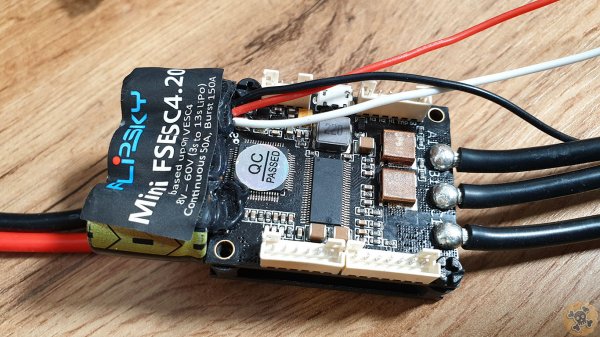
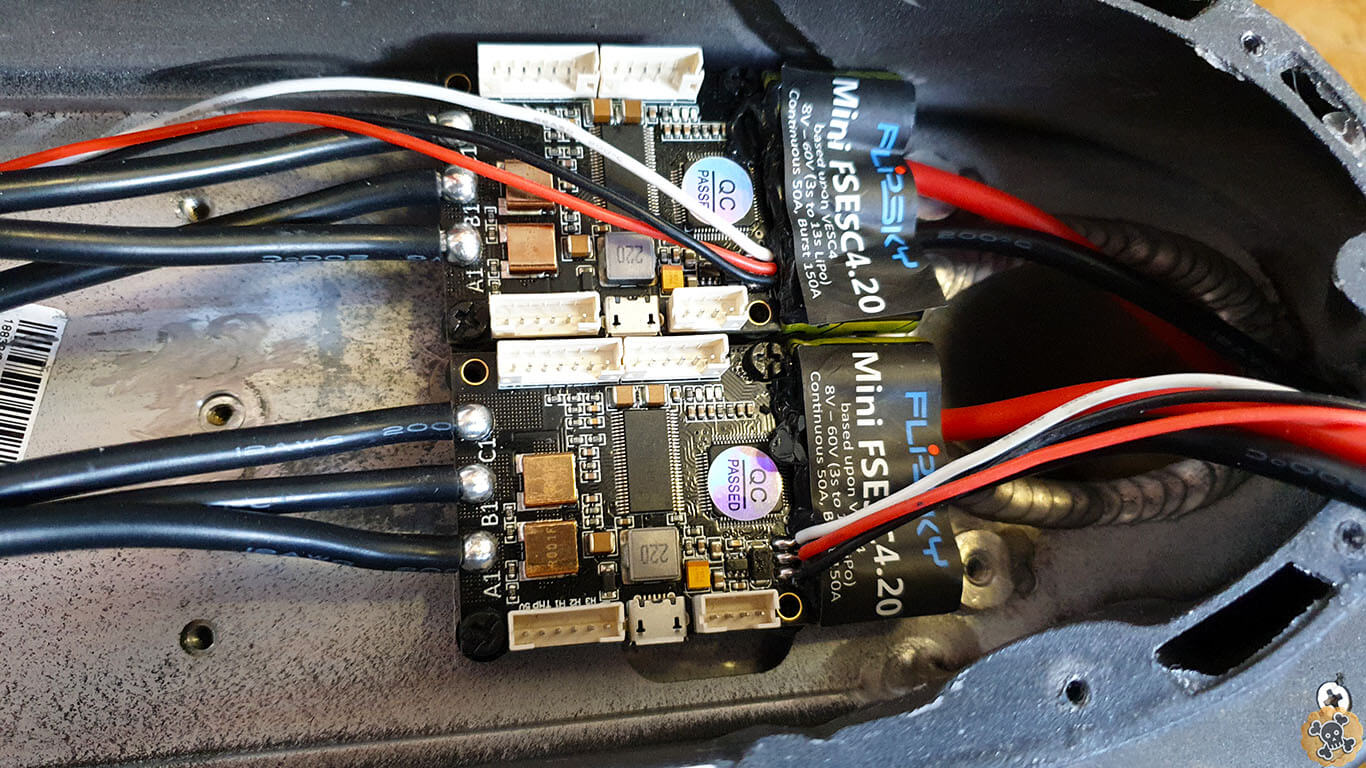
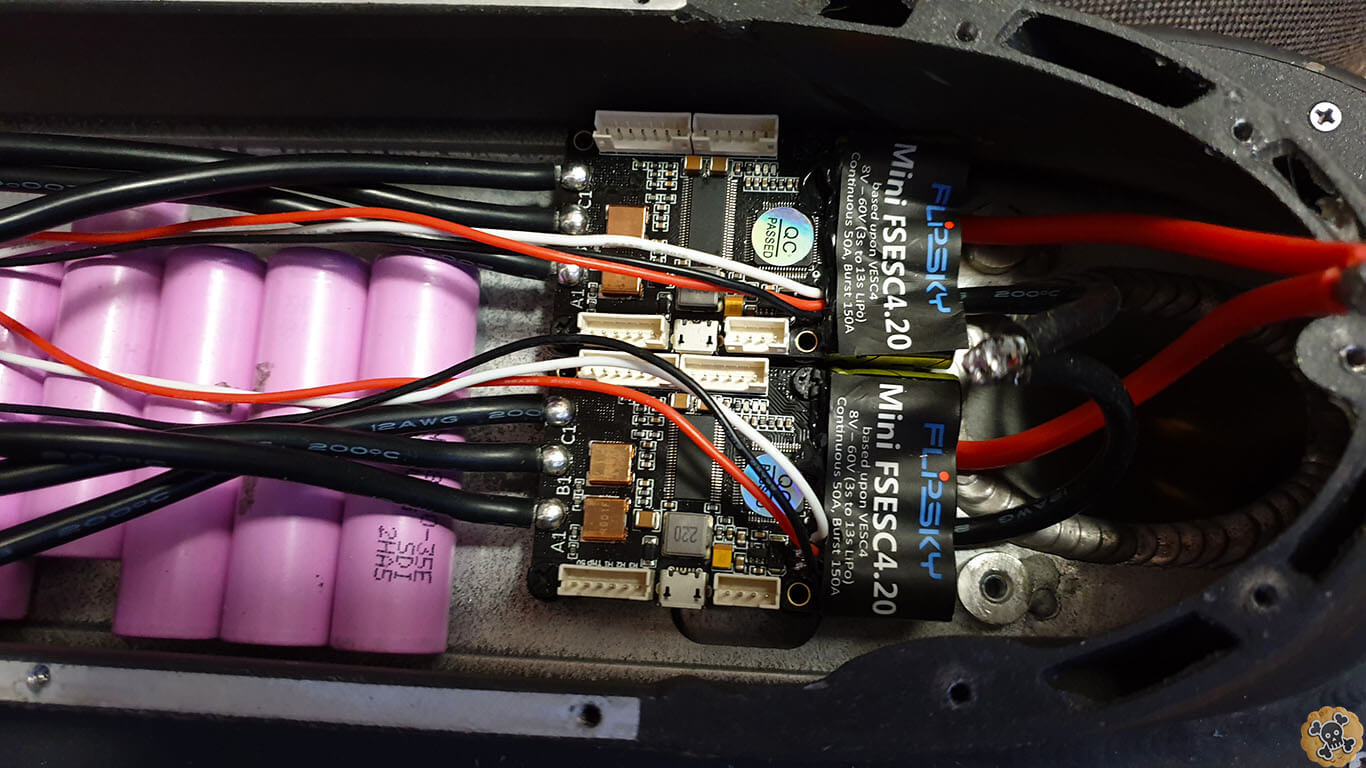
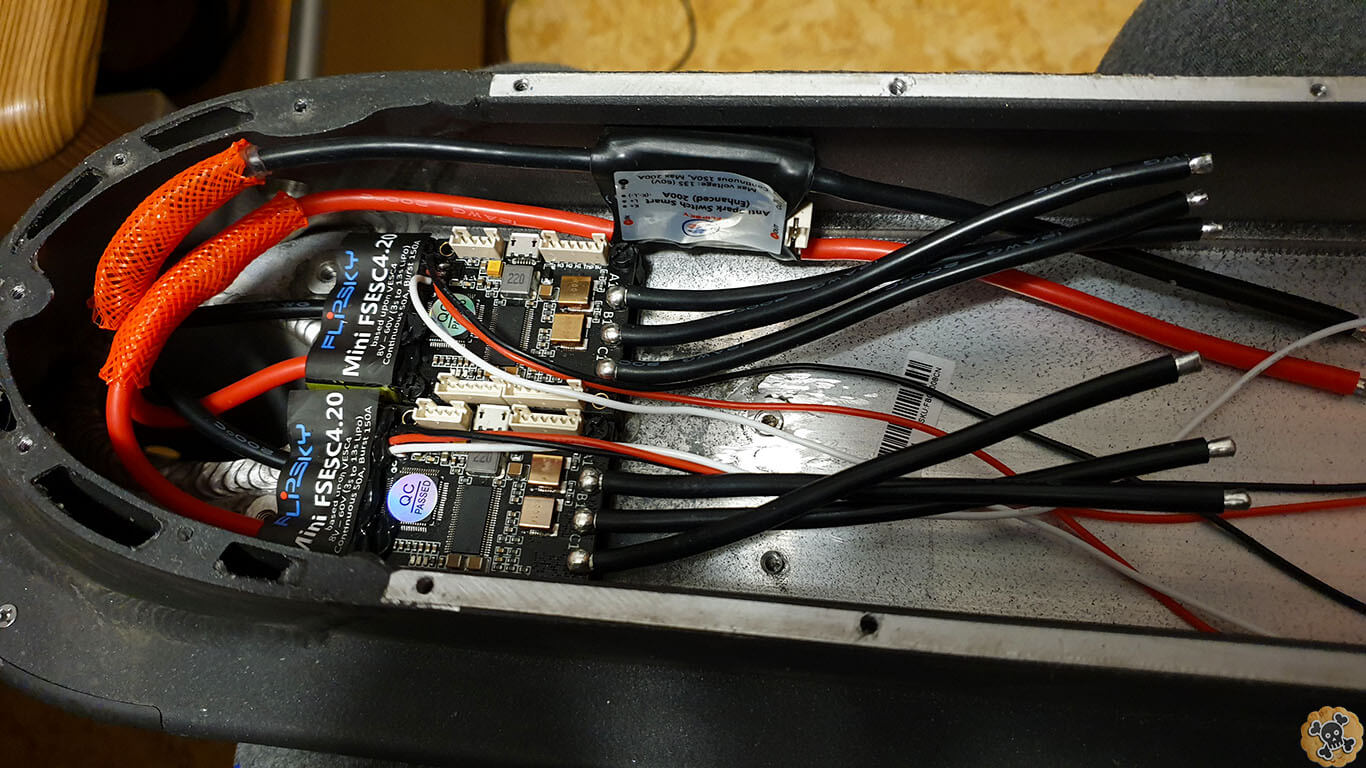
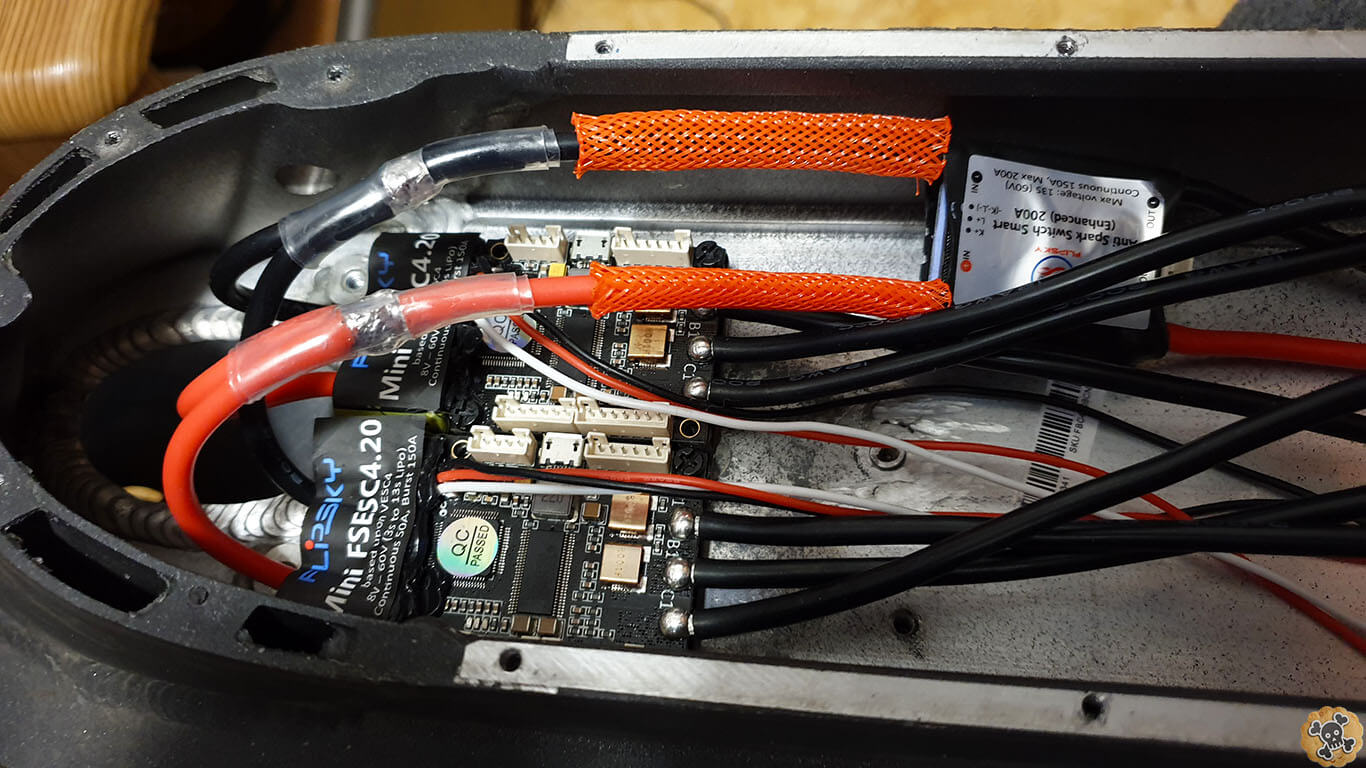
Flipsky Mini FSESC4.20
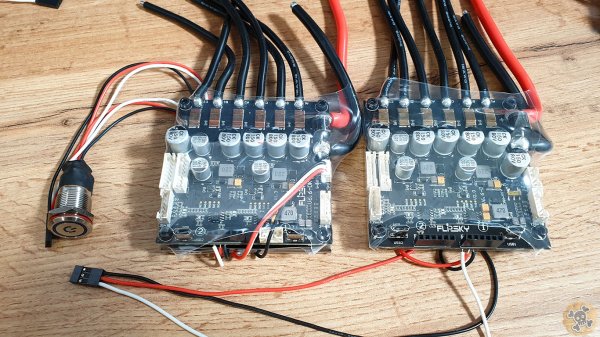
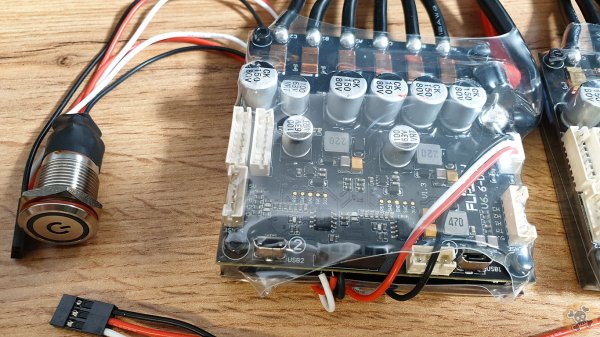
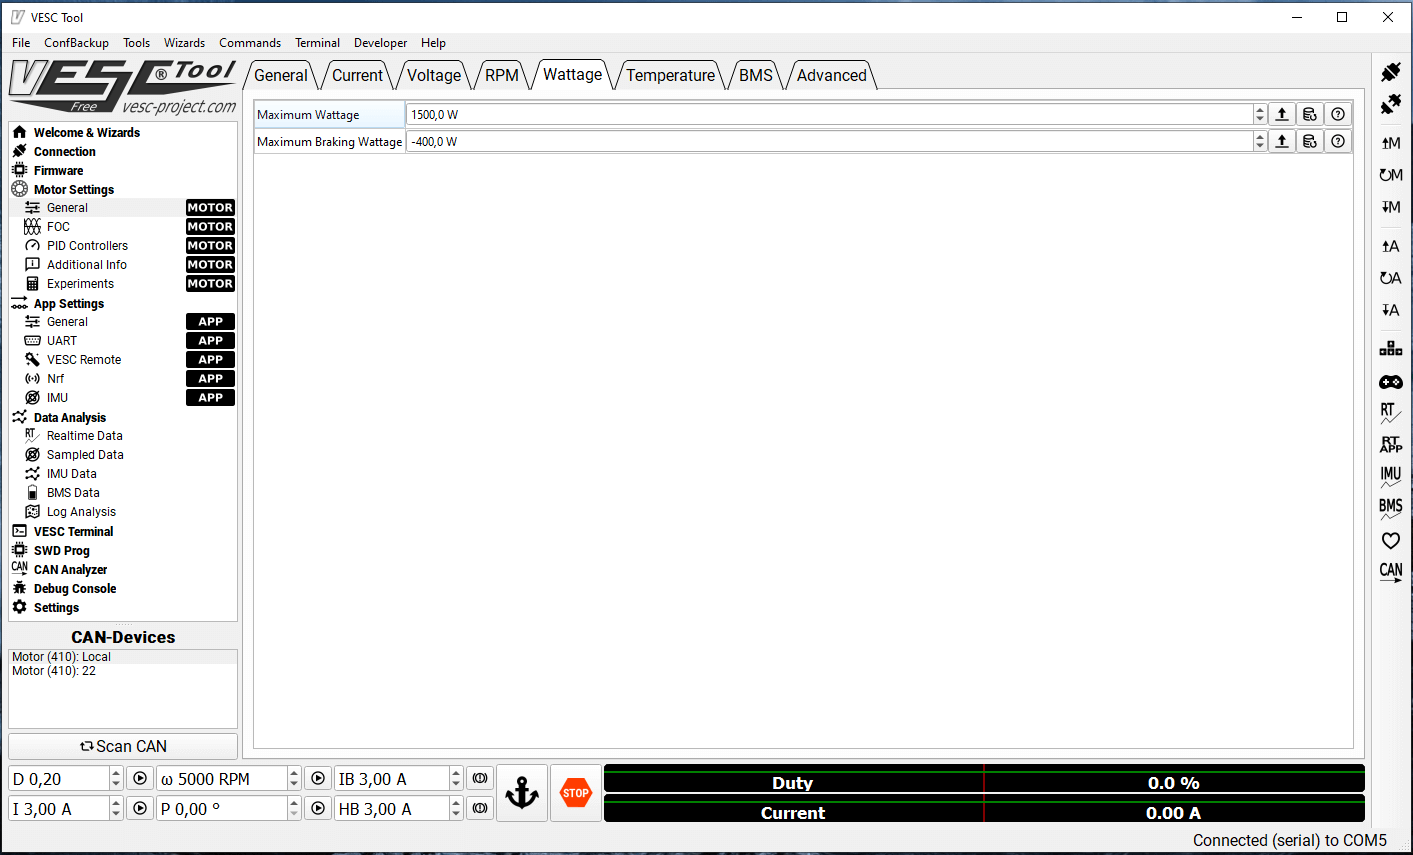
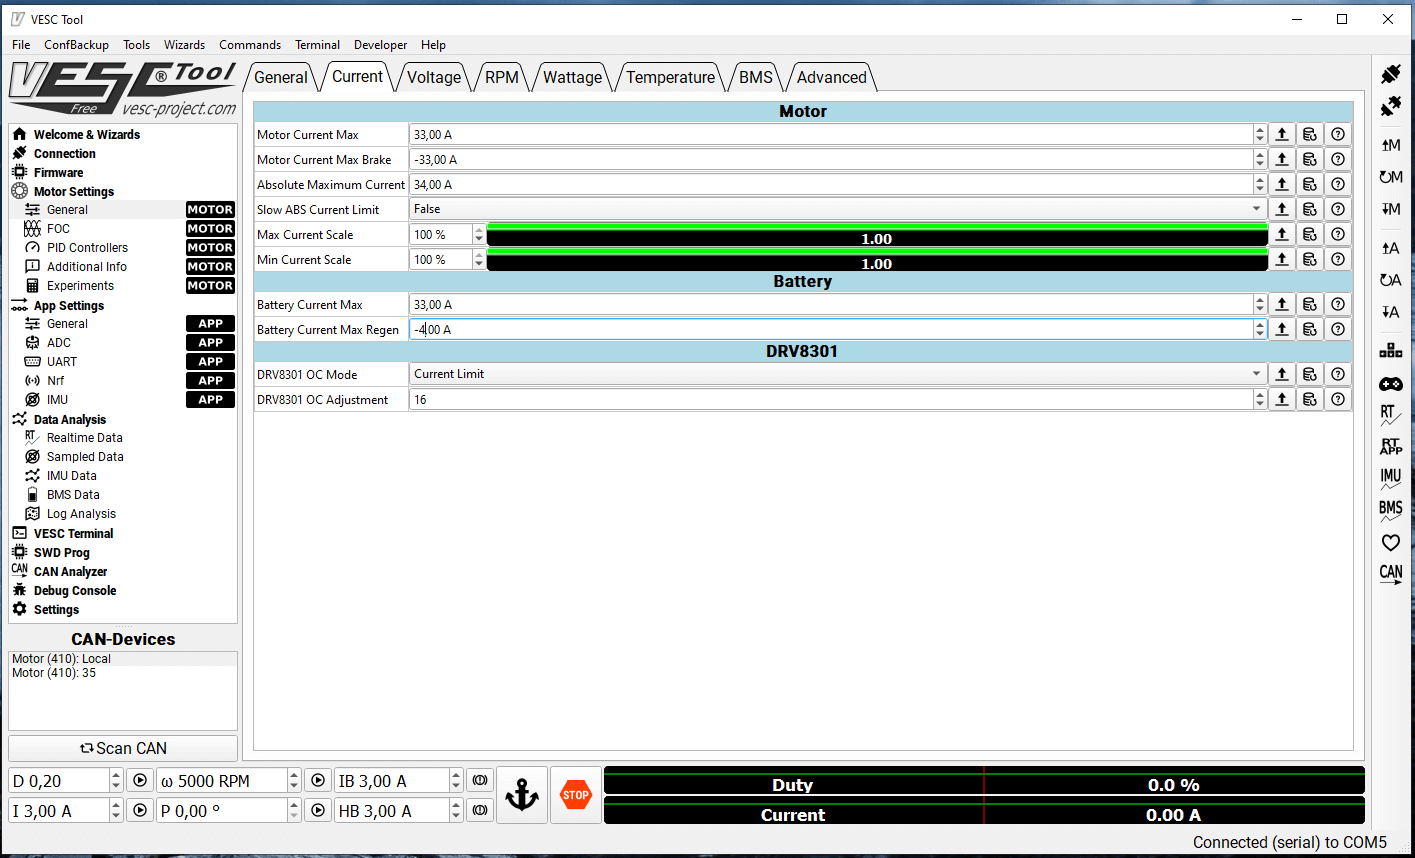
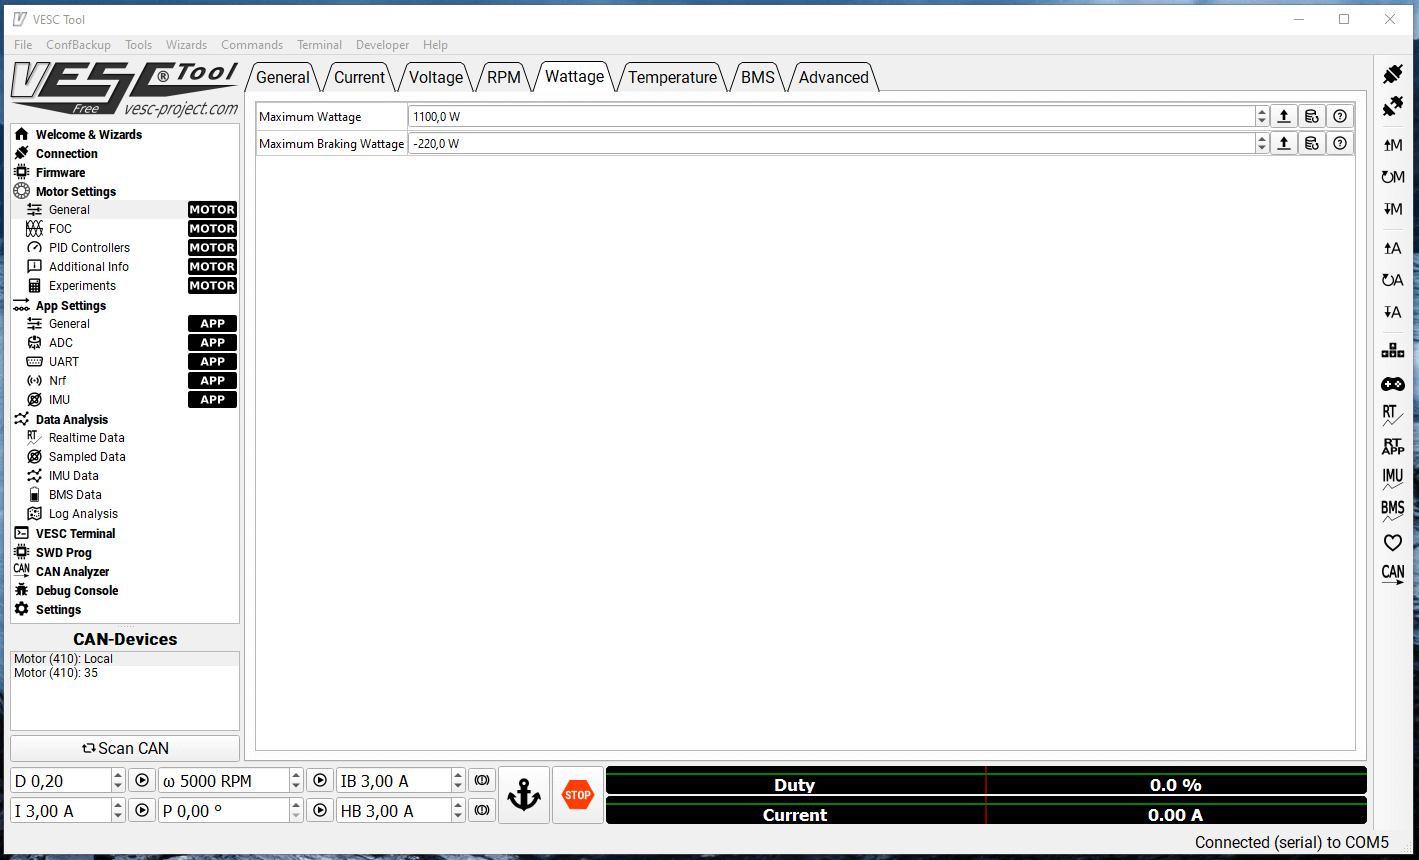
I used Vesc as a controller cause it’s Super advanced system , has lots of features, can hanbdle up to 12s for 4.4ver and 13s for 6.6 ver. Vesc electric braking system is one of the best that you can find on the market ( so yeah we don’t need disc brake any more ) . In my ” Light ” version I used 2x Vesc Flipsky Mini FSESC4.20bit.ly/VescMini42 , tiny size and should handle up to 50Amps at 12s which is around 2400watts per controller , but I will set max 1200watts for rear pro motor and 900W for front classic motor ( I don’t want to burn motors ) and from other hand my battery pack 12s 5p ( 35E cells ) can’t provide more than 60Amp…. but at least it has 17,5amps capacity . Vescs are mounted to the frame so the heat will be spread out, ofcourse some extra thermal paste between frame and radiator is needed . To add ON/OFF switch to 2x single Vesc 4.2 I decided to use Flipsky Smart Switch with AnitSpark bit.ly/FlipskySmartSwitch , it cost around 30$ and it’s like must have cause otherwise we will be not able to turn off Vesc
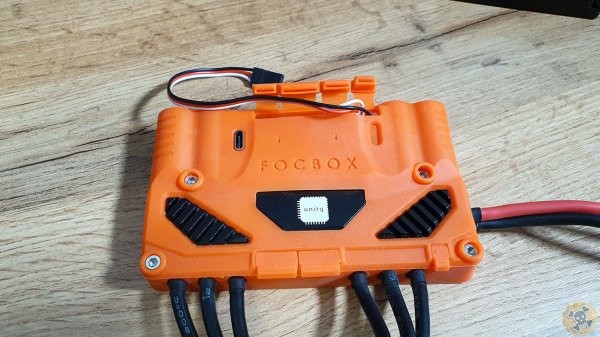
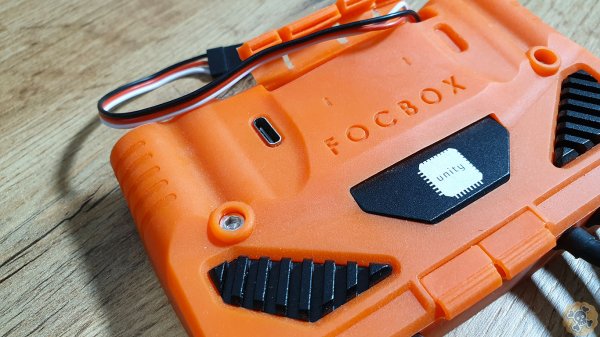
FOCbox
Soon…
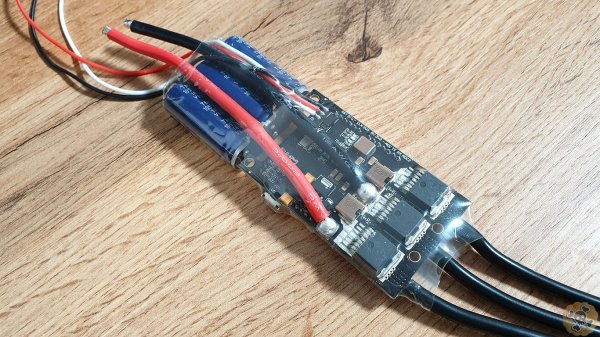
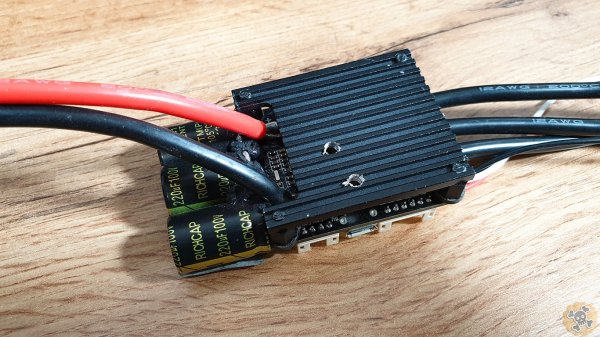
Flipsky Mini FSESC6,6
Soon…
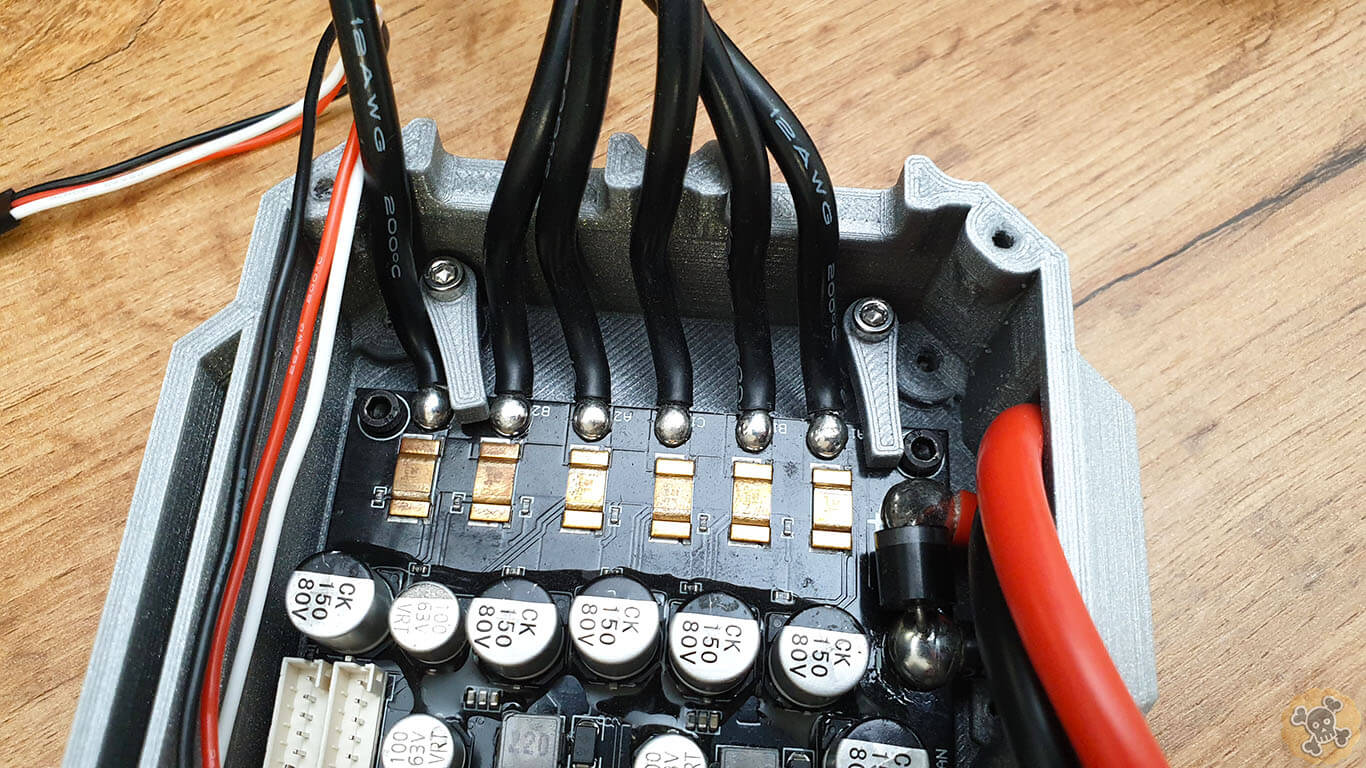
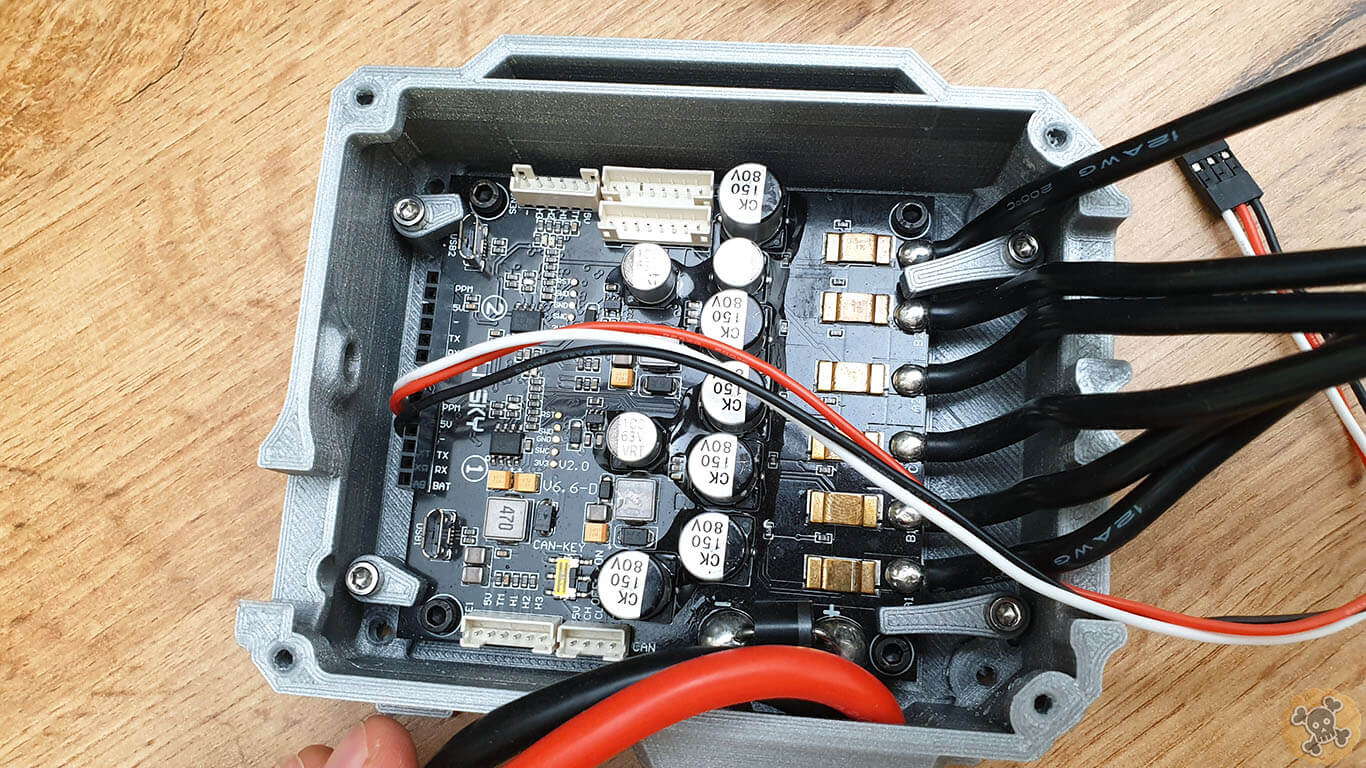
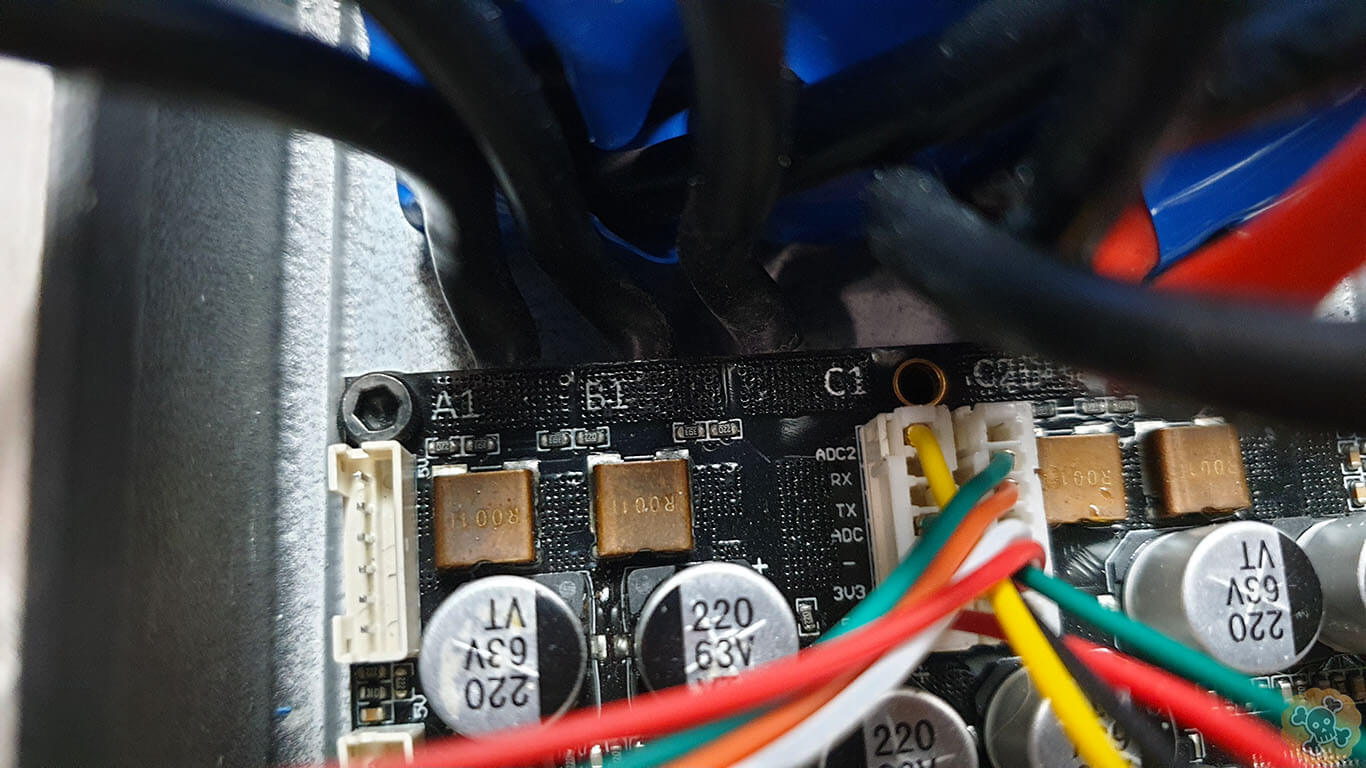
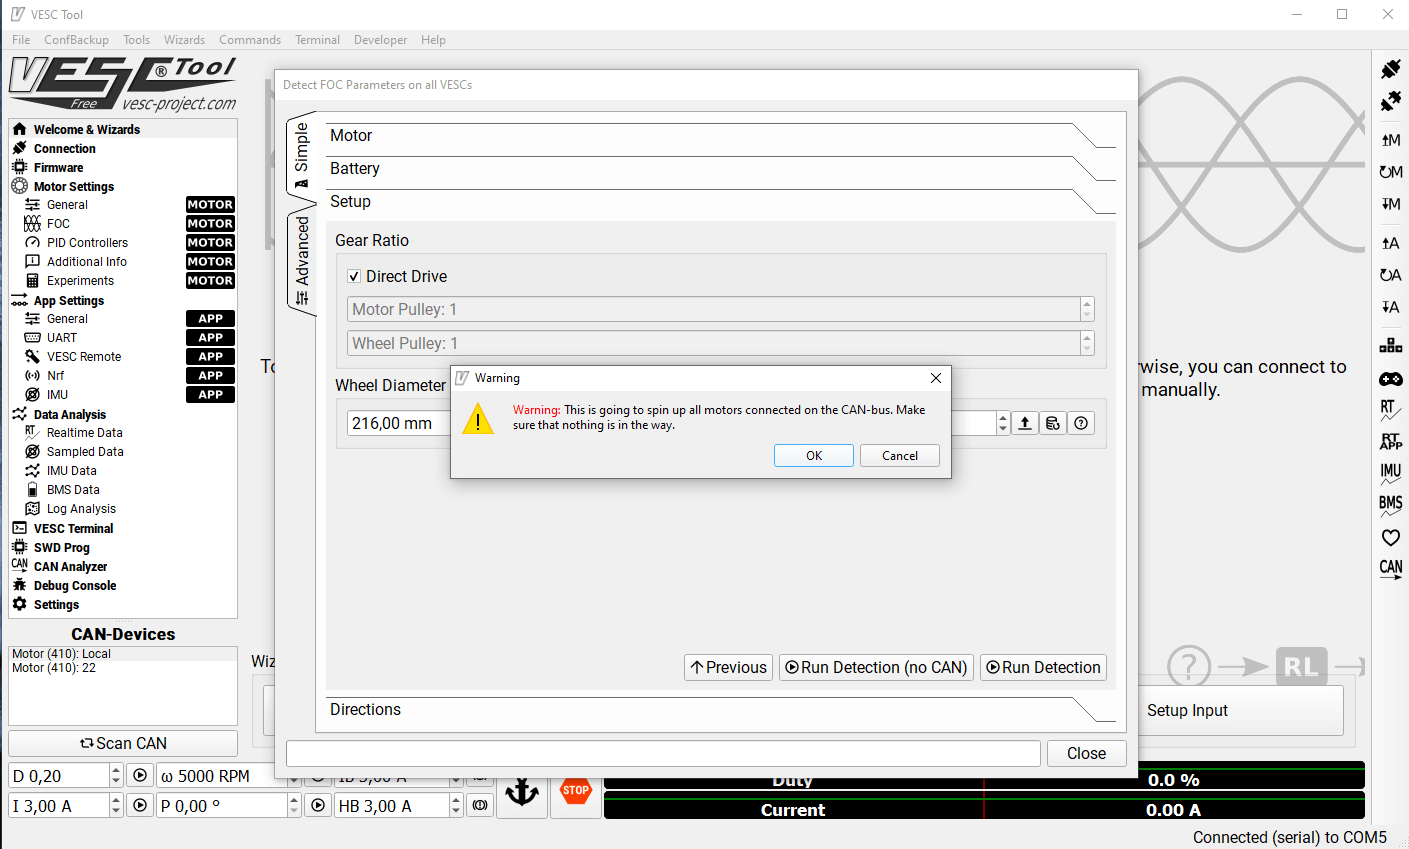
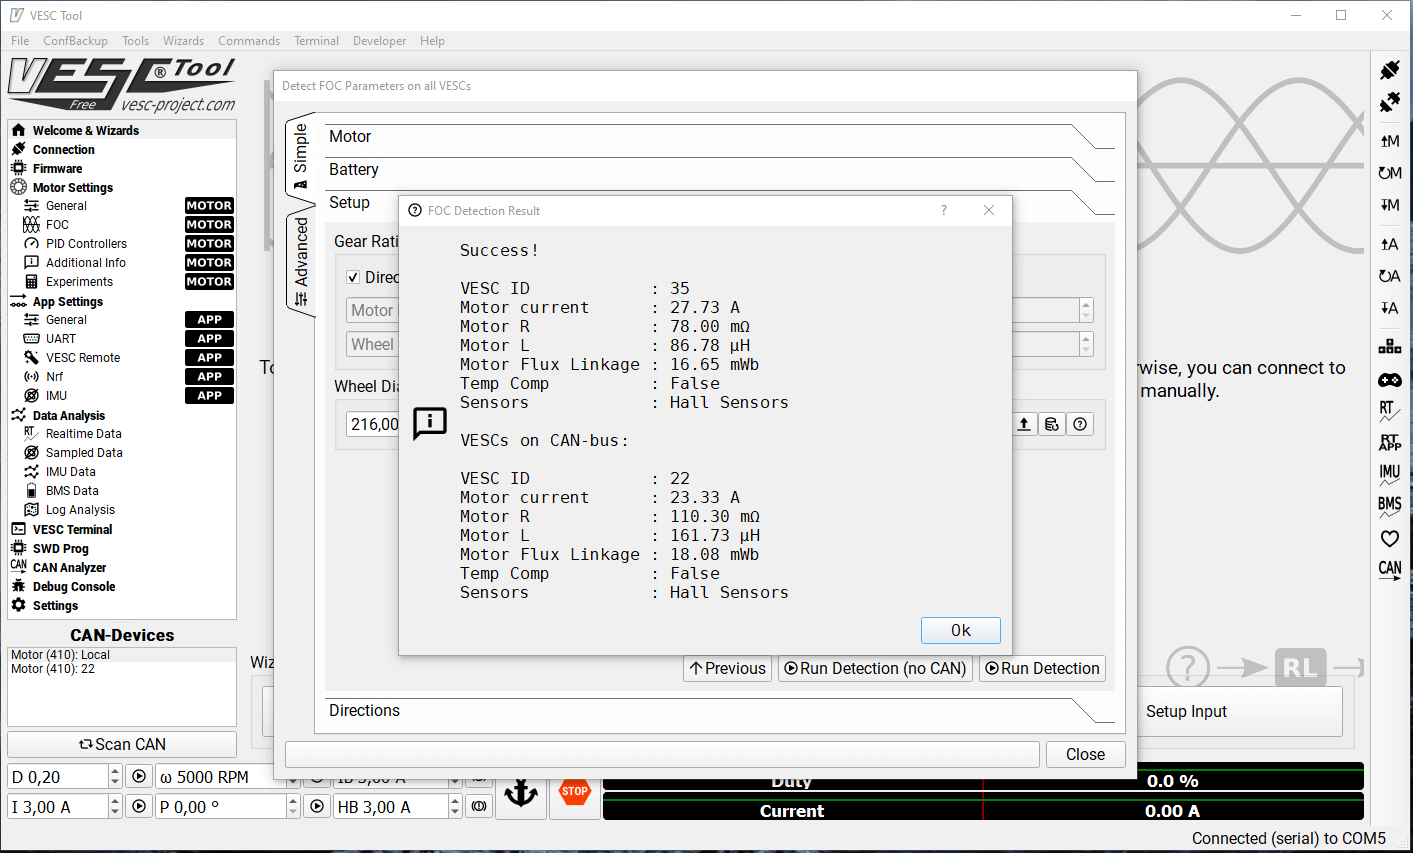
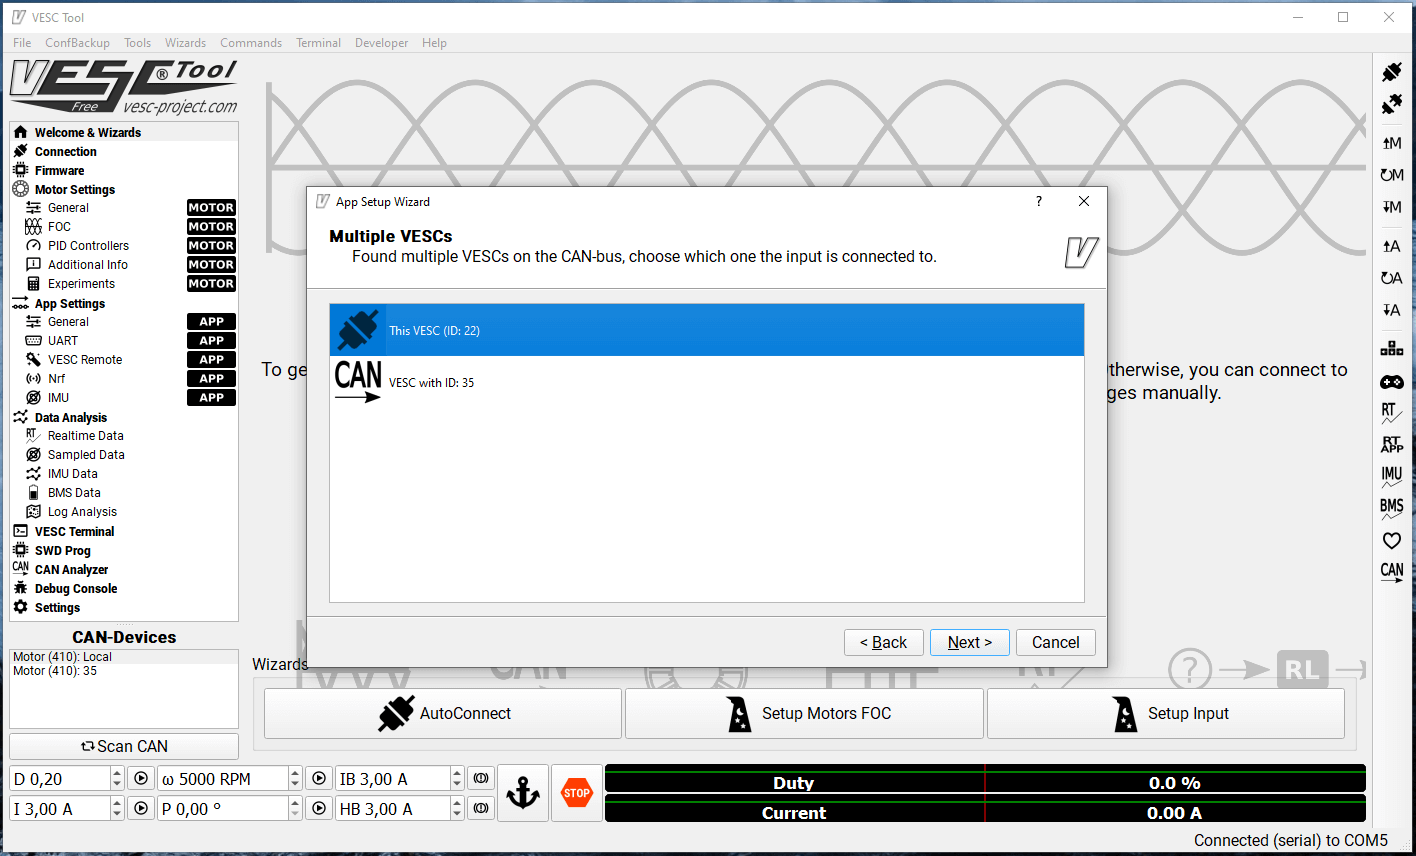
Wiring Vesc to Motors
Here please FOCUS, be careful with RED wires ( + voltage ) , one mistake and you can bake some electronic . Please connect wires Exactly the same way like I did.
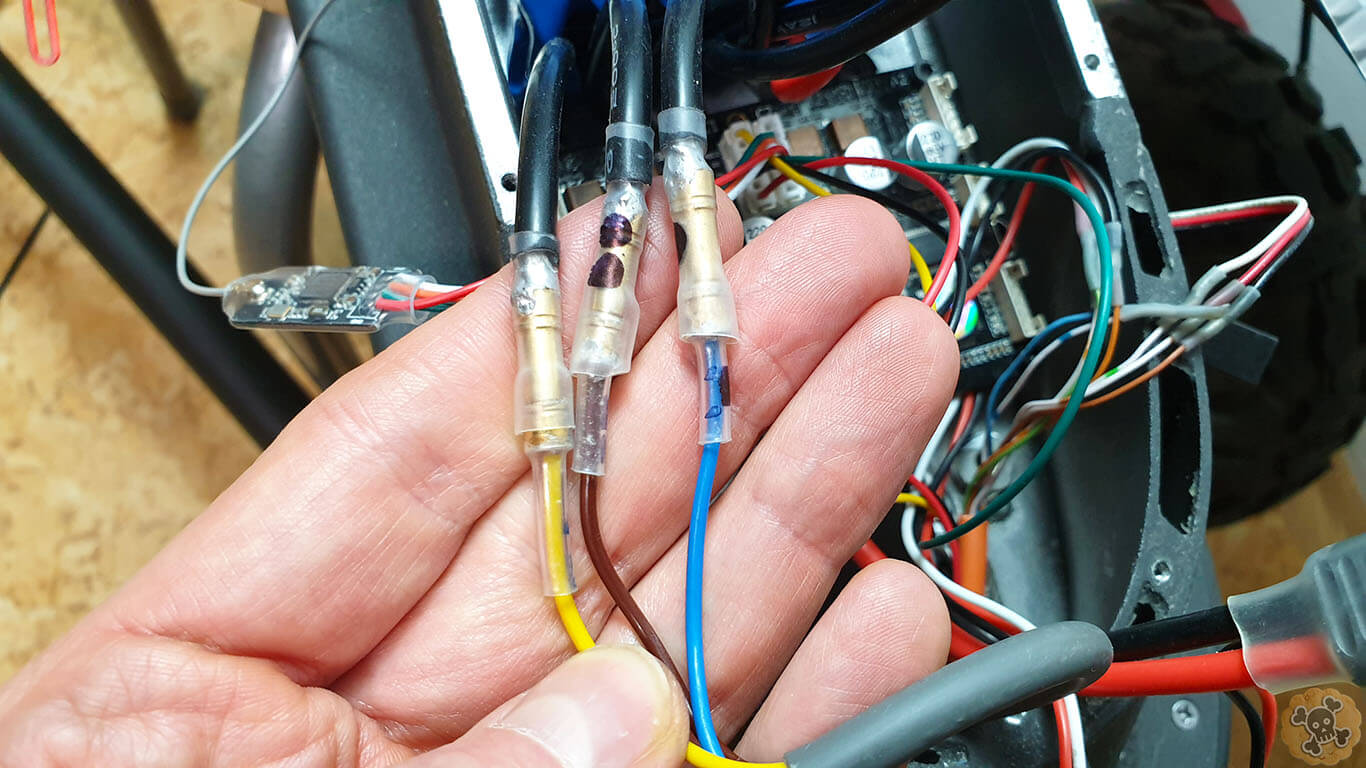
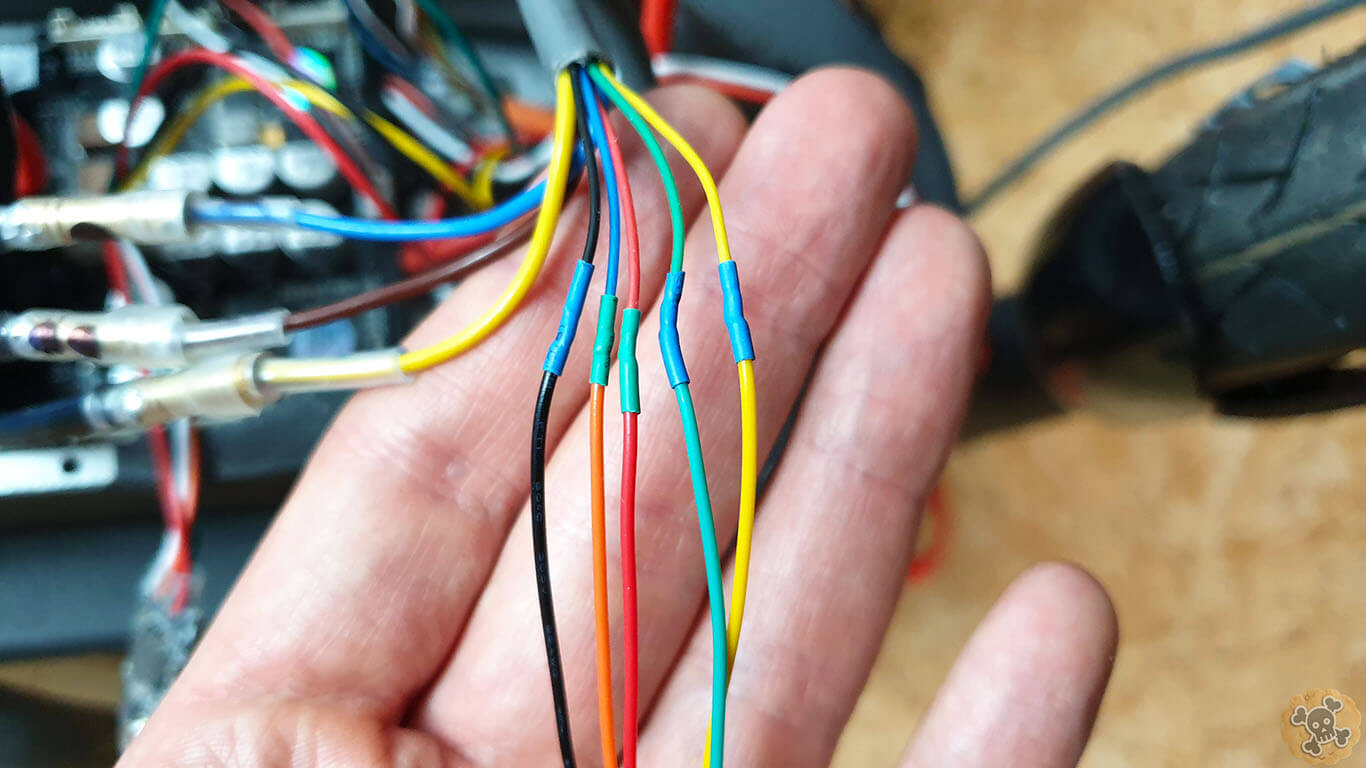
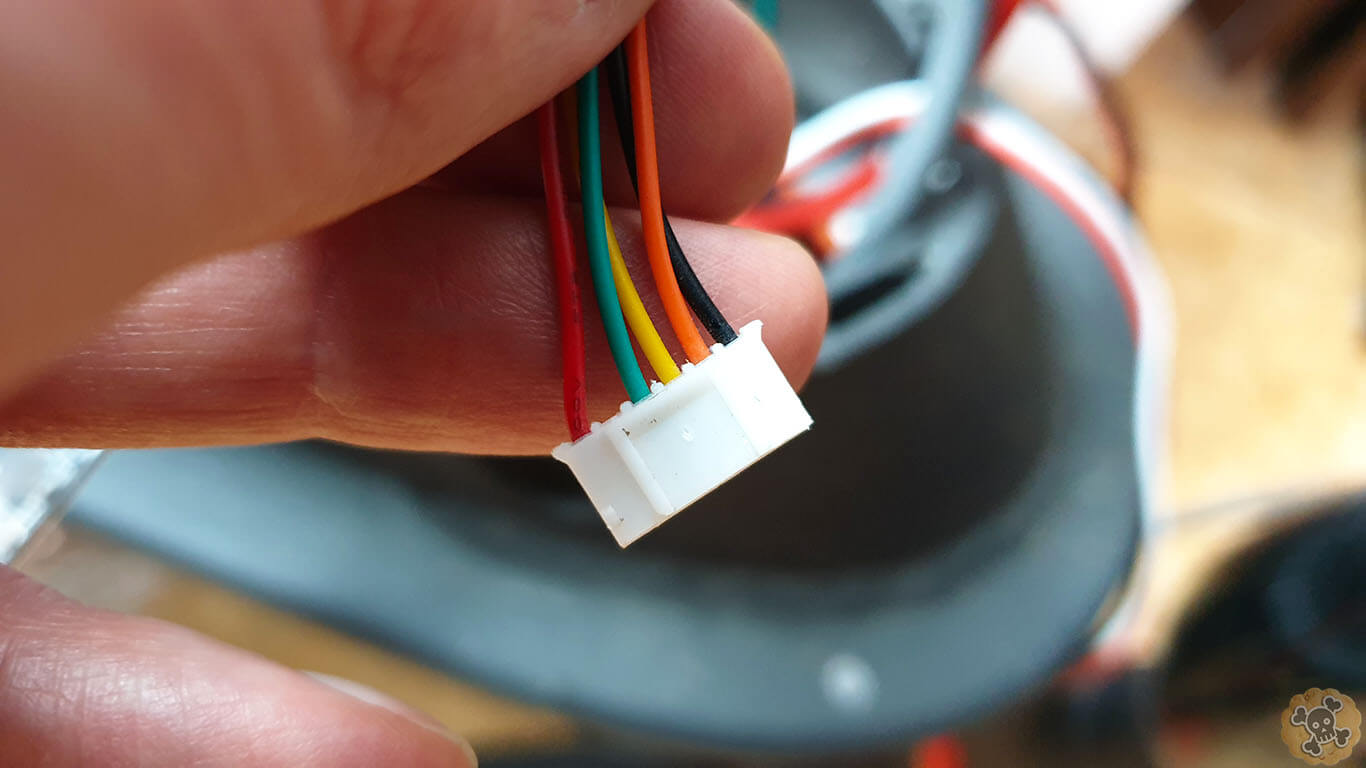
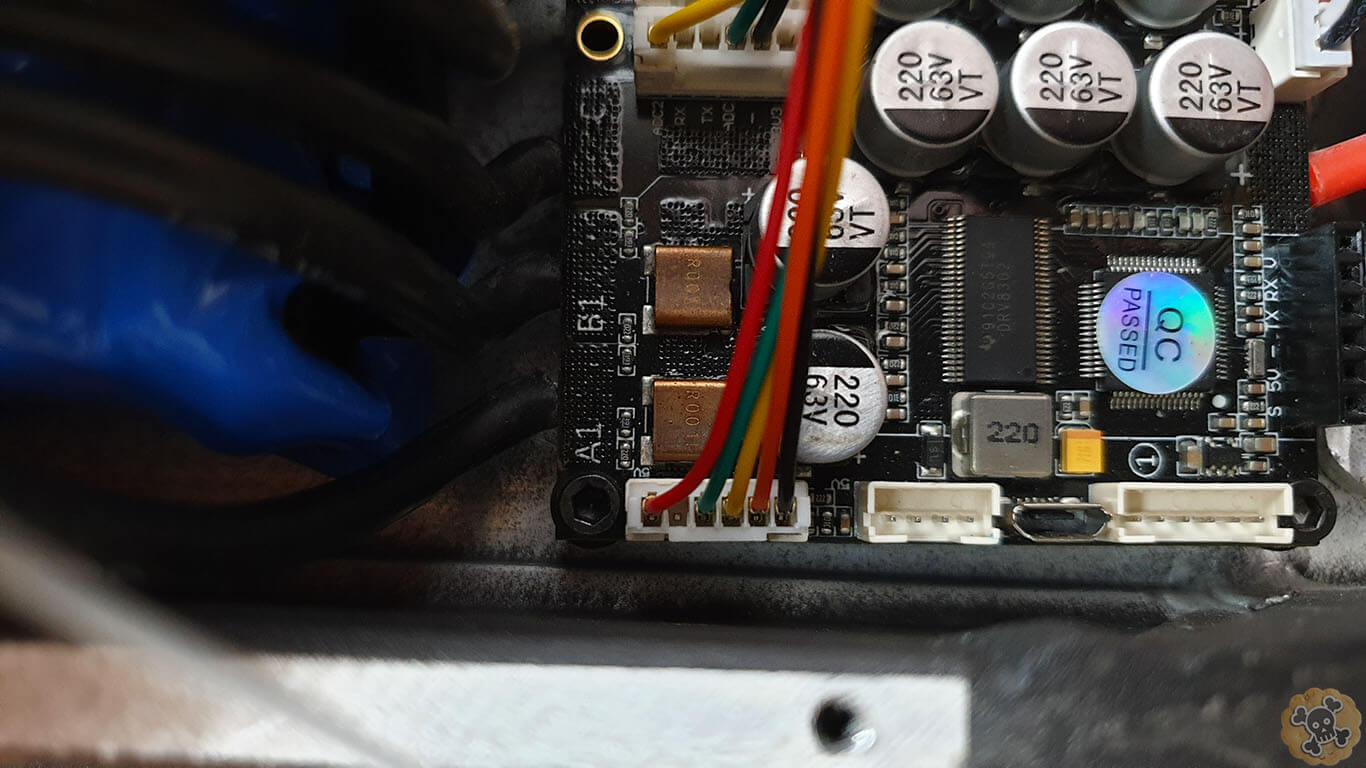
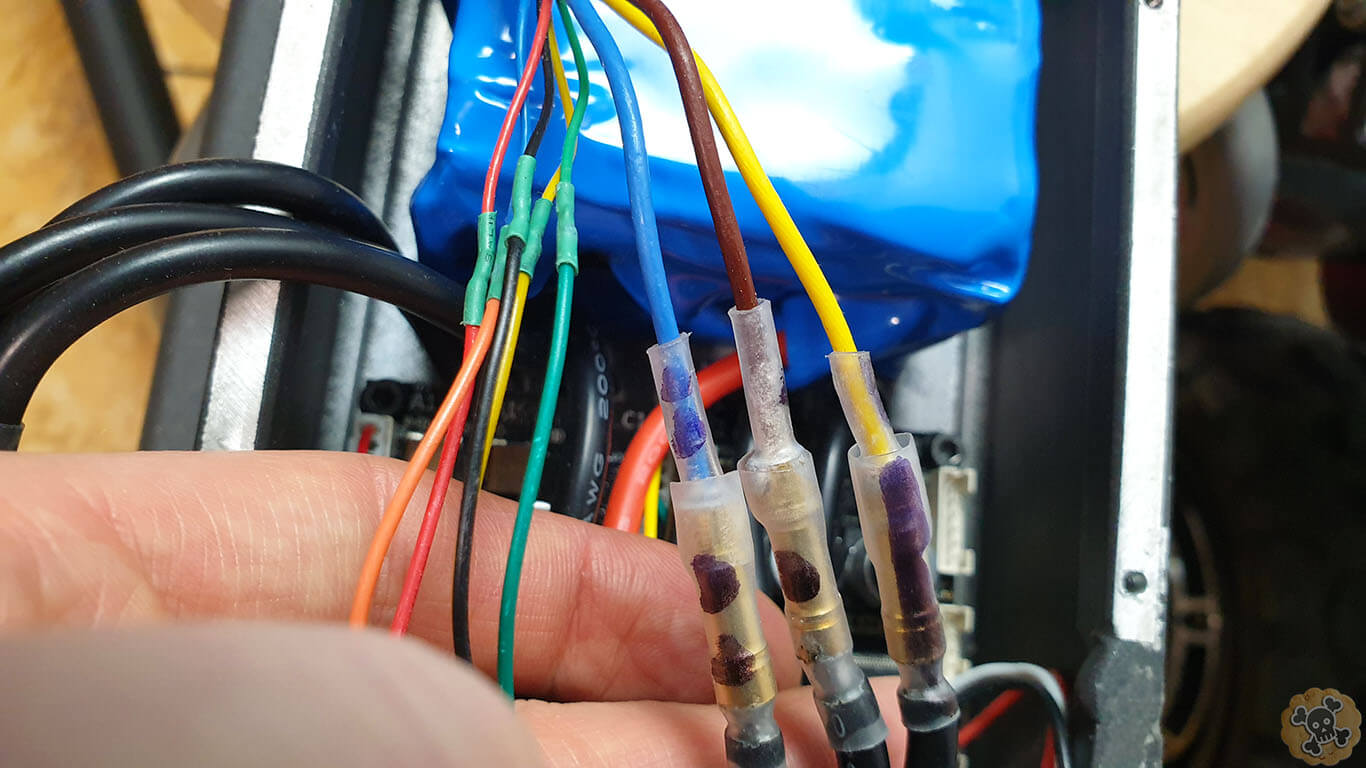
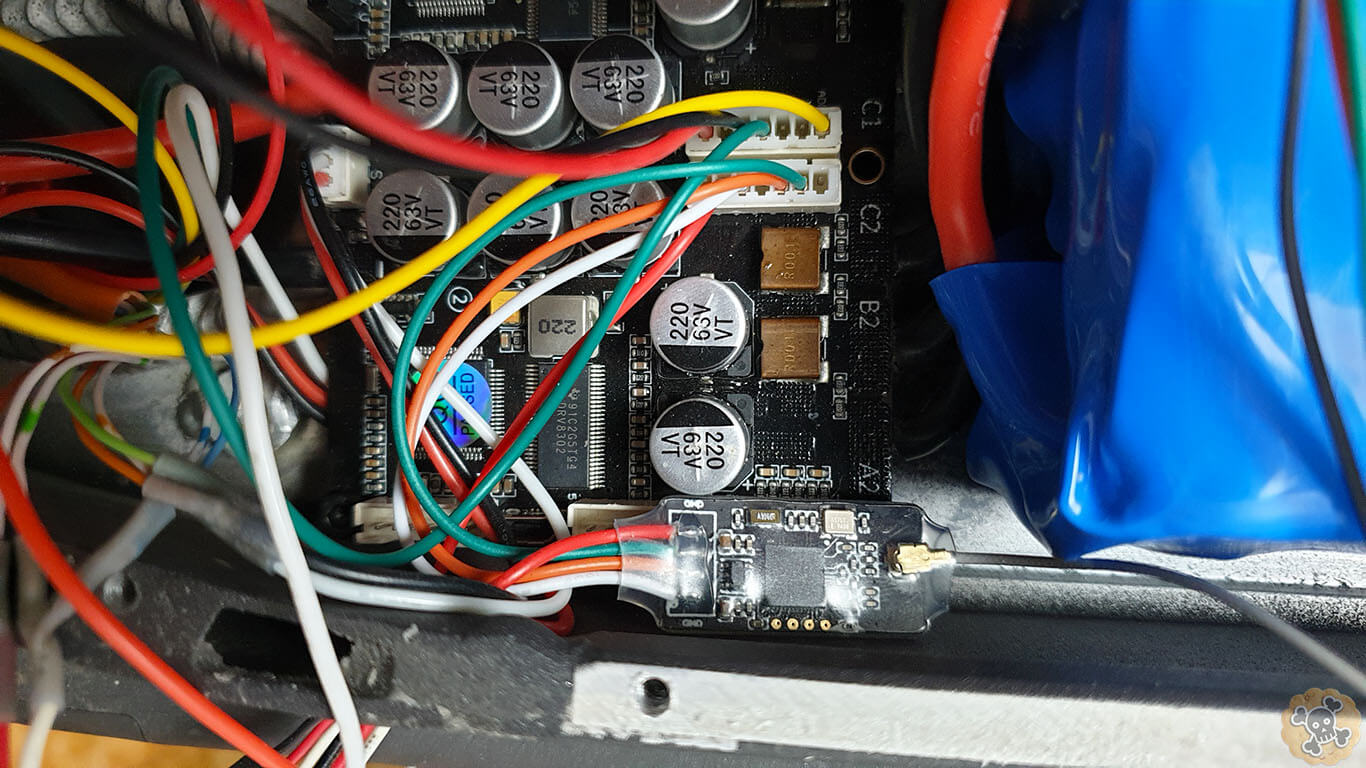
Front motor I connected to port A1 ( yellow ) / B1 ( Brown ) C1 (Blue) . Hall sensor wires are connected to port near by A1B1C1, colors of wires you can see on pics ( I extended a bit stock wires and new cables got different colors but please connect them exactly the same way like I did to the conenctor )
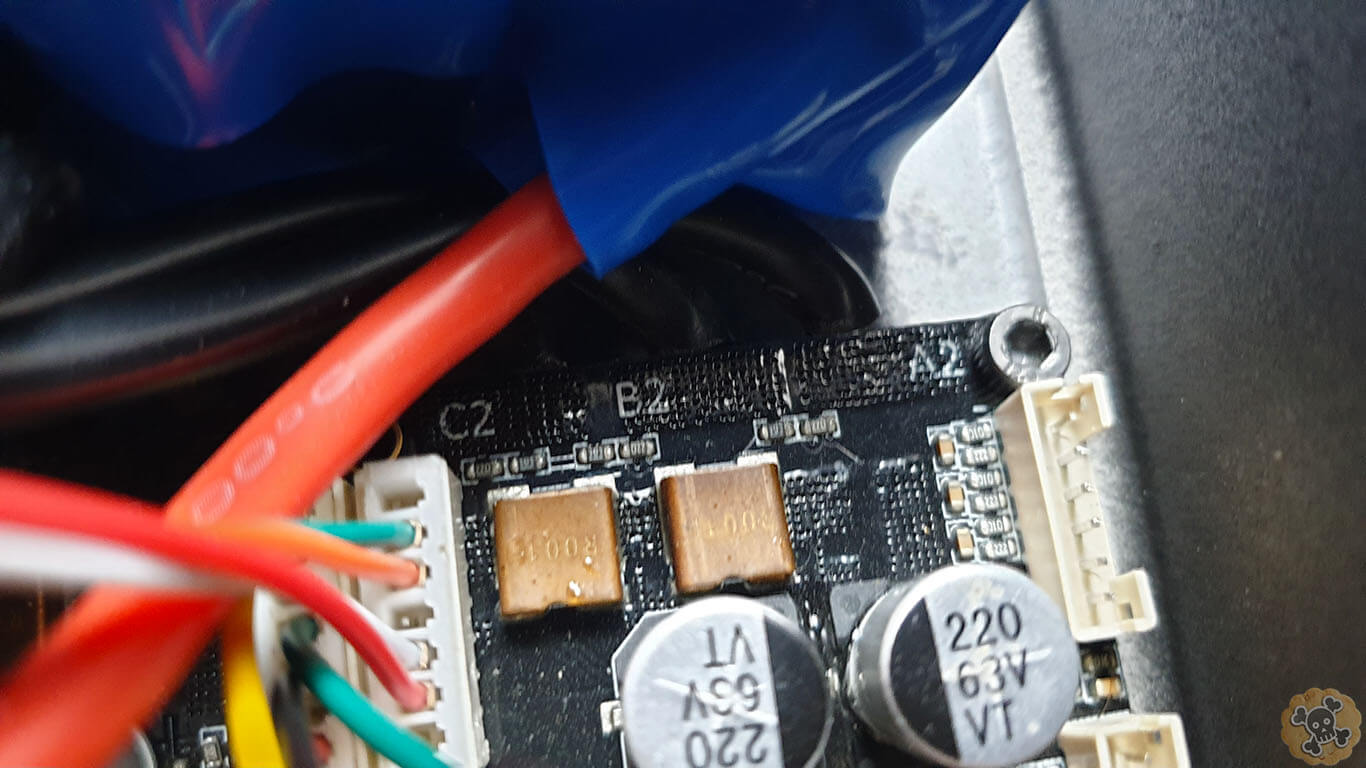
Rear motor I connected to port C2 (Blue) / B2 ( Brown ) / A2 ( yellow ). Hall sensor wires are connected to port near by C2B2A2, colors of wires you can see on pics ( I extended a bit stock wires and new cables got different colors but please connect them exactly the same way like I did to the conenctor )
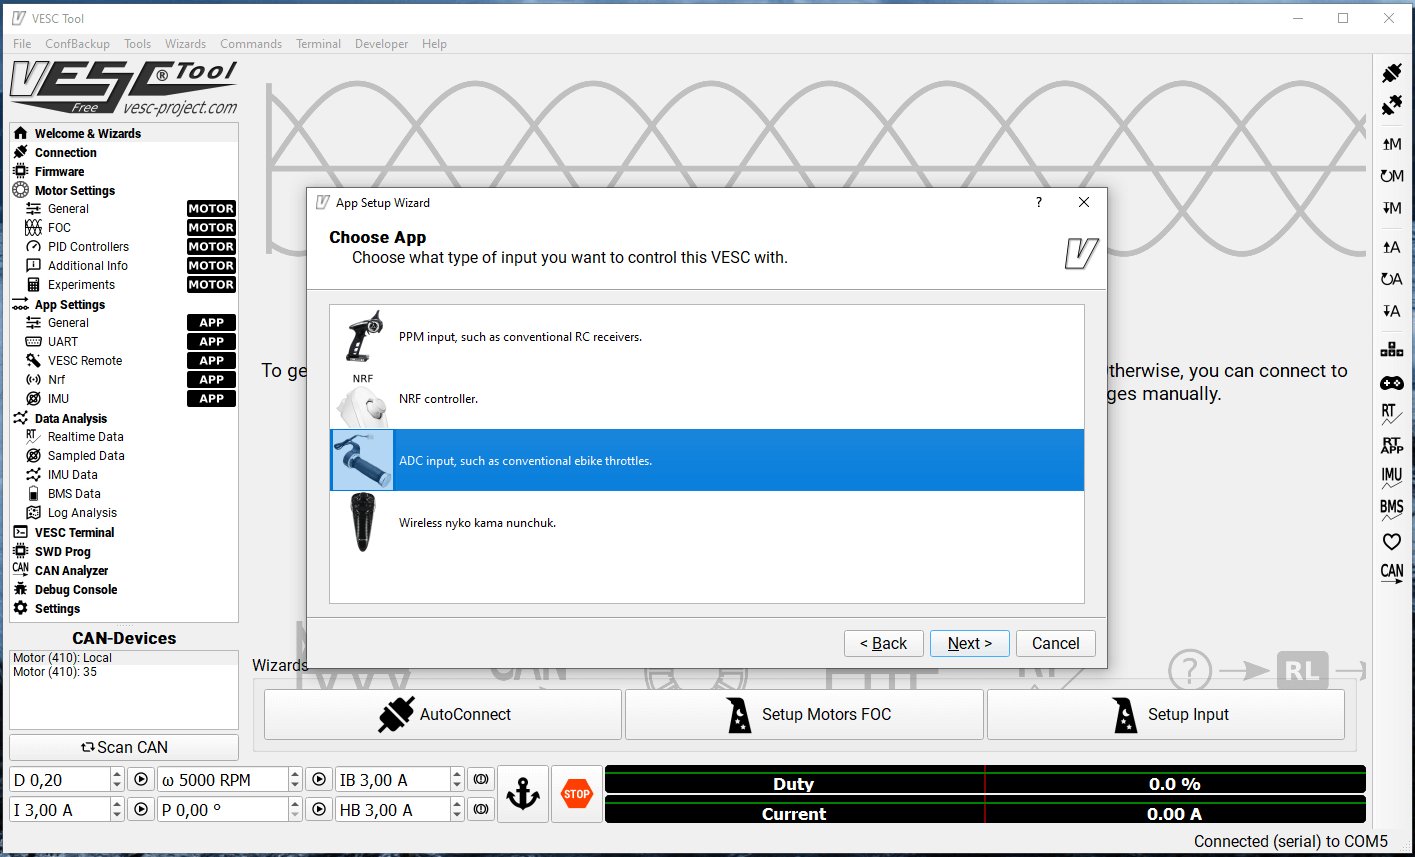
Wiring VESC to Throttle & Brake lever
Here please FOCUS, be careful with RED wires ( + voltage ) , one mistake and you can bake some electronic . Please connect wires Exactly the same way like I did.
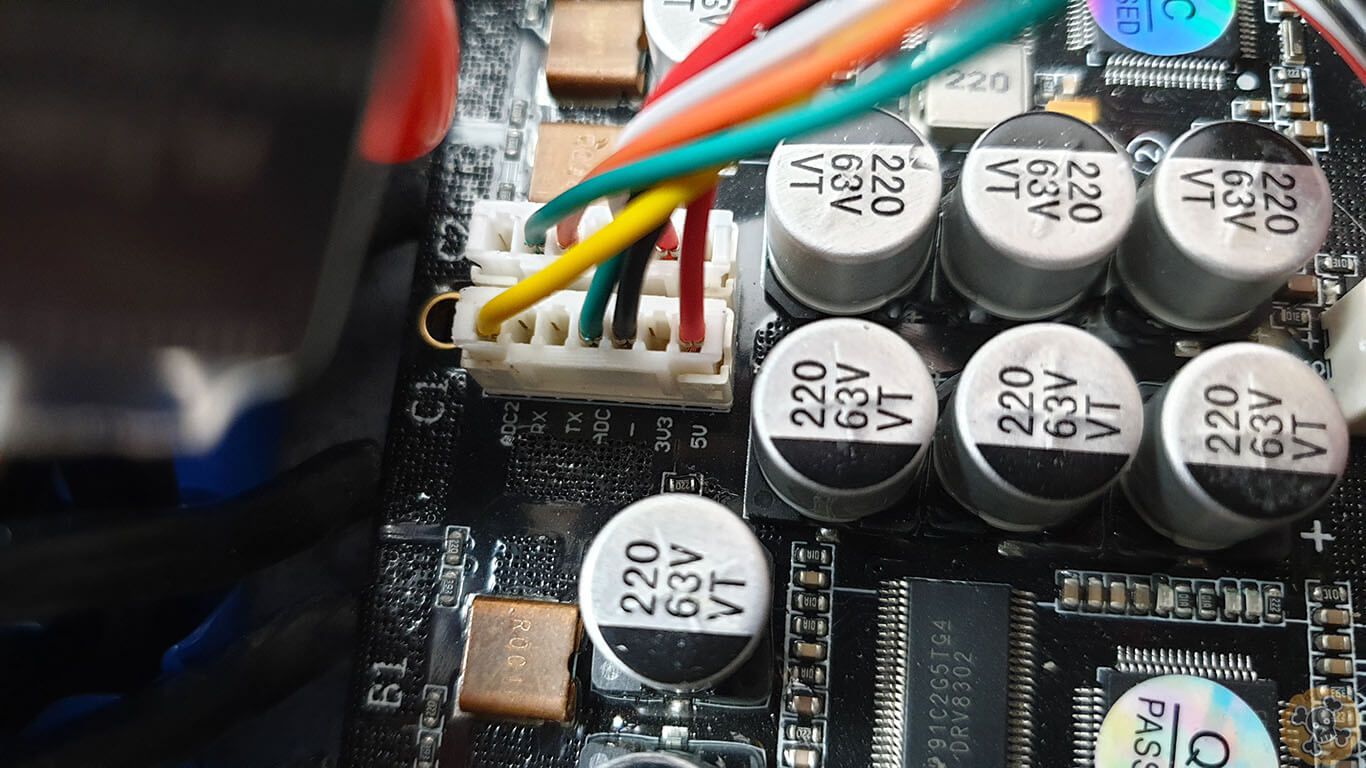
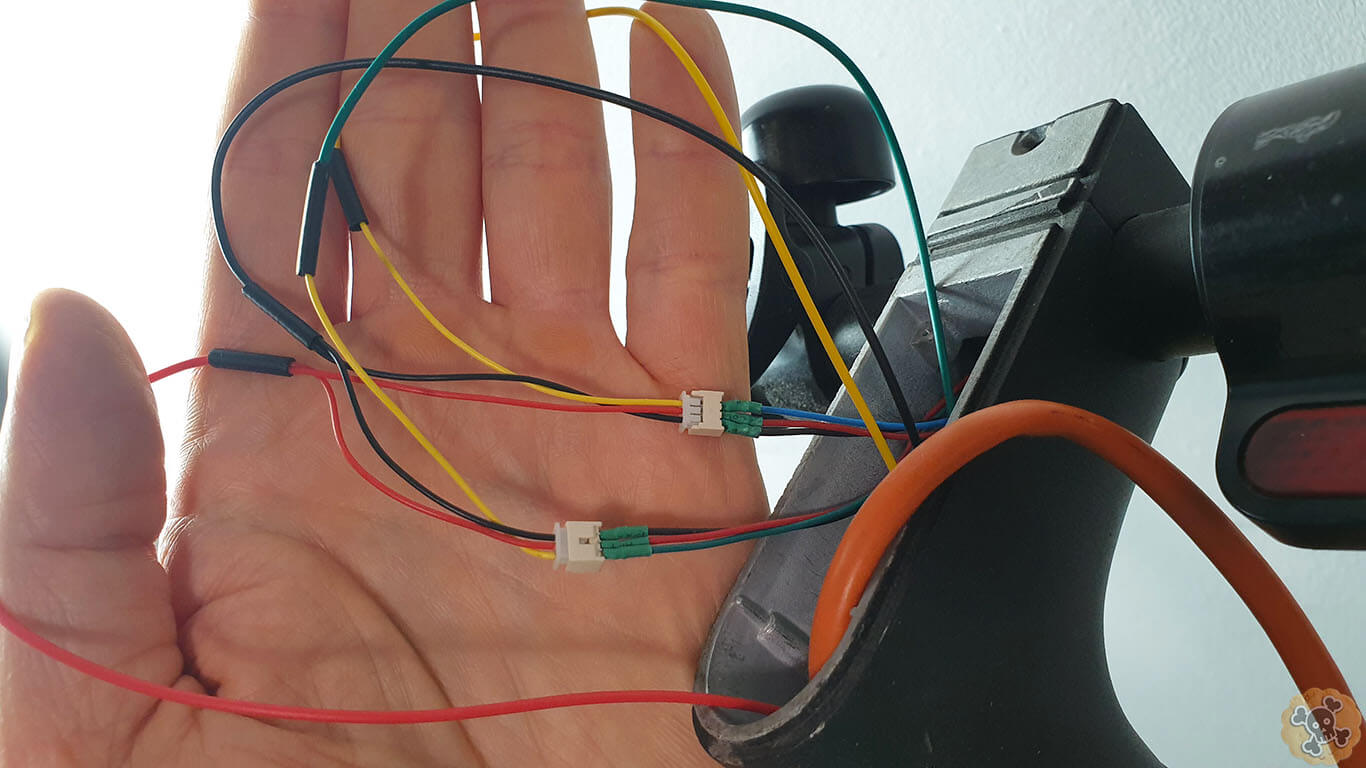
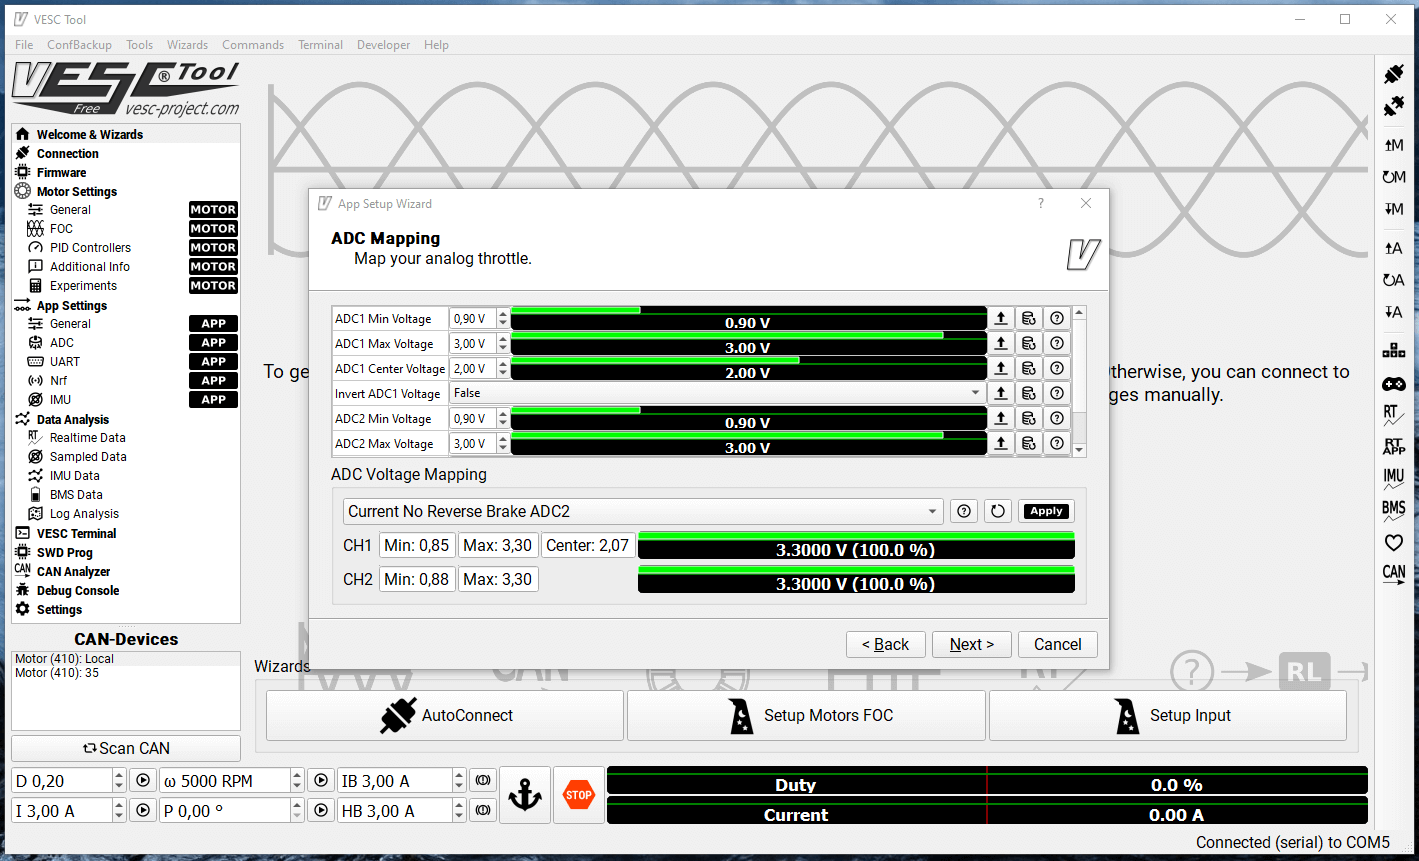
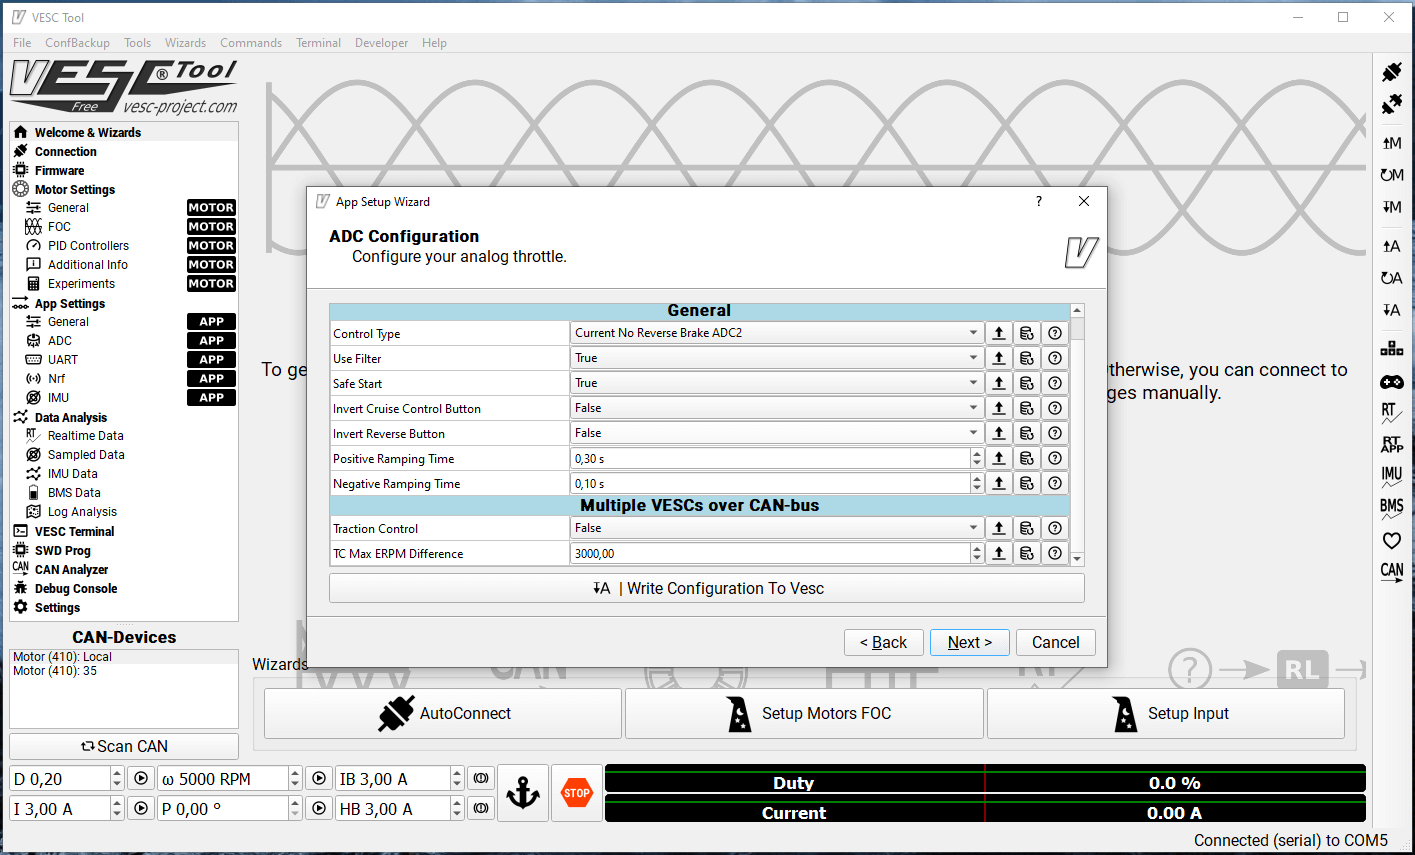
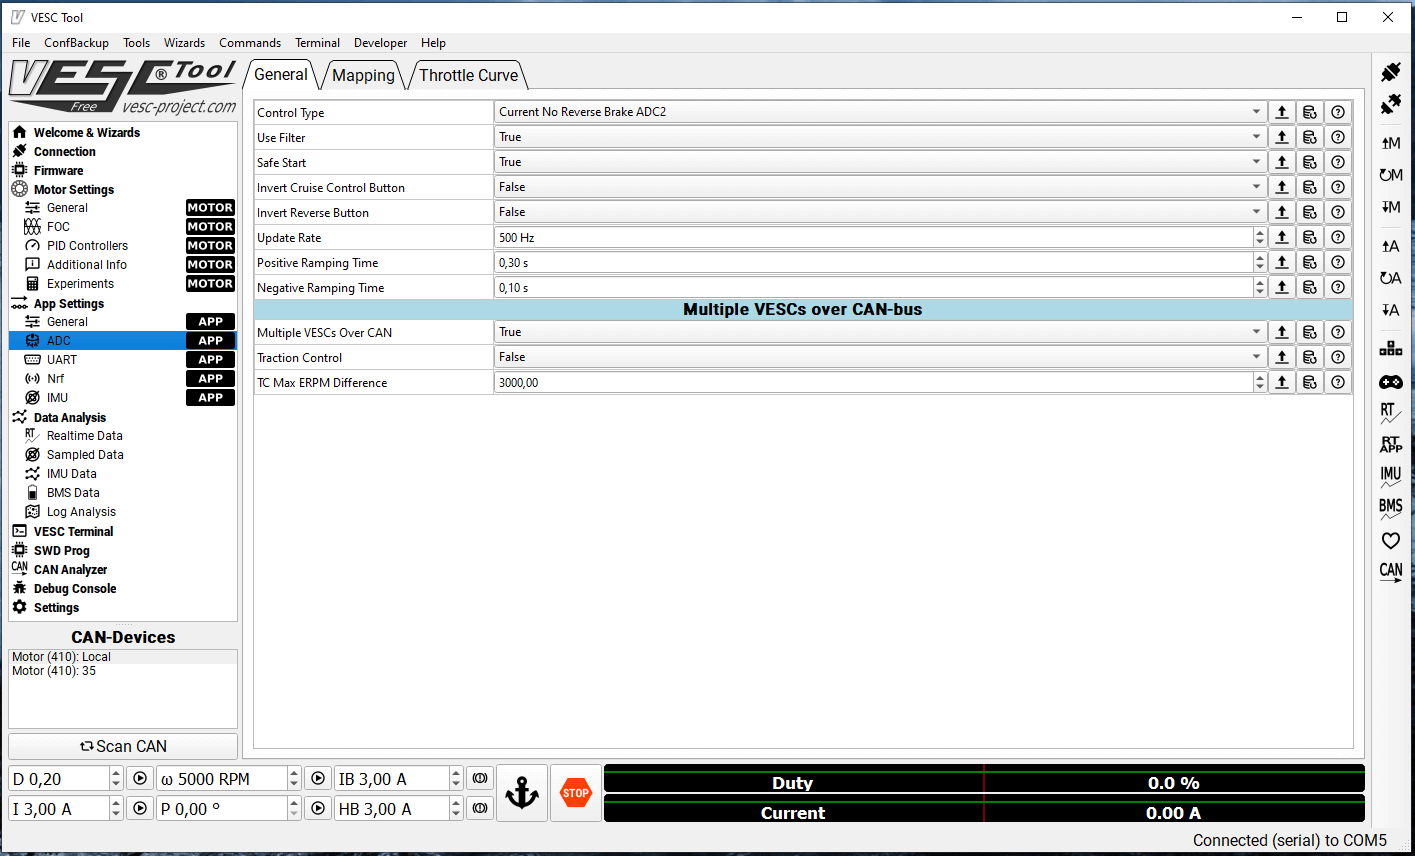
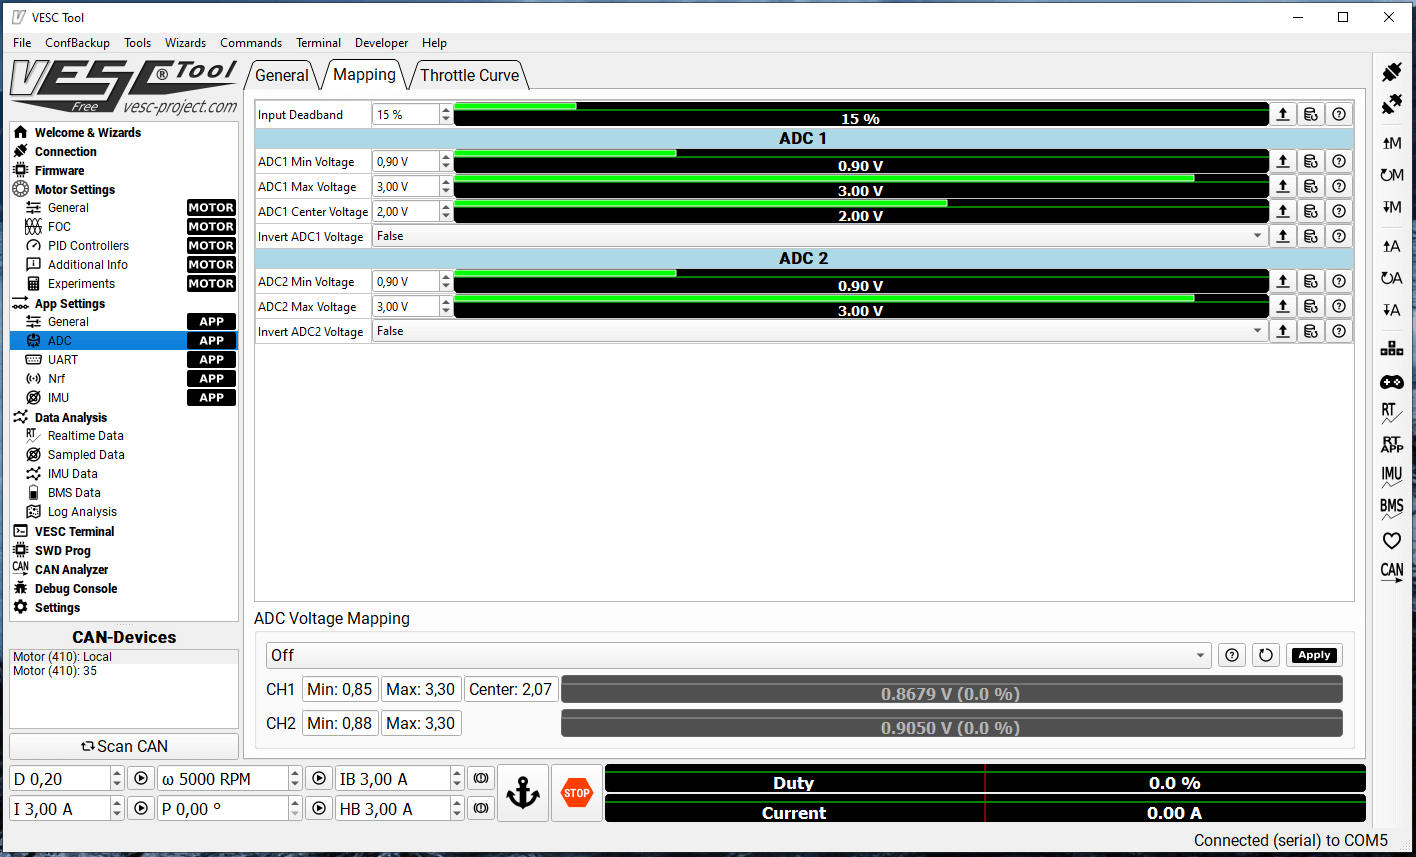
We will use analogue COMM input on VESC called ADC1 / ADC2 , to control brake and throttle ( analogue means that difference in volatge will be measure from 0V to 5V ) . Please connect 4 wires to COMM port as you can see on pic : ADC2 ( Yellow ) / ADC1 ( Green ) / – Ground ( Black ) / +5V ( Red )
Throttle gimbal has 3 wires : Green ( Signal out ) / Black ( GND ) / Red ( 5V ) . Connect Green wire from Throttle Gimbal to ADC1 on COMM port , then Black to Black and Red to Red.
Brake lever has 3 wiress : Blue ( Signal out ) / Black ( GND ) / Red ( 5V ) . Connect Blue wire from Brake lever to ADC2 on COMM port ( in my case extended wire has yellow color ), then Black to Black and Red to Red.
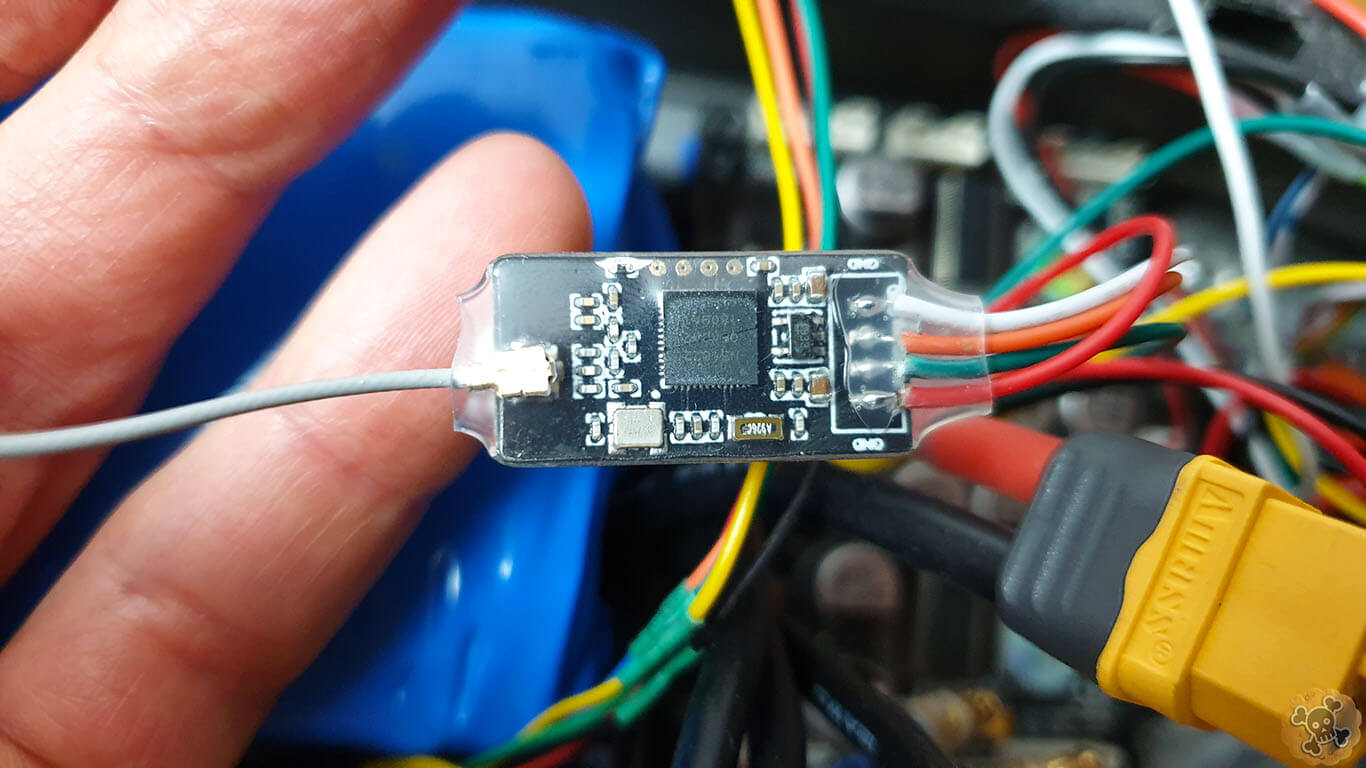
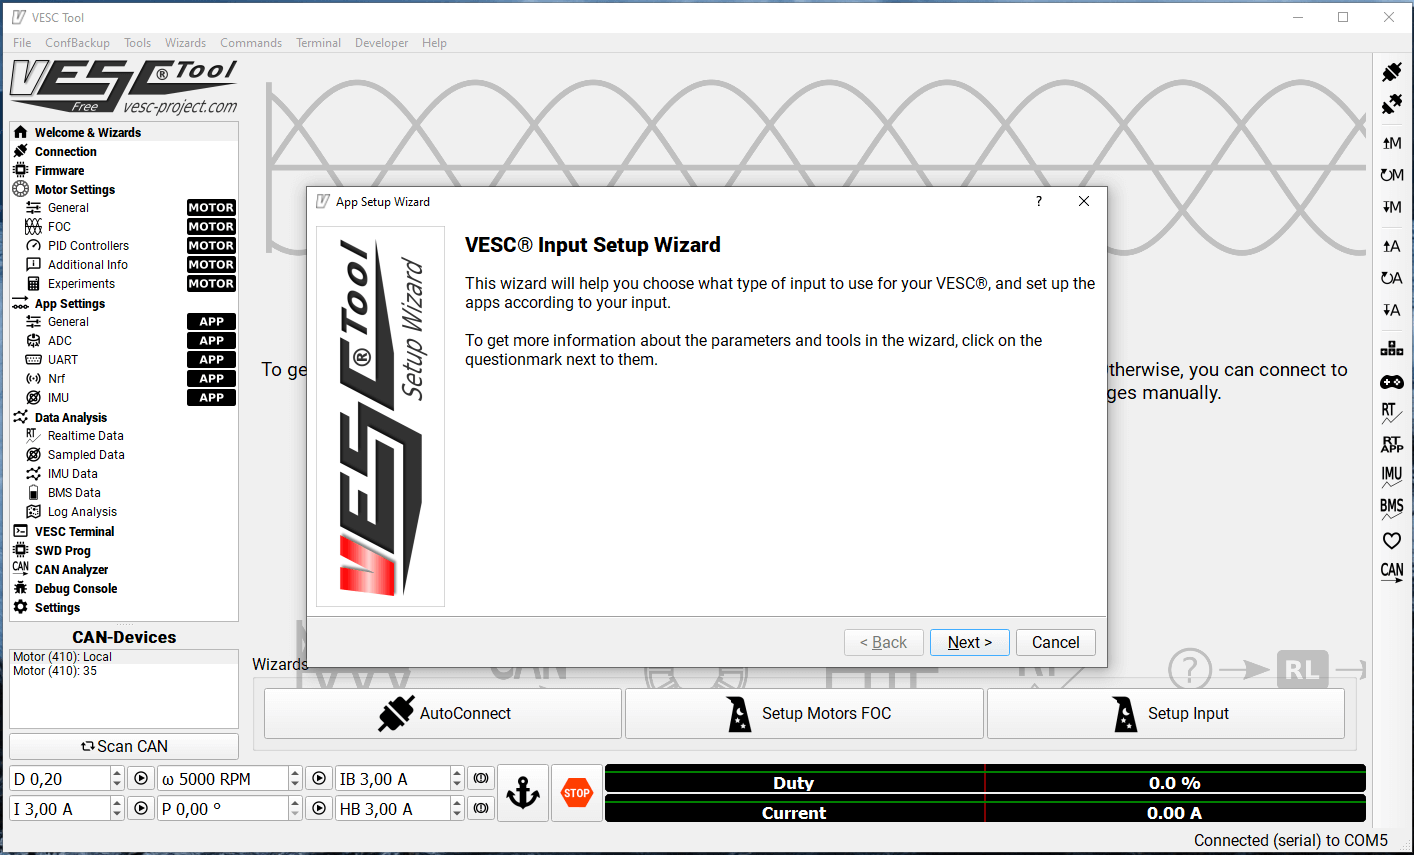
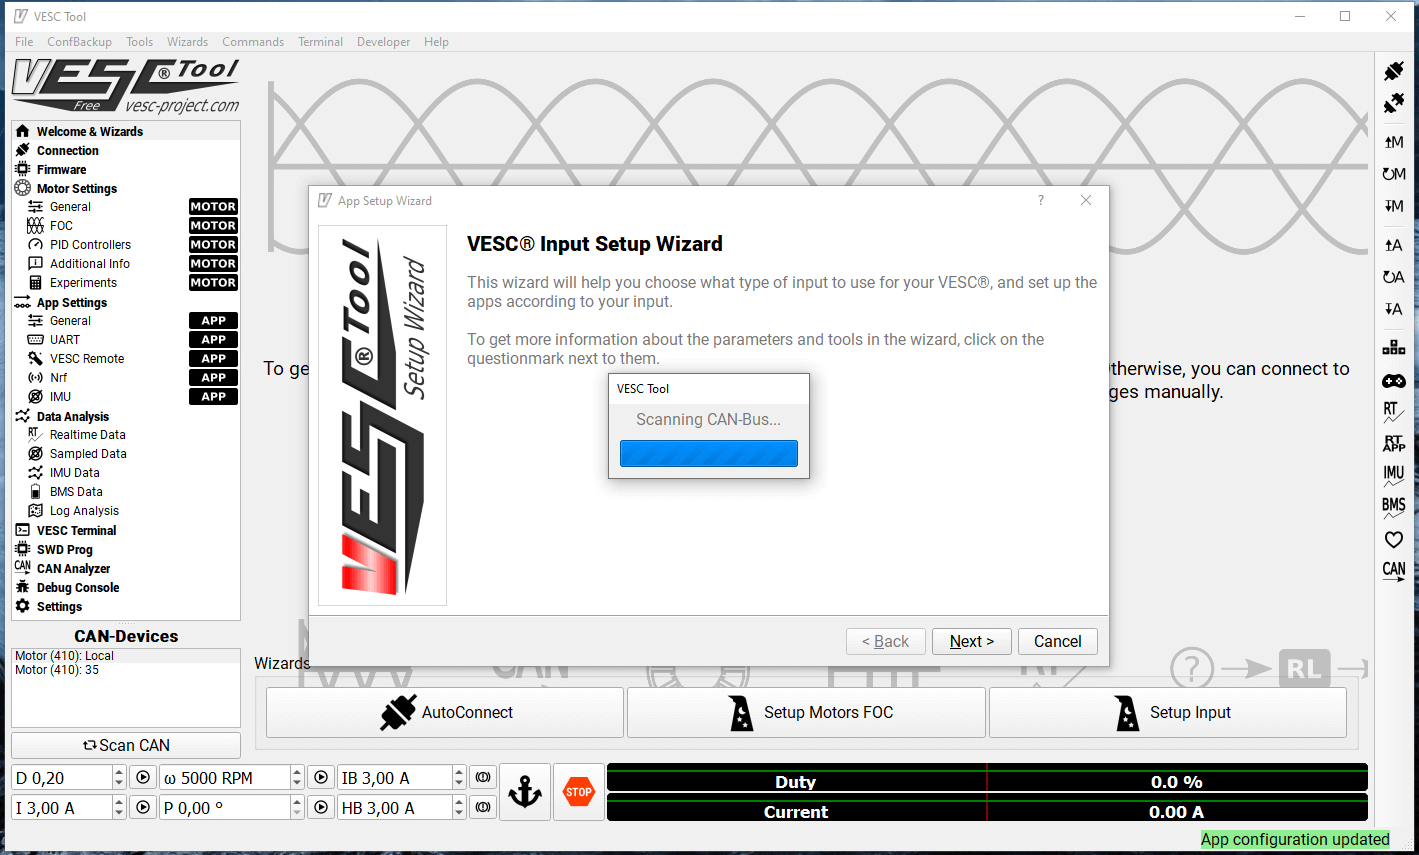
Adding Bluetooth to Vesc
This pretty straightforward , just connect BT module to COMM port and it’s done. Worth to mention is that BT module for Vesc 4.20 and 6.6 has a bit different connector , if U buy wrong then no worries just switch wires on BT connector
Battery pack
13S5P for Max speed
—-soon—-
12S5P for true Sleeper
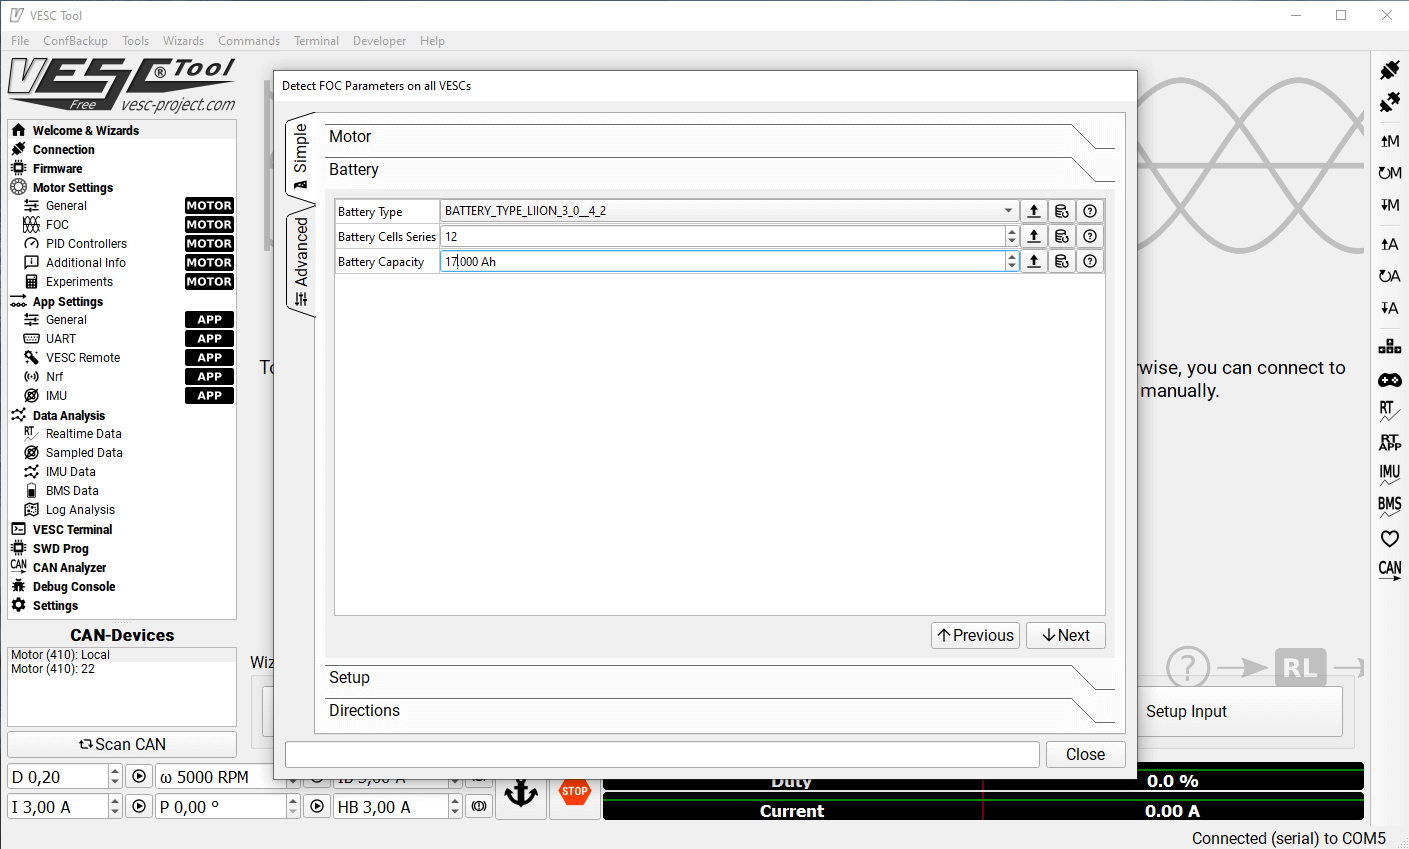
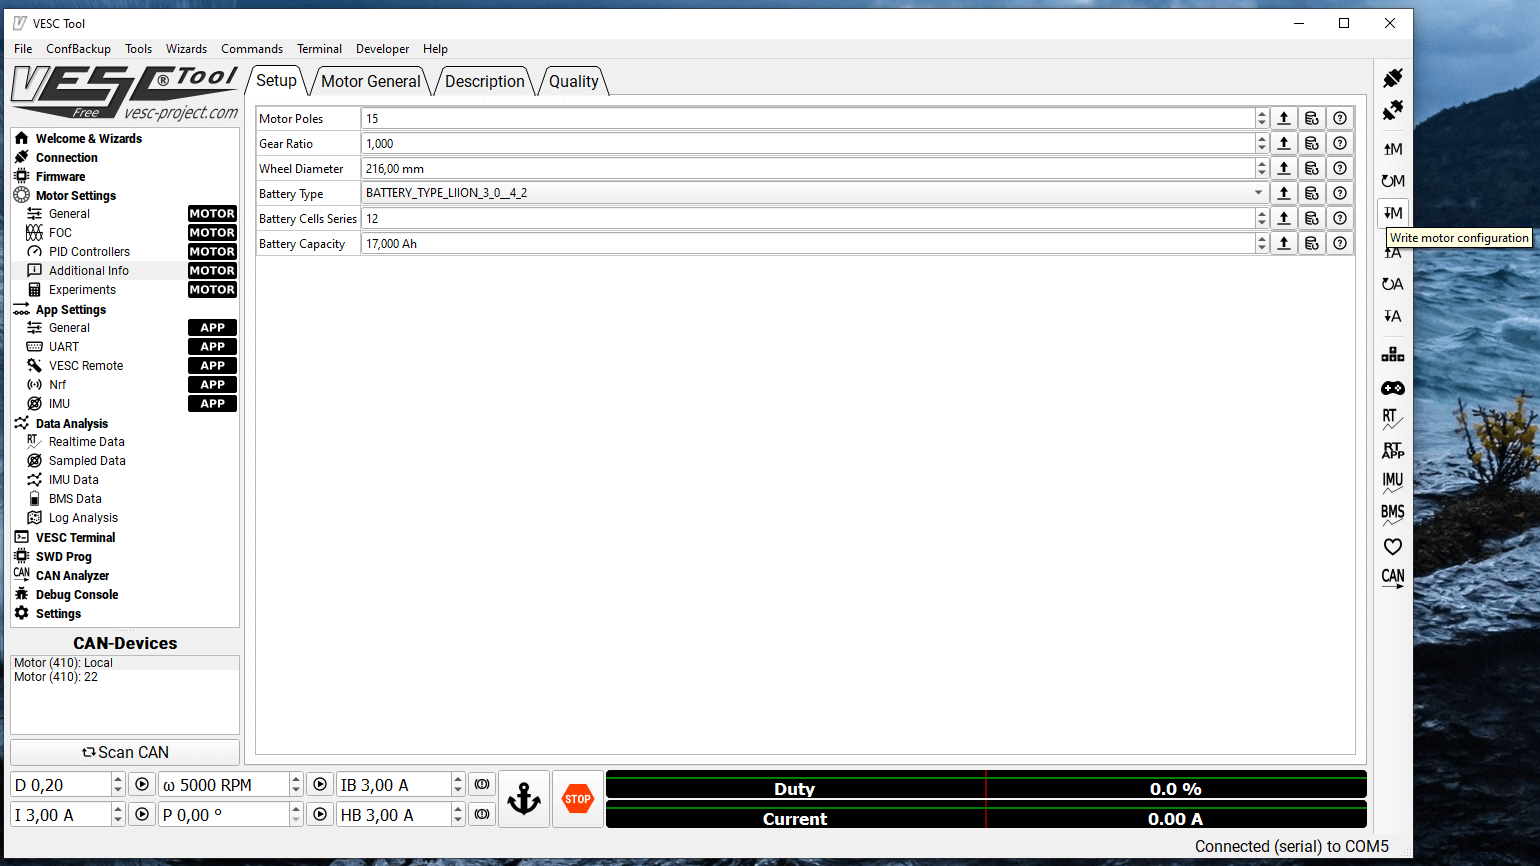
If you woud like to build true Sleeper then you have to make it look like stock, so controllers and battery need to built inside the deck. I do recommend to make 12S battery pack so 12s = ( 12x 3.7V one LI-IONcell = 44,4V ) , When fully charged 12s = 12×4.2V= 50,4V . Here is quite importnat thing, if you use battery with higher voltage then motor will rotate faster so you can go faster.
What is the Kv rating of an electric motor?
Answer: “Kv” refers to the constant velocity of a motor (not to be confused with “kV,” the abbreviation for kilovolt). It is measured by the number of revolutions per minute (rpm) that a motor turns when 1V (one volt) is applied with no load attached to that motor. The Kv rating of a brushless motor is the ratio of the motor’s unloaded rpm to the peak voltage on the wires connected to the coils.
Knowing the Kv rating of a motor will help you determine how fast that motor will rotate when a given voltage is applied to it. For example, a 980Kv motor powered by an 11.1V battery would spin at 10,878 rpm (980 x 11.1) with no load. A change in voltage will change the rpm and will require changing the propeller to avoid overloading the motor. Kv allows you to get a handle on the torque that can be expected from a particular motor. Torque is determined by the number of winds on the armature and the strength of the magnets. A low Kv motor has more winds of thinner wire—it will carry more volts at fewer amps, produce higher torque, and swing a bigger prop. A high Kv motor has fewer winds of thicker wire that carry more amps at fewer volts and spin a smaller prop at high revolutions. Source: www.rotordronepro.com/understanding-kv-ratings
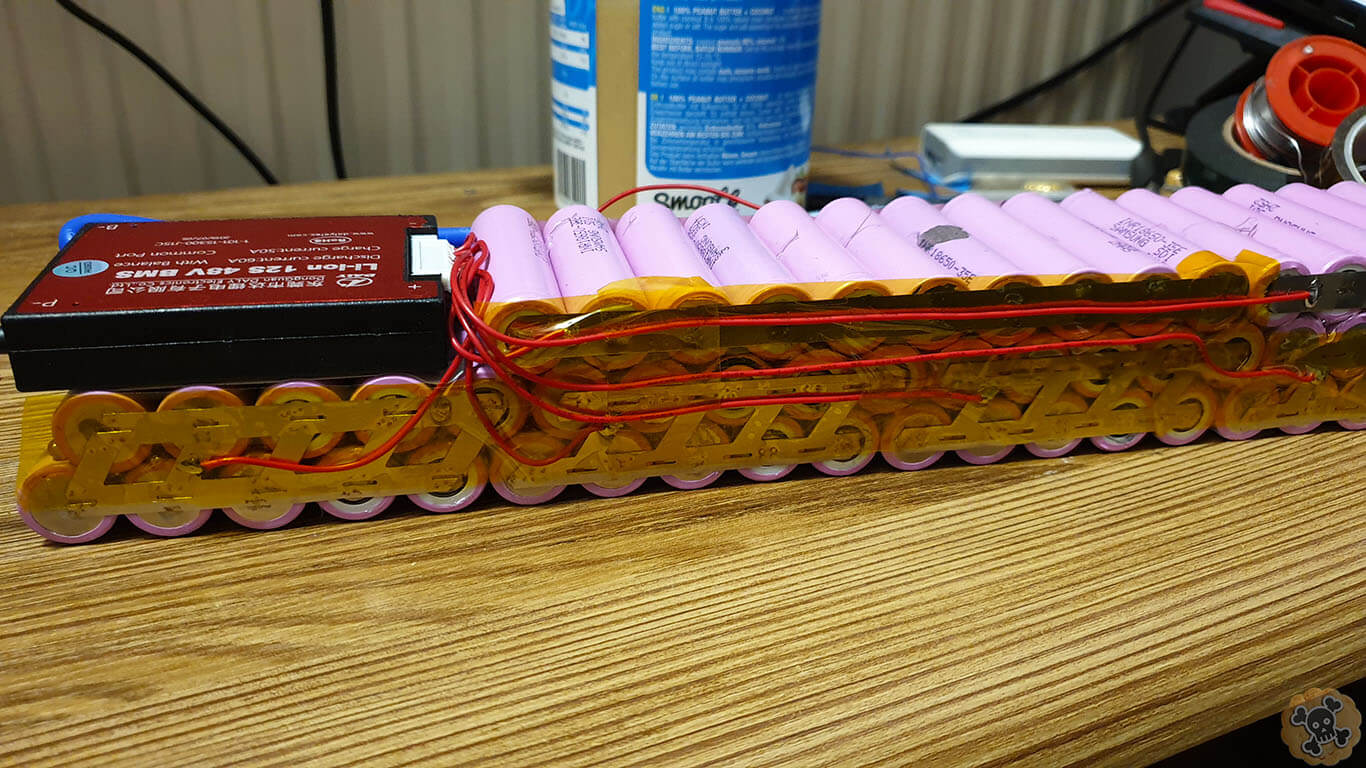
To make my battery pack I used Samsung 35E ( every cell has around 3500mah capacity ) , no of cells is 12s x 5p = 60 cells , 5P means ( 5 cells connected parallel so if one LI IOn cell has 3500mah then 5P x 3500mah = 17 500mah or 17,5AH ) , so battery pack for my sleeper is 44,4V 17,5AH ( we can expect working range 50km+ and speed +-40km/h ) . This is how it looks , we got 3 levels and I been able to fit BMS 60A Delay s.click.aliexpress.com/e/_AtVFeA which I do recommend due to quality , ( choose Common port casue you will have only one line to charge/discharge battery so best option for regenerative braking )
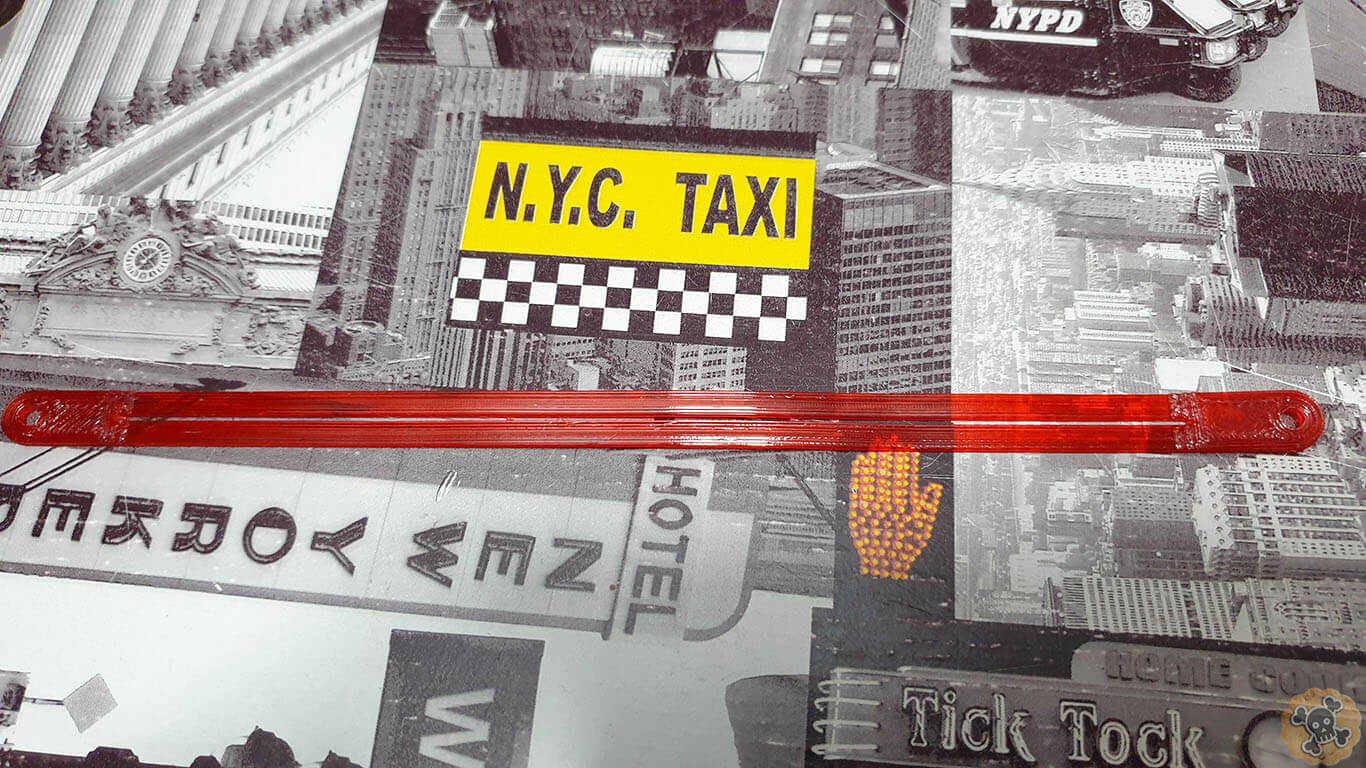
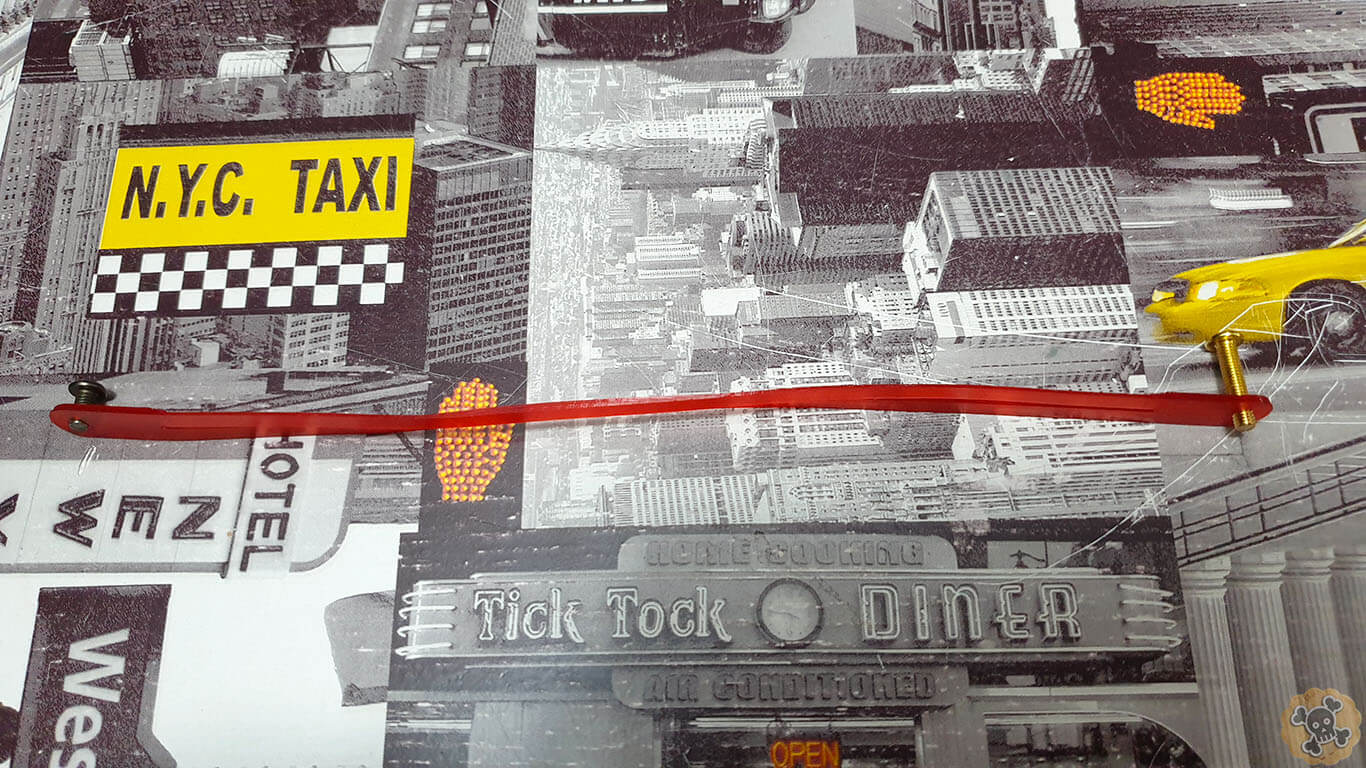
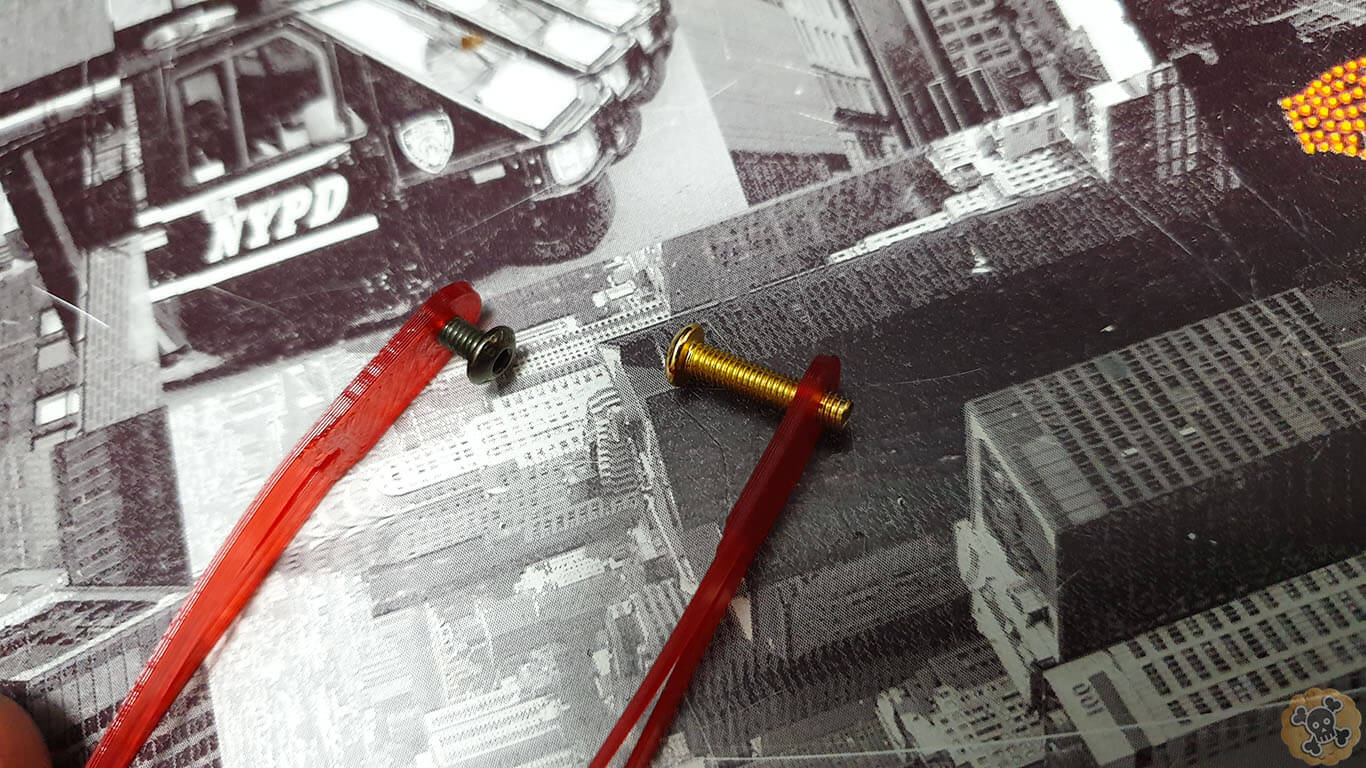
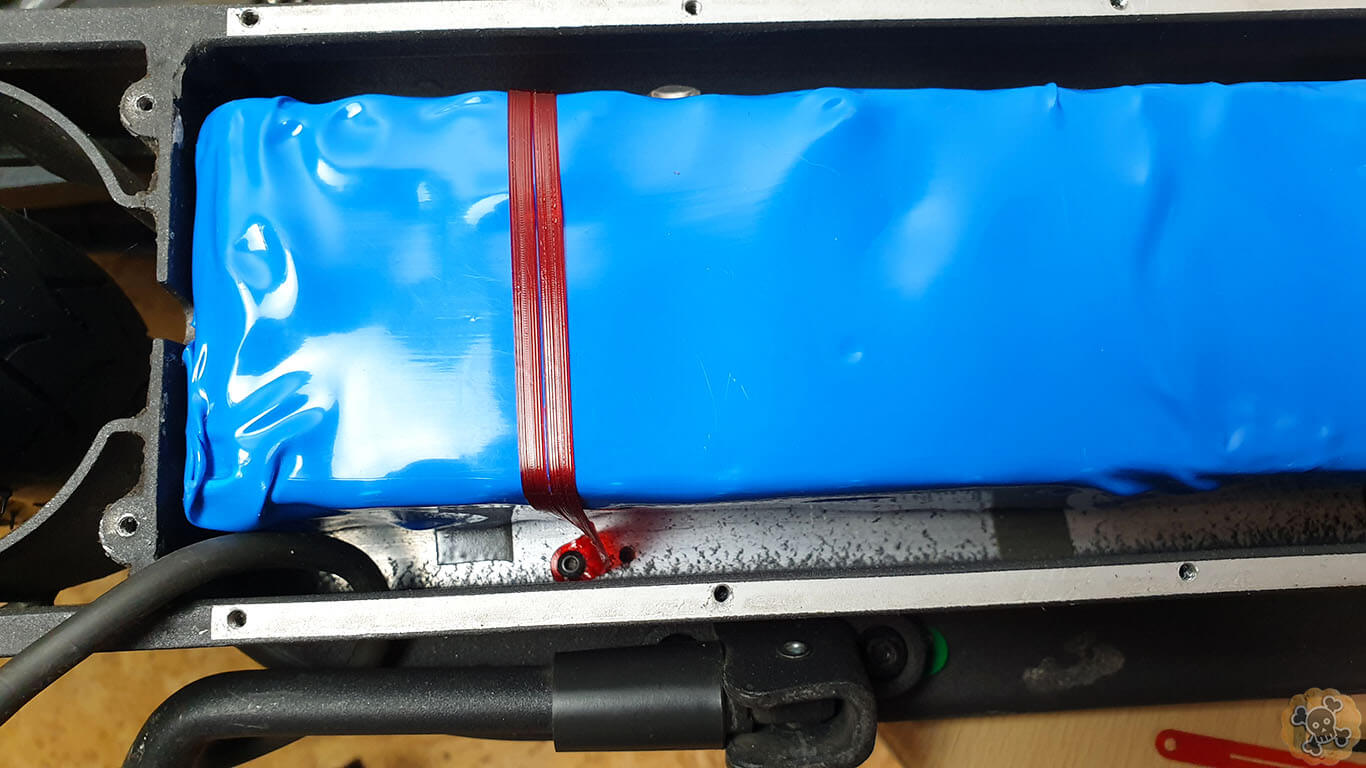
To fix battery pack to the M365 frame I used 2 printed belts and I did 4 holes for M3x8 screws ( Belt project is free for my Patrons , just use TPU filament )
3Level battery is a bit higher then frame so I had to print small spacer, ofcourse this project is free for my patrons ( I recommend flexible TPU filament and printer with bed 300x300mm is needed)
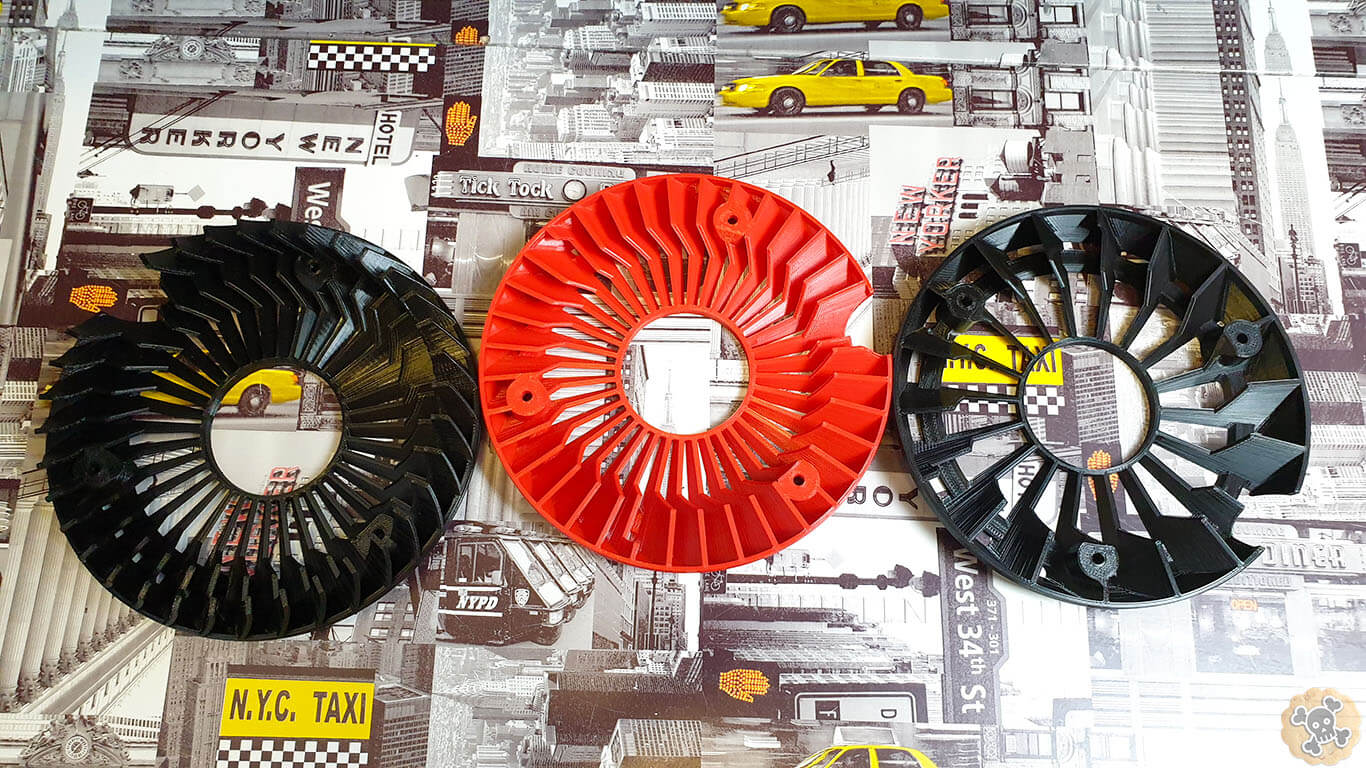
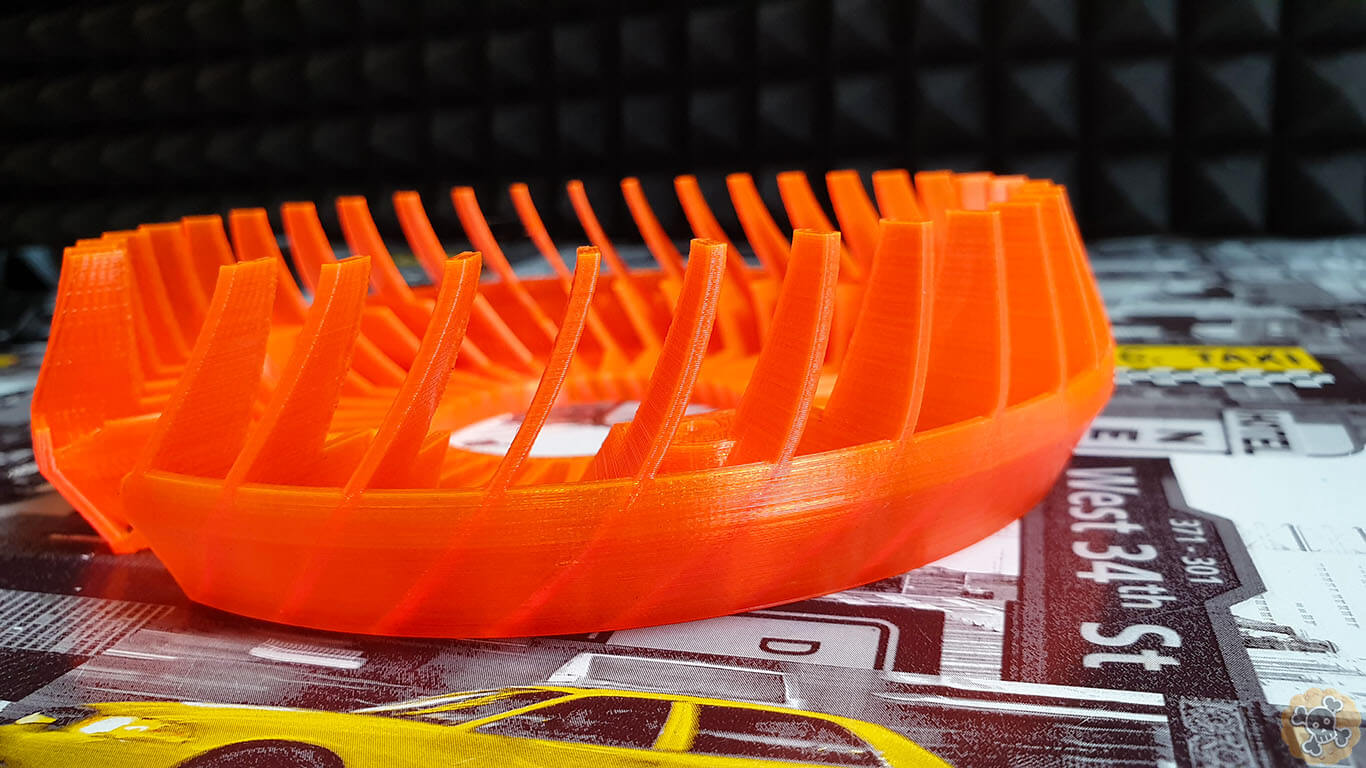
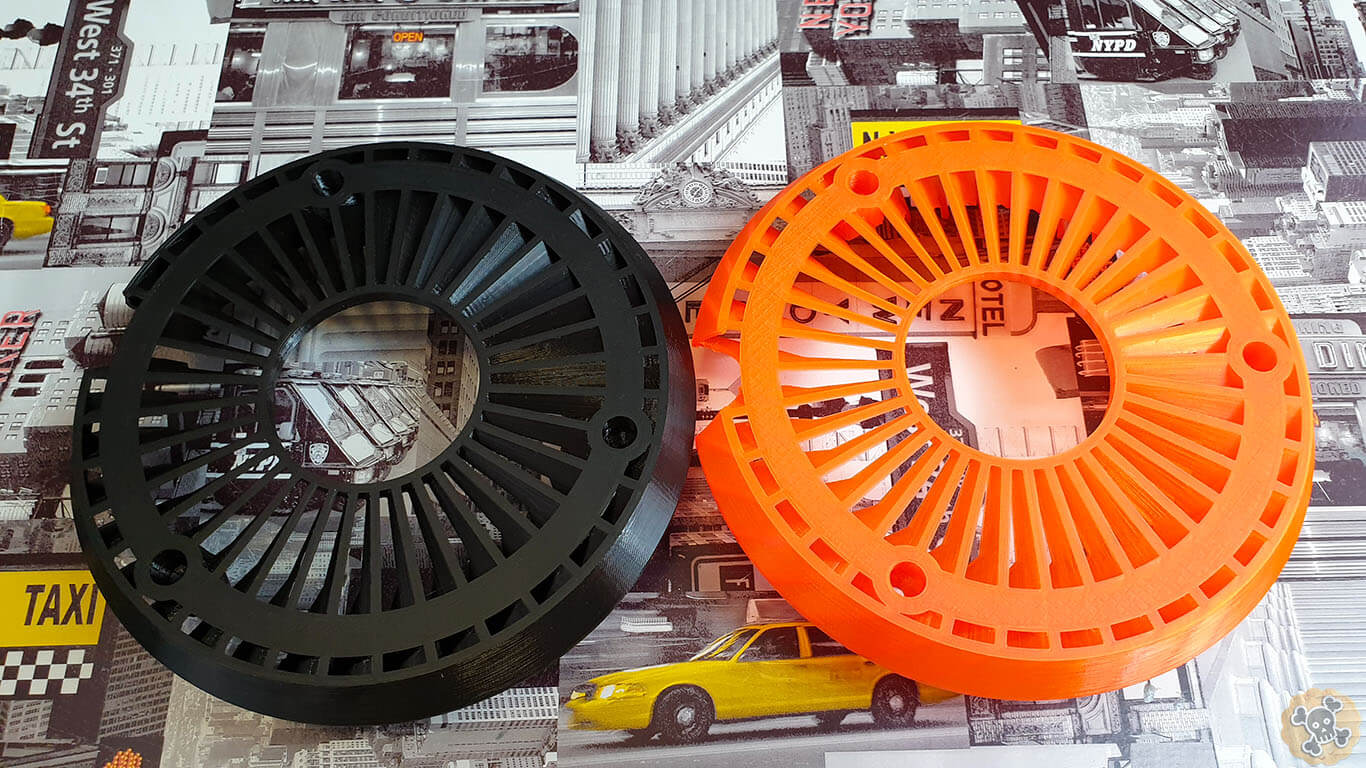
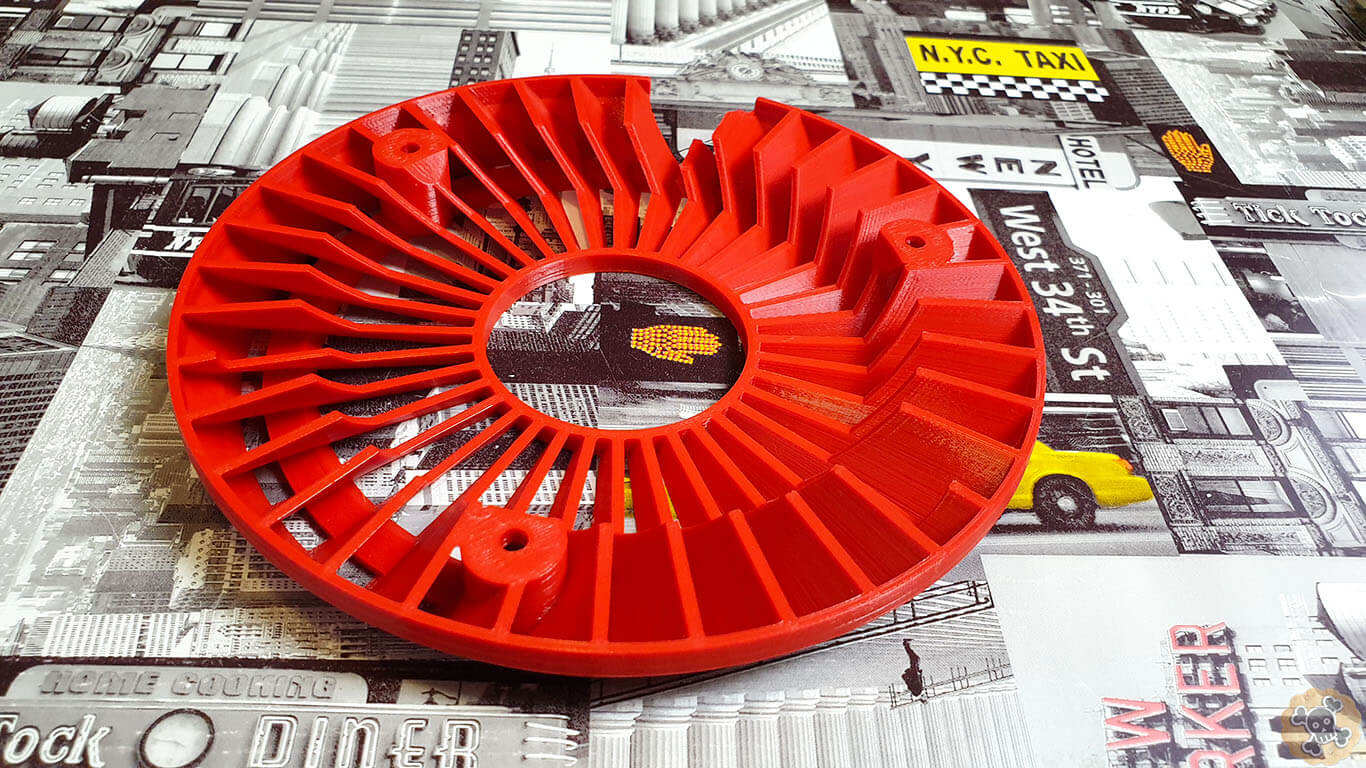
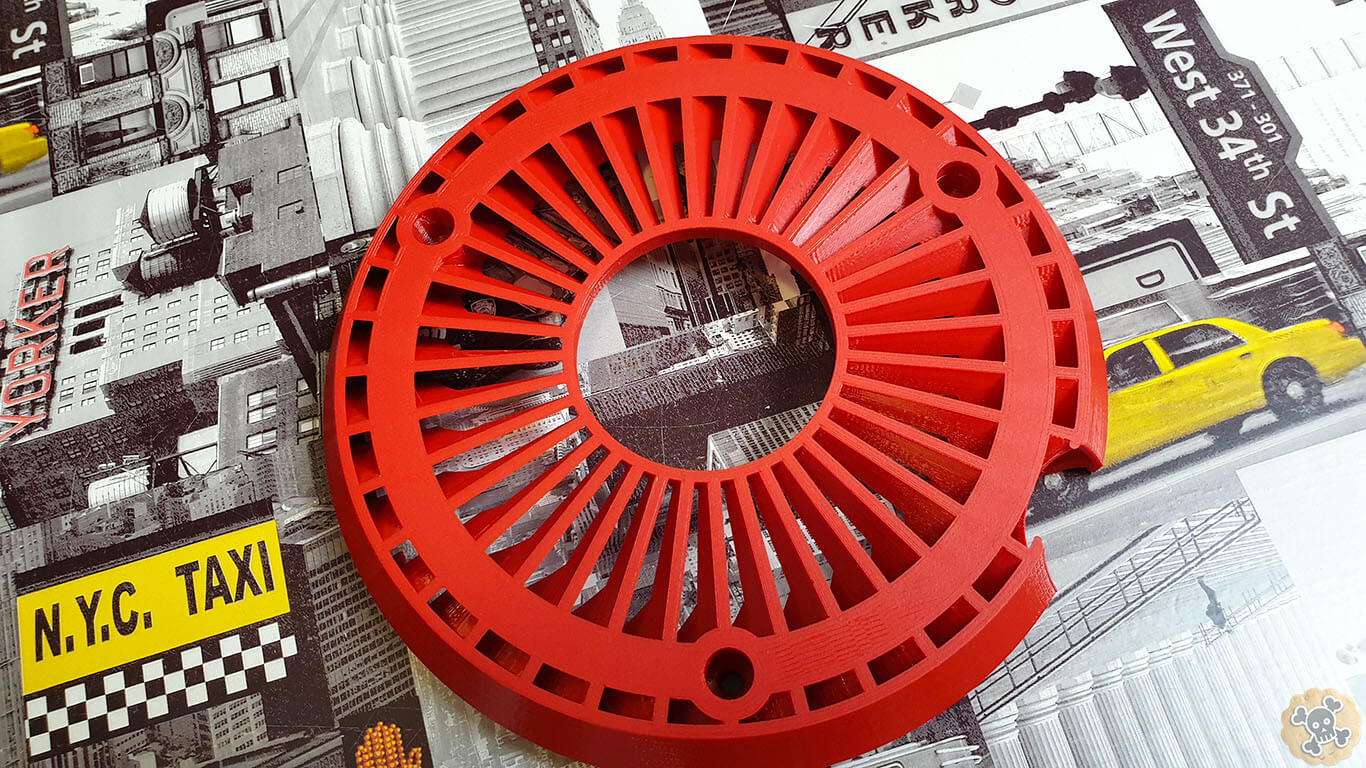
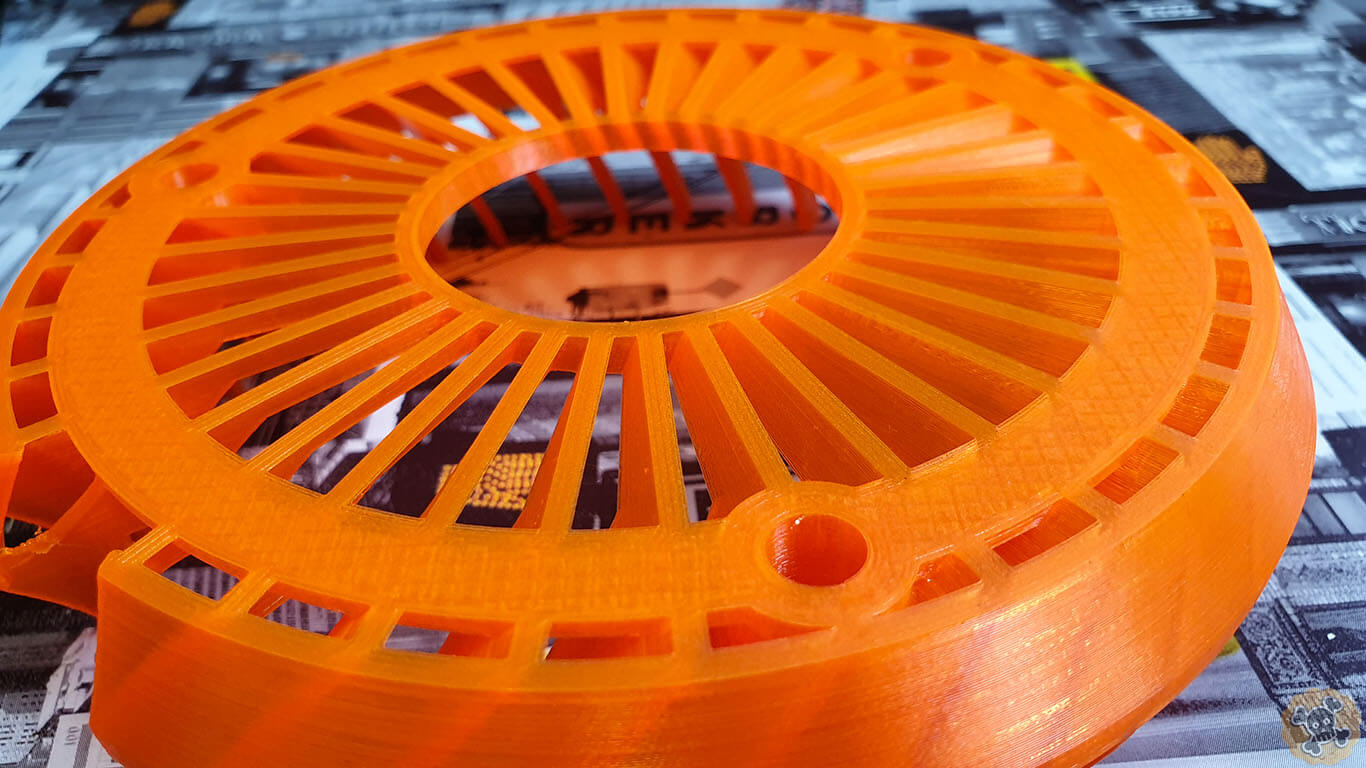
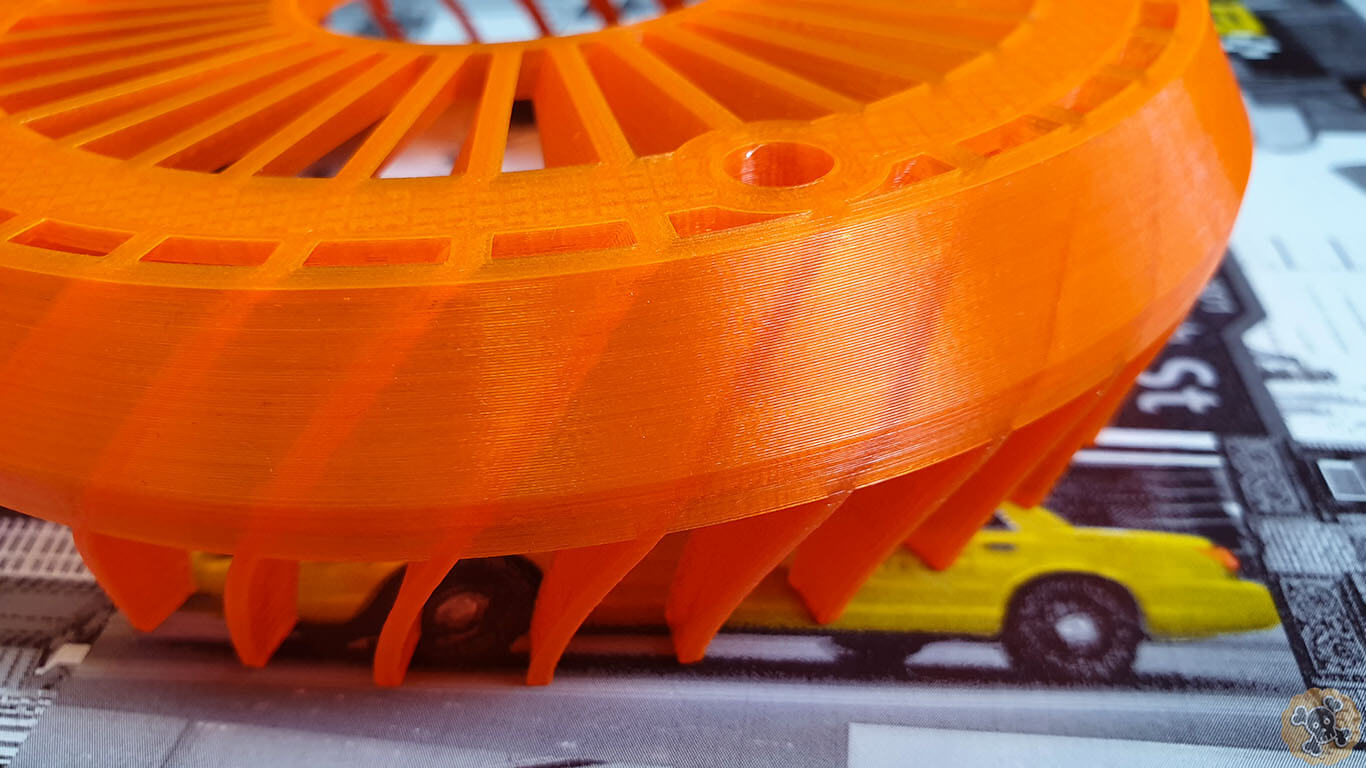
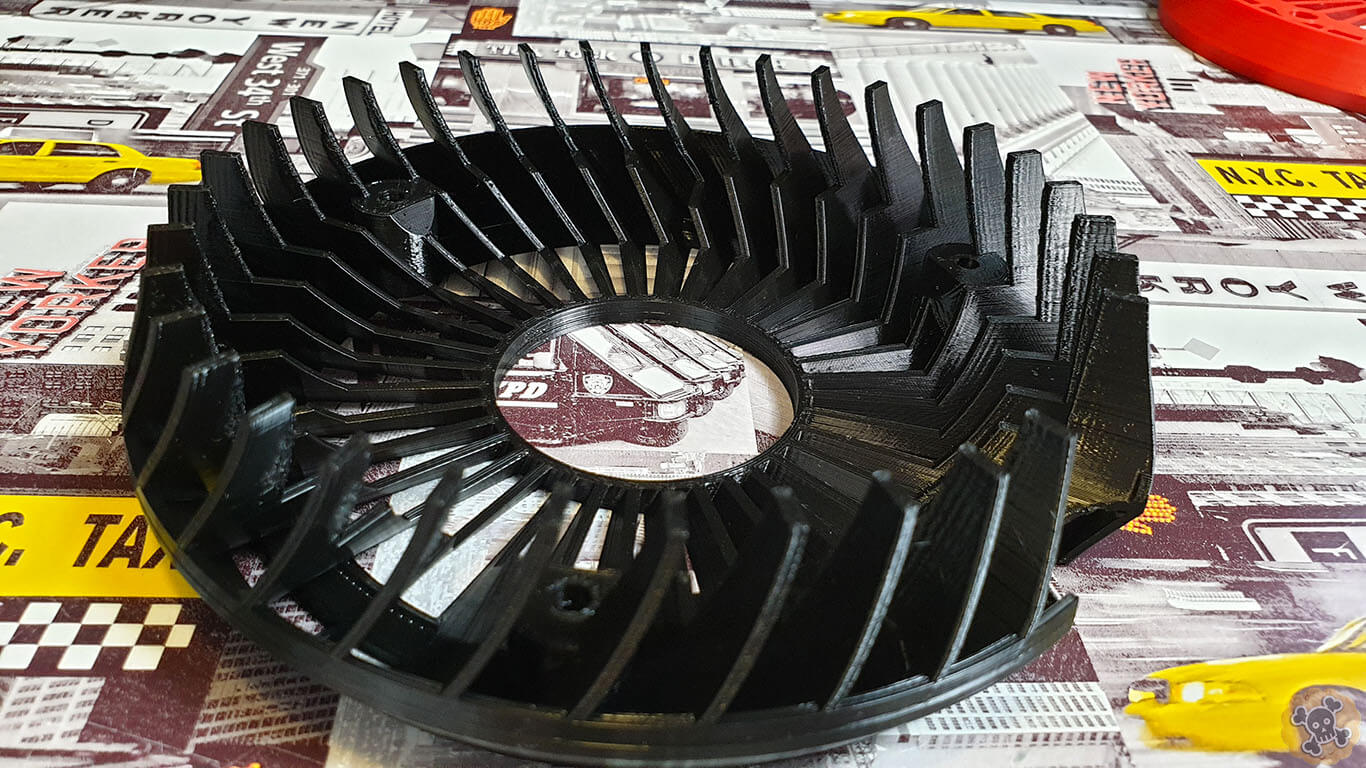
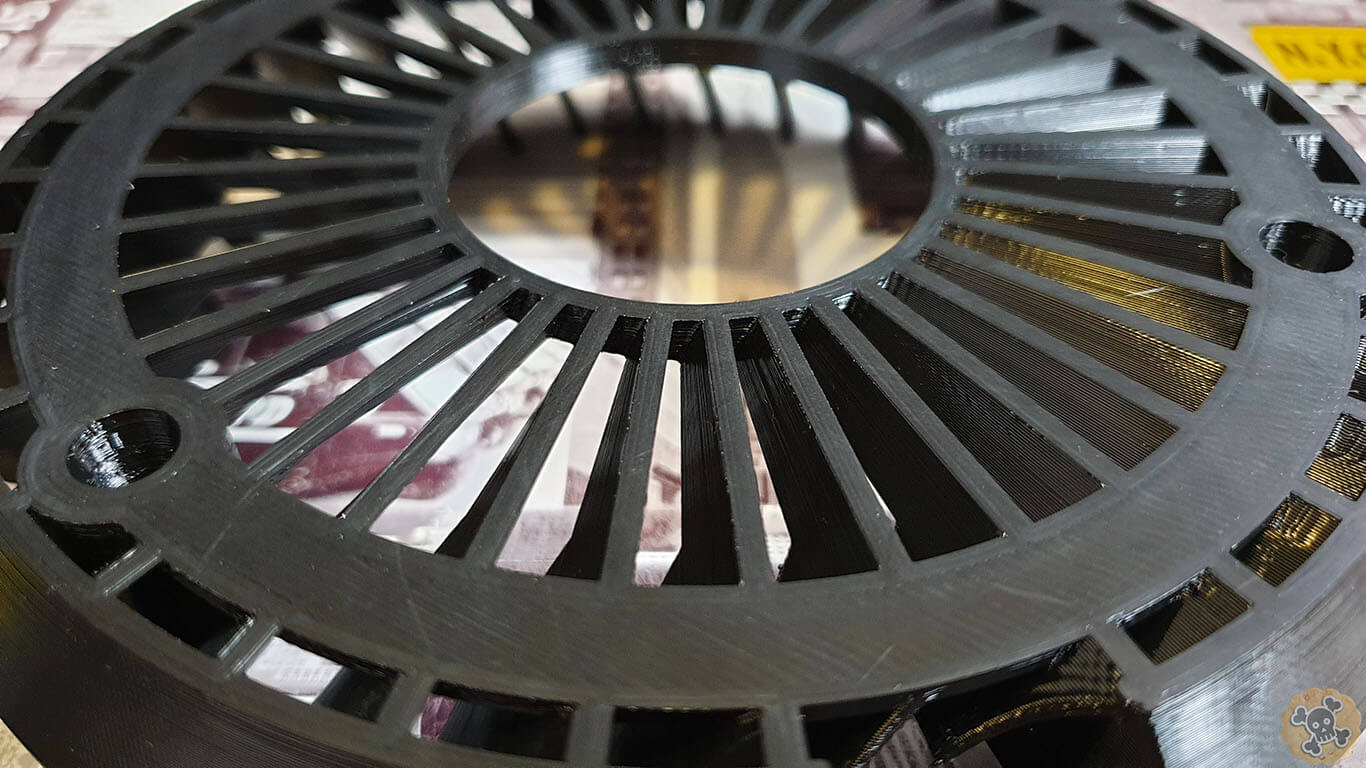
Janobike T85 and Laotie ES18 are really powerful, even after 1 year of use I still got this silly smile when I hit full throttle … and because o this power components heat up. Motors shell can reach sometimes over 85C which means that inside motor is easily over 100C, so if we cool down the motor shell to even 80C from 85C then inside motor temp will be also way lower.
That is why I designed coolers, after many months of testing no more problems with overheating motor , even after some crazy ride I can hold my hand on motor shell where it was not possible to do it without cooler. Now temperatures with coolers are around 60C compare o 75C+ without cooler 🙂 !
Ofcourse lower temp. will extend life span of the motor but no surprise here ?
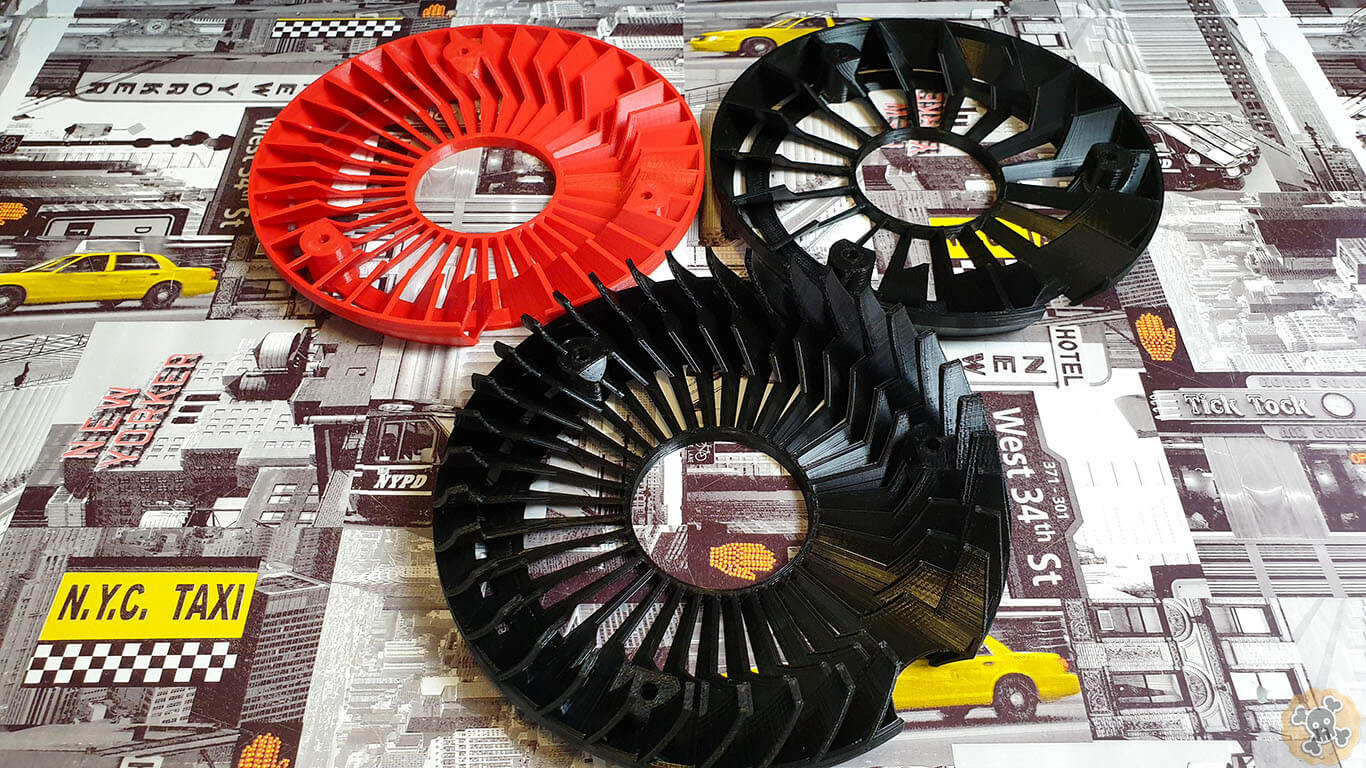
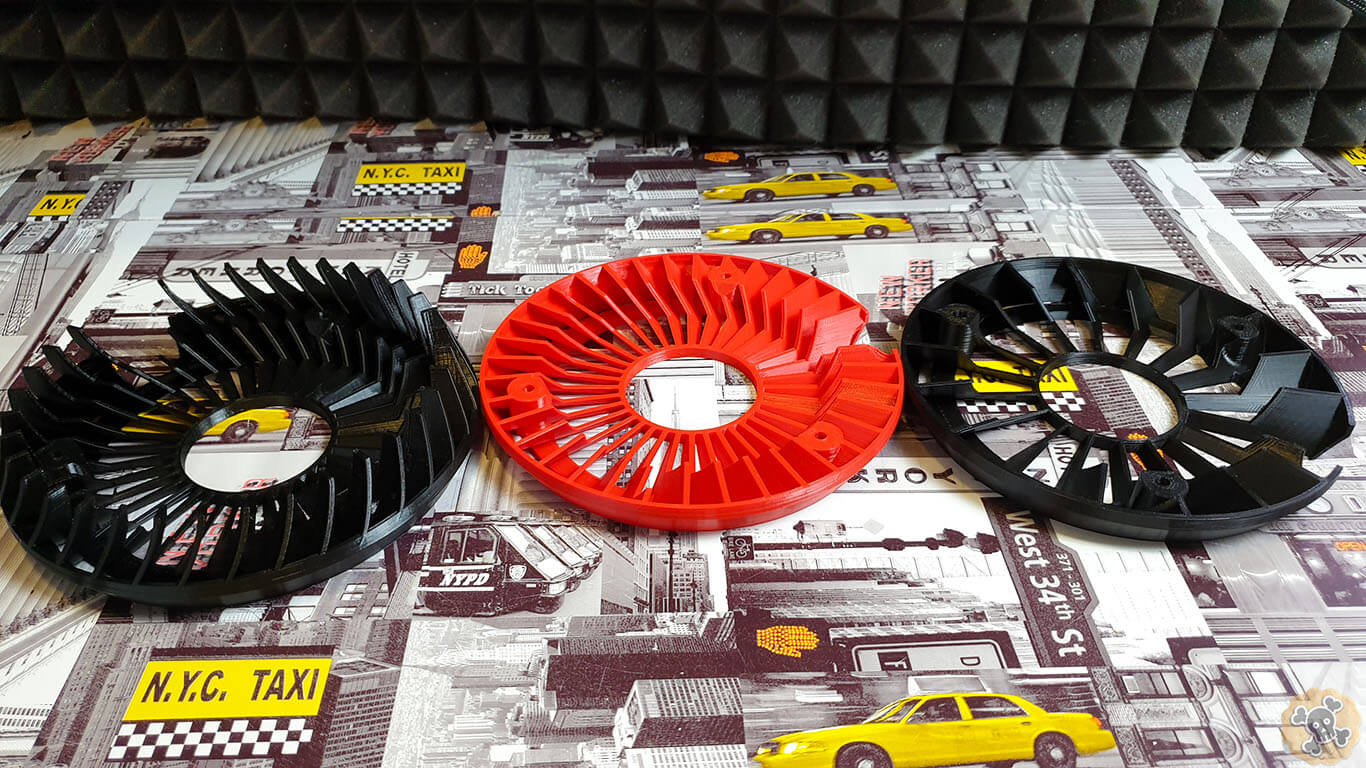
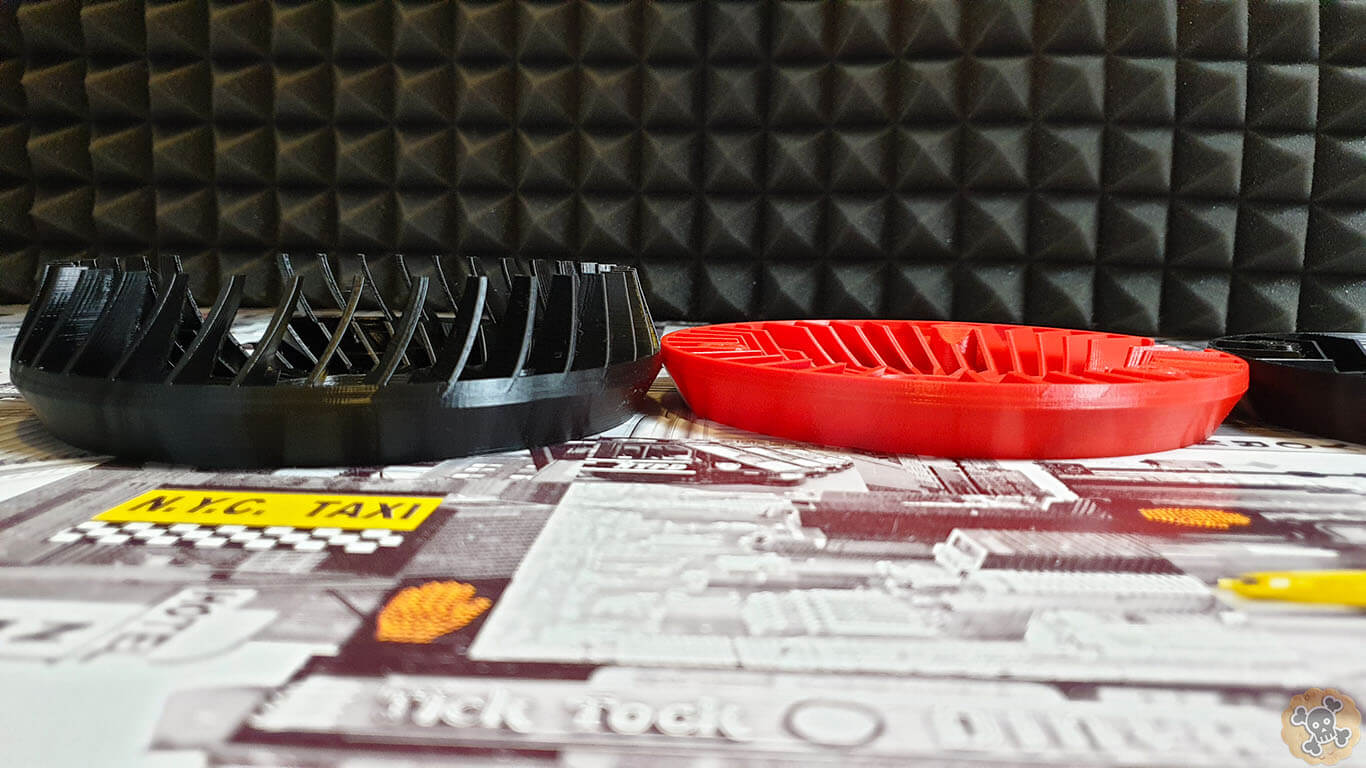
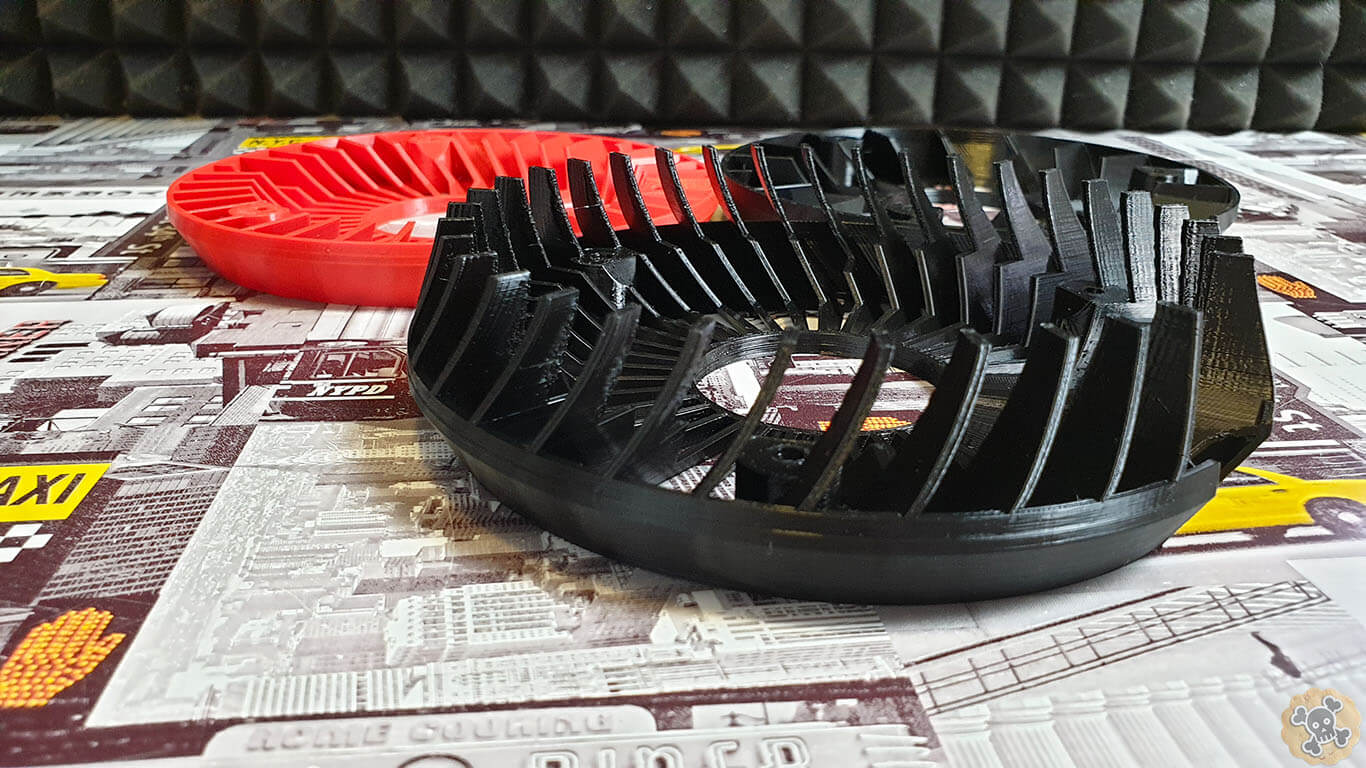
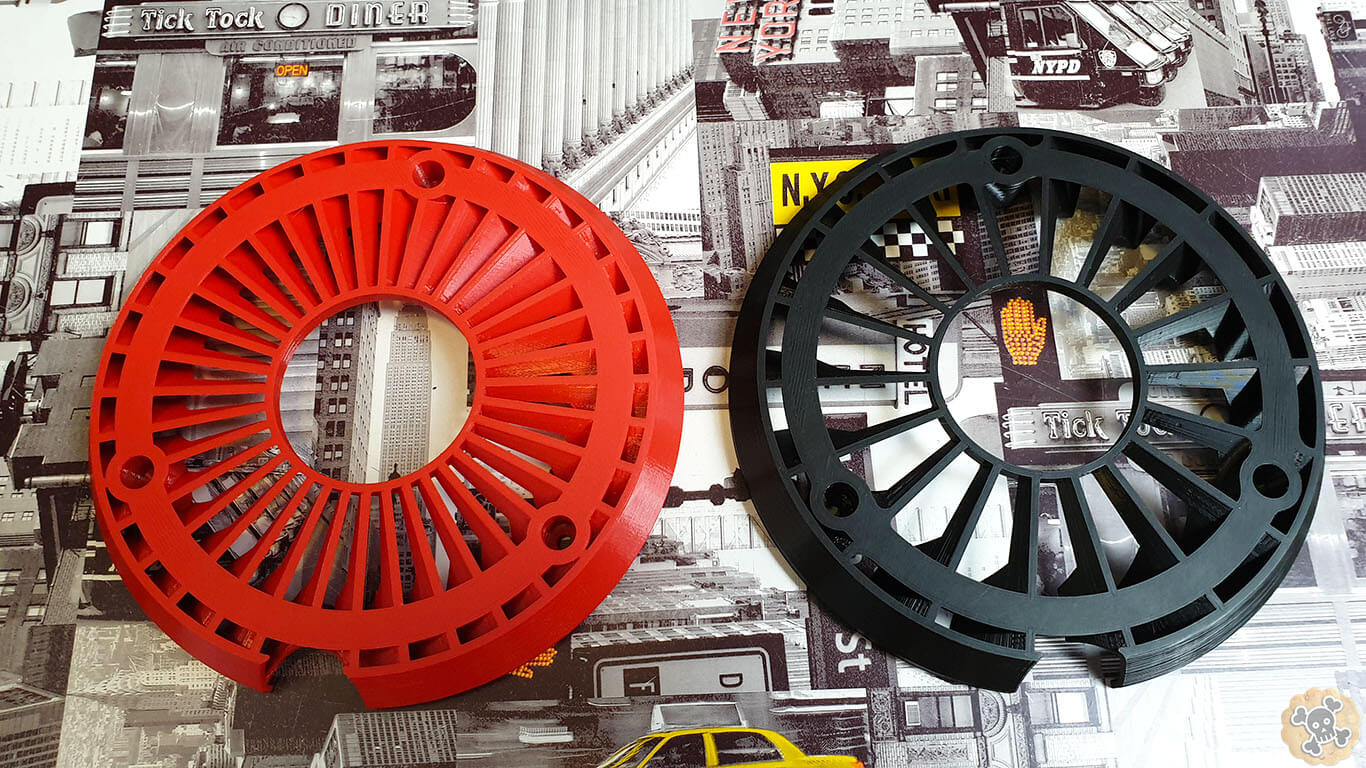
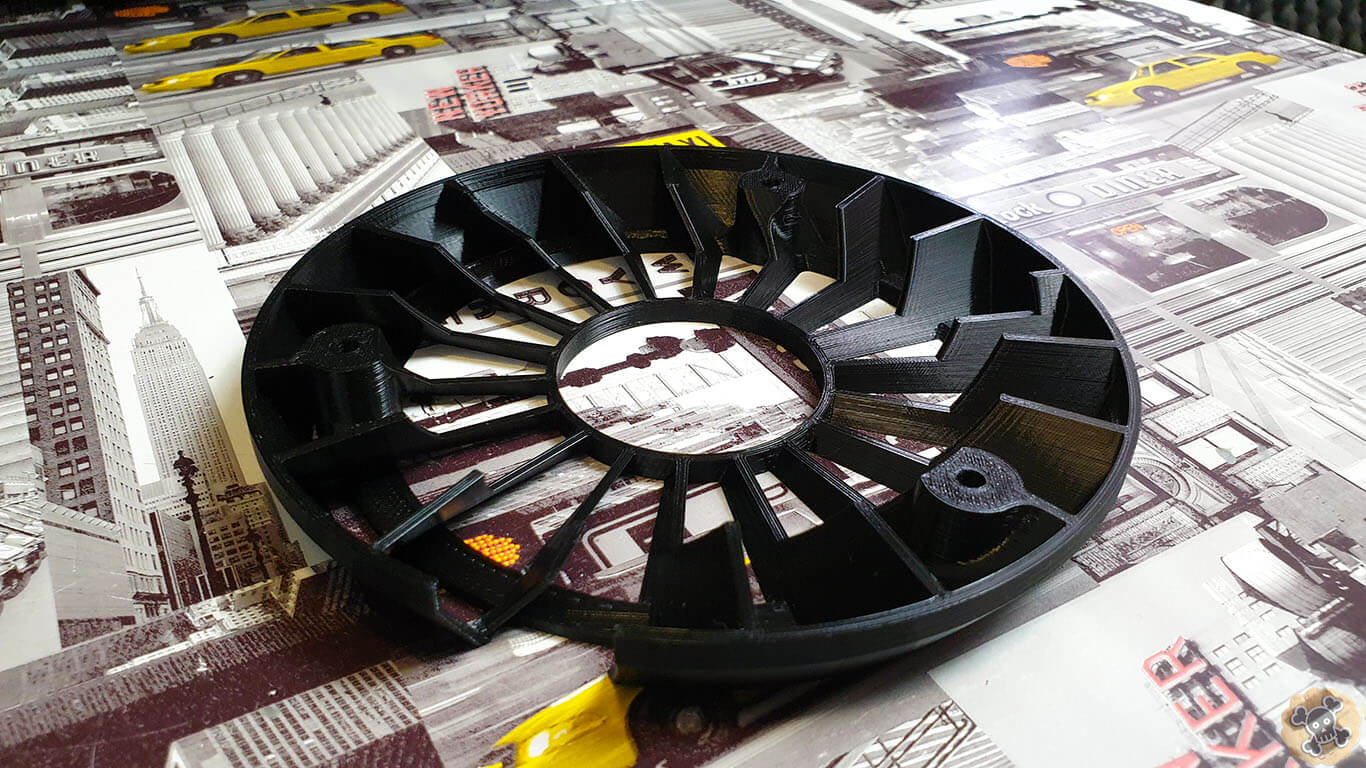
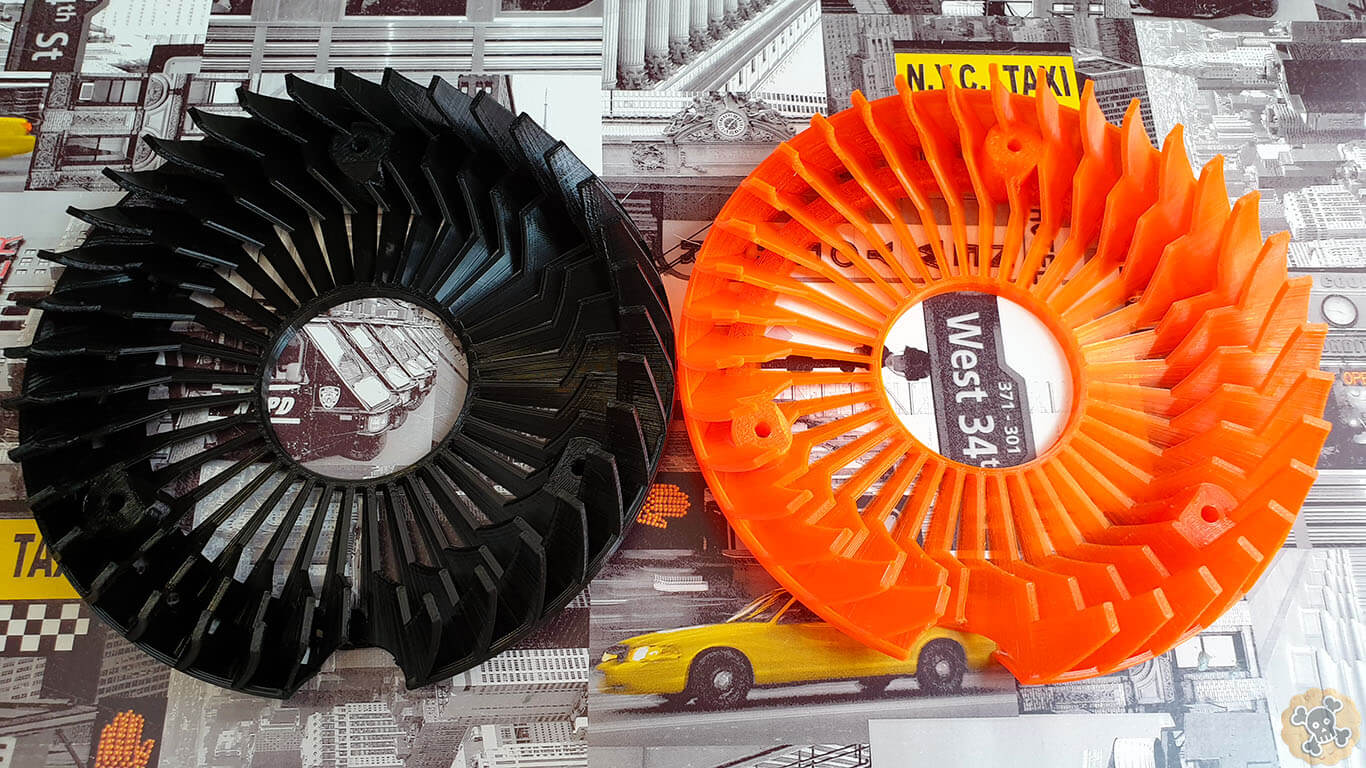
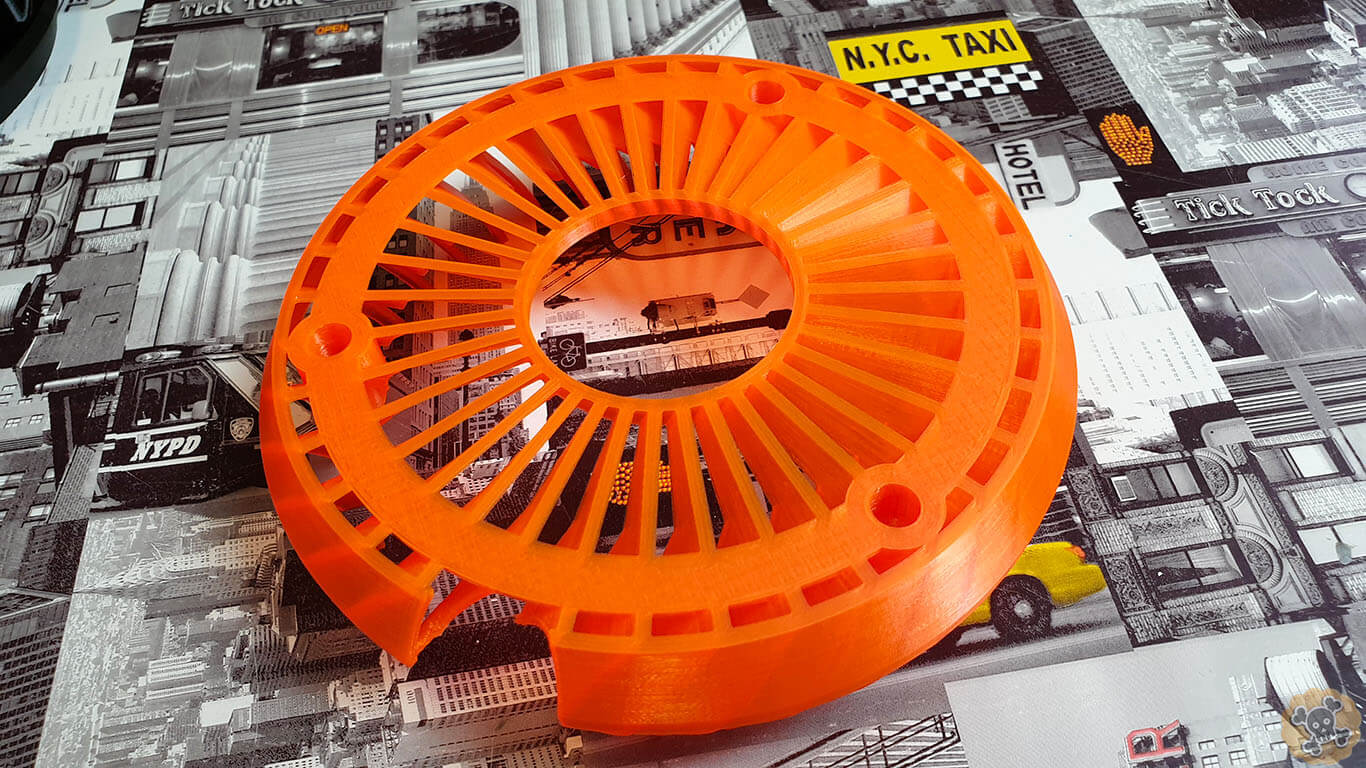
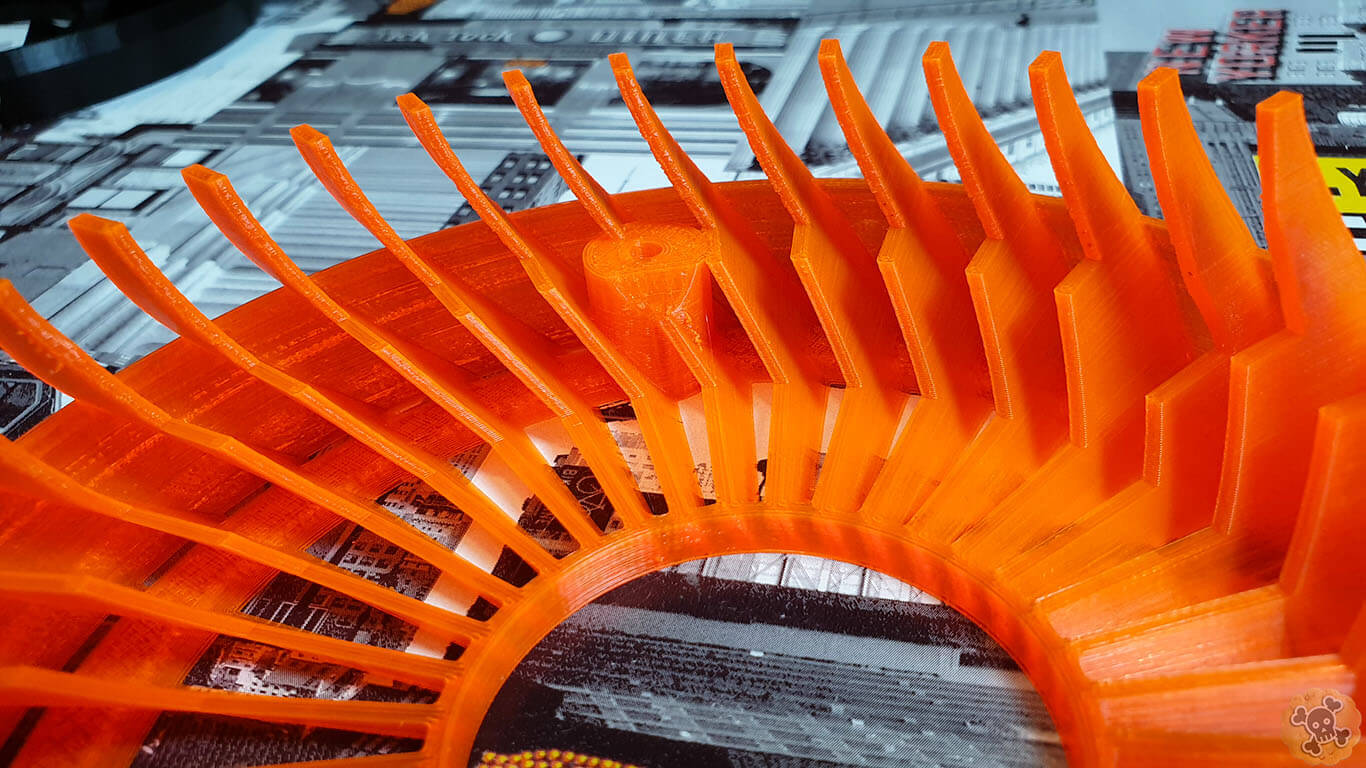
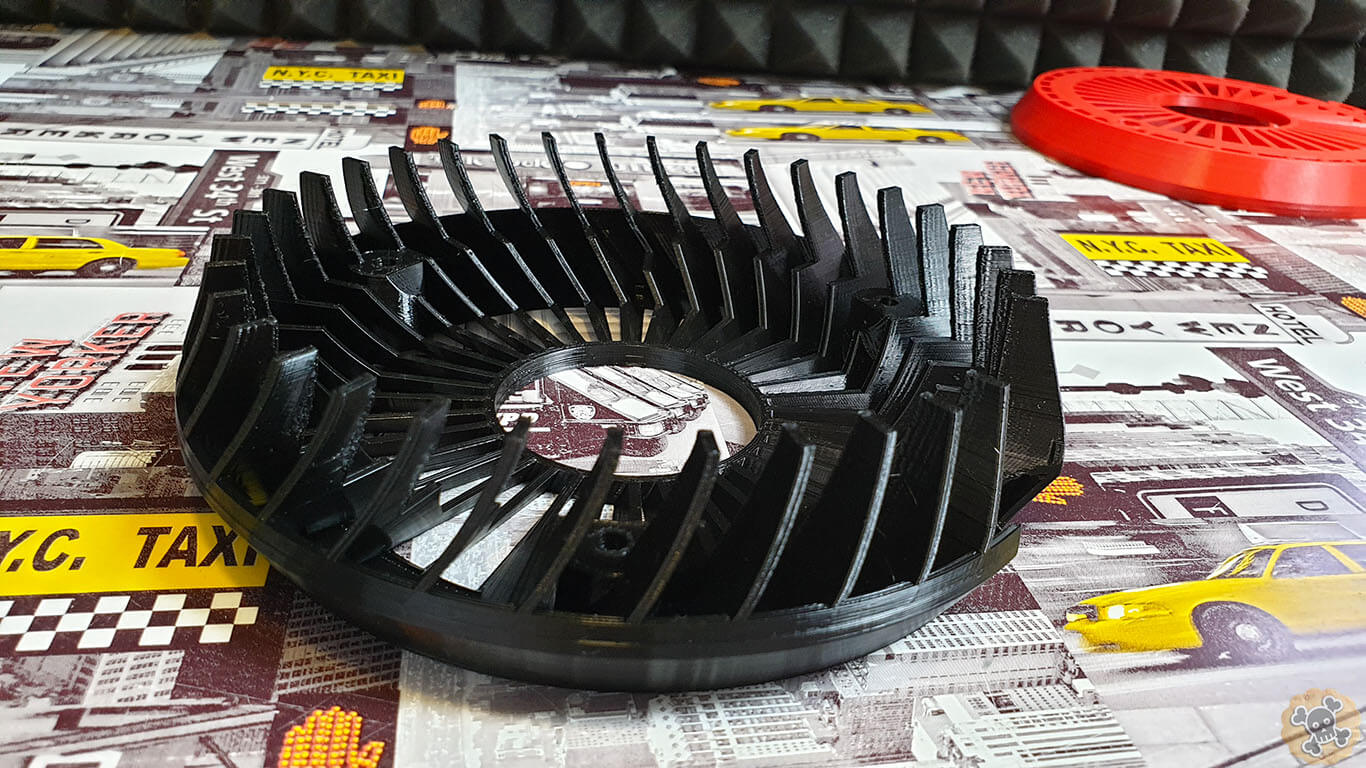
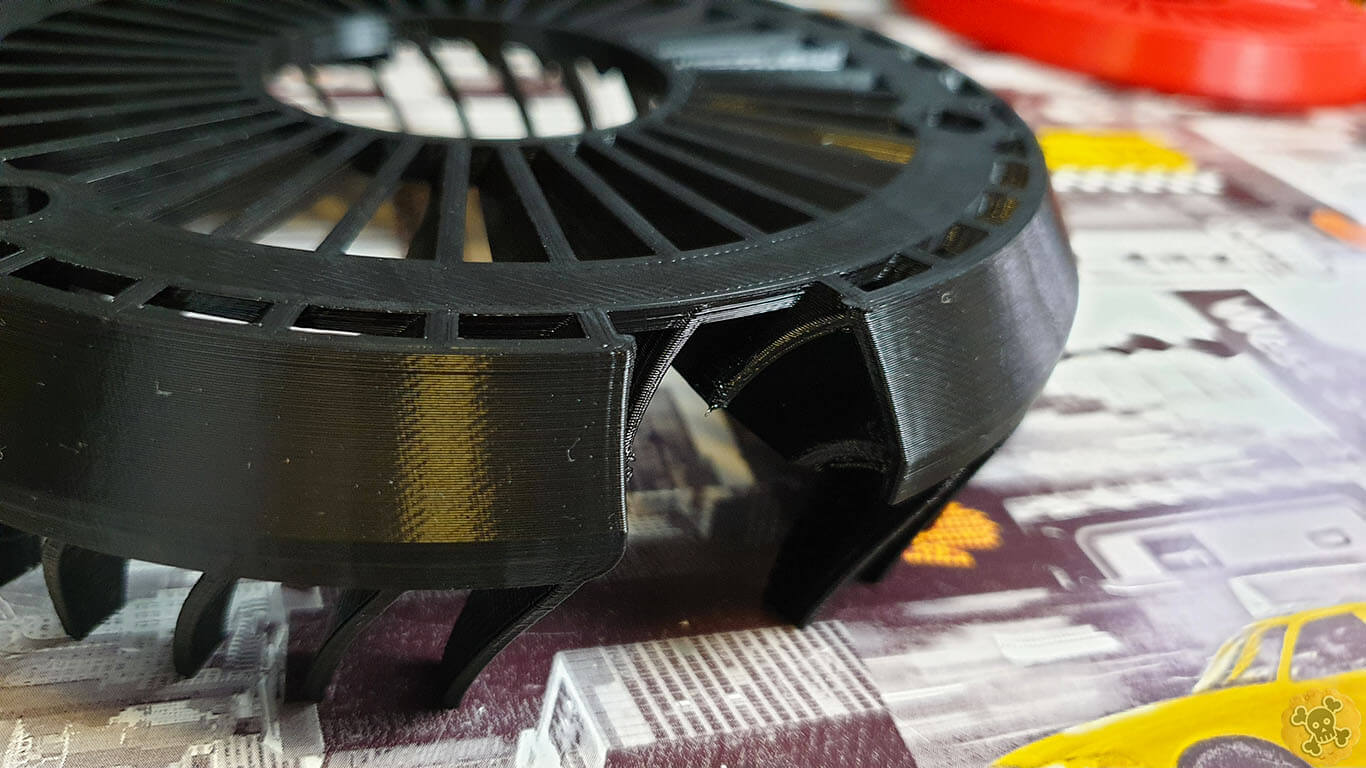
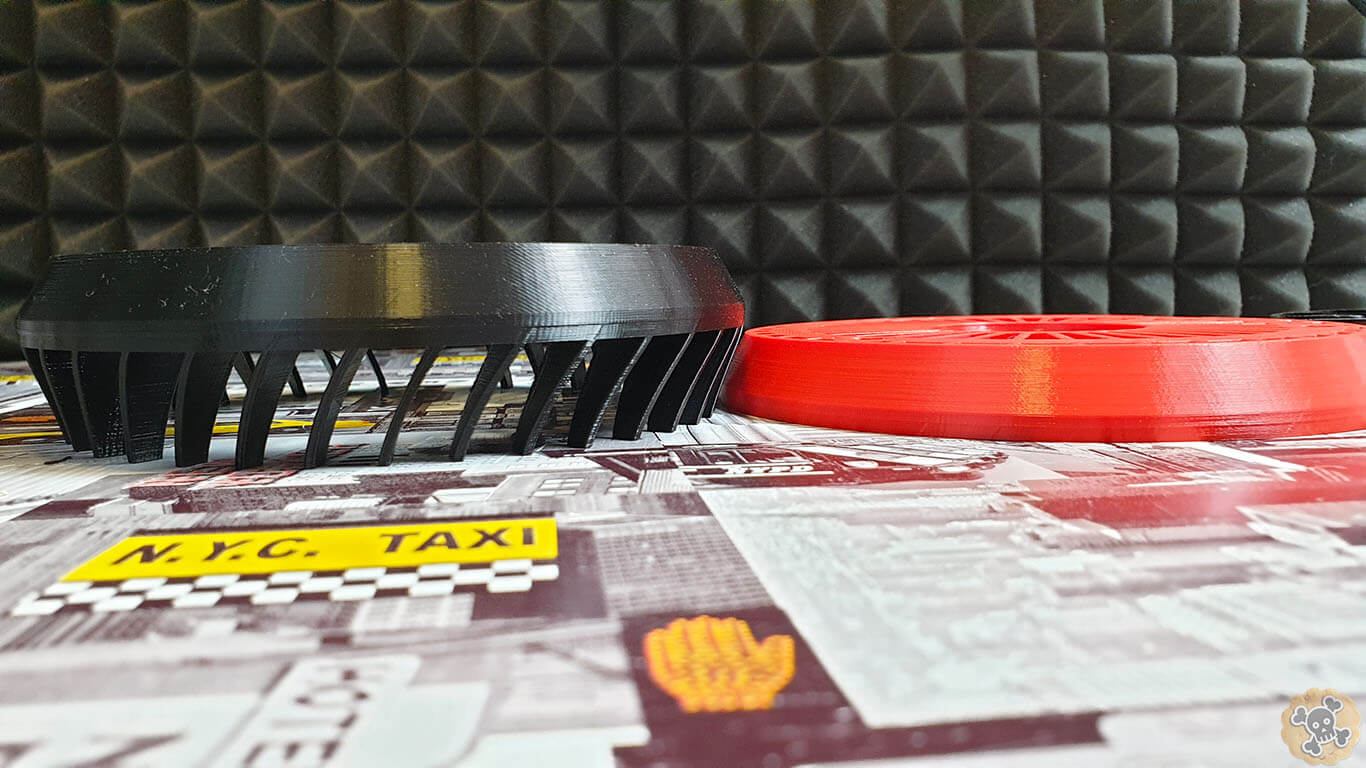
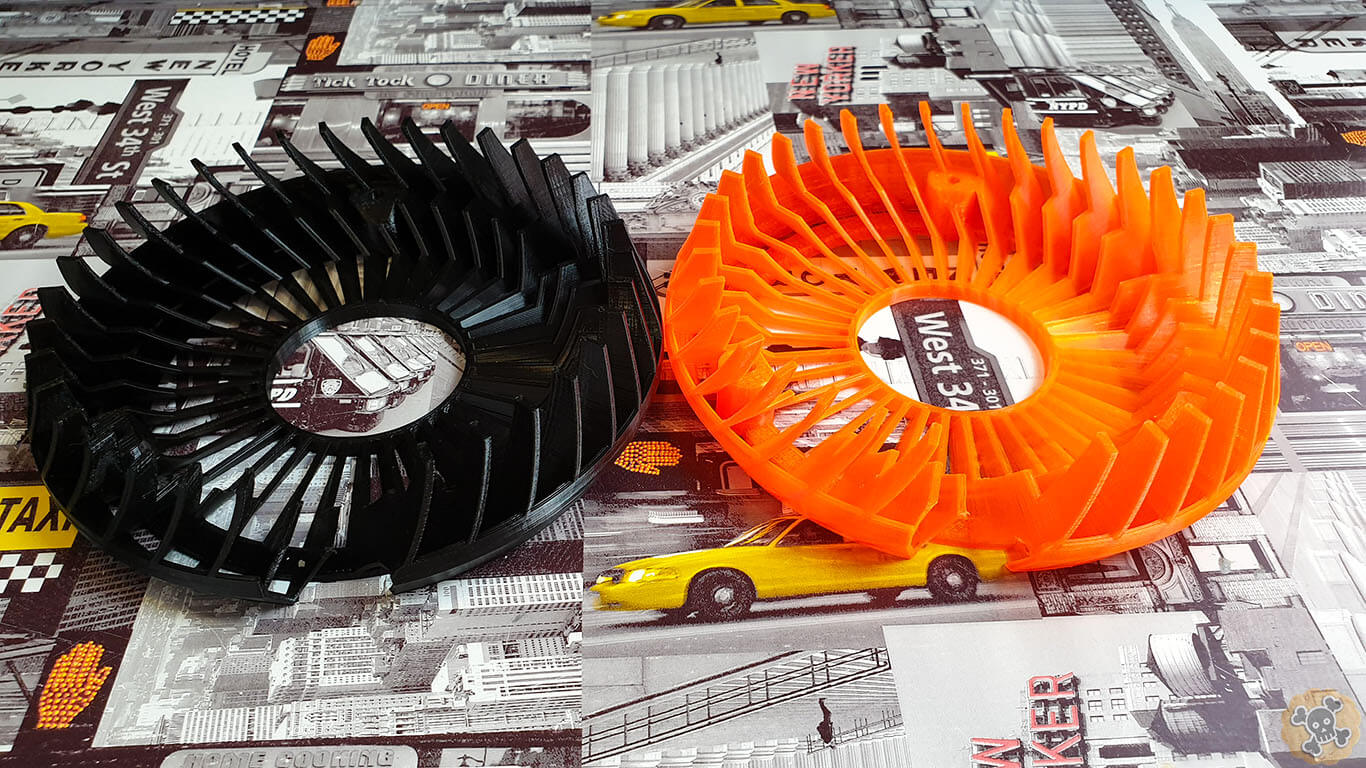
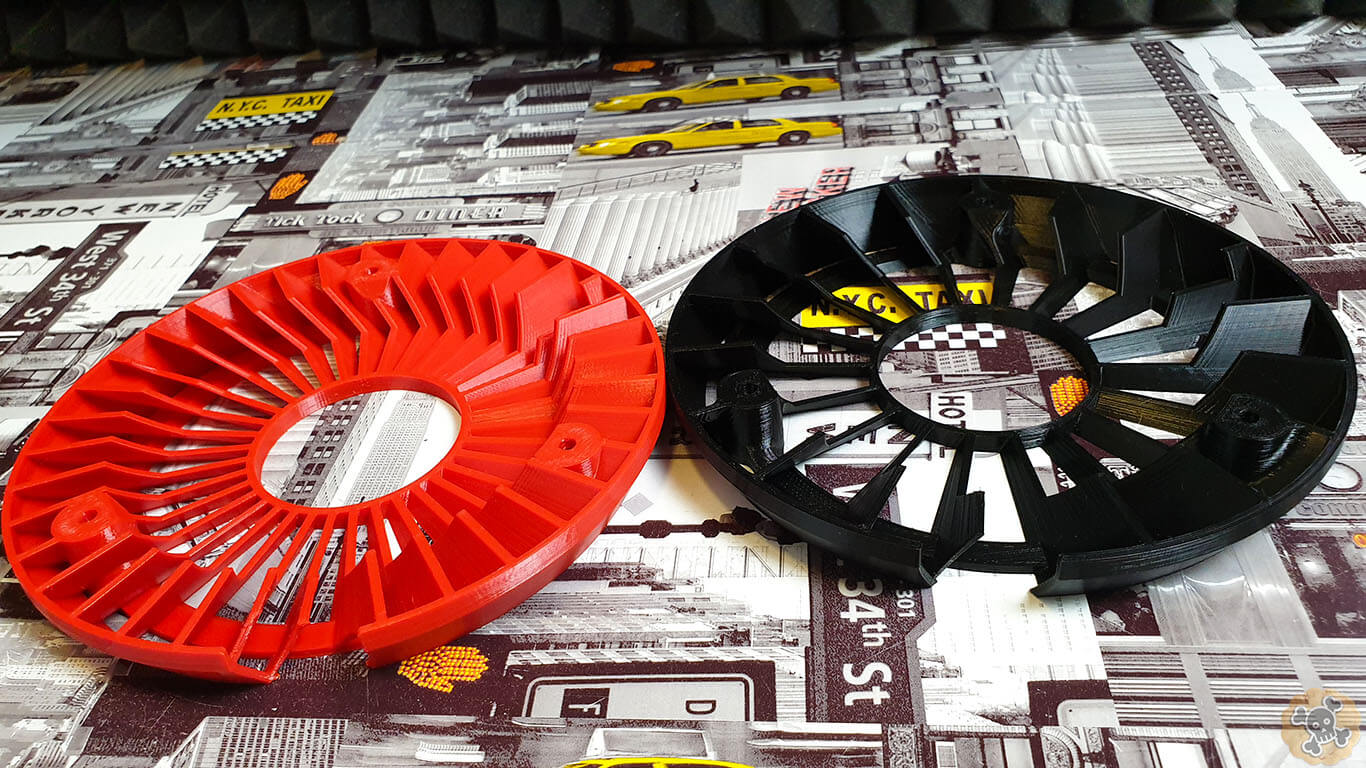
I design 3 different versions, Regular , Turbo, Ultimate
Regular is cheapest one , has less fins but still can cool down motor, this one I recommend for regular riders who don’t use full throttle very often.
Turbo is for riders who like Full throttle, this one has 2x more fins and can handle some beating due to reinforced structure ( should survive small crashes )
Ultimate version has extended fins to push even more air, this one is for maniacs who like to overclock ??⚡⚡?☠️
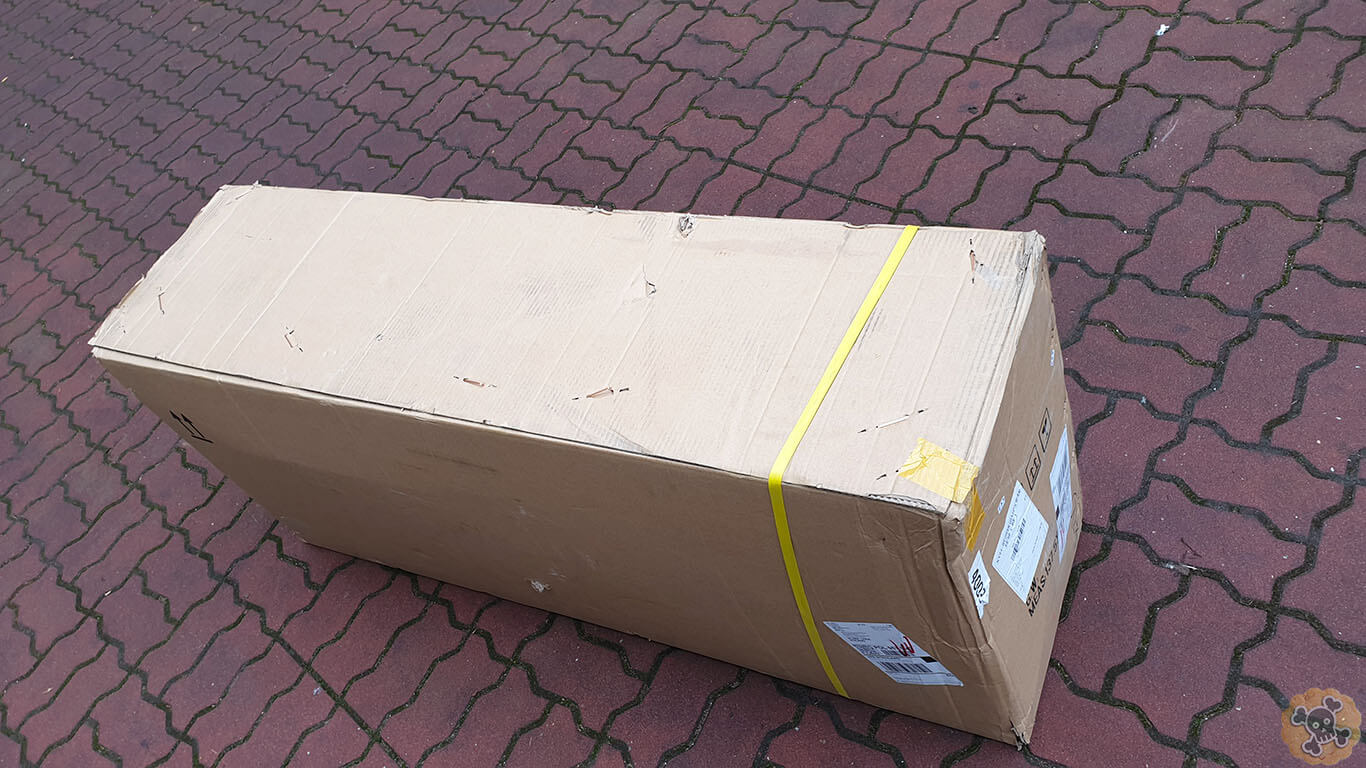
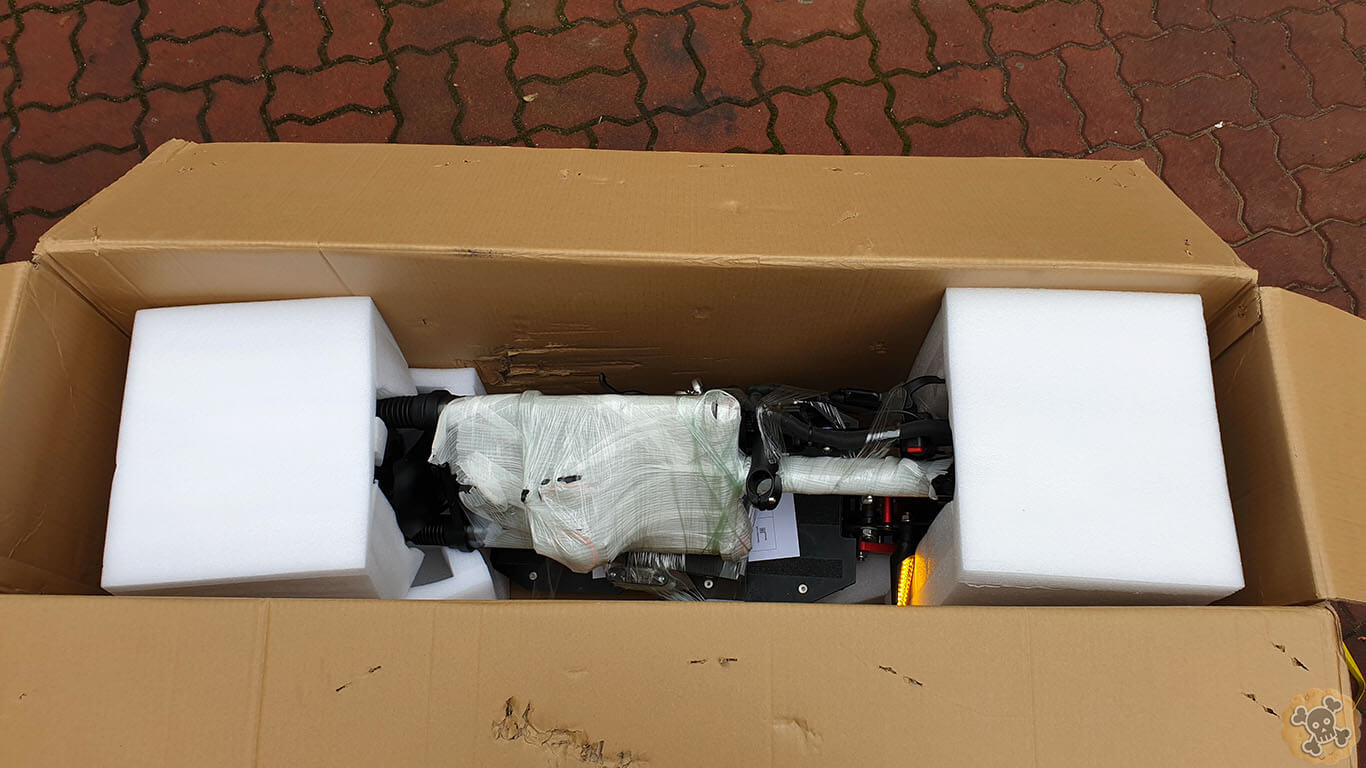
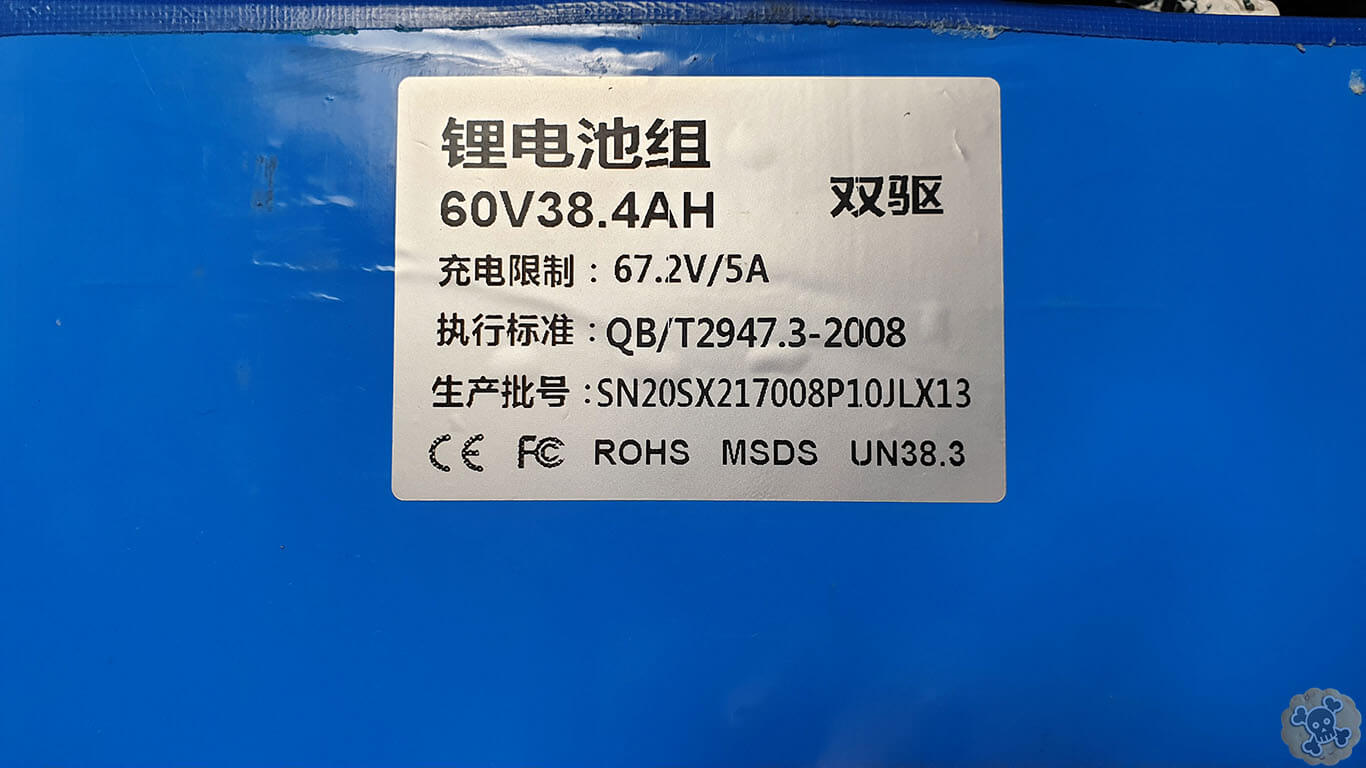
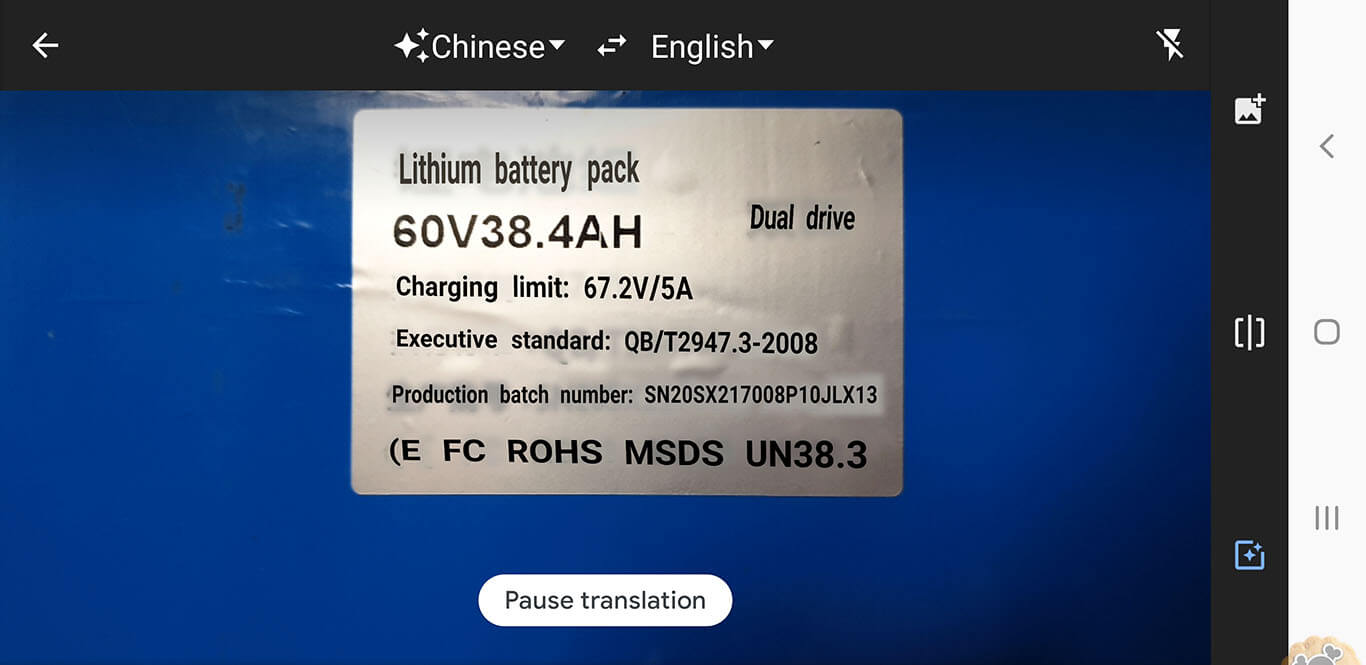
Just received newest Laotie Ti30 Landbreaker with HUGE battery 60V 38.4Ah , this capacity is even bigger than in Laotie ES18 31.2AH . New Landbreaker looks like Multipurpose scoot, great for City long range ride/ OFFroad or even thanks to big battery you can use it as Delivery scoot.
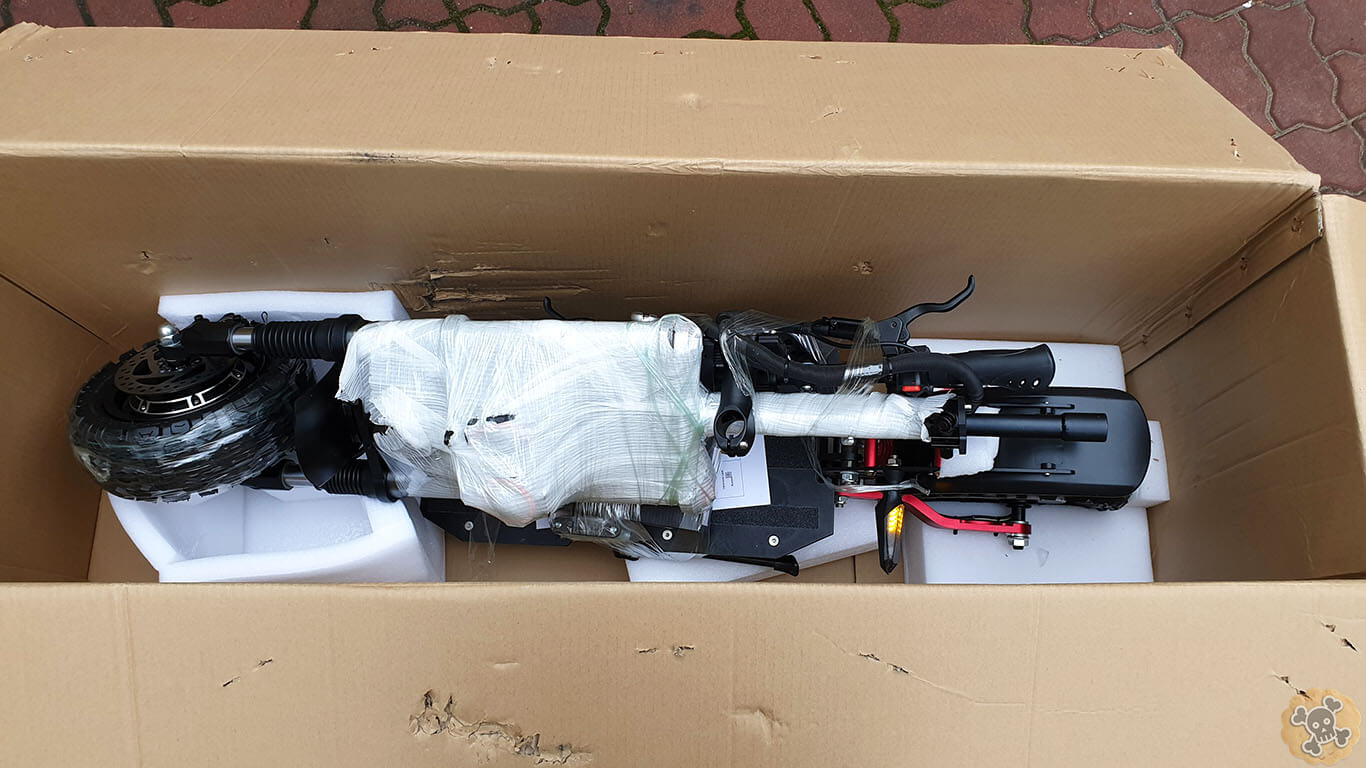
Ofcourse scoot is secured NOT bad , big haevy box if sponge BUT when I opened package I noticed that left blinker was turned one whole time from china and battery was 45V so Ultra low… .
Yeah it’s very well secured.
In the box we will find also 2x 67.2v 2A chargers, key set , manuals
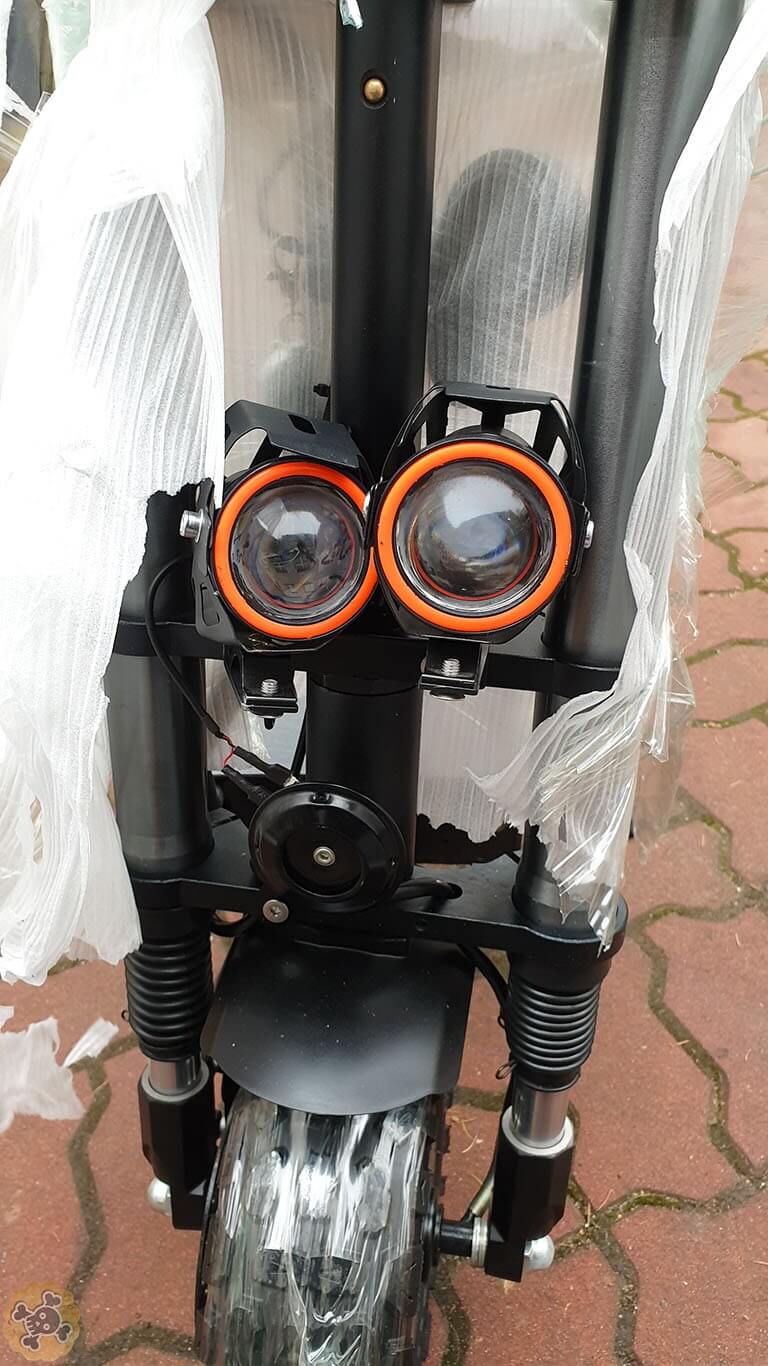
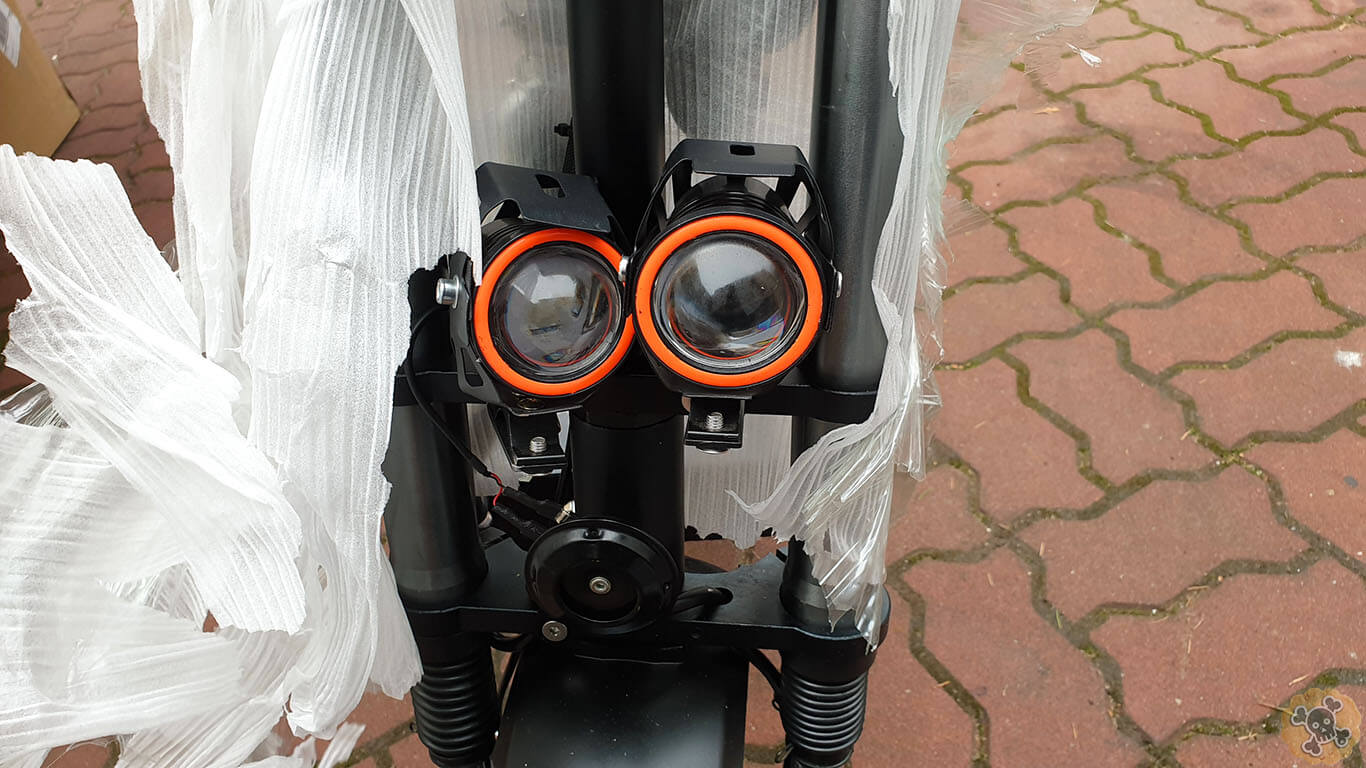
How do not Love these Derp eyes ??
Scoot looks the same like BOYEDA 😉 , frame is Massive and I never had any problems with it, there is even old Good Crappy folding mechanism ?
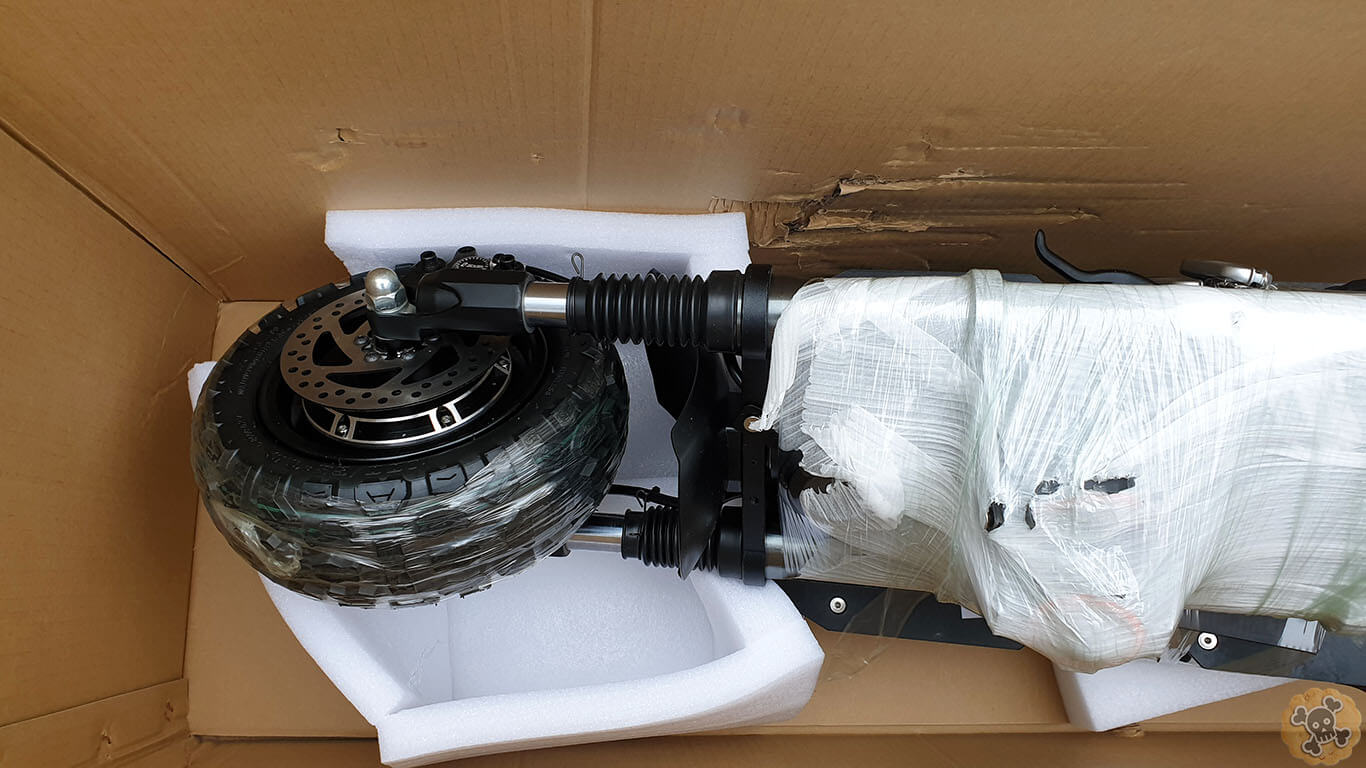
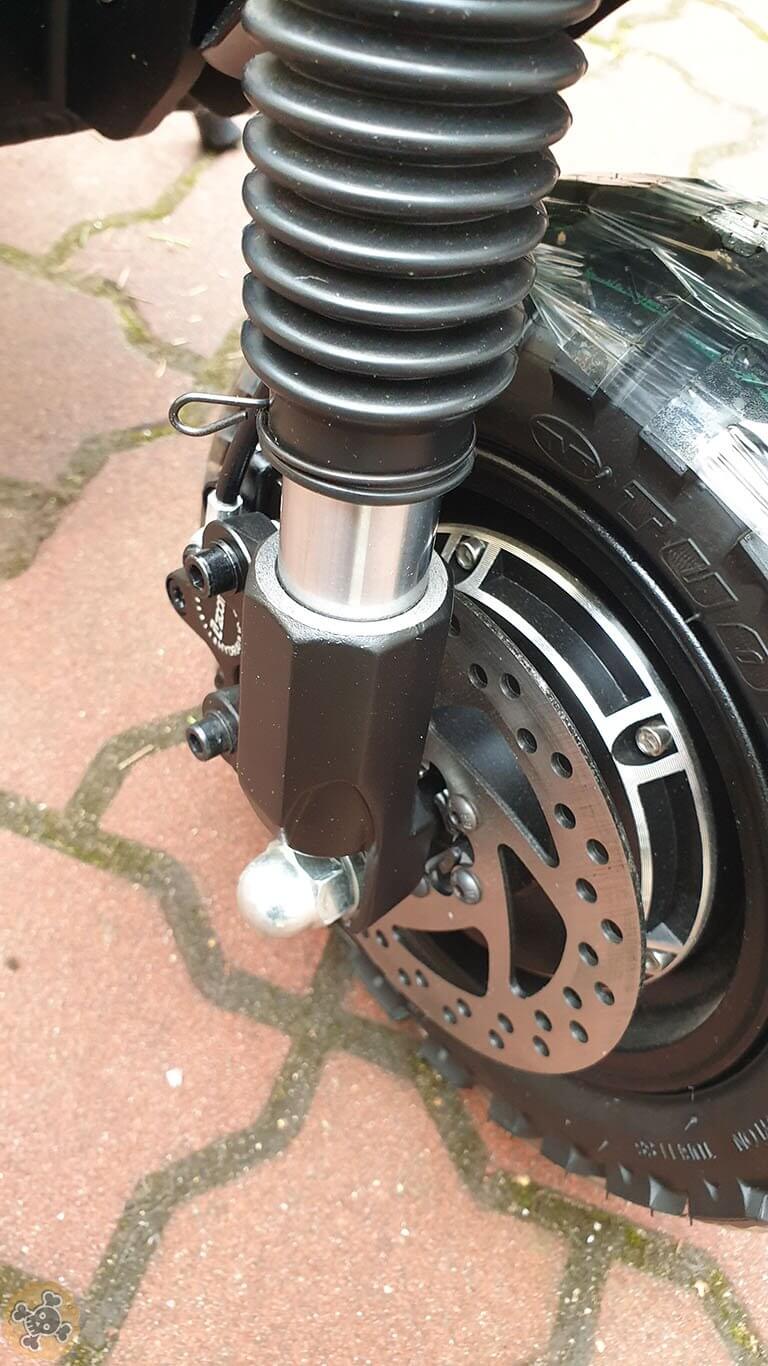
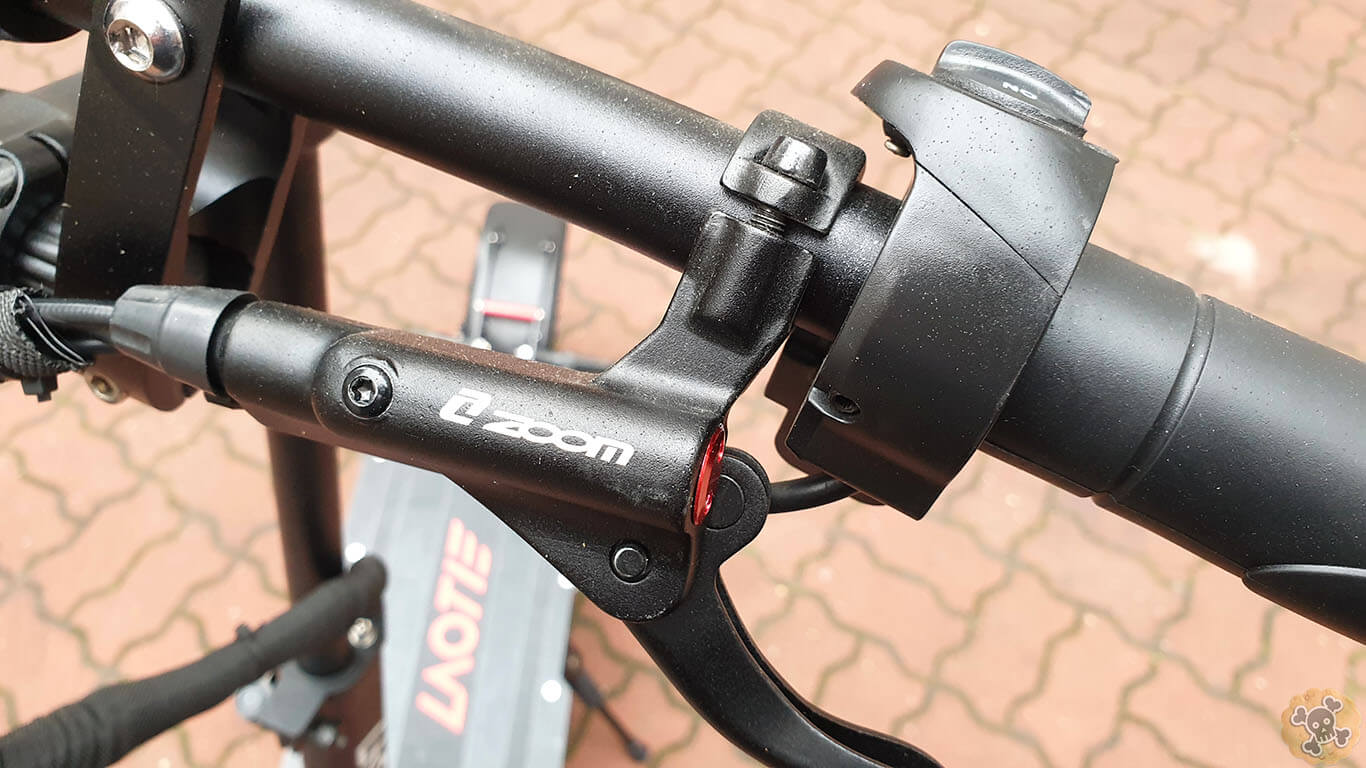
Suspension is almost the same like in Boyeda , almost because Front Fork is upgraded one , it has slower rebound ( no more cracking noise ) and extra rubber covers . On the back w have spring system which is working very well .
Worth to mention is that front fork seems to have a little bit better reinforced motor mount, old version could break at that spot , couple pics can be found about it but I never had any problems with it and I hope that new version is really better.
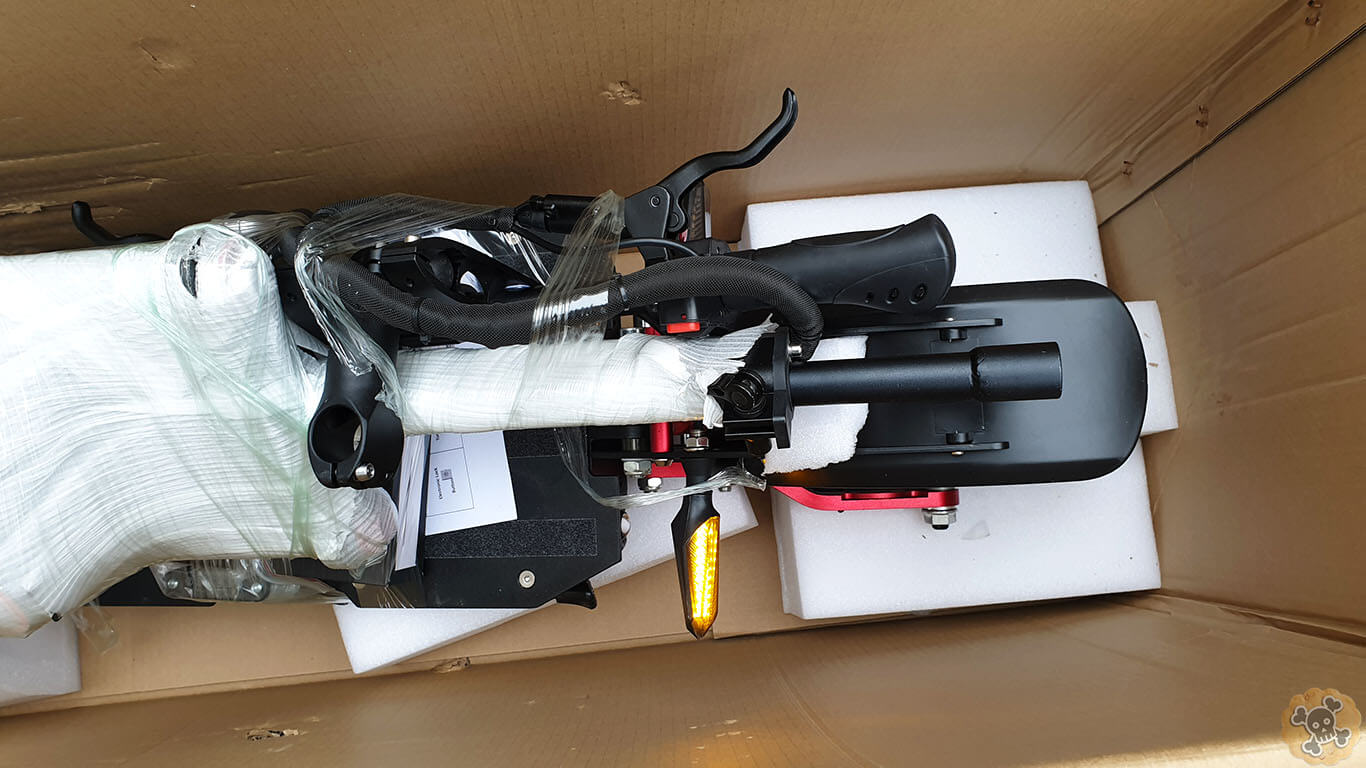
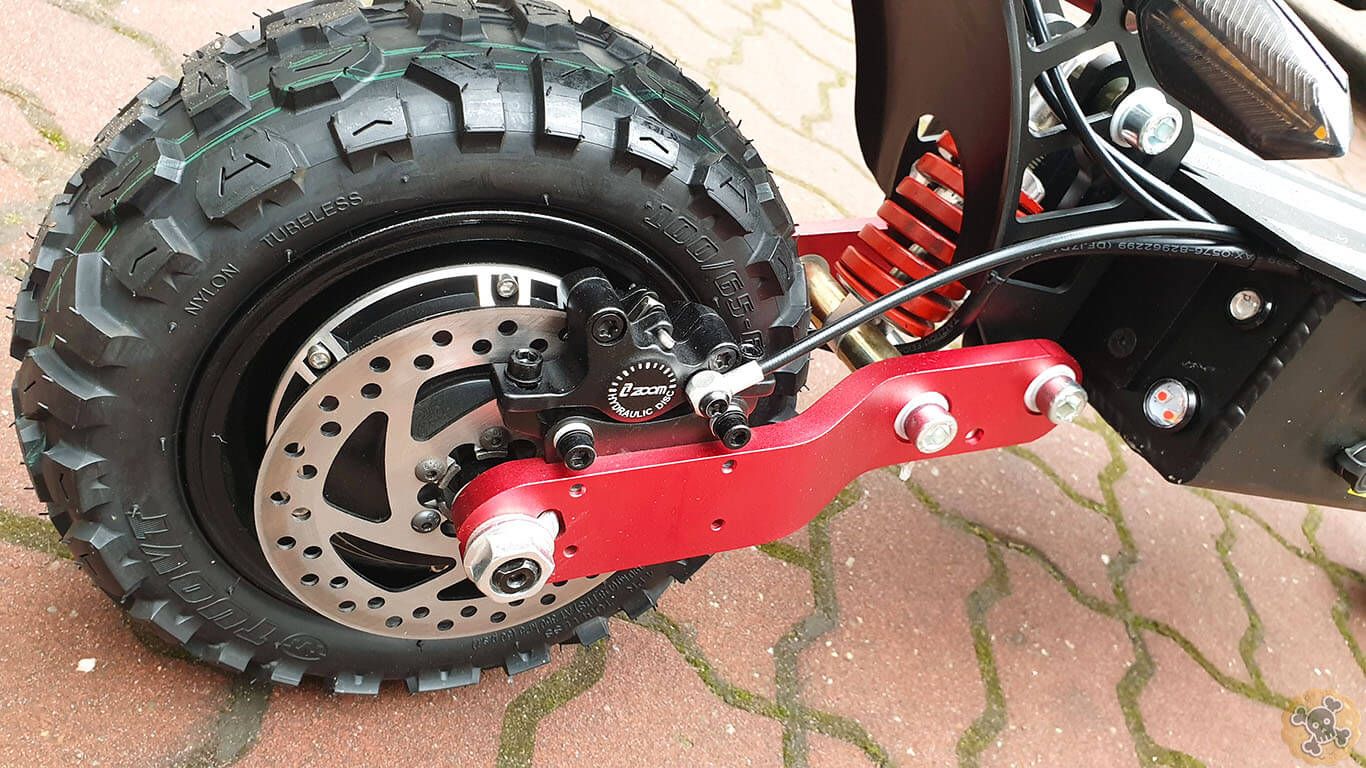
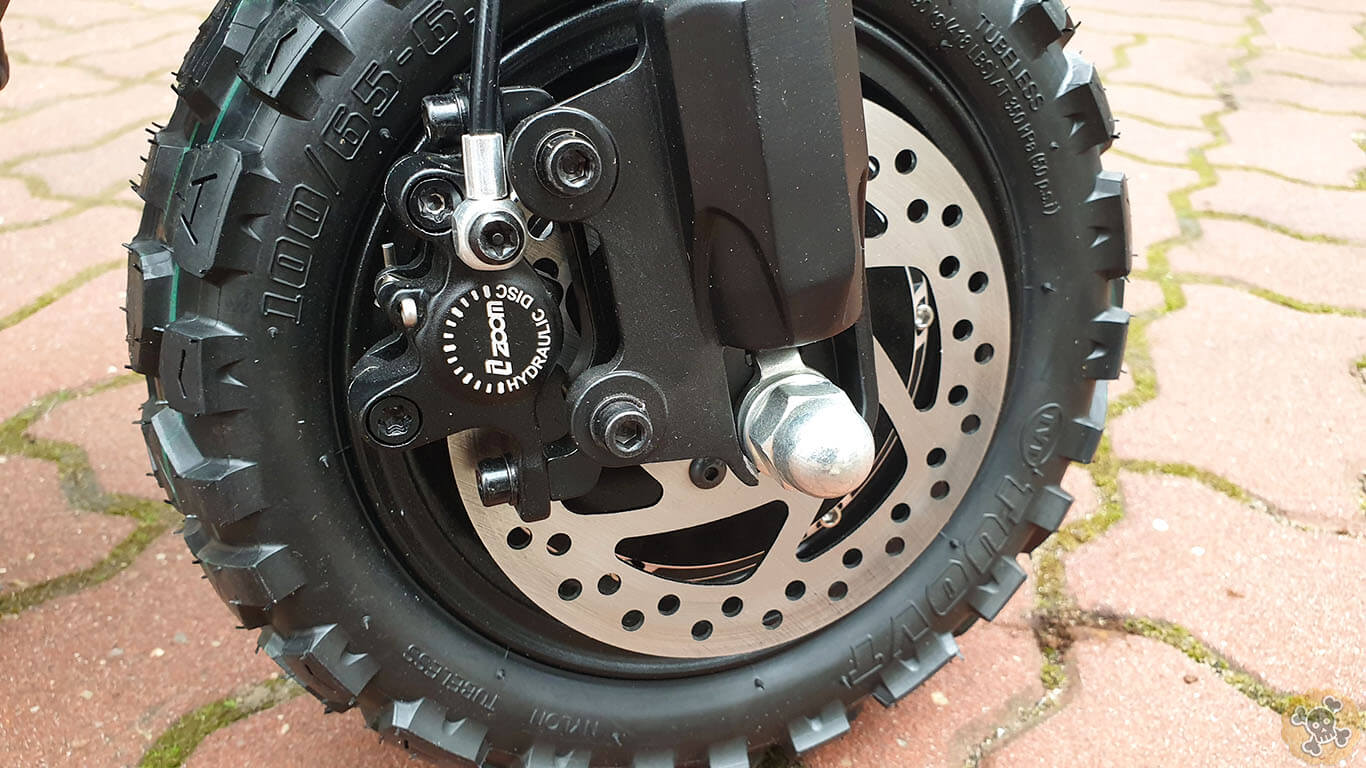
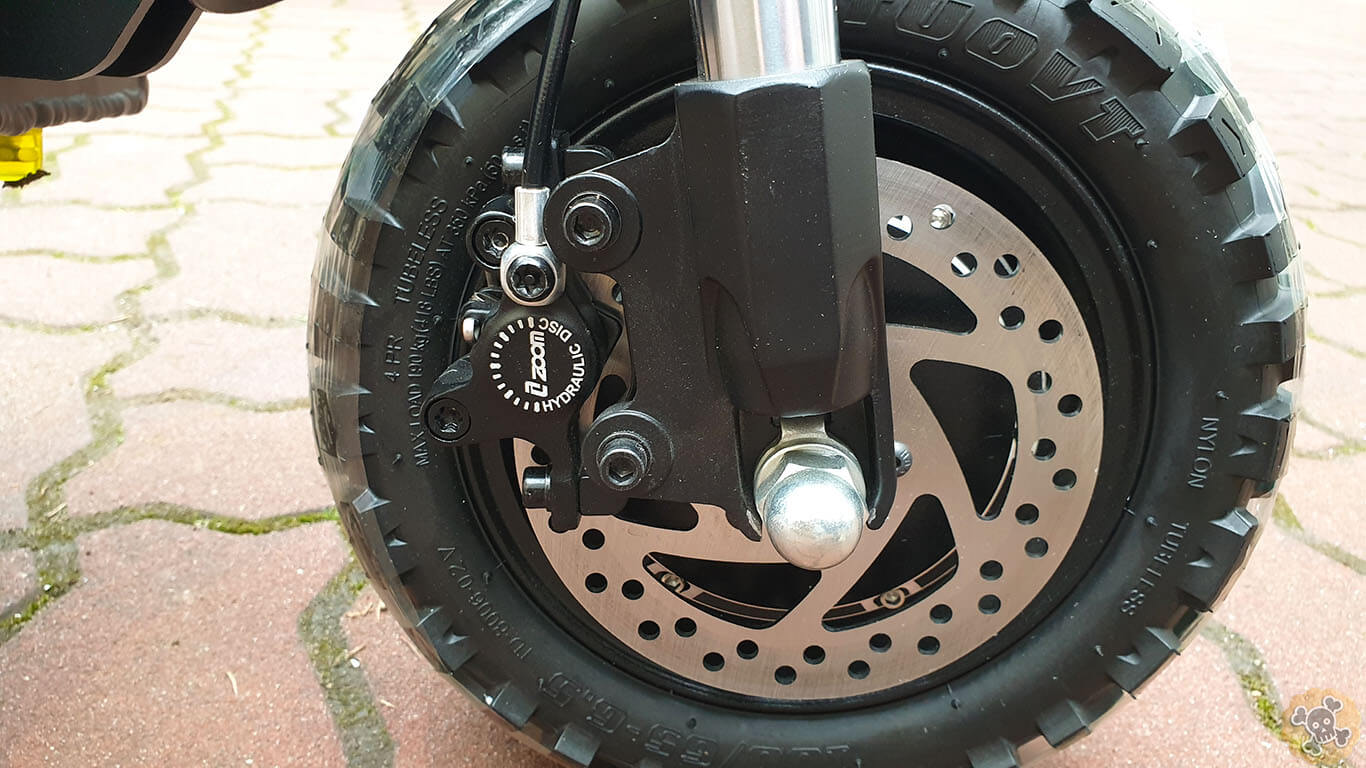
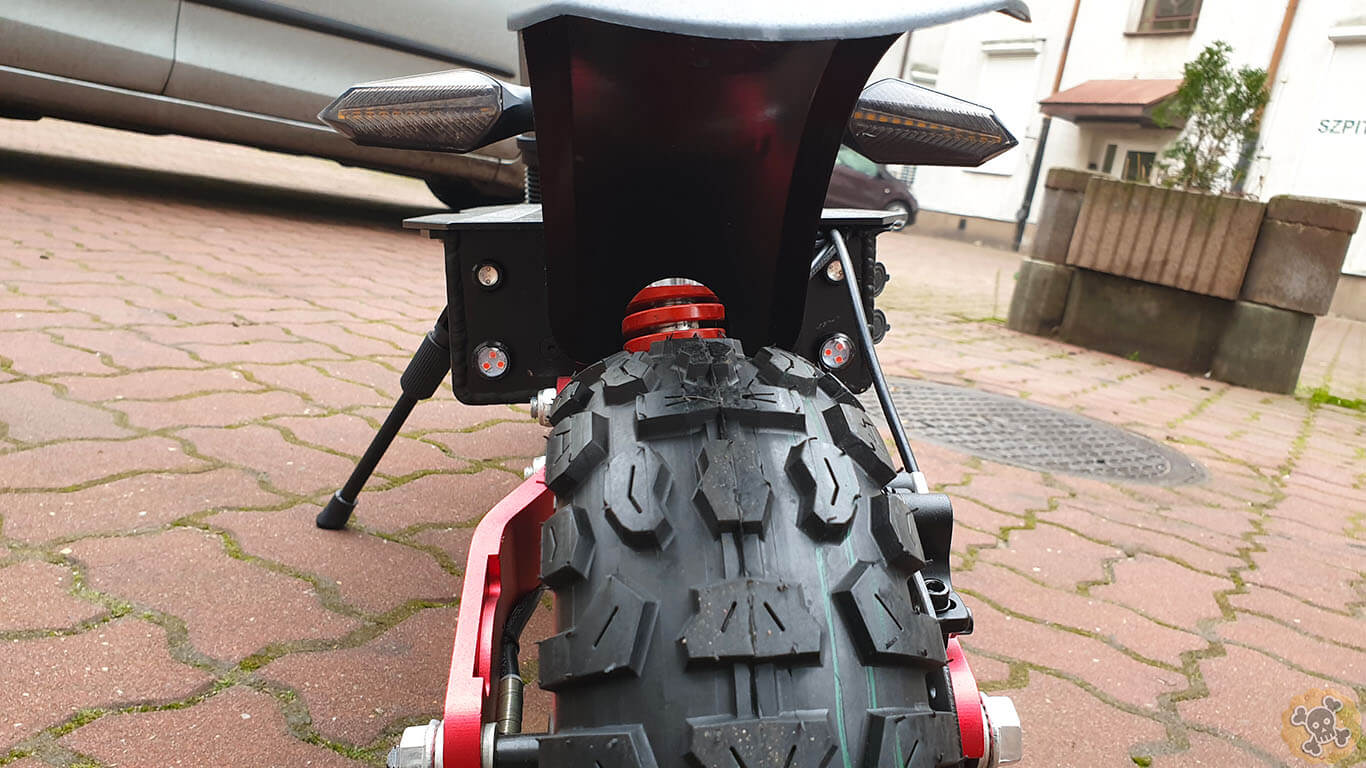
Motors are 2800W ( the same like in Boyueda ), aaaaand it has my Fav ZOOM hydraulic brakes ??
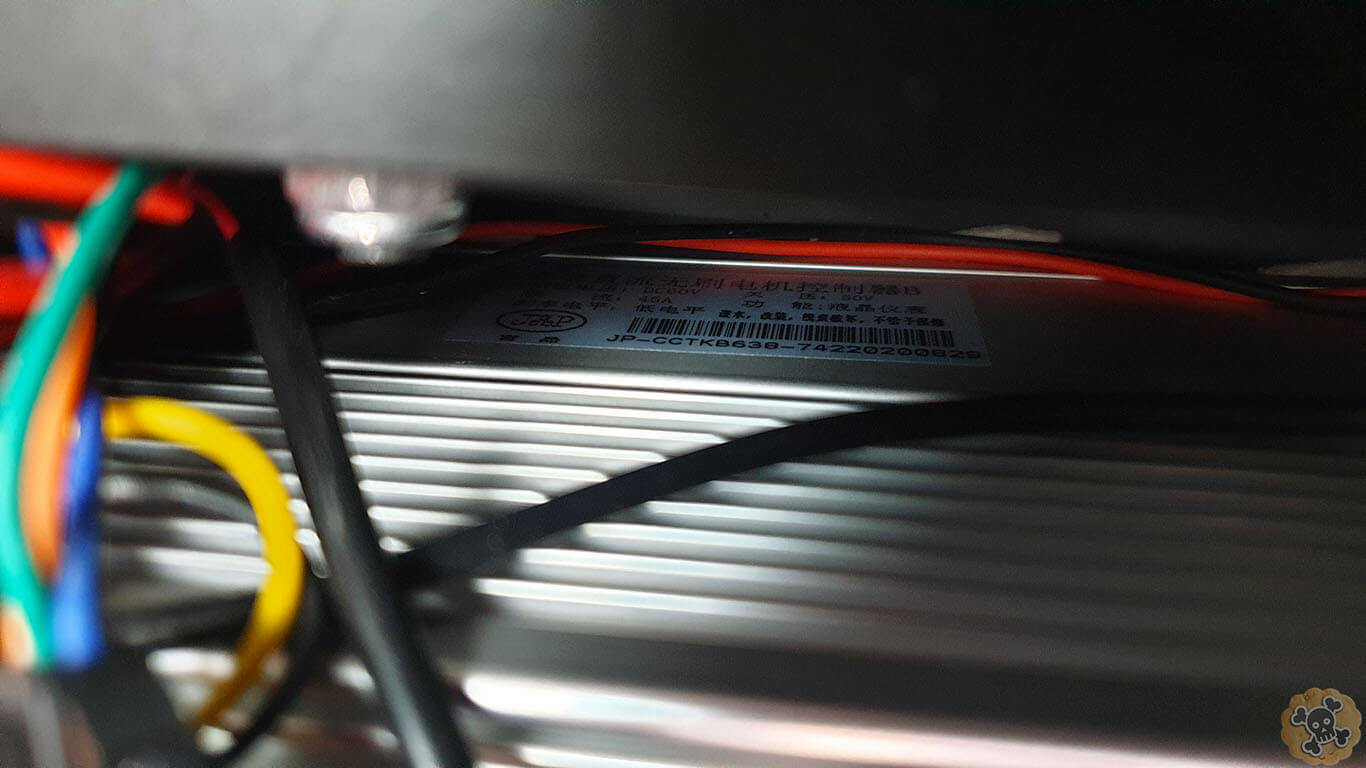
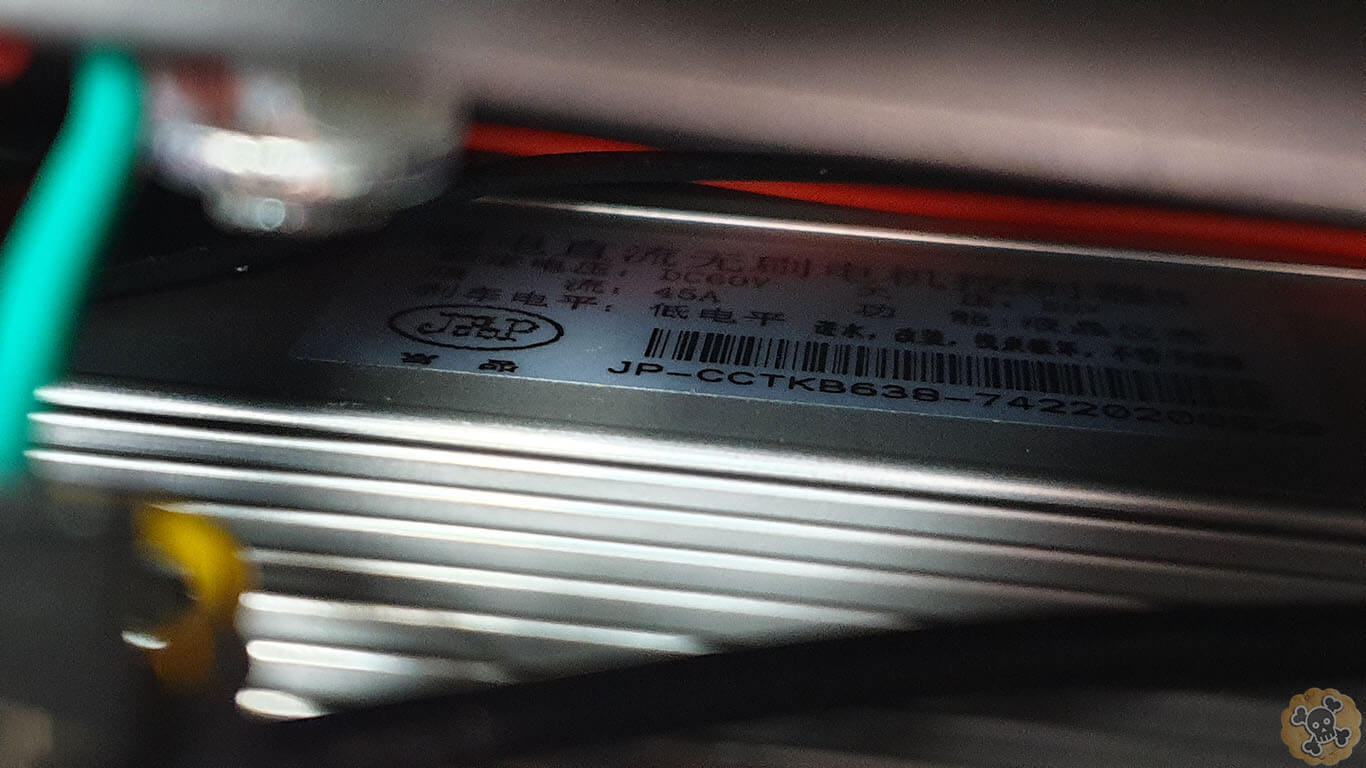
Controllers 45A , I am sure we will have some GOOD Power ?
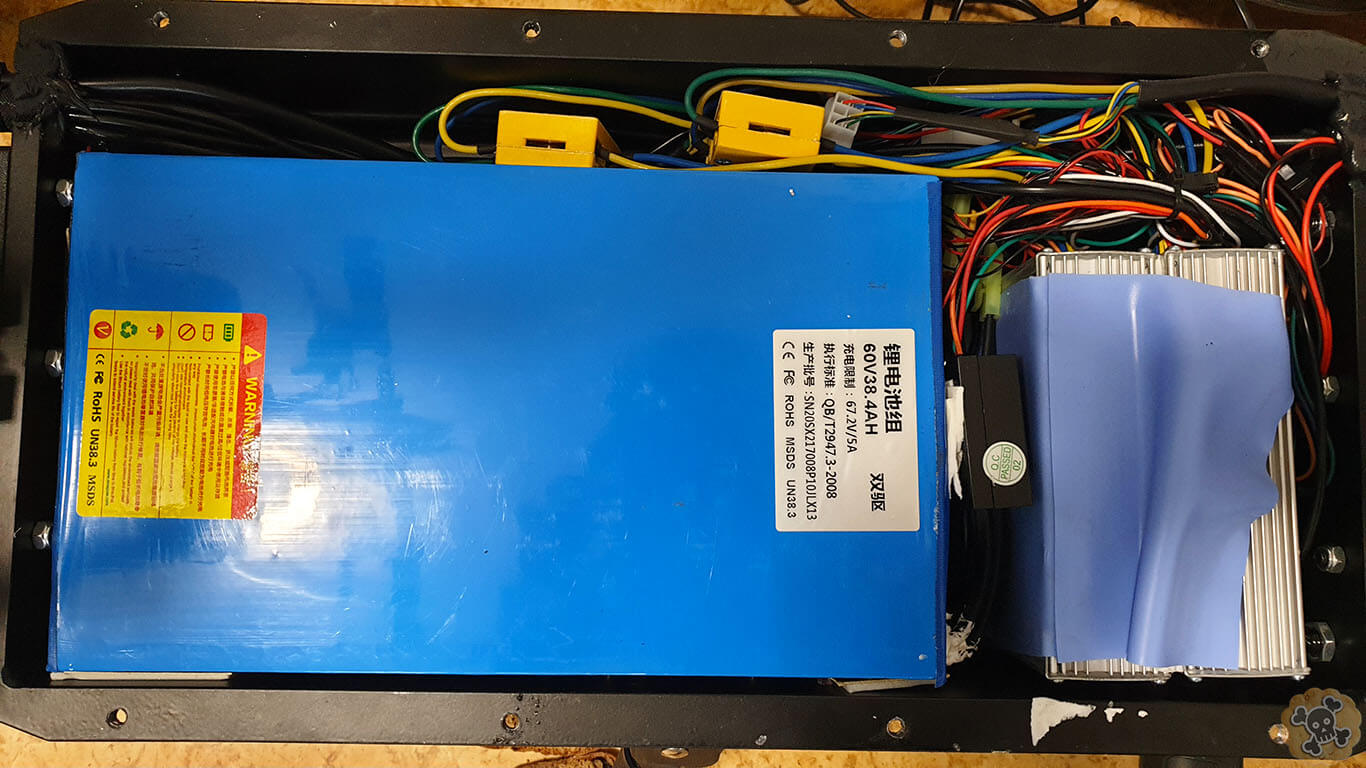
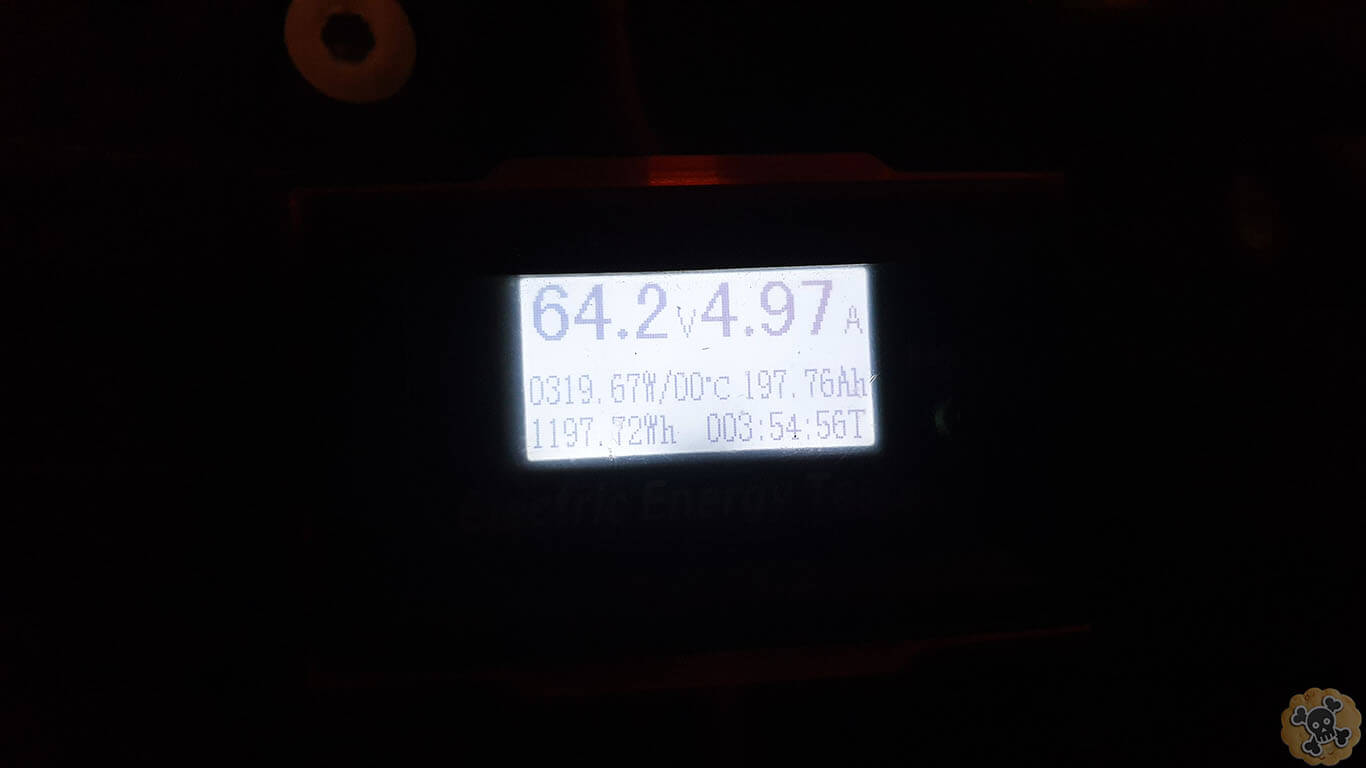
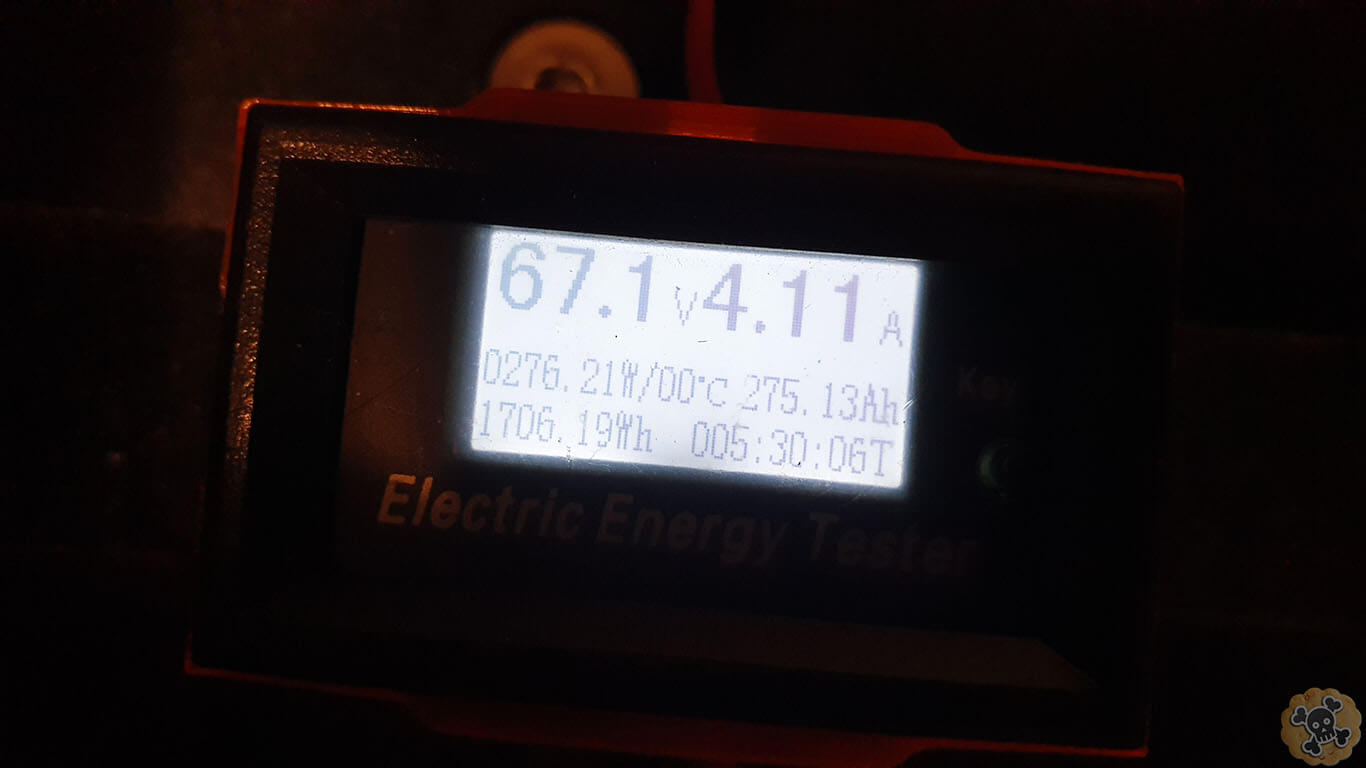
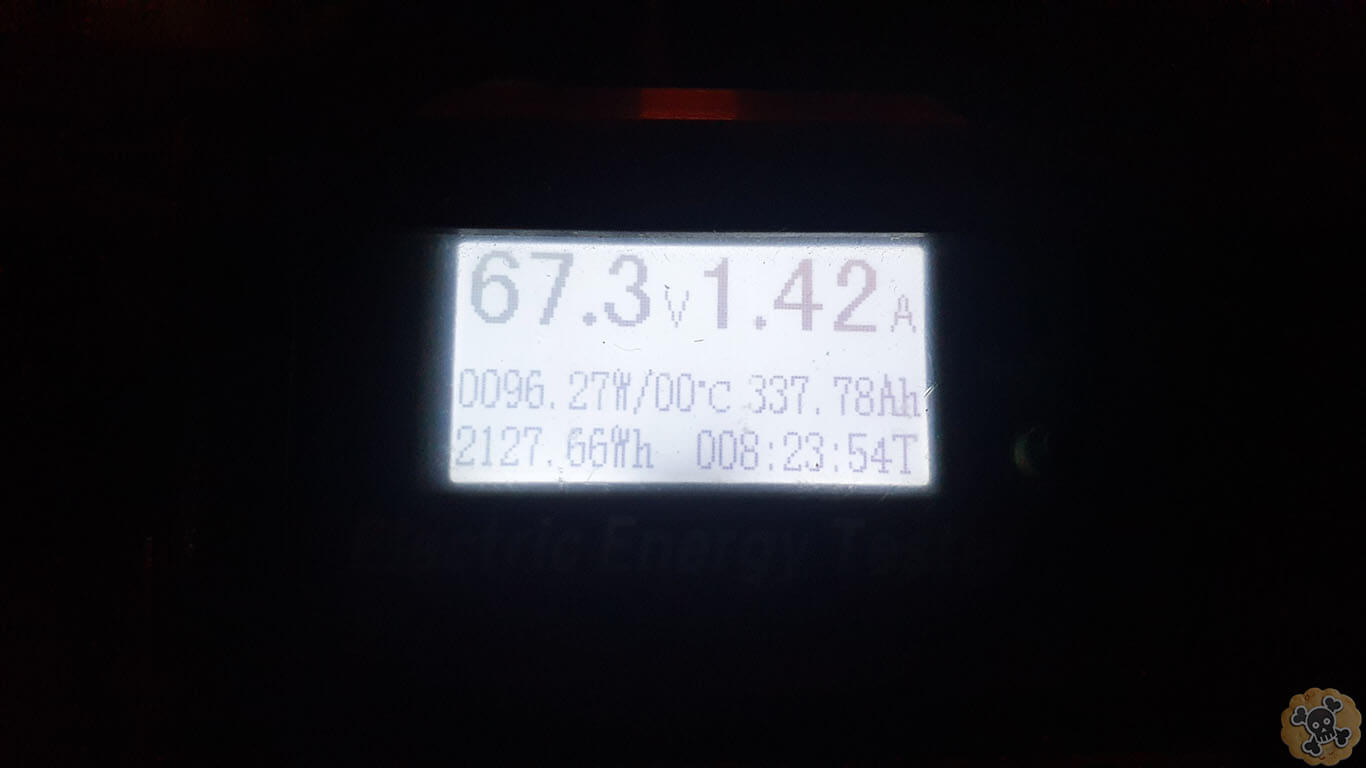
Battery ! This is pretty crazy or fishy ( I need more time to check it ) because battery in Ti30 is a little bit bigger than in Boyueda but way smaller than in ES18 and overally Ti30 feels lighter than Boyeda ( bare in mind that we got built-in BigAss battery 38AH ) ! , So far I been able to pump into battery 36AH after 10H. ** I said something is fishy because this battery is really small and light so more testing is needed BUT if this battery is really at least 36AH then I want it in ALL MY SCOOTS ???
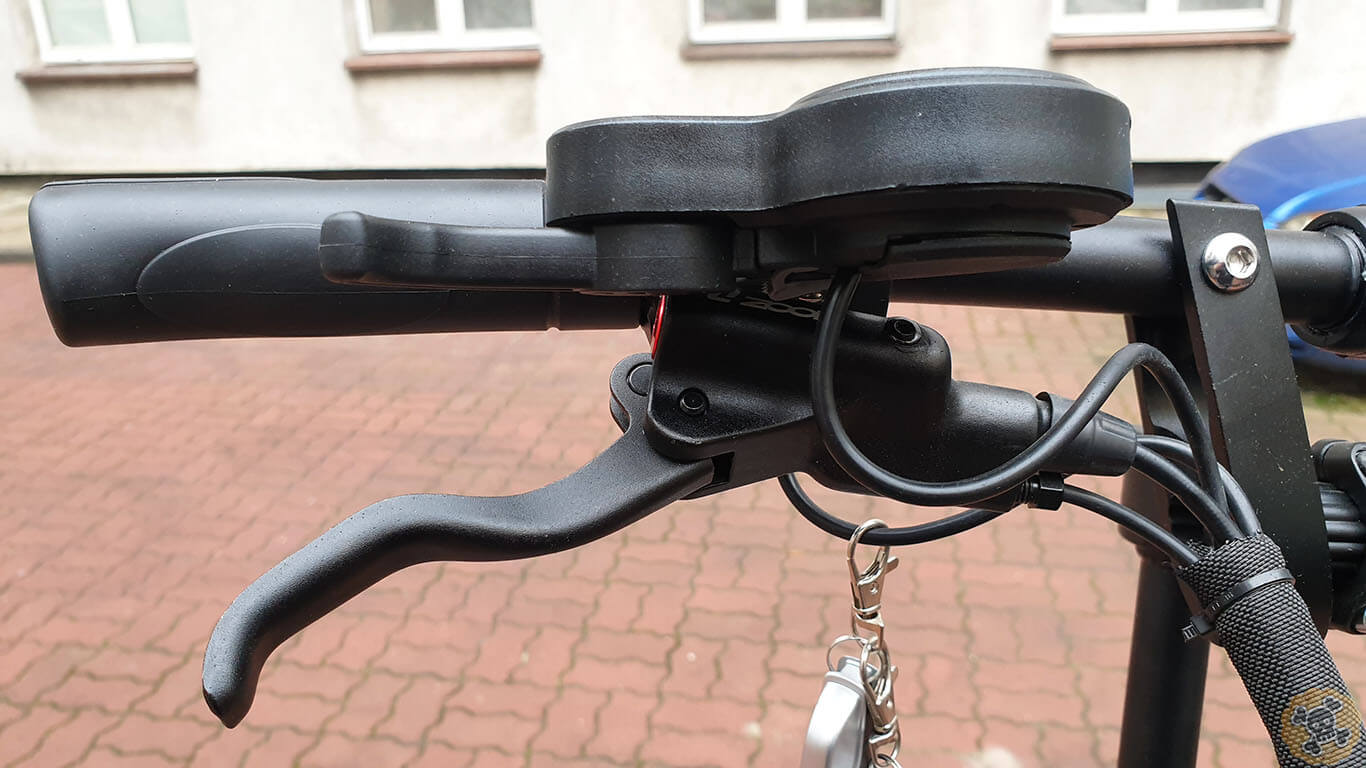
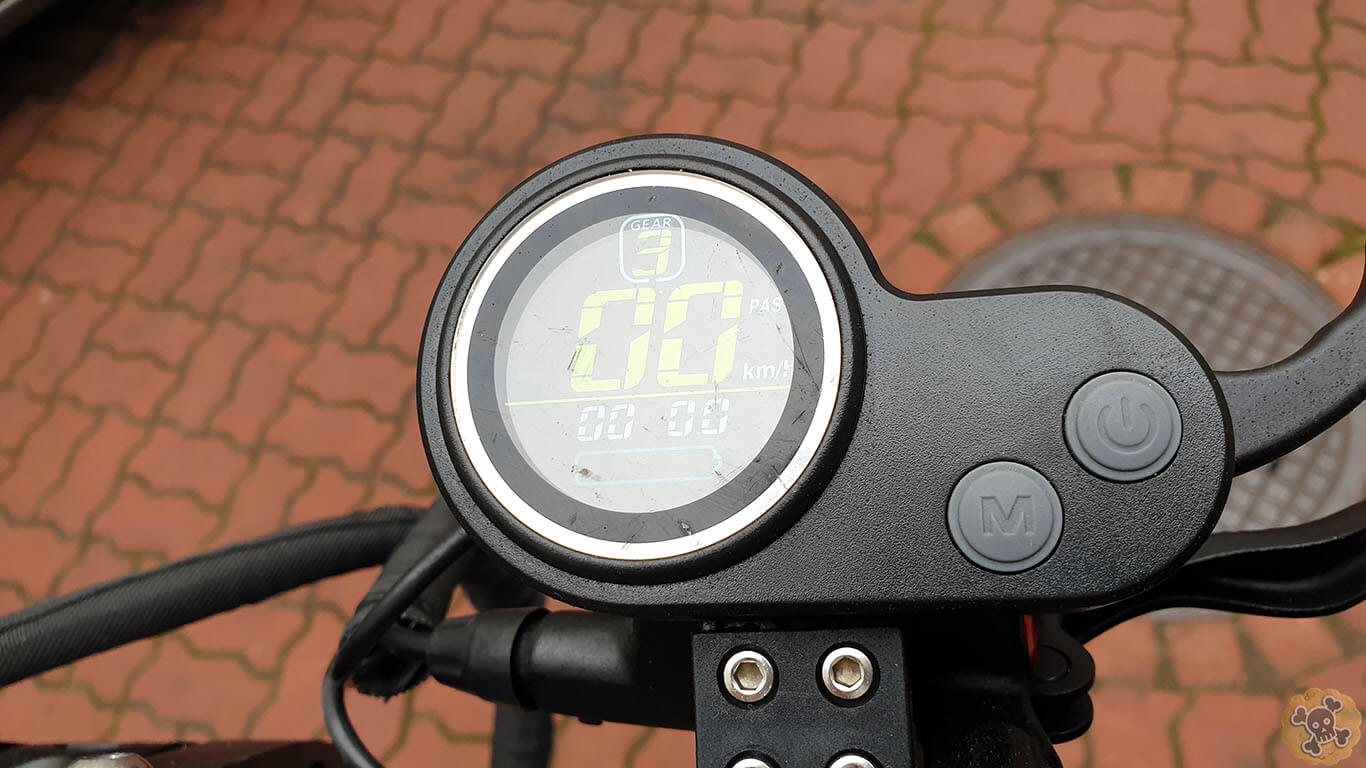
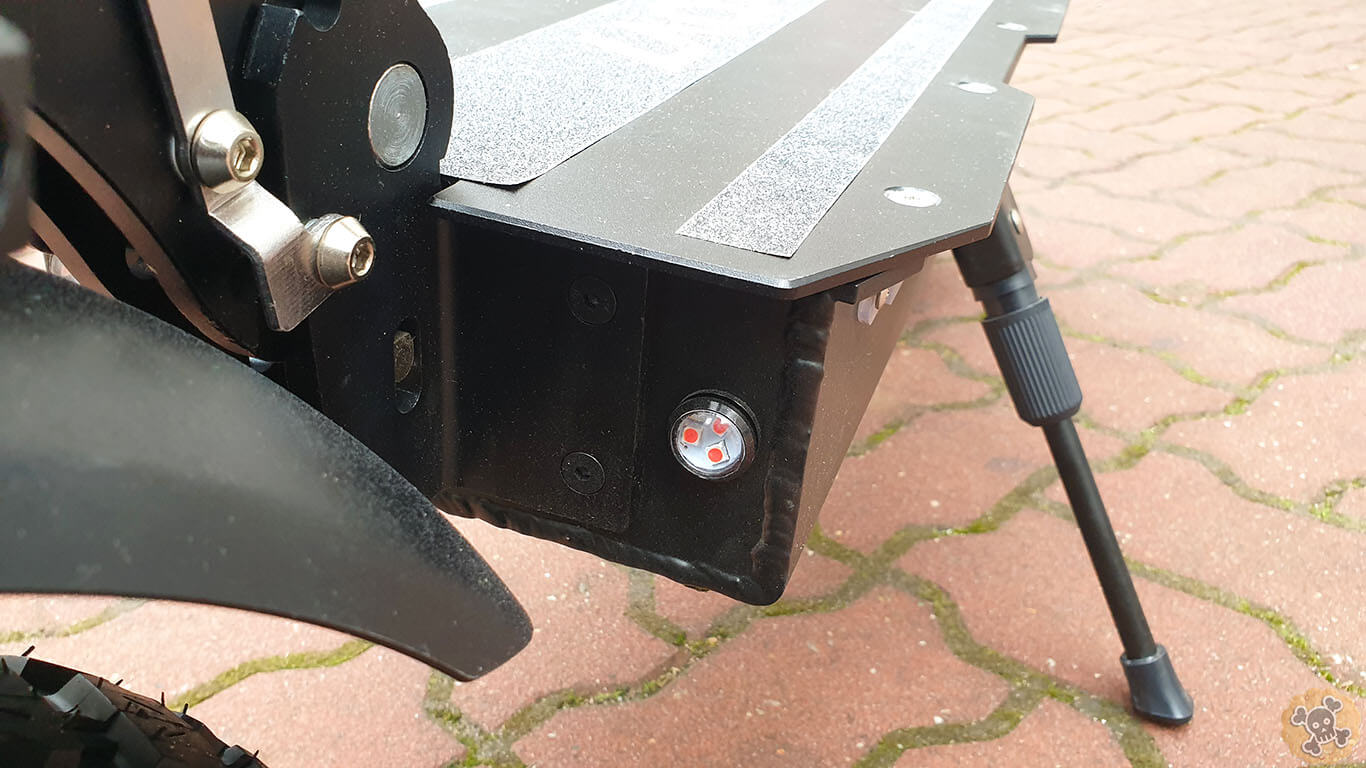
Electric stuff, so we got 2x charging port on the side/ standard Remote alarm ( I really like this one ) / 2 Big and 2 Small front lights / 2 lights on the sides / 2 Blinkers on the back / 2 back lights and 2 Stop back lights.