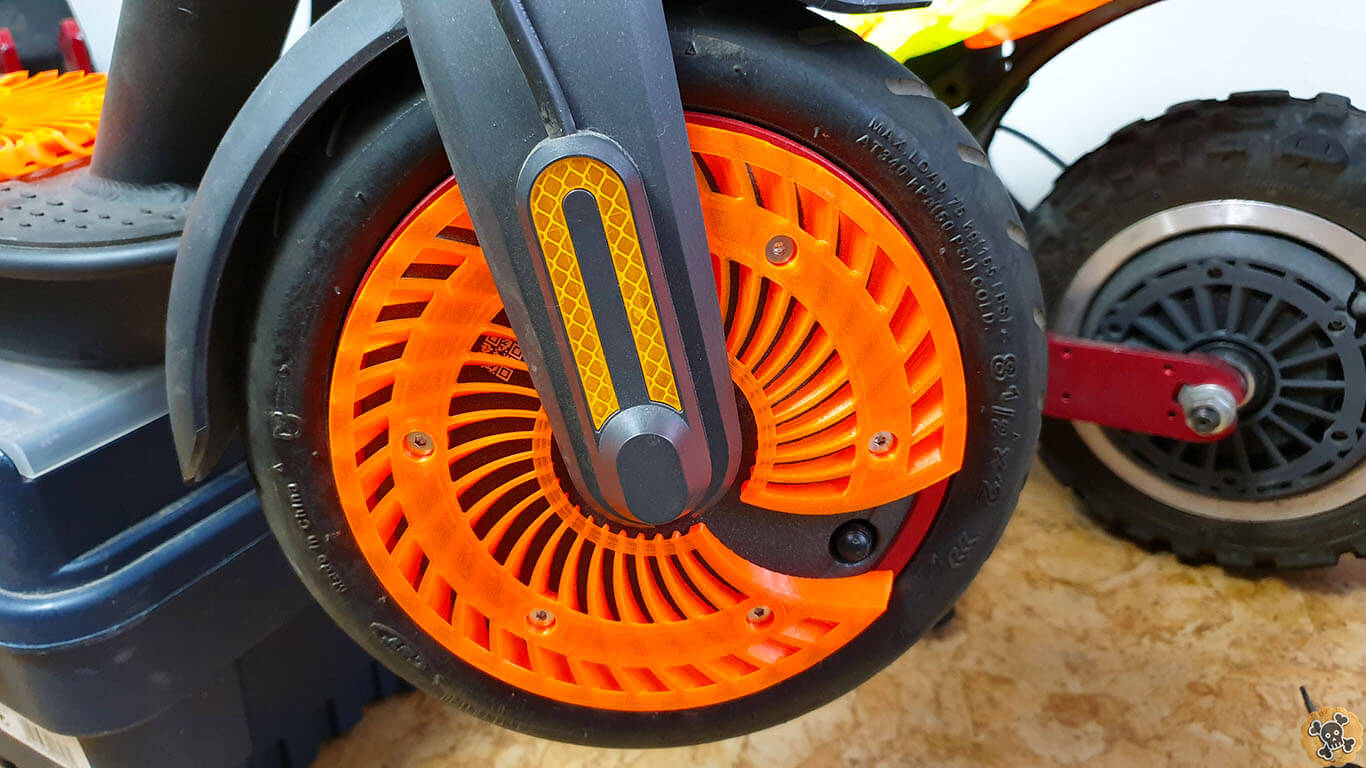
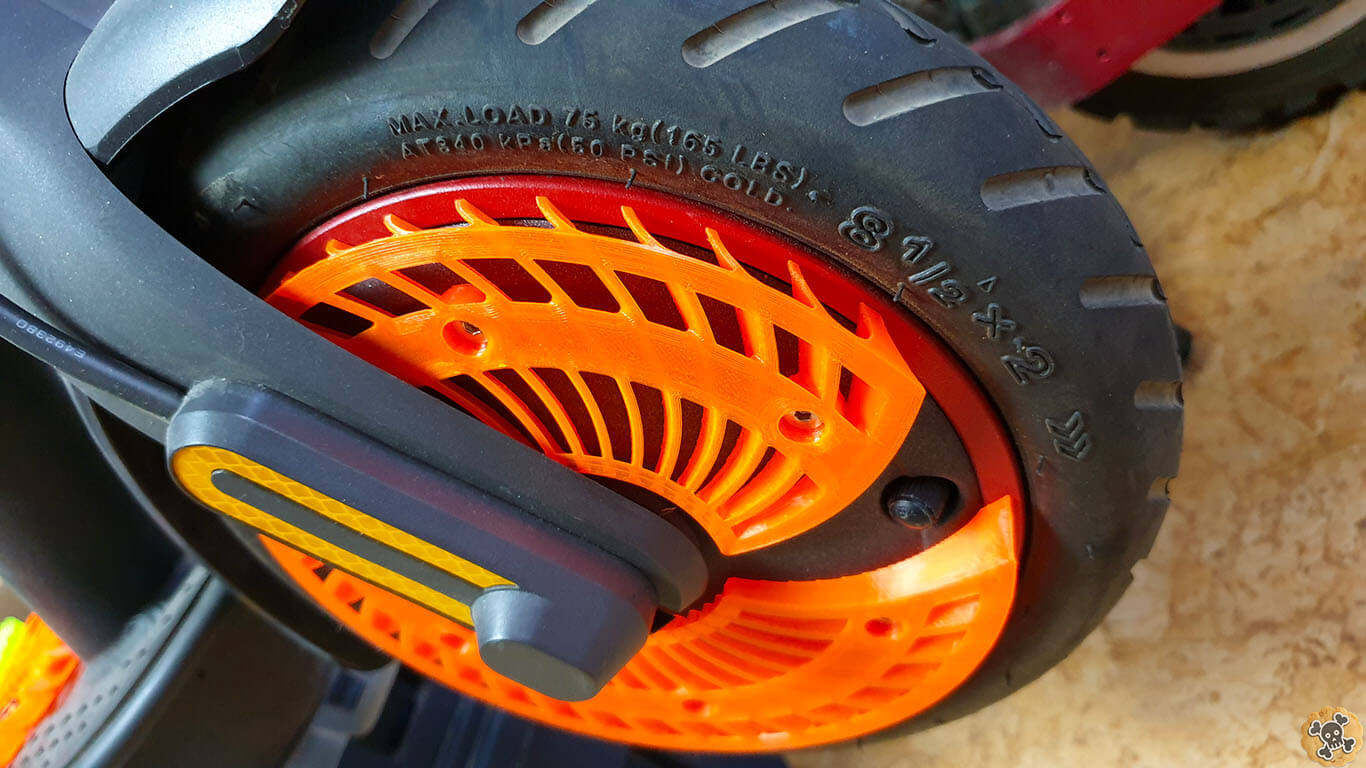
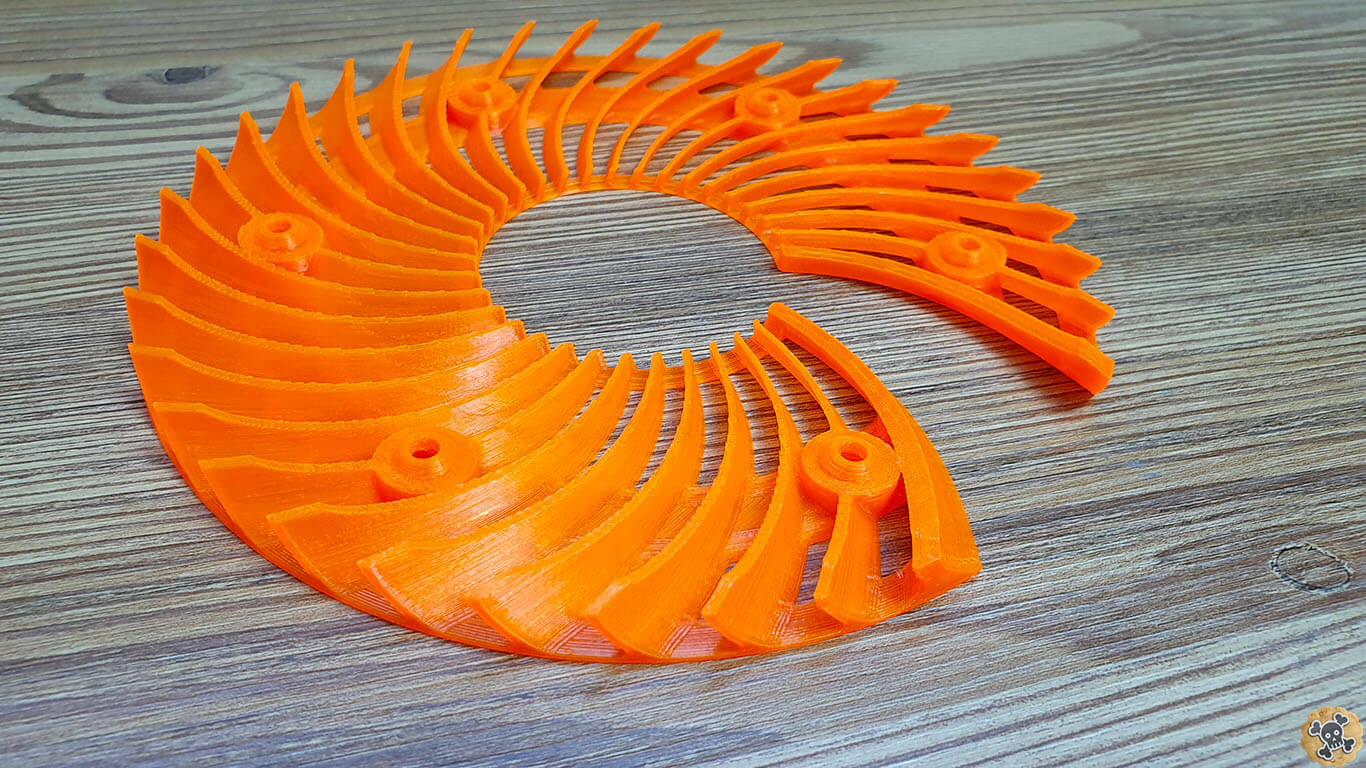
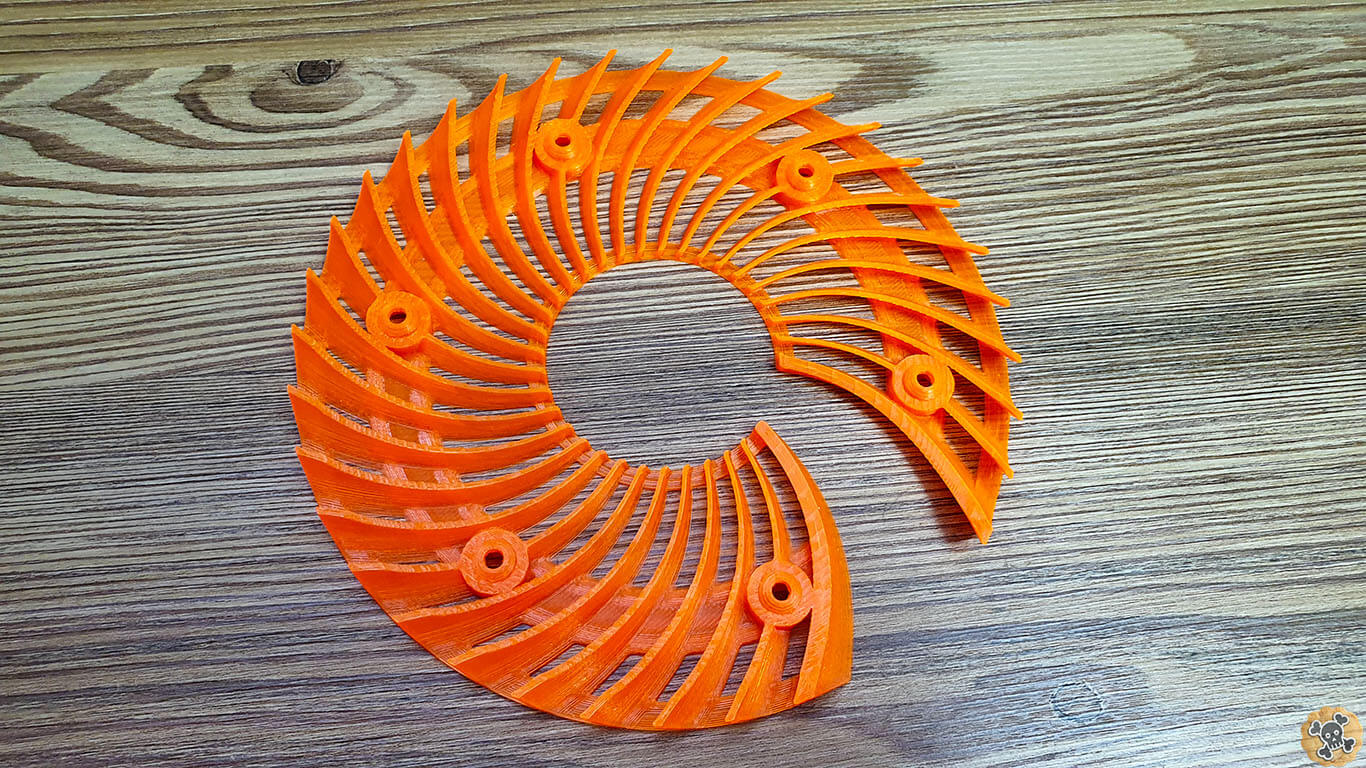
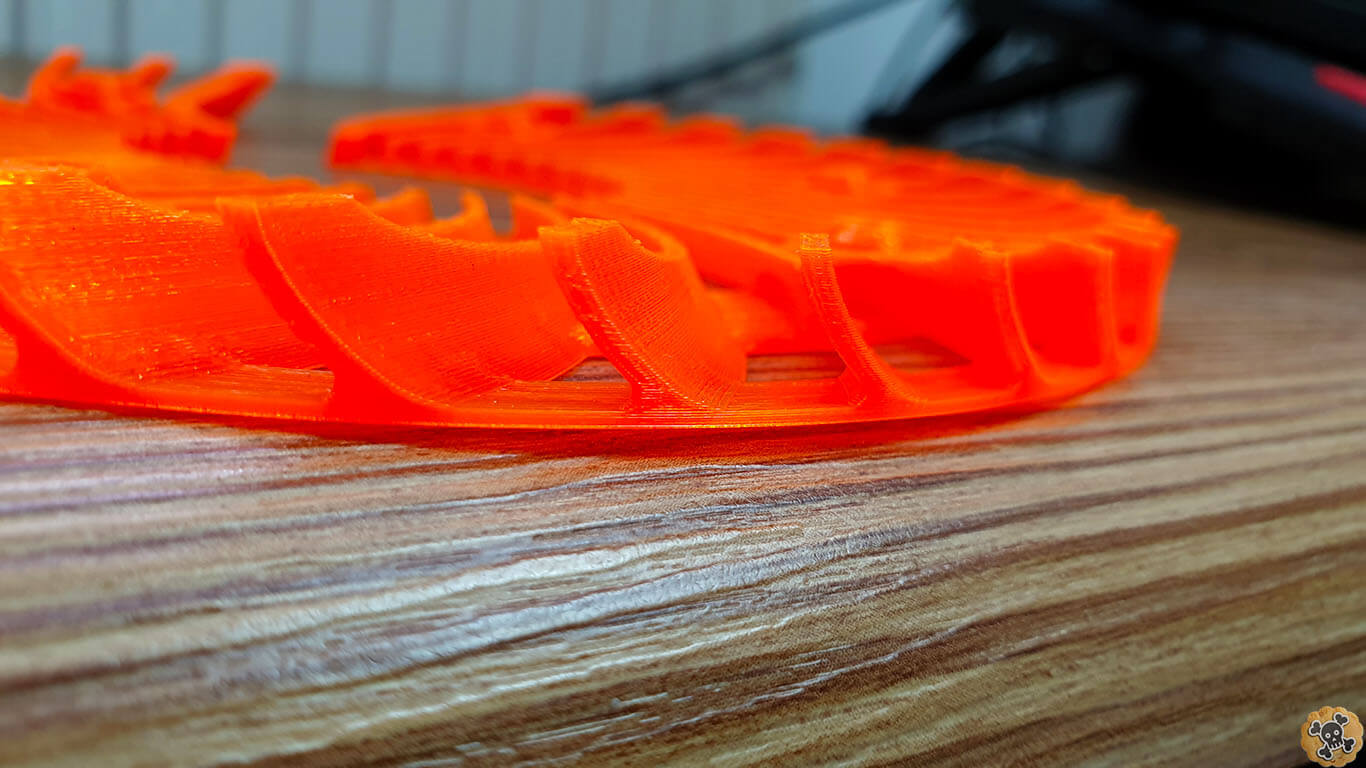
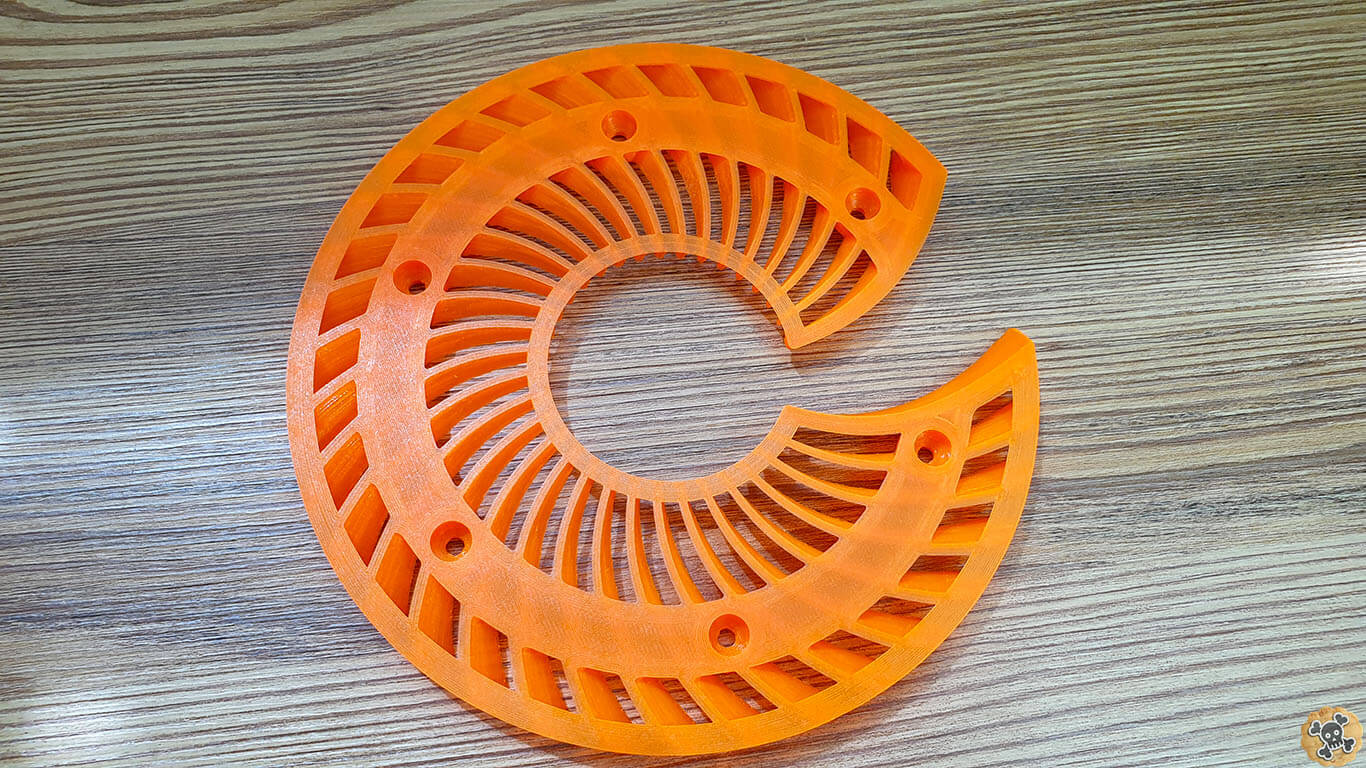
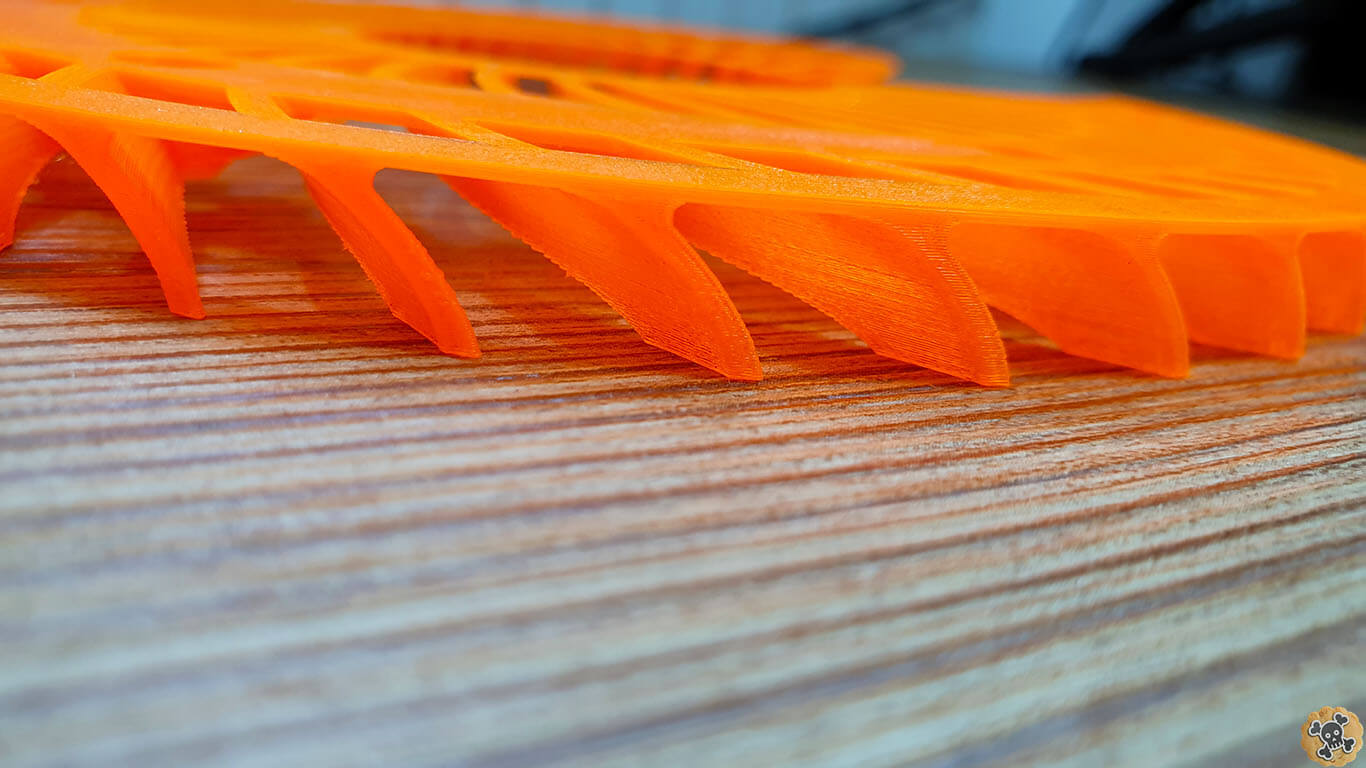
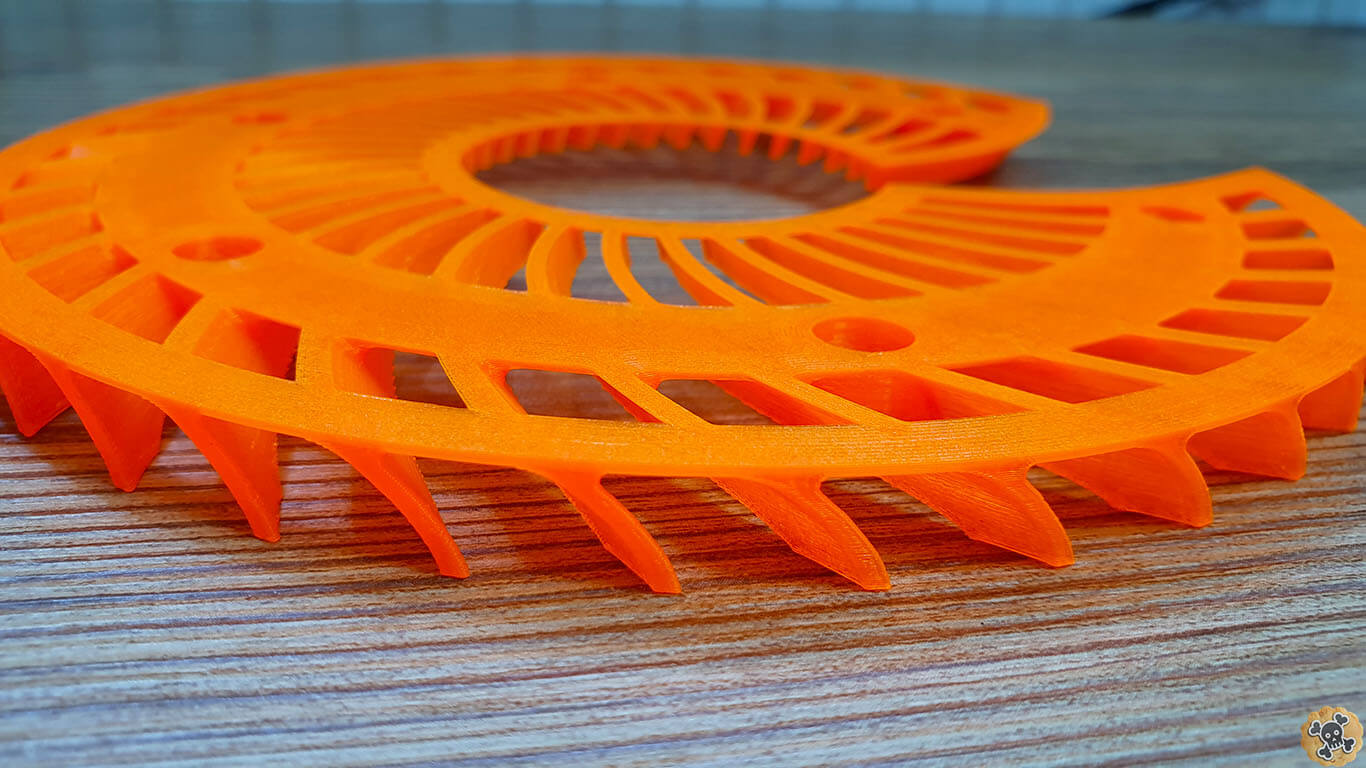
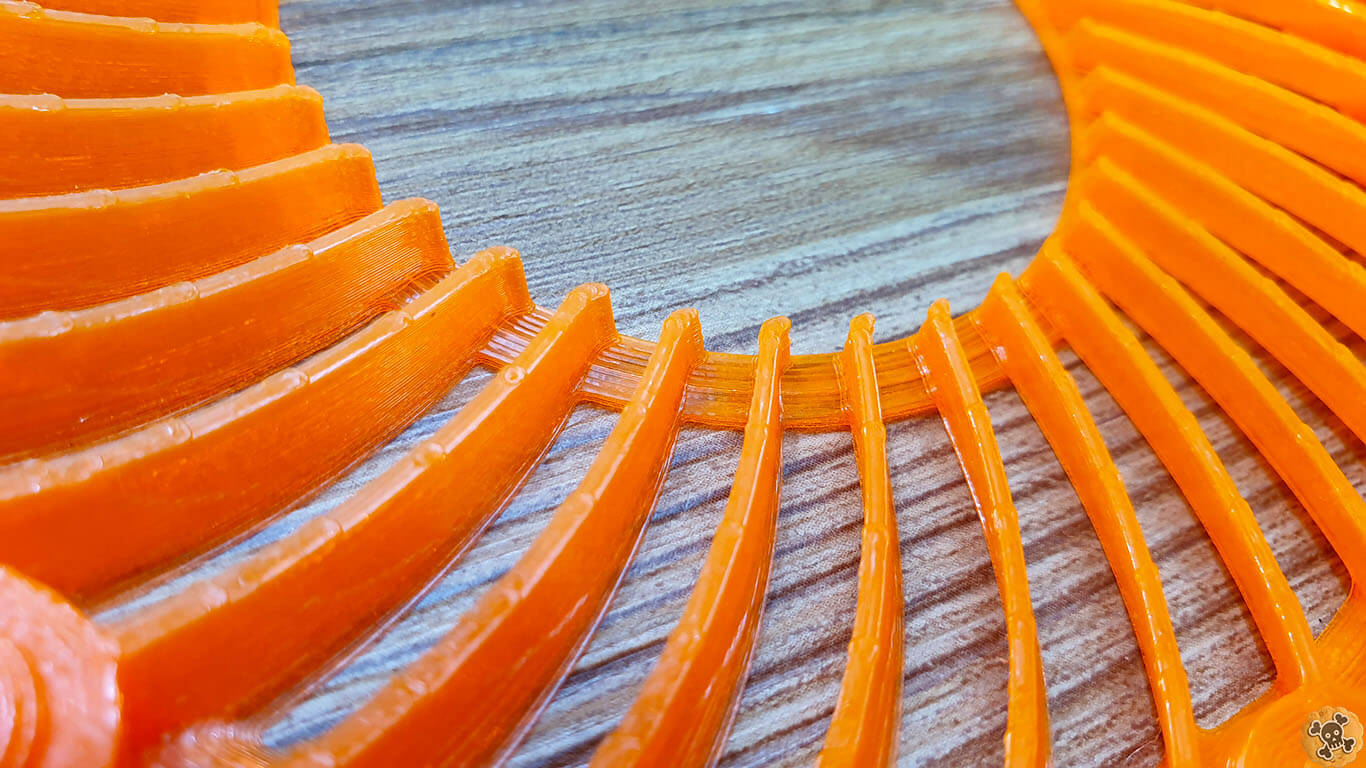
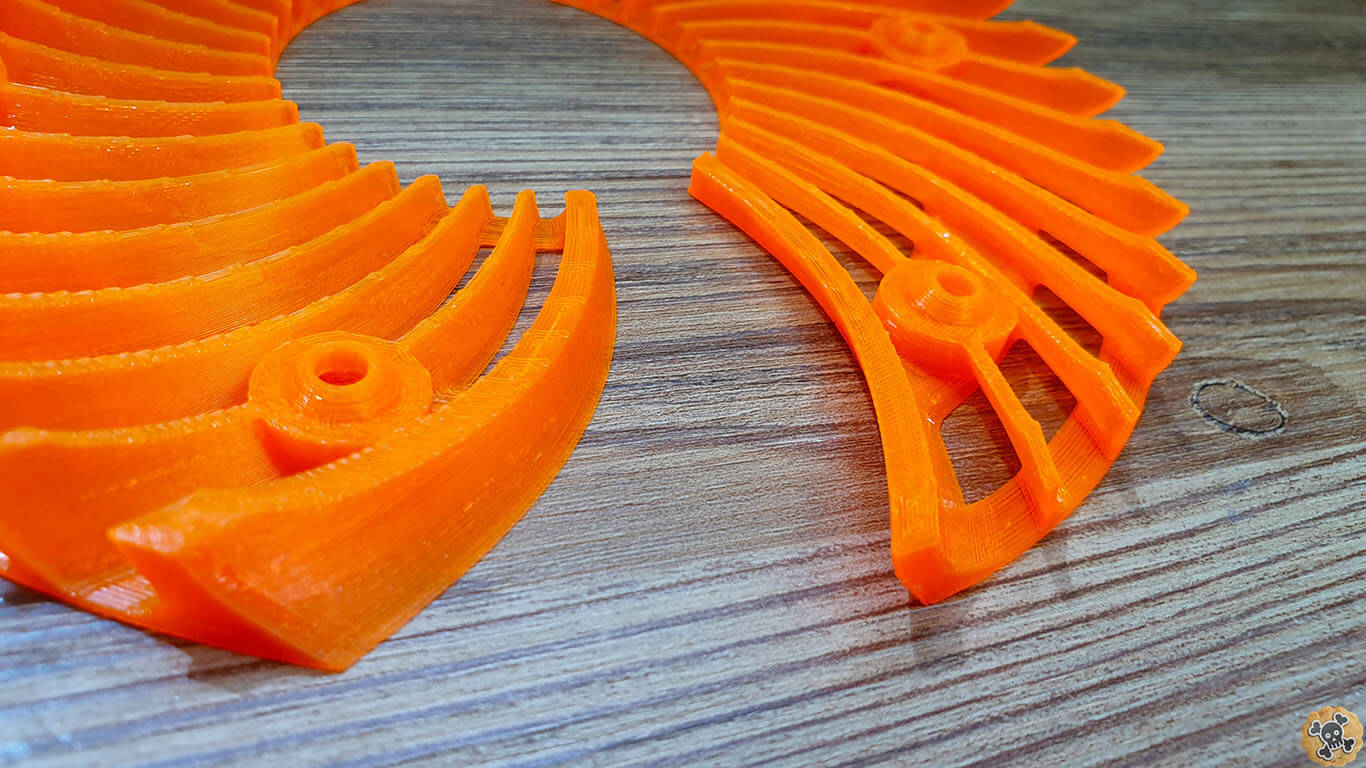
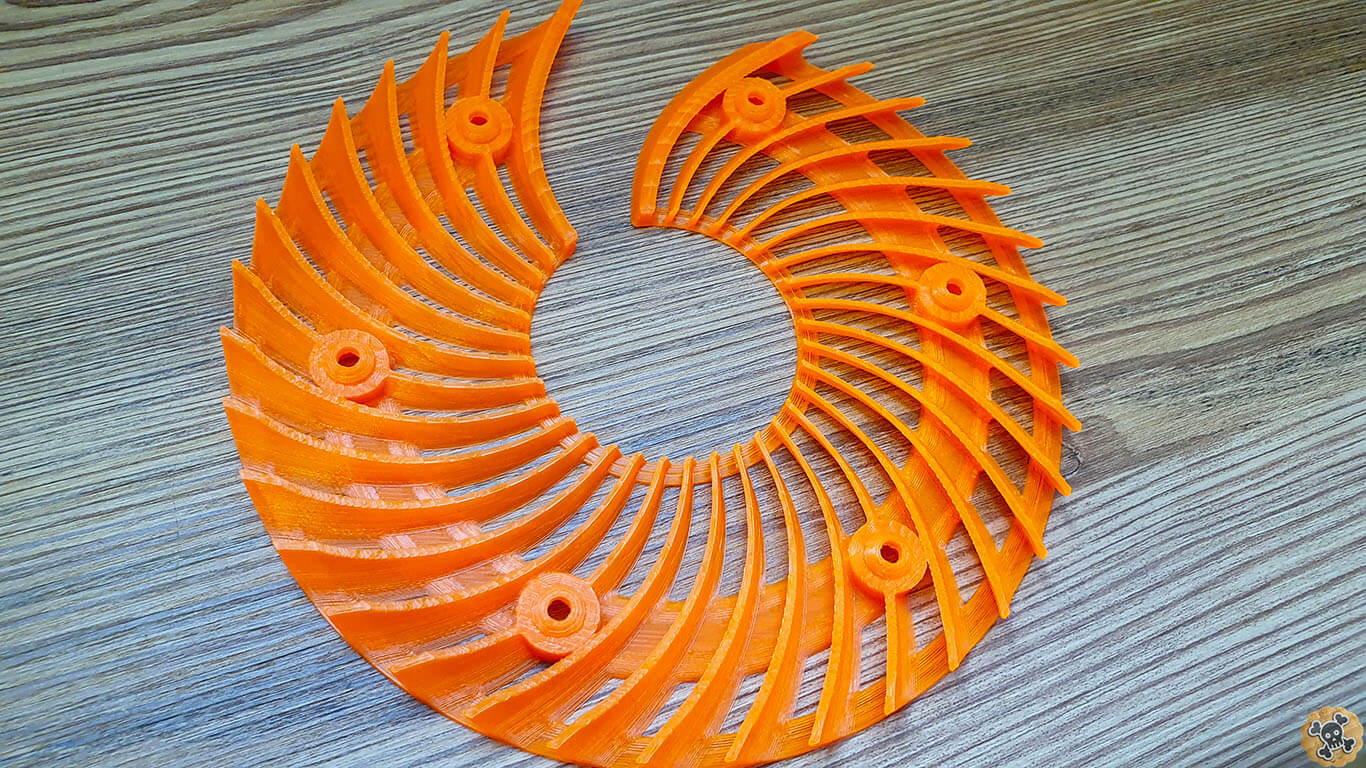
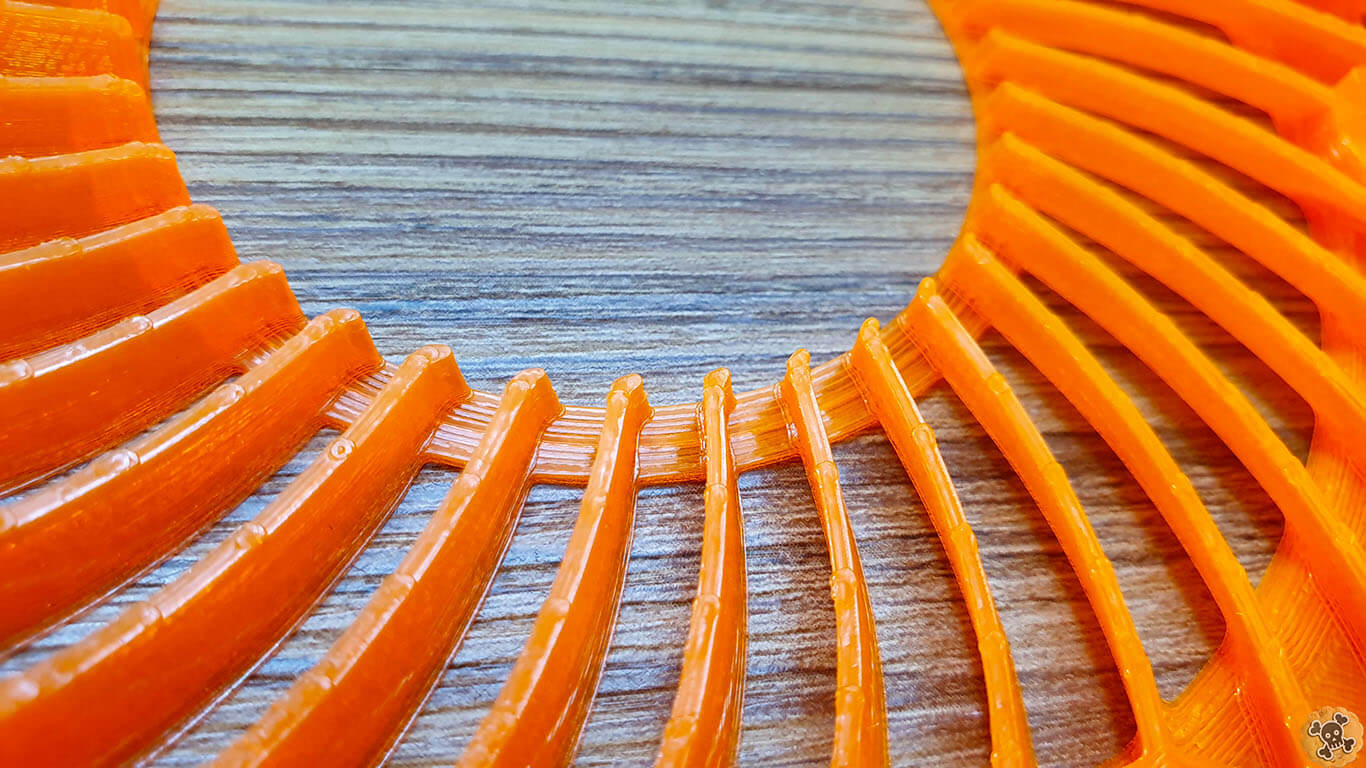
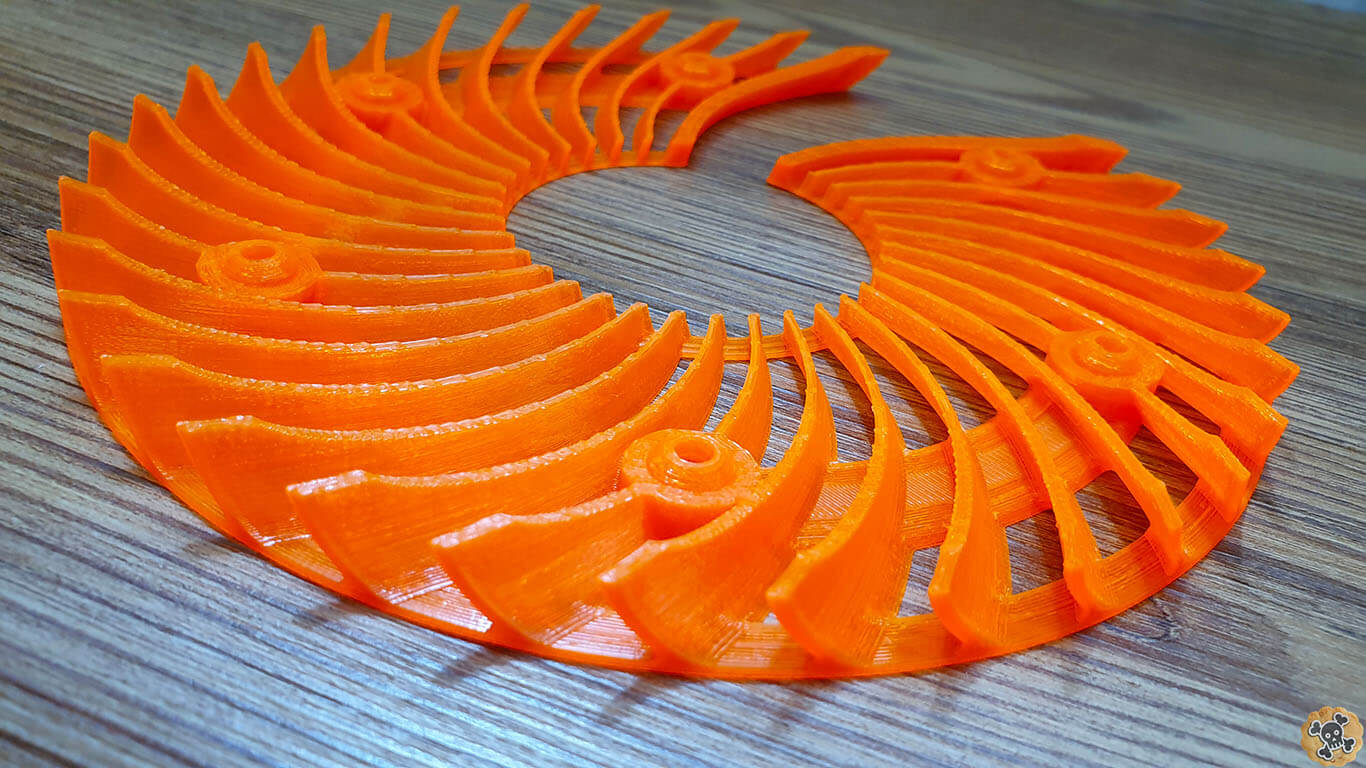
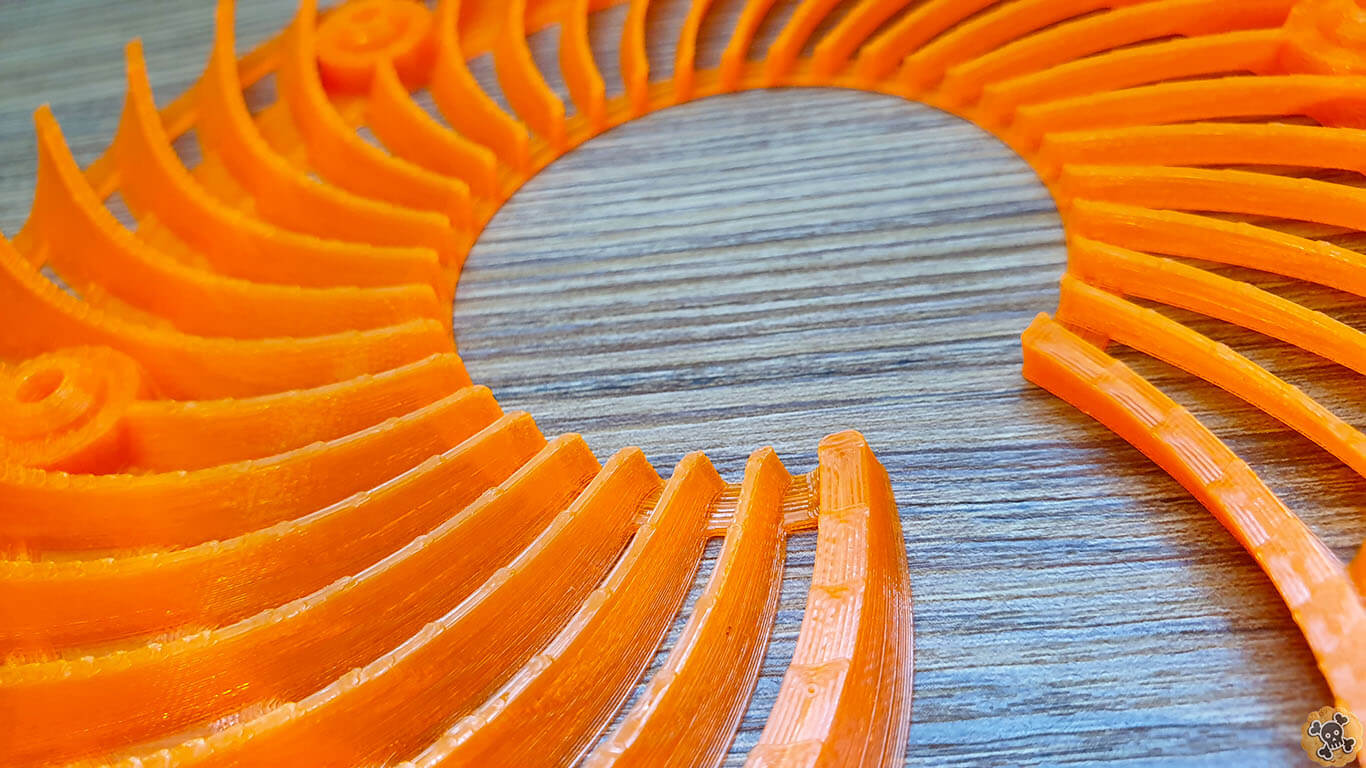
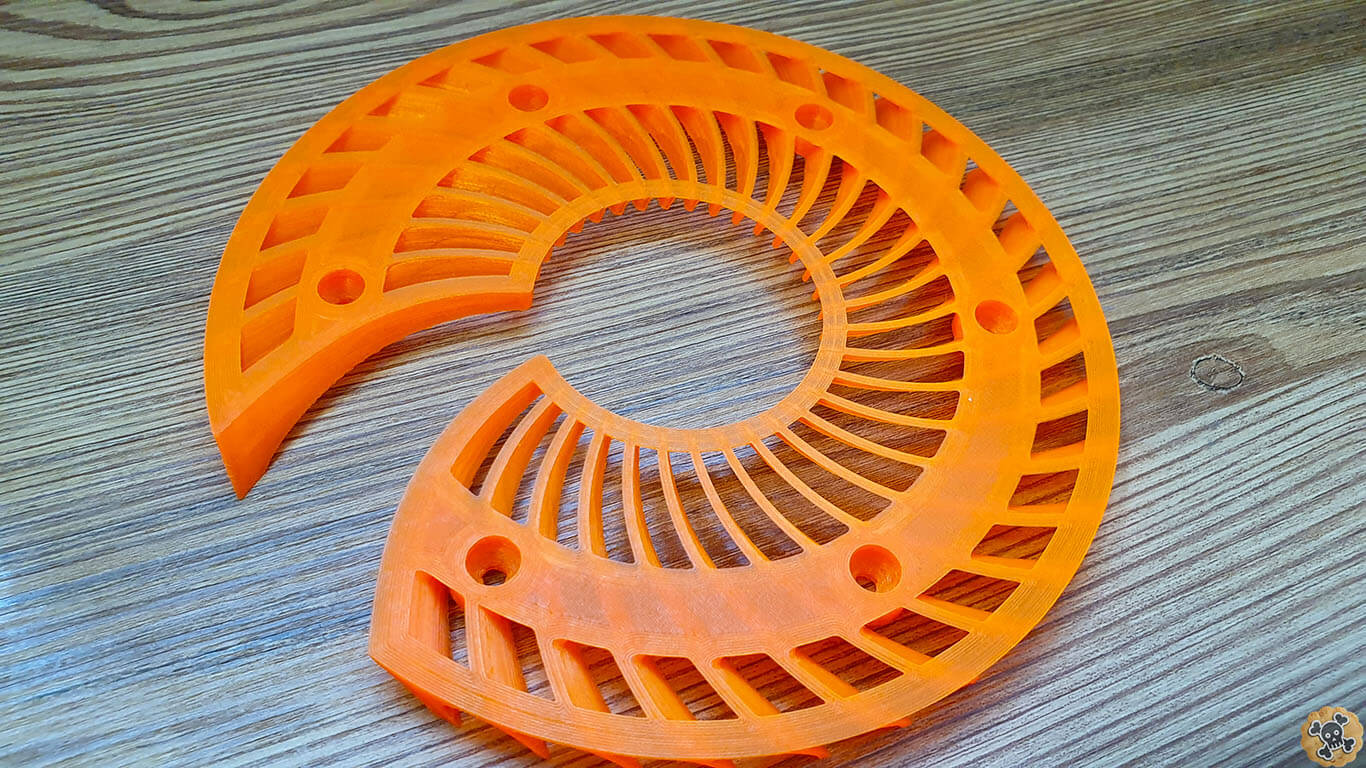
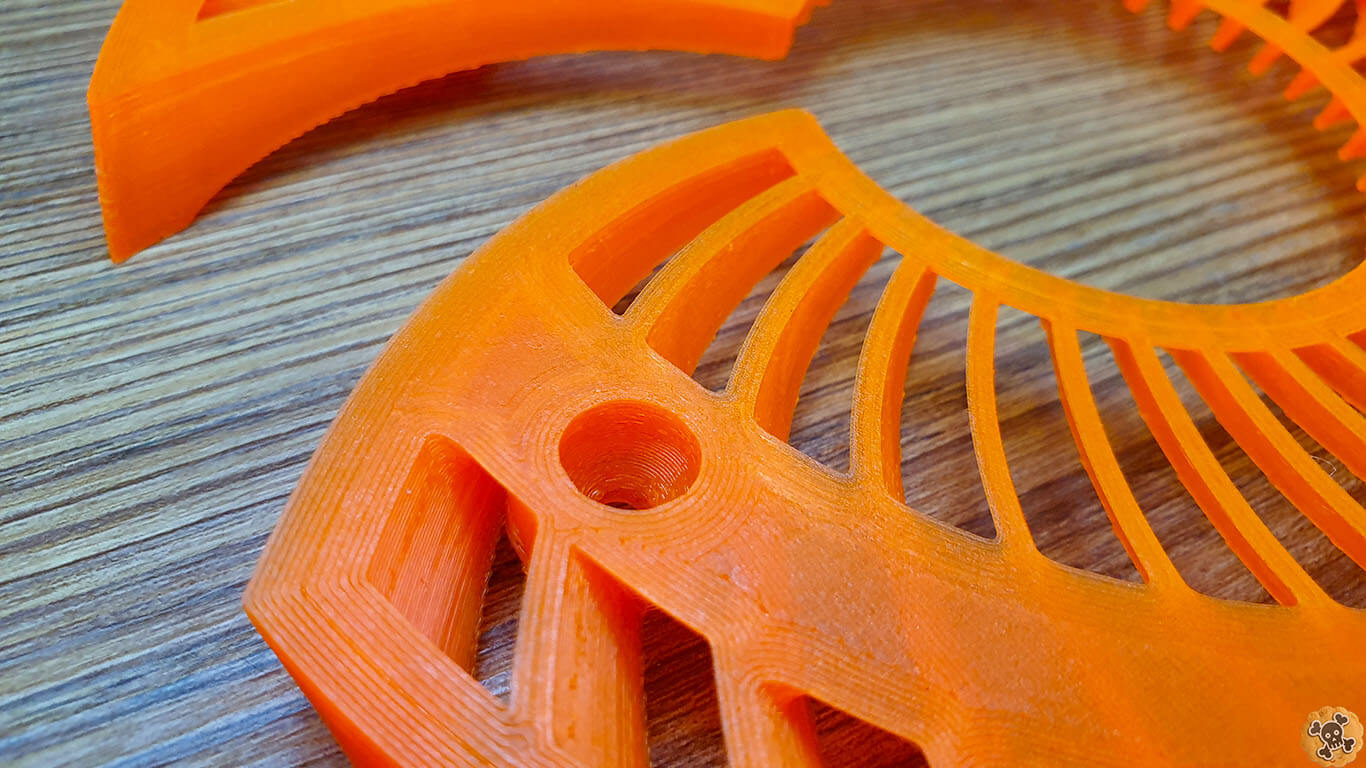
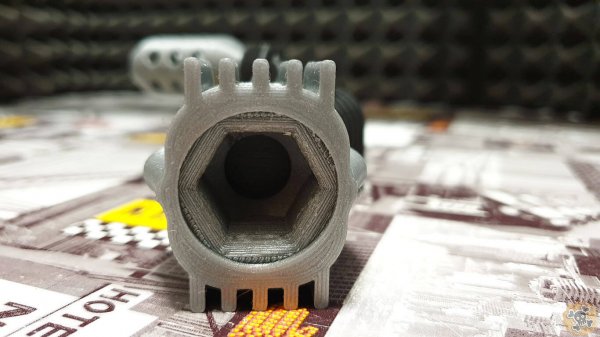
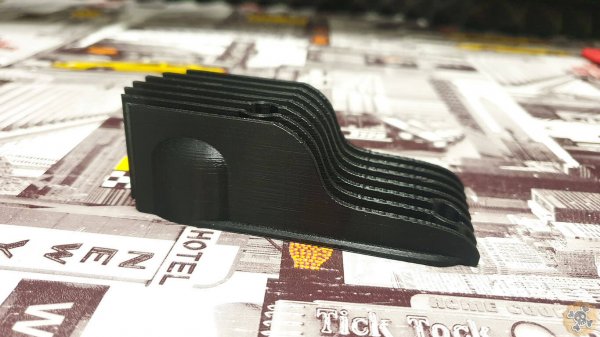
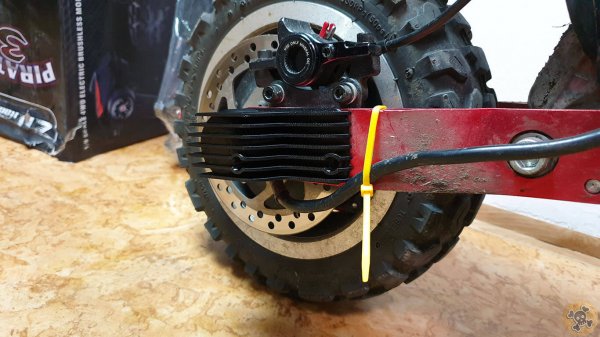
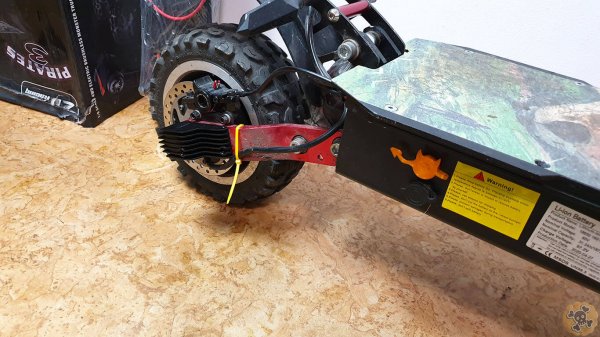
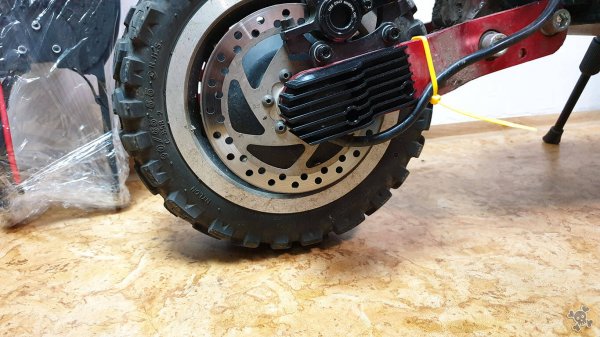
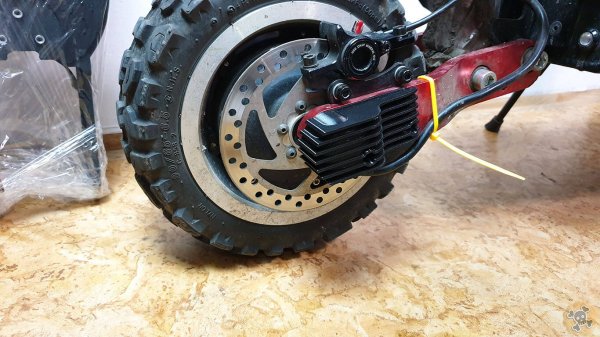
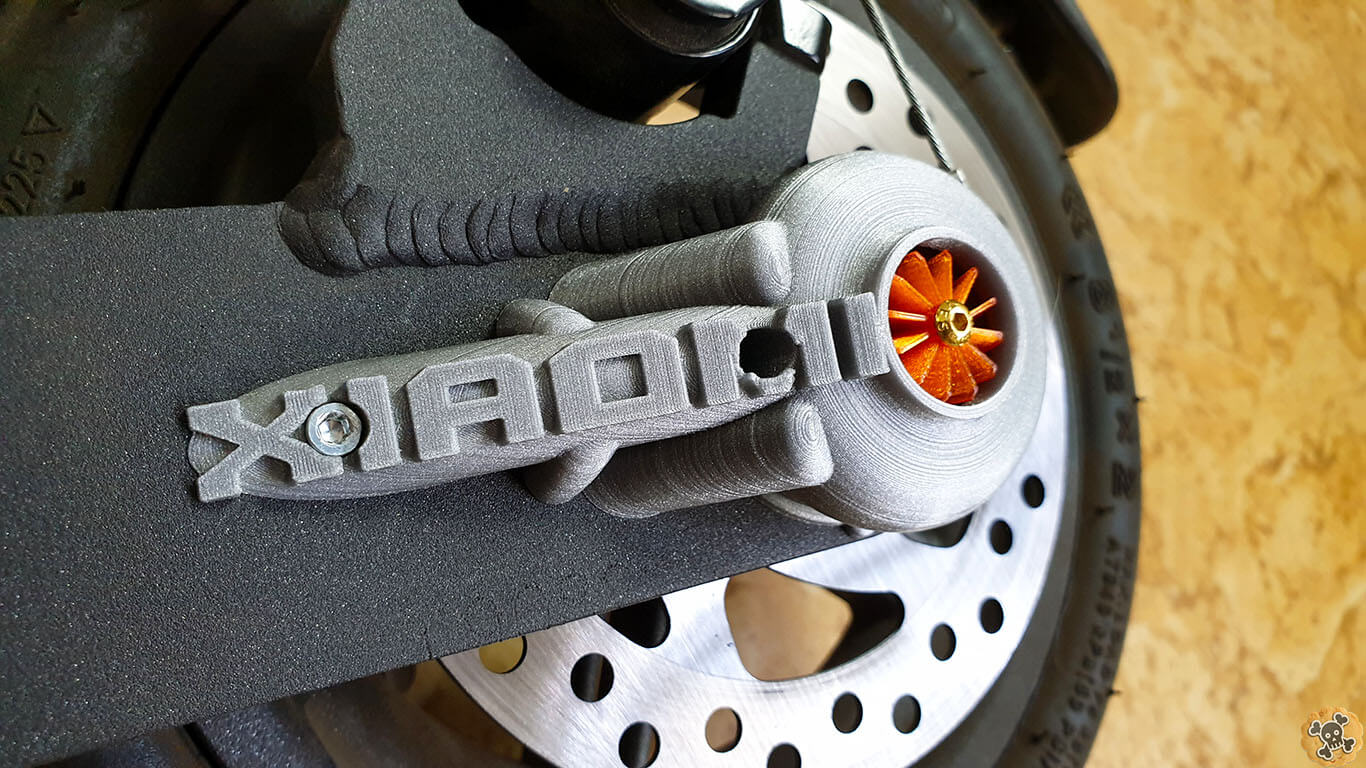
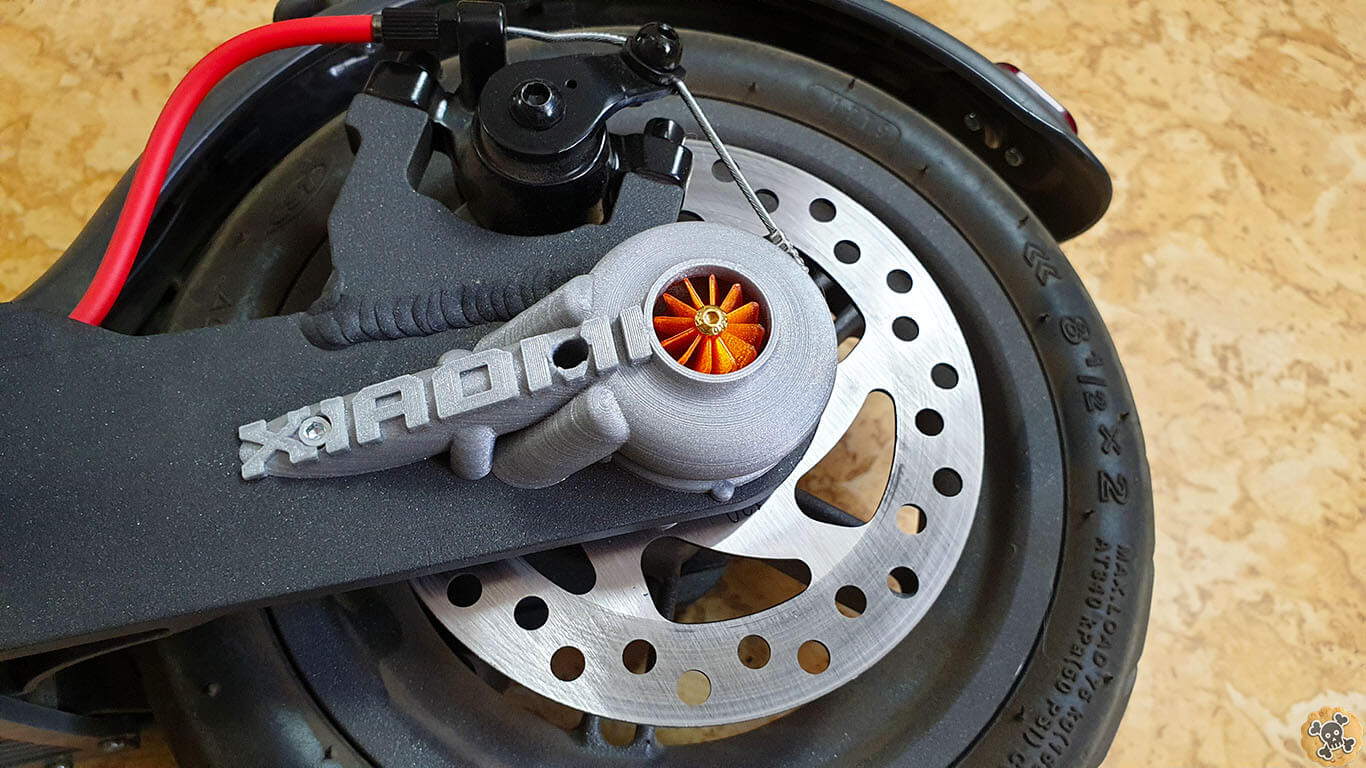
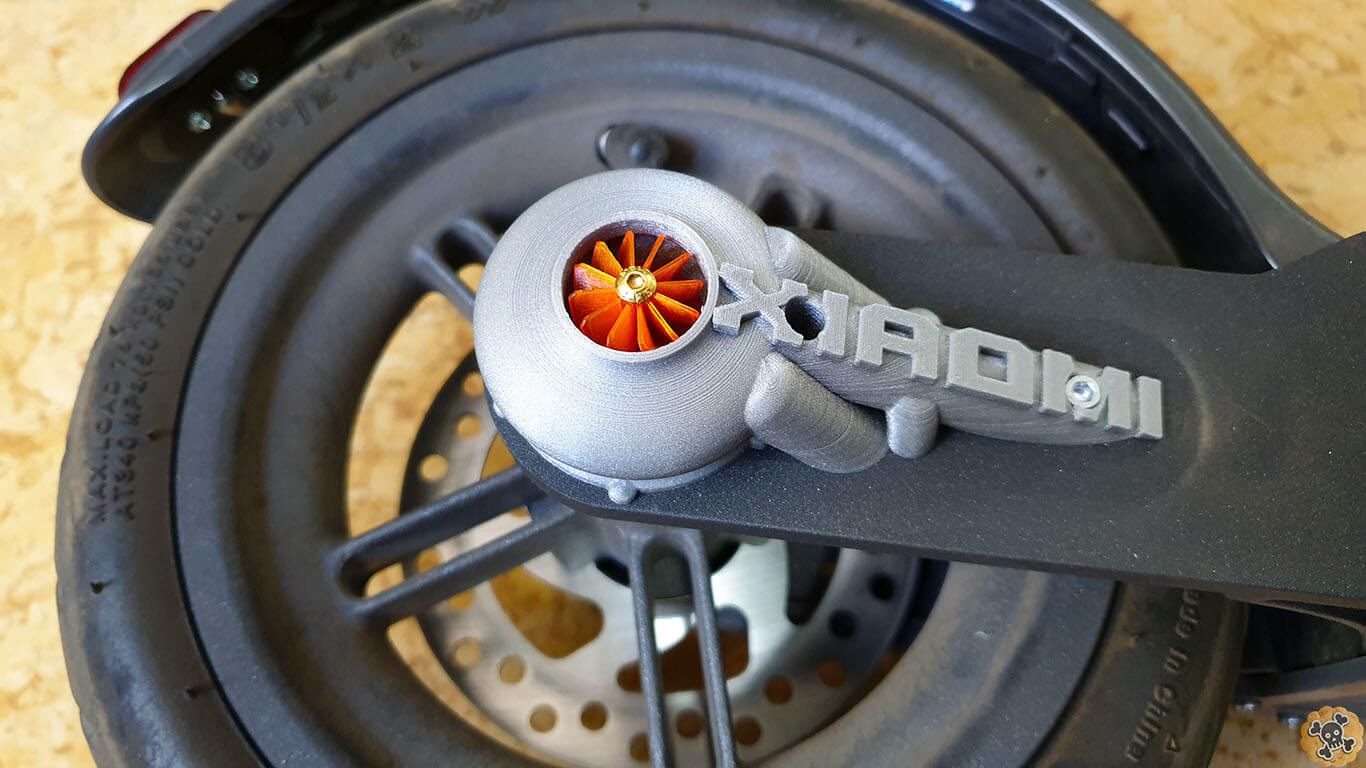
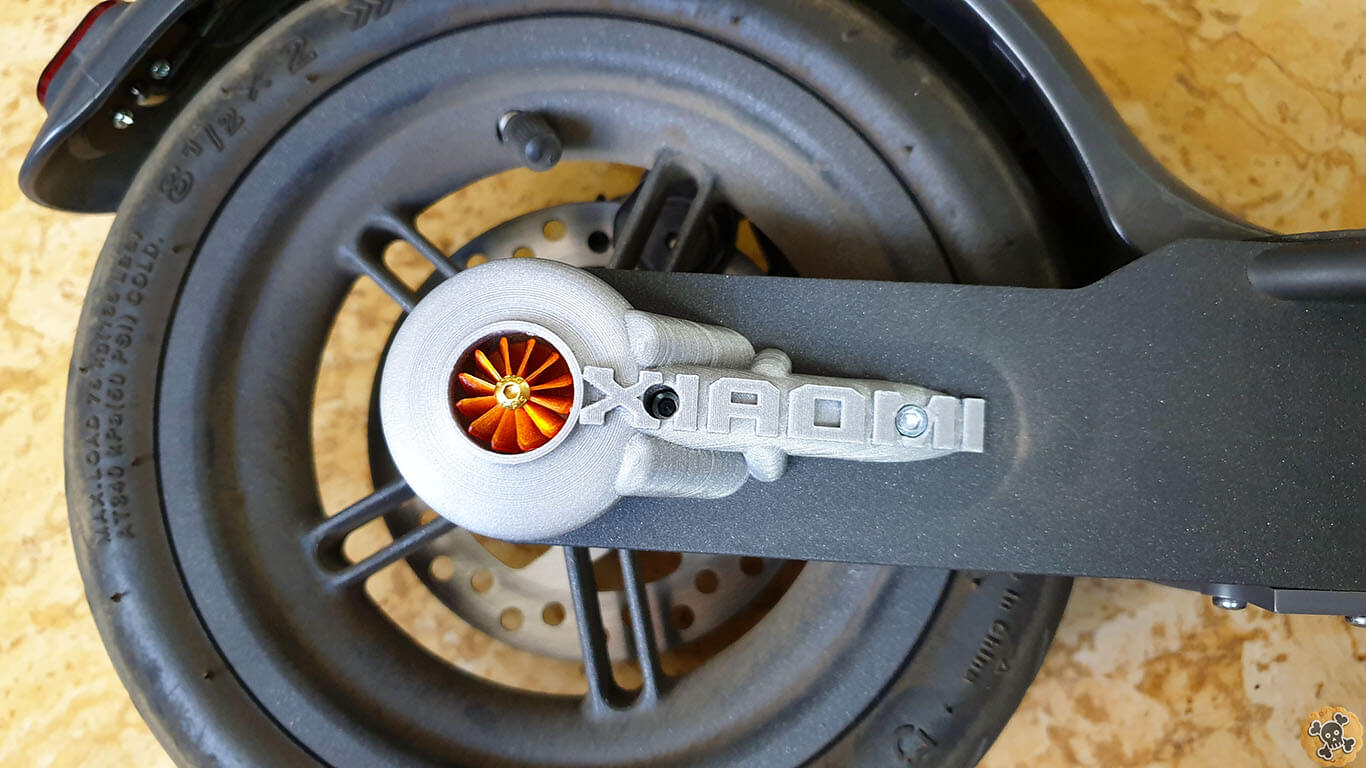
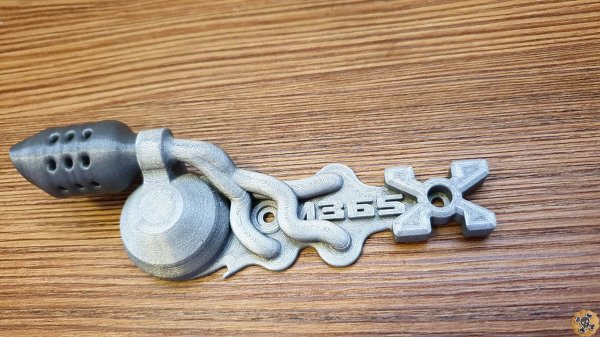
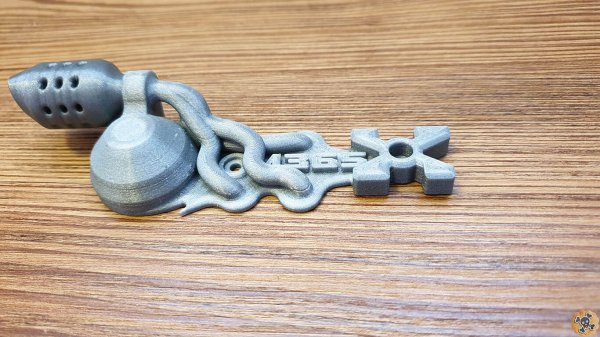
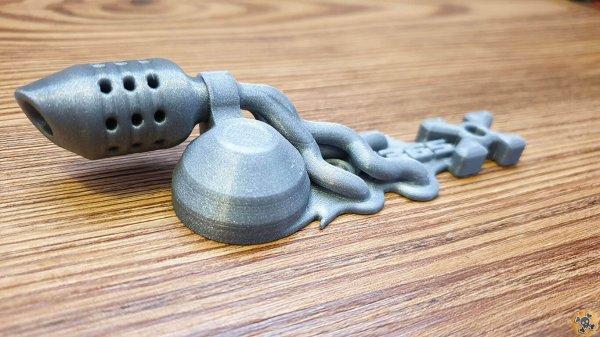
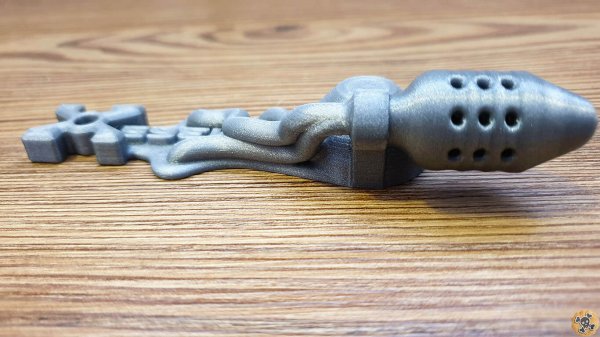
Newest Cooler for Xiaomi m365 called MAX is my most efficient construction yet, 3x greater airflow compare to old version. Also it’s lighter, looks Awesome , fits of M365 Classic/Pro & can be easily installed without removing motor. This cooler can decrease temperature of the motor, which is quite important if you increasing power 1000w++ ⚡? ( stock Pro got 980W ) or if you are BiG Guy ?
Brushless motor #1 killer is overheating, Temperature difference between the motor shell and inner coil can be even 1:2 so if motor shell is 50C then inside the motor could be even over 100C so as you can imagine any temperature drop counts.
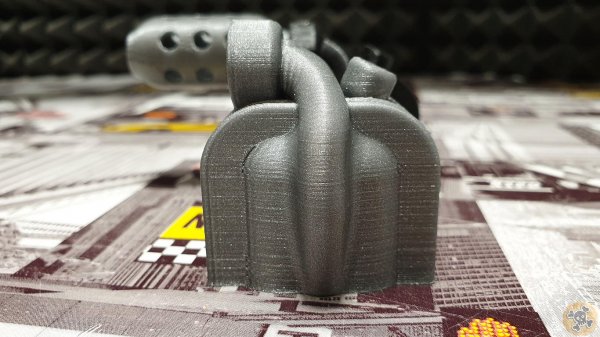
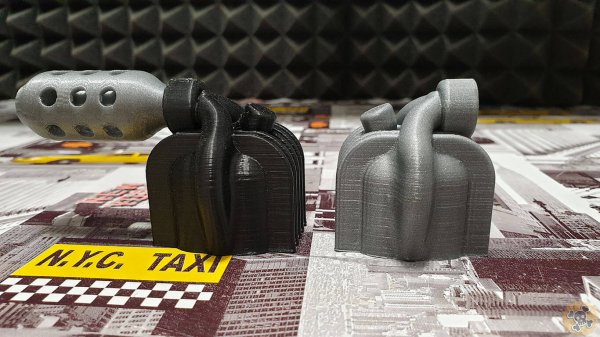
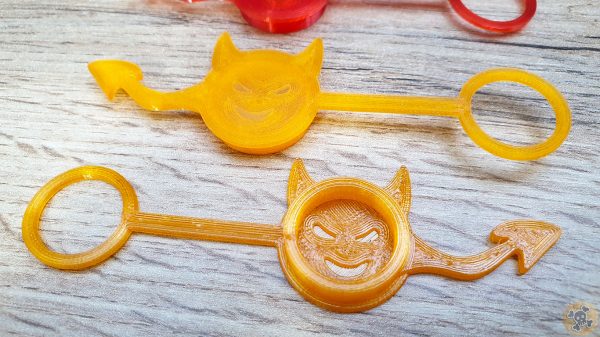
Without side covers for motor shaft scoot looks bad, but with covers looks much better 😉 . Some designs are free for my Patrons, if you would like me to print it for you then send me a message ( click on Contact tab )
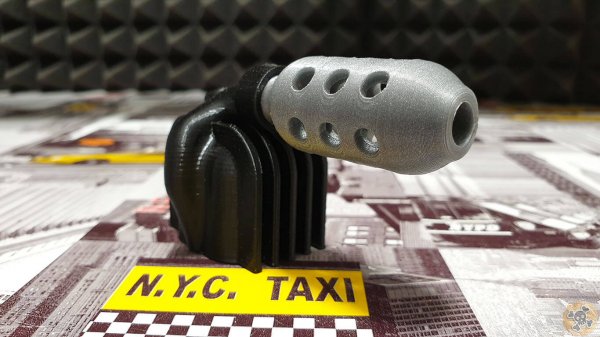
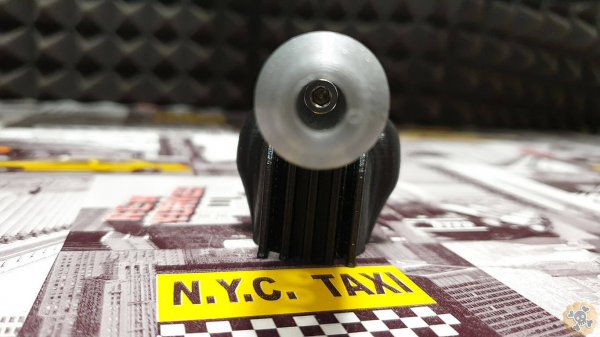
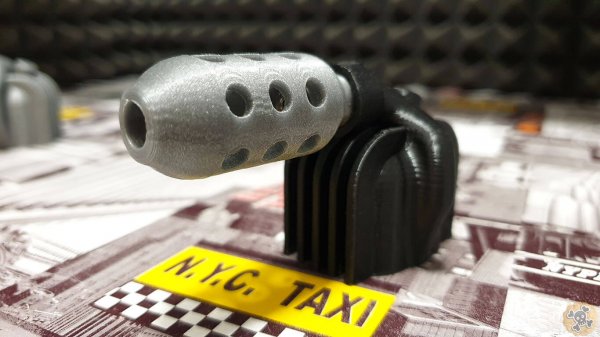
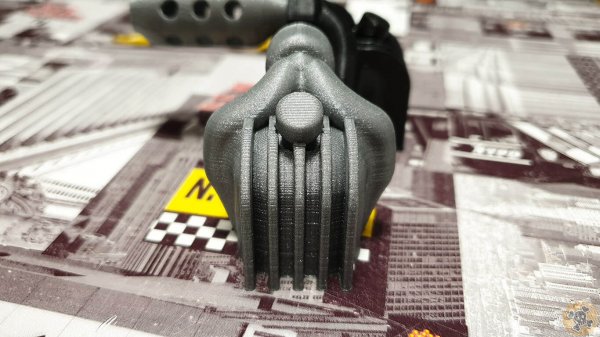
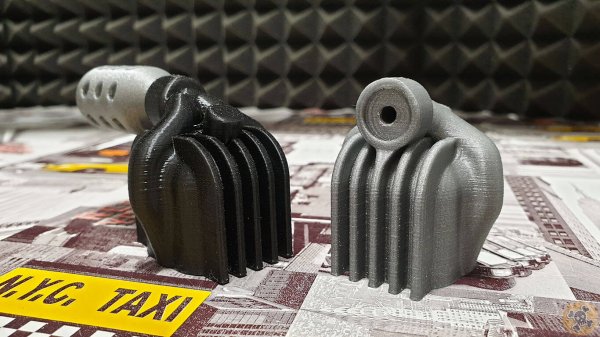
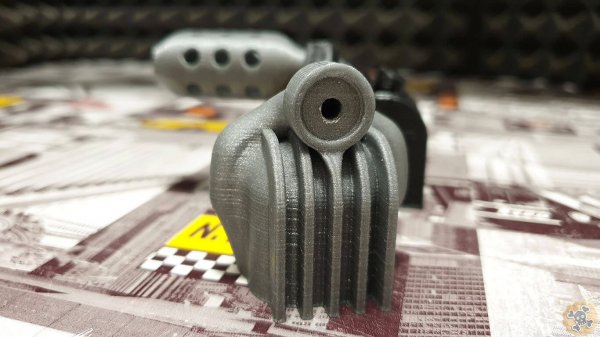
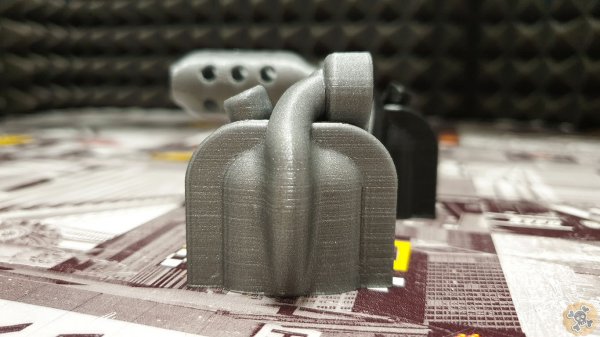
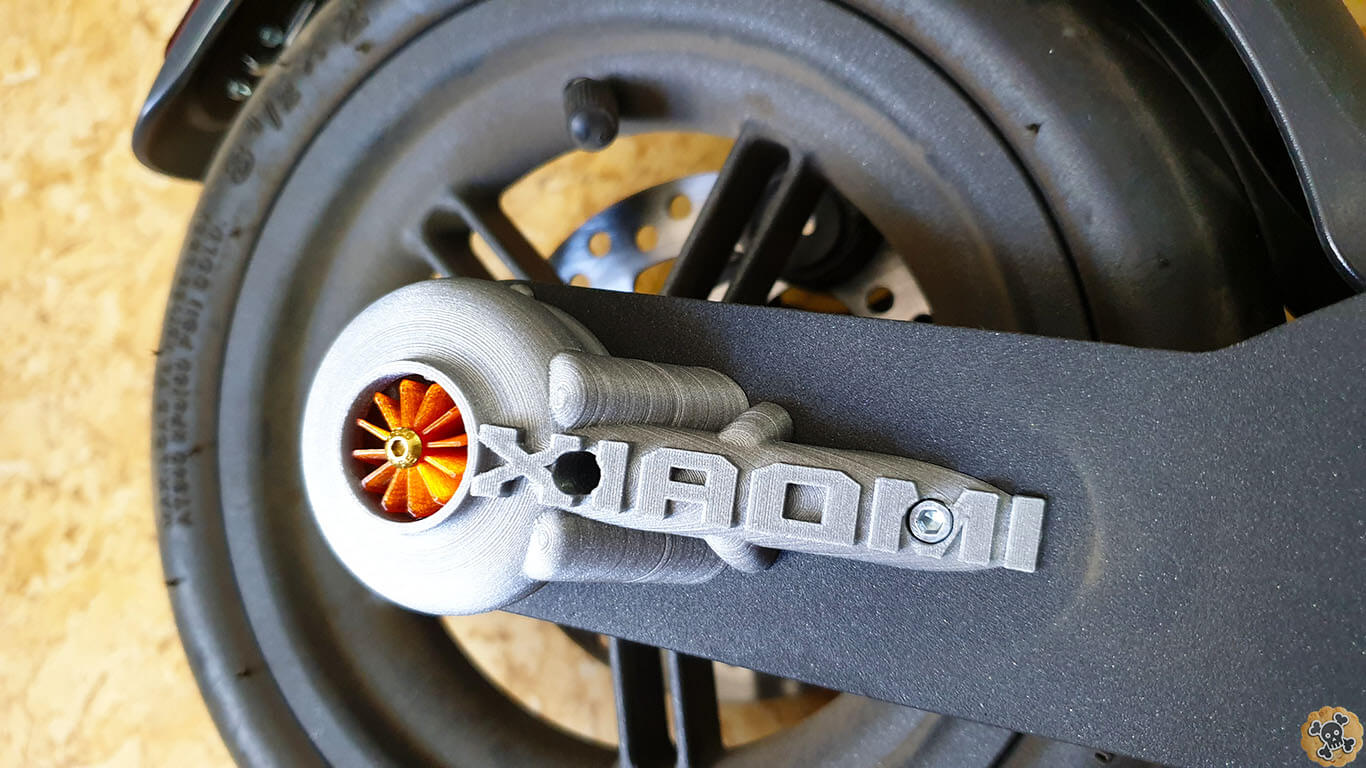
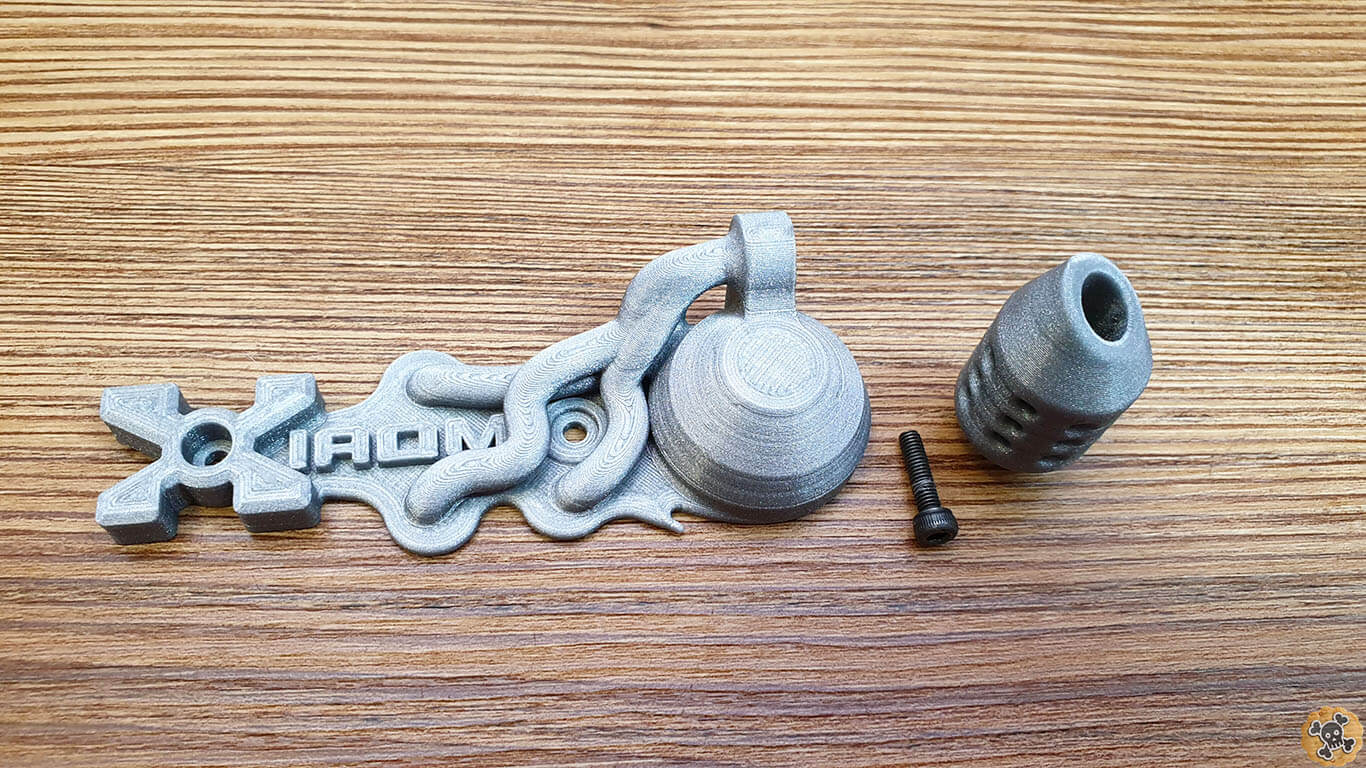
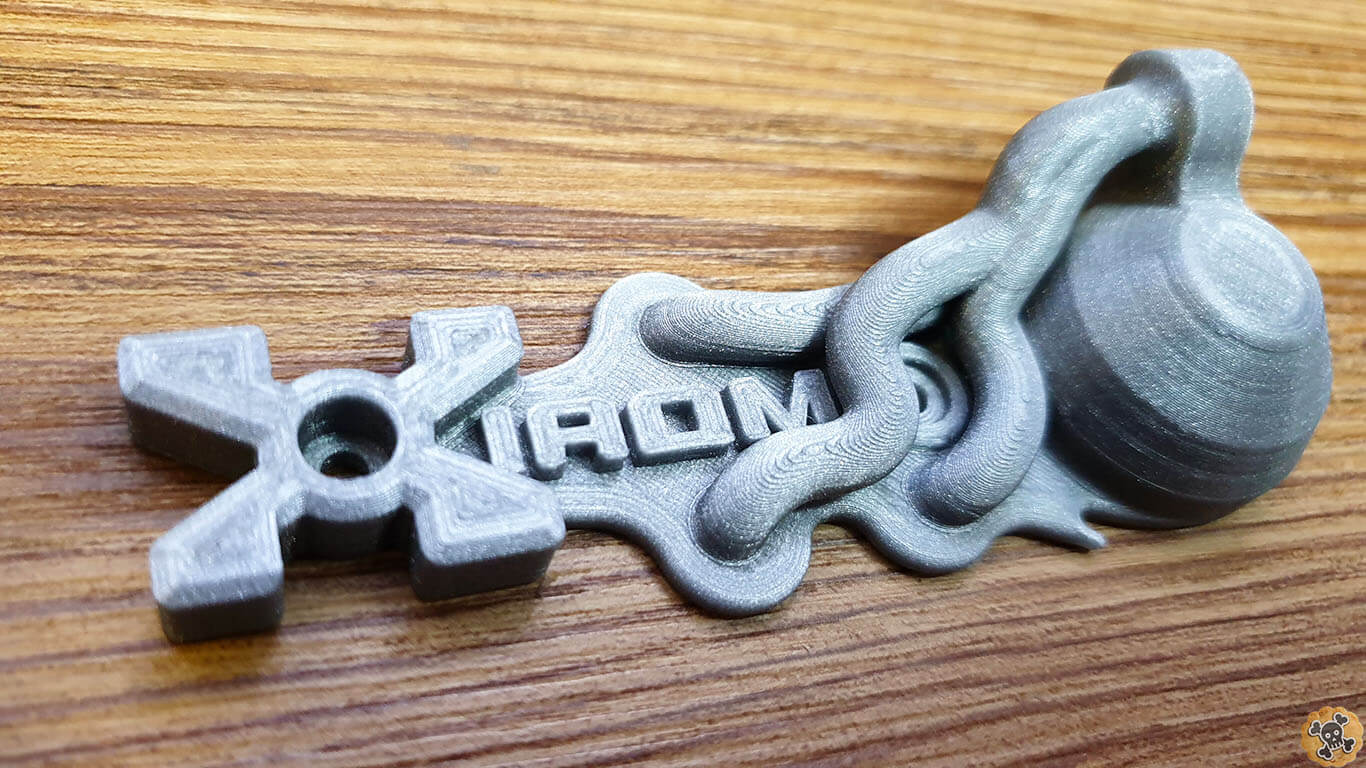
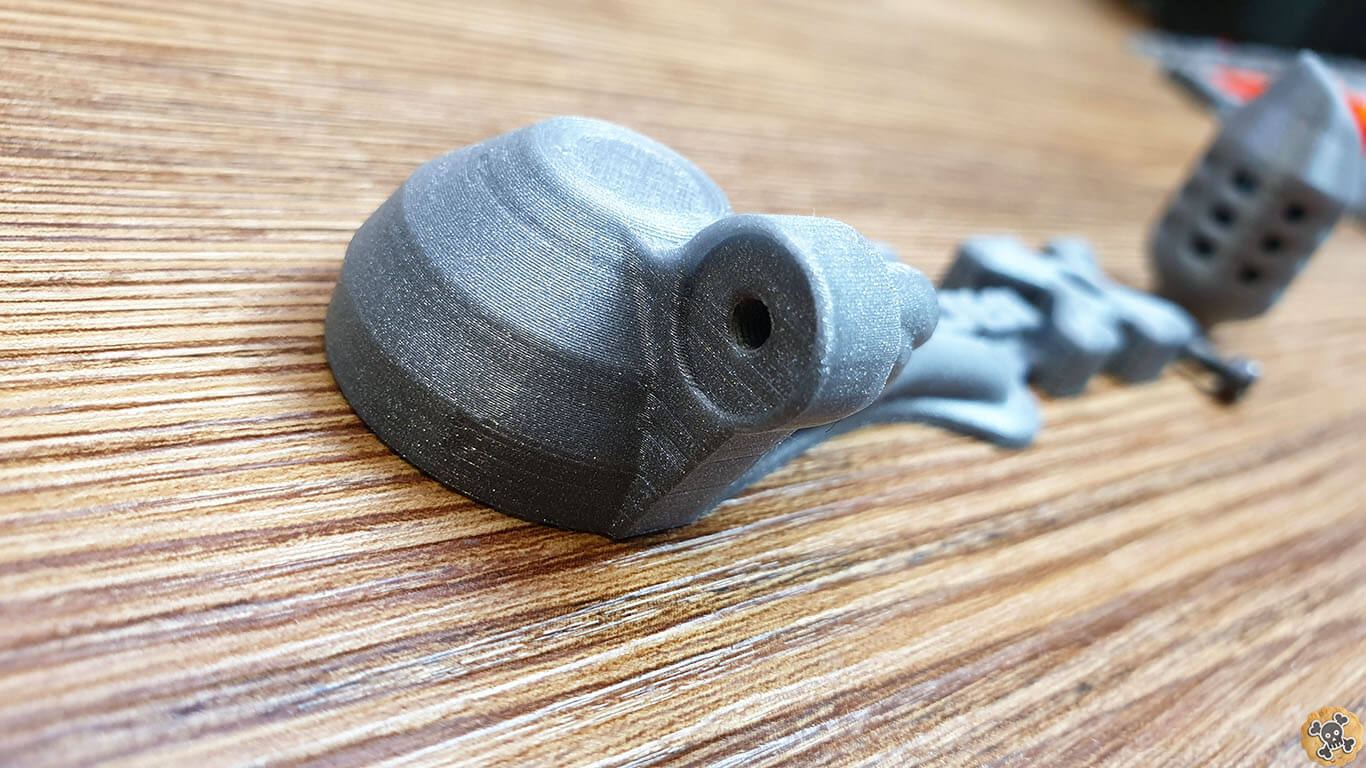
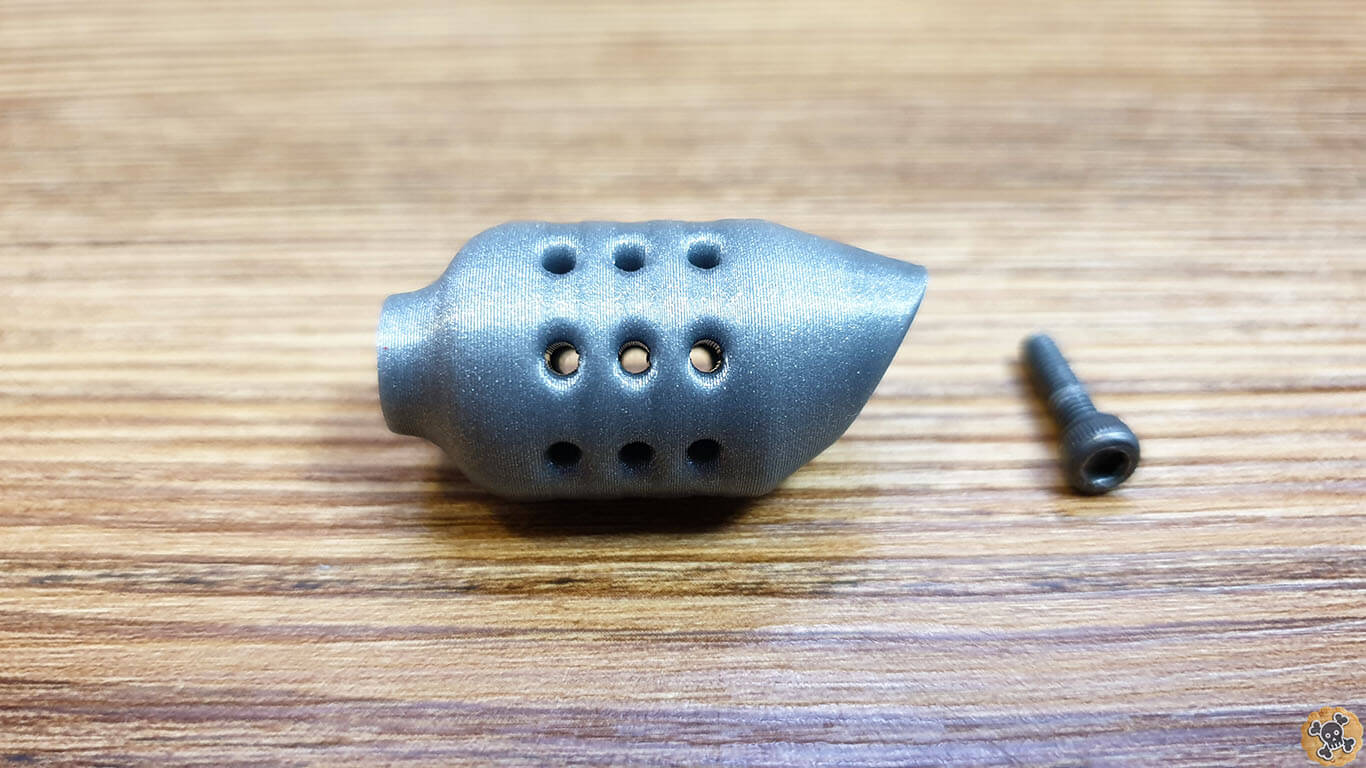
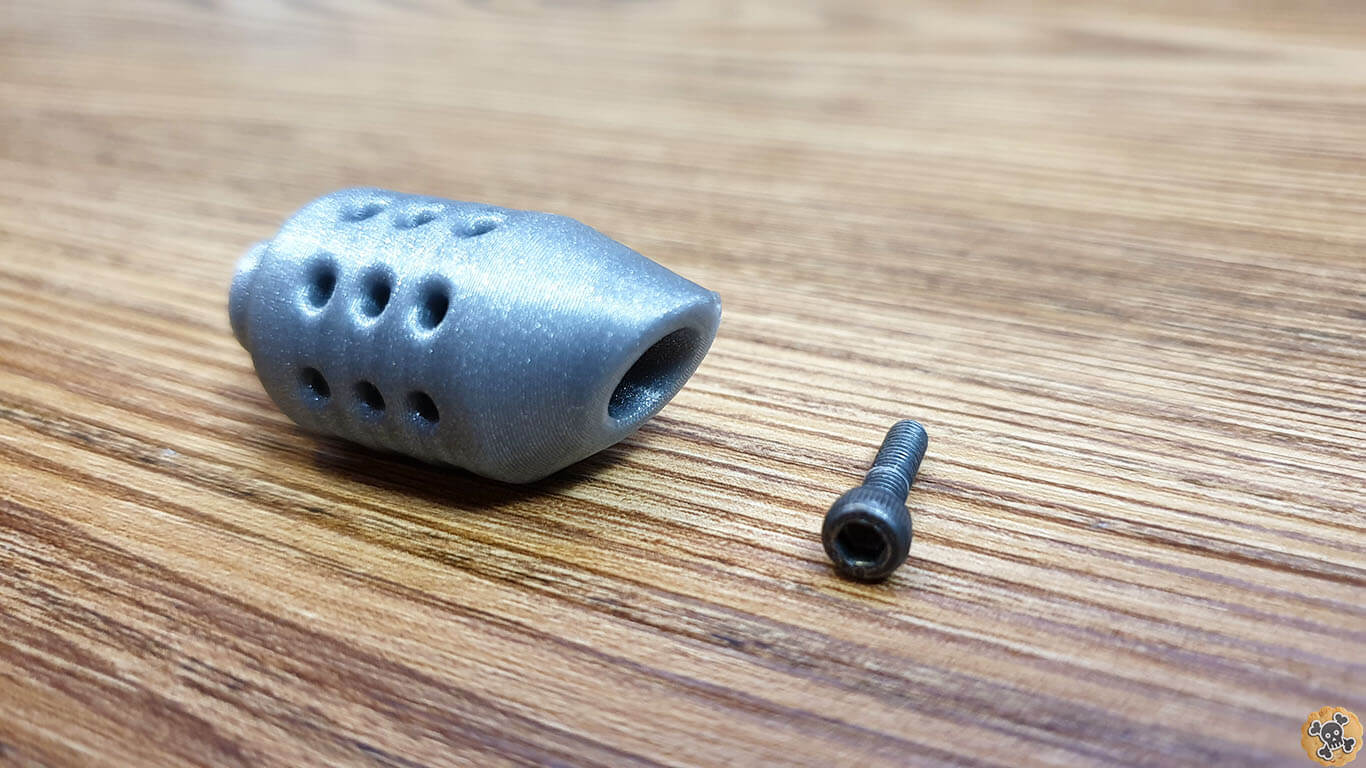
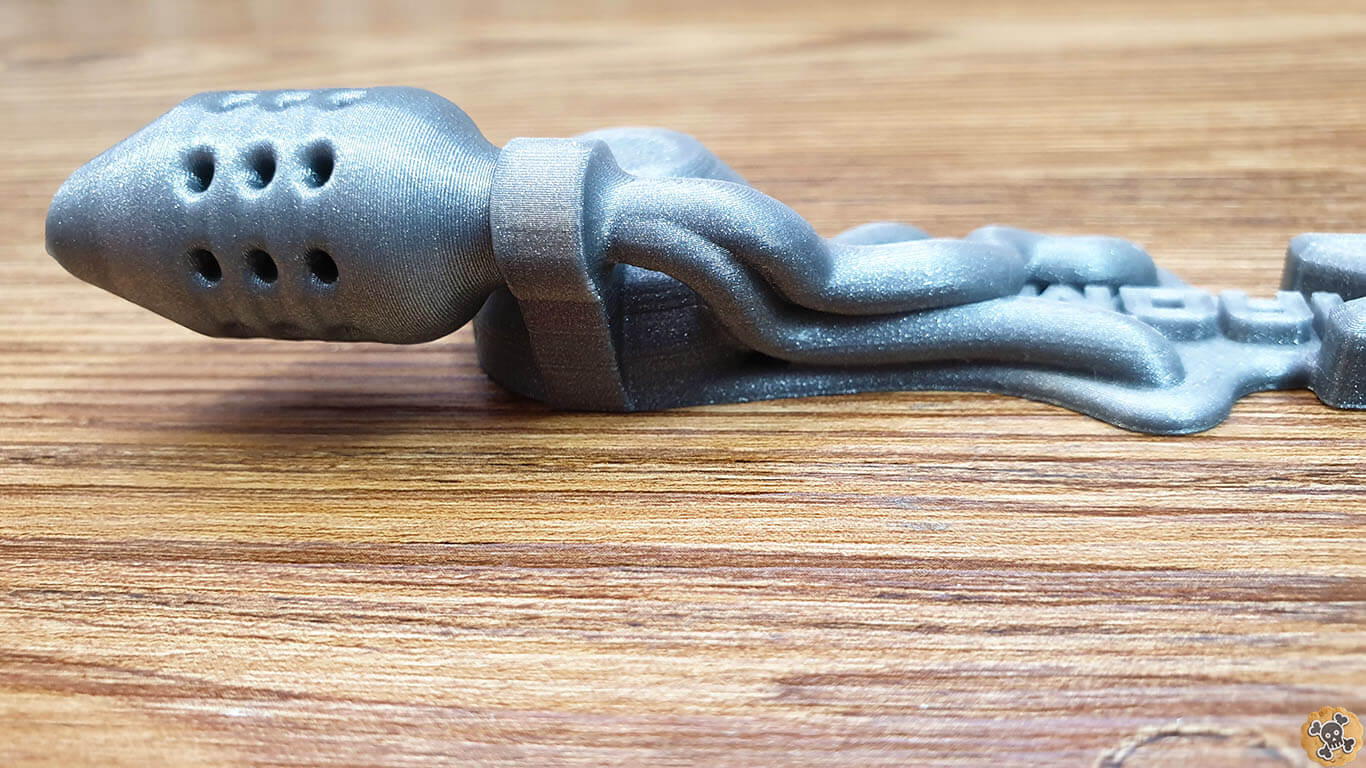
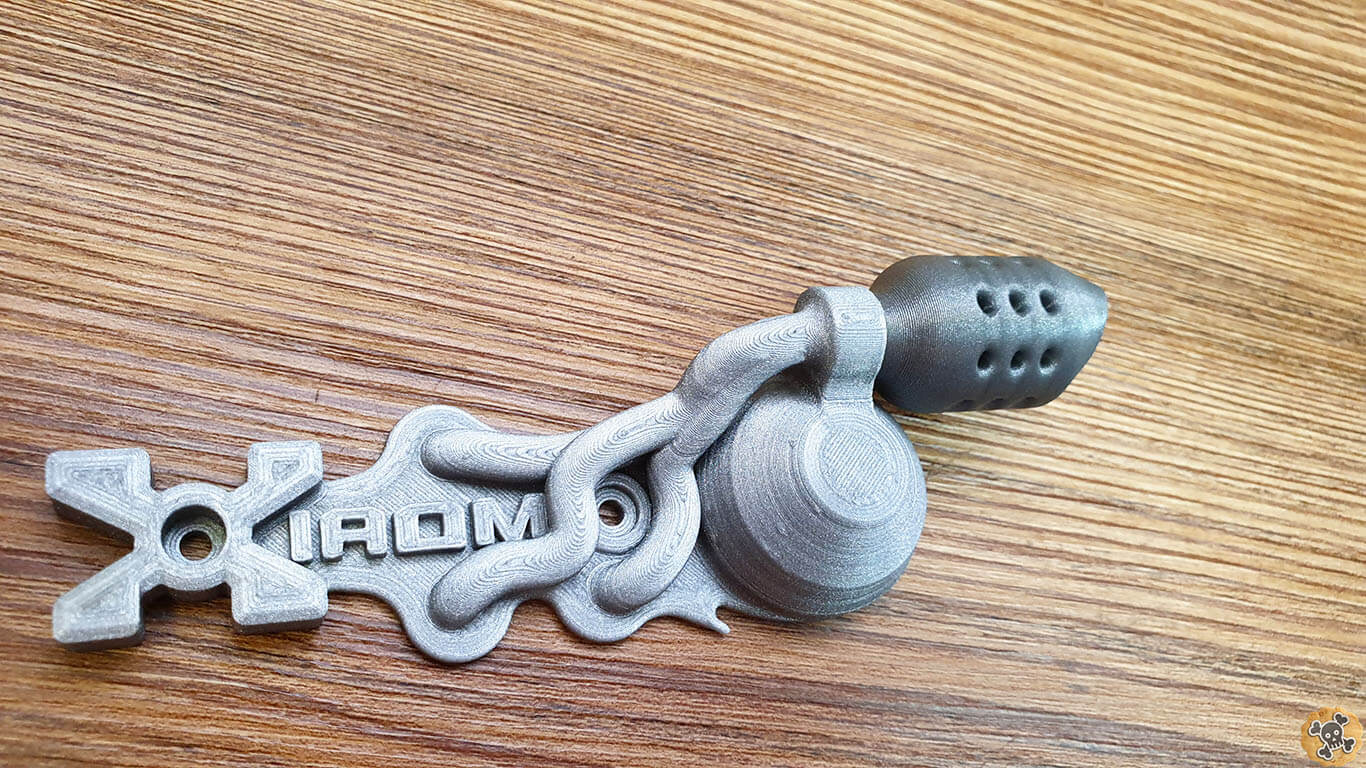
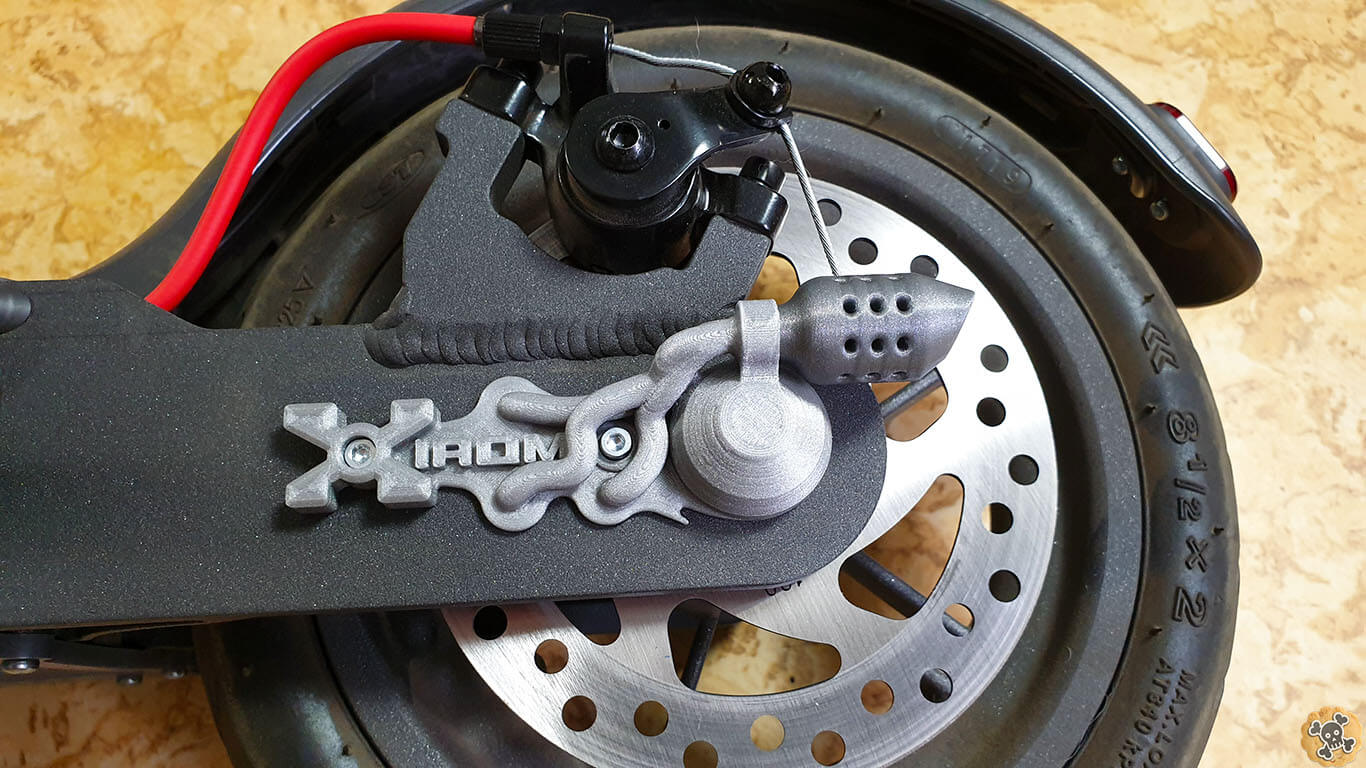
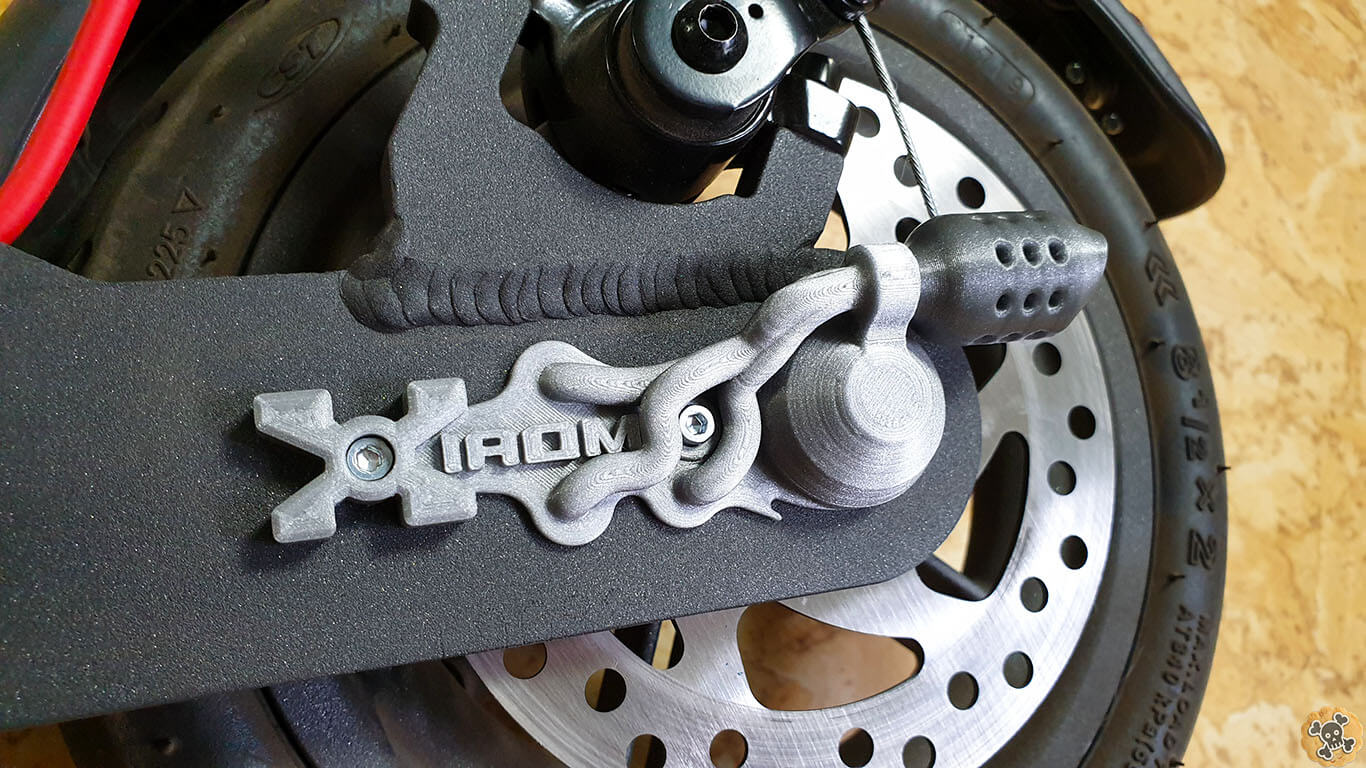
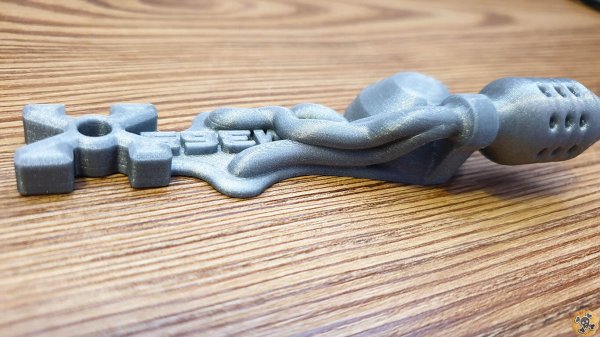
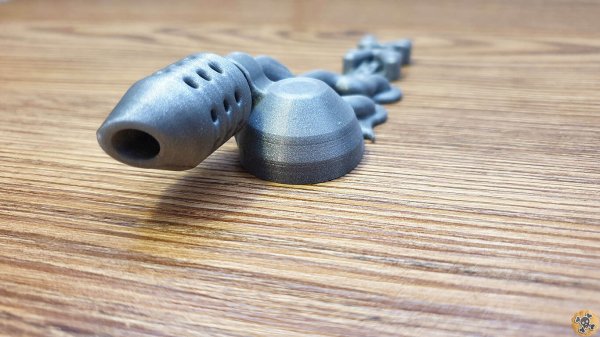
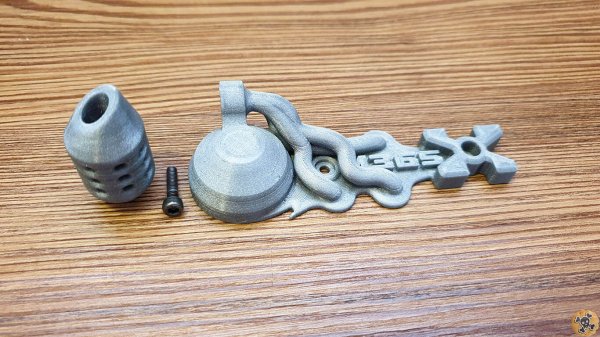
Here Cap which looks like Engine with exhaust
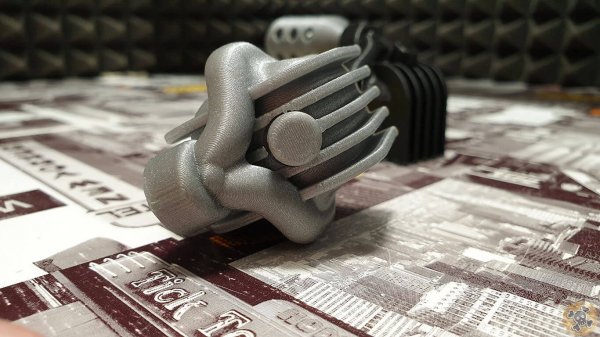
On scoots looks way better 🙂
Big radiator design for sure will survive much more and looks really massive 🙂
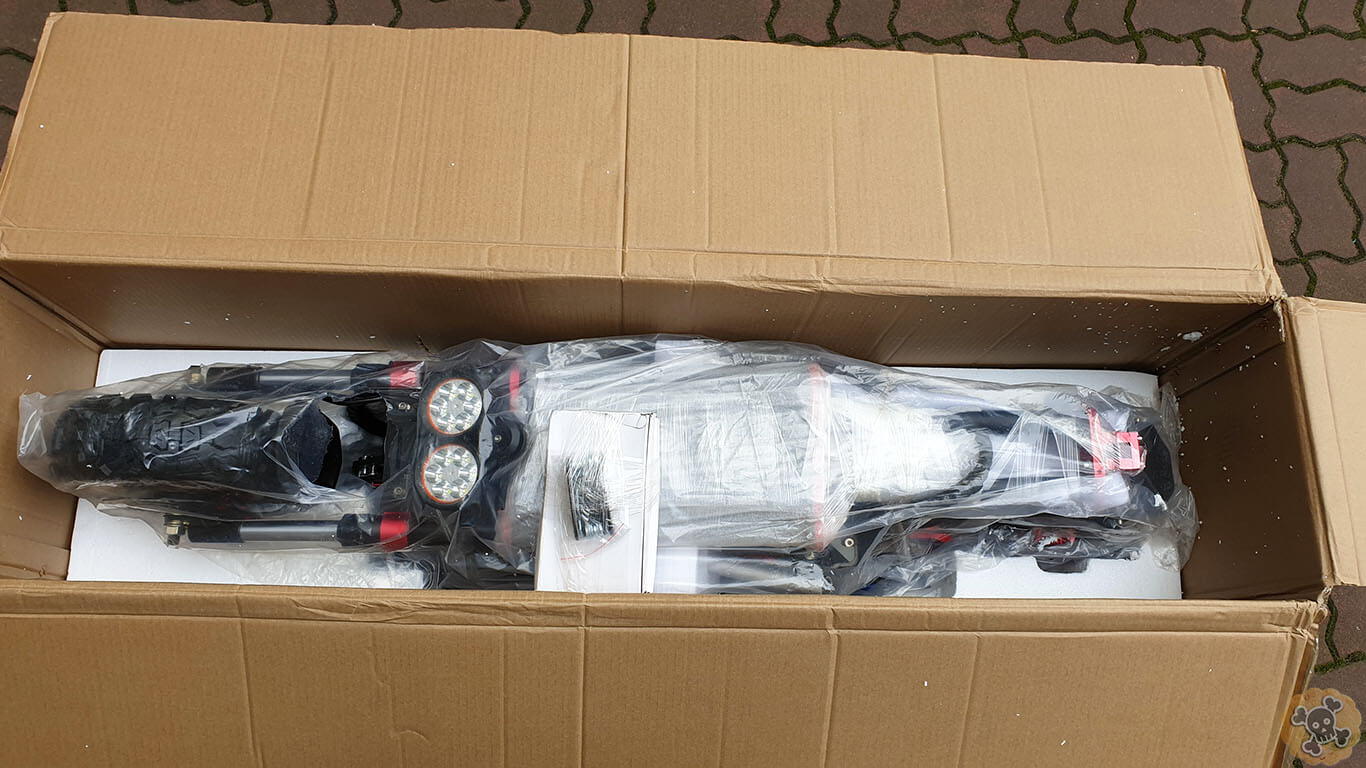
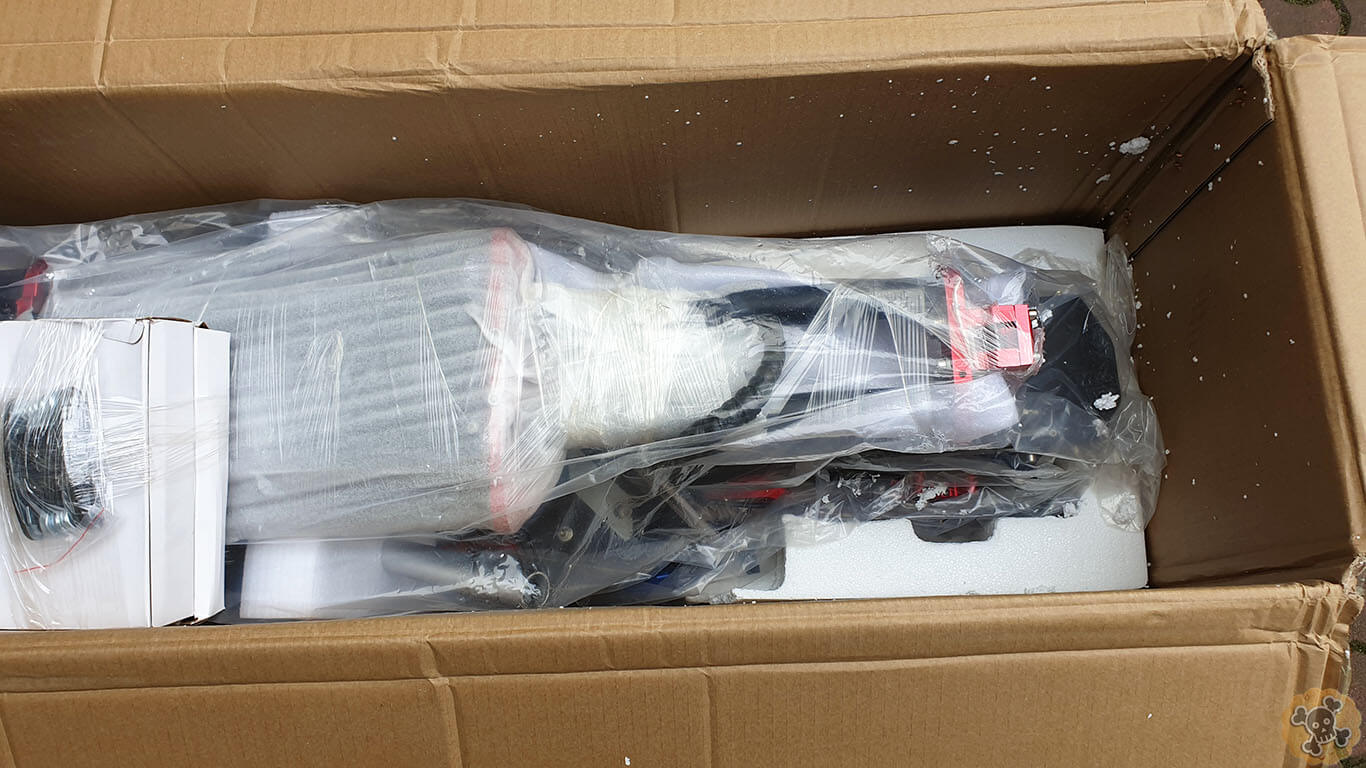
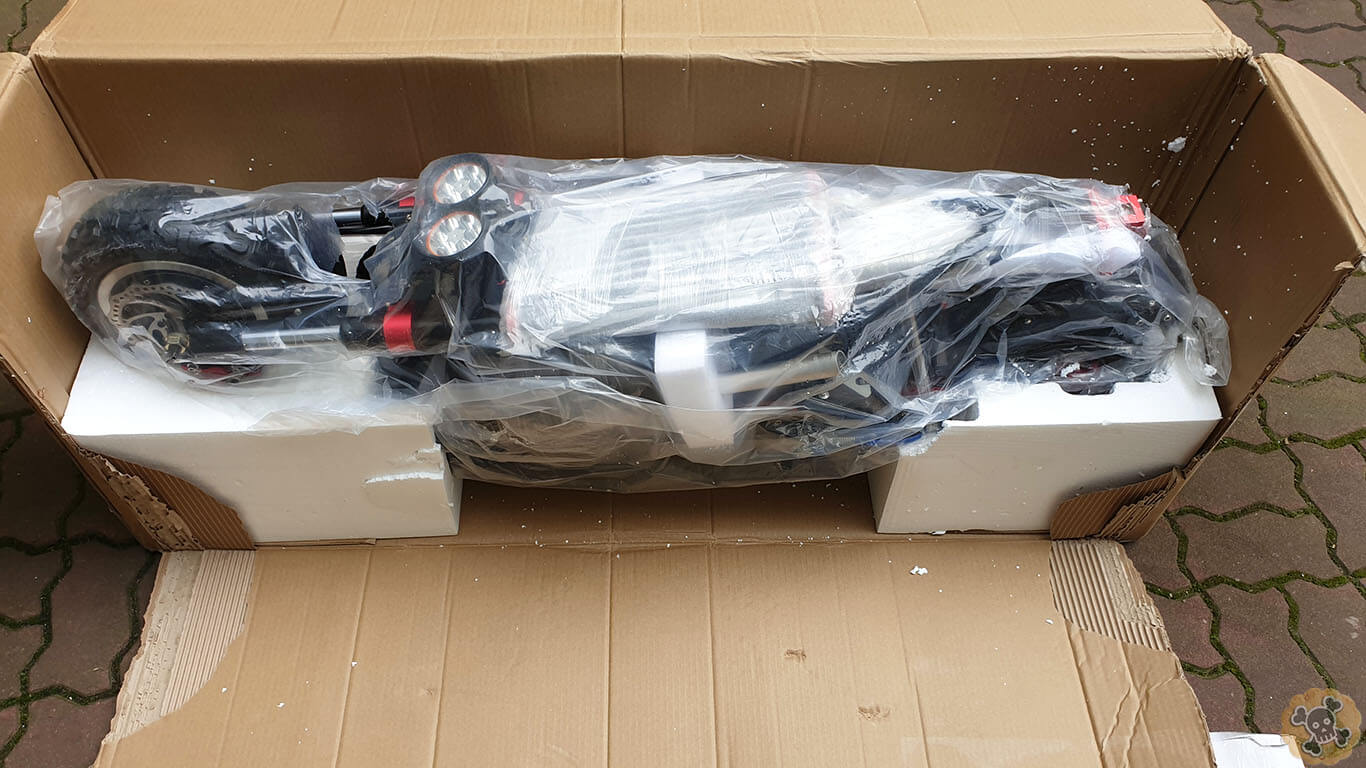
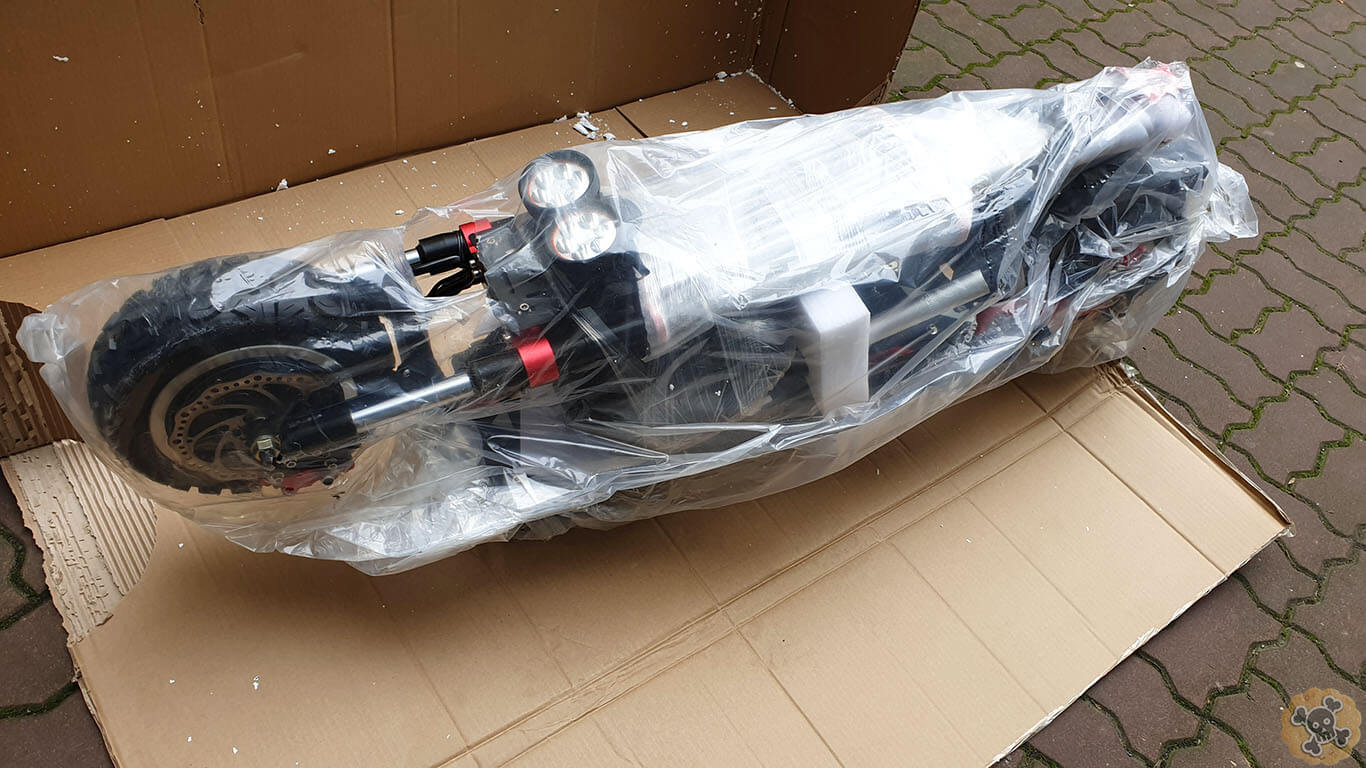
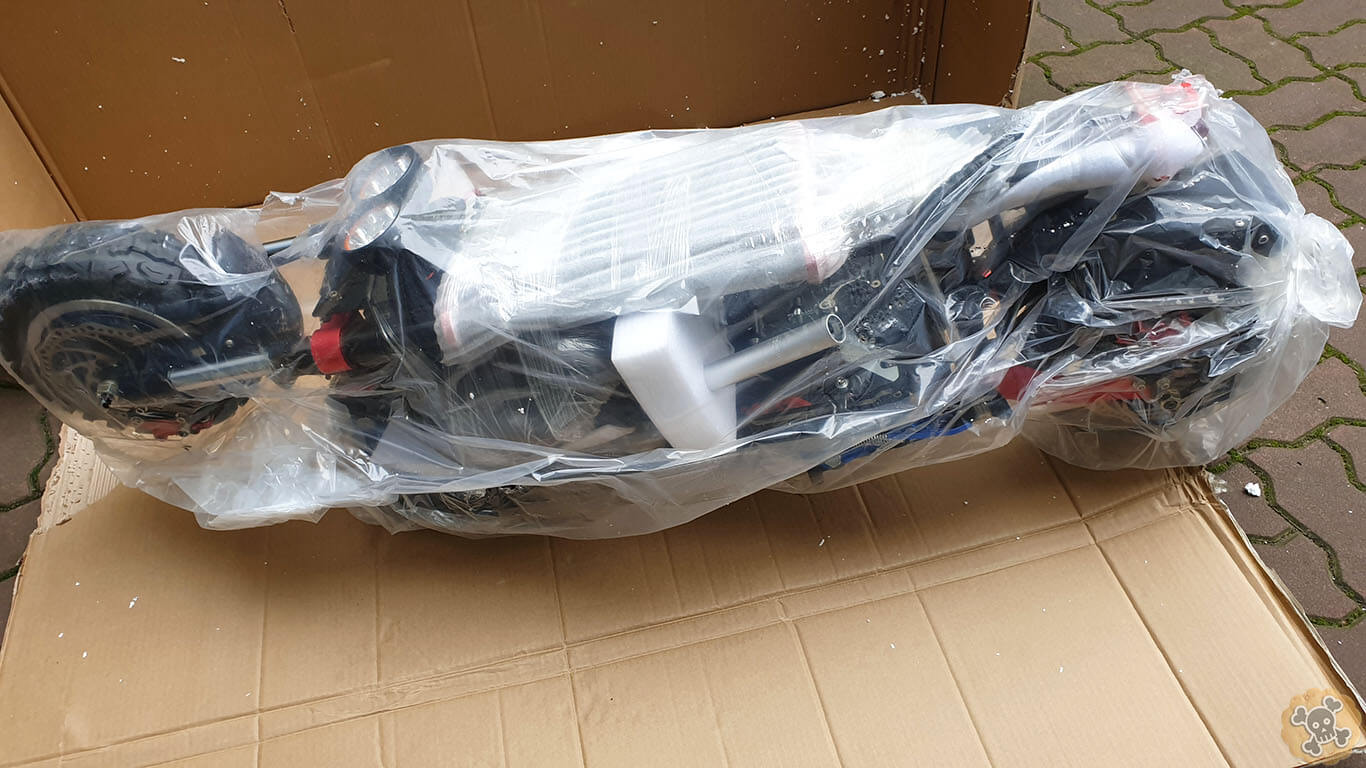
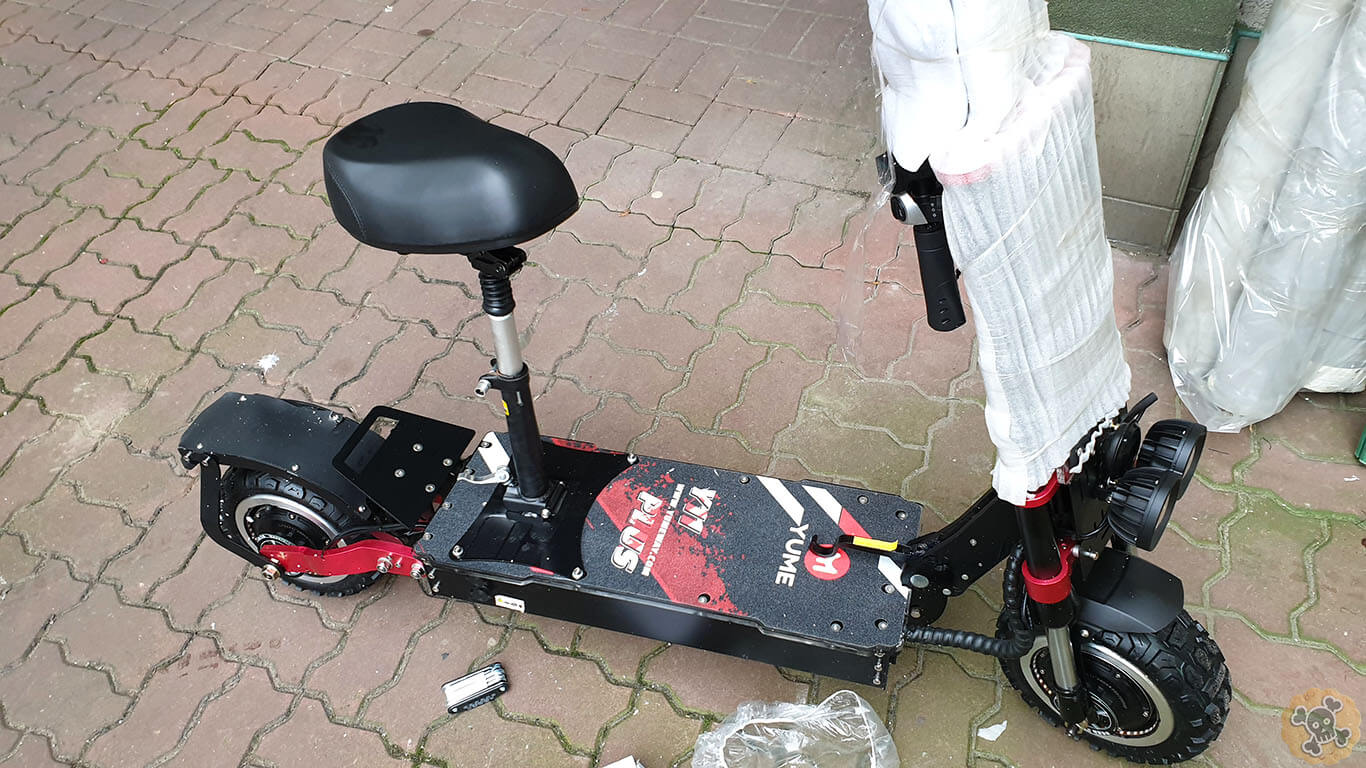
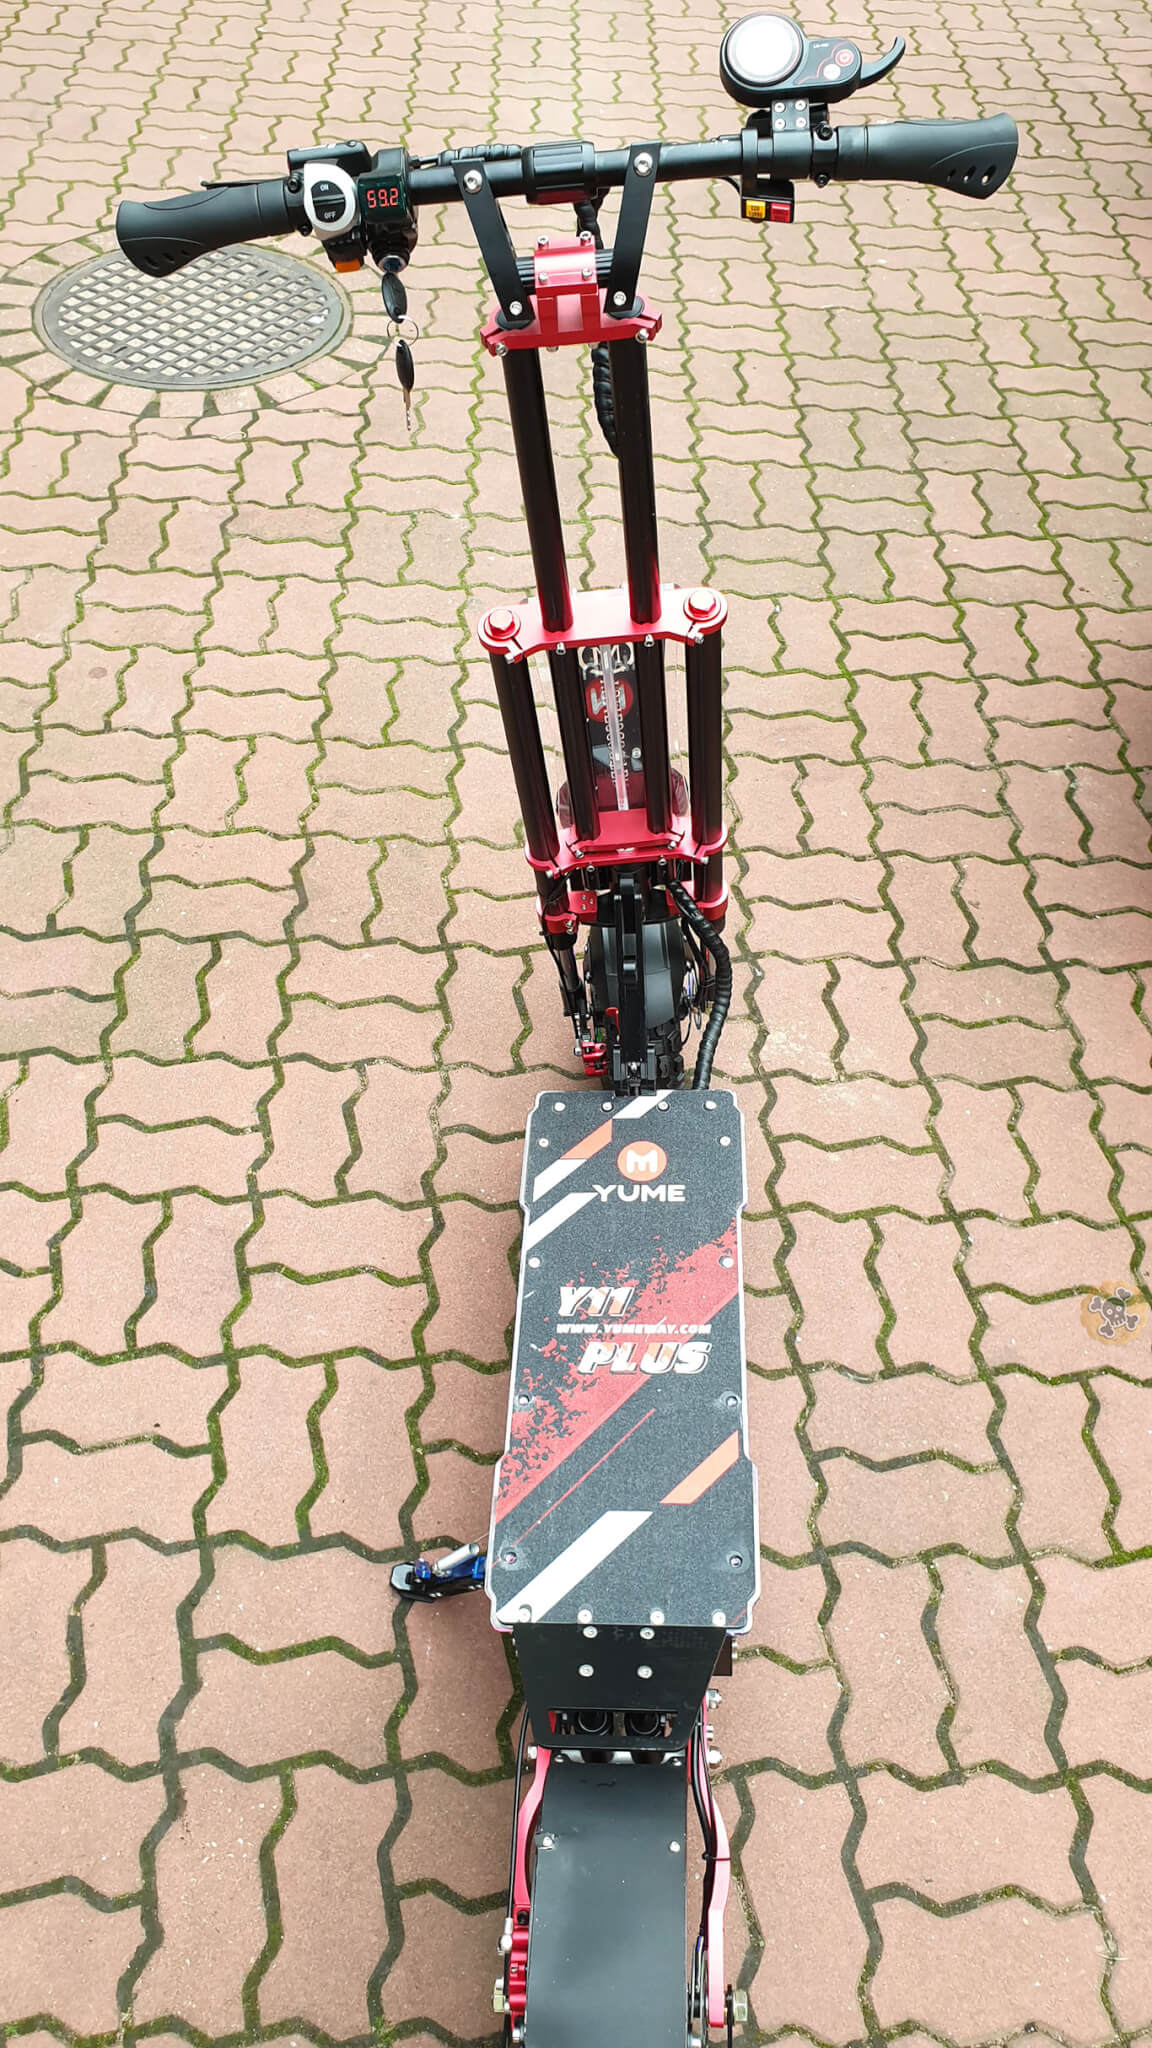
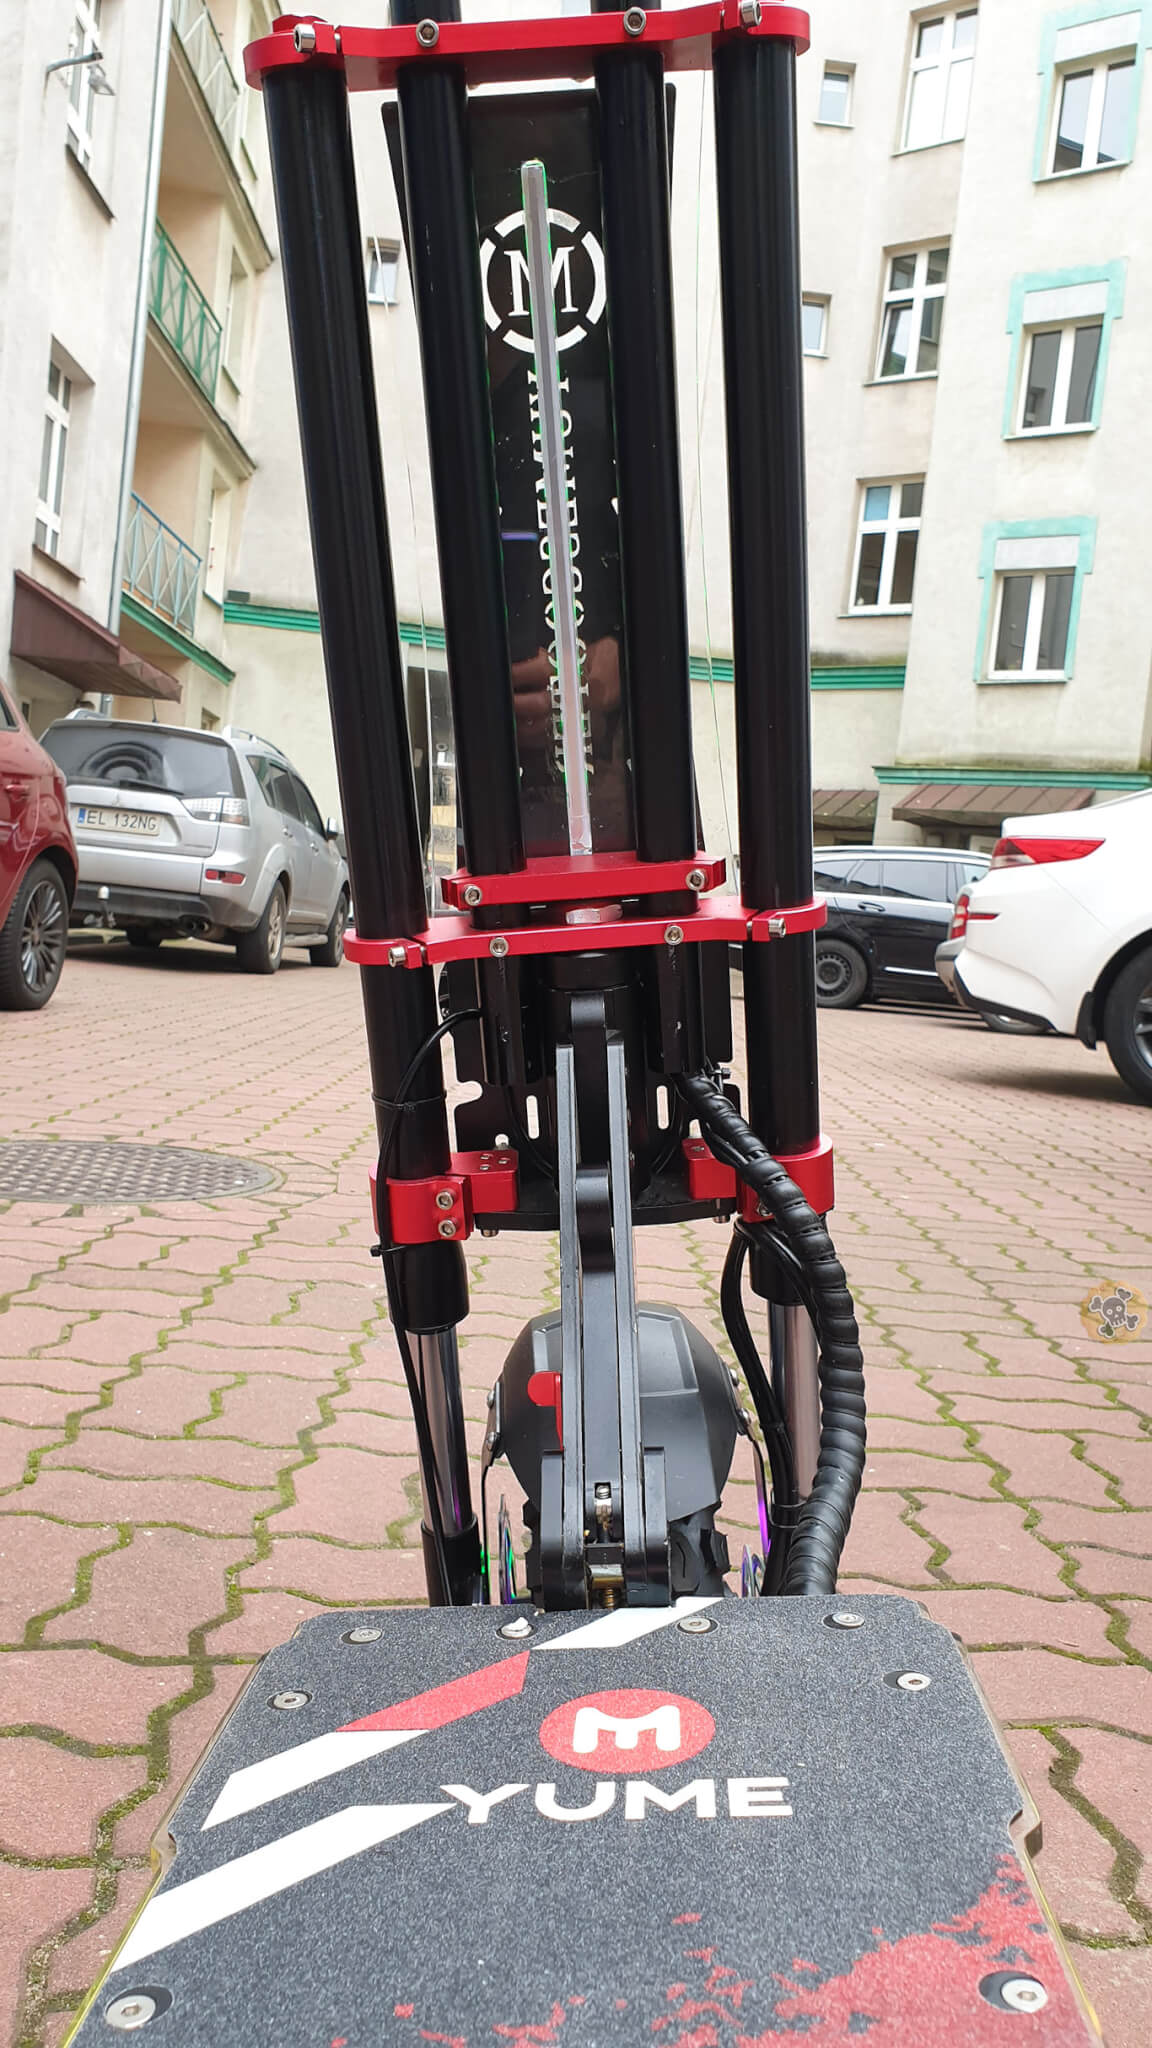
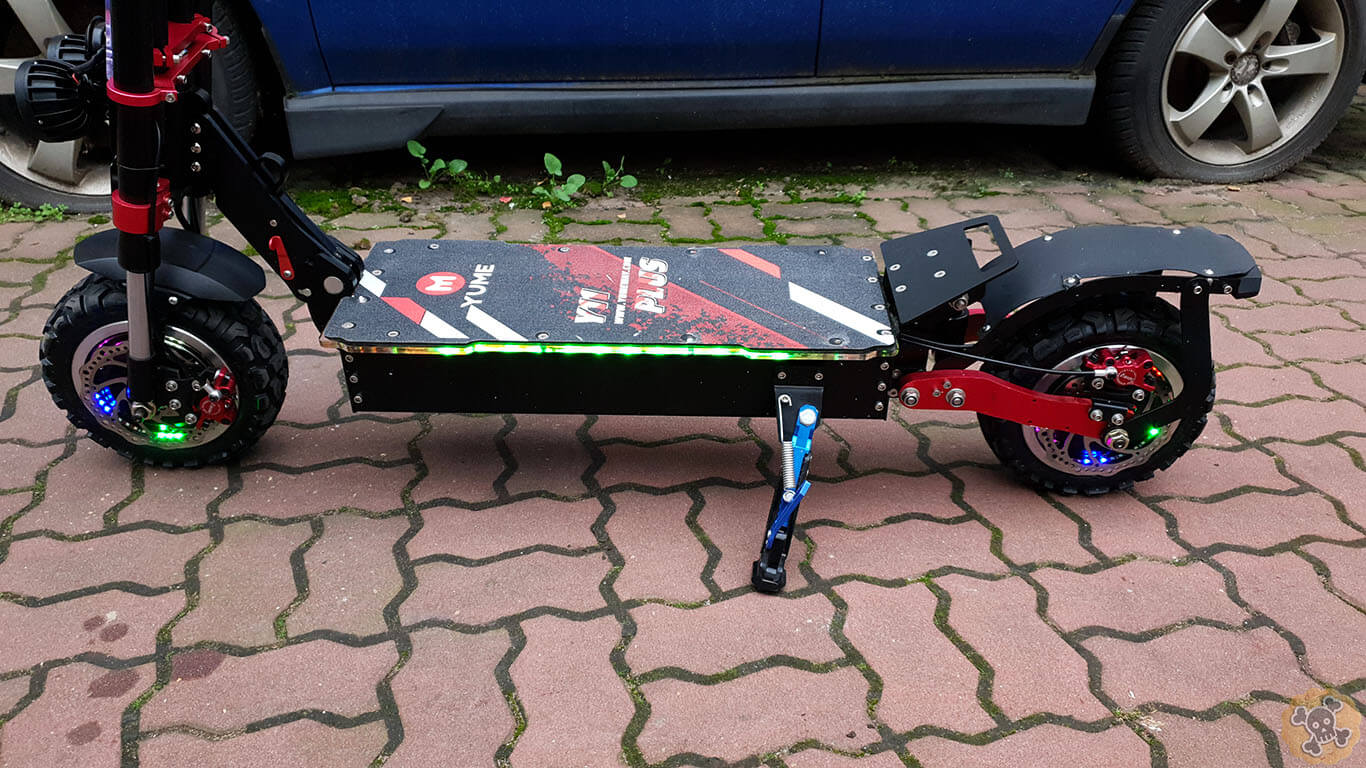
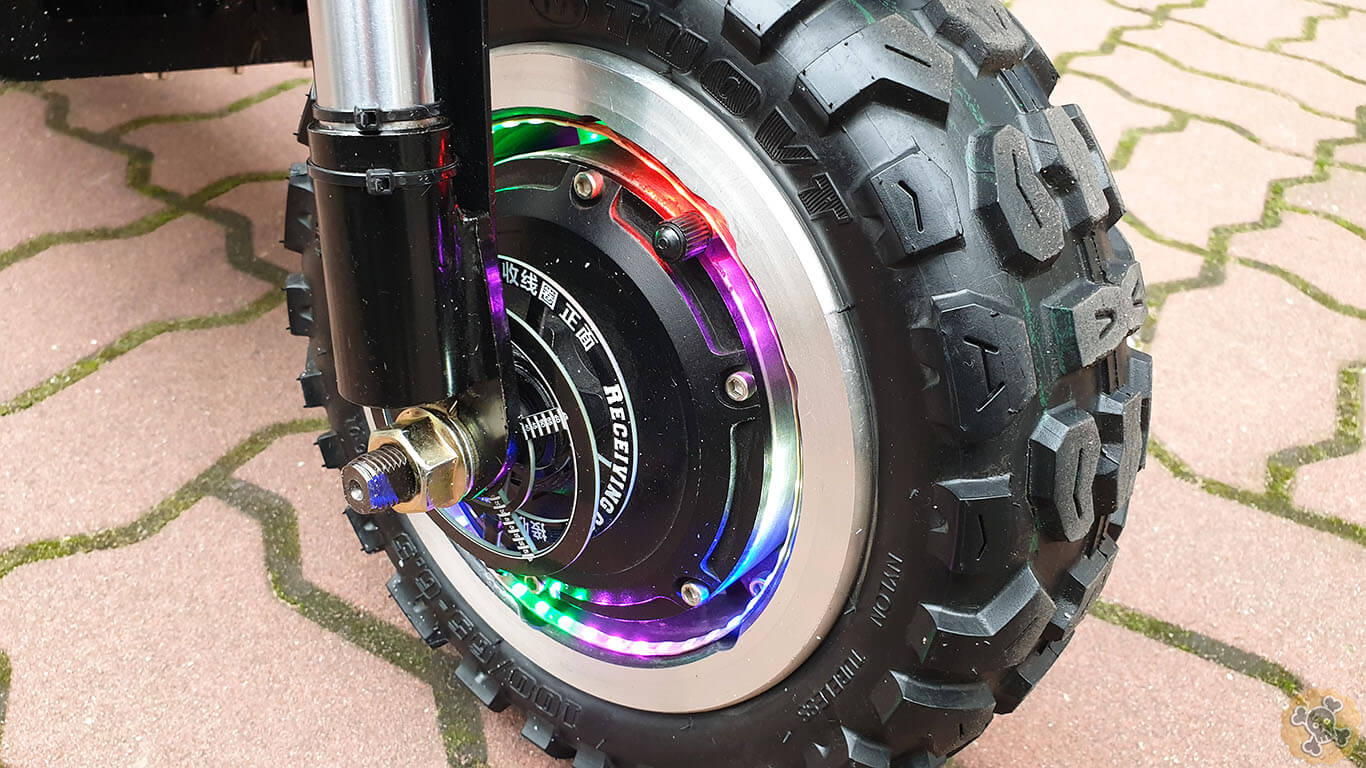
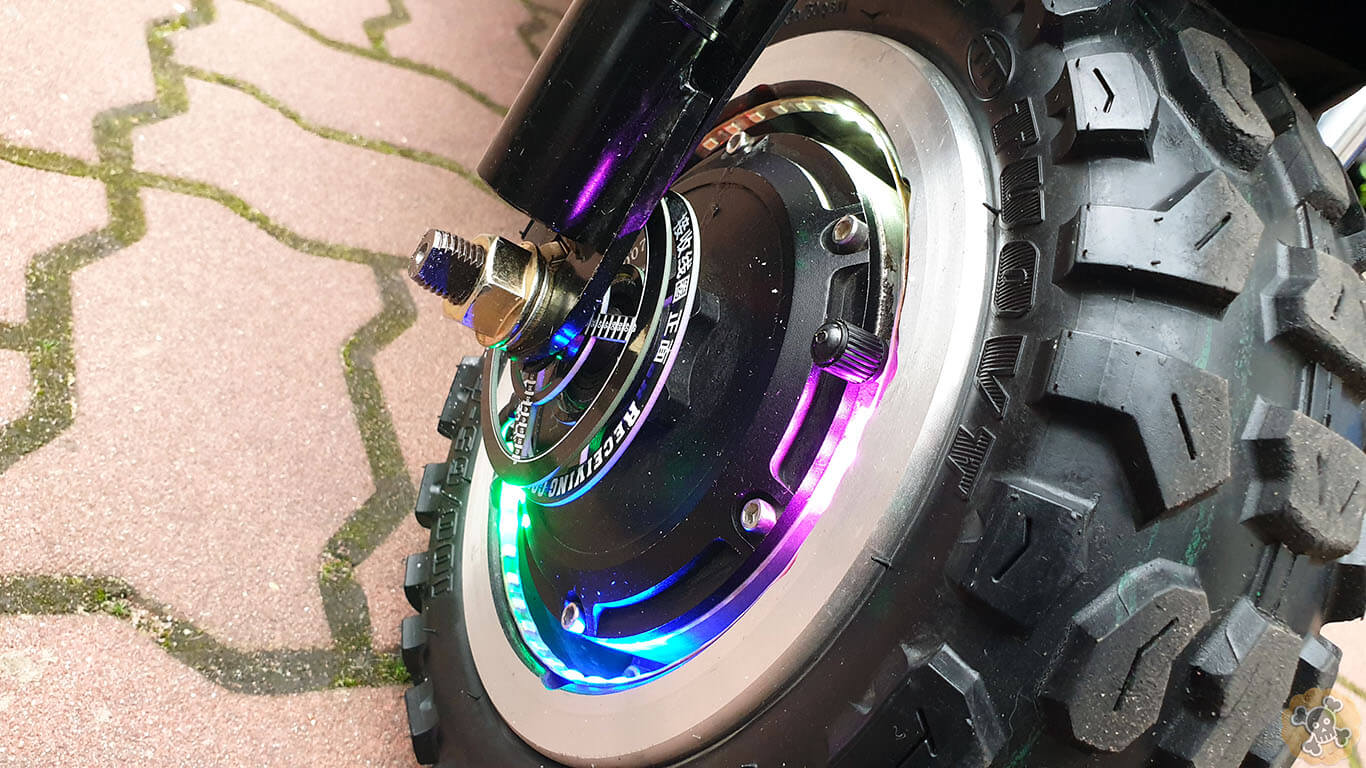
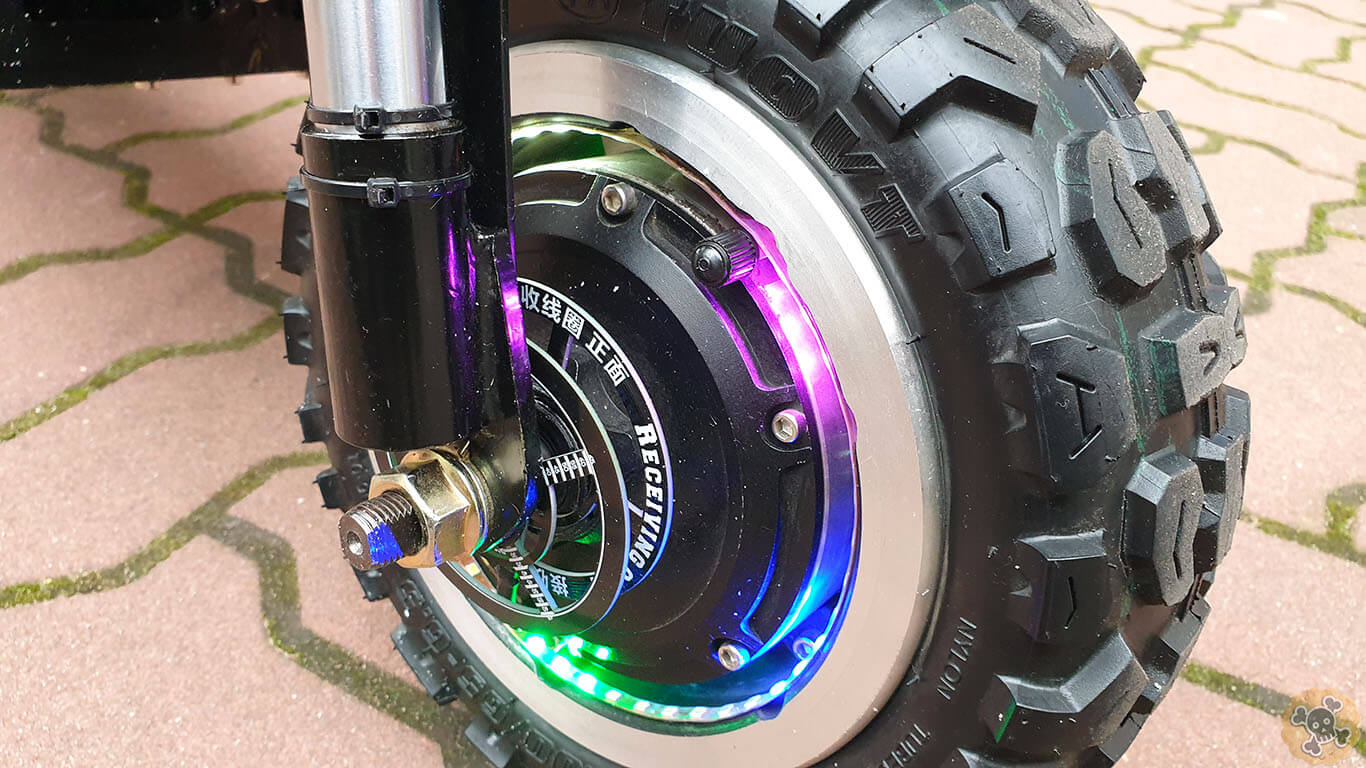
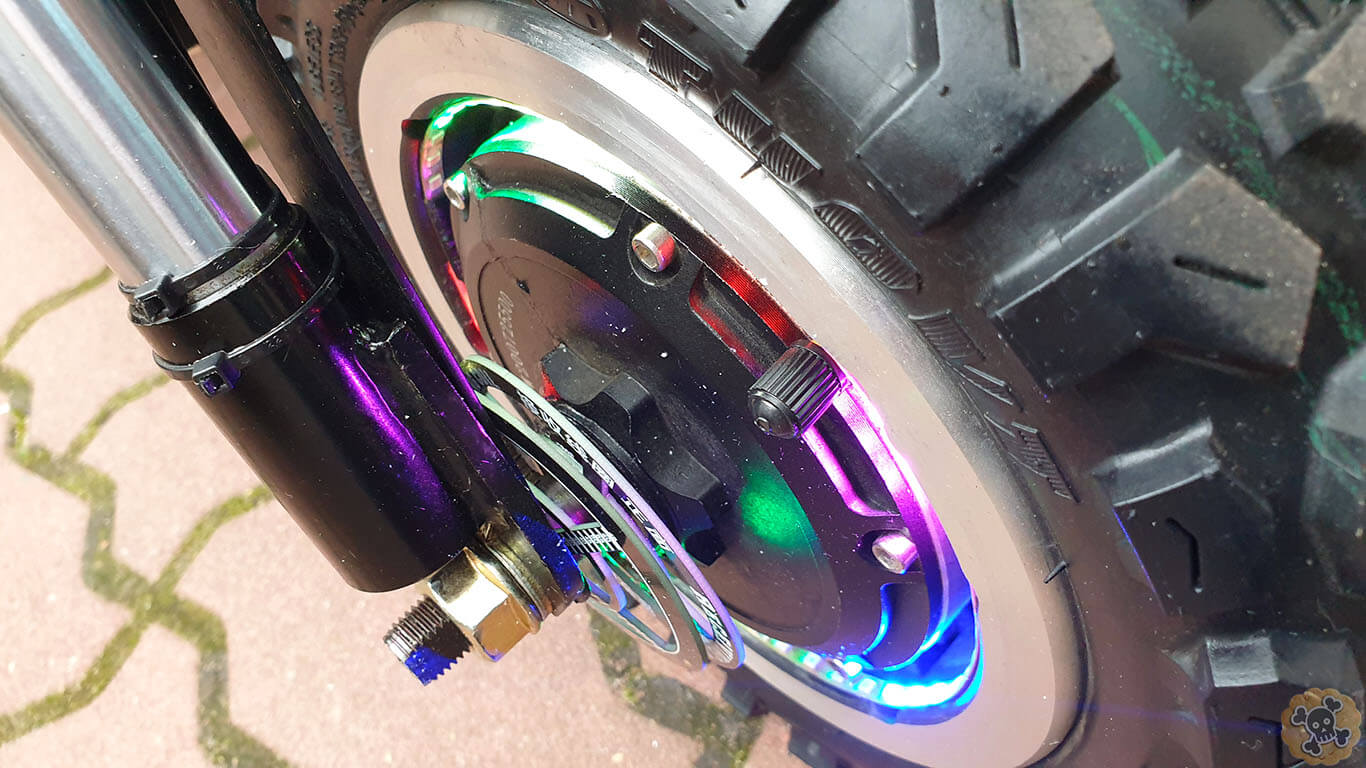
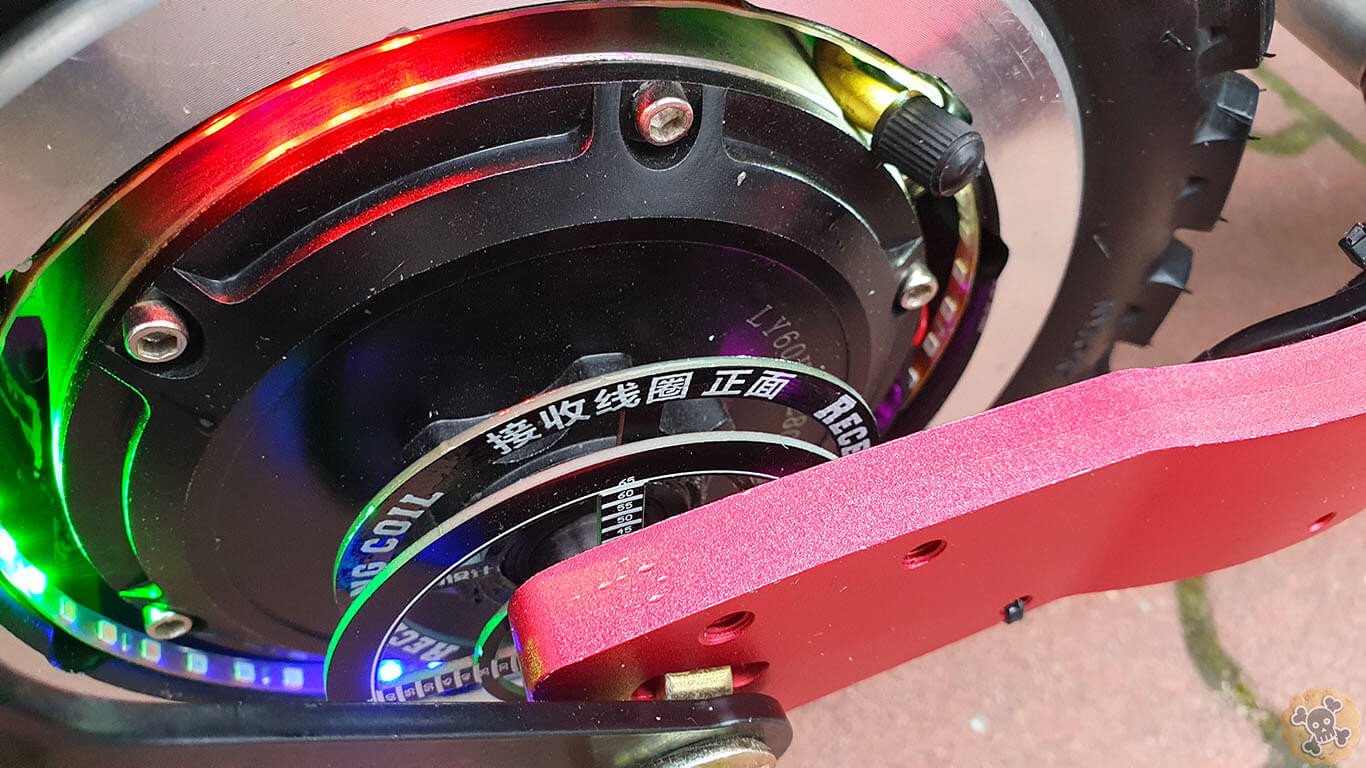
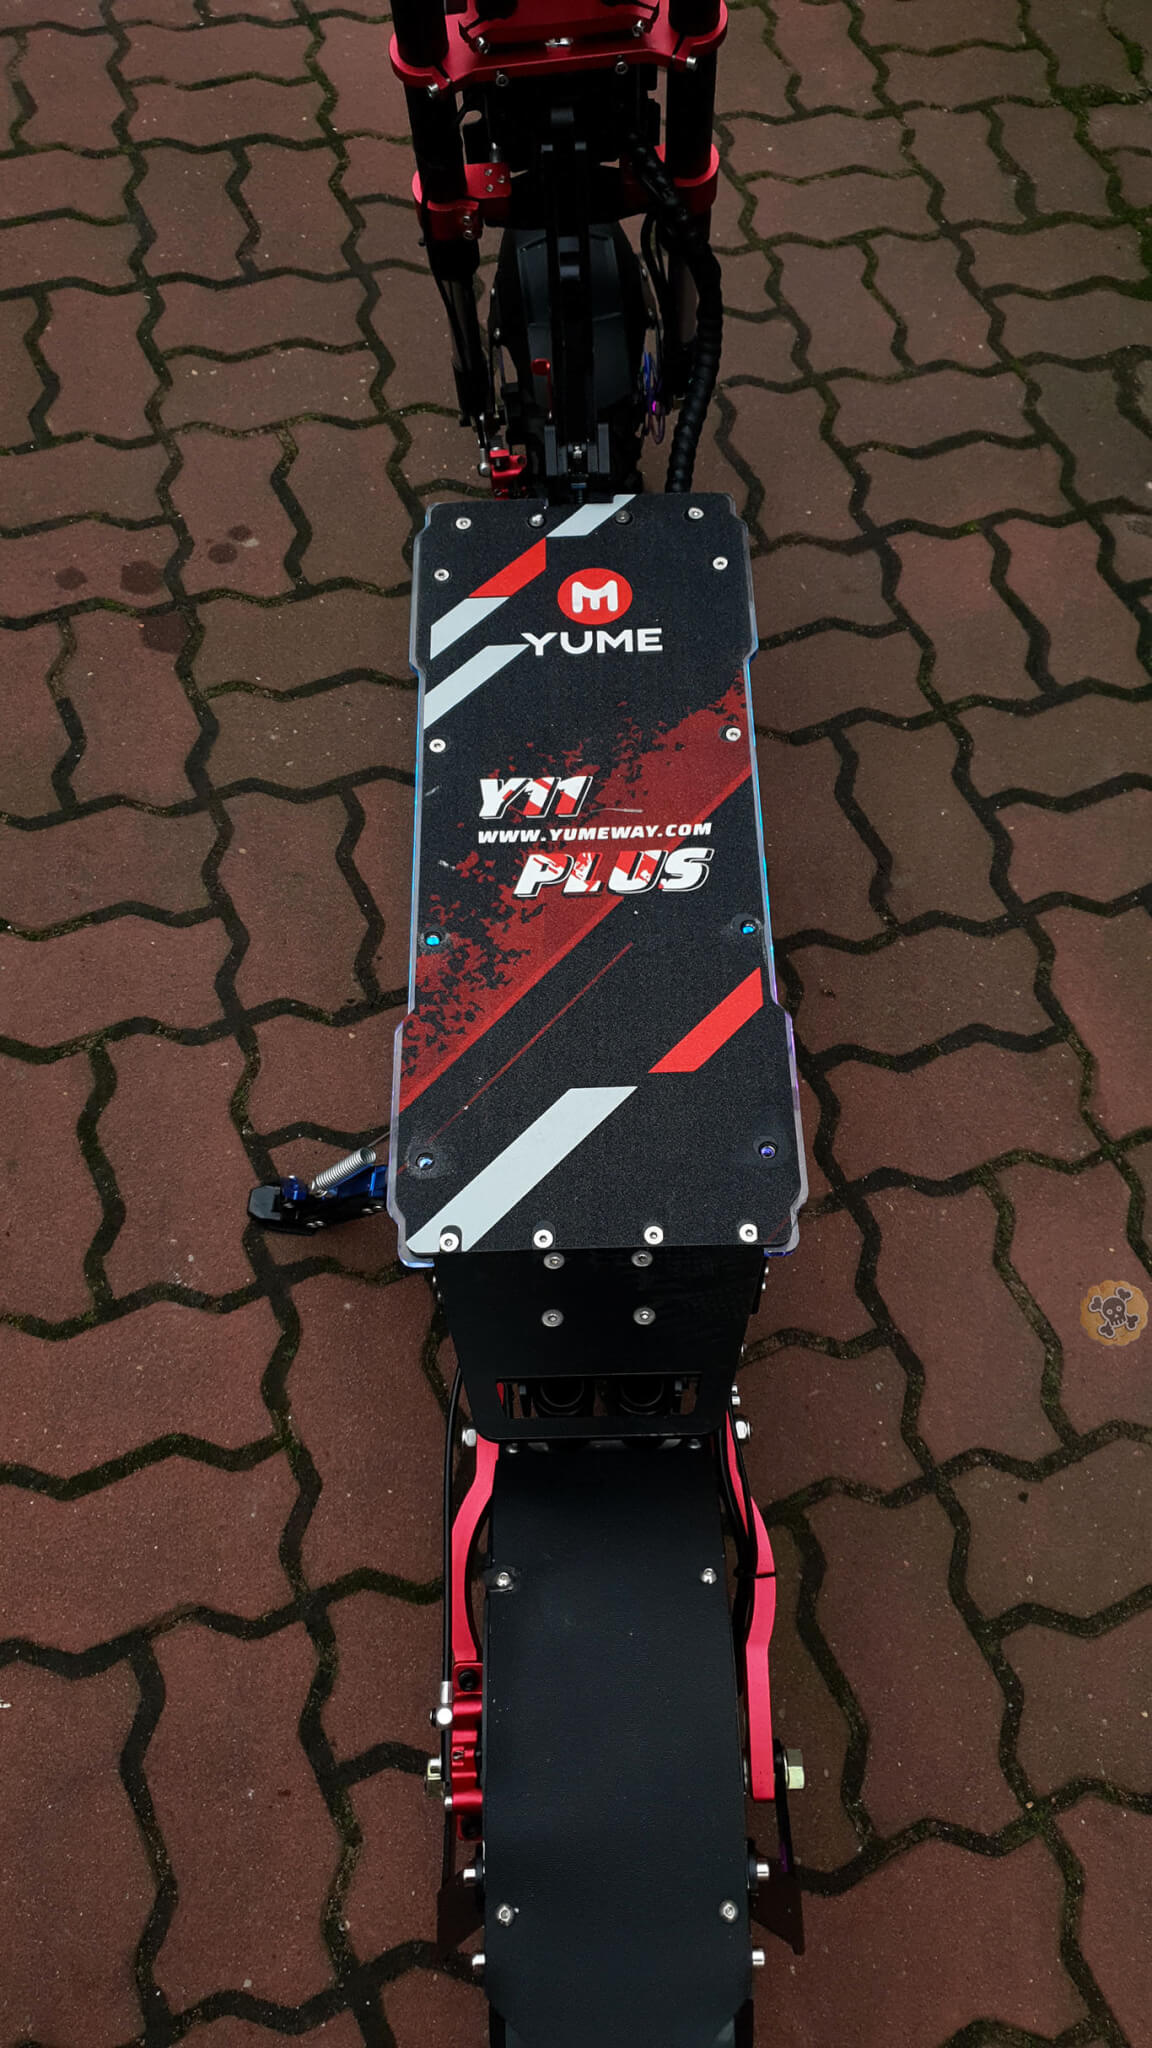
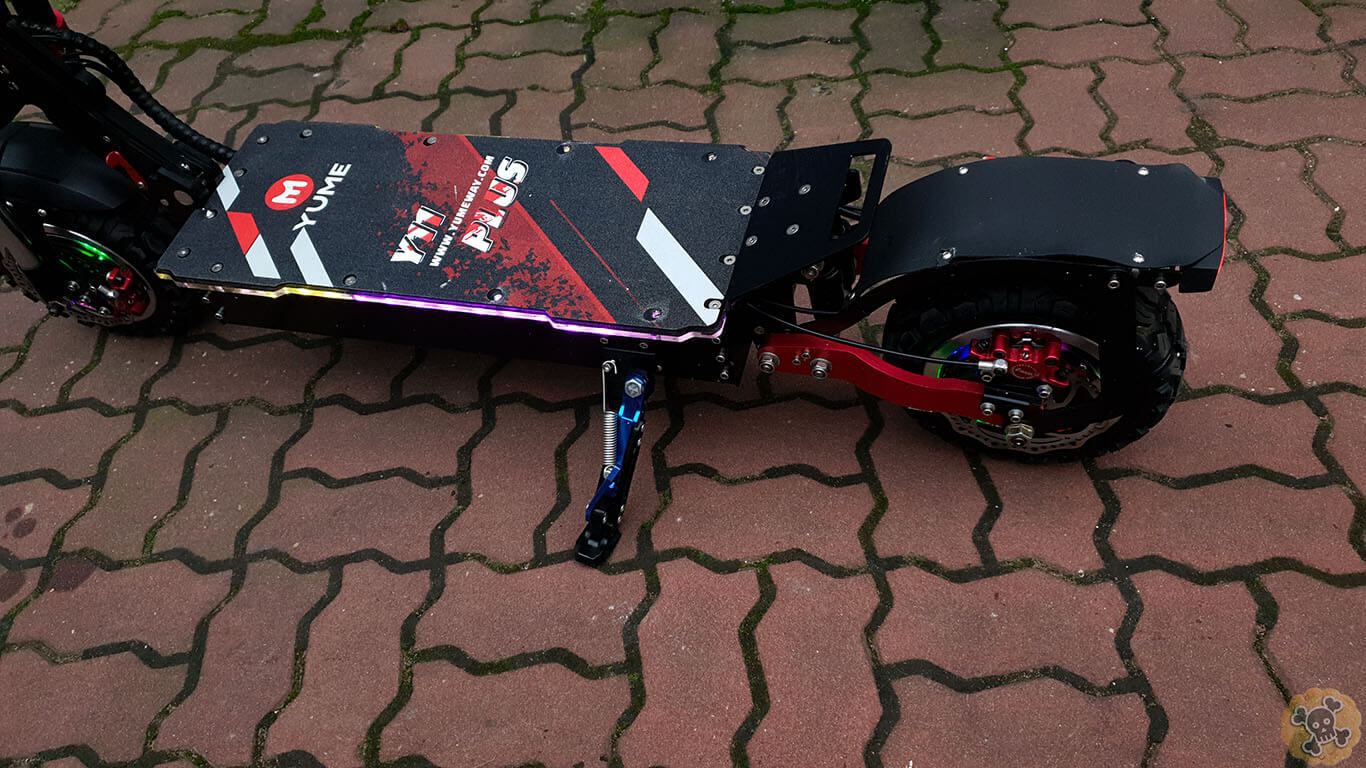
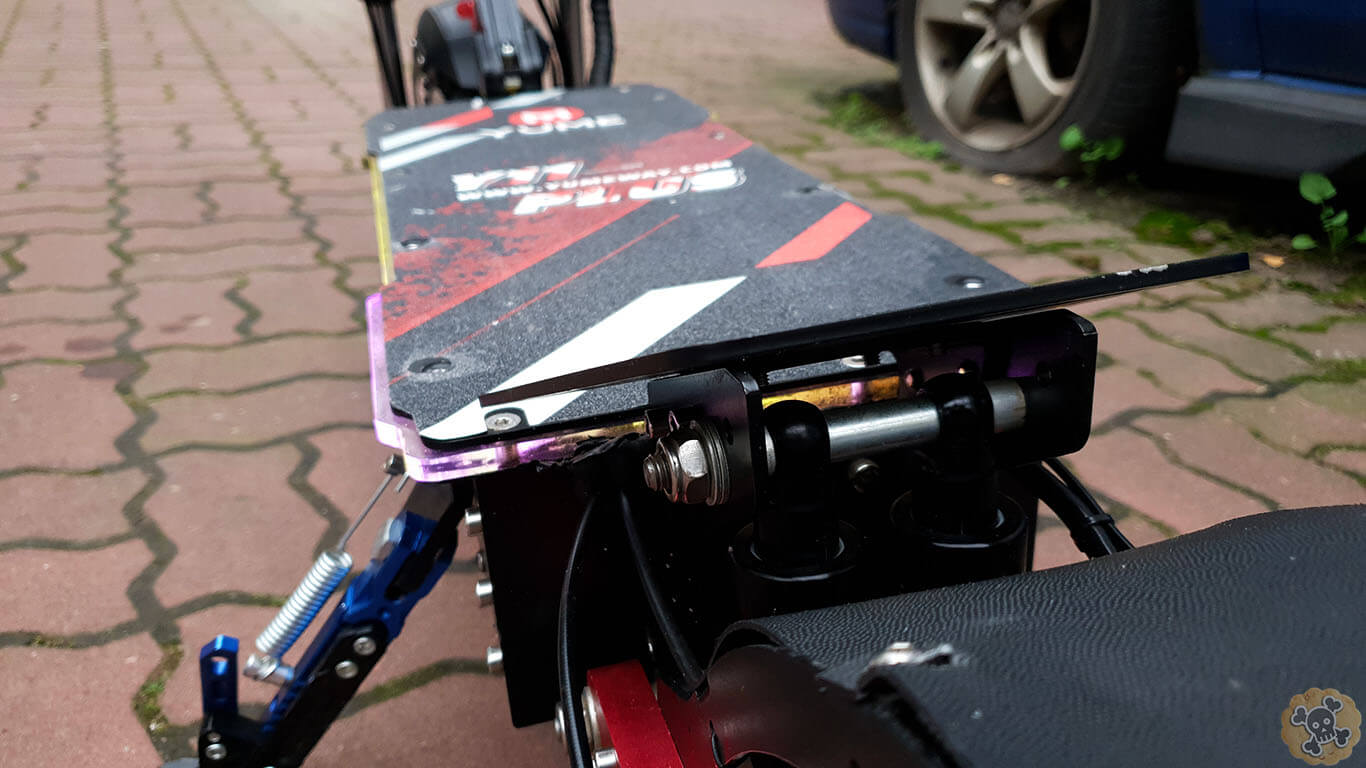
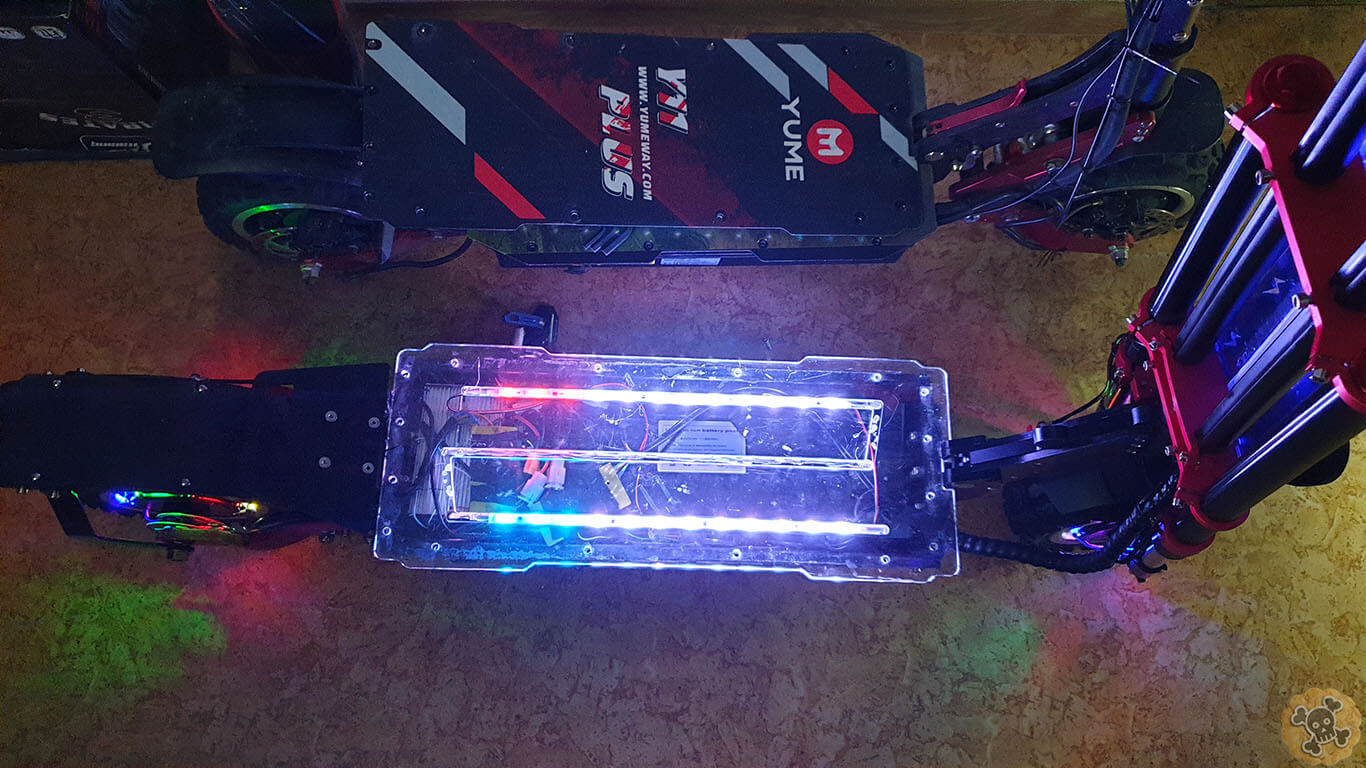
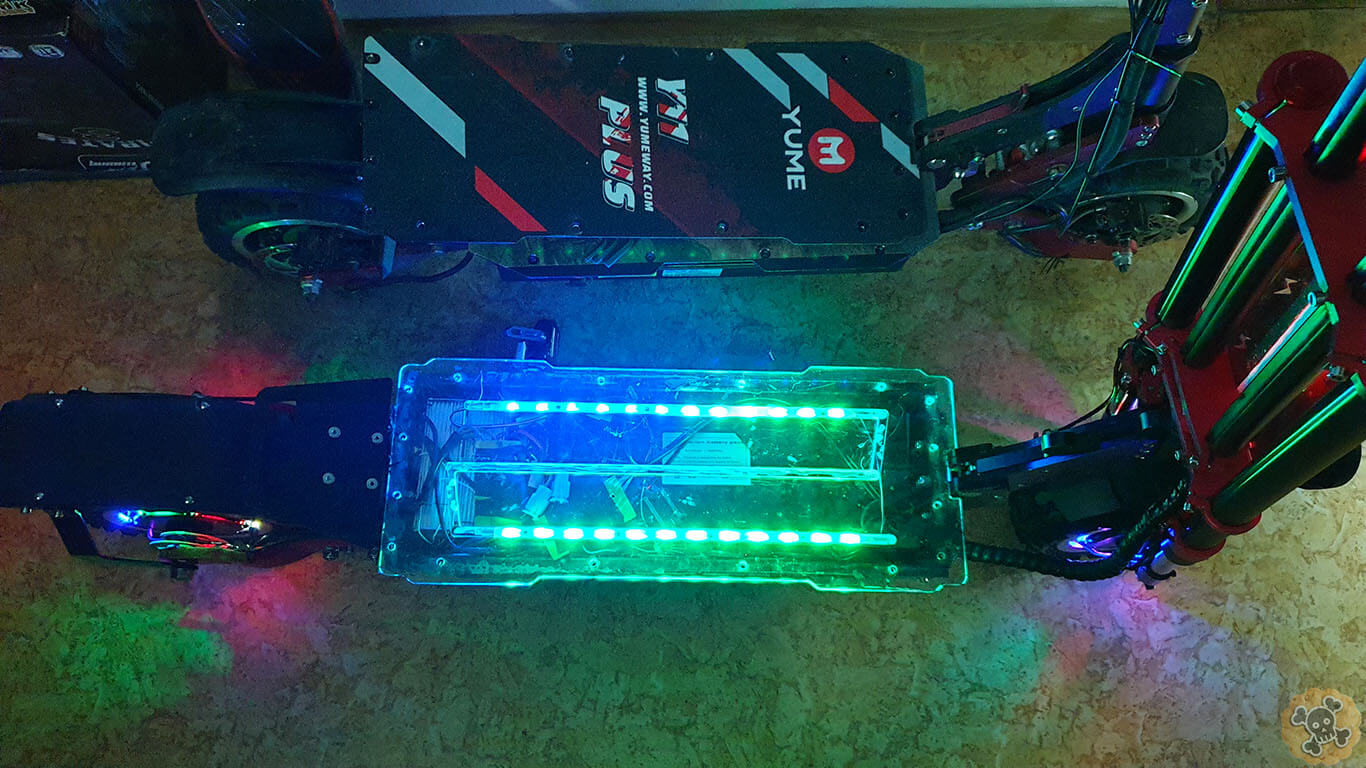
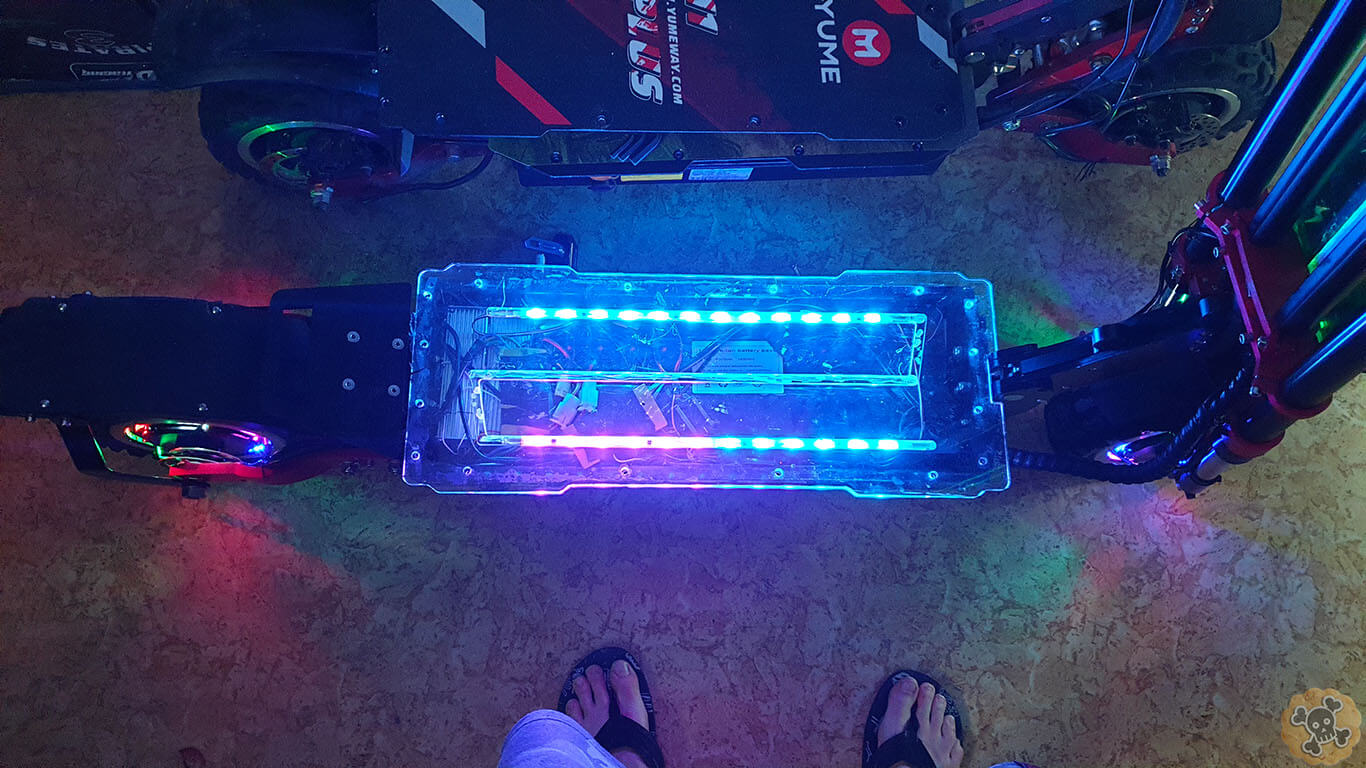
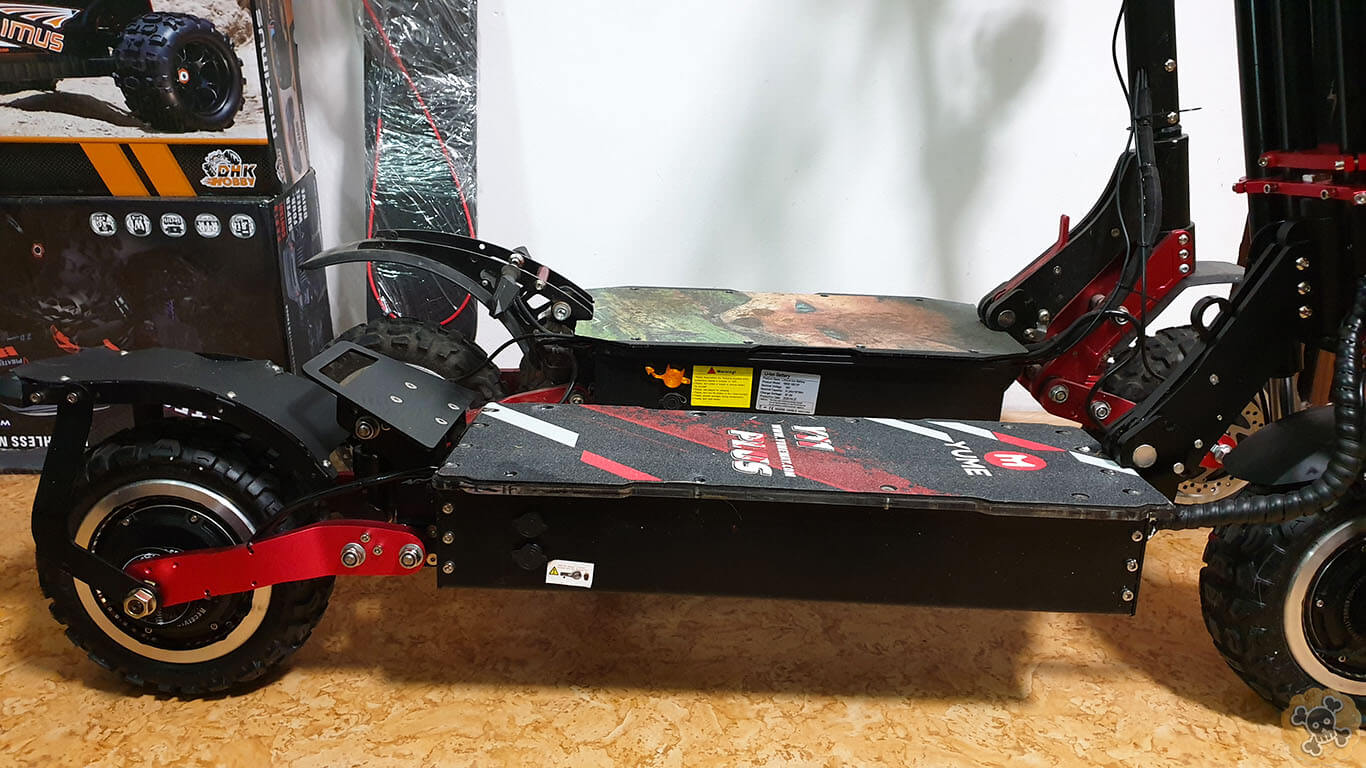
Yume Y11 Plus s.click.aliexpress.com/e/_AOuX8I is one the most Blink Blink Escoots from china, my 1st impression was ” Shinyyyy ?? “, just check led system on the motors it’s Amazing ! . So this scoot doesn’t only looks good but also quality is better then I expected ( so far better than on other scoot which I tested )
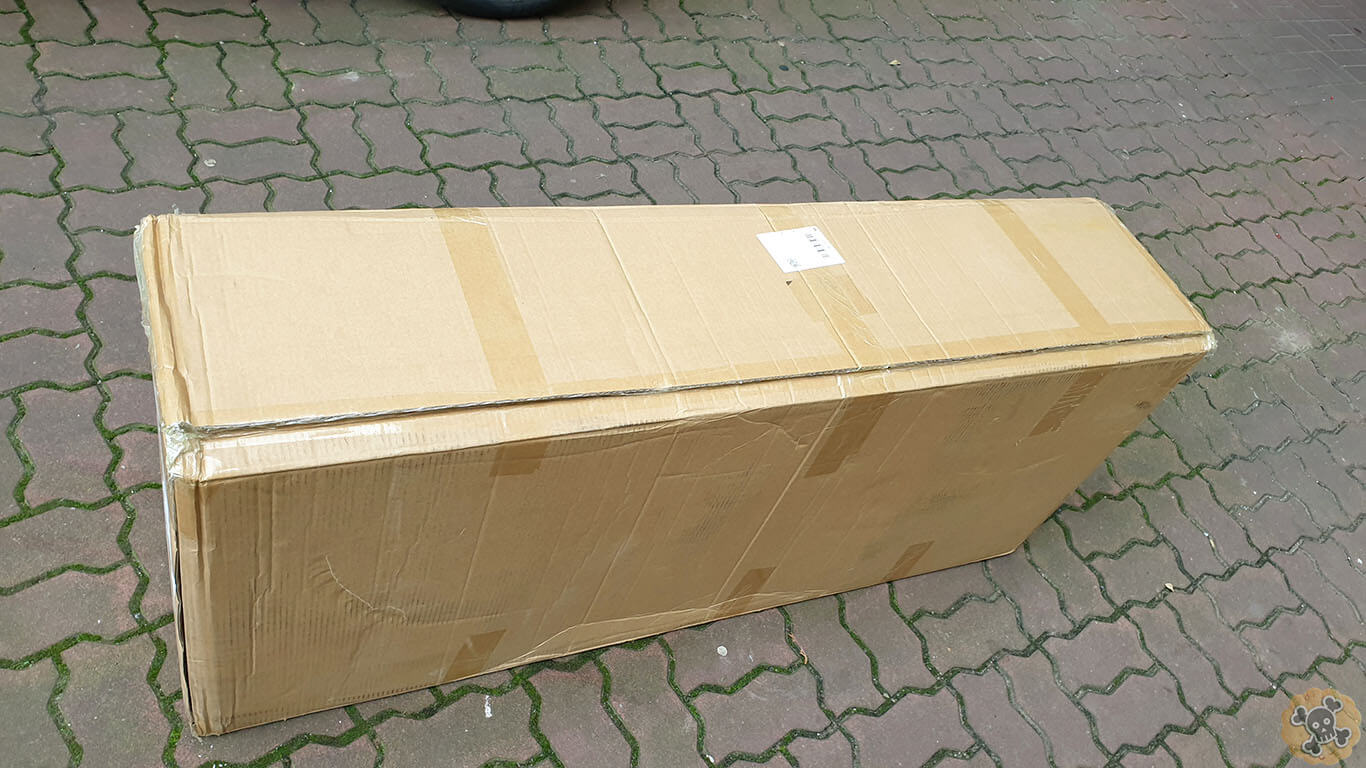
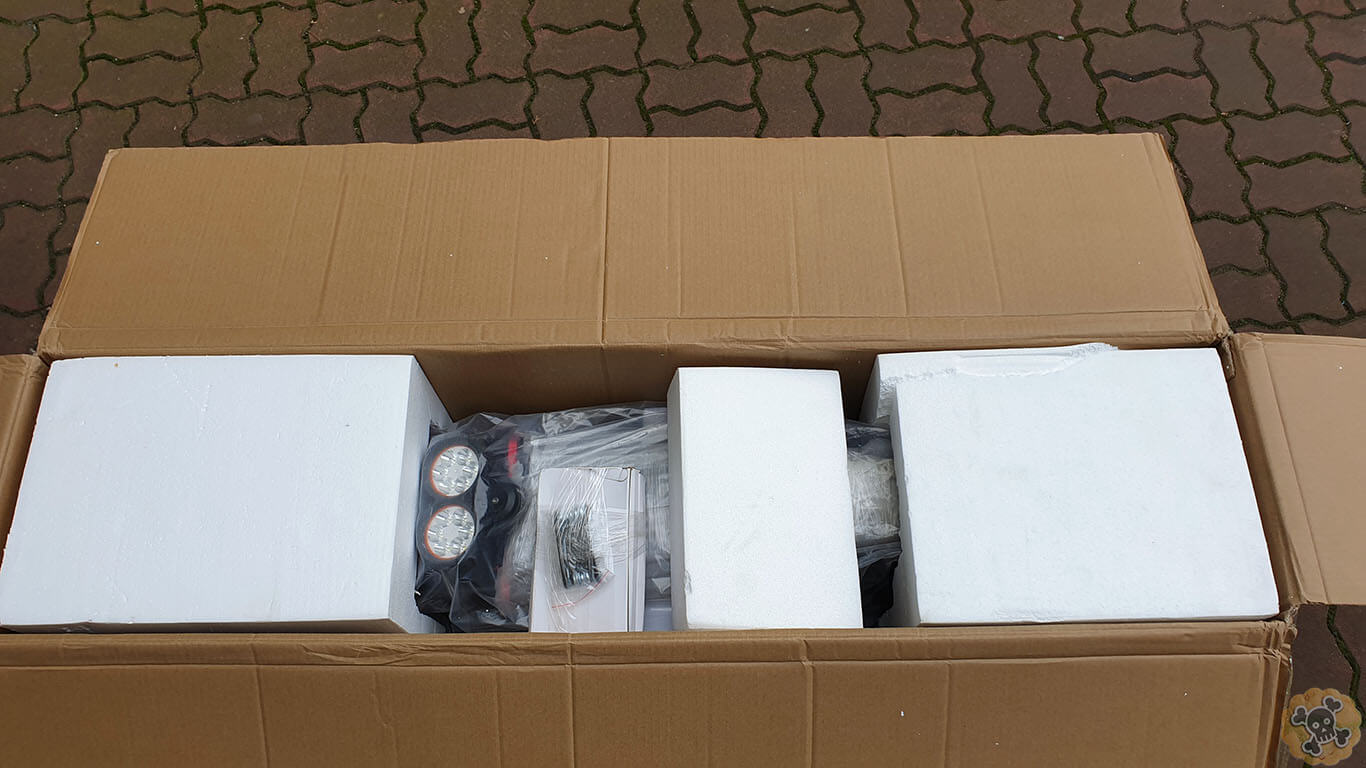
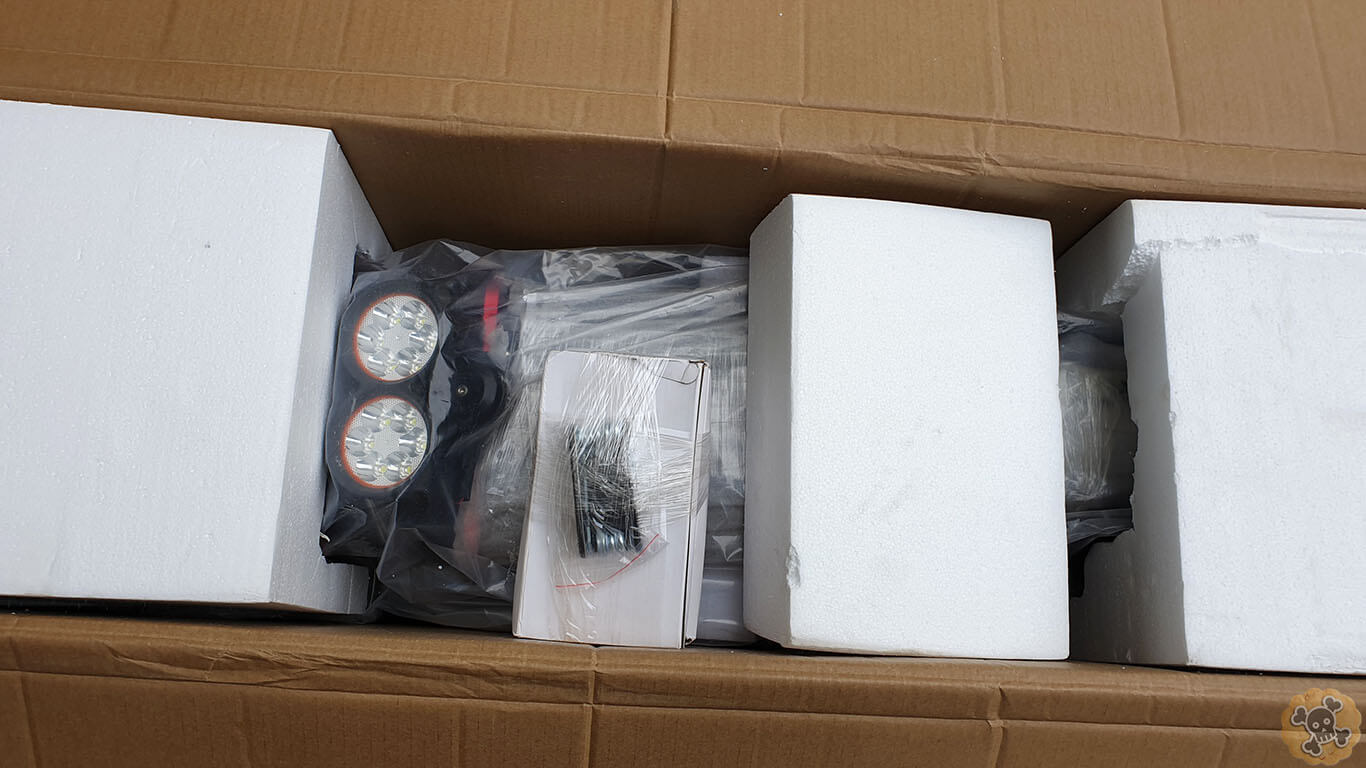
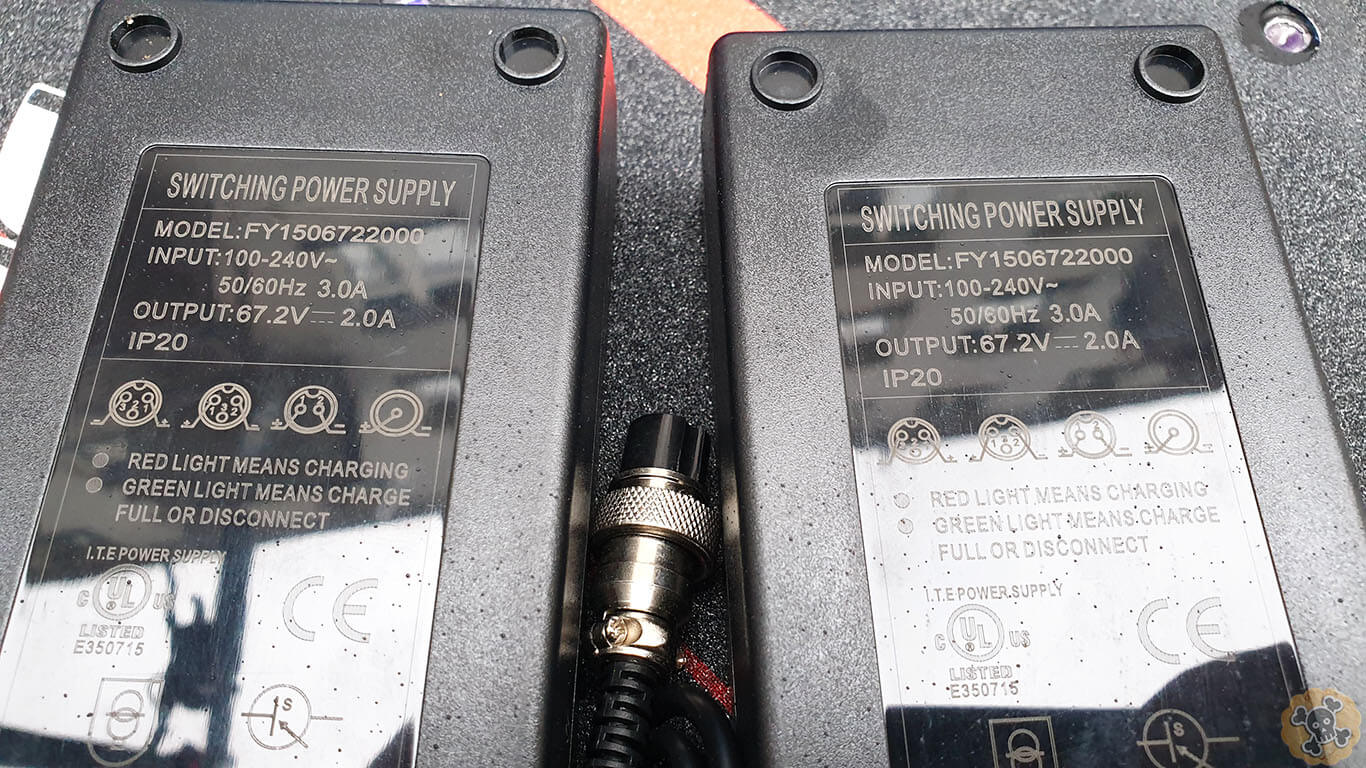
Lets start with Package , scoot was very well secured . Of course in the box we will find Scoot / 2x charger 2A / Seat / Tool Box (
Overall Quality of the Yume Y11 Plus is more than I expected (actually this scoot is not cheap so no surprise )
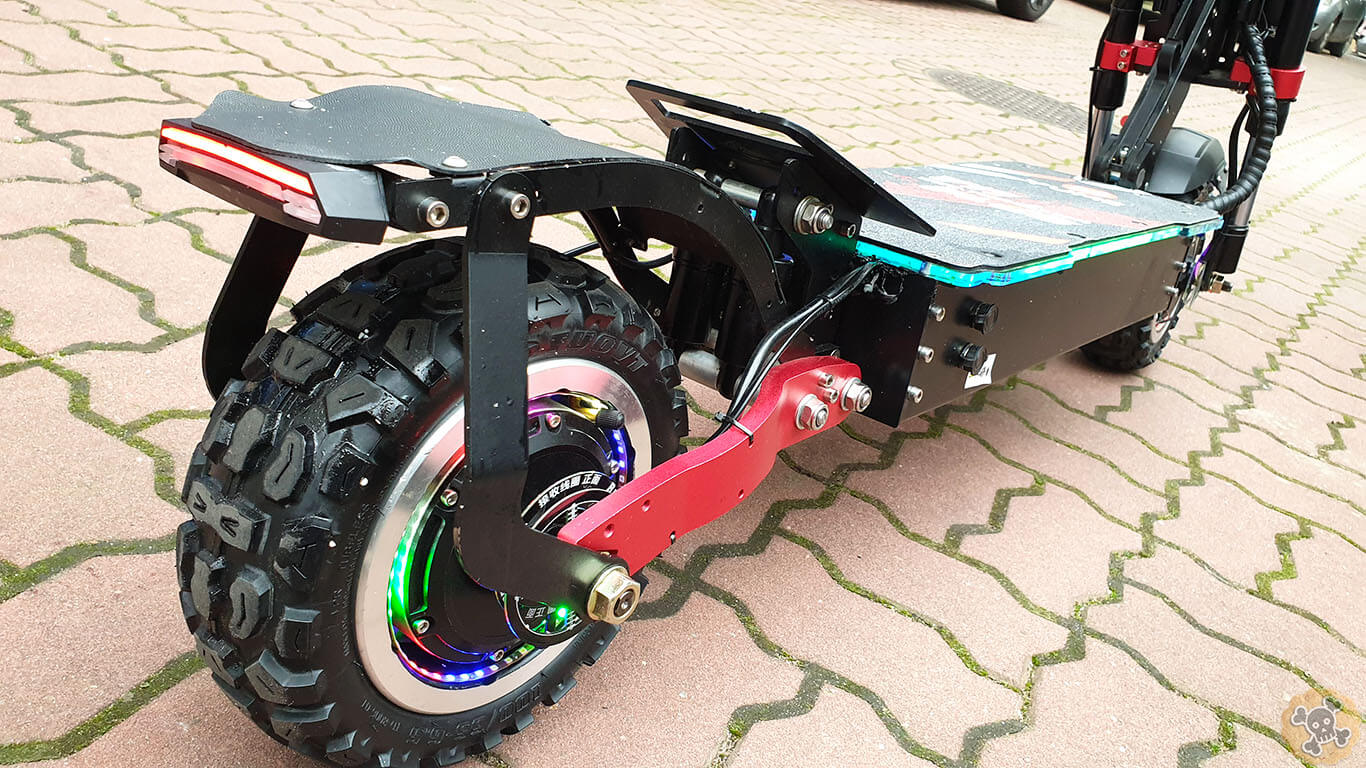
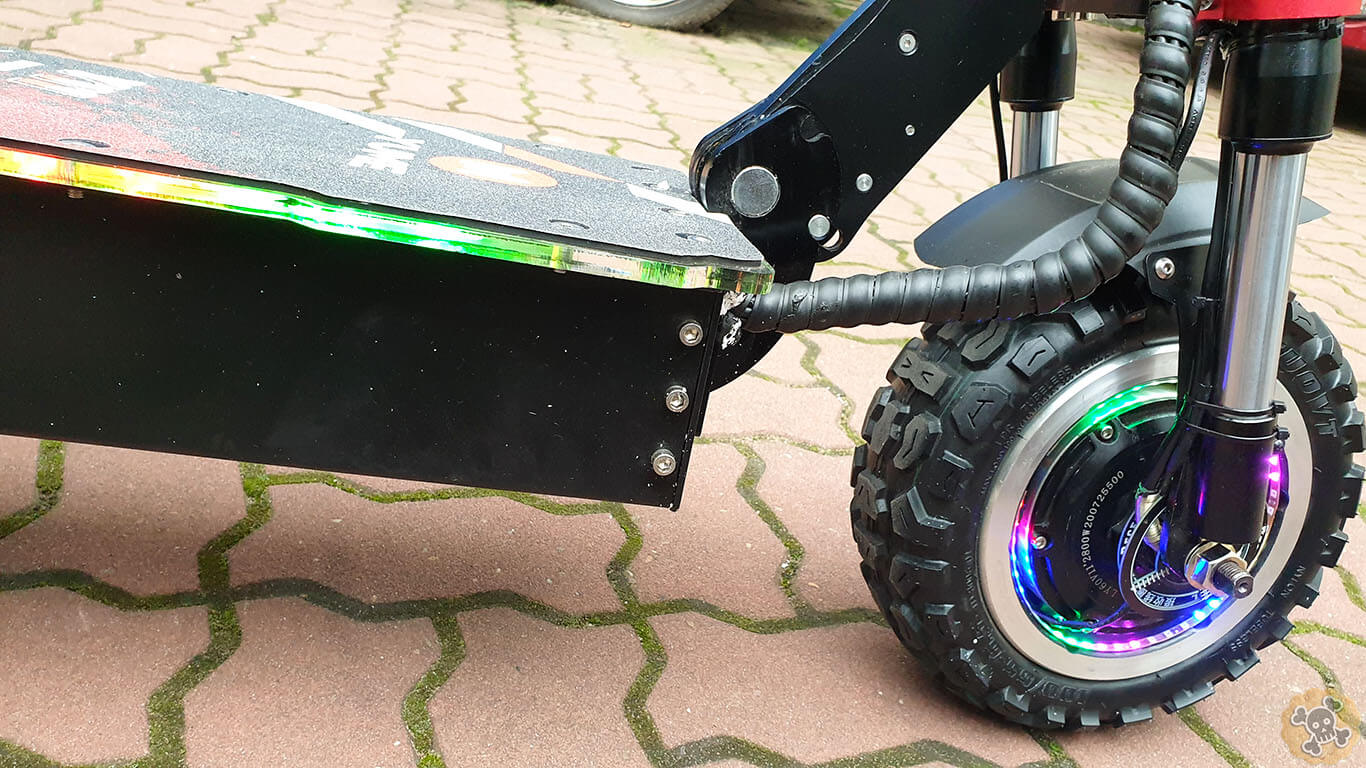
Lights in 11″ RIMS are like GOD mode ! First time I see something like this ( LEDs are powered by wireless ” Charging ” system know from smartphones, ” Tesla coil system ” )
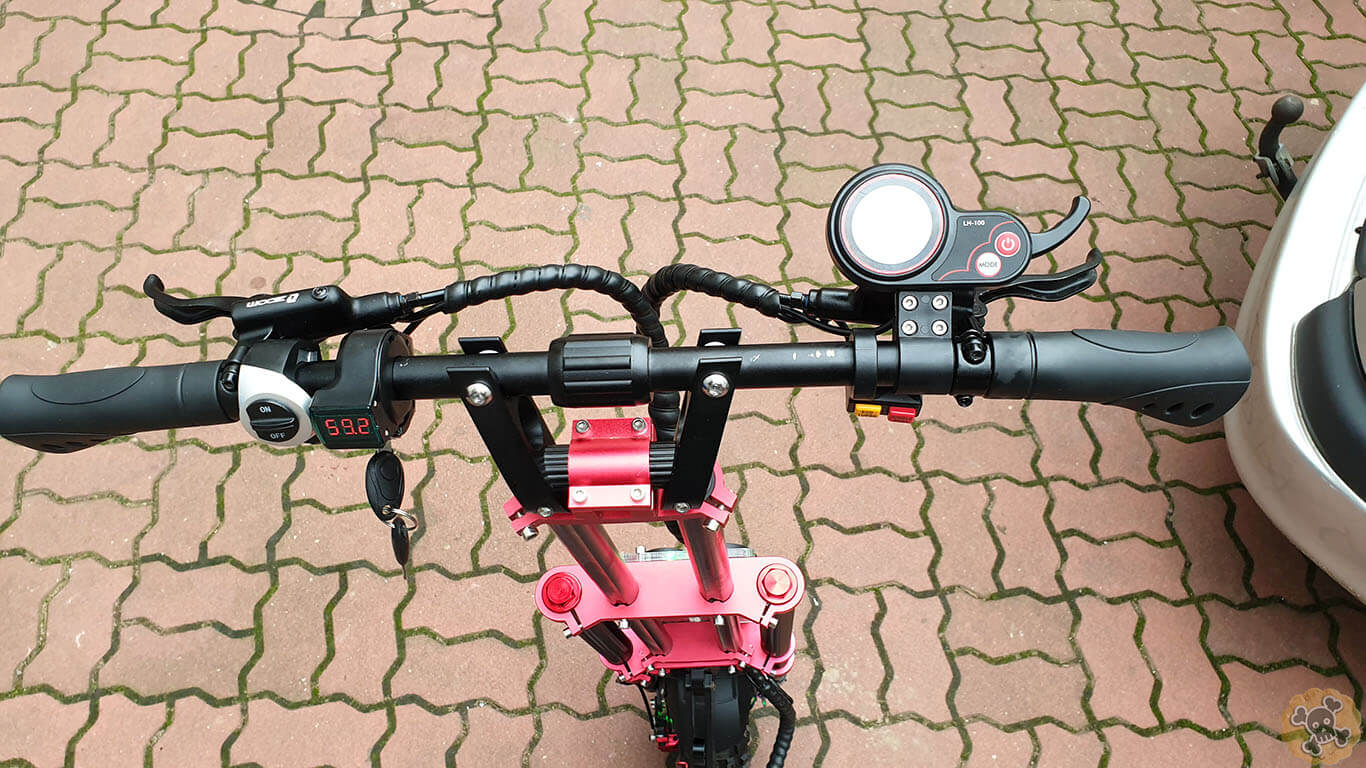
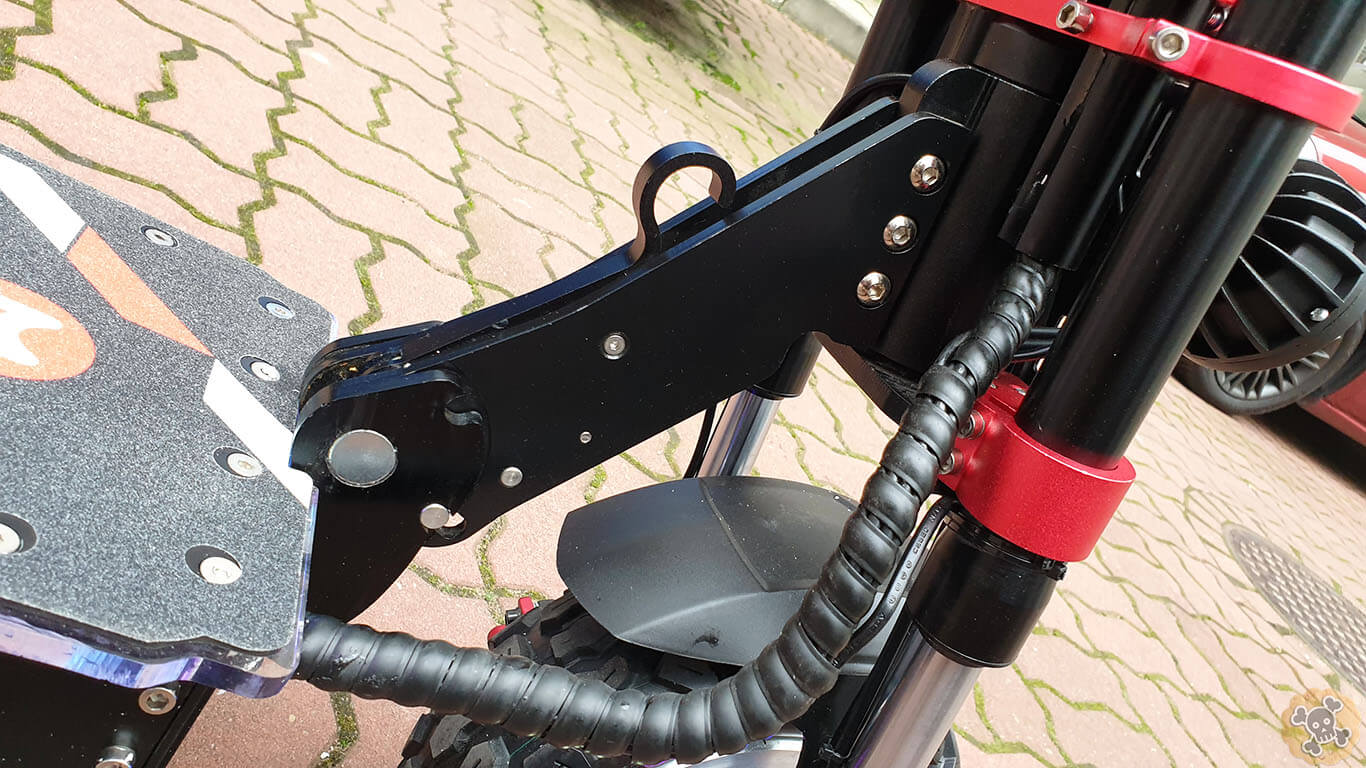
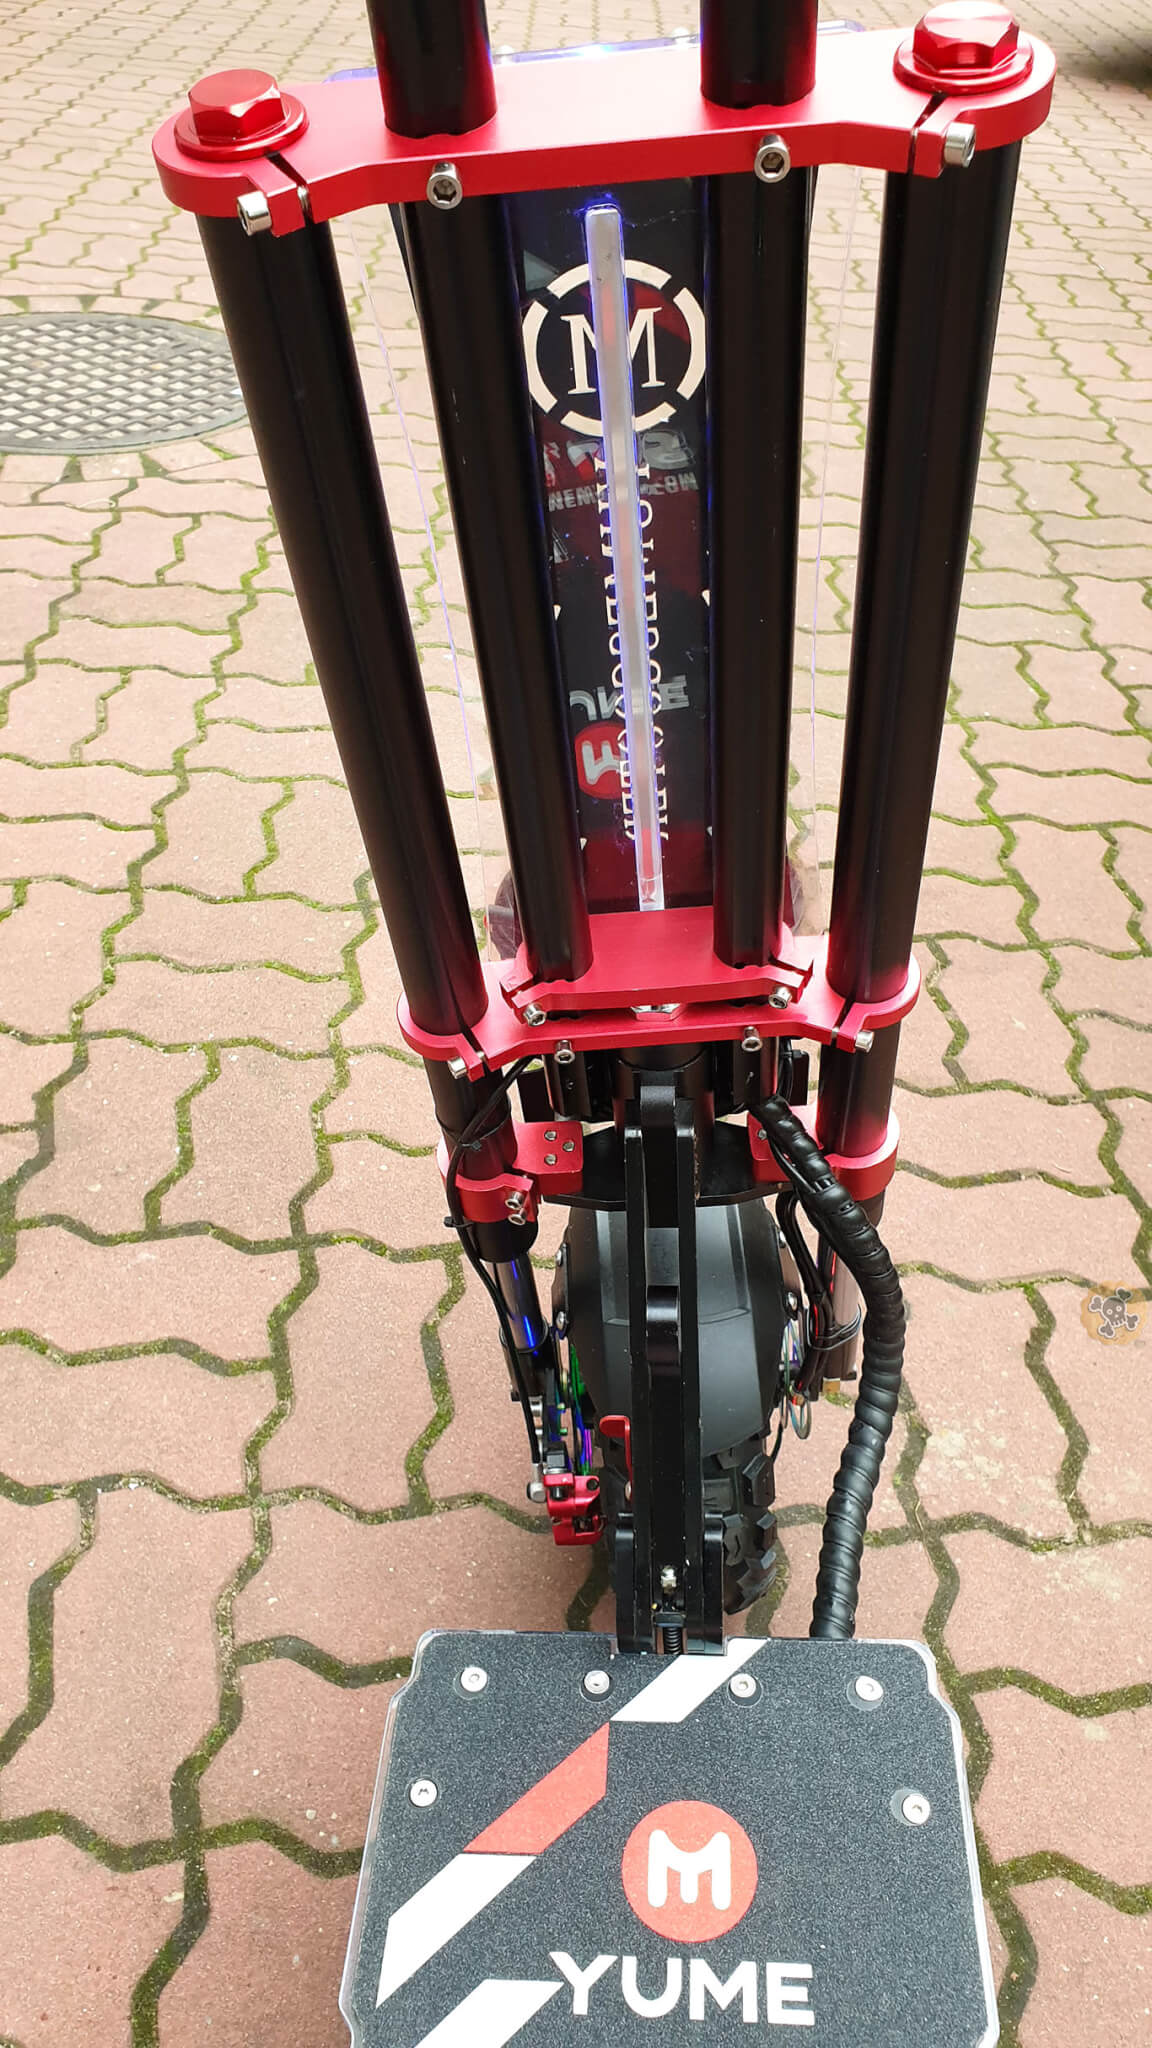
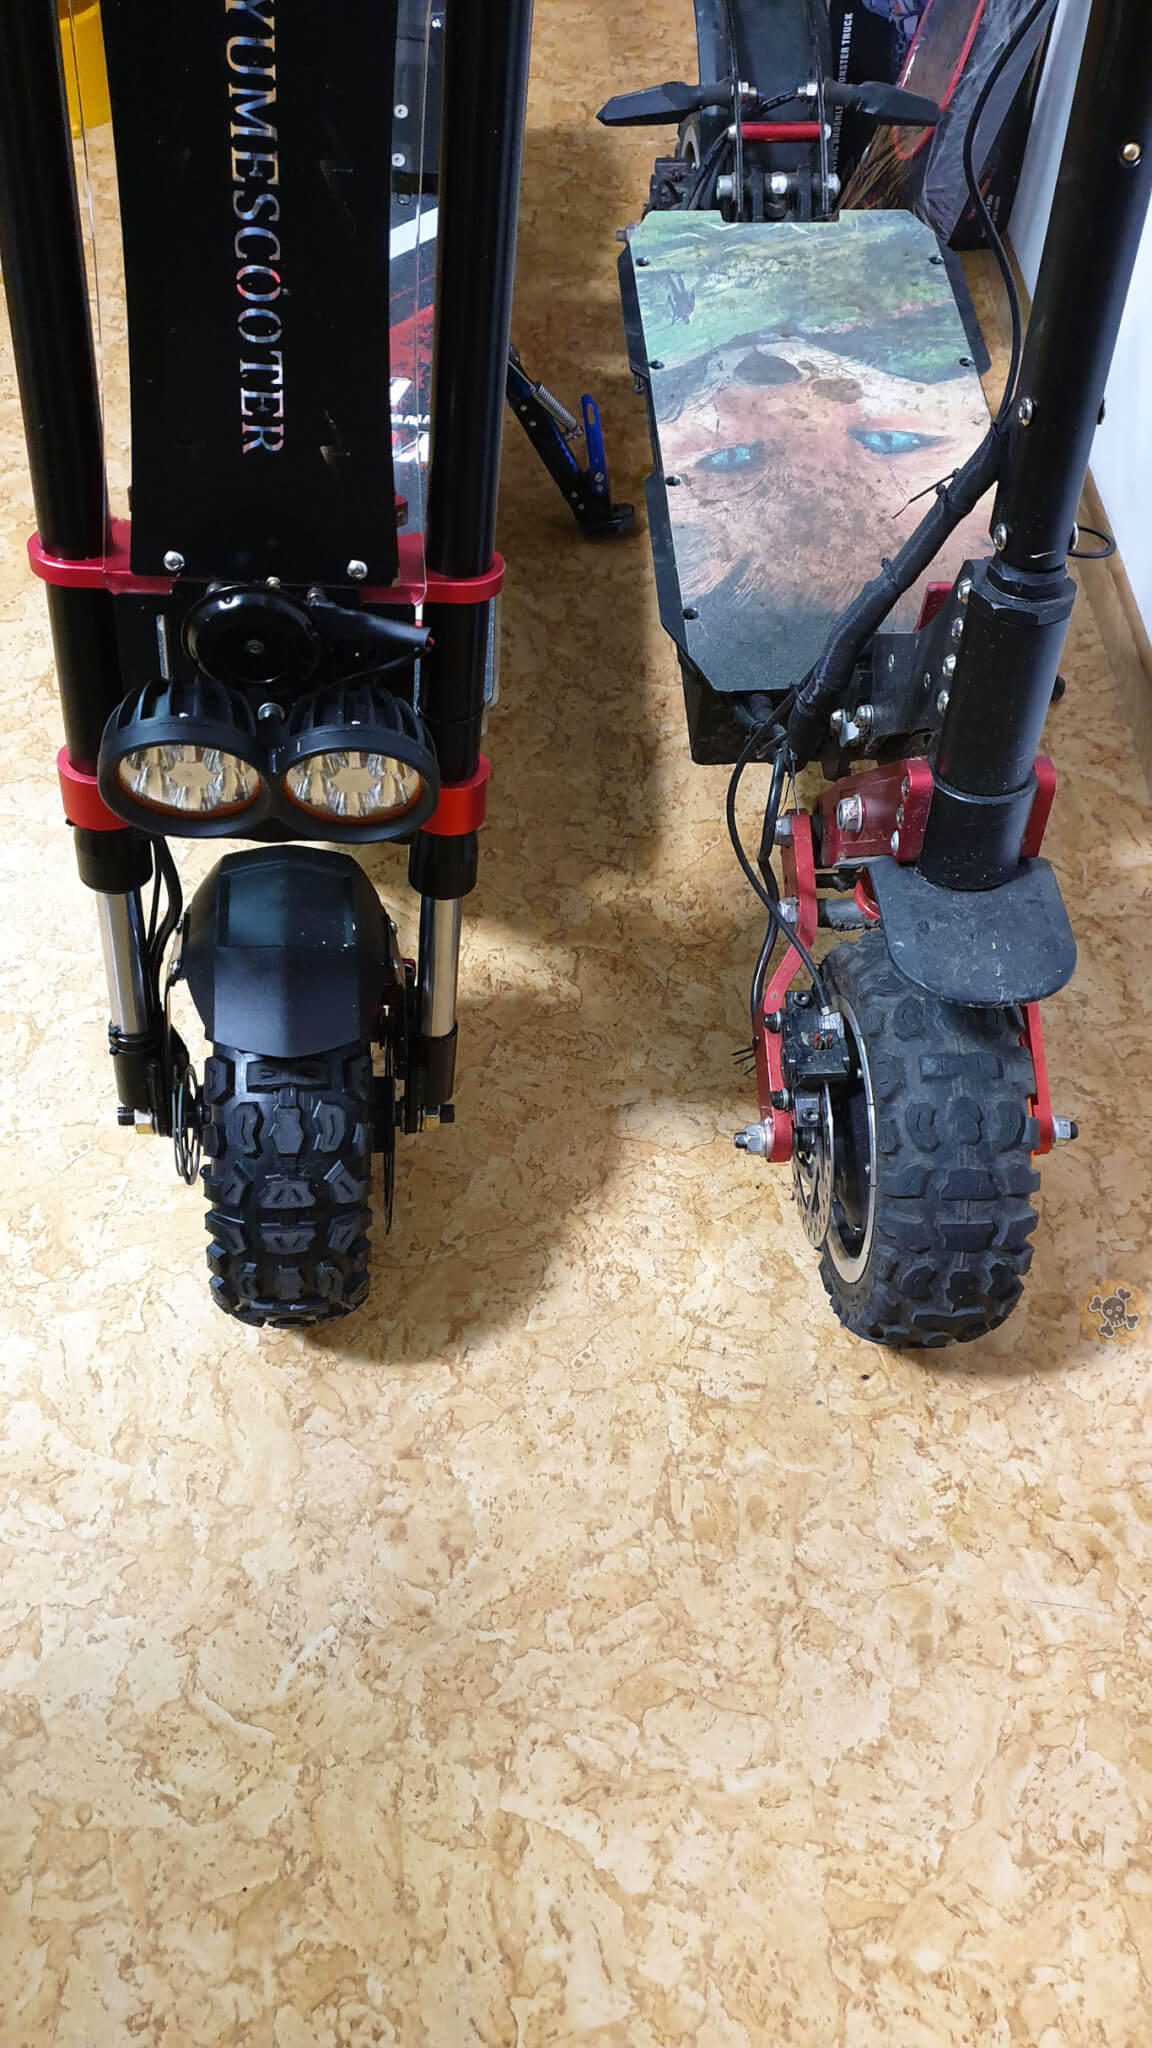
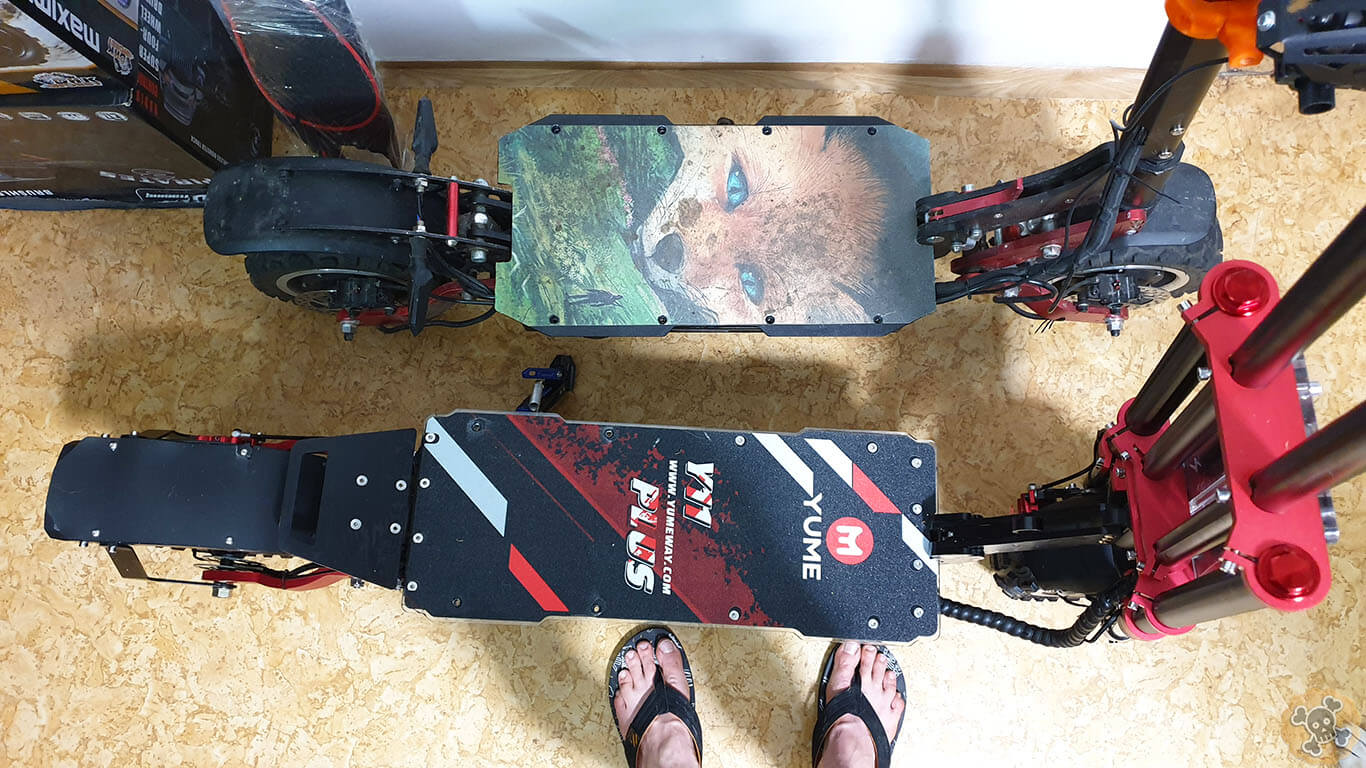
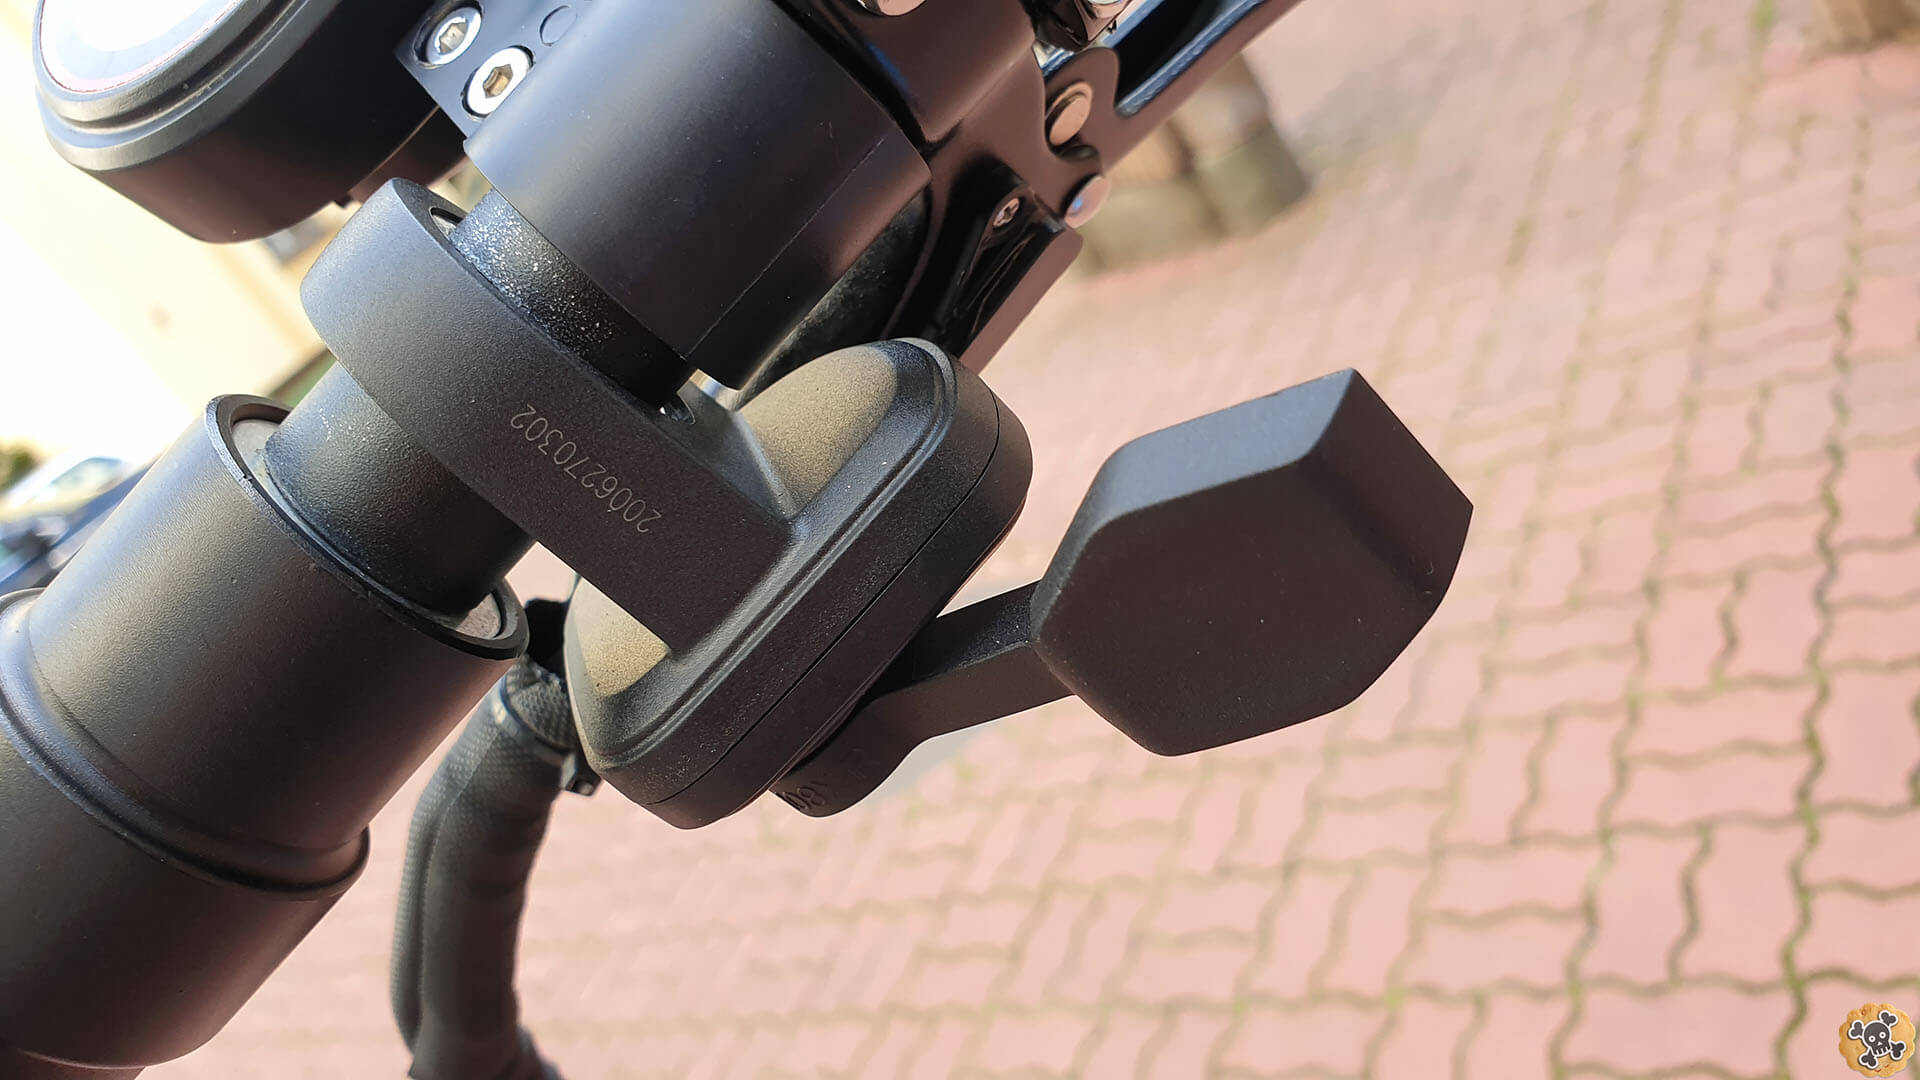
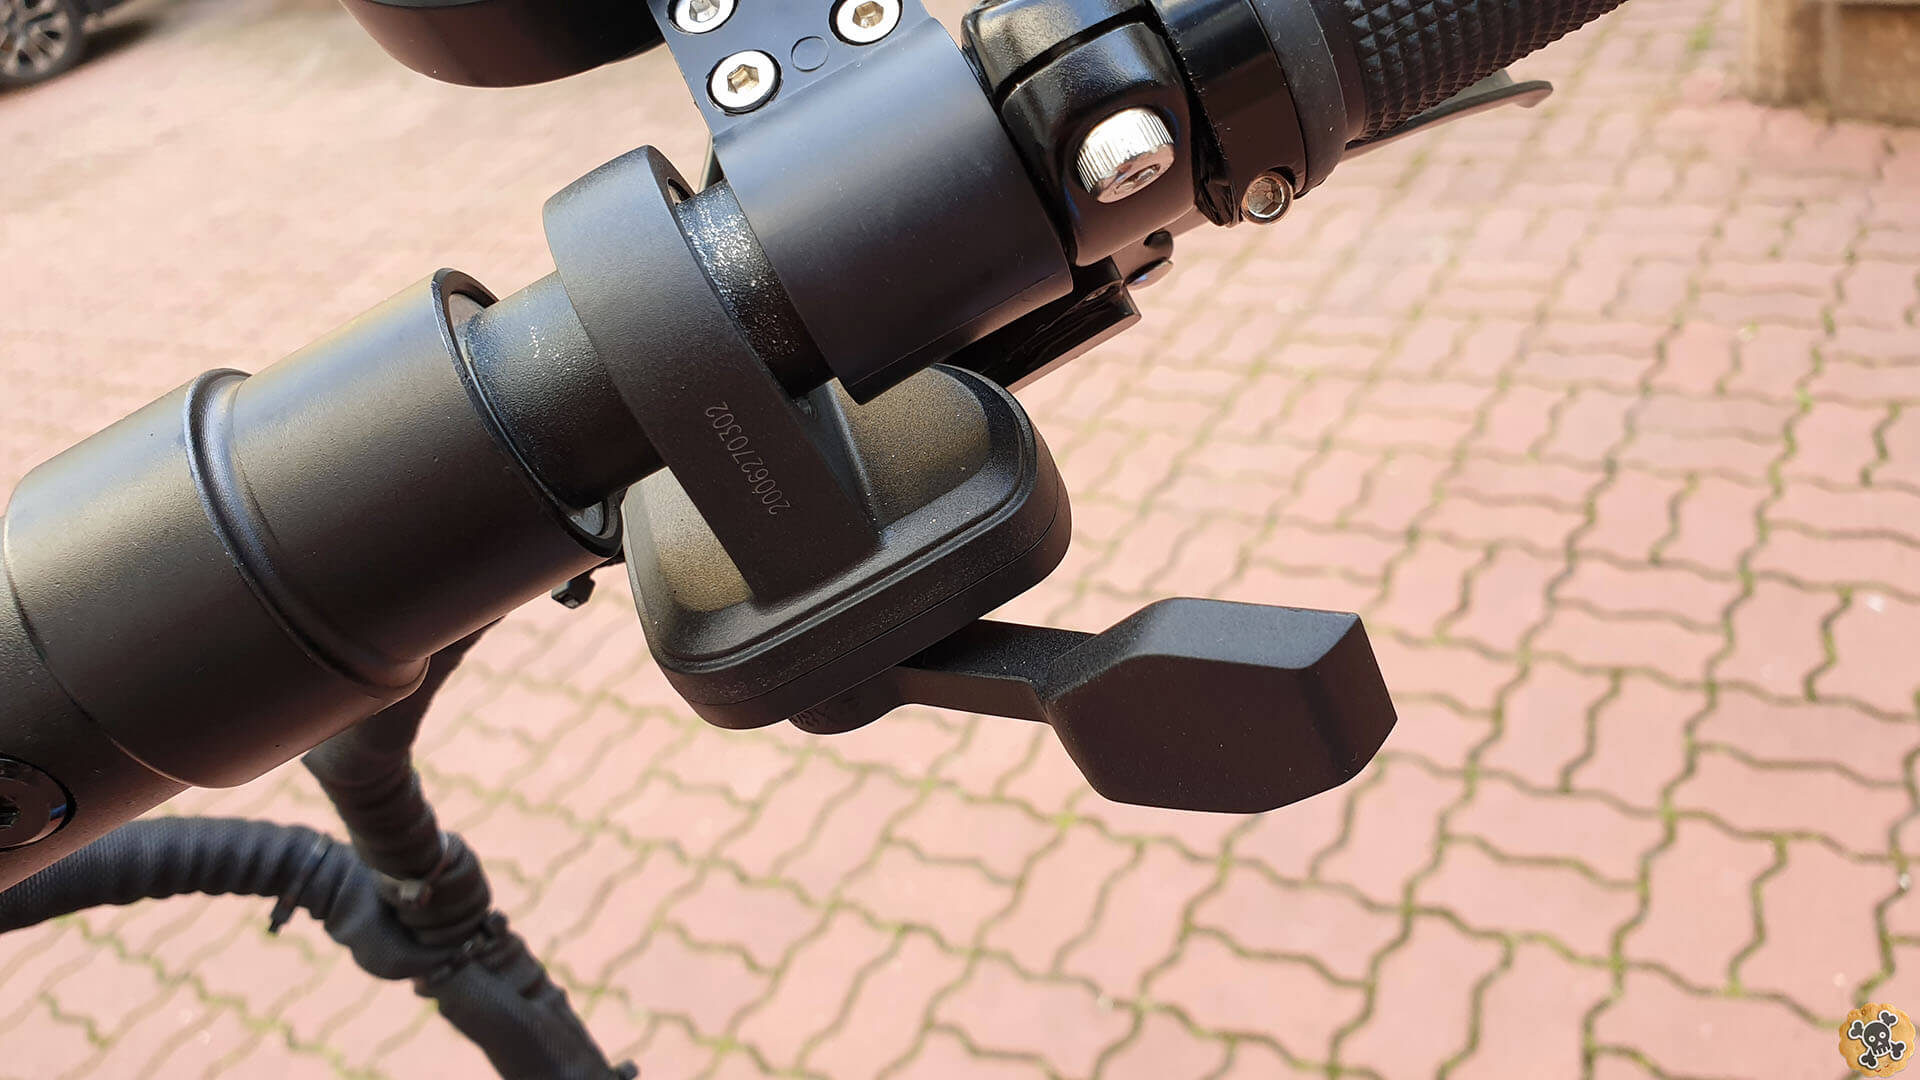
Frame is really long so should be comfier than in other Escoots from china like Laoties ES18 or Boyueda . Steering column & steering bar feels quite solid ?
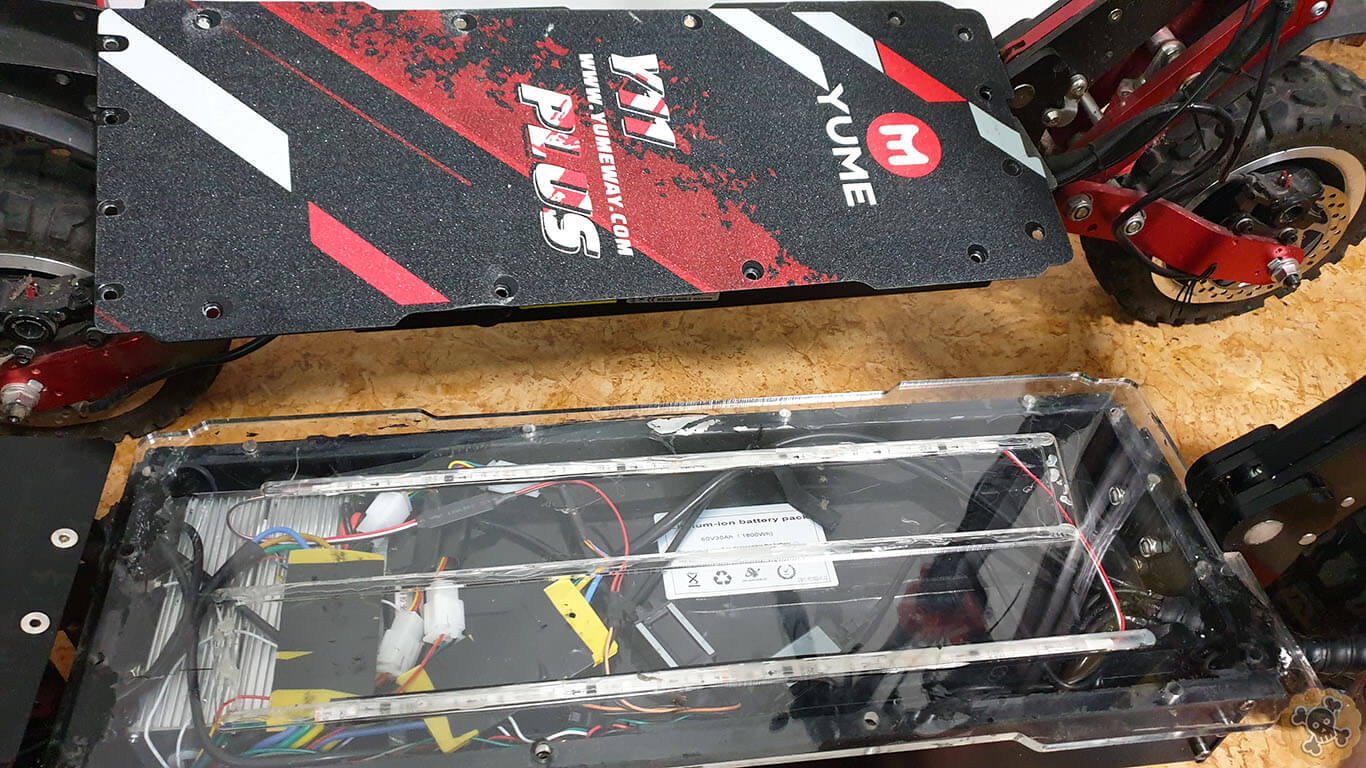
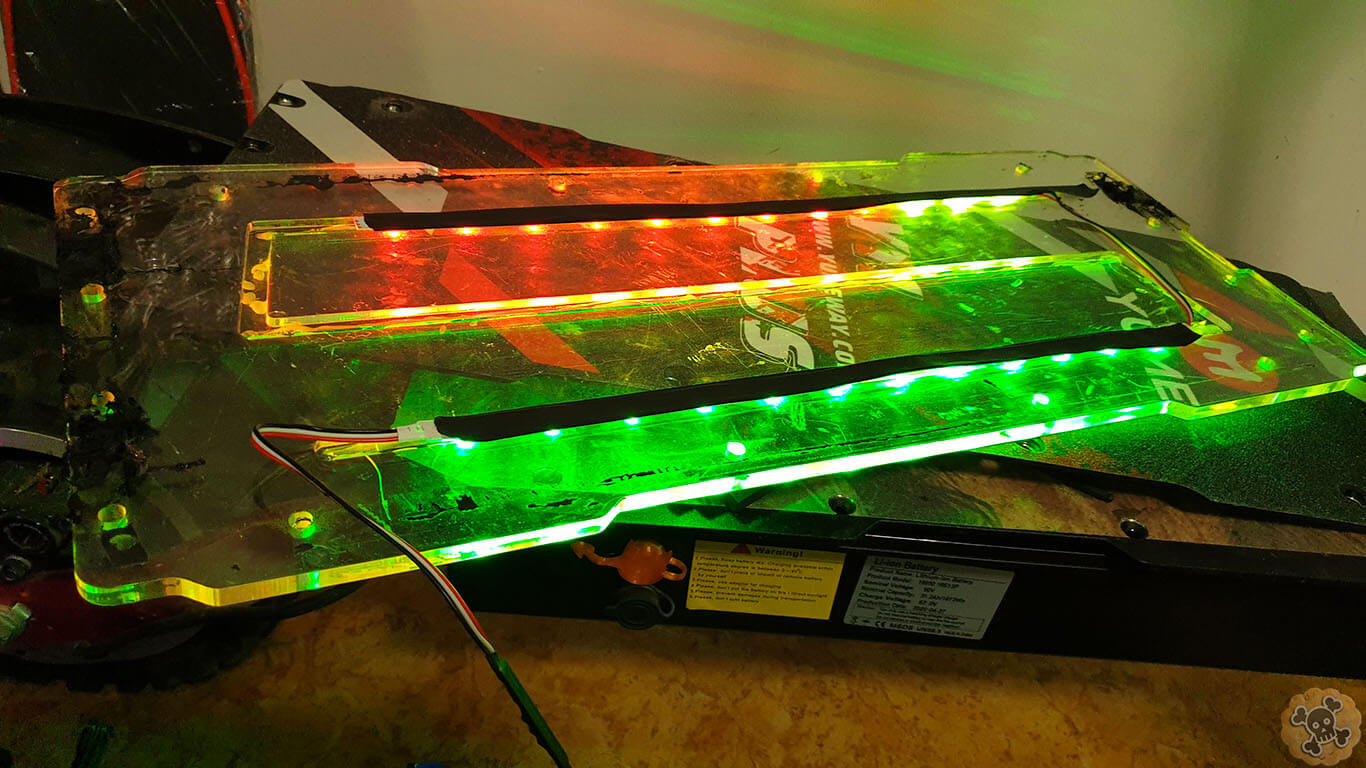
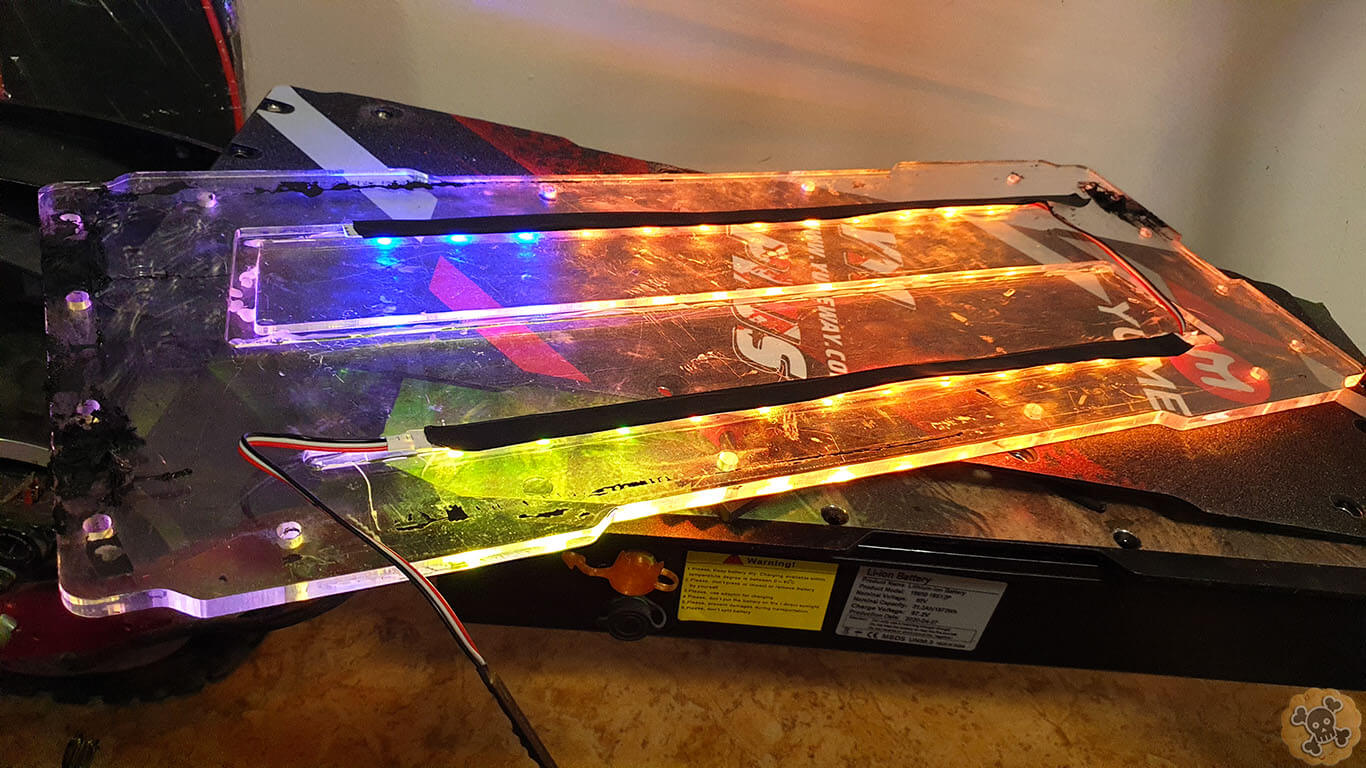
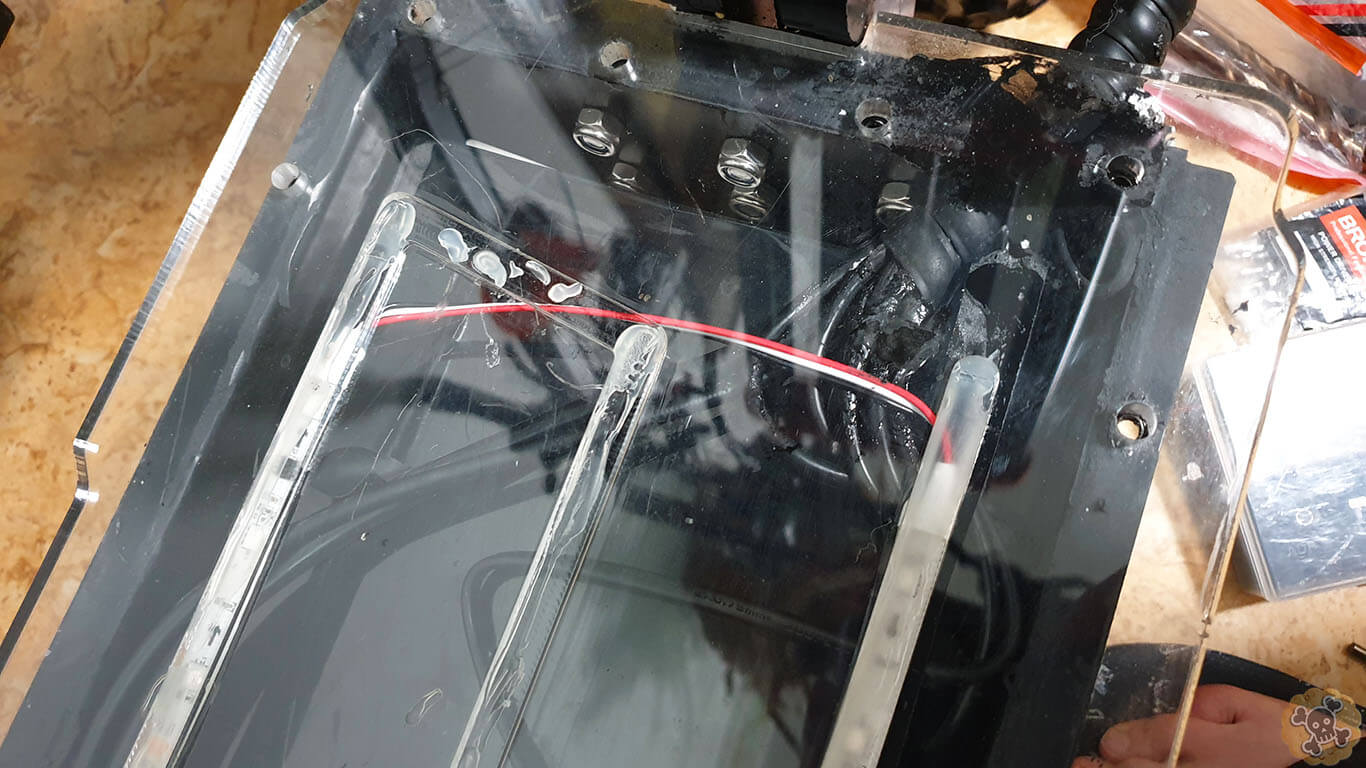
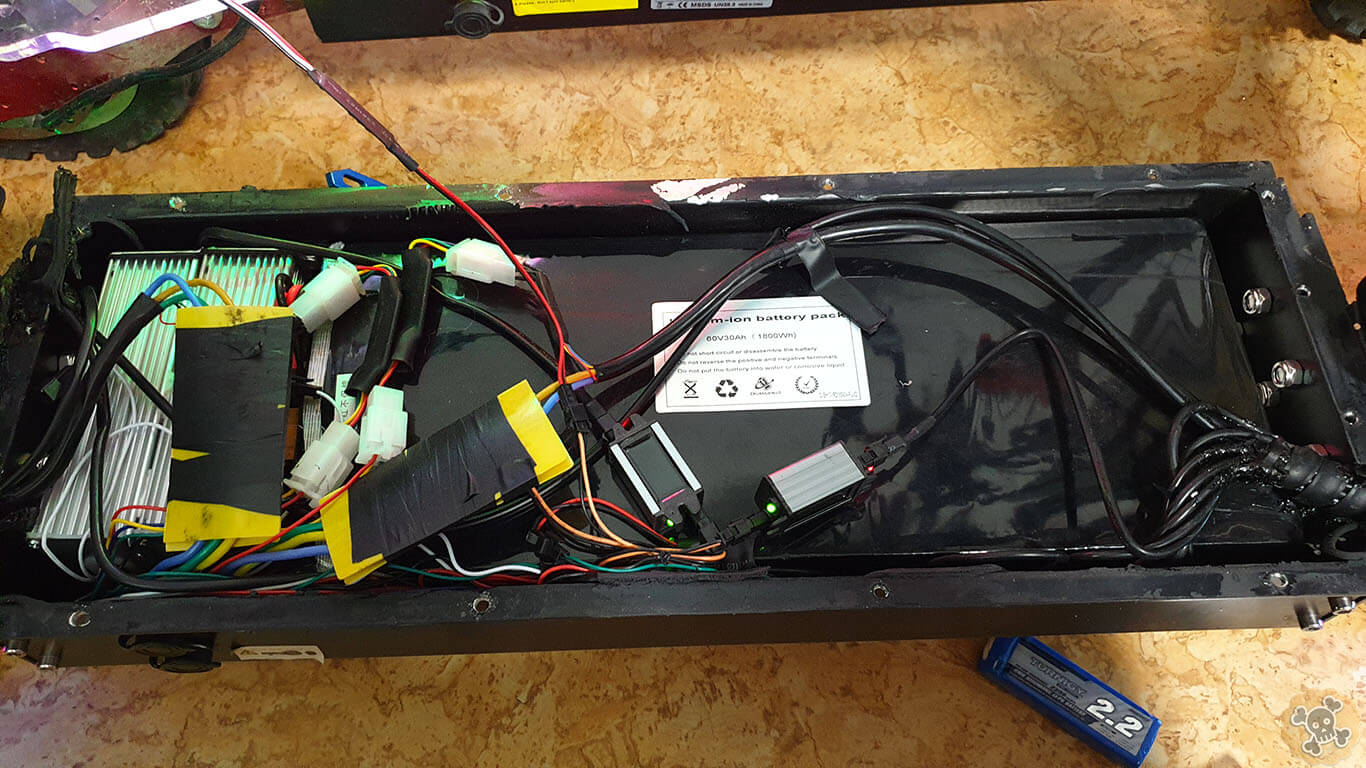
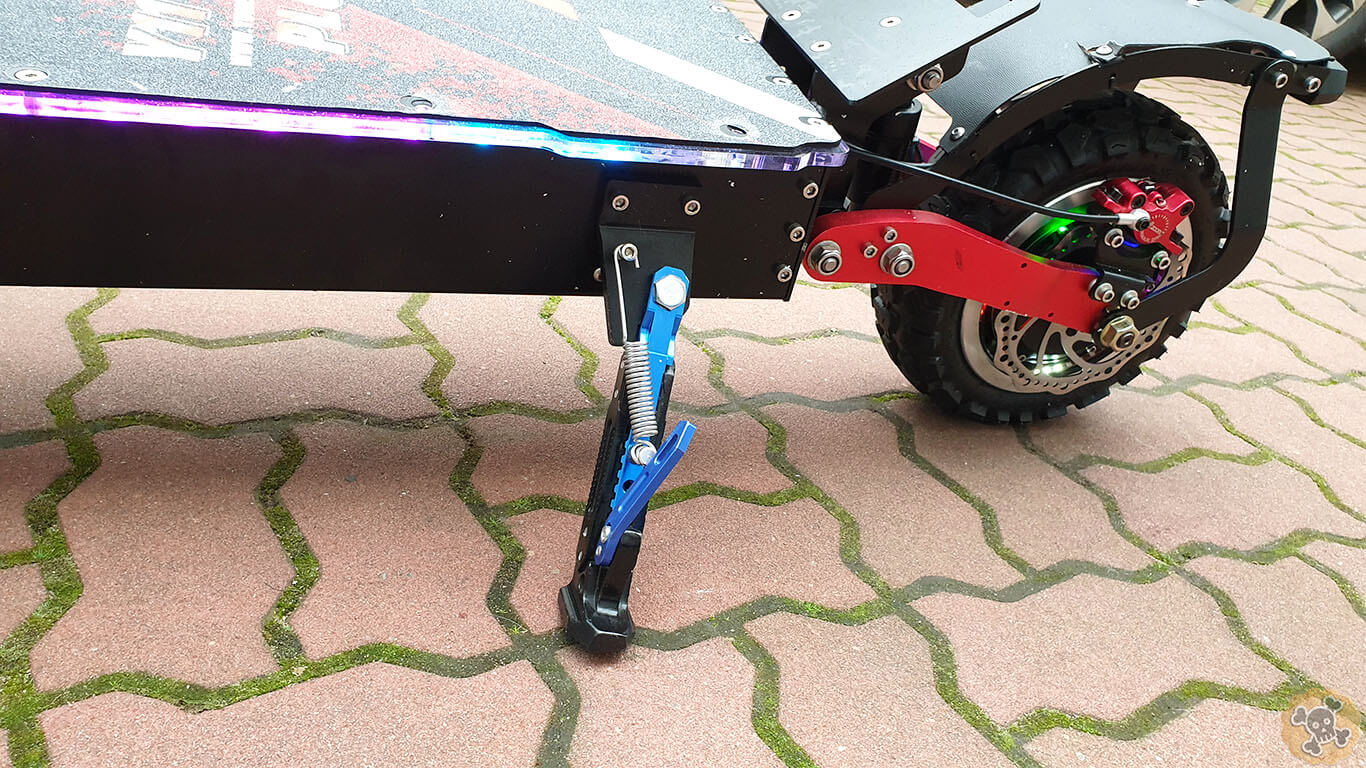
Under the deck we got also plenty of leds ???
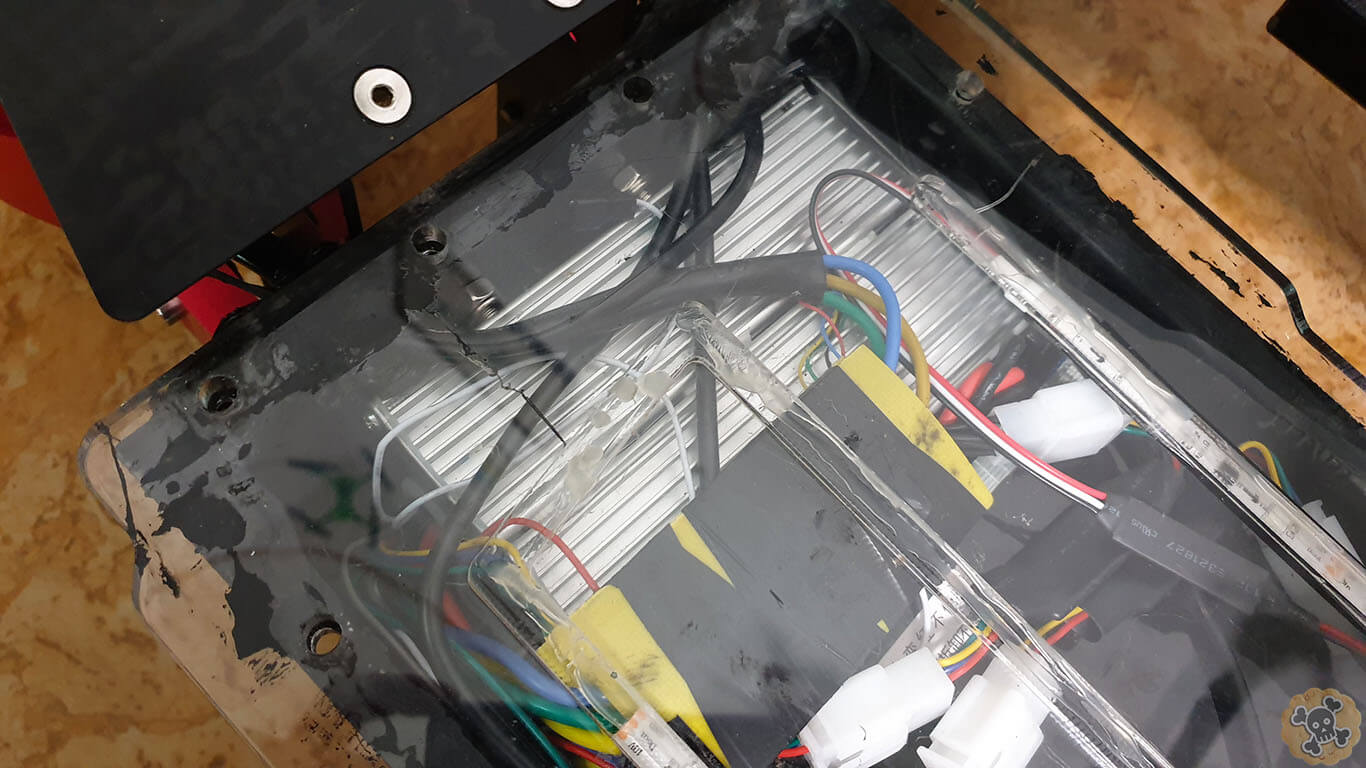
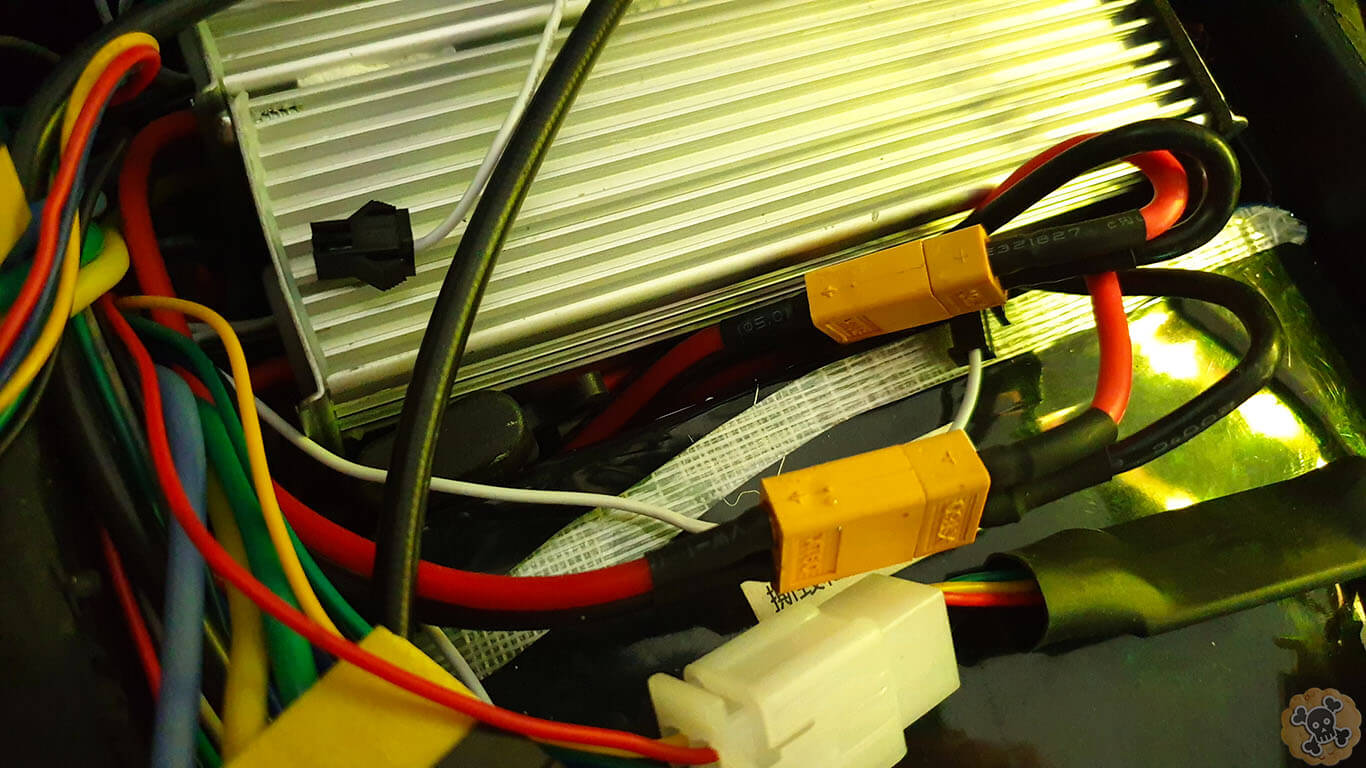
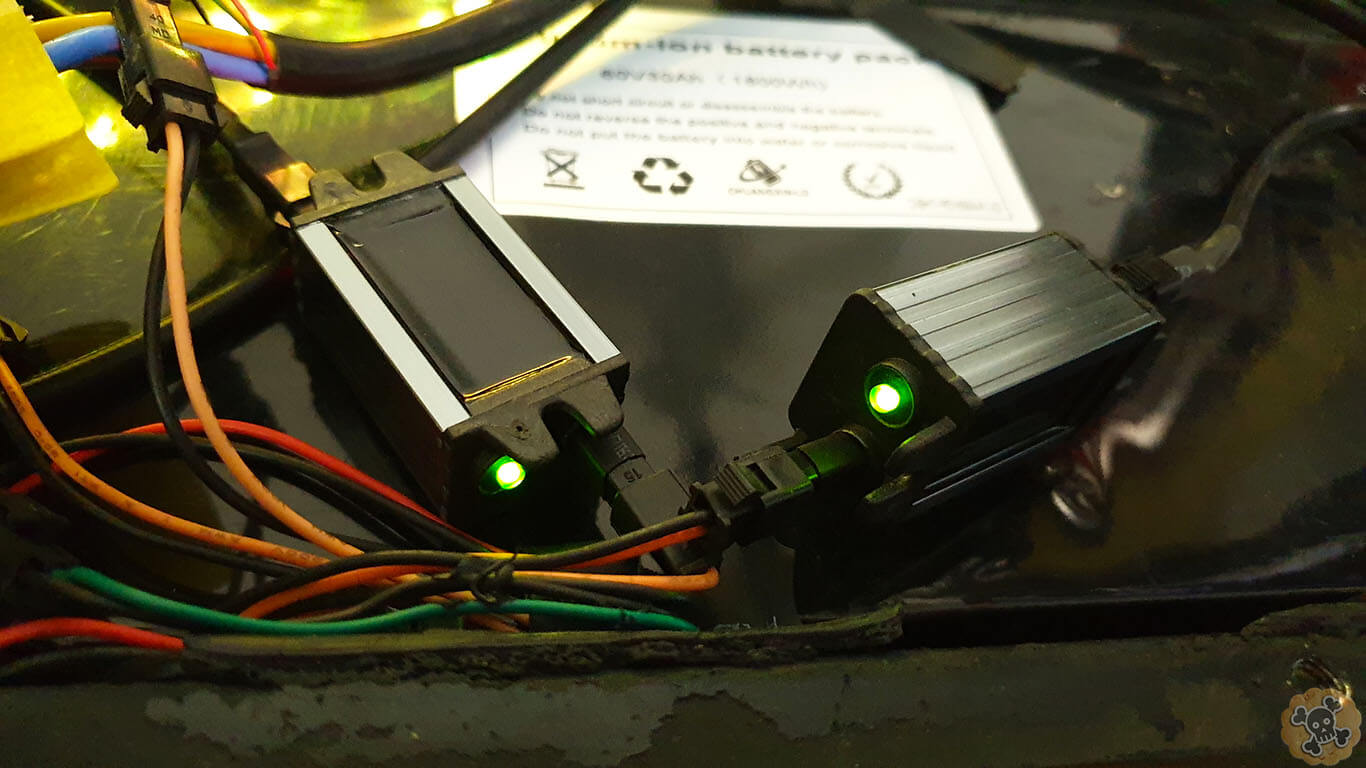
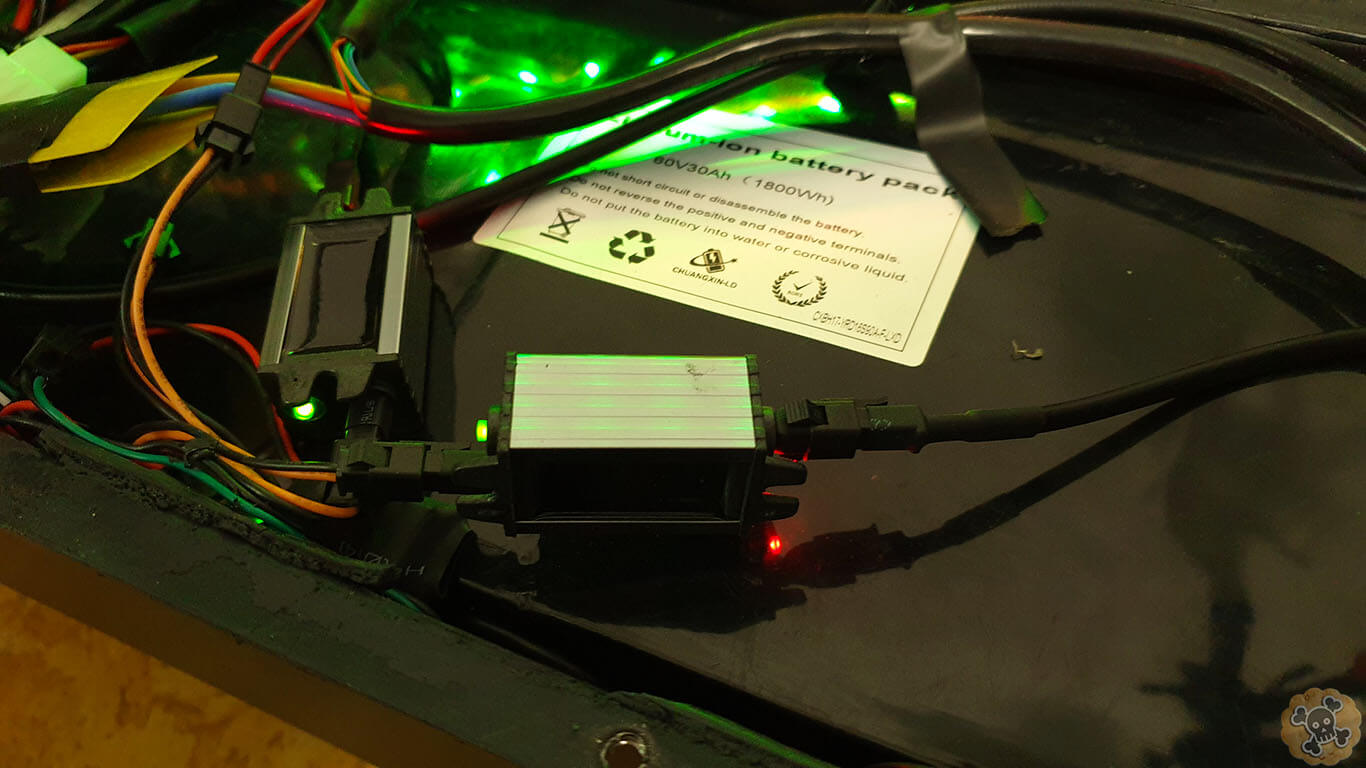
Inside the deck we Can see 45A controller ,60V 30AH Battery , converters for LEDs and other stuff
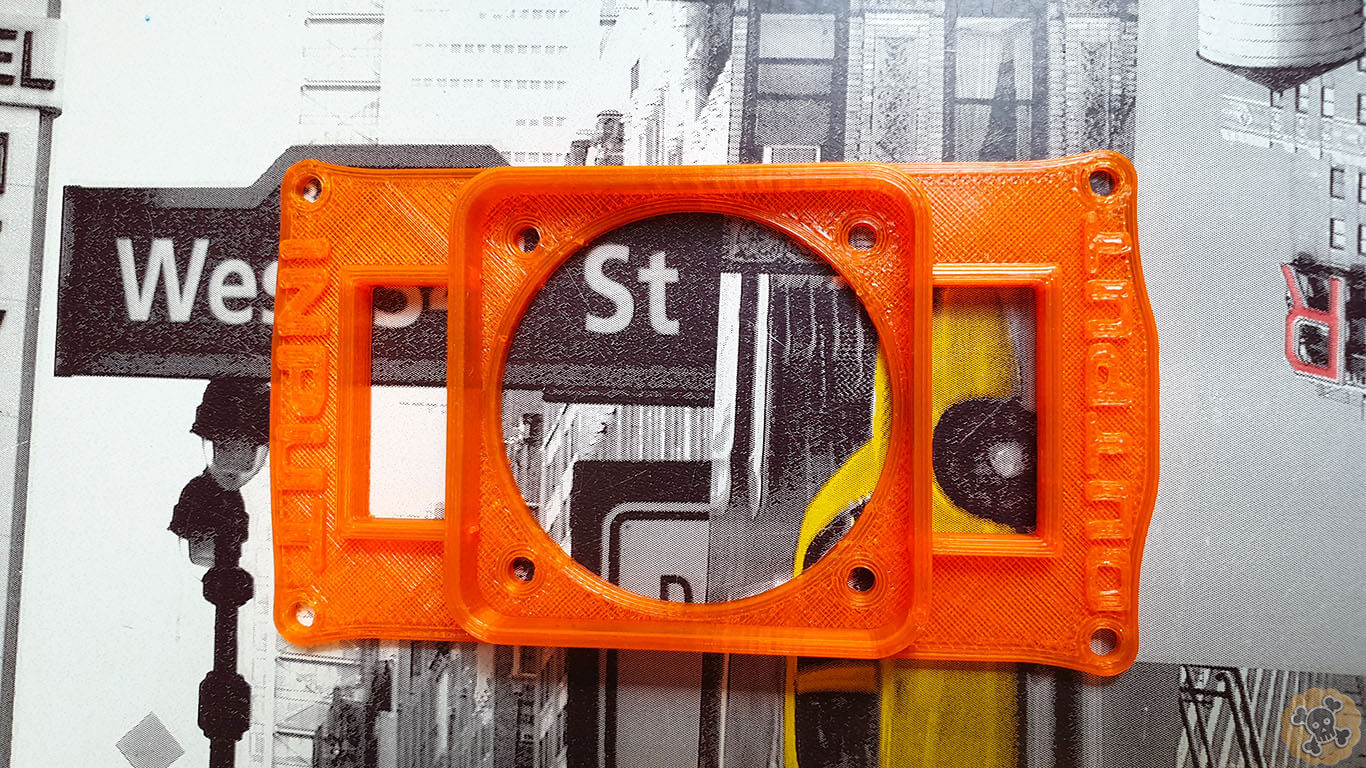
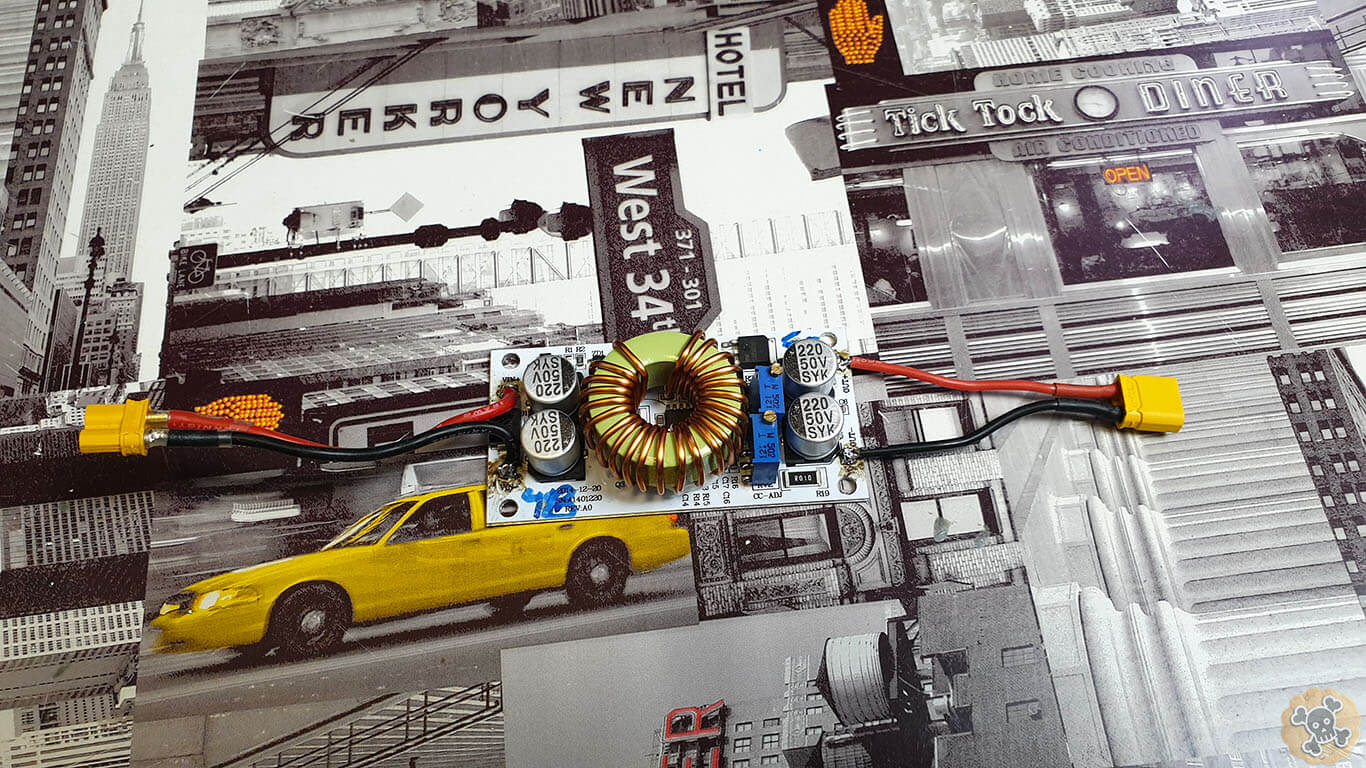
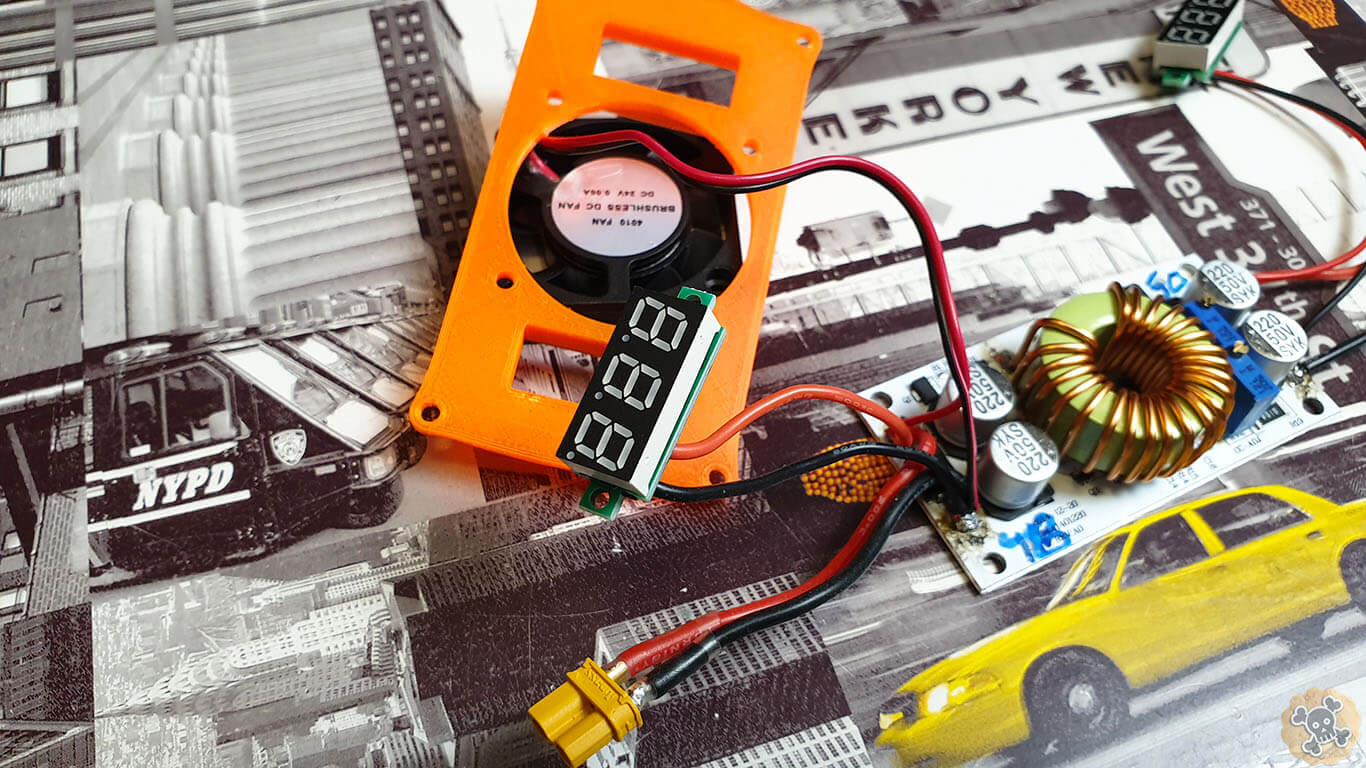
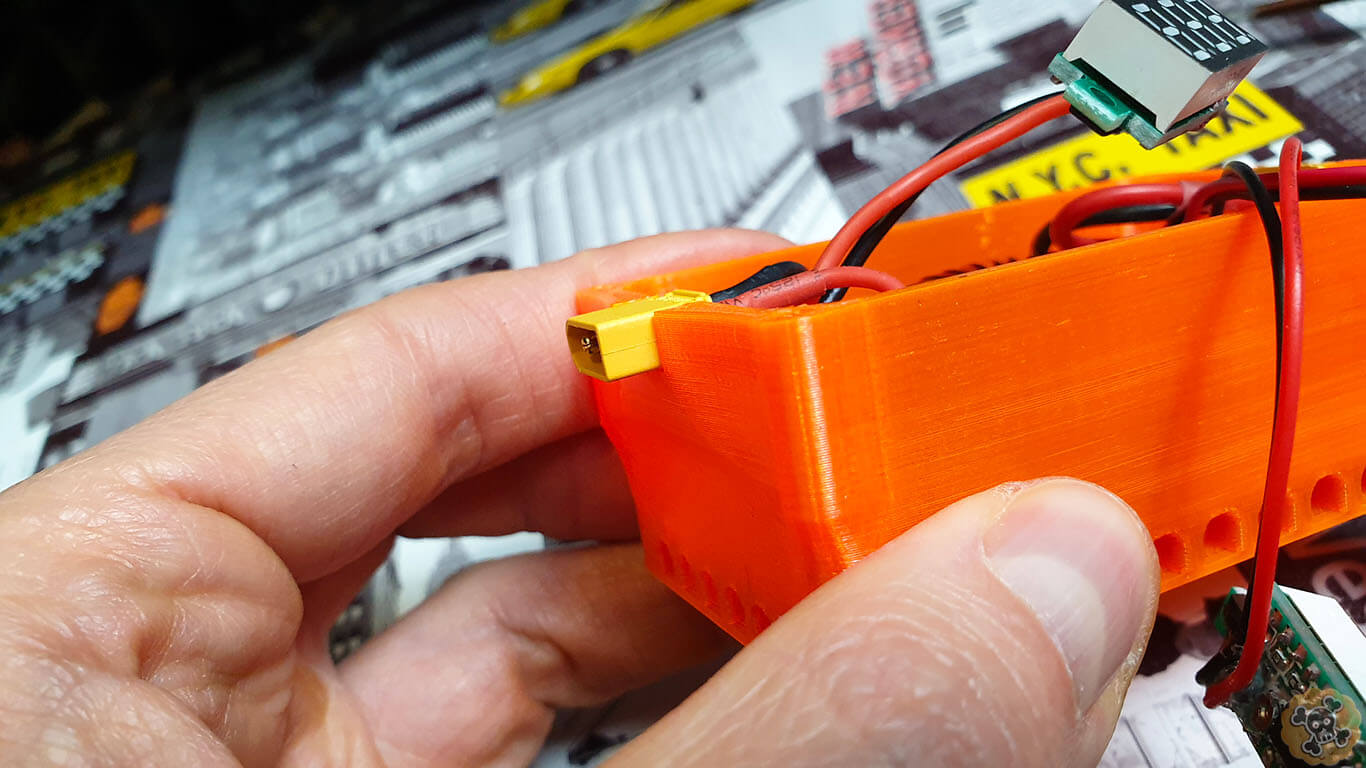
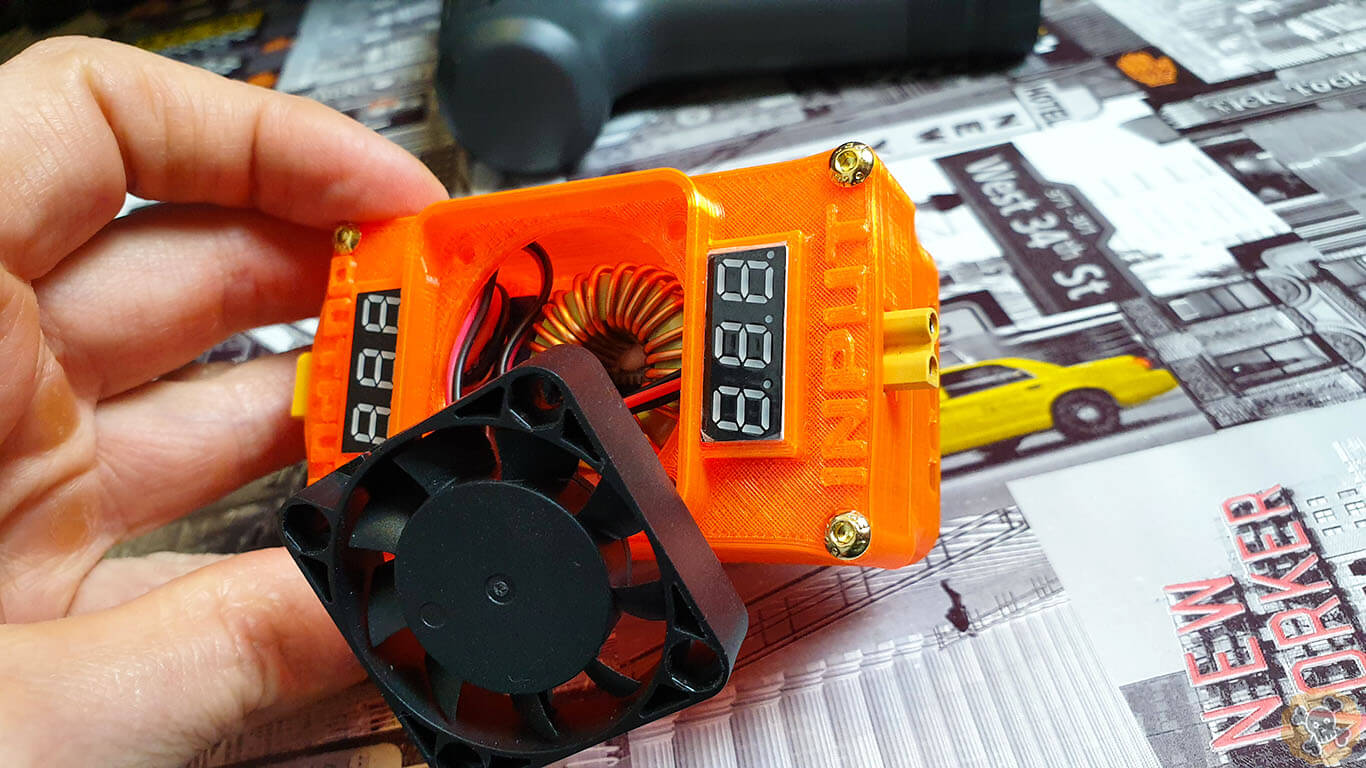
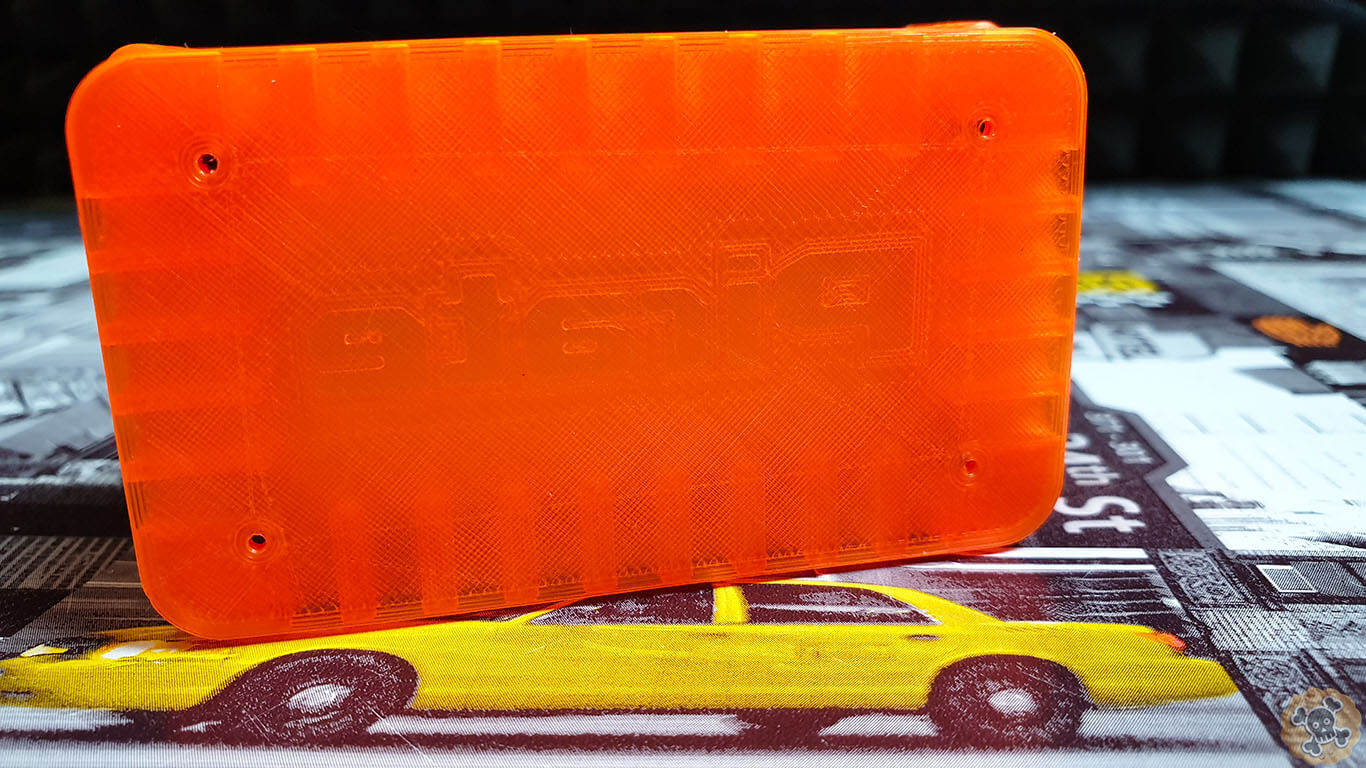
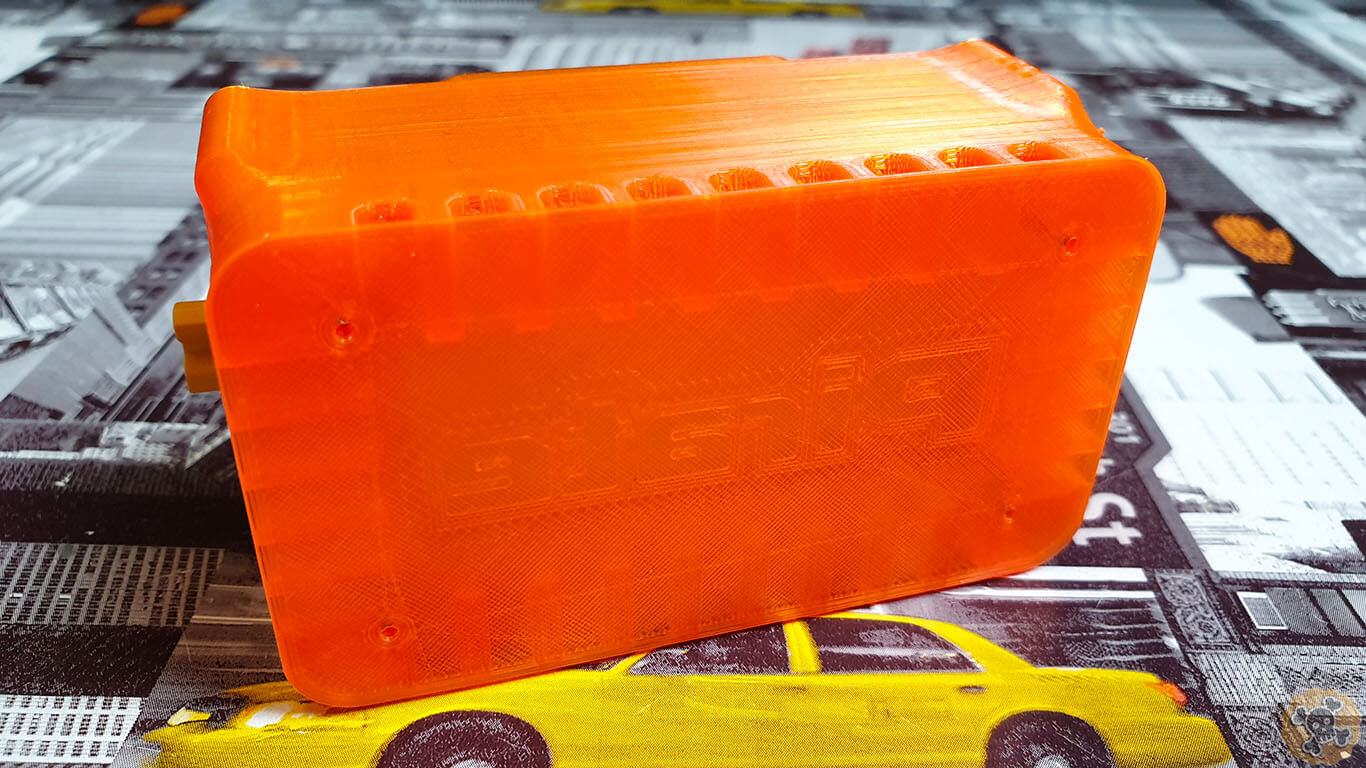
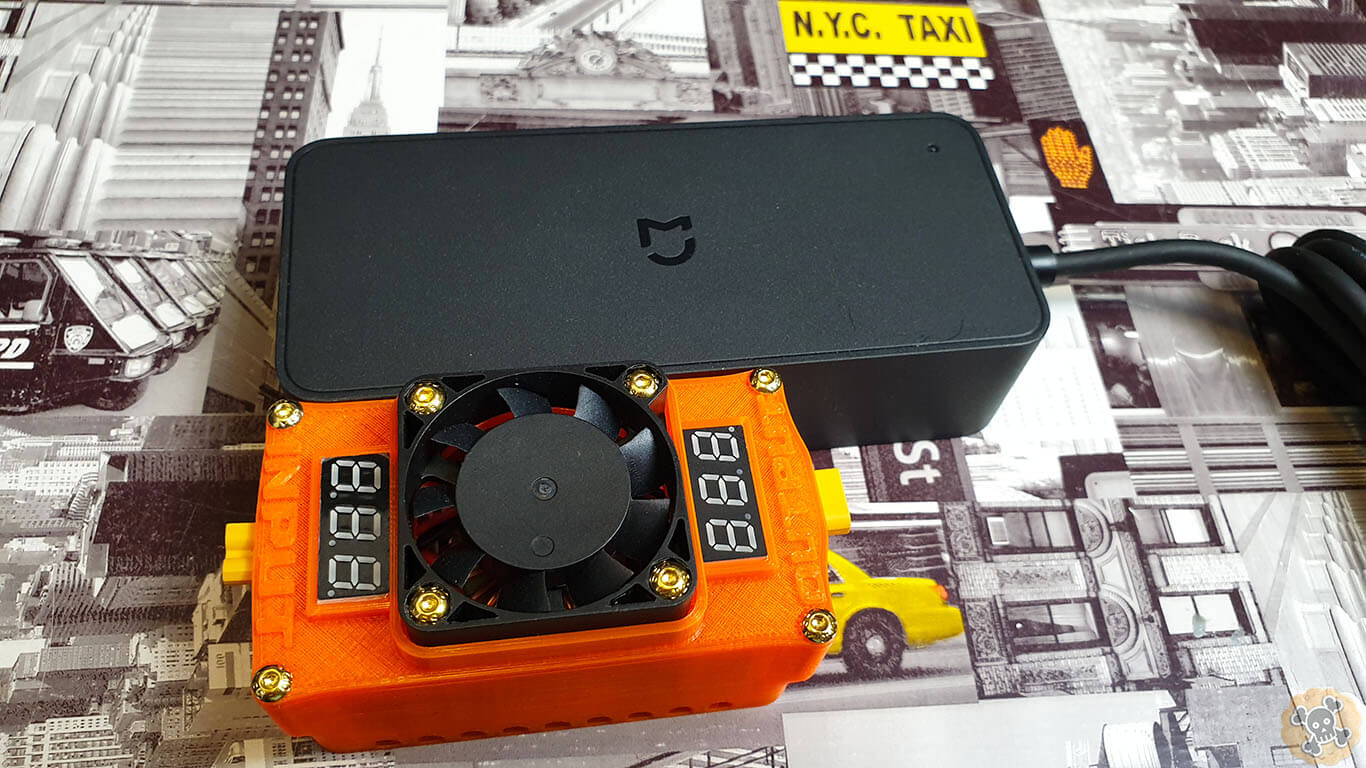
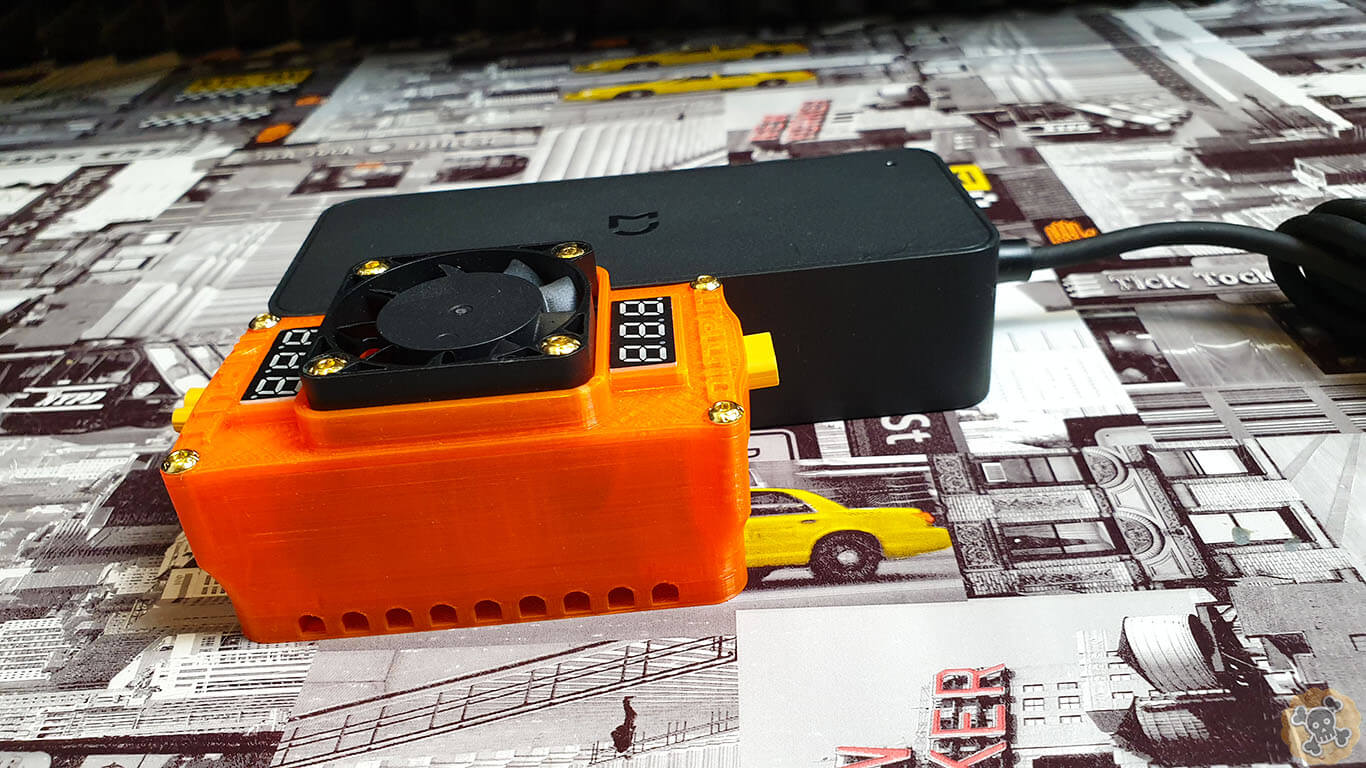
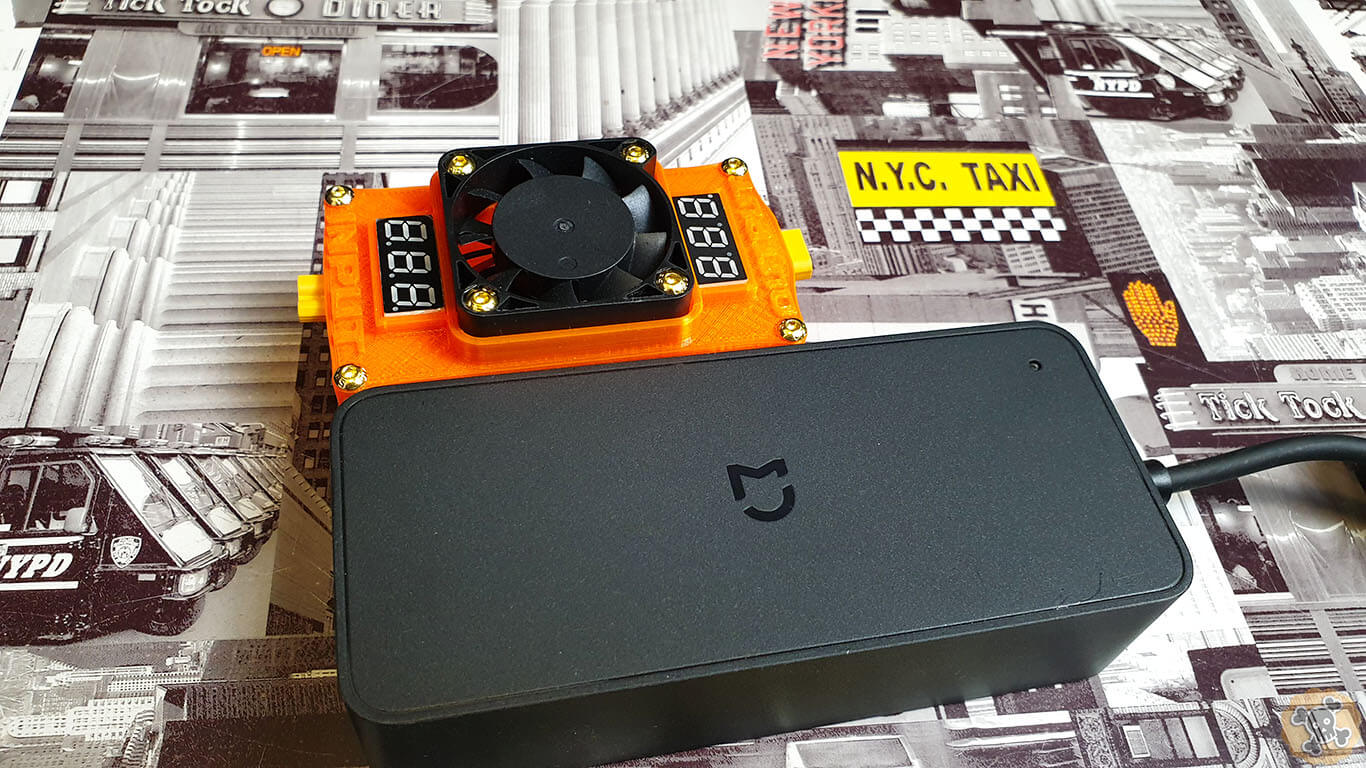
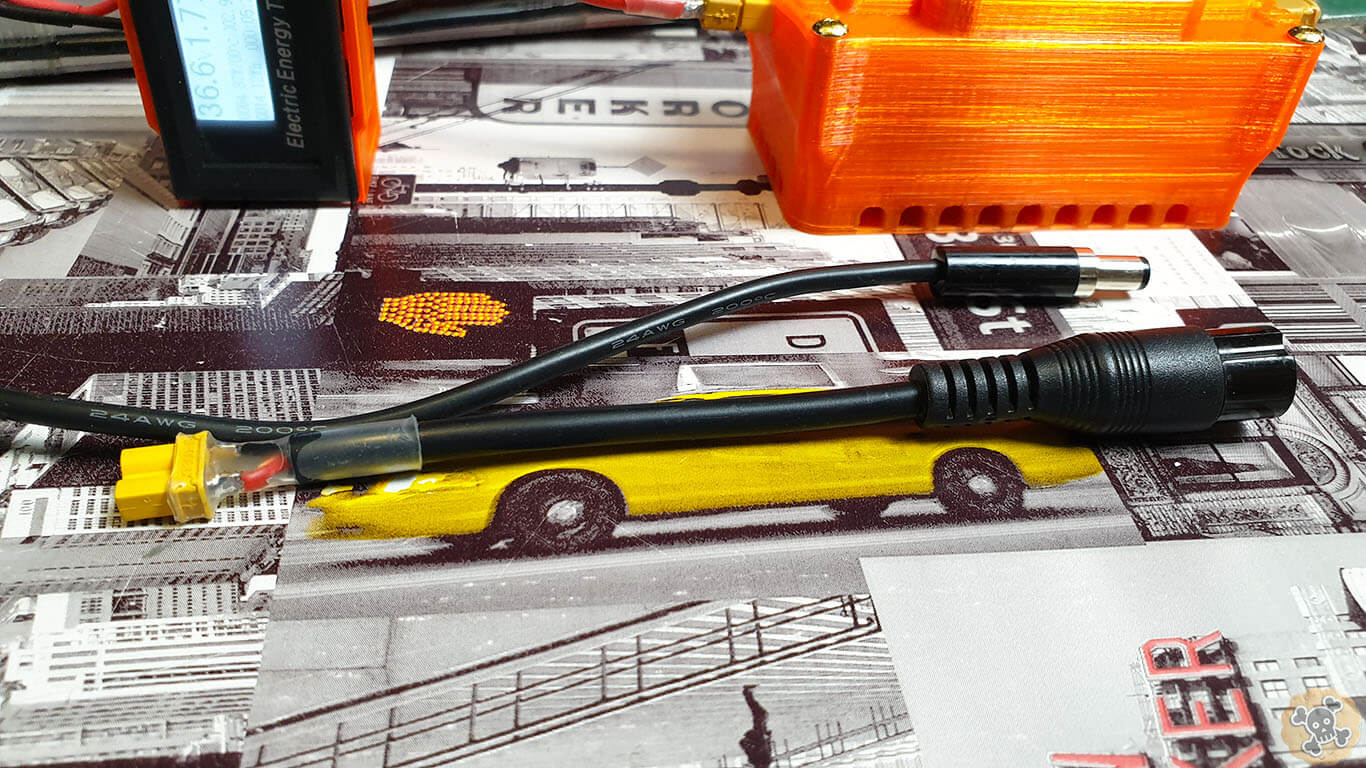
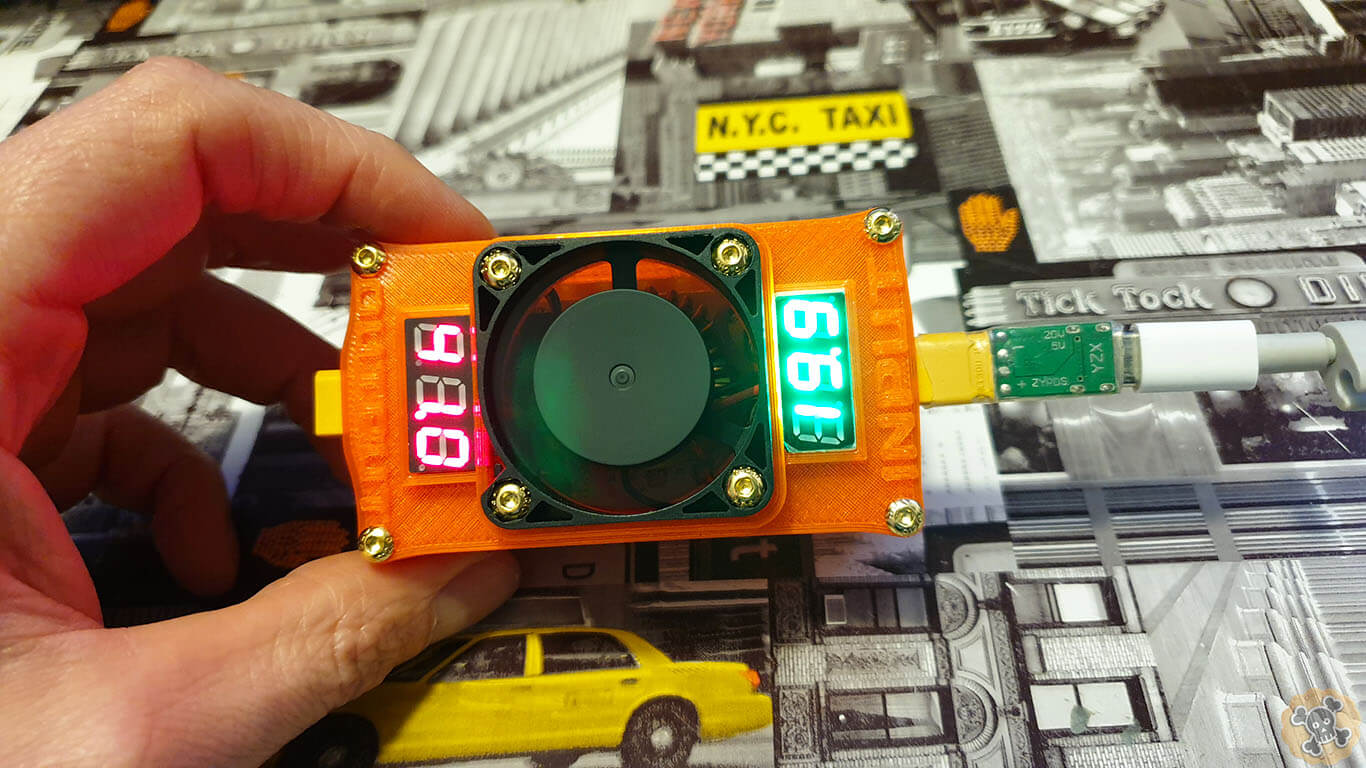
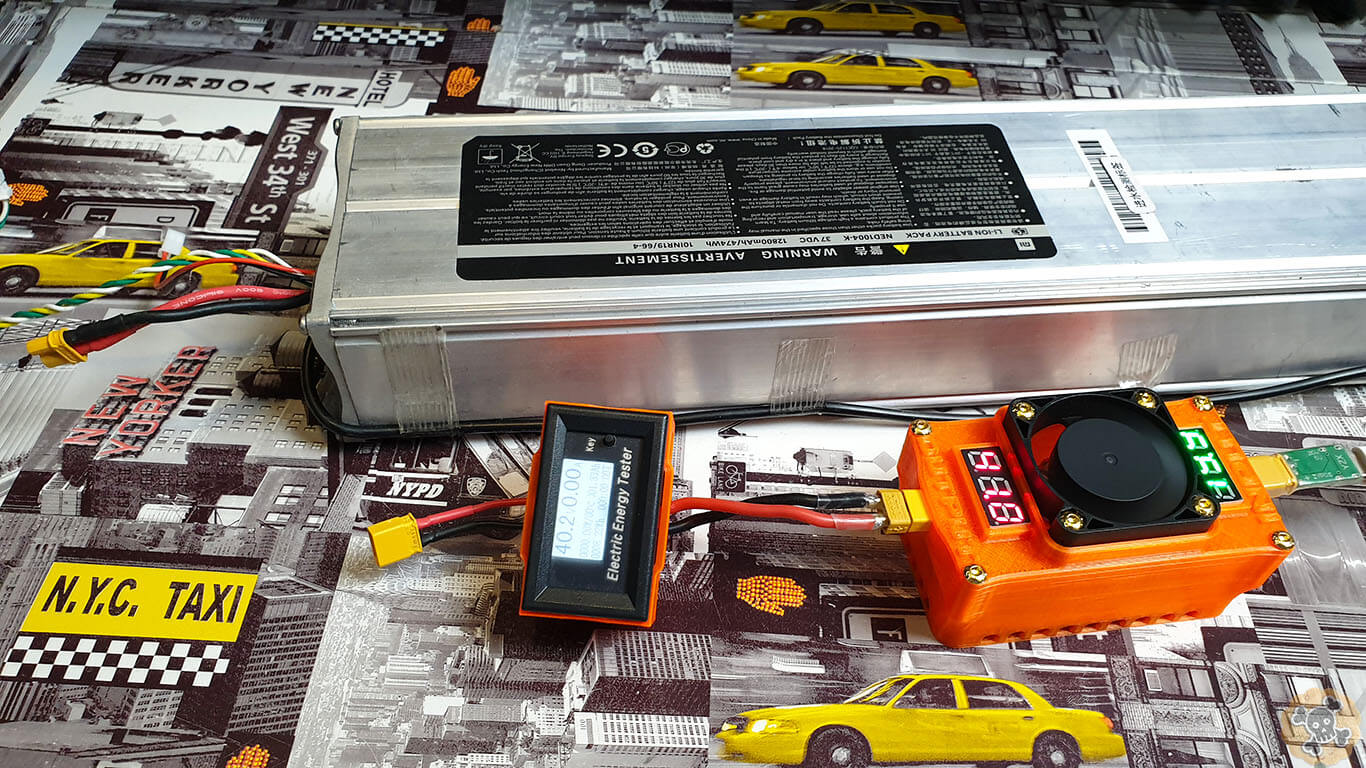
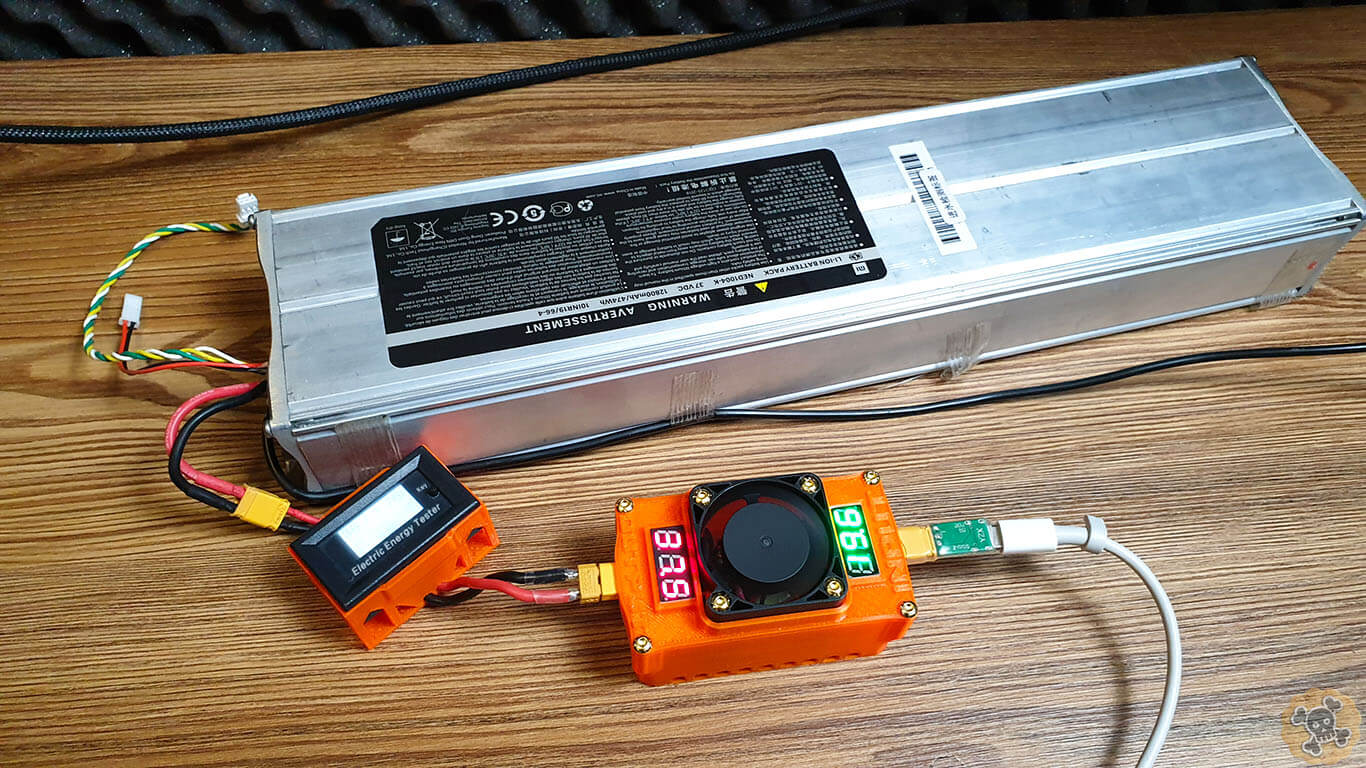
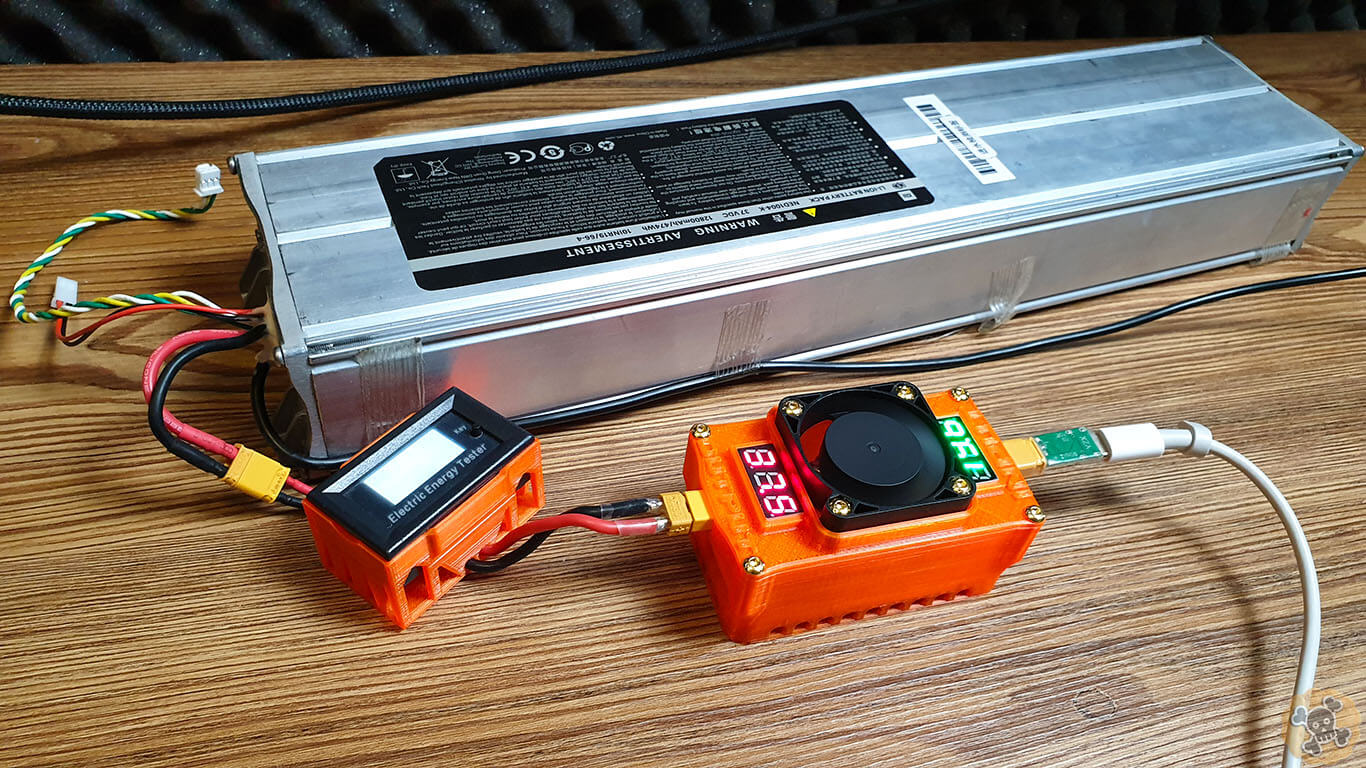
We do like simple things like one USB charger to charge smartphone and some GoPro cameras and one USB PD charger to charge Laptop and Escoot 😉 , so today I will show you my idea. It’s crazy Easy to Build and Use. You make any charging connector to make it work with yours Ewheels.
What do you need:
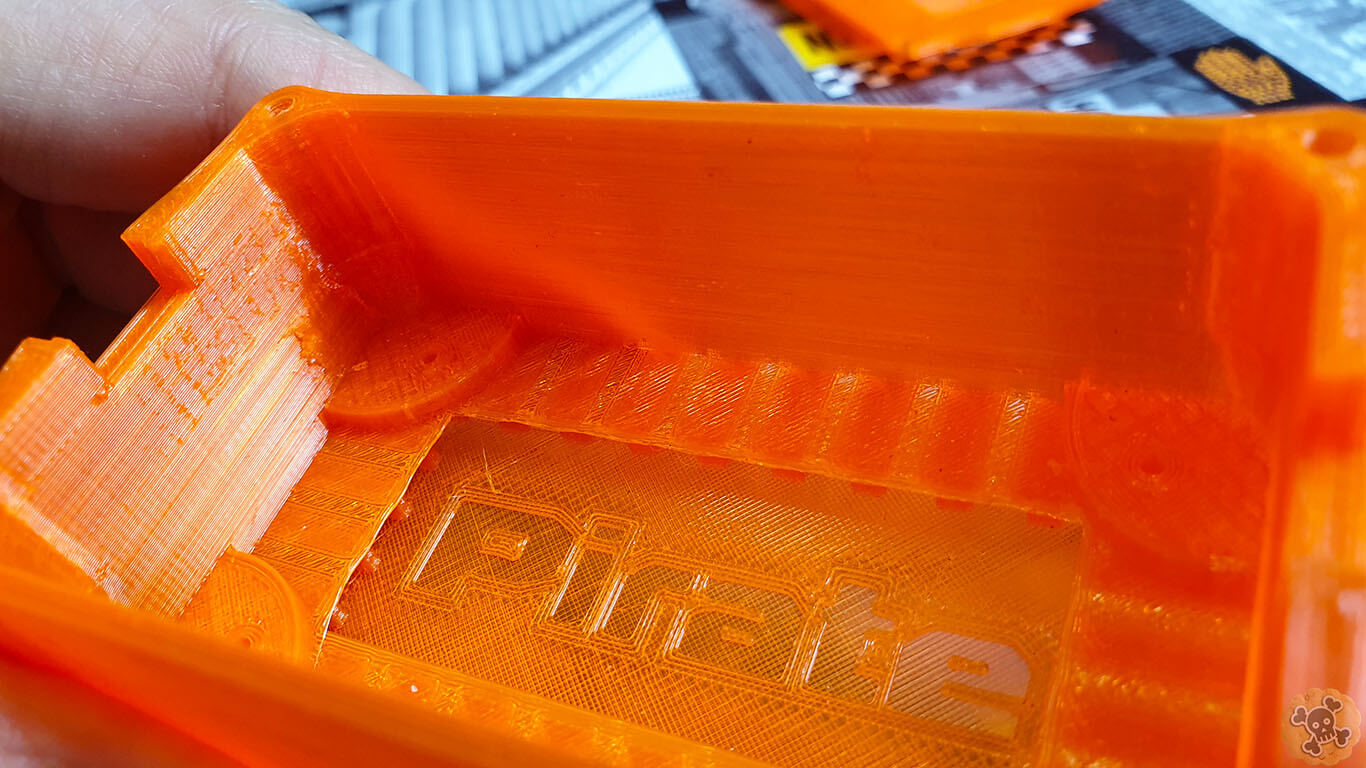
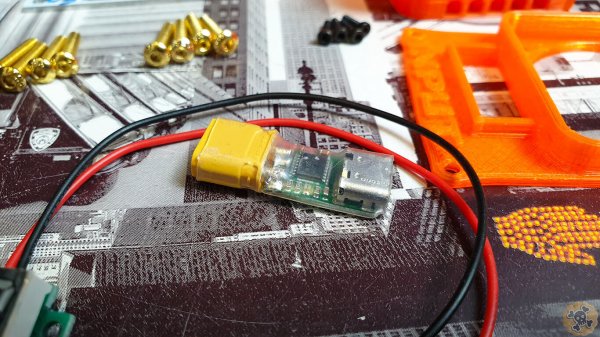
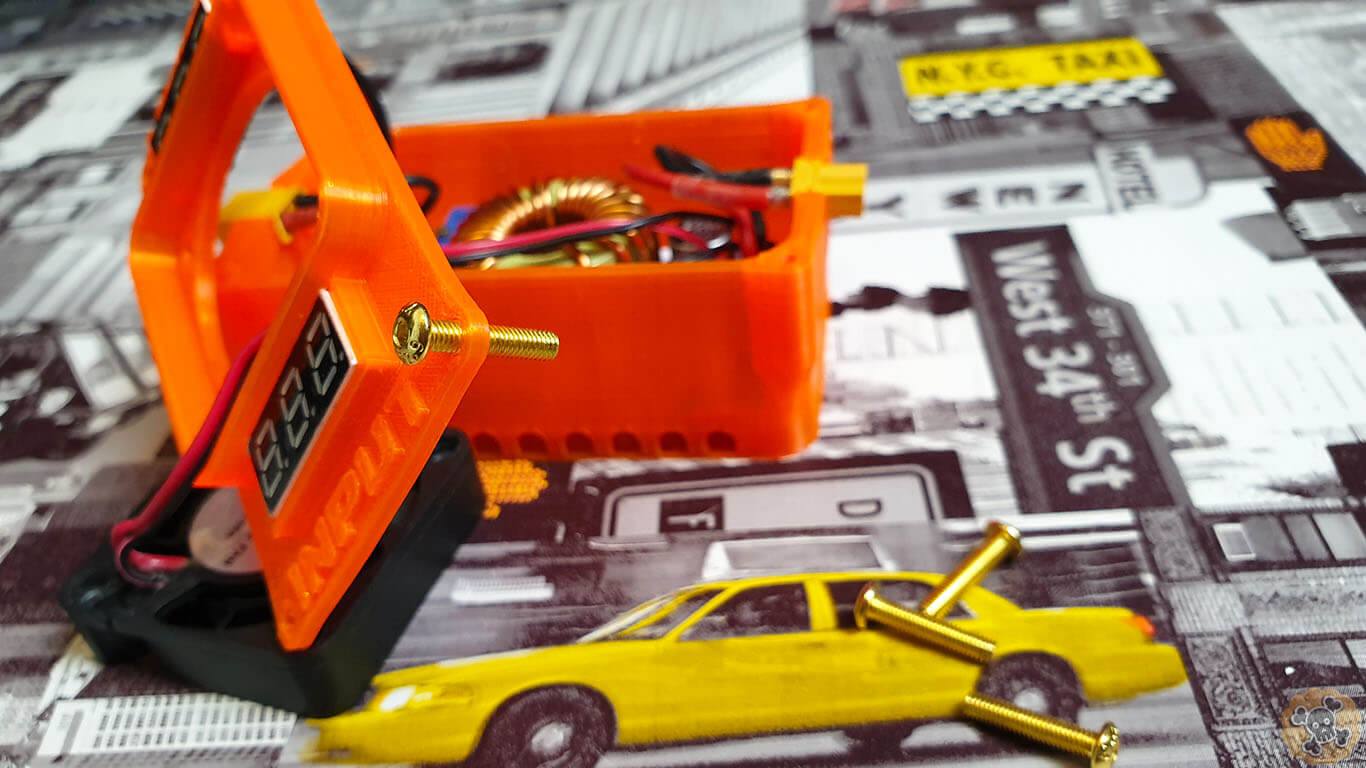
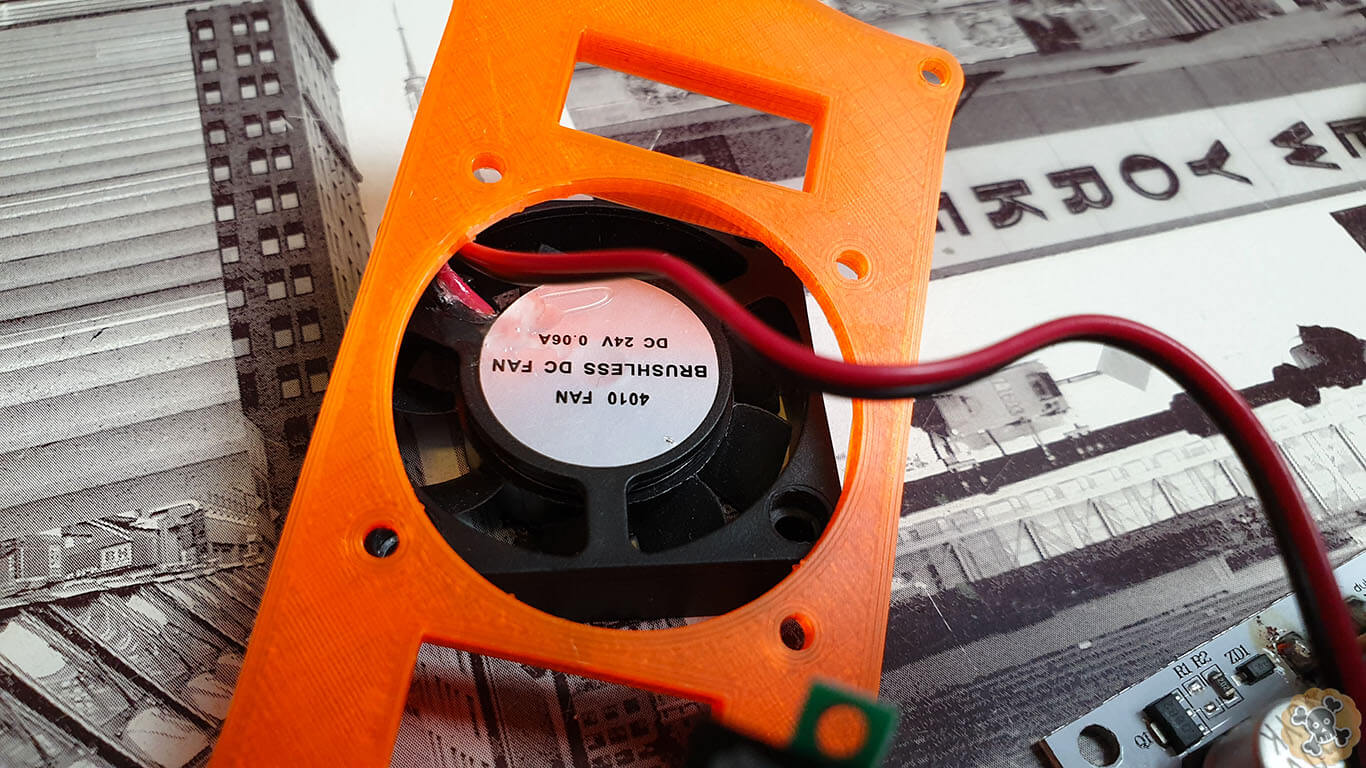
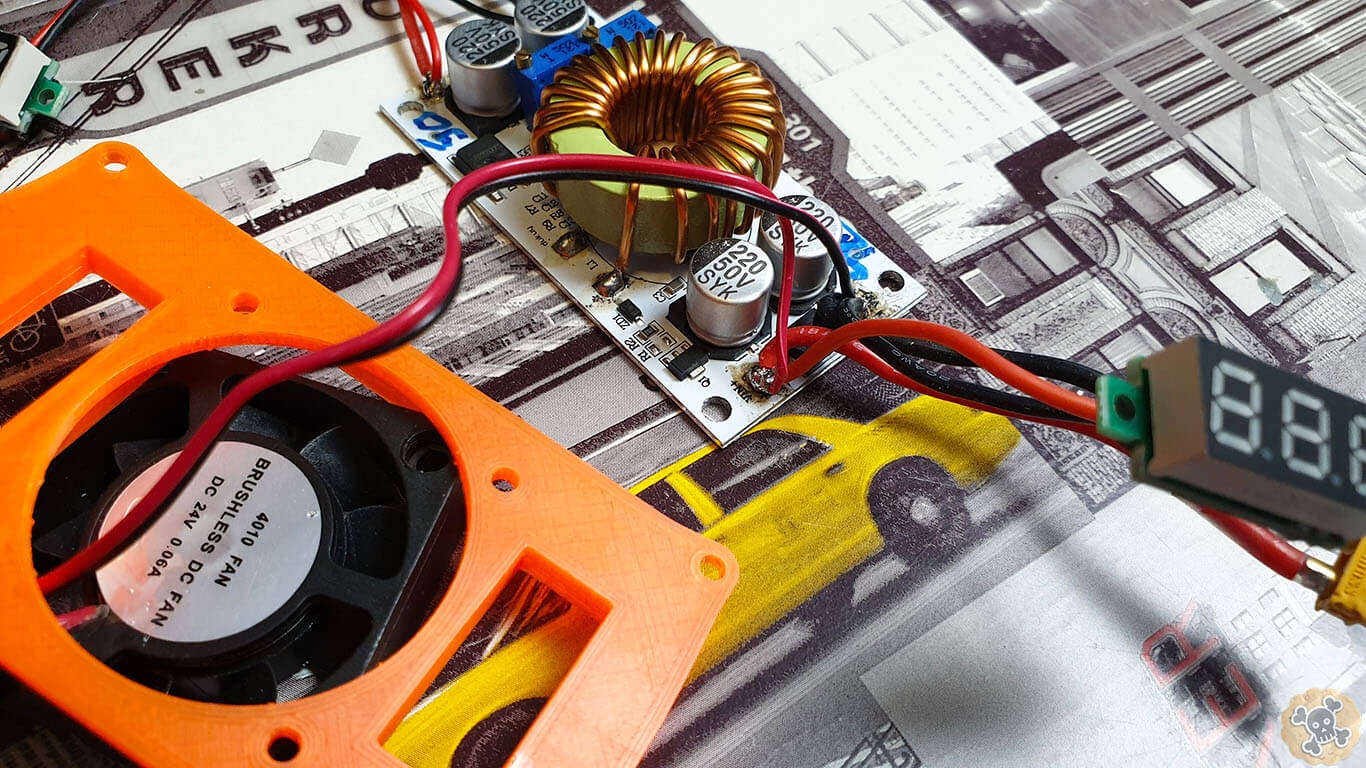
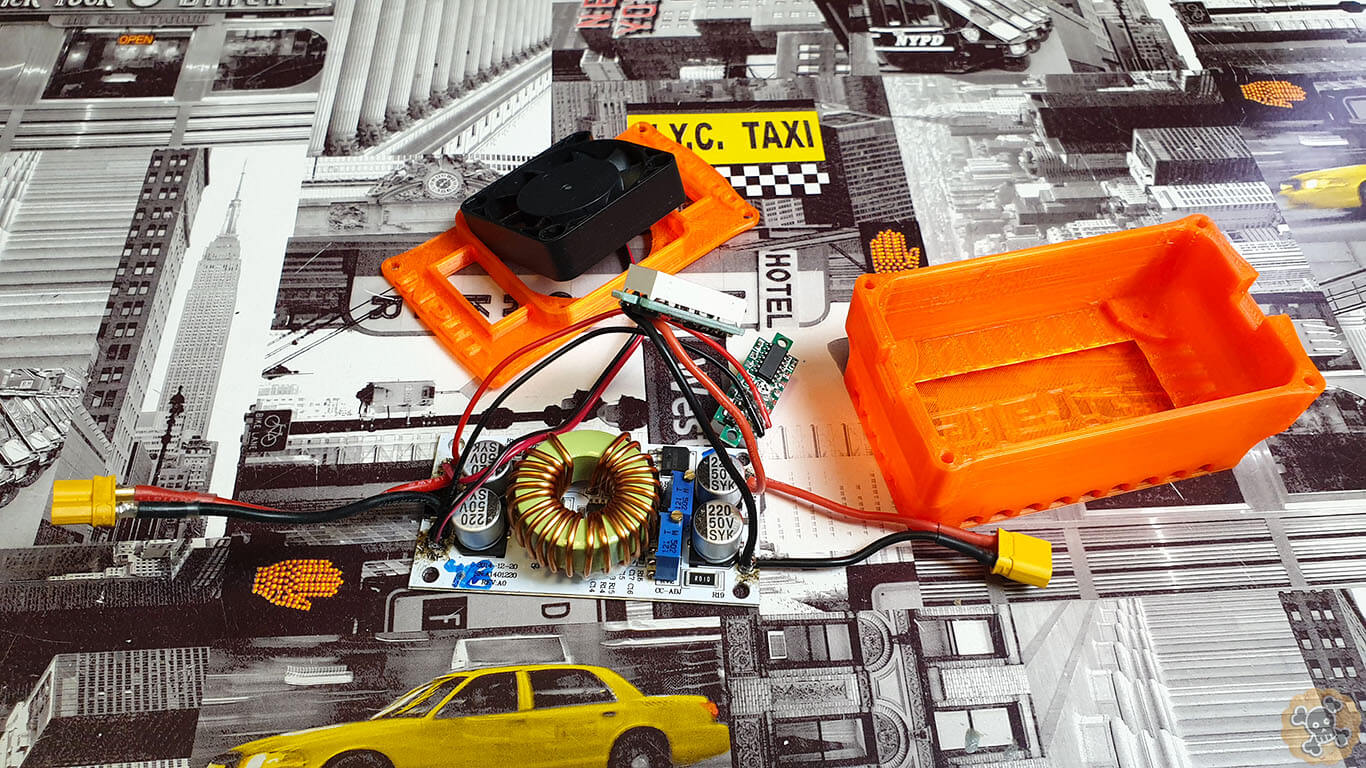
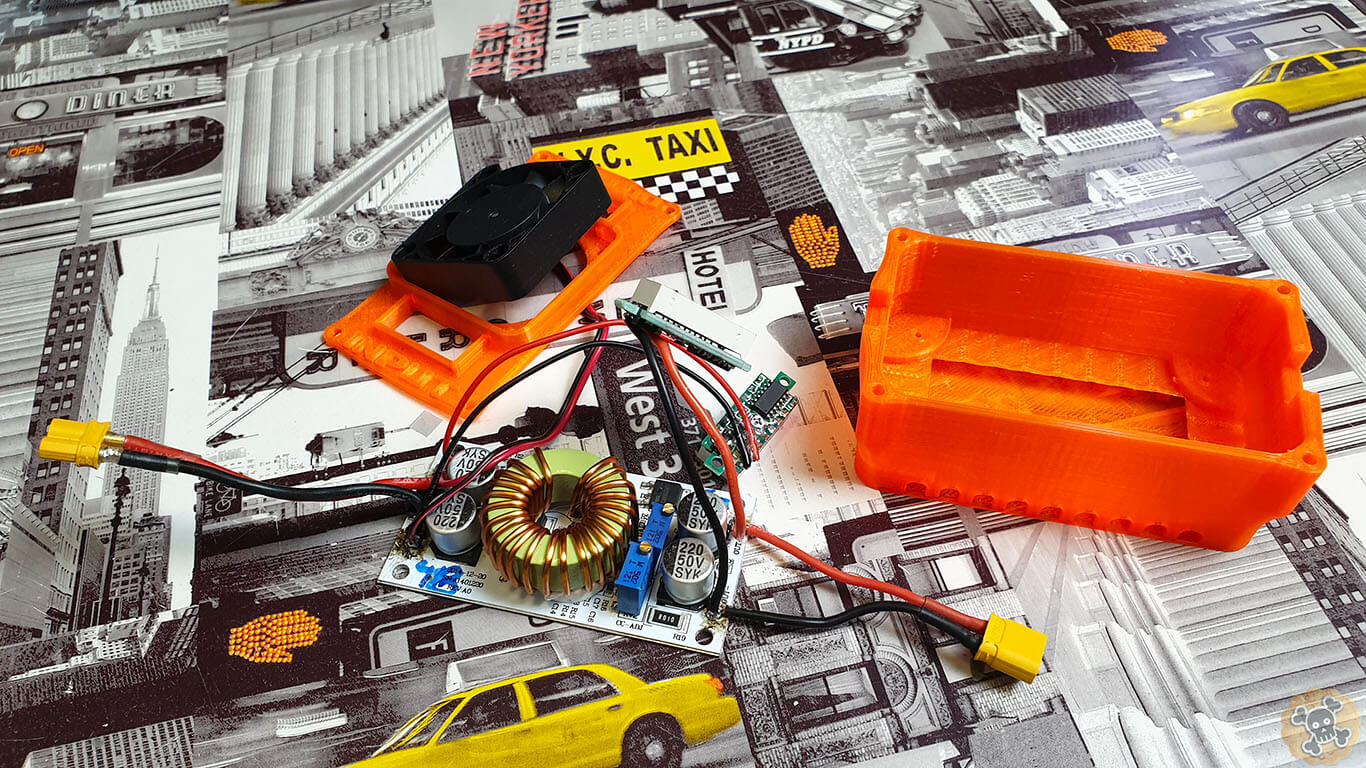
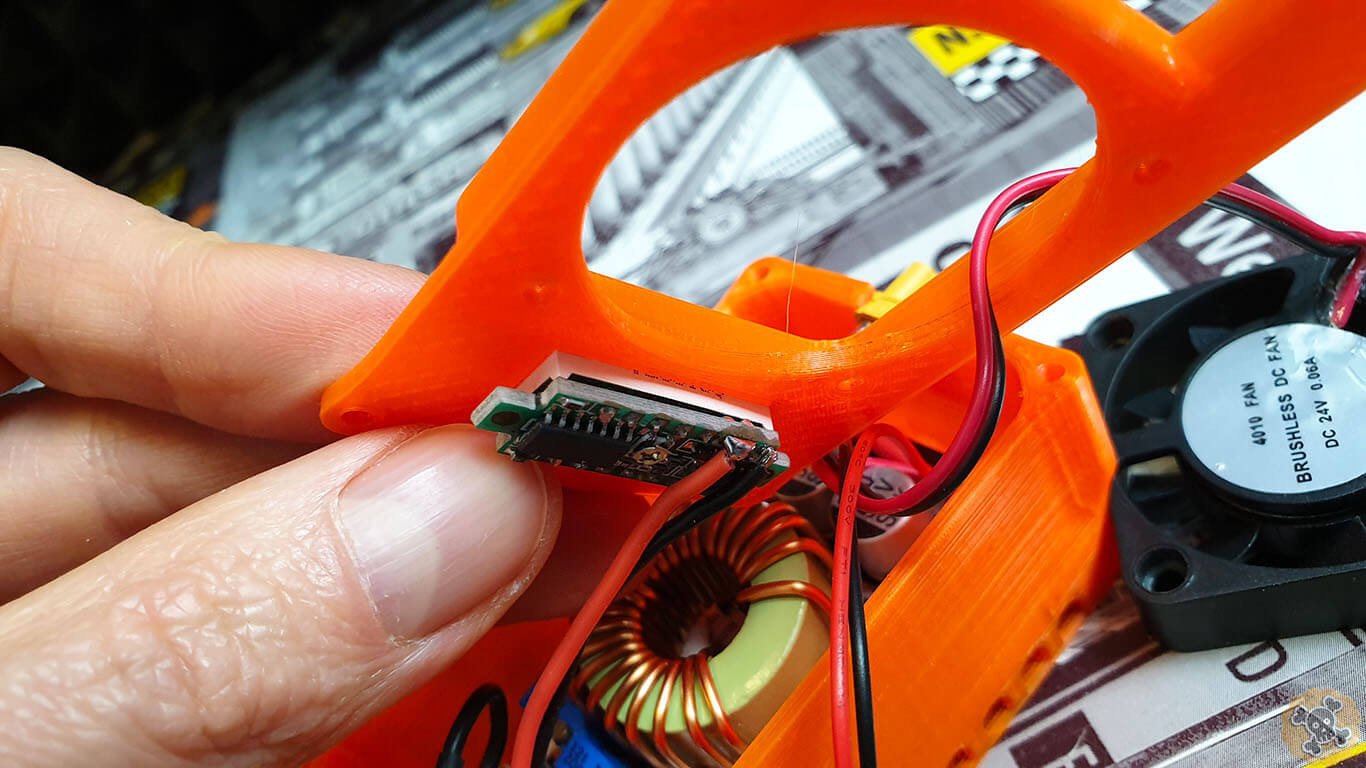
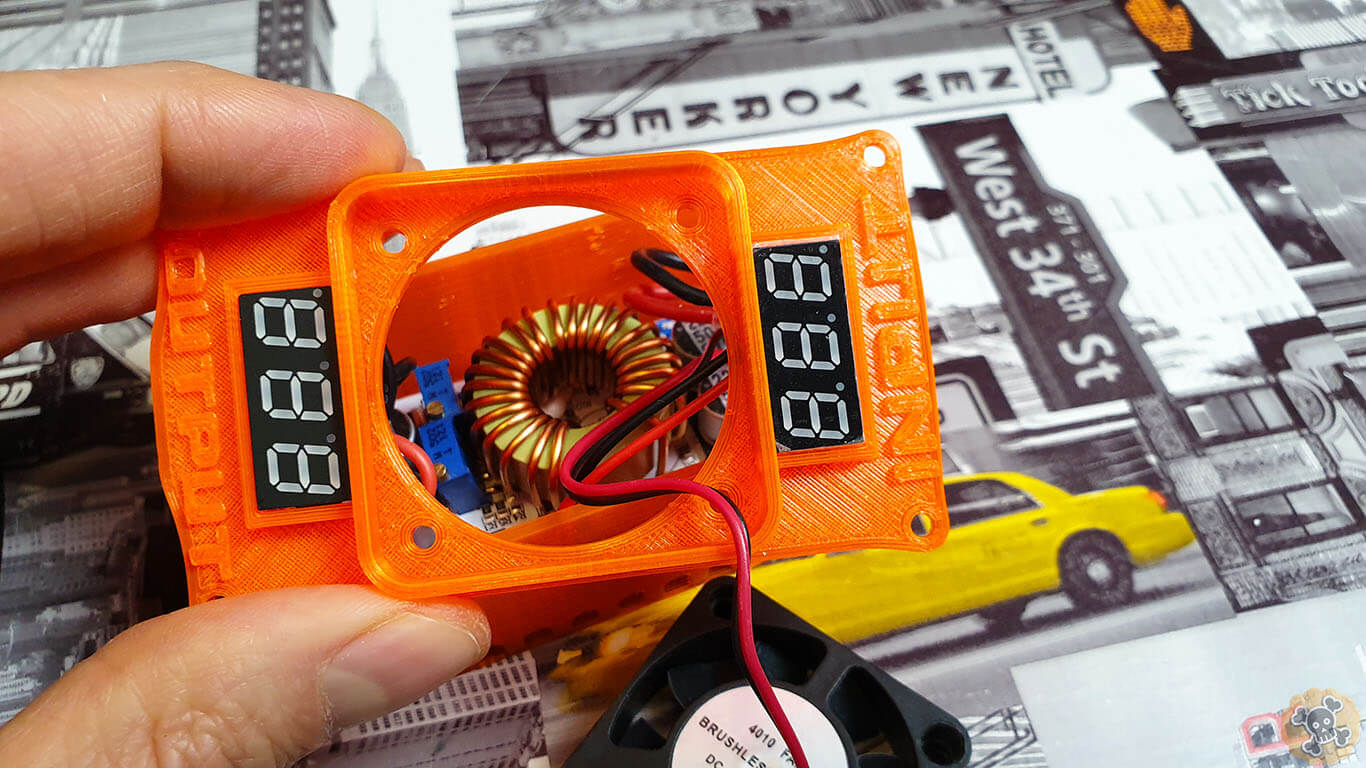
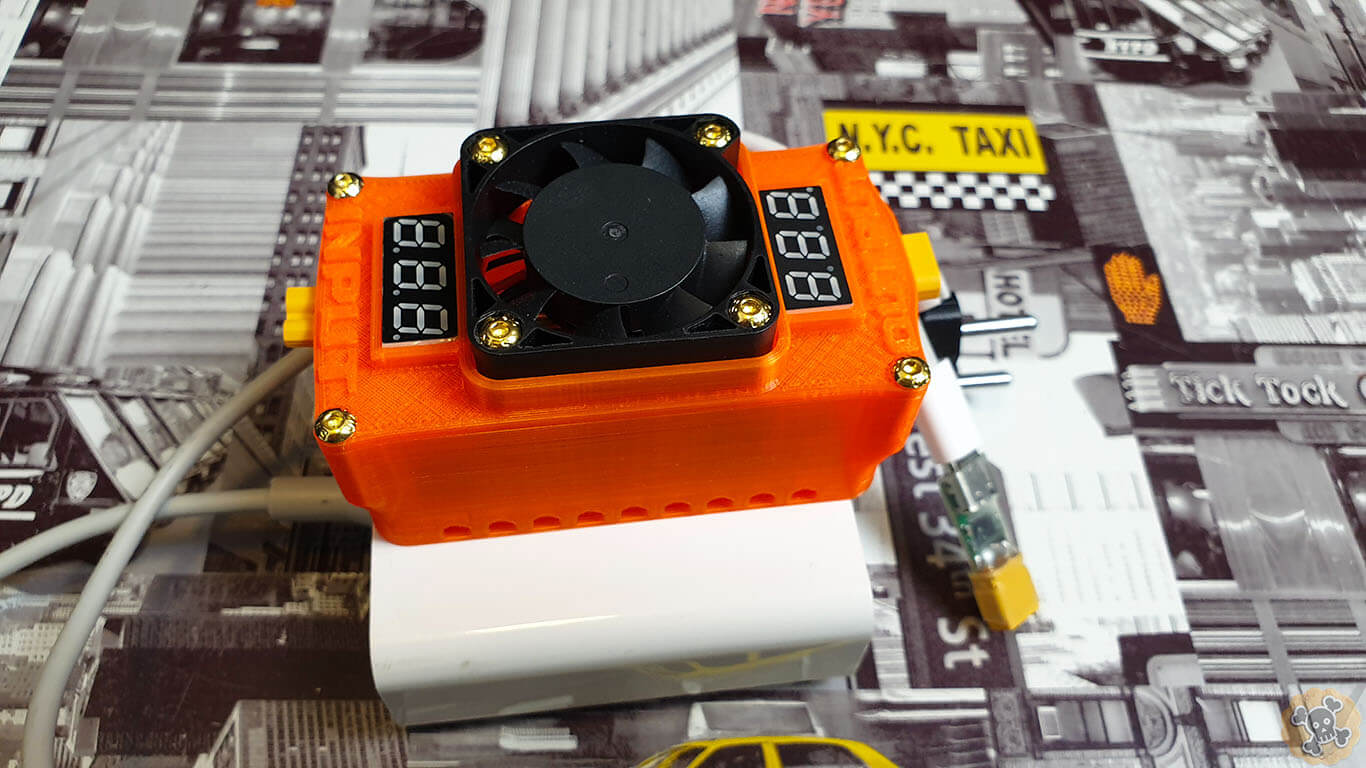
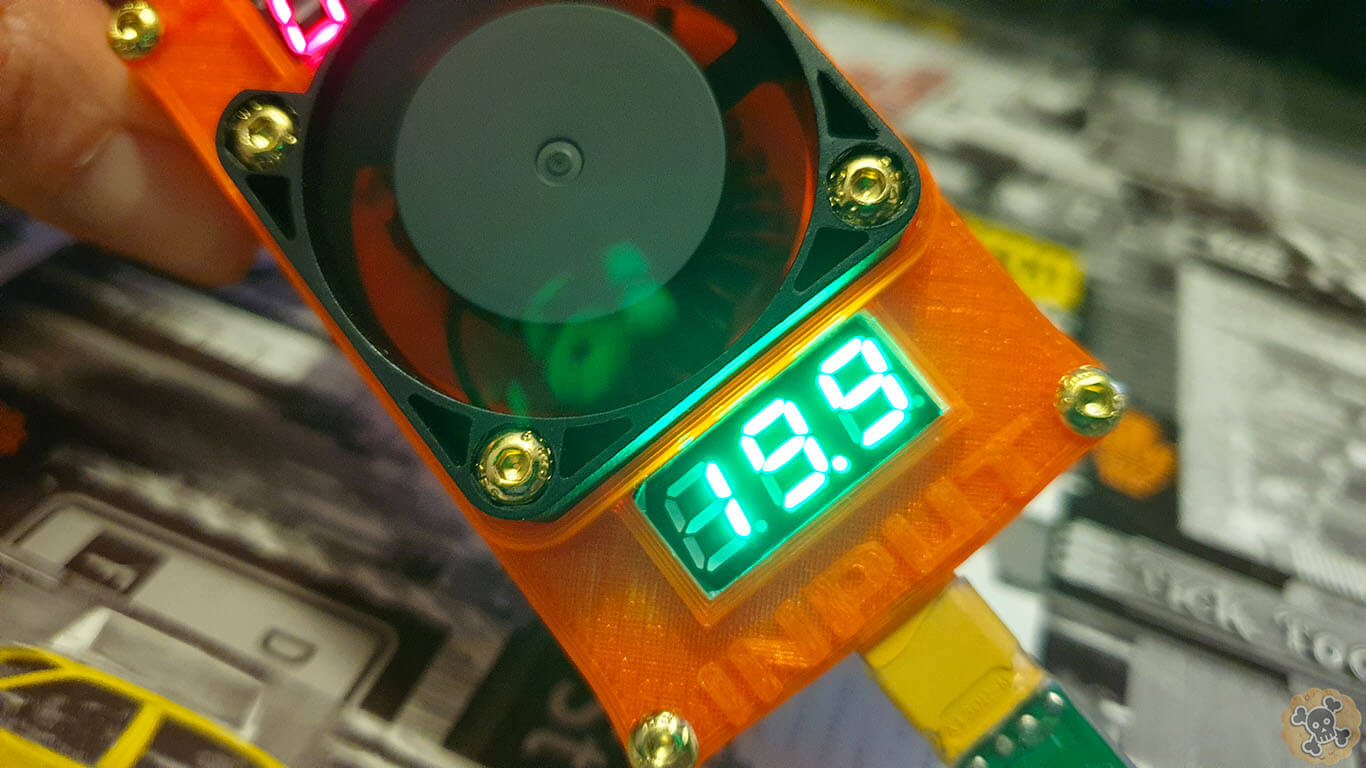
My printed shell ( 3d project free for my Patrons ), shell is designed to have great airflow which helps to cool down converter
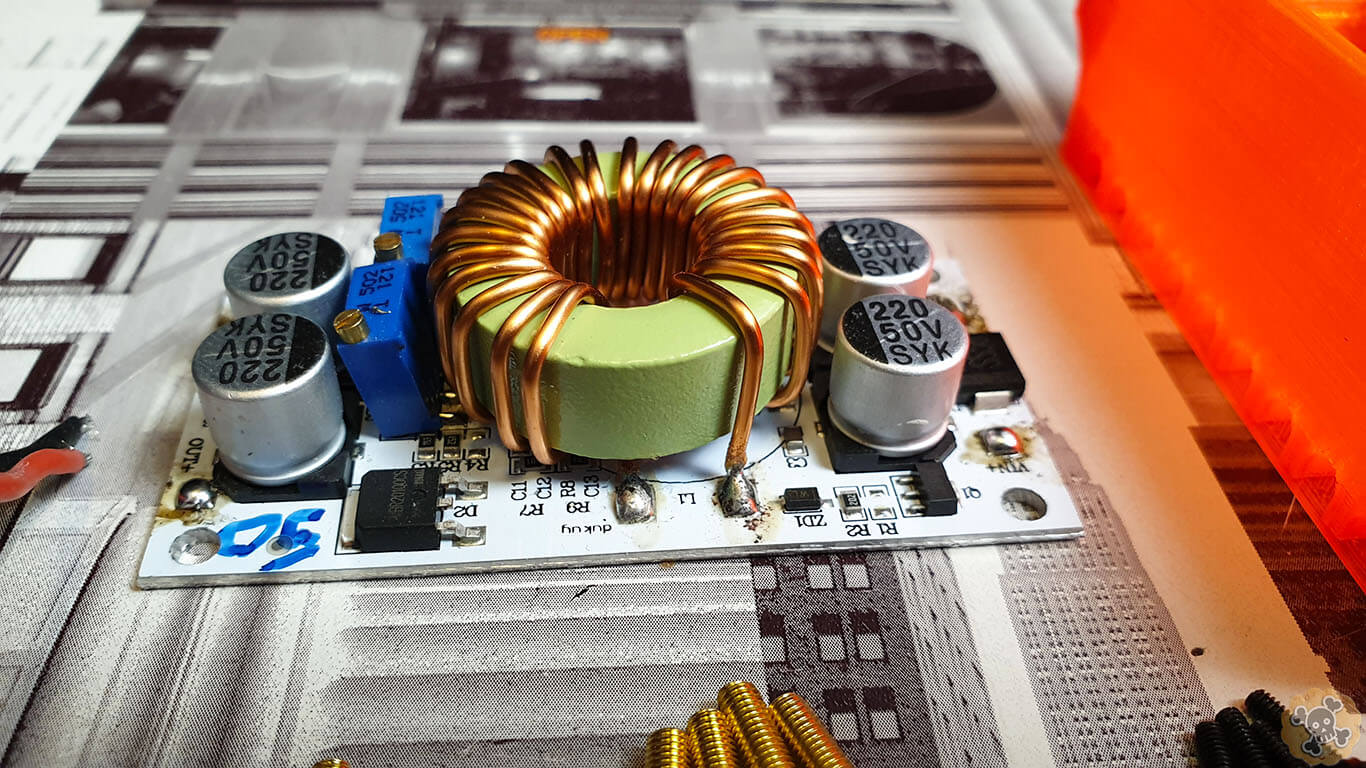
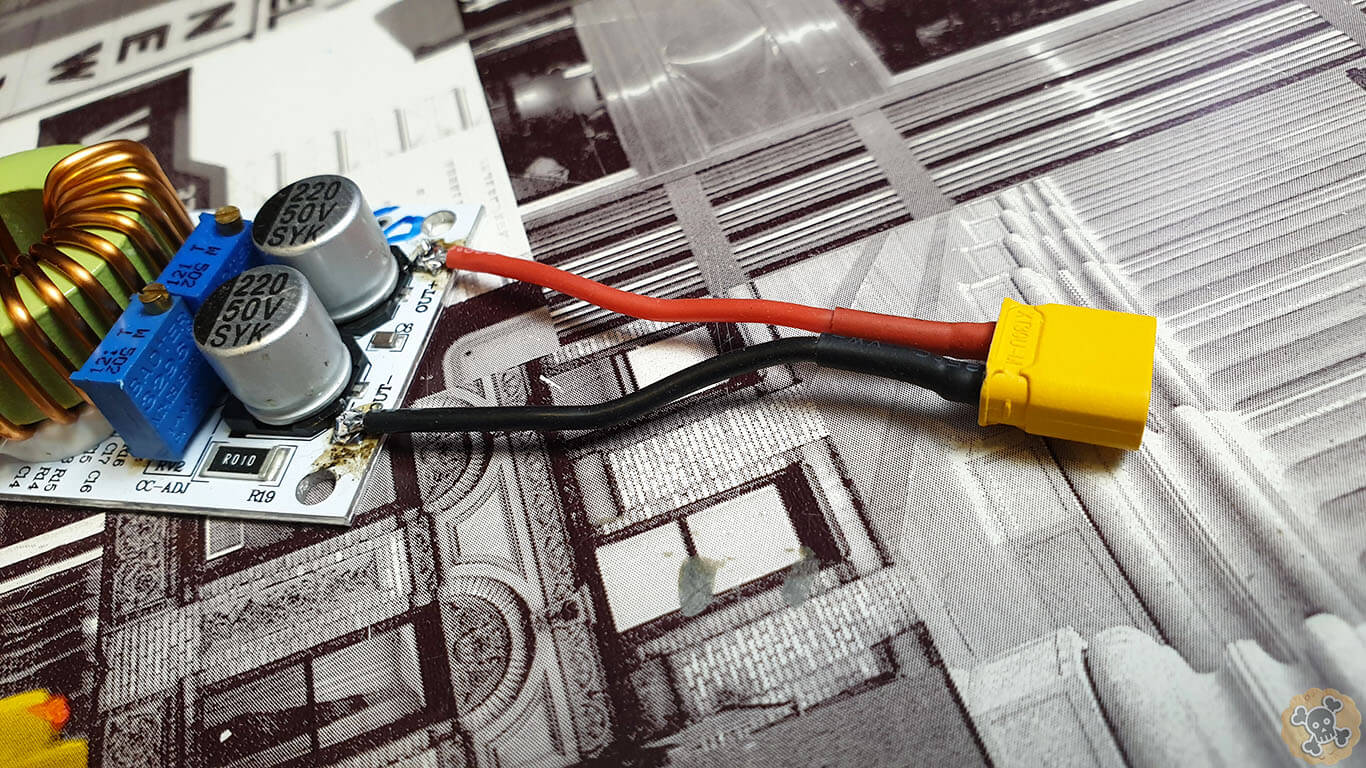
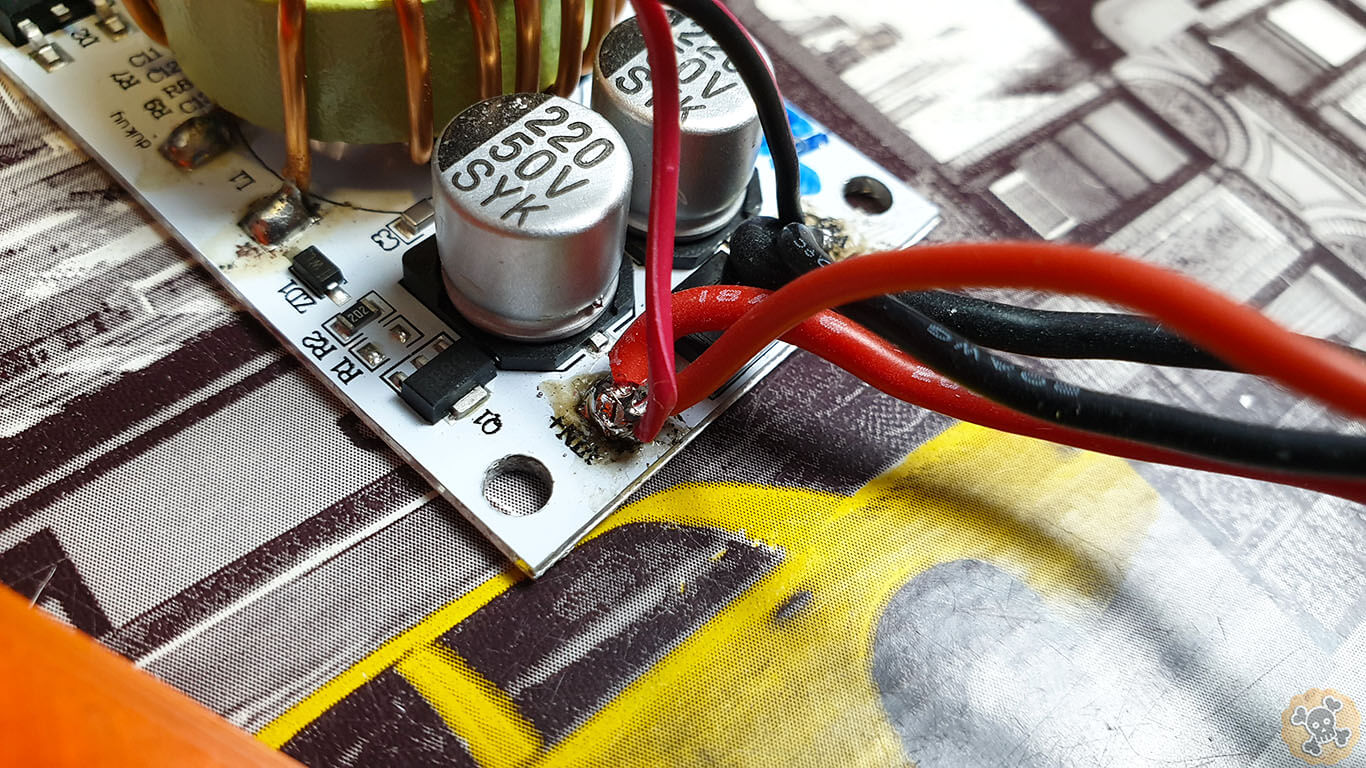
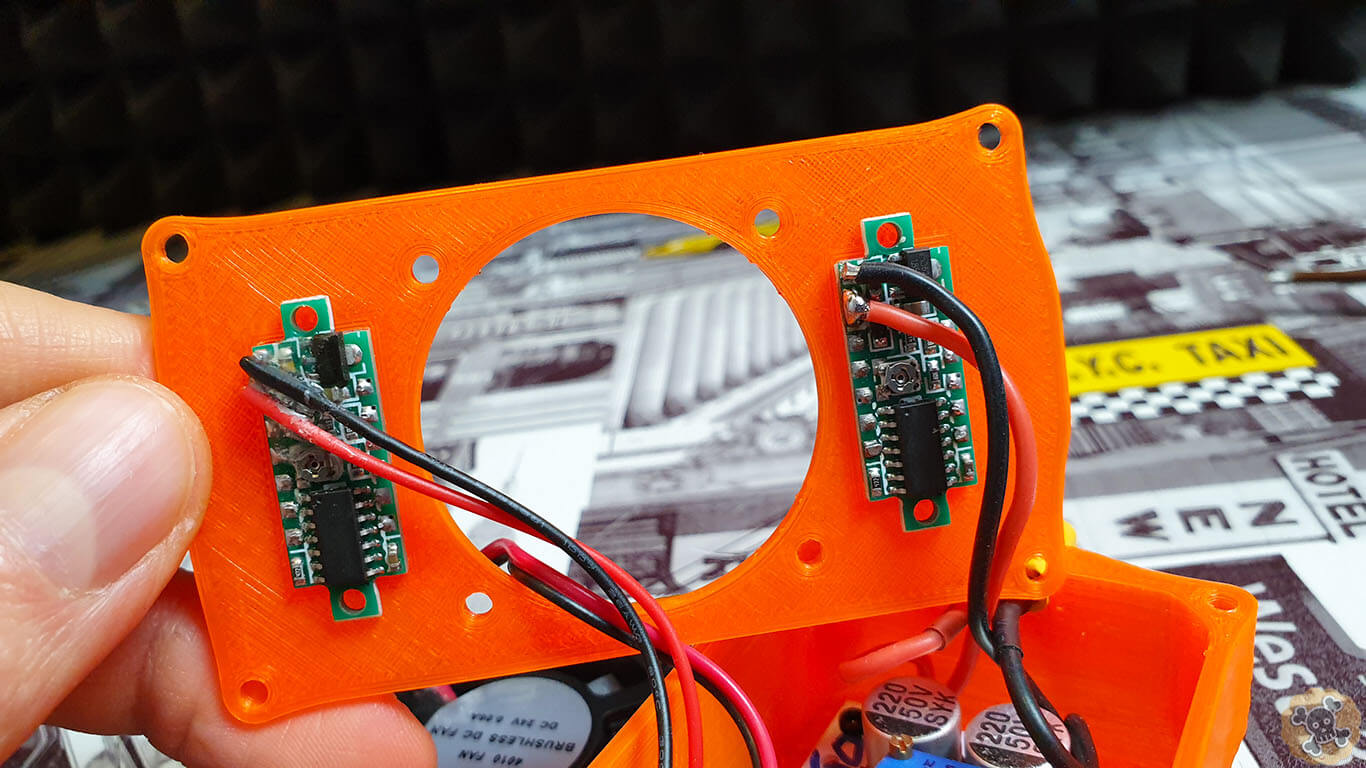
Step Up converter 5-50V BG bit.ly/StepUpAlloy50v ( this one which I used is perfect cause whole bottom part is alloy, so heat can be spread out easily , also I didn’t notice any overheating problems even after long time of use )
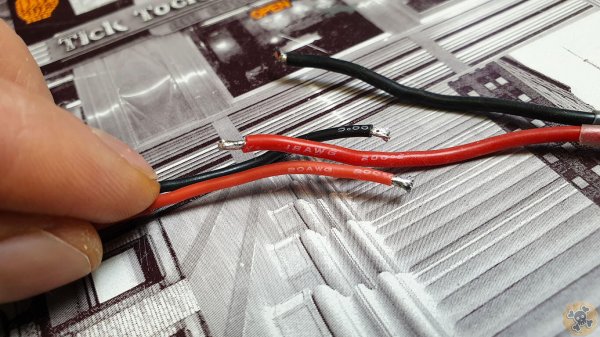
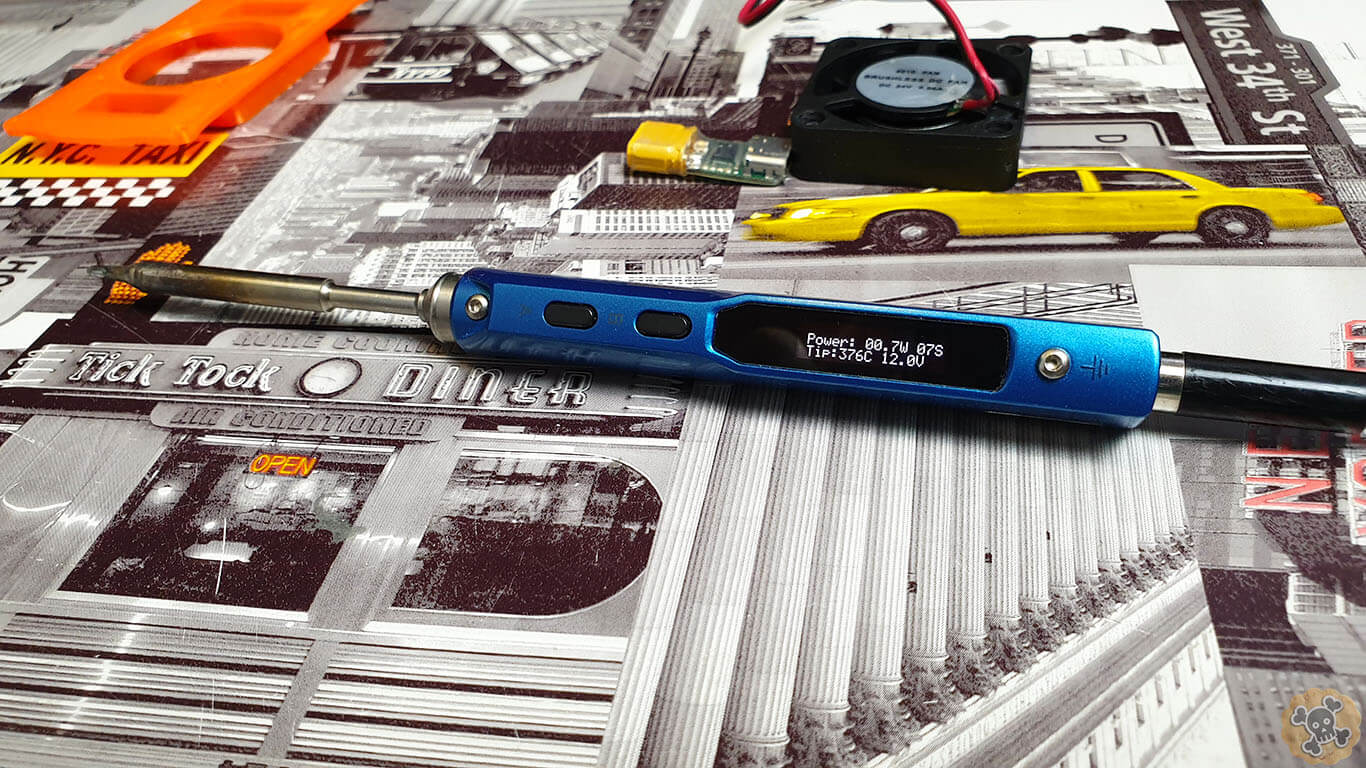
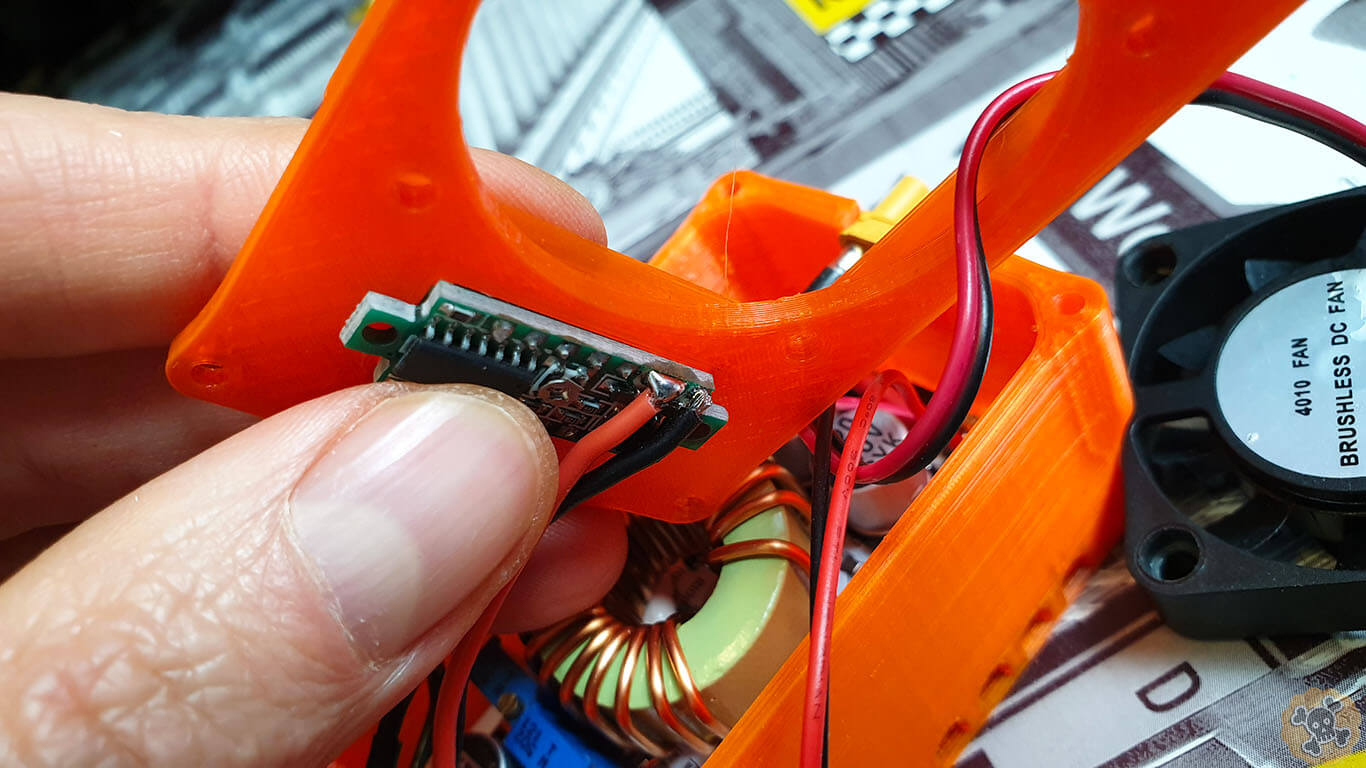
At first solder to StepUp converter XT30 connectors, it will be not easy cause bottom part is alloy so any heat will spread out quite fast, but I noticed that when I set my TS100 to 380C then it was much easier, BUT you have to do it fast 🙂
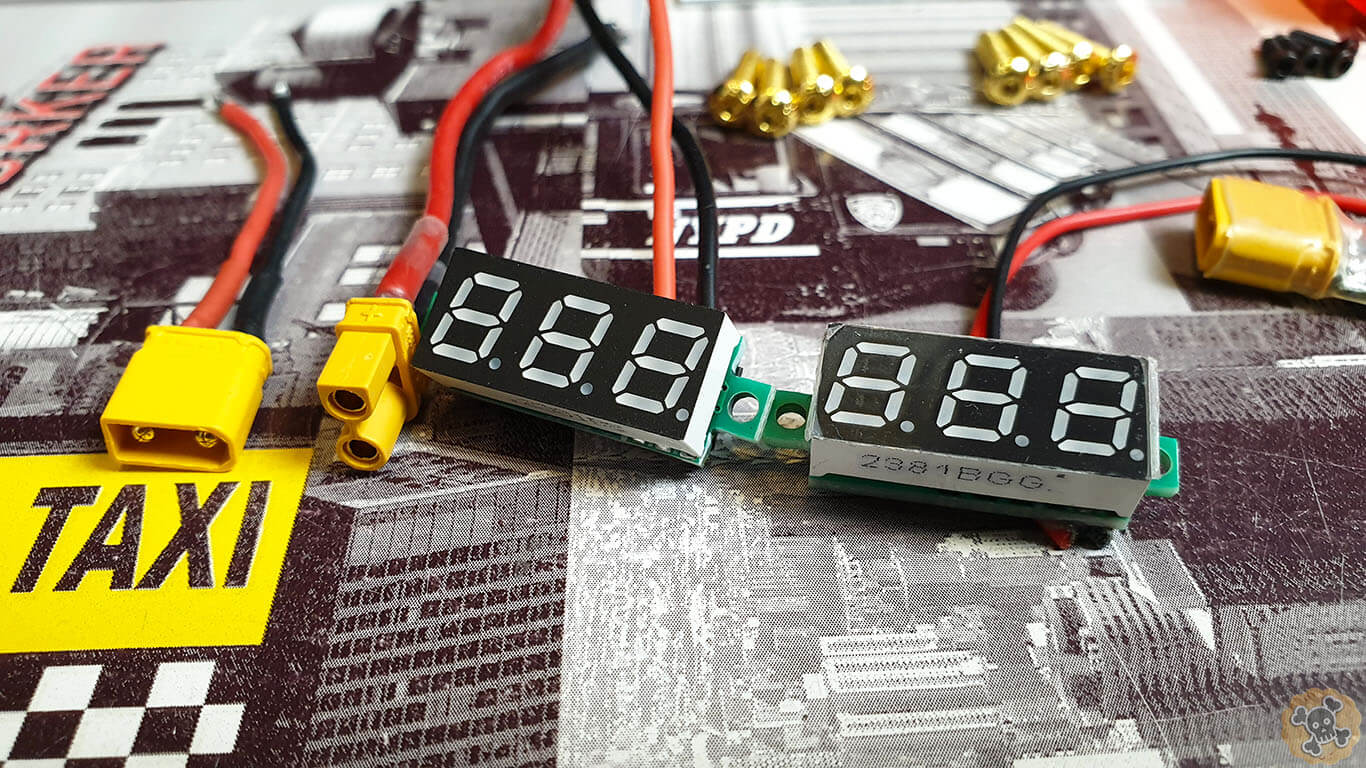
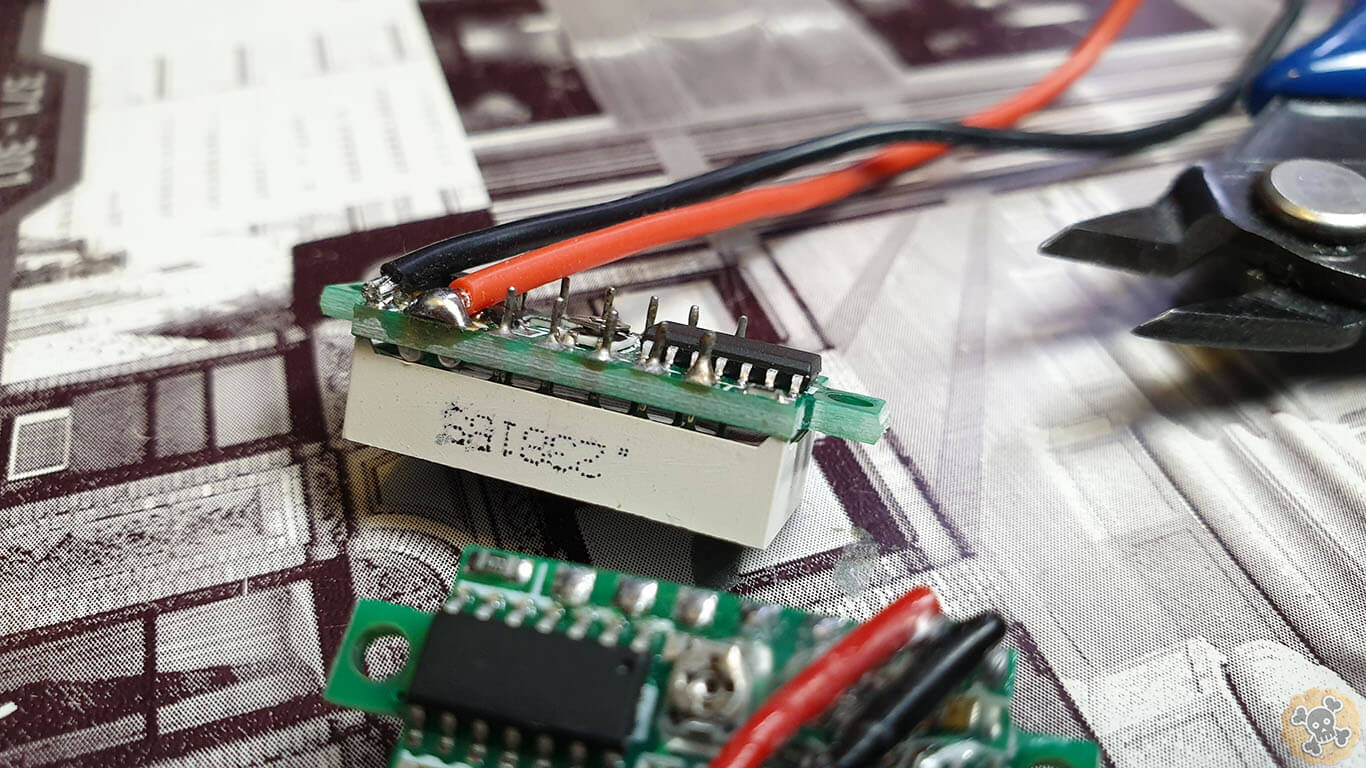
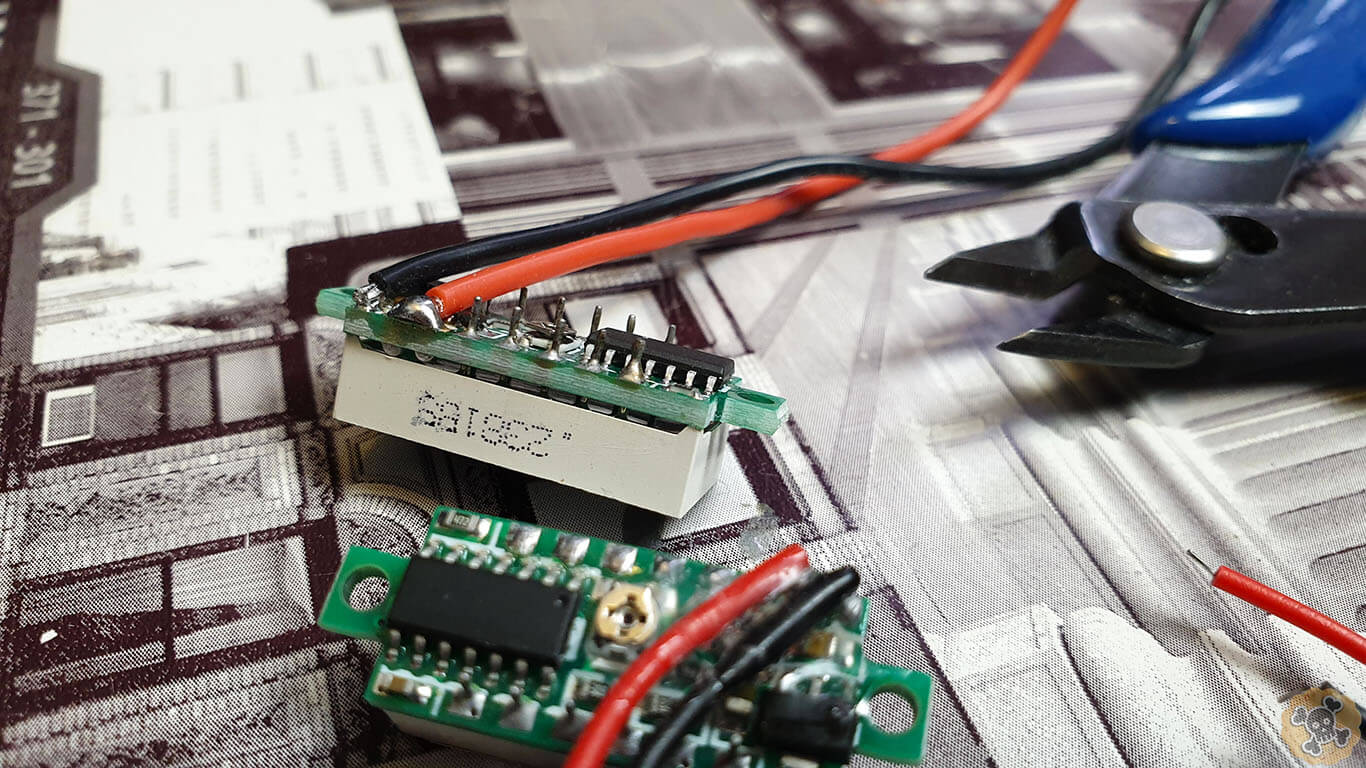
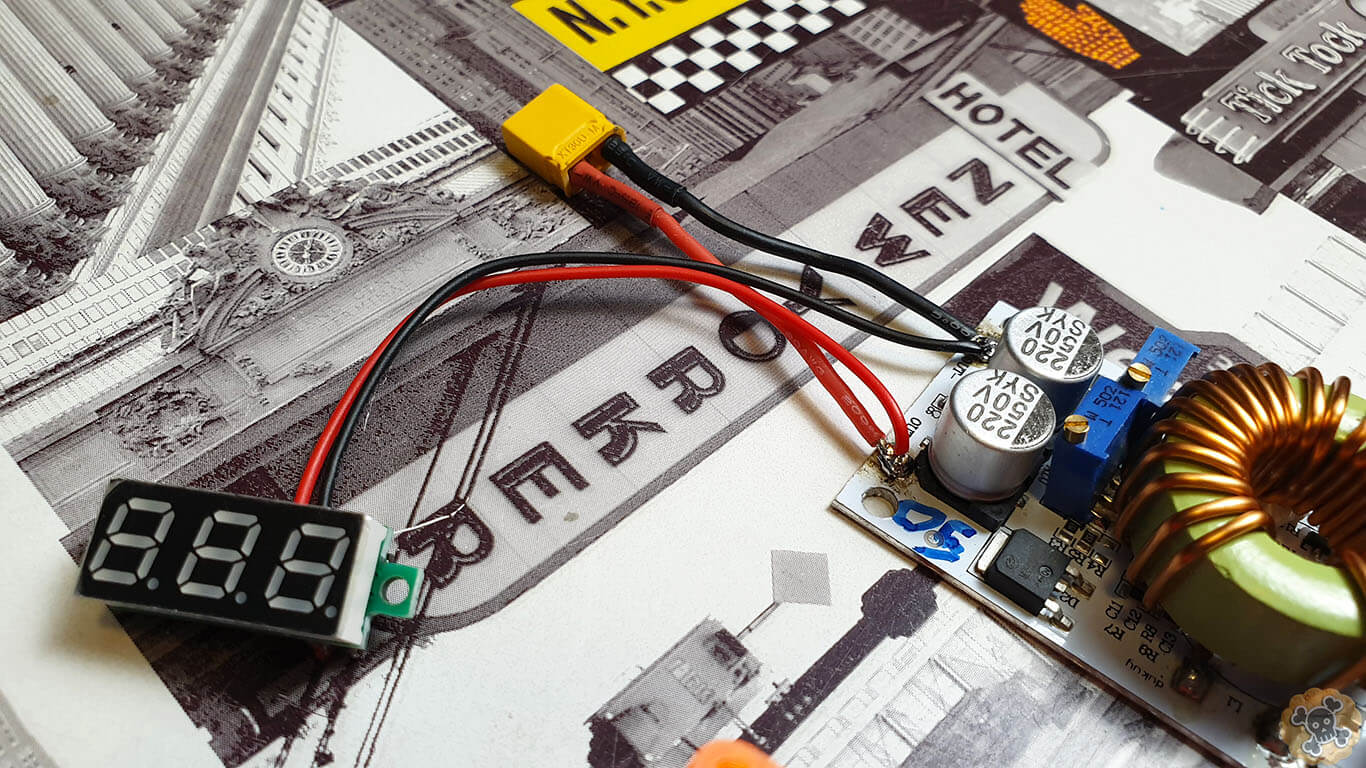
Cutoff small wire legs which are under LCD ( smaller chance to have short circuit inside )
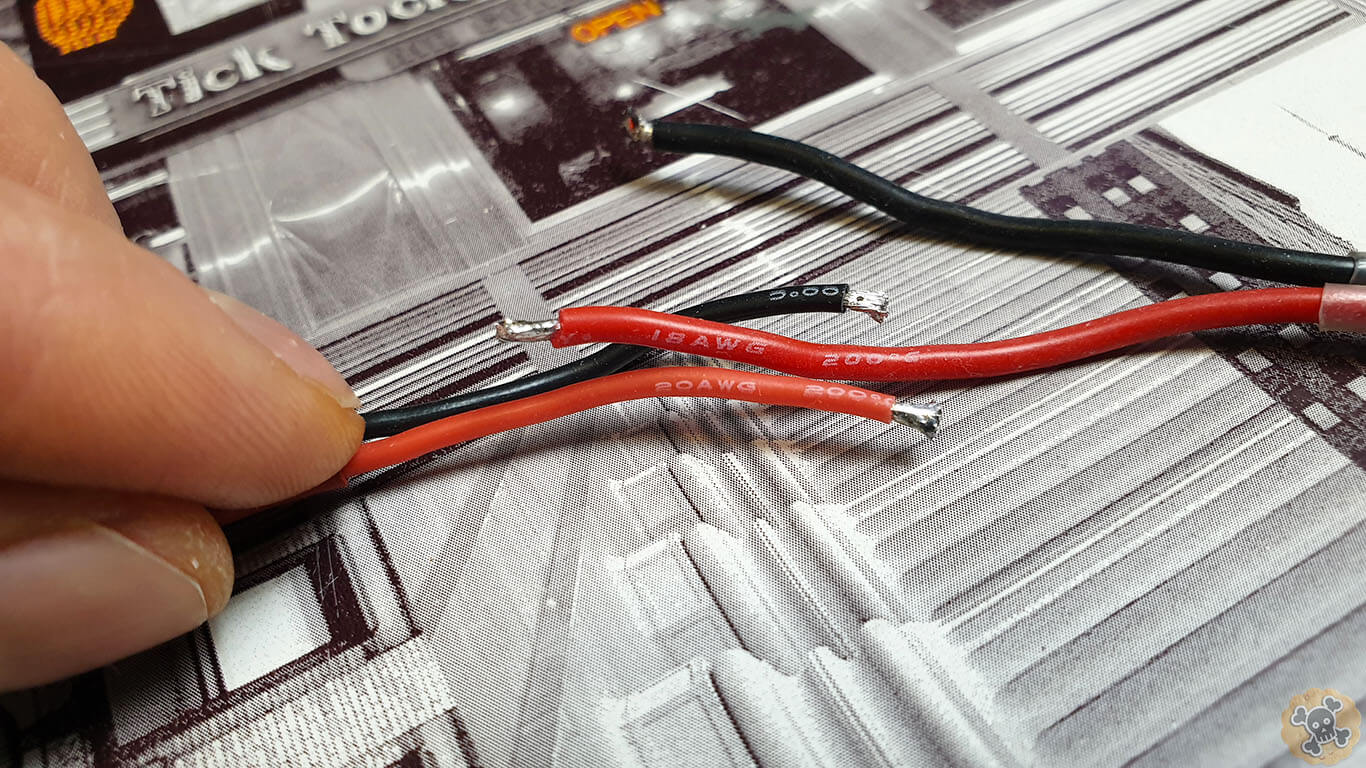
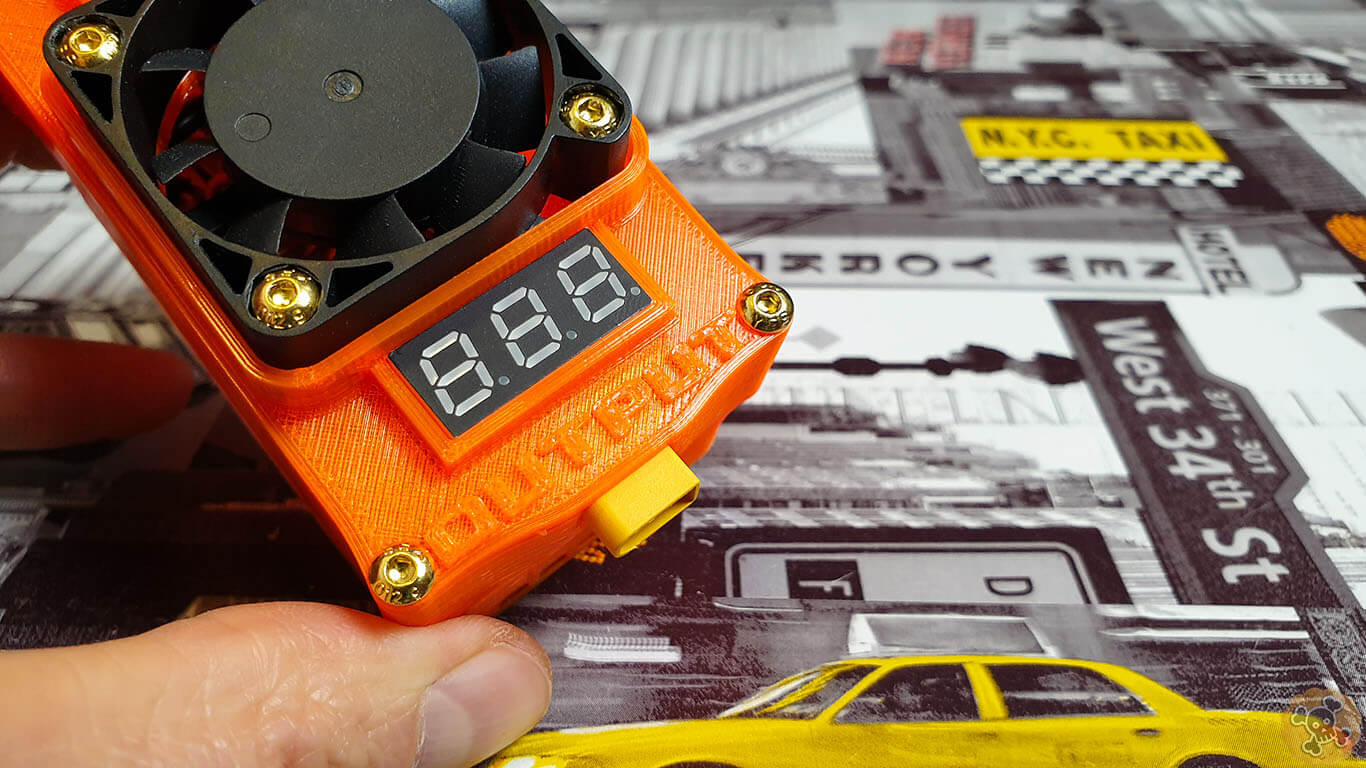
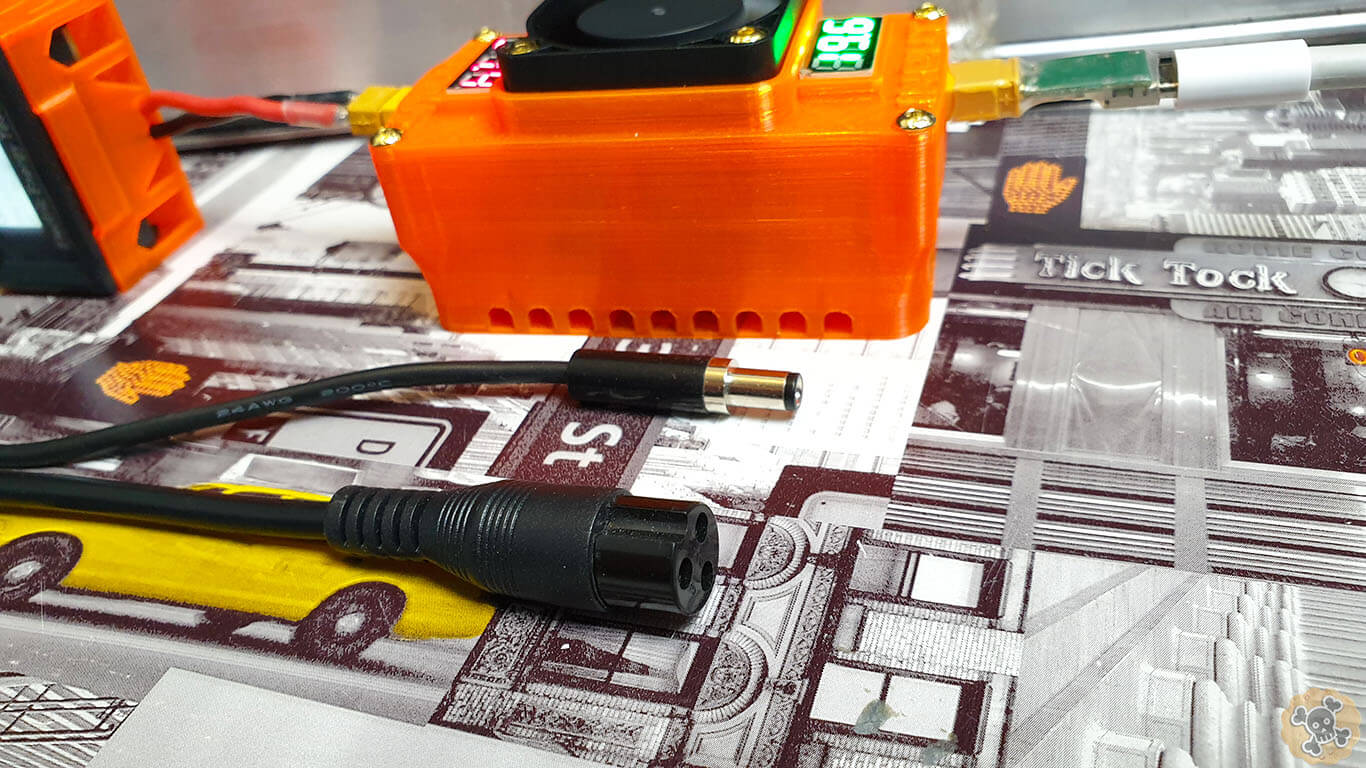
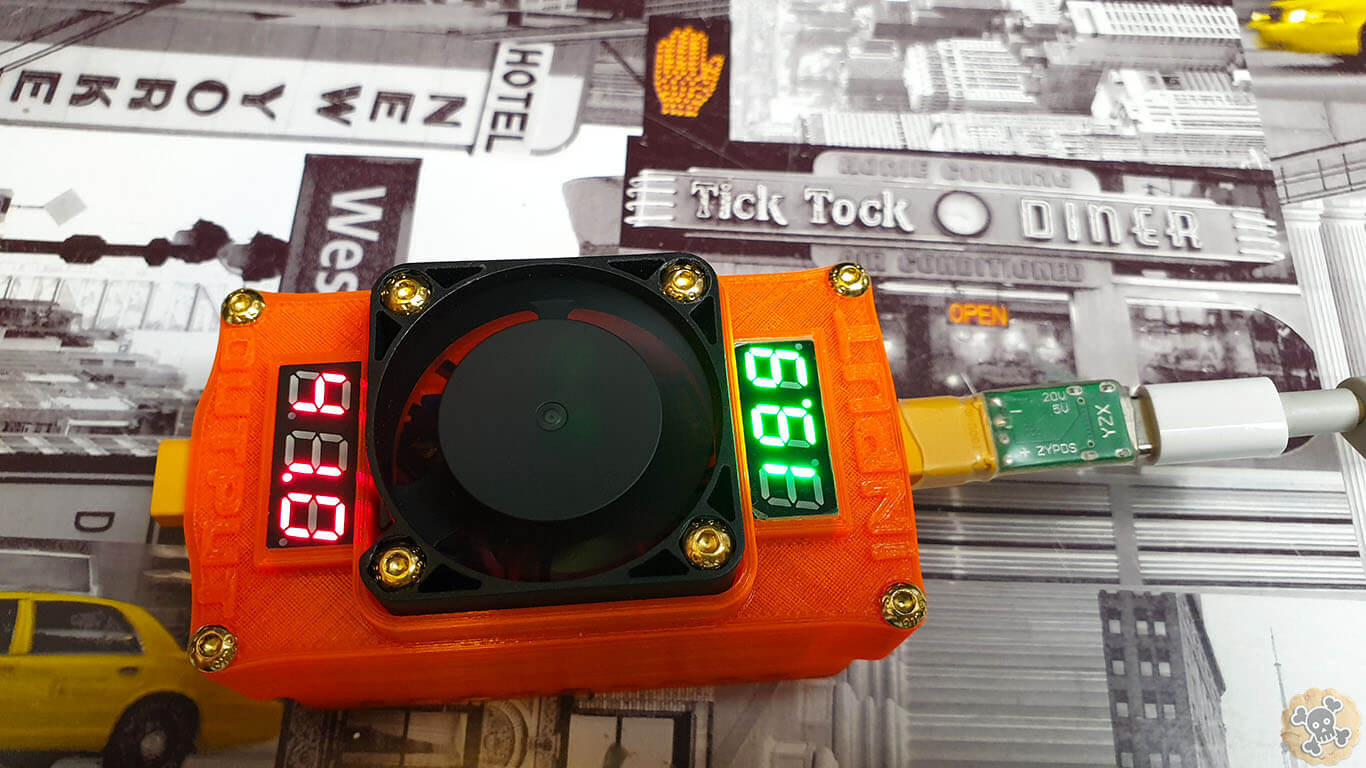
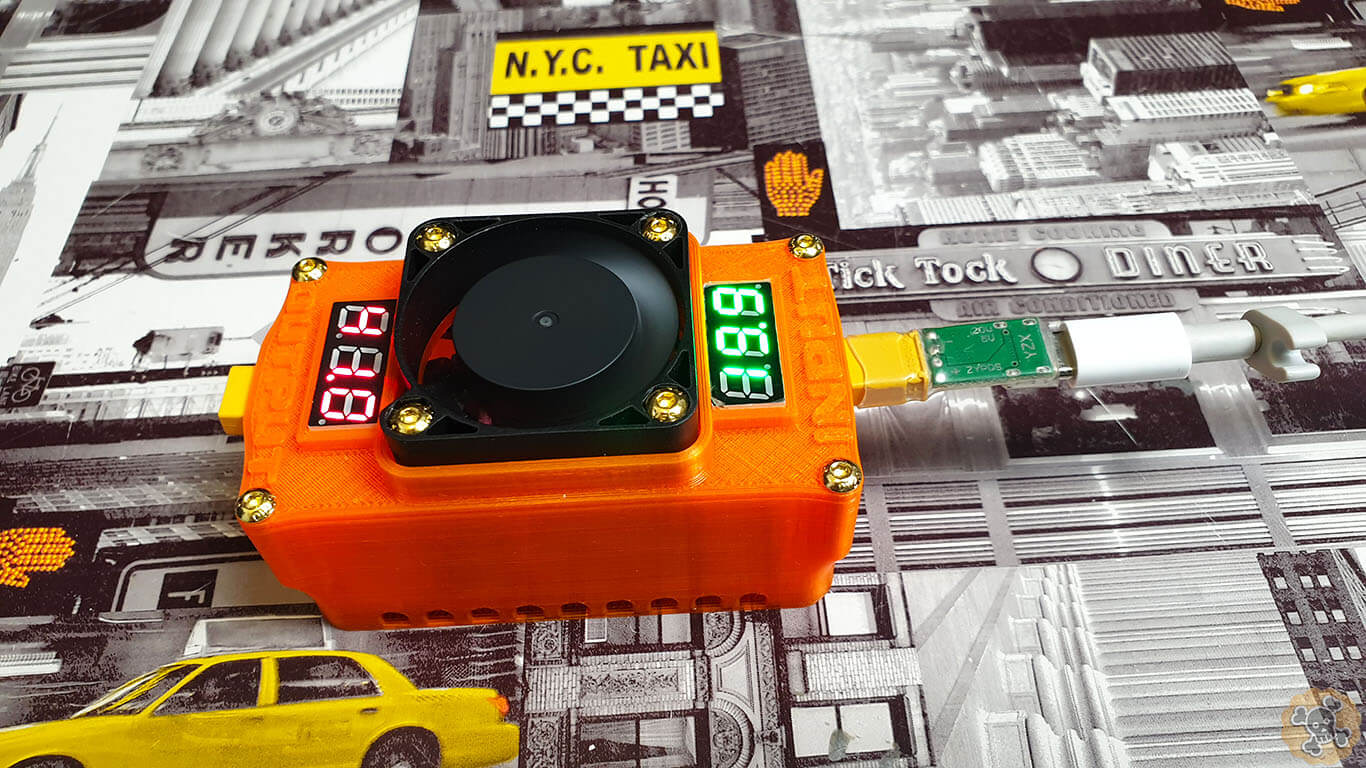
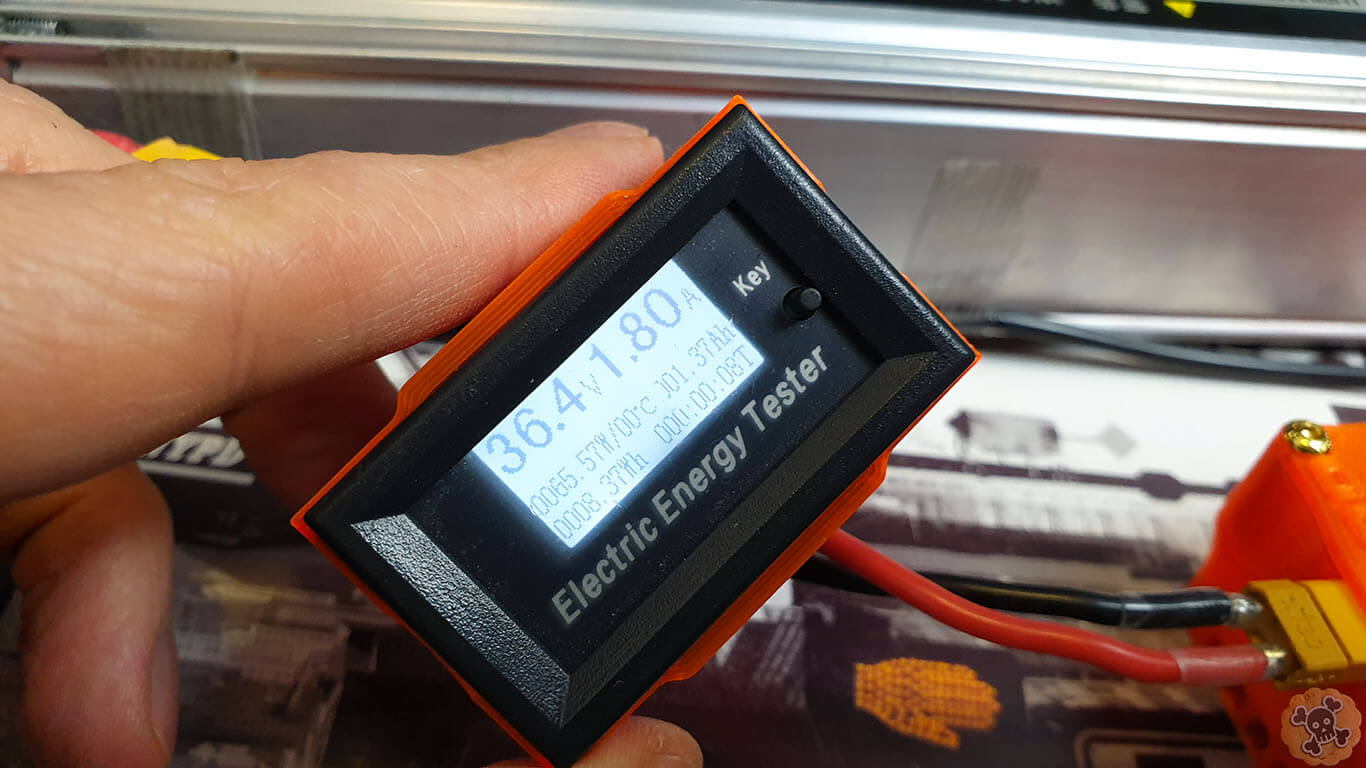
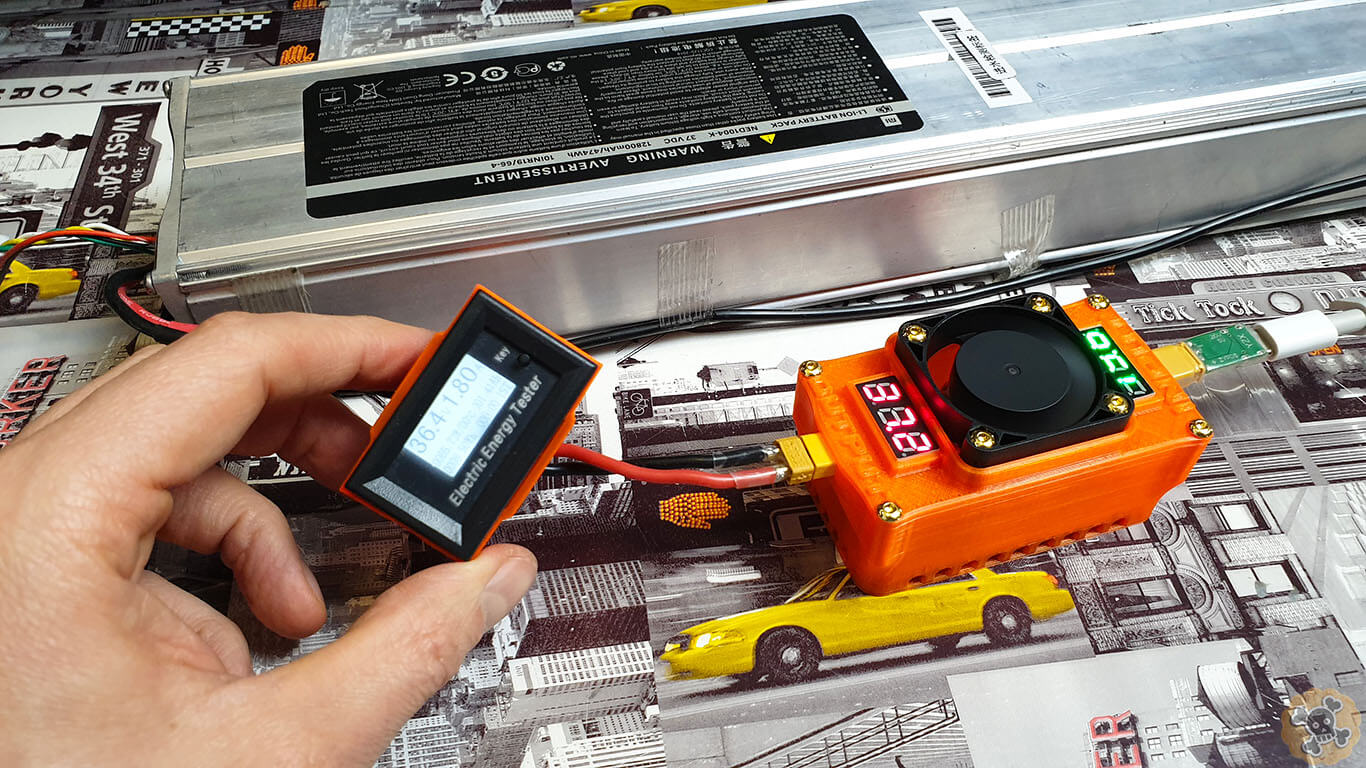
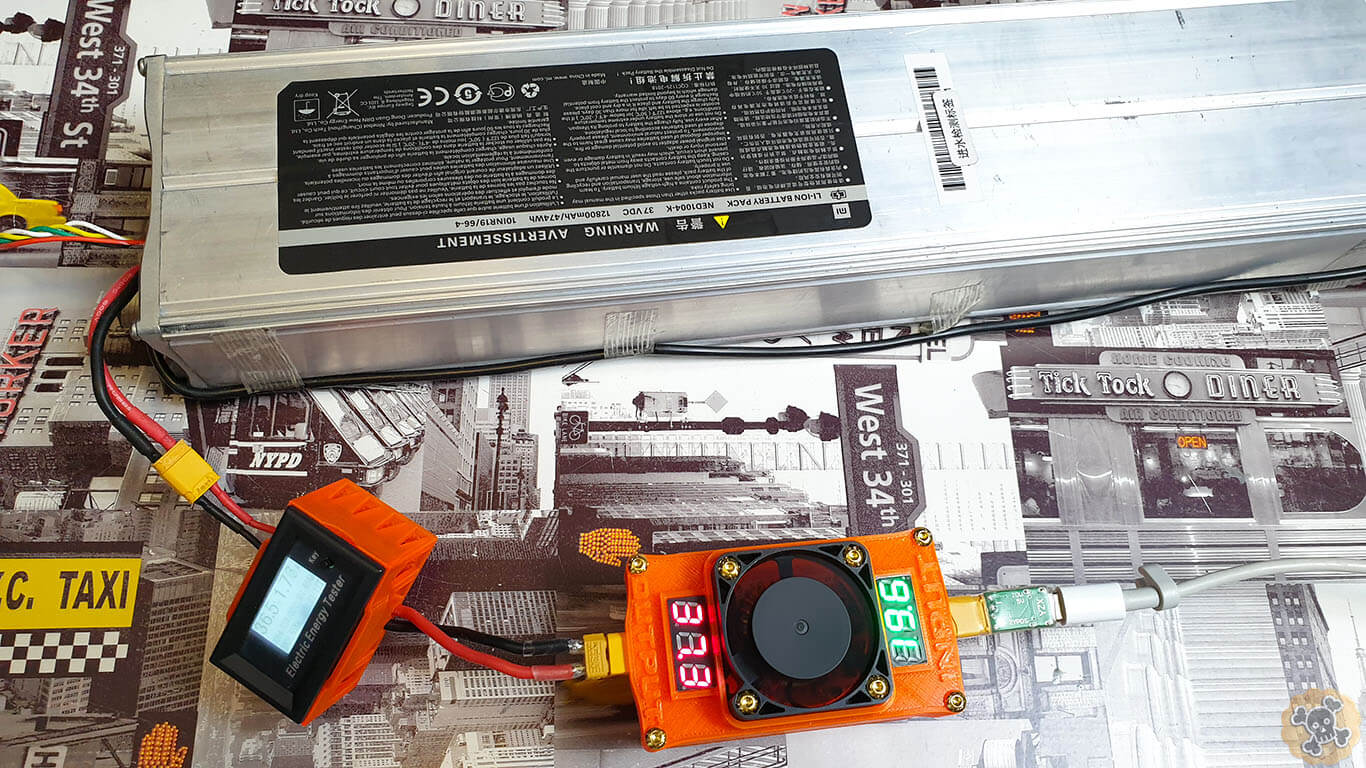
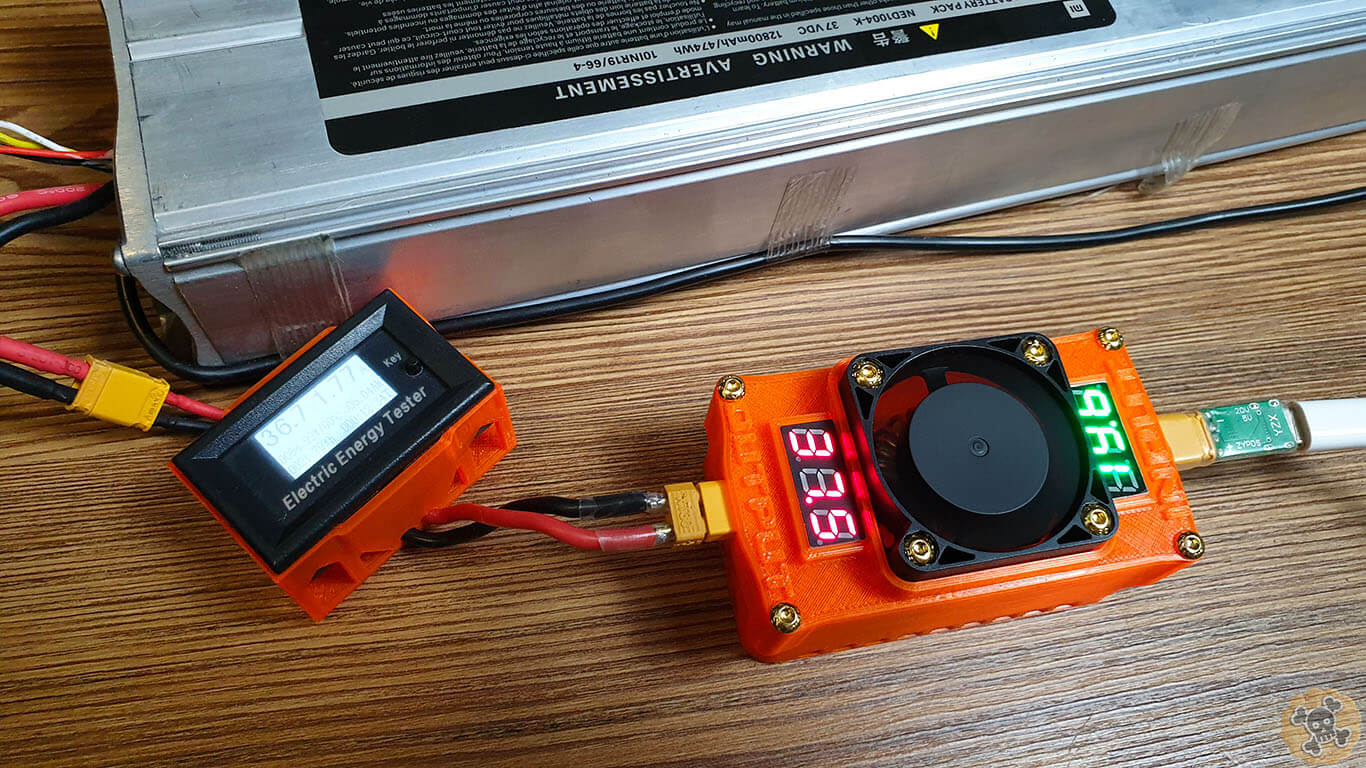
Then solder fan wires to Input + – ( Red is + / Black is – ) & LCD power cables. From LCD we got 3 wires ( on my pics u can see only 2 but soon I will change it to 3 wires just waiting for deliver ) Red cable is V input (max 30V ) / Black is ground / Orange is Voltage reading . Now focus , red & black cables we have connect to Voltage input , and One orange wire to voltage input ( to see what is voltage on the input ) and Second orange wire to voltage output ( to see what is voltage on the output ) EASY ???☠️
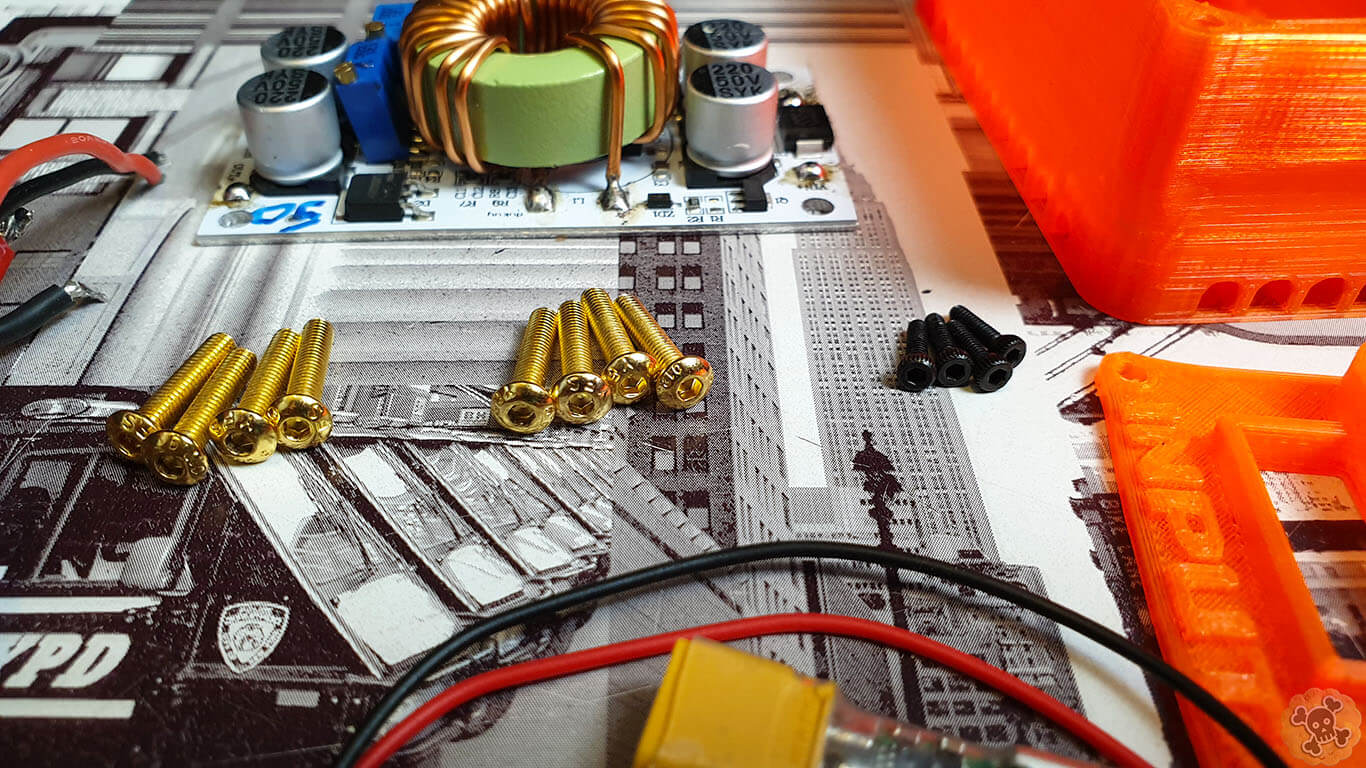
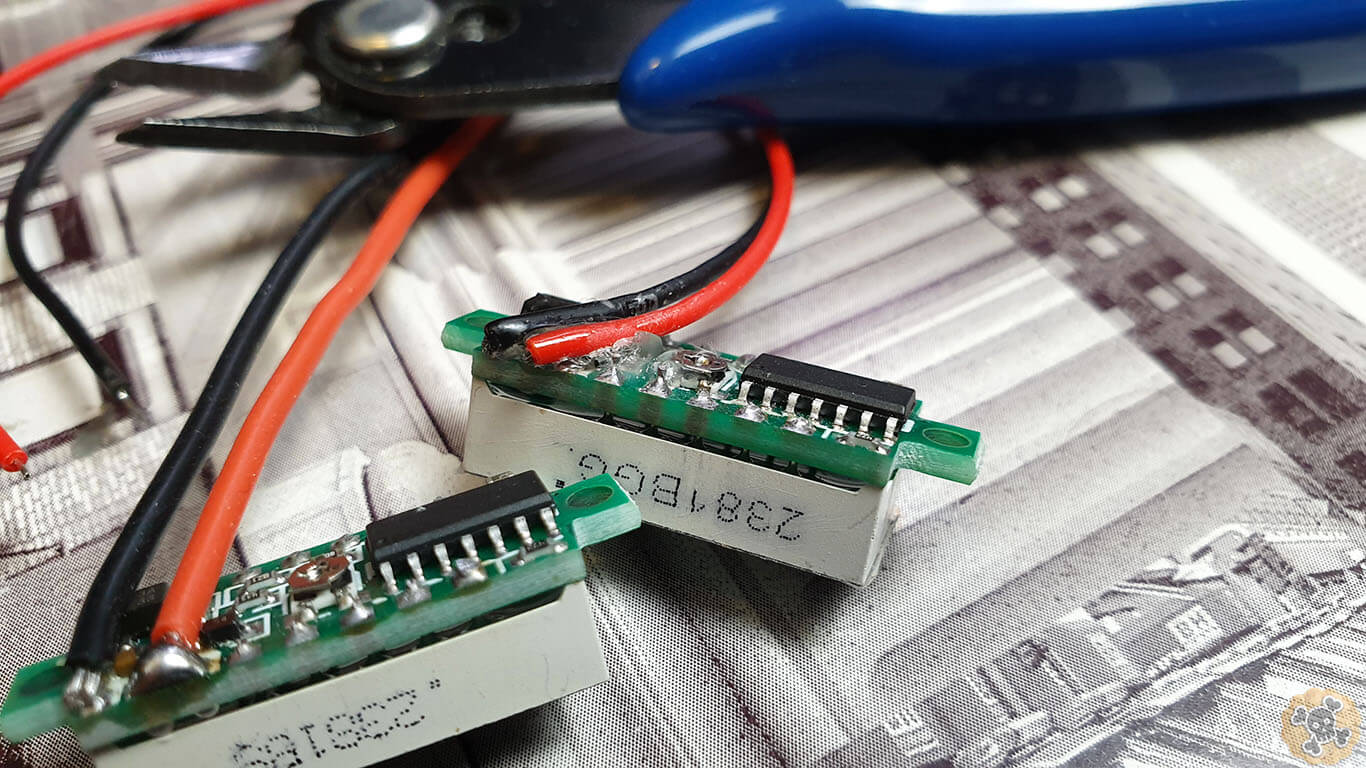
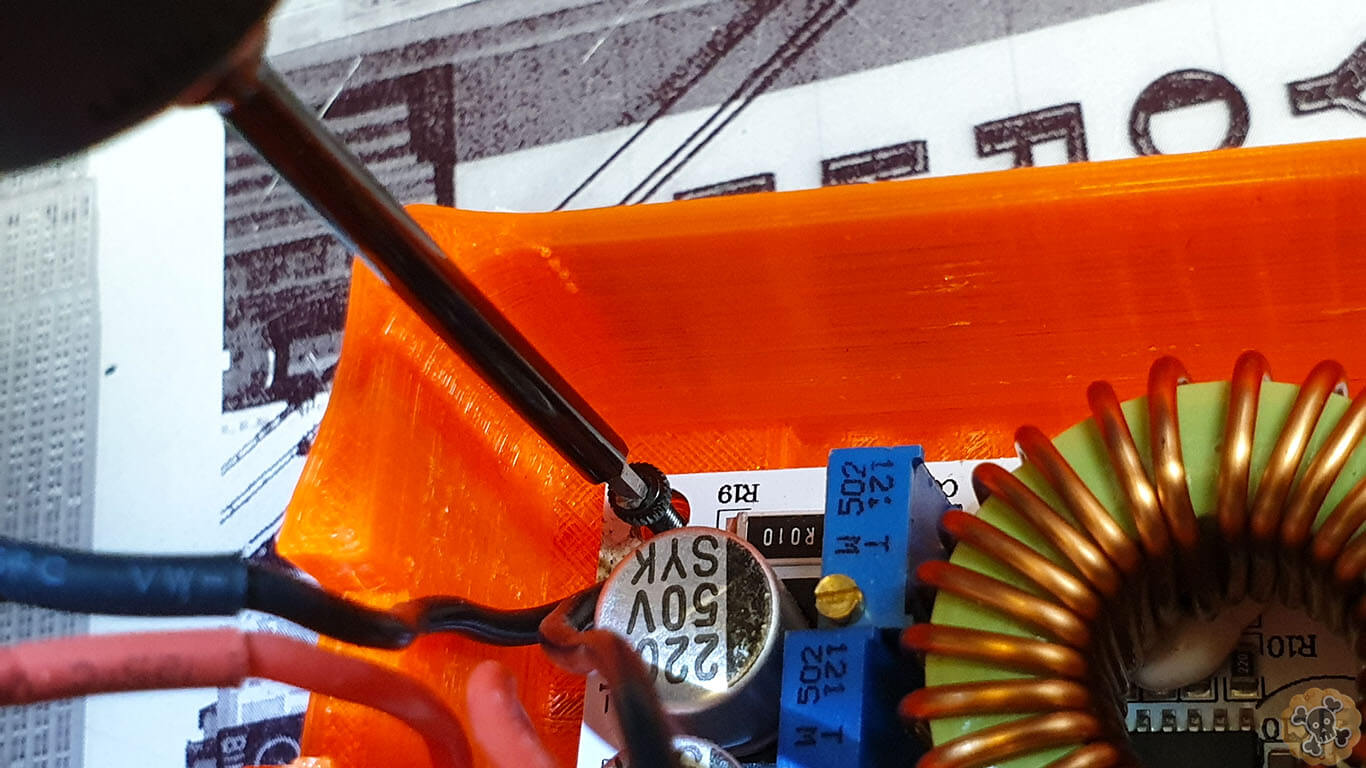
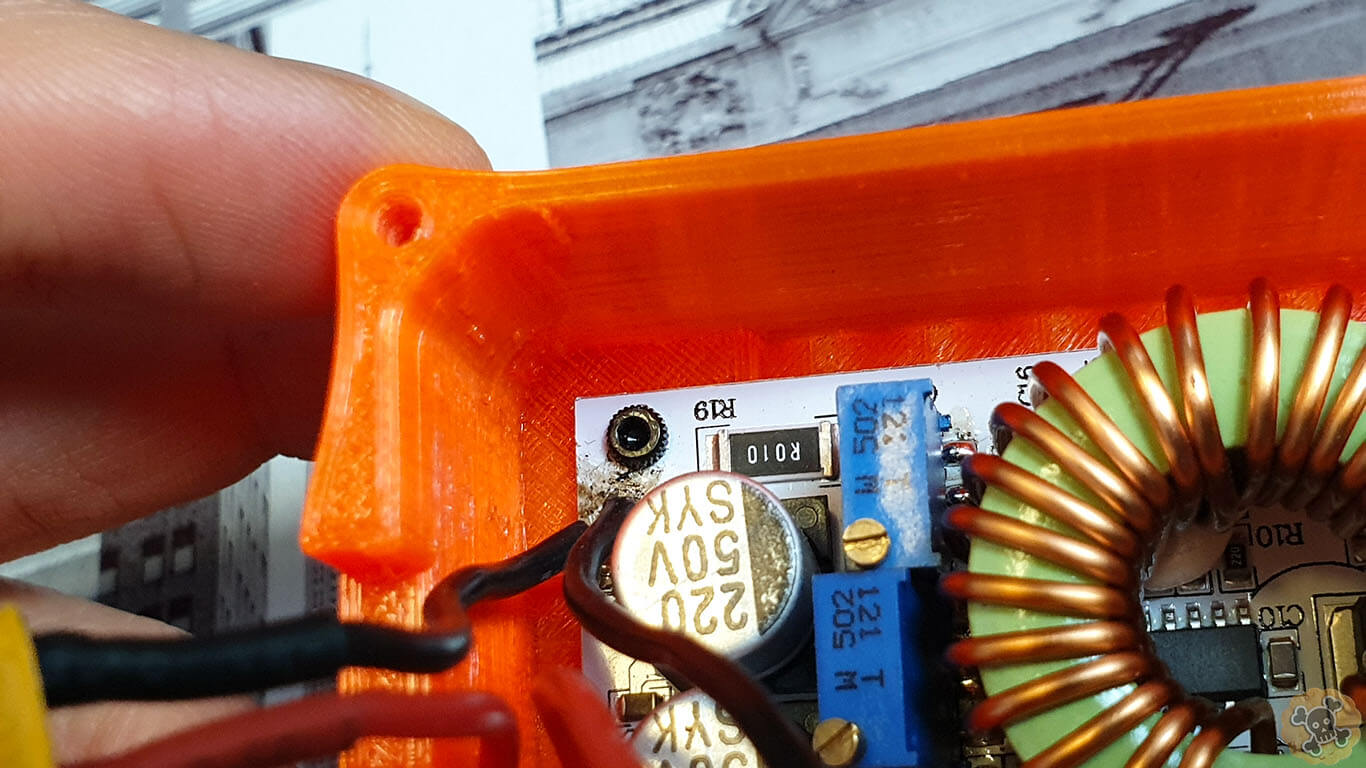
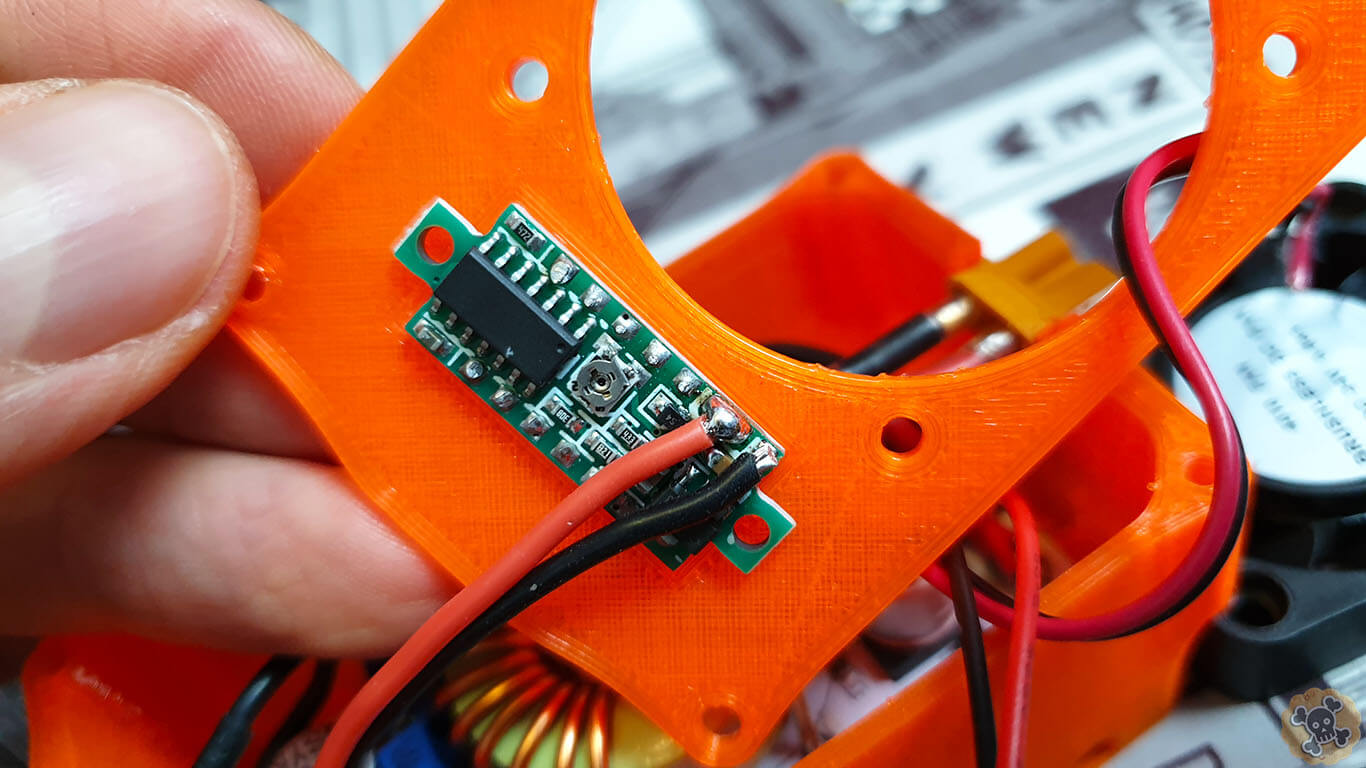
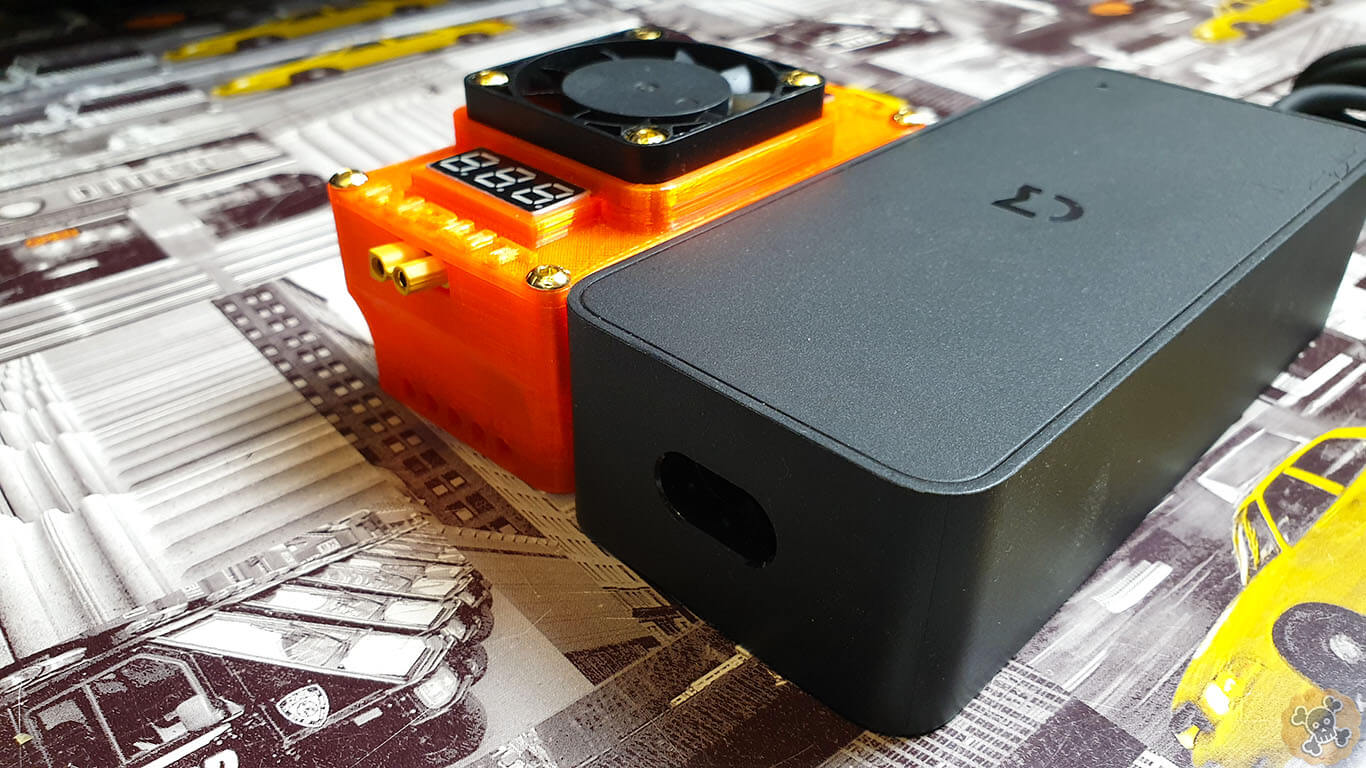
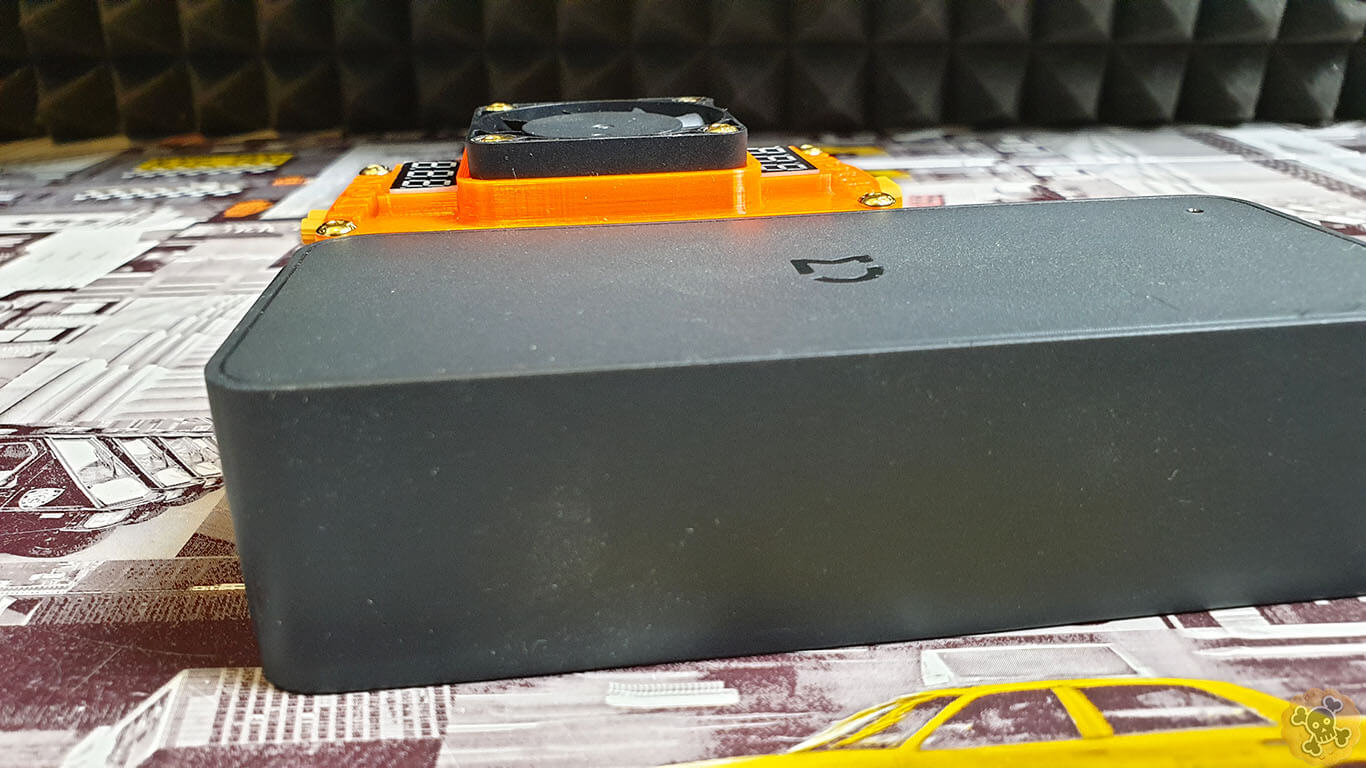
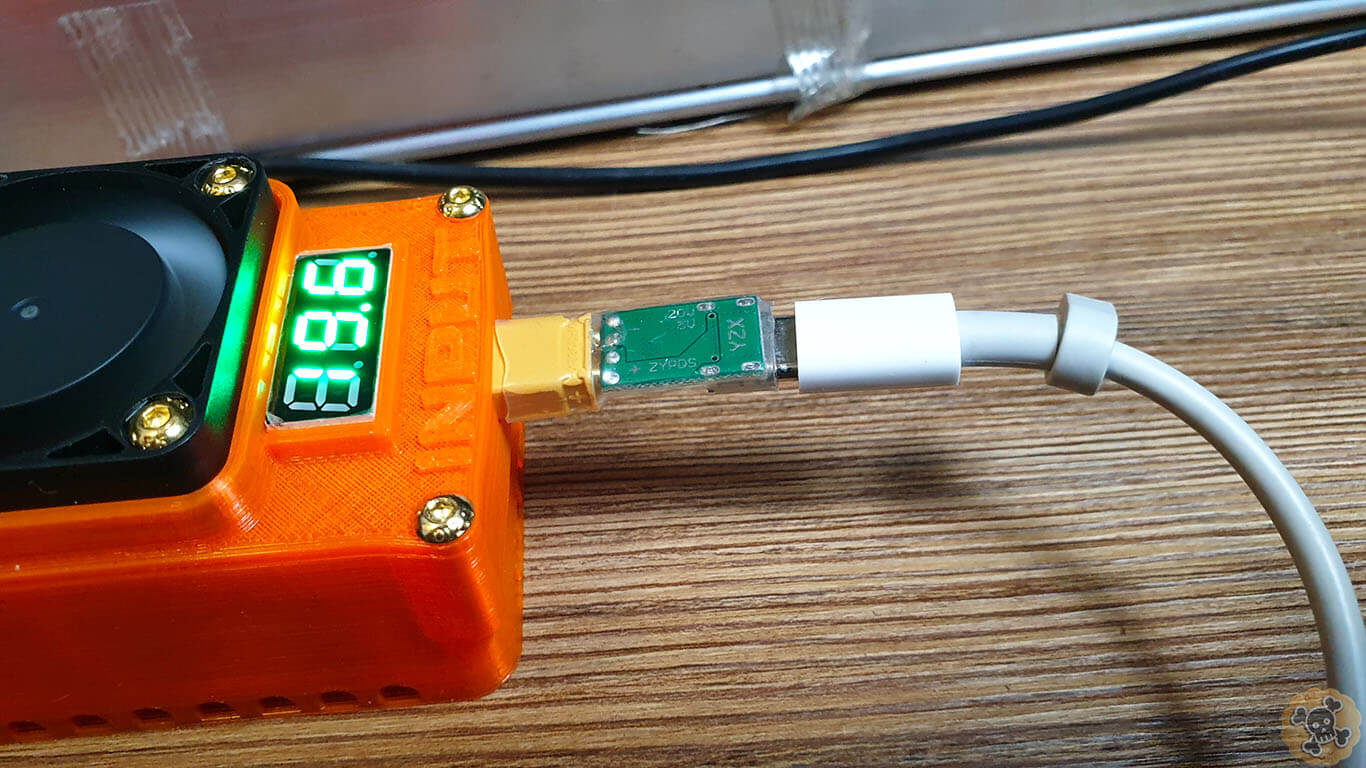
Now place StepUp converter into shell and secure it by 4x M2 screws, then connect converter to the power source like USB PD charger and set voltage / amperage output by rotating 2 gold bolts on the blue ” boxes ” ( when you set voltage do not connect load on the output , when you set amperage connect Load on the output )
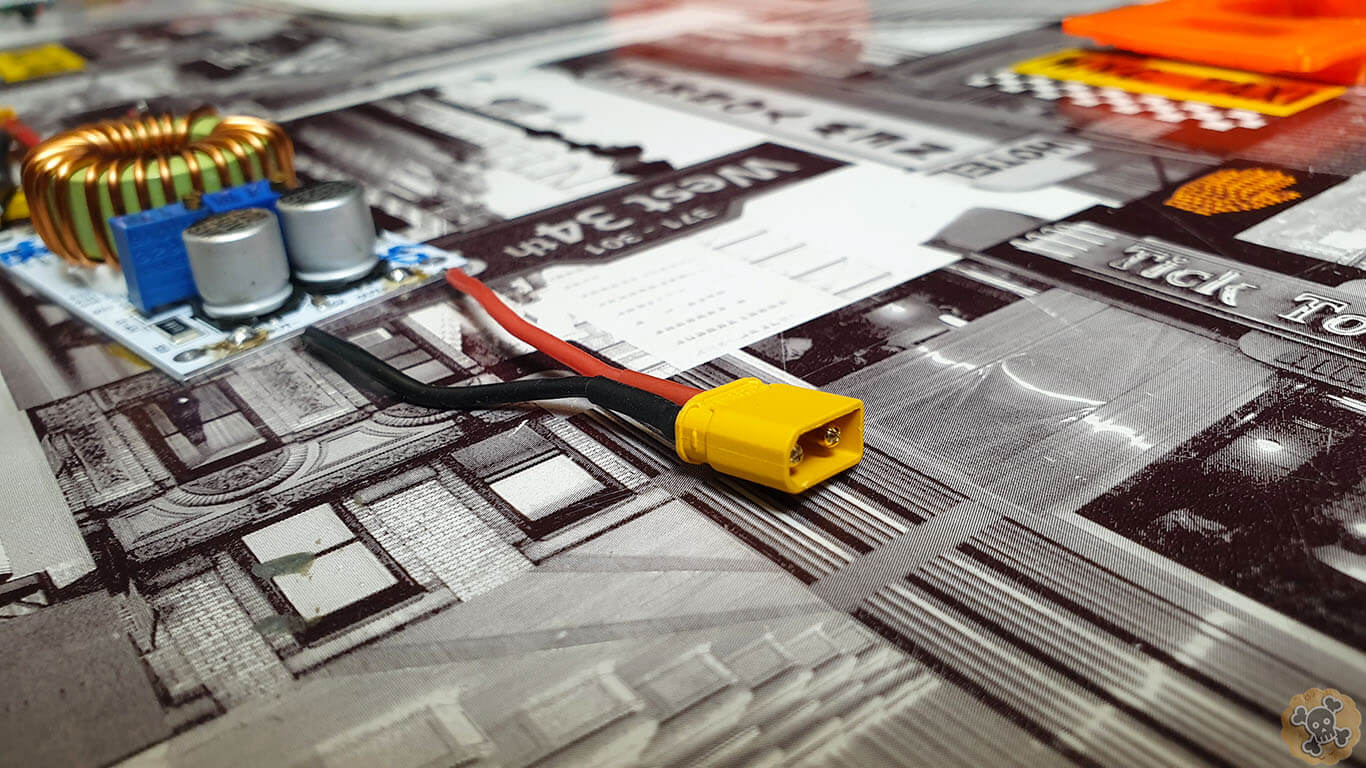
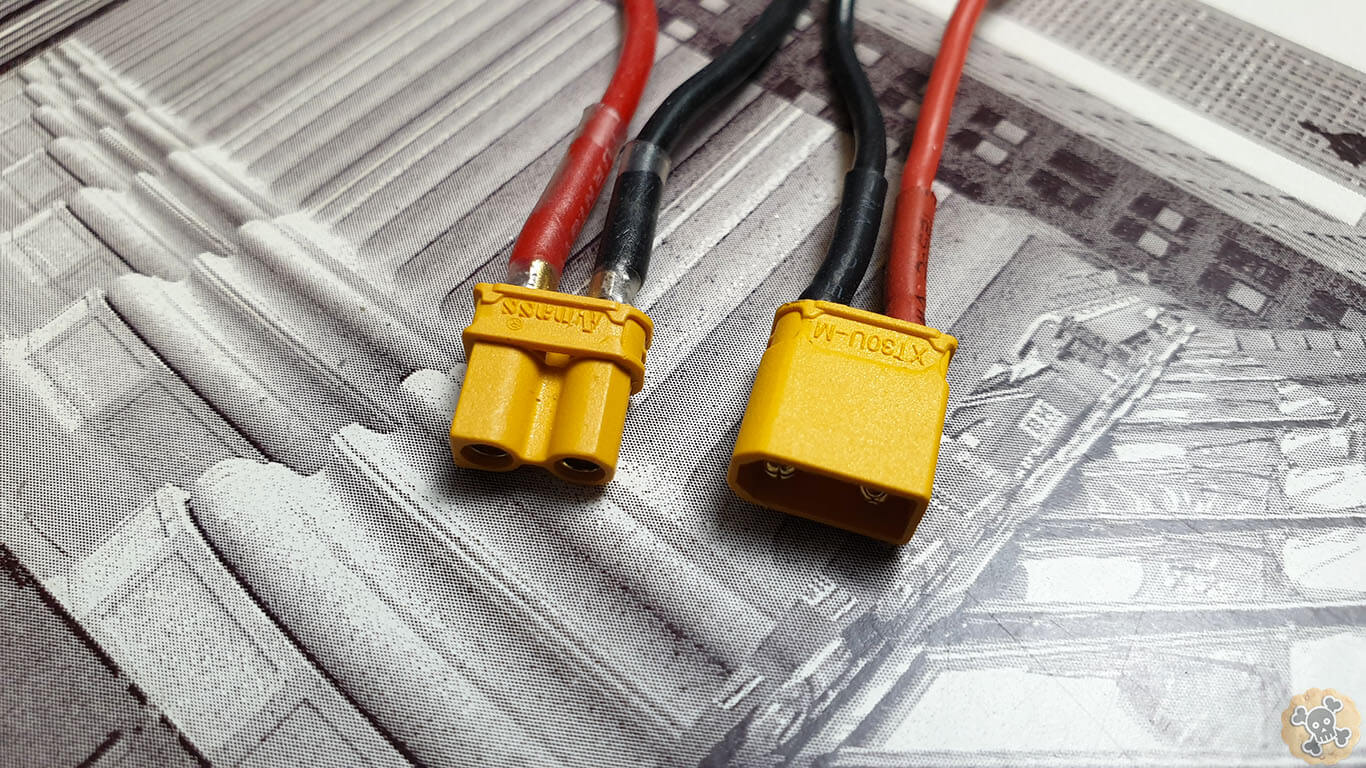
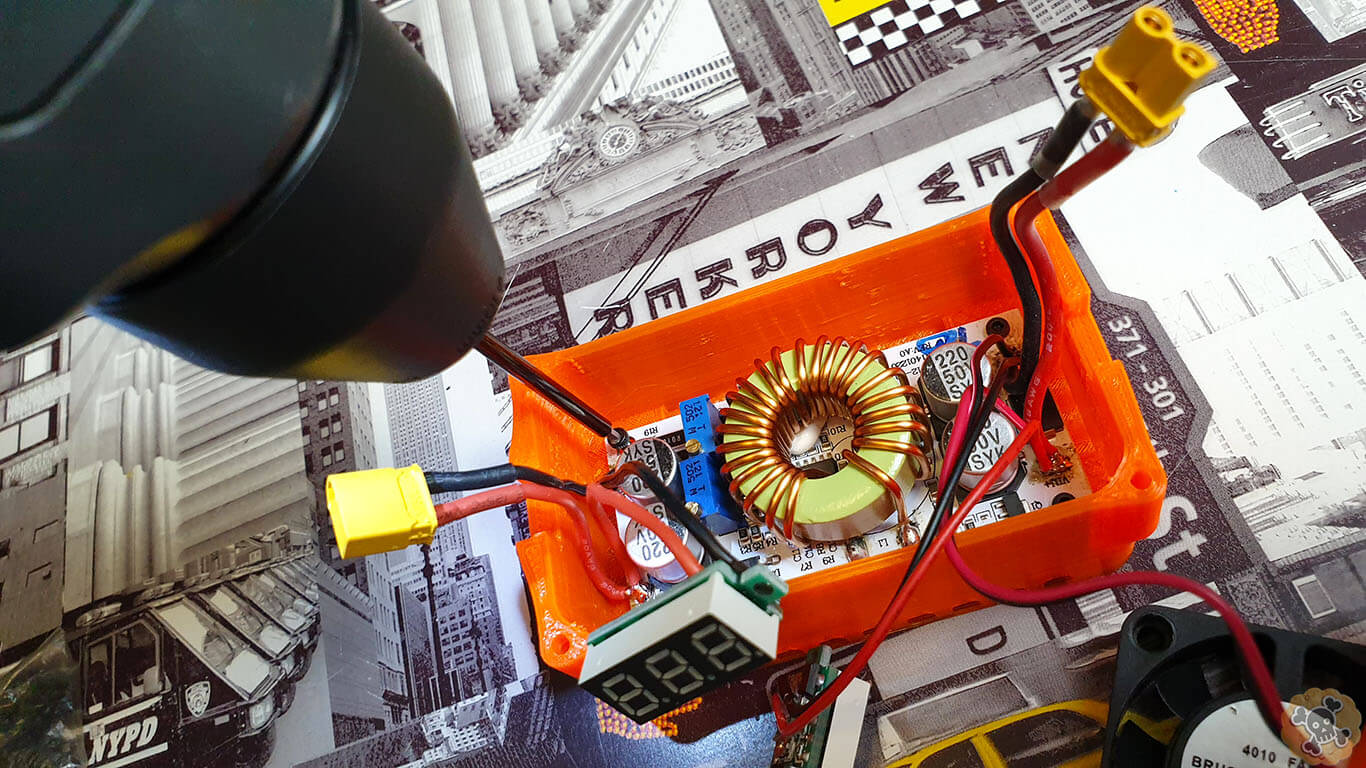
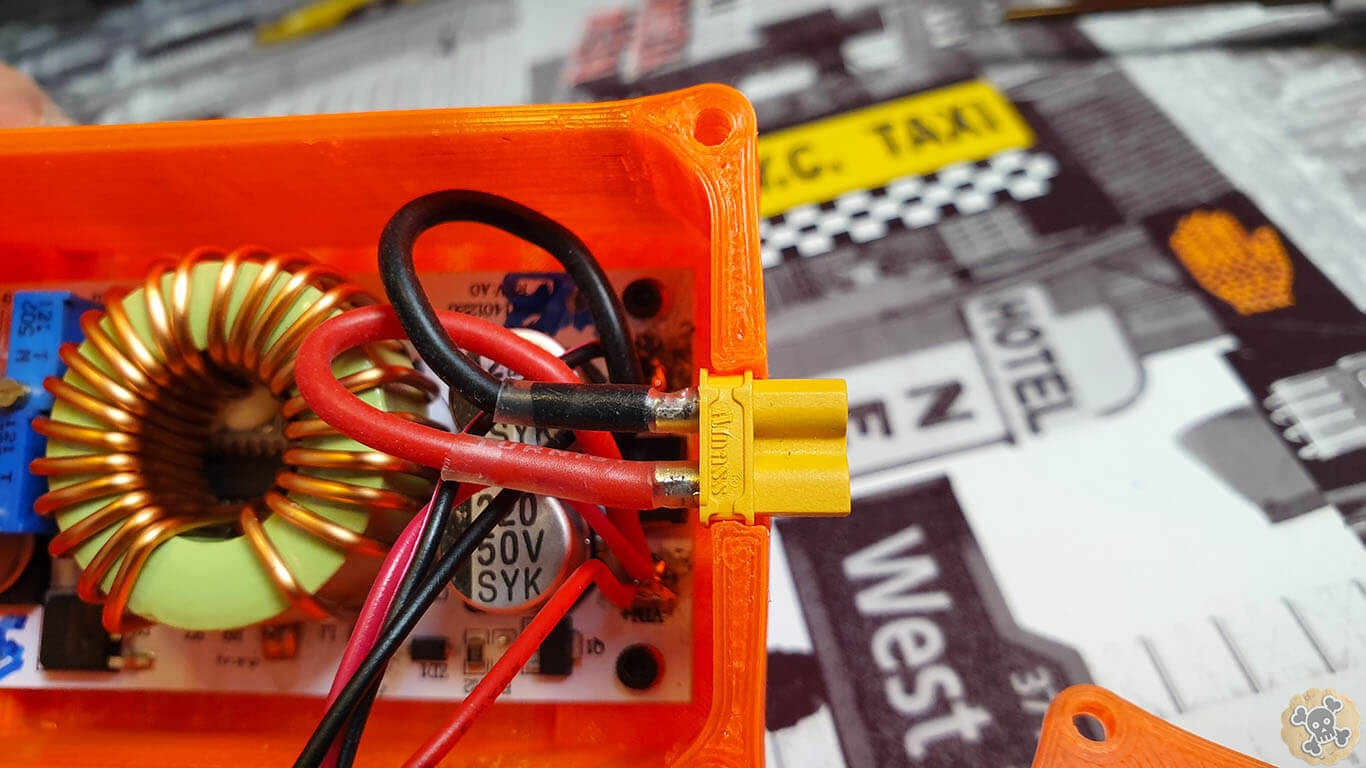
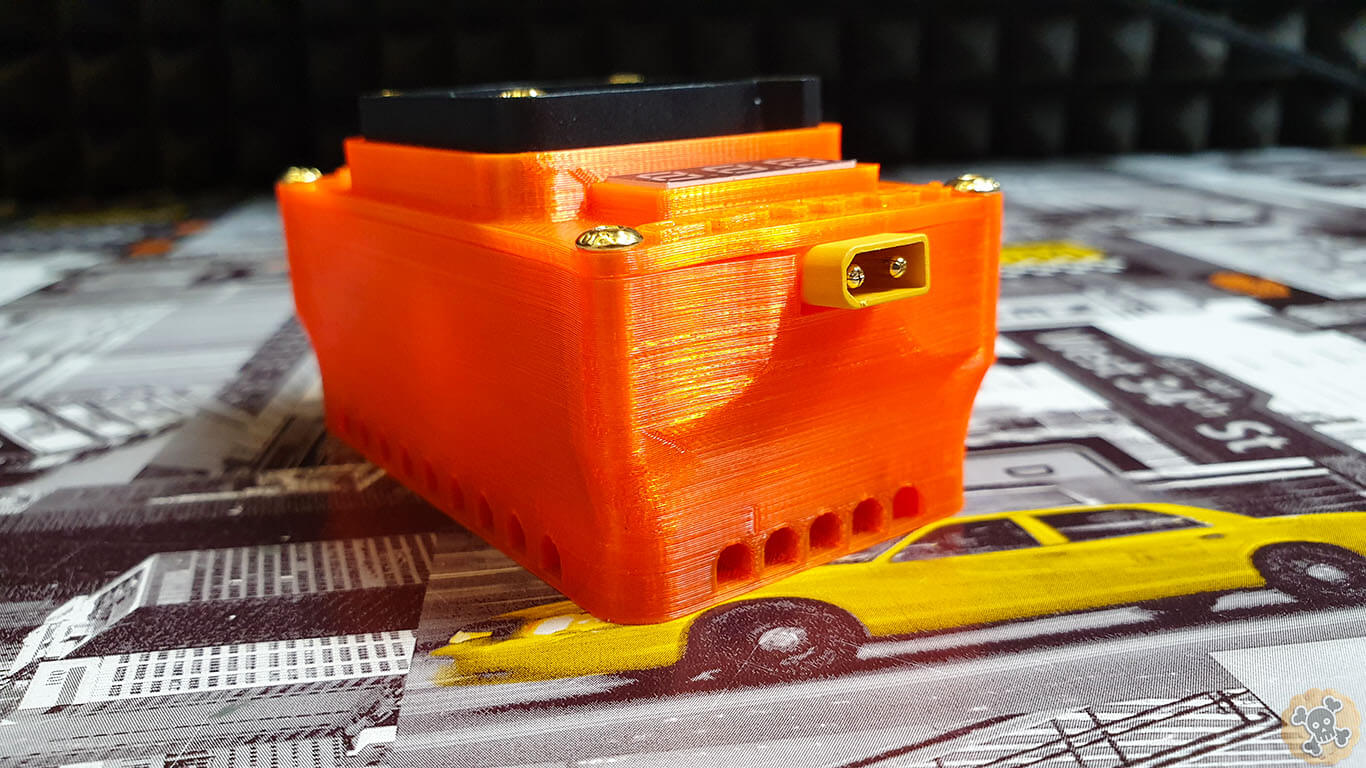
Place XT30 connectors on spot !! Please notice that place for the connector in the shell is thicker on the one side and thinner on the other, so place connectors the same wasy as you can see on the pictures !! . If it will not fit , then you can grind a little bit name/type on the connector ( more or less Amass connectors will fit perfect here, just push it down and done )
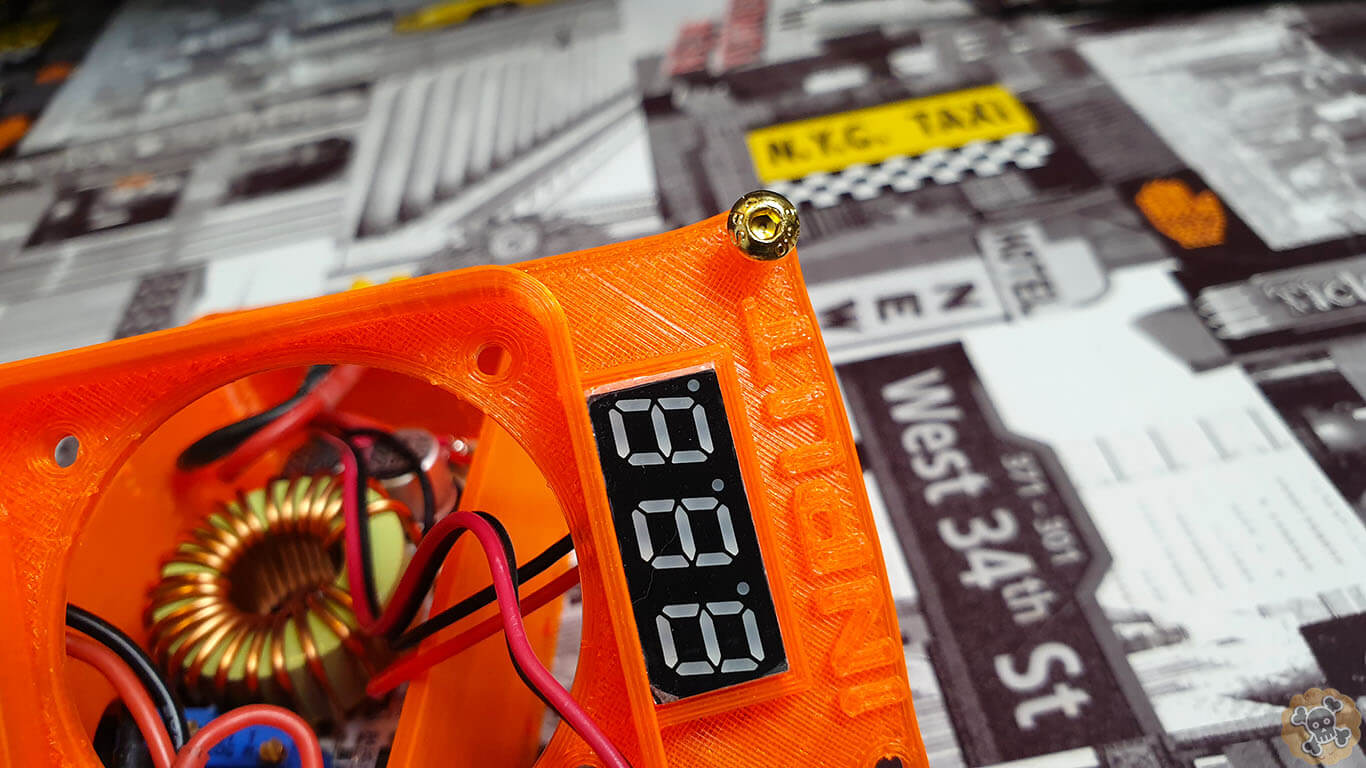
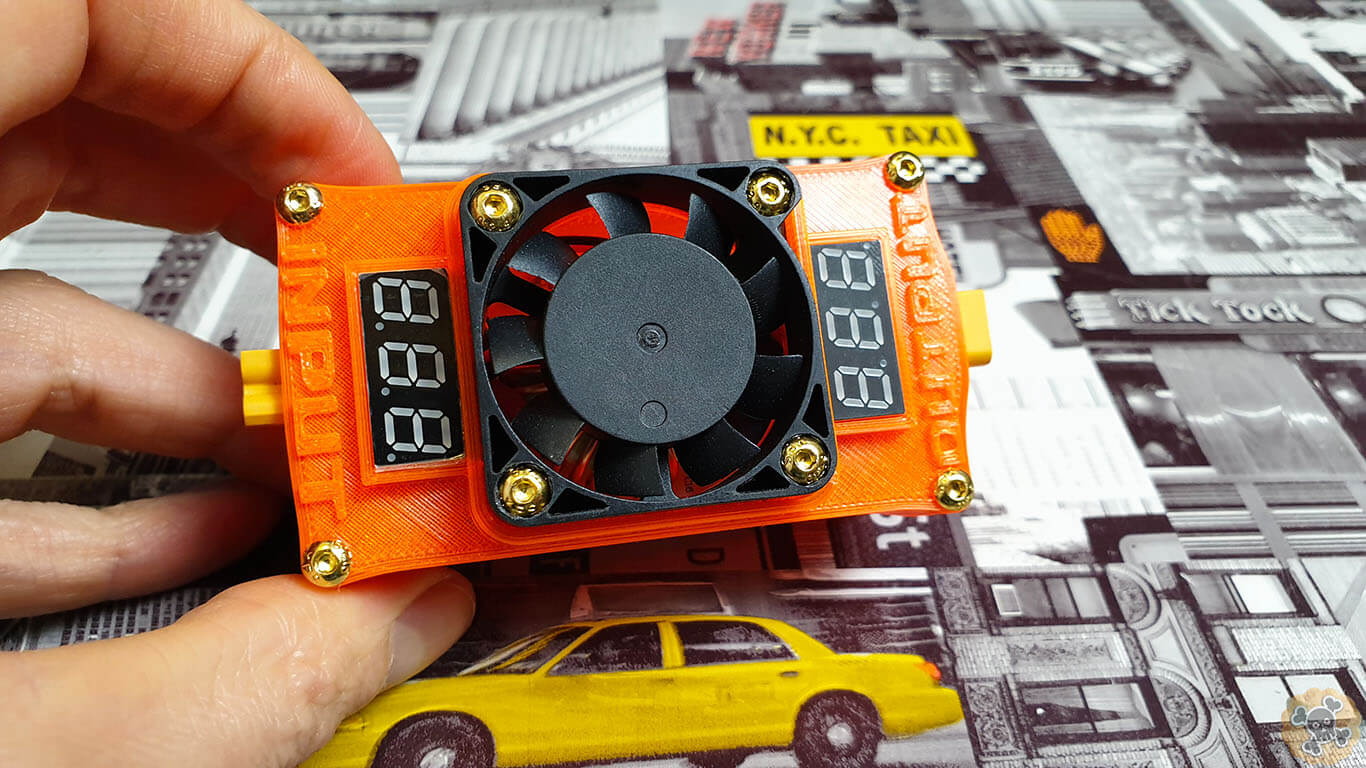
To secure LCDs you don’t need any screws just push it in to rectangle hole ( f it will not fit then grind a bit rectangle to make it fit )
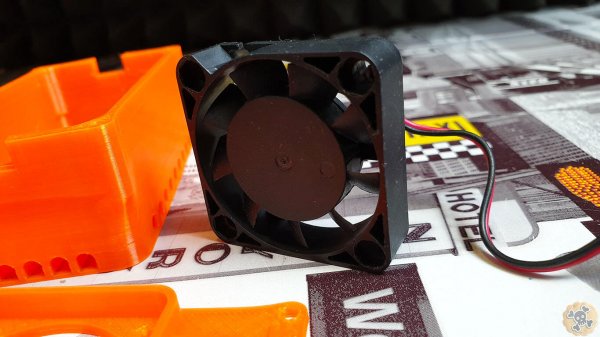
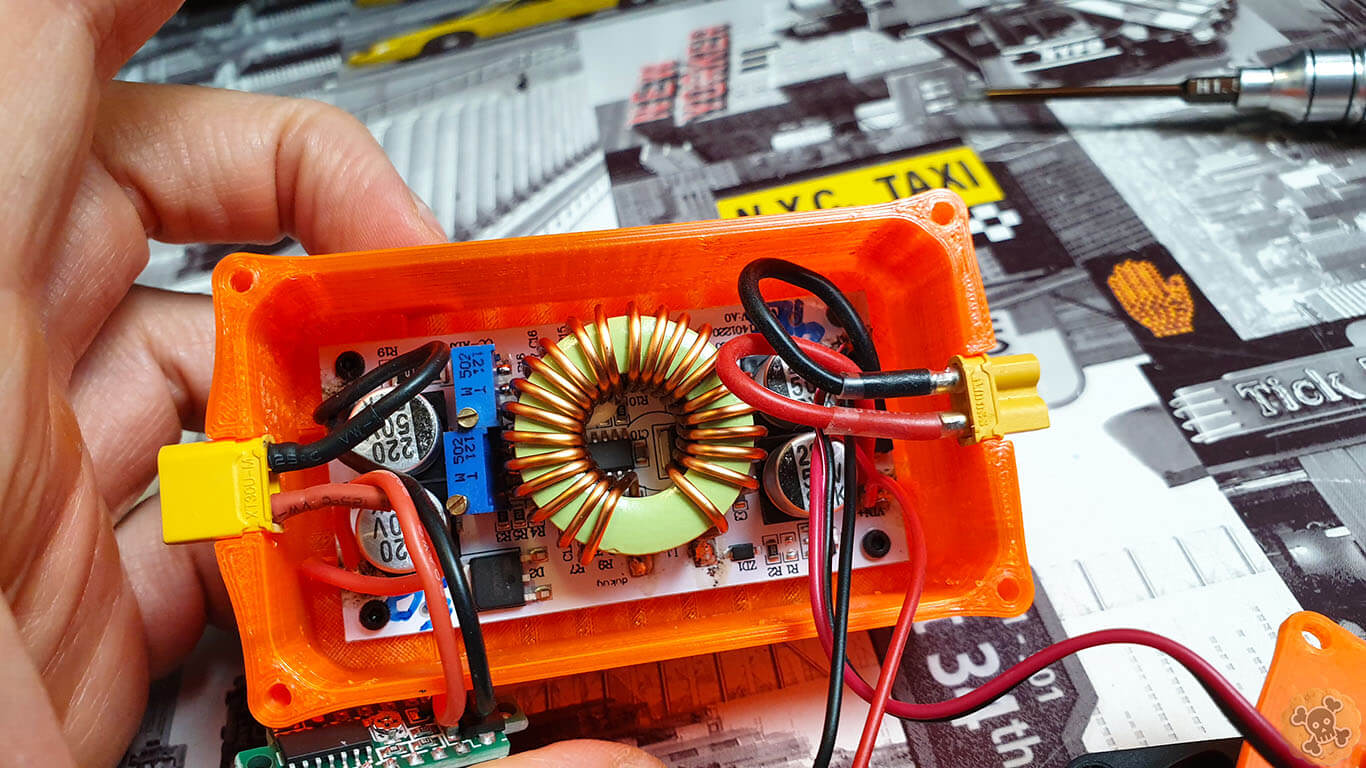
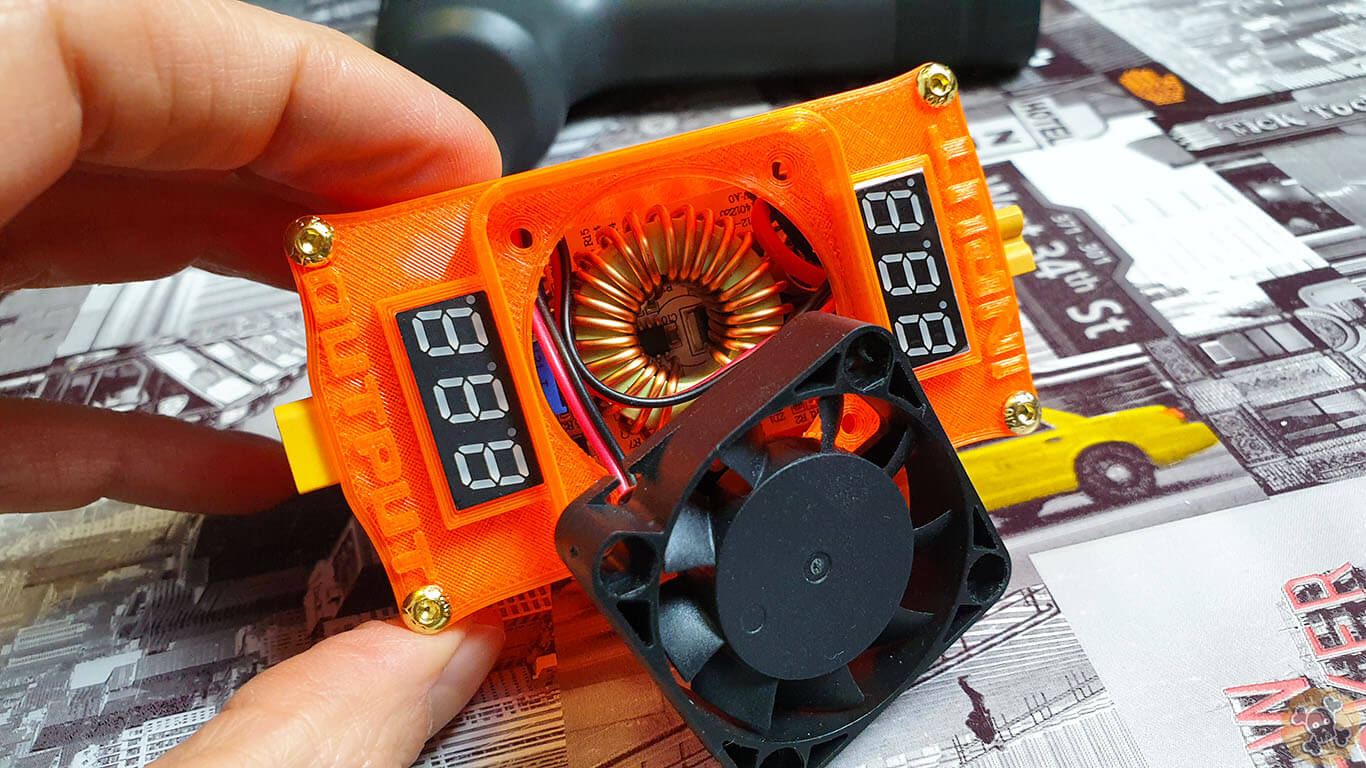
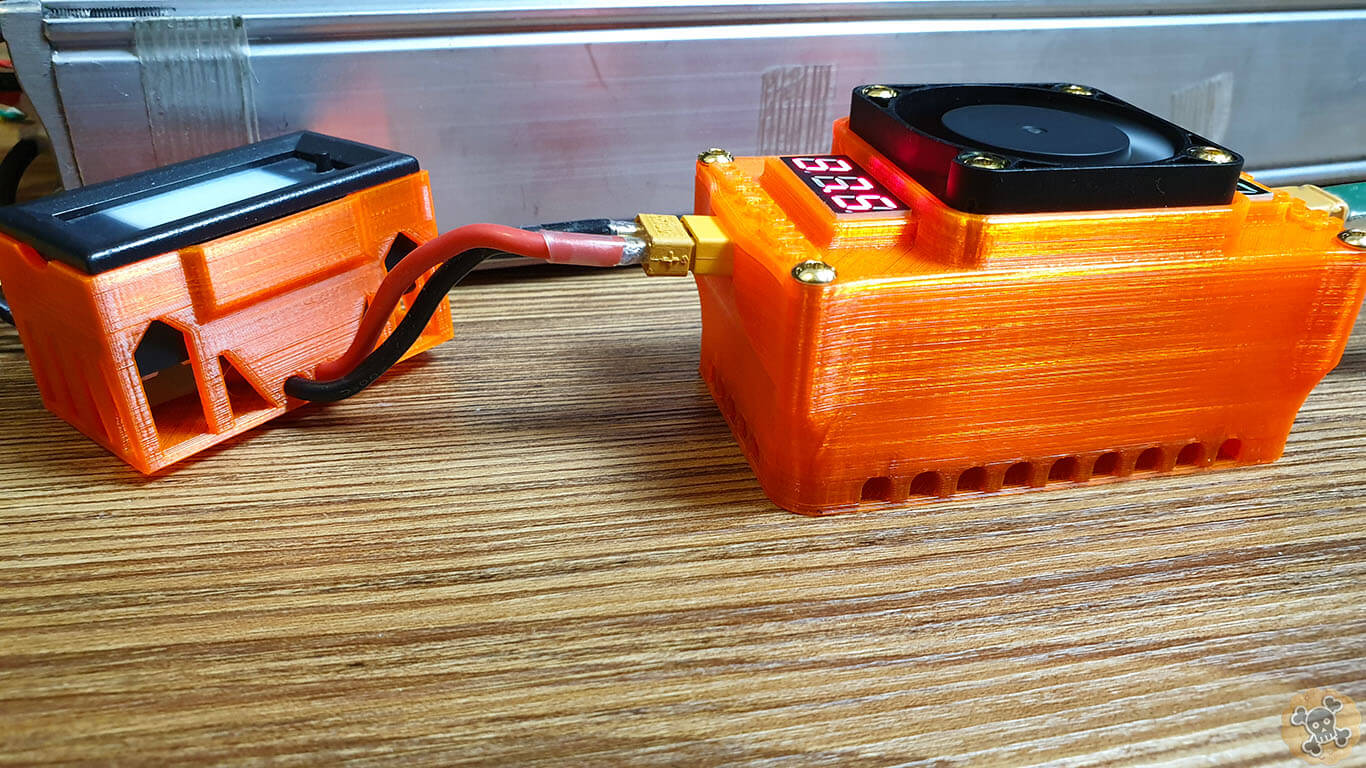
Use 4x M4 screws to tighten both shell parts
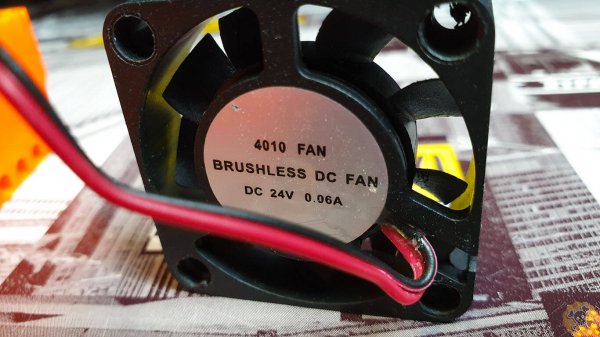
Use 4x M4 screws to secure the Fan, and you are done 😉
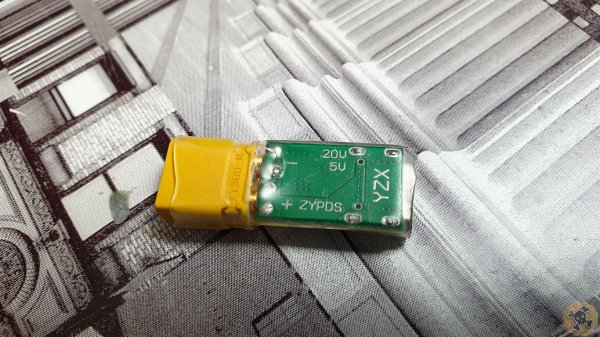
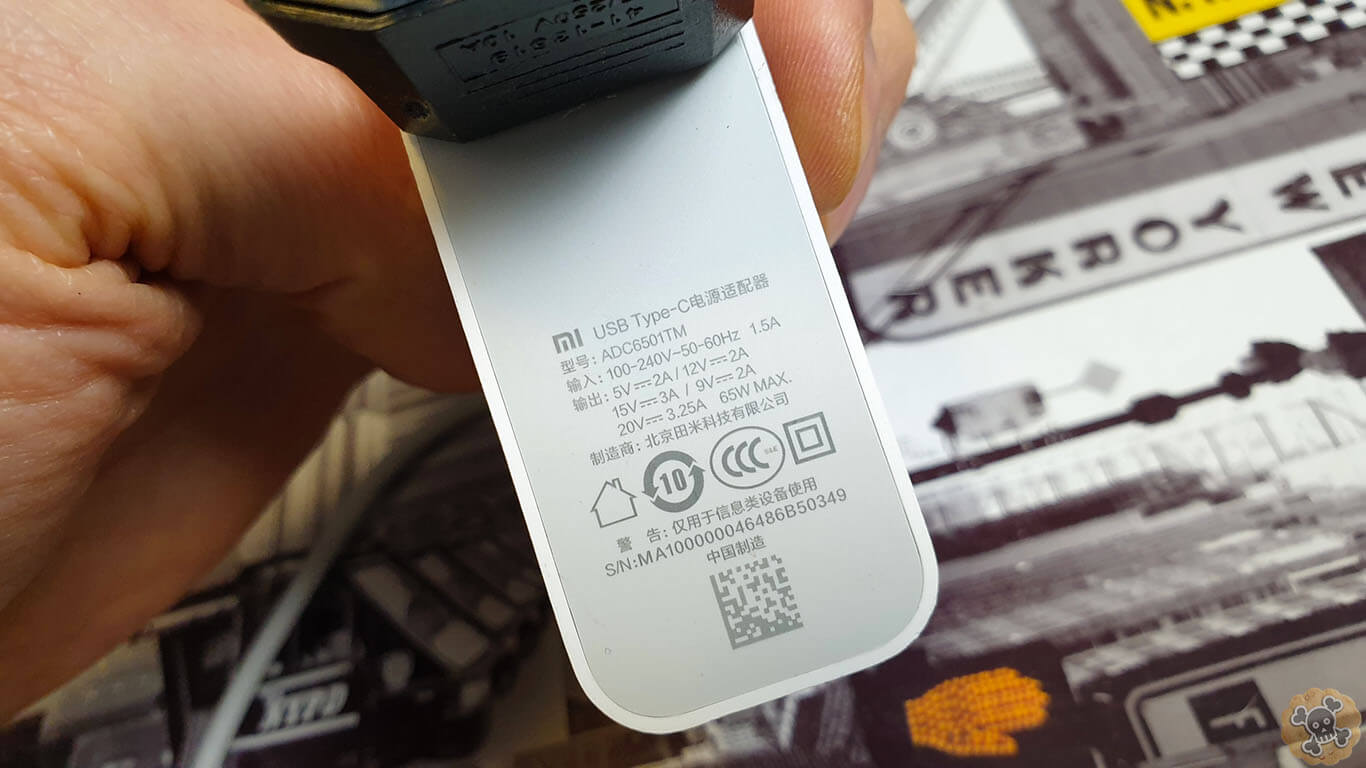
Compare to Xiaomi charger, USB one is a bit smaller 😉
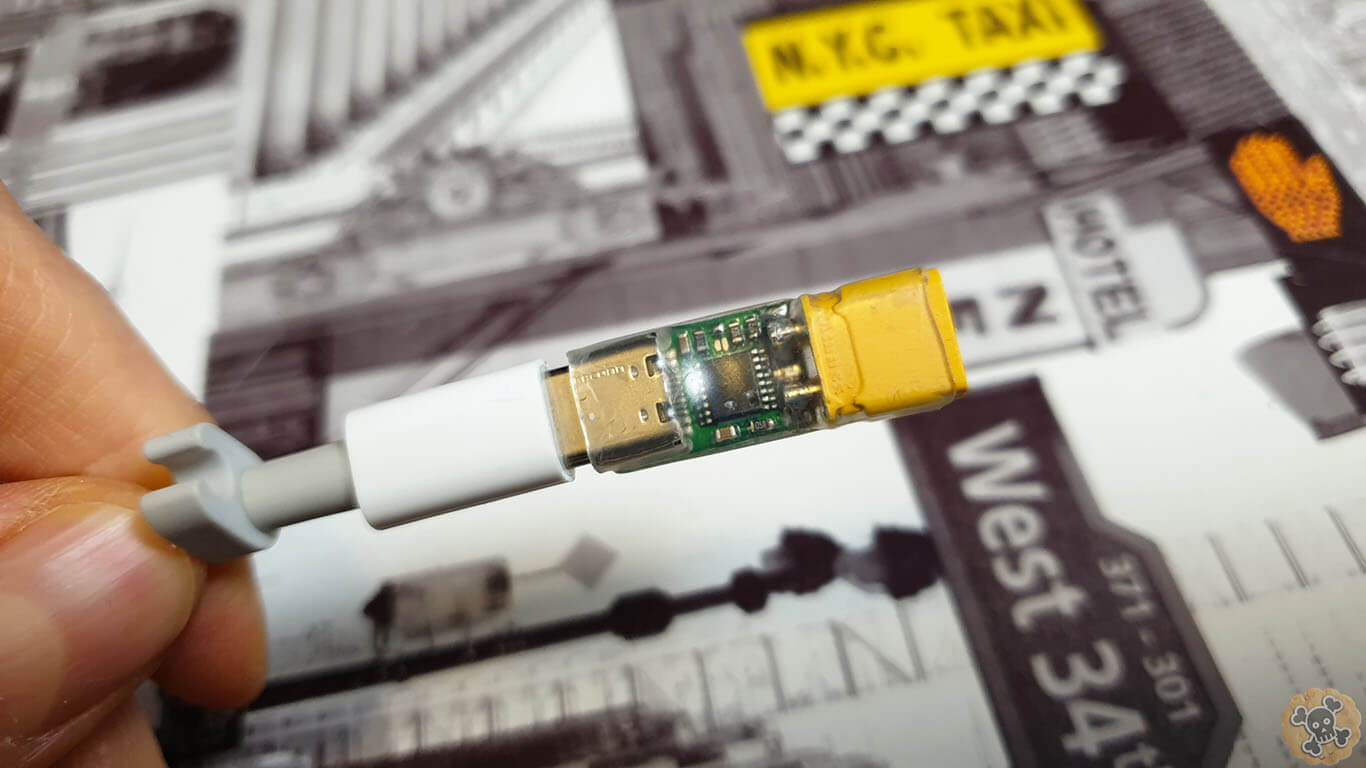
Ofcourse you can make any connector you like as you can see on pic.
I recommend to use some HQ charger like Xiaomi USB PD 65w s.click.aliexpress.com/e/_AsCl0z because this charger has stable output and true 65W , also we can charge any other thing because this is still standard USB charger
After some tests I have to say that i’s working great, but still more testing is needed, if you will build one, please share your thoughts
I will update this post in a future , today is 06.11.2020 . See ya soon ???☠️?
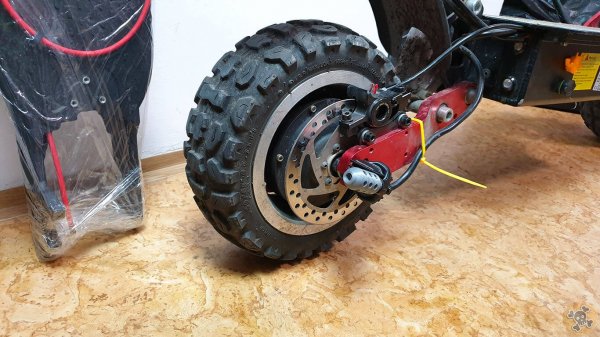
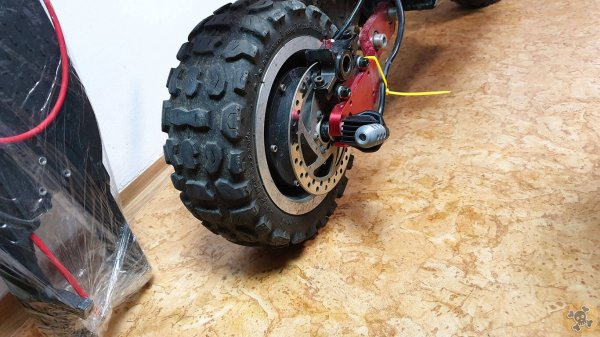
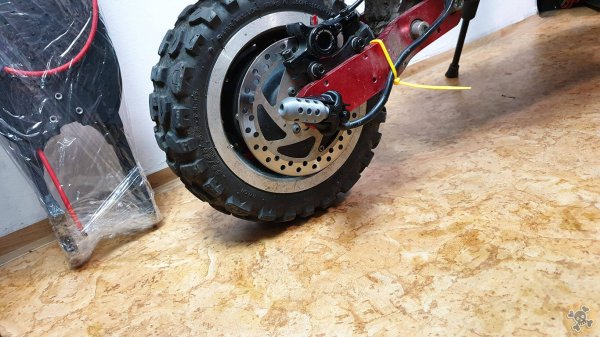
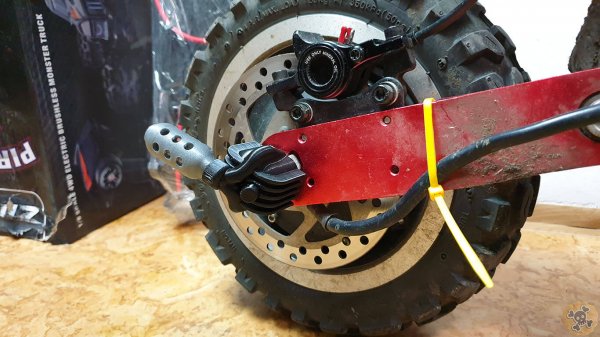
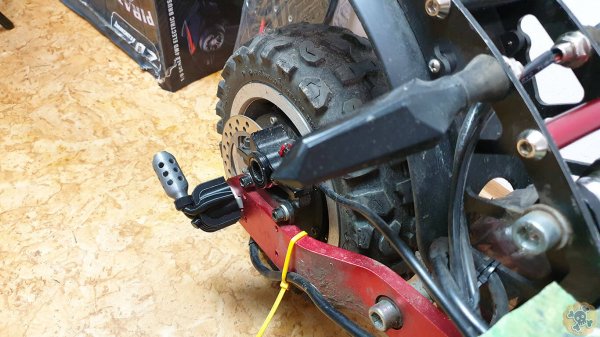
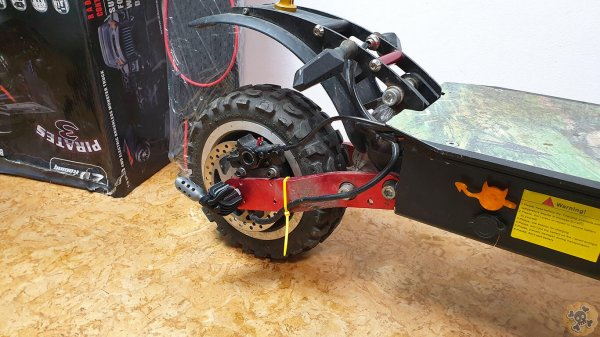
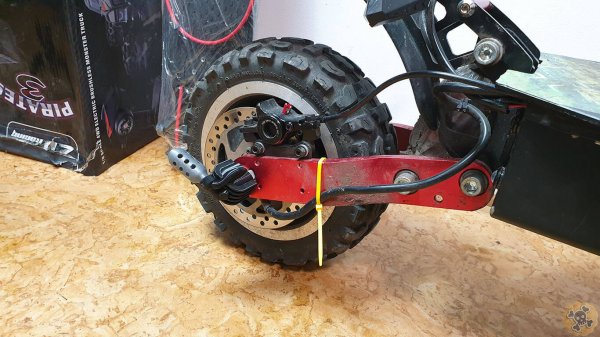
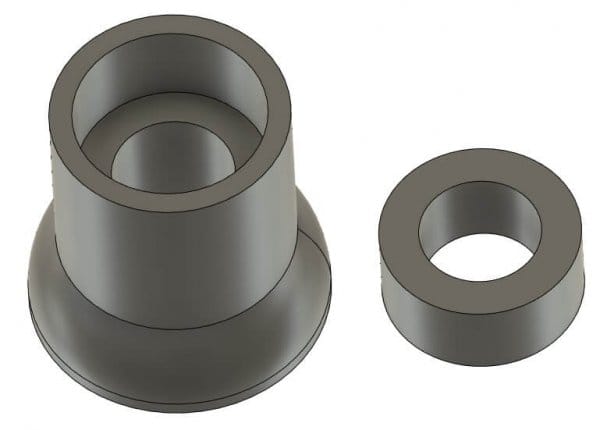
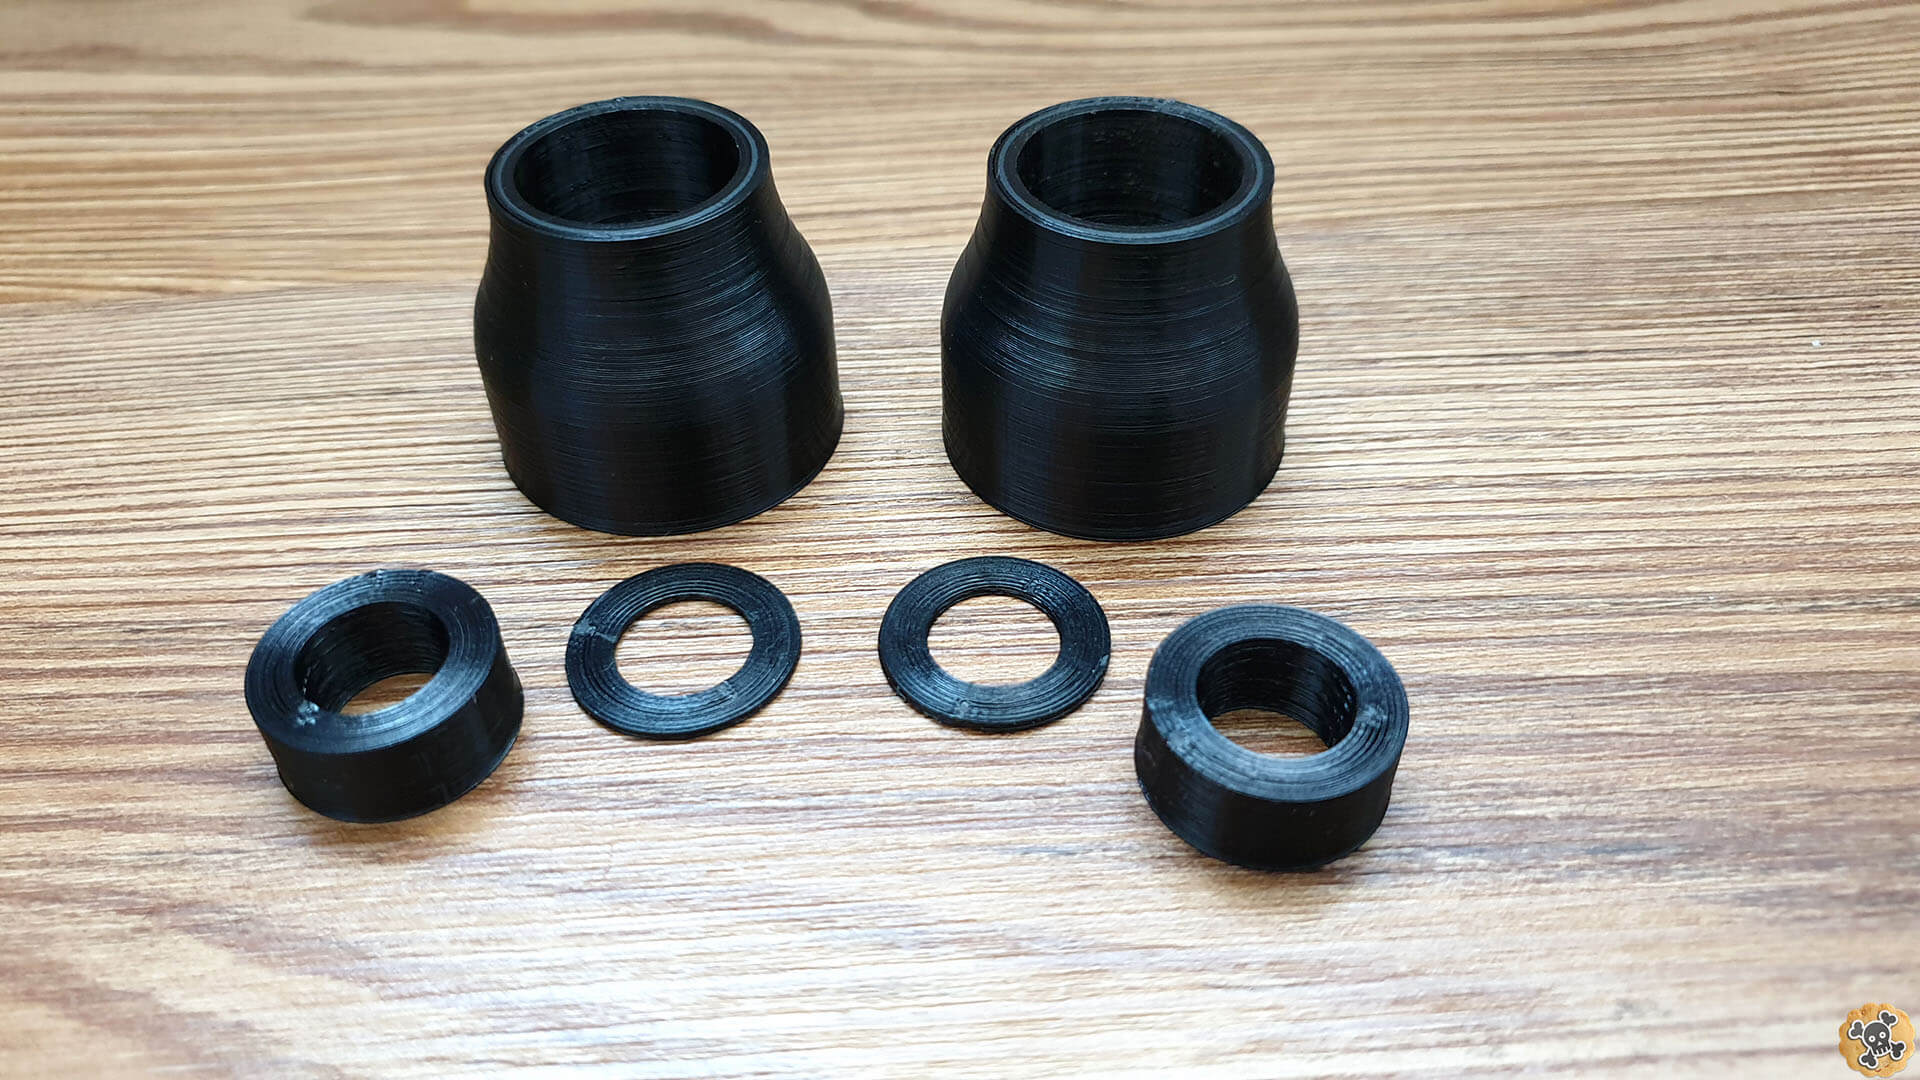
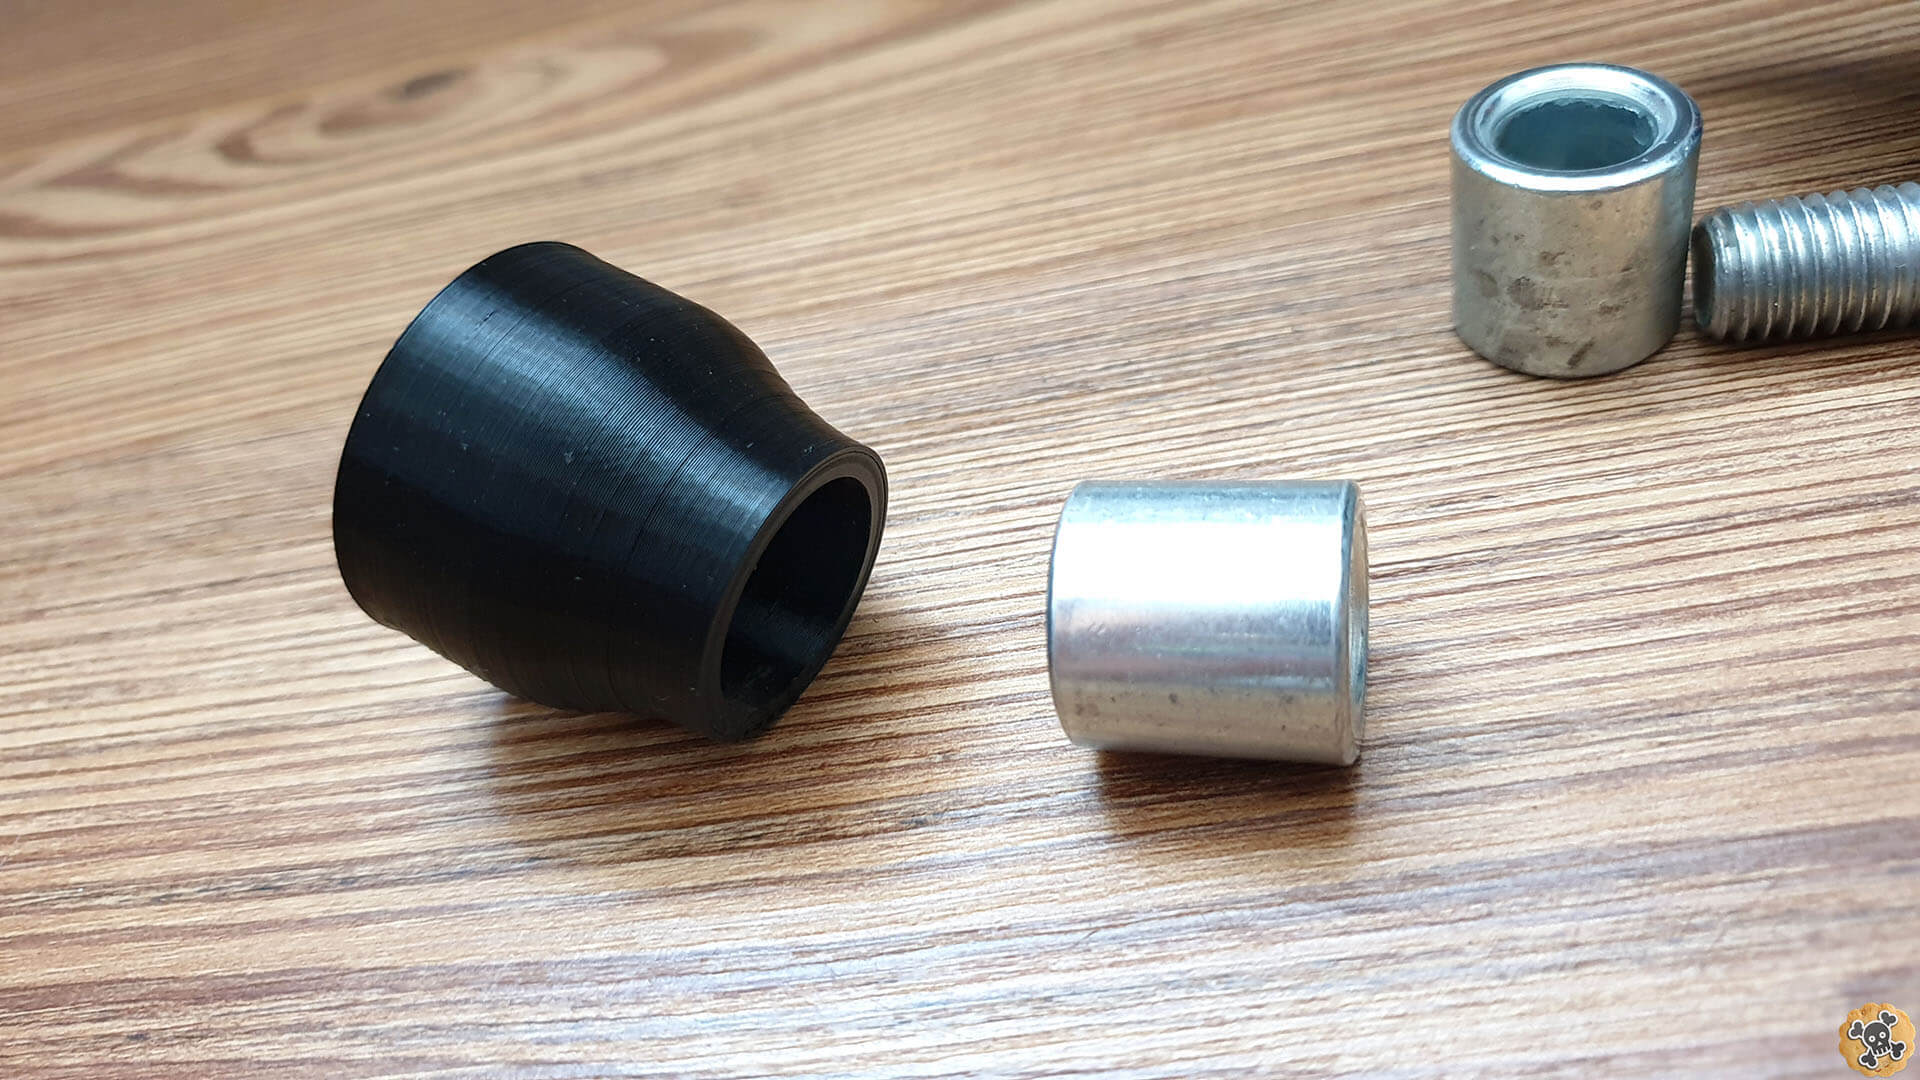
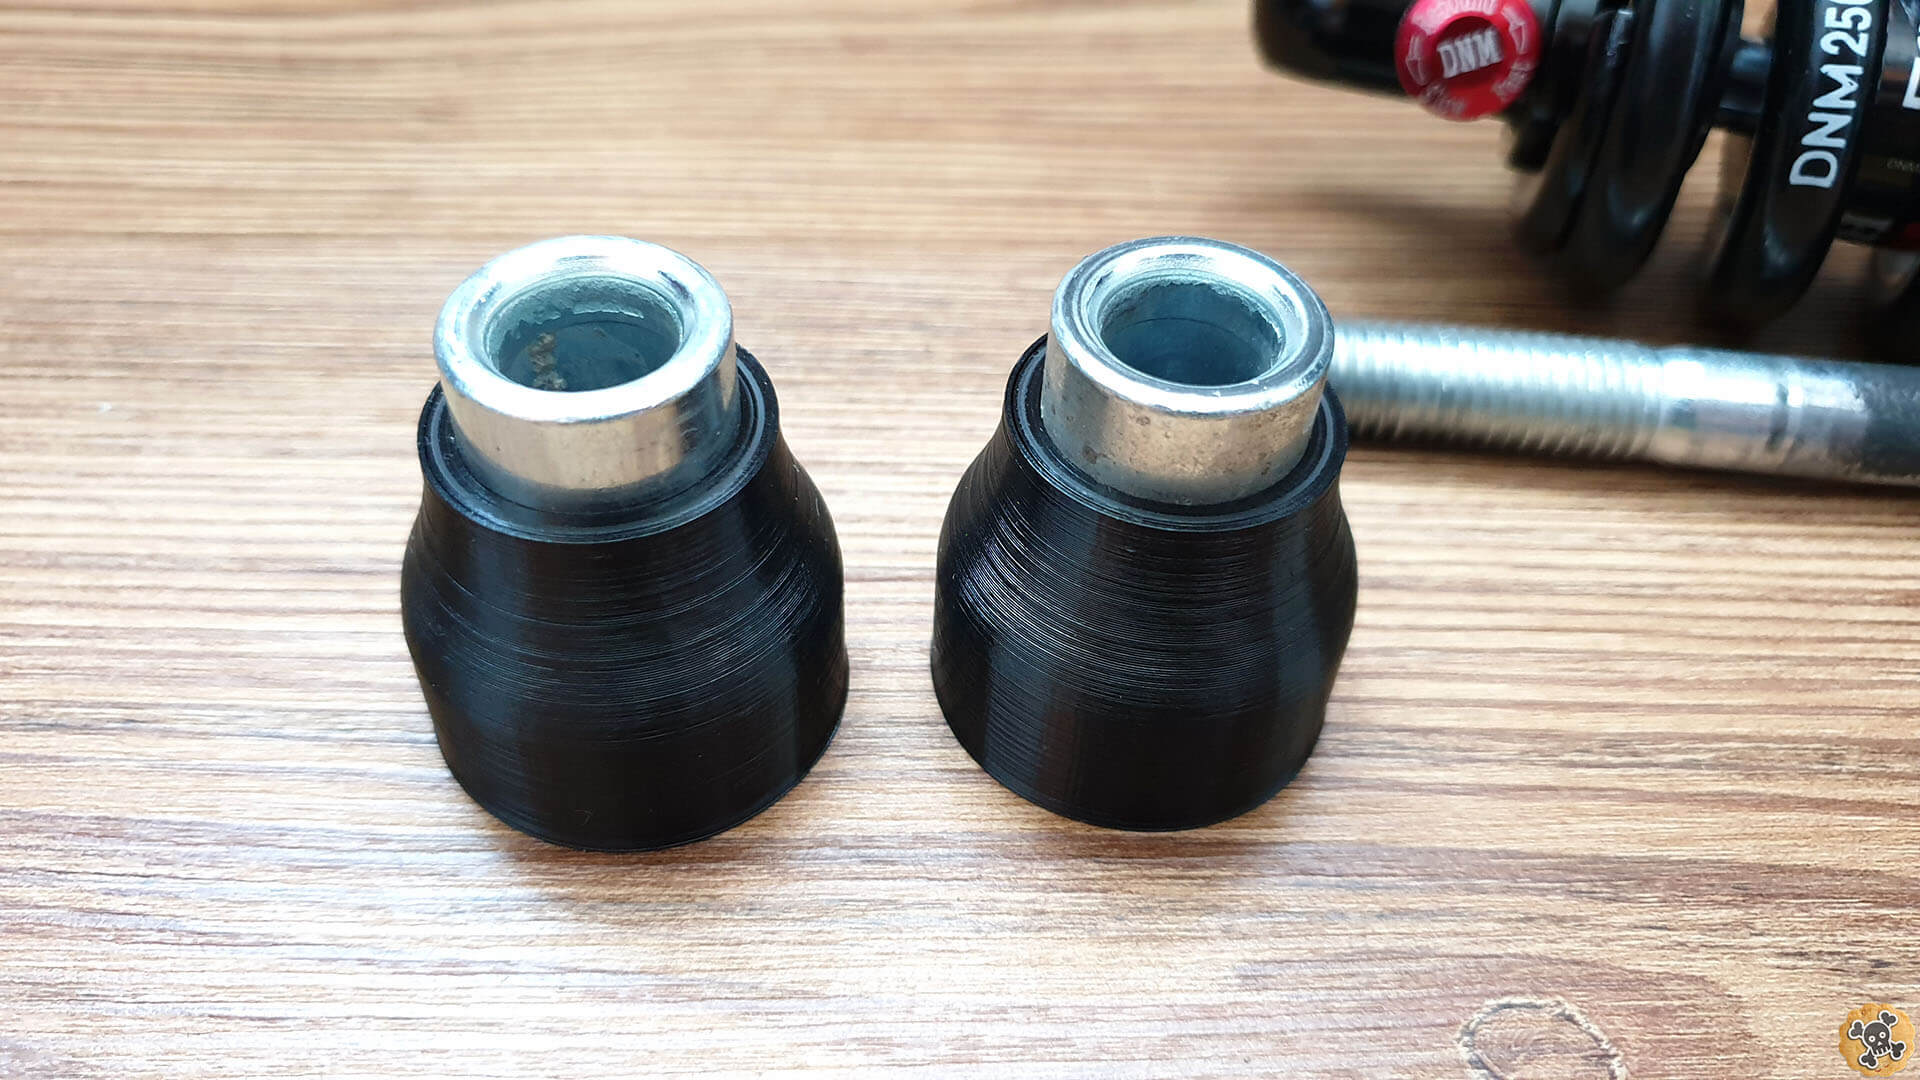
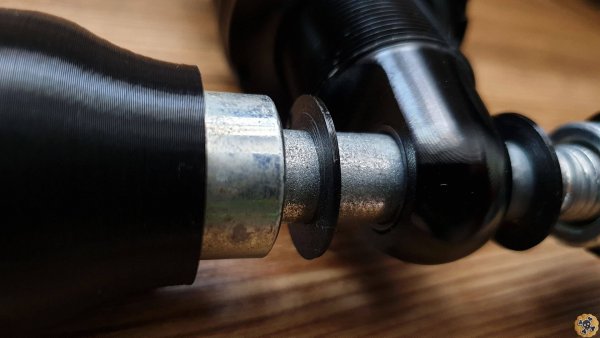
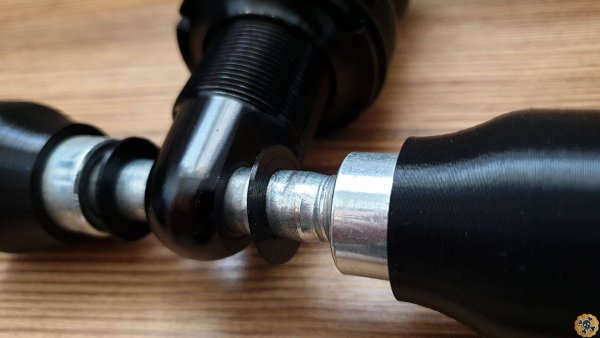
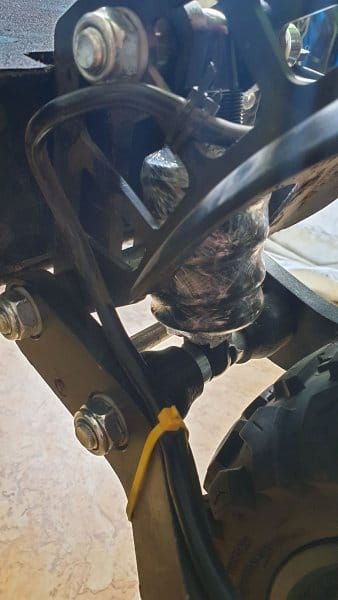
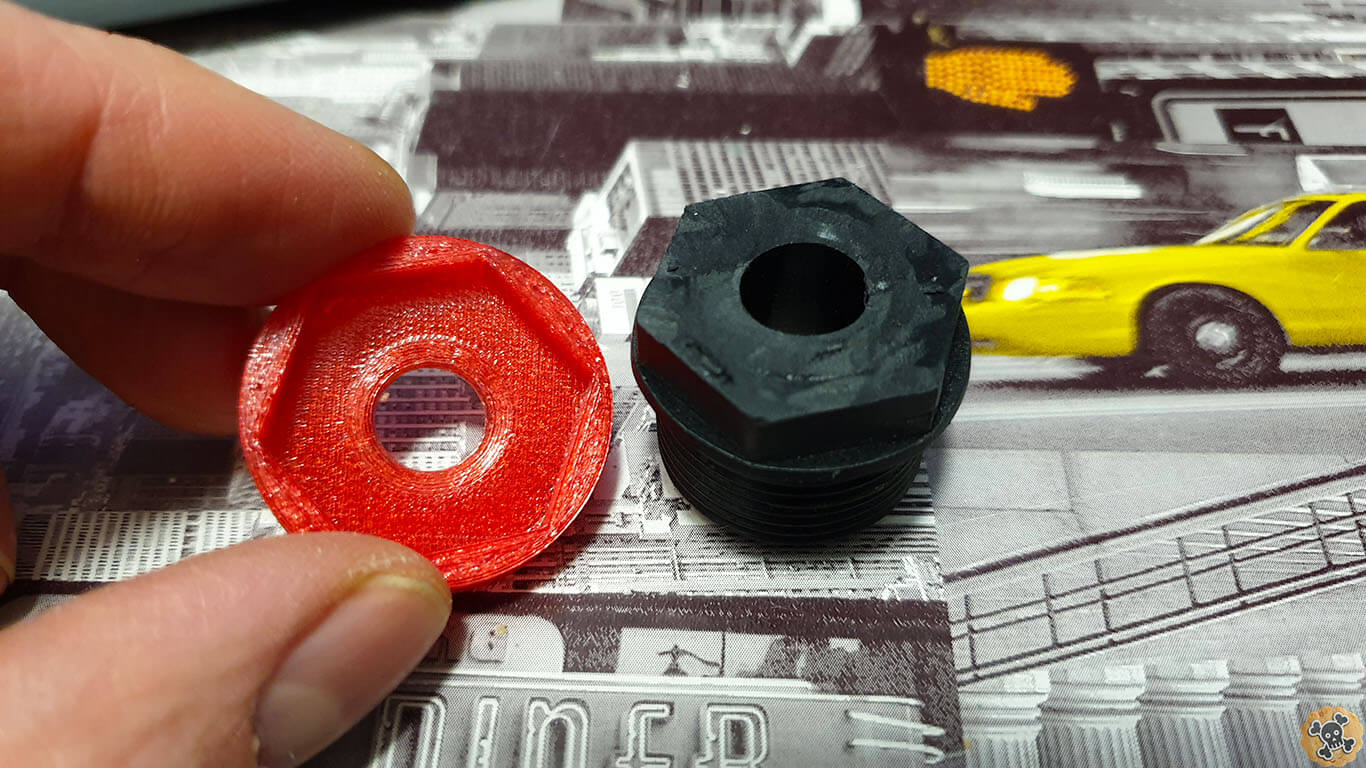
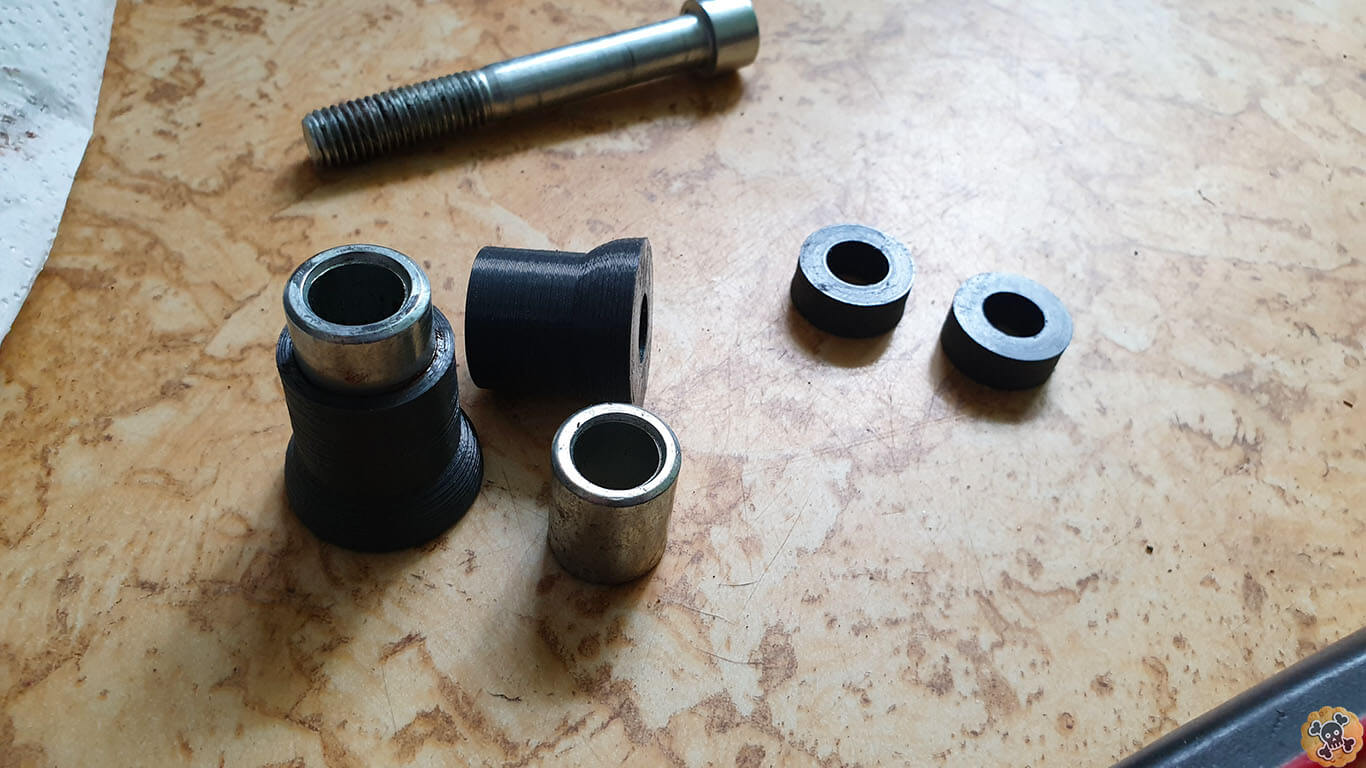
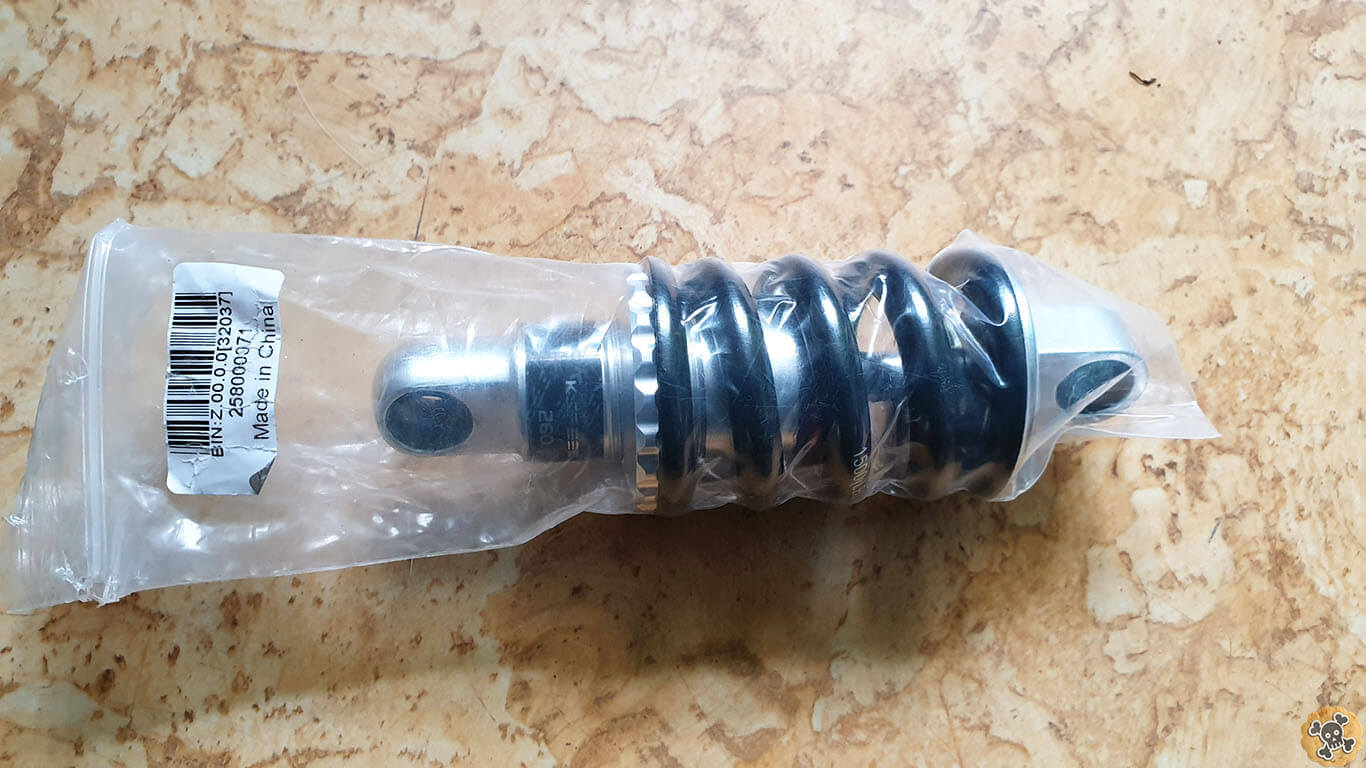
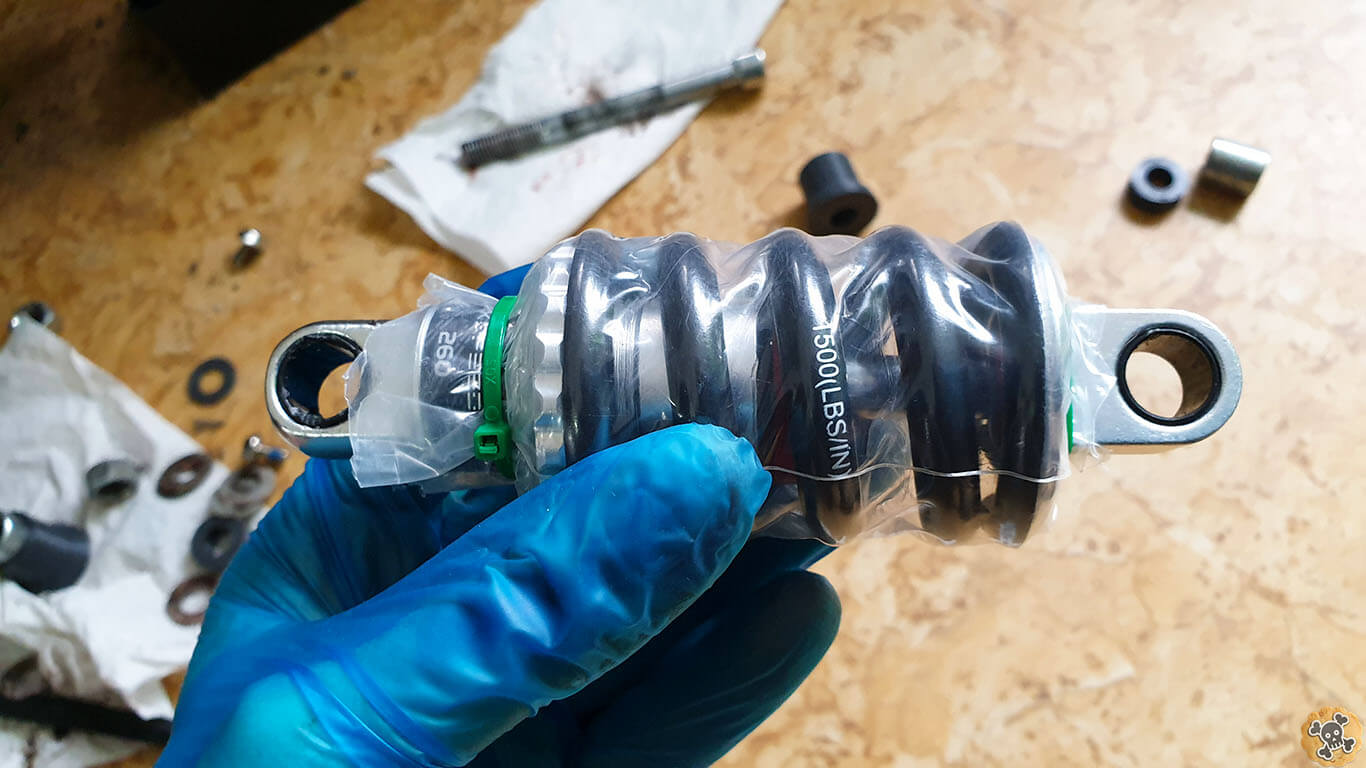
Thanks to this simple adapter you will be able to install Oil MTB shock on the back, scooter will be way more stabe and you will be able to go faster than before 🙂 . What you need is Oil Shock like 125mm 2500lbs and my adapter. Here you can choose between these 2
Free V1 4pcs versionV2 6pcs version where I added extra bushing to decrease friction and increase size to make it more durable.
It’s super easy to install.
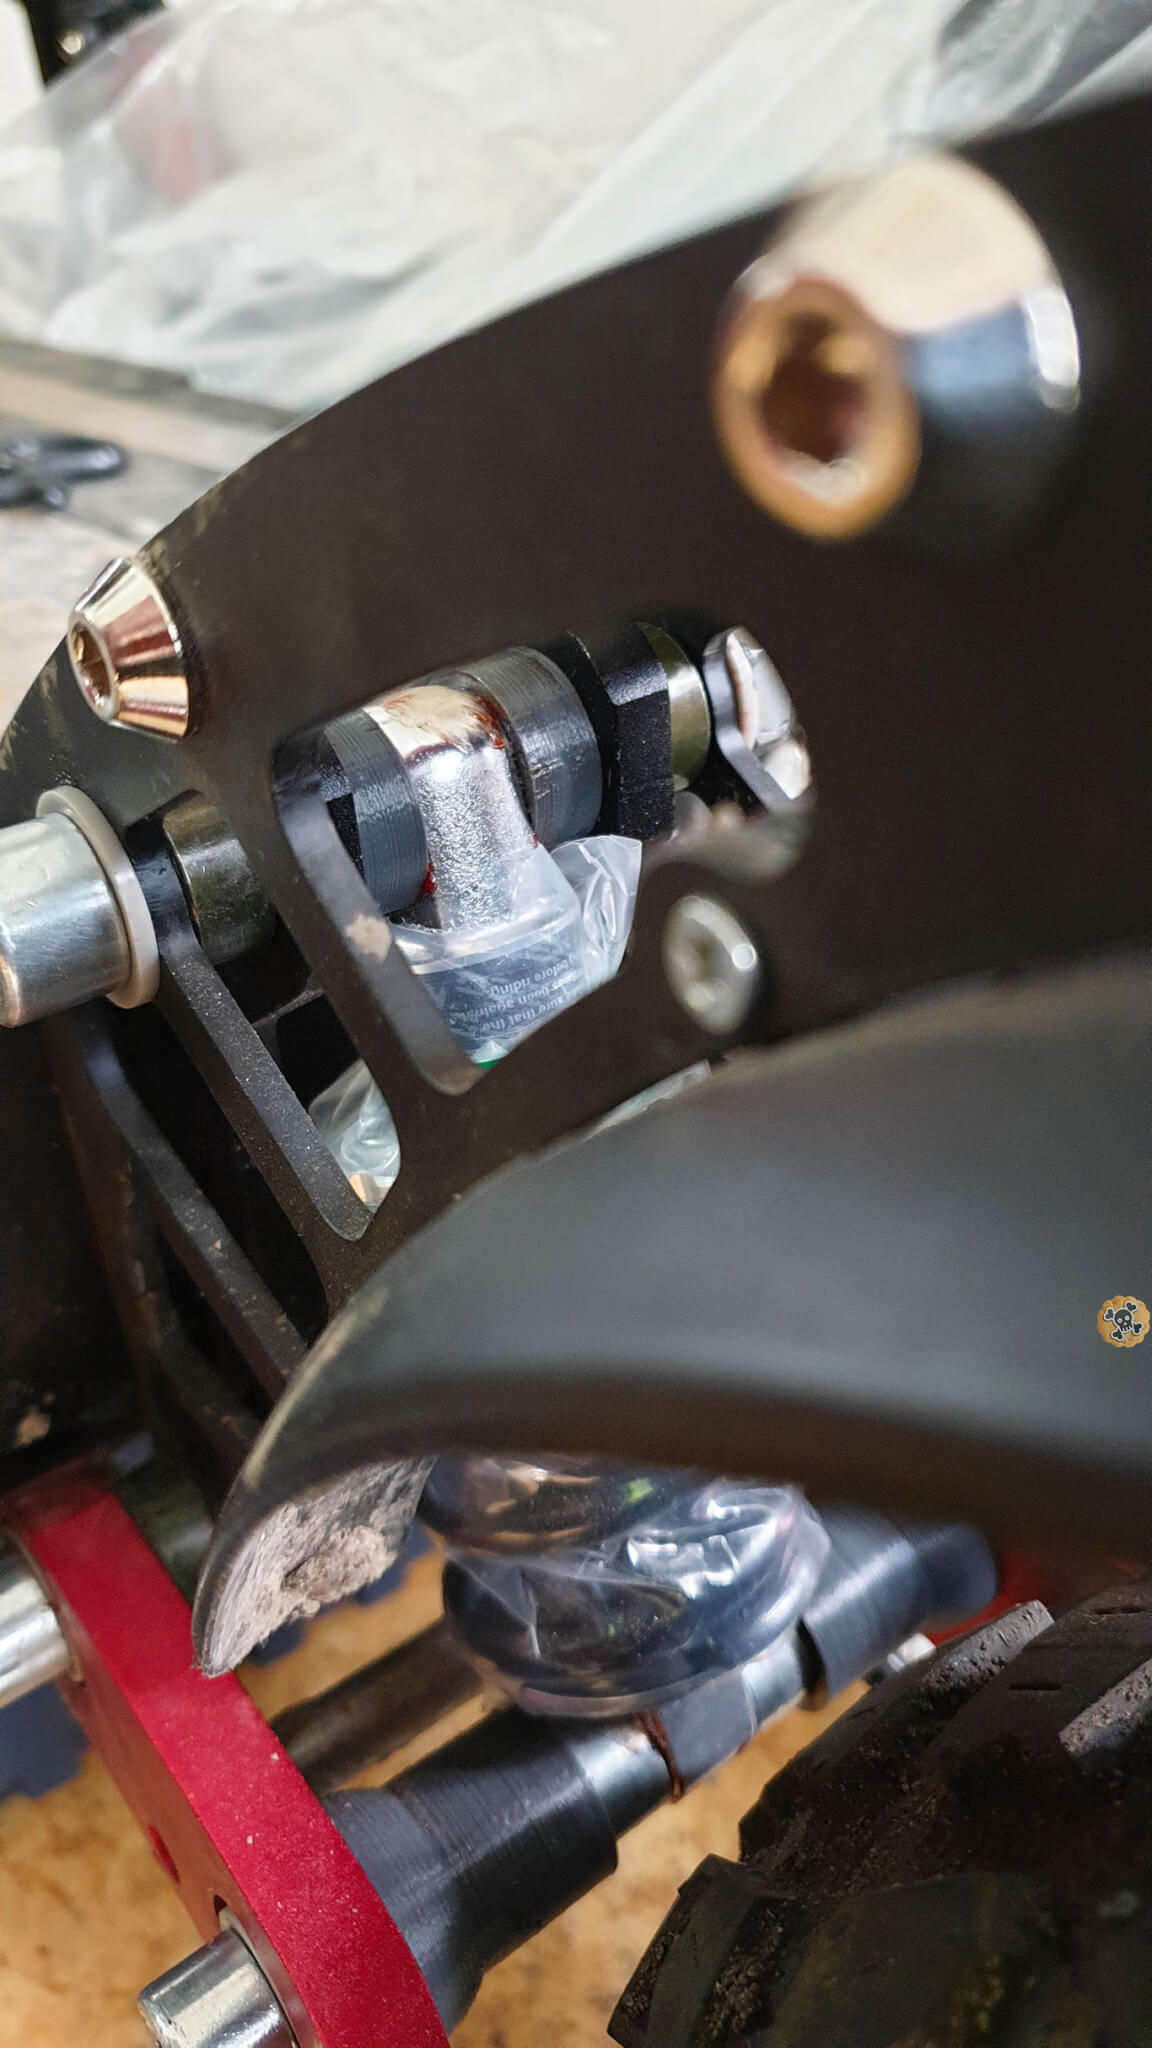
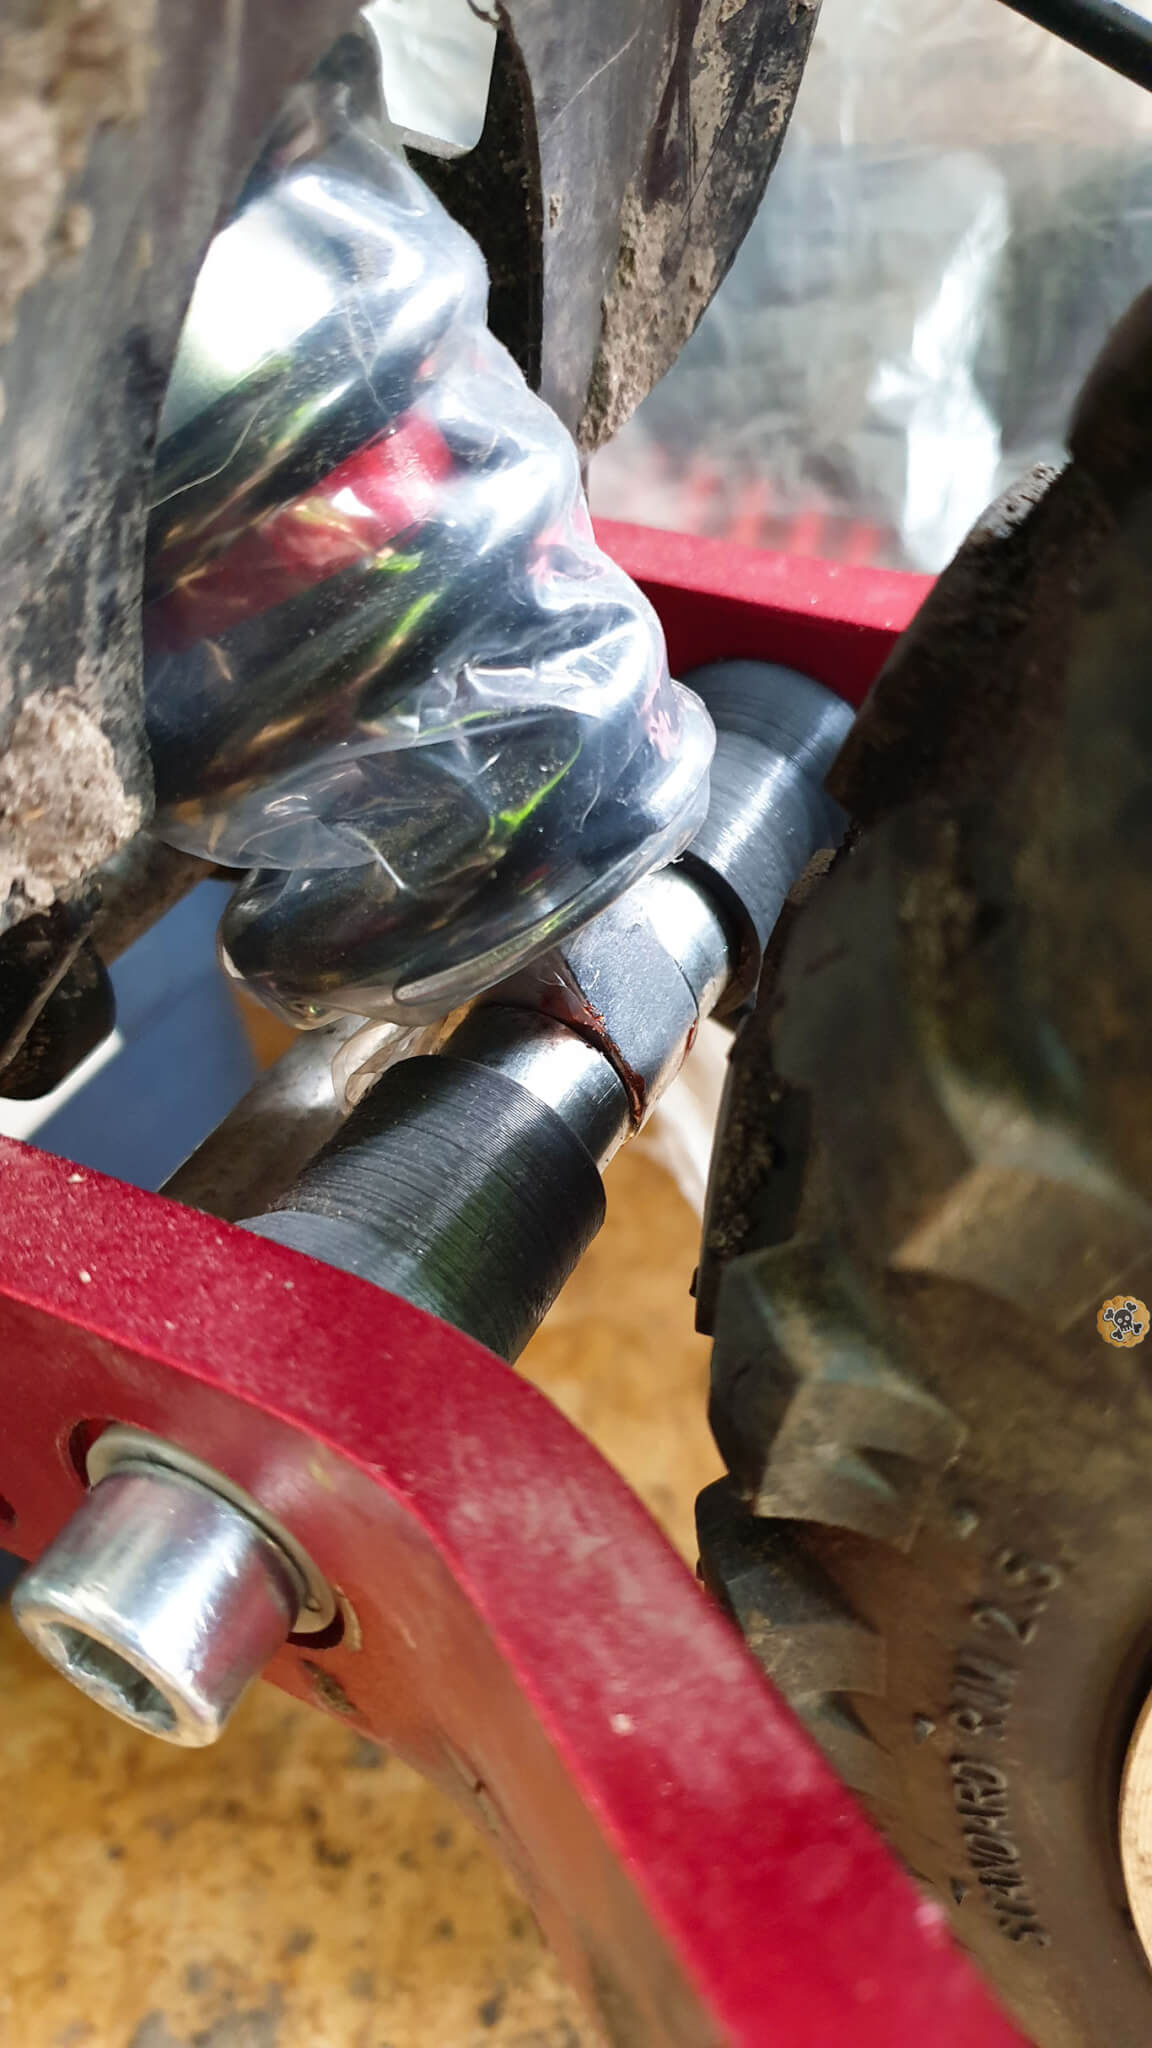
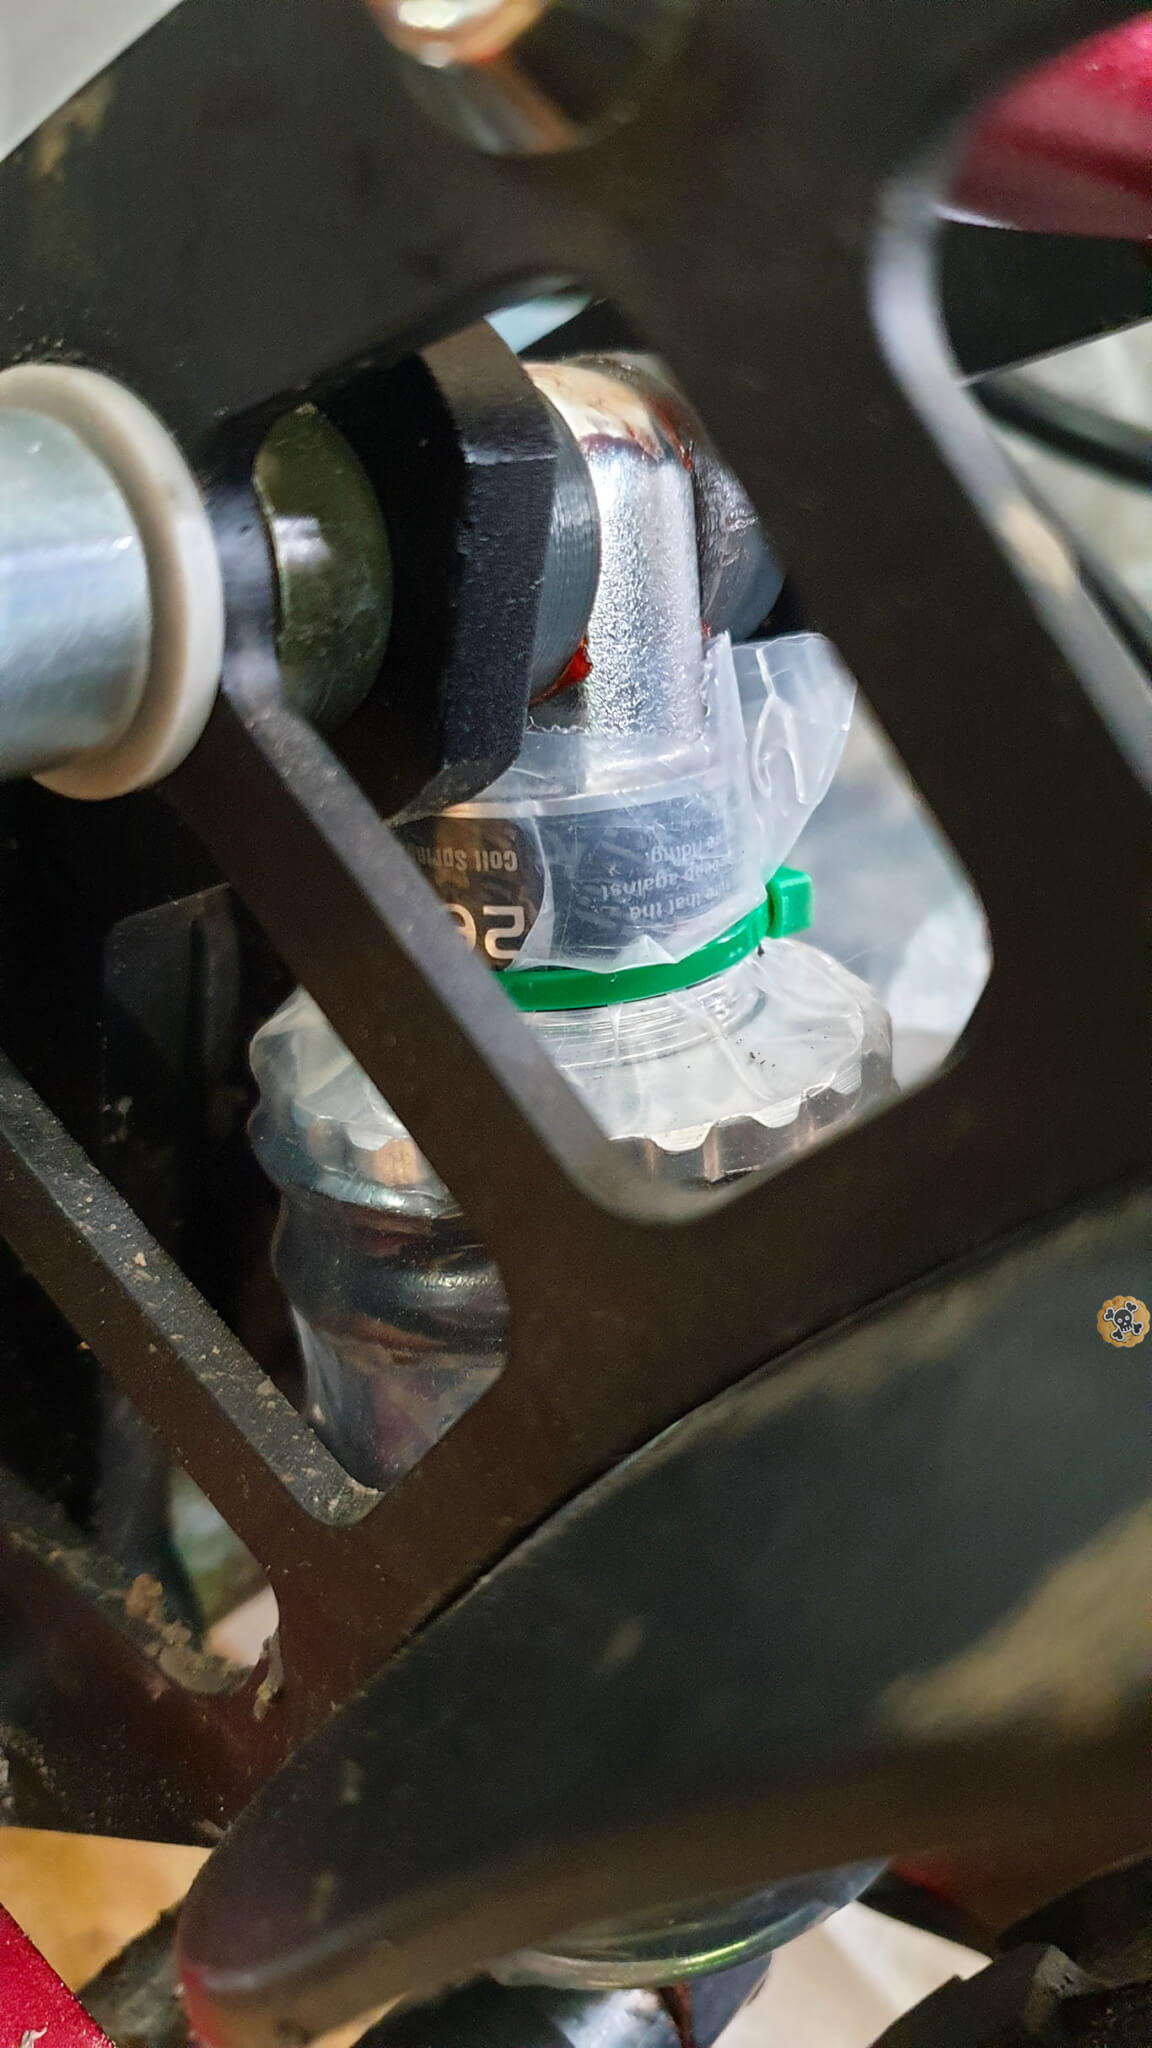
Just remove old rear shock. On silver bottom spacer place big adapter
If you have V2 then between fork and silver washer add tiny washers and Do NOT FORGET to use grease on all moving parts including bolts.
on the top ( other side of the fork ) use 2 medium spacers
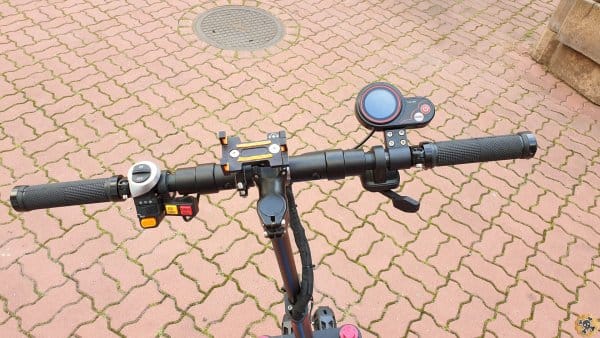
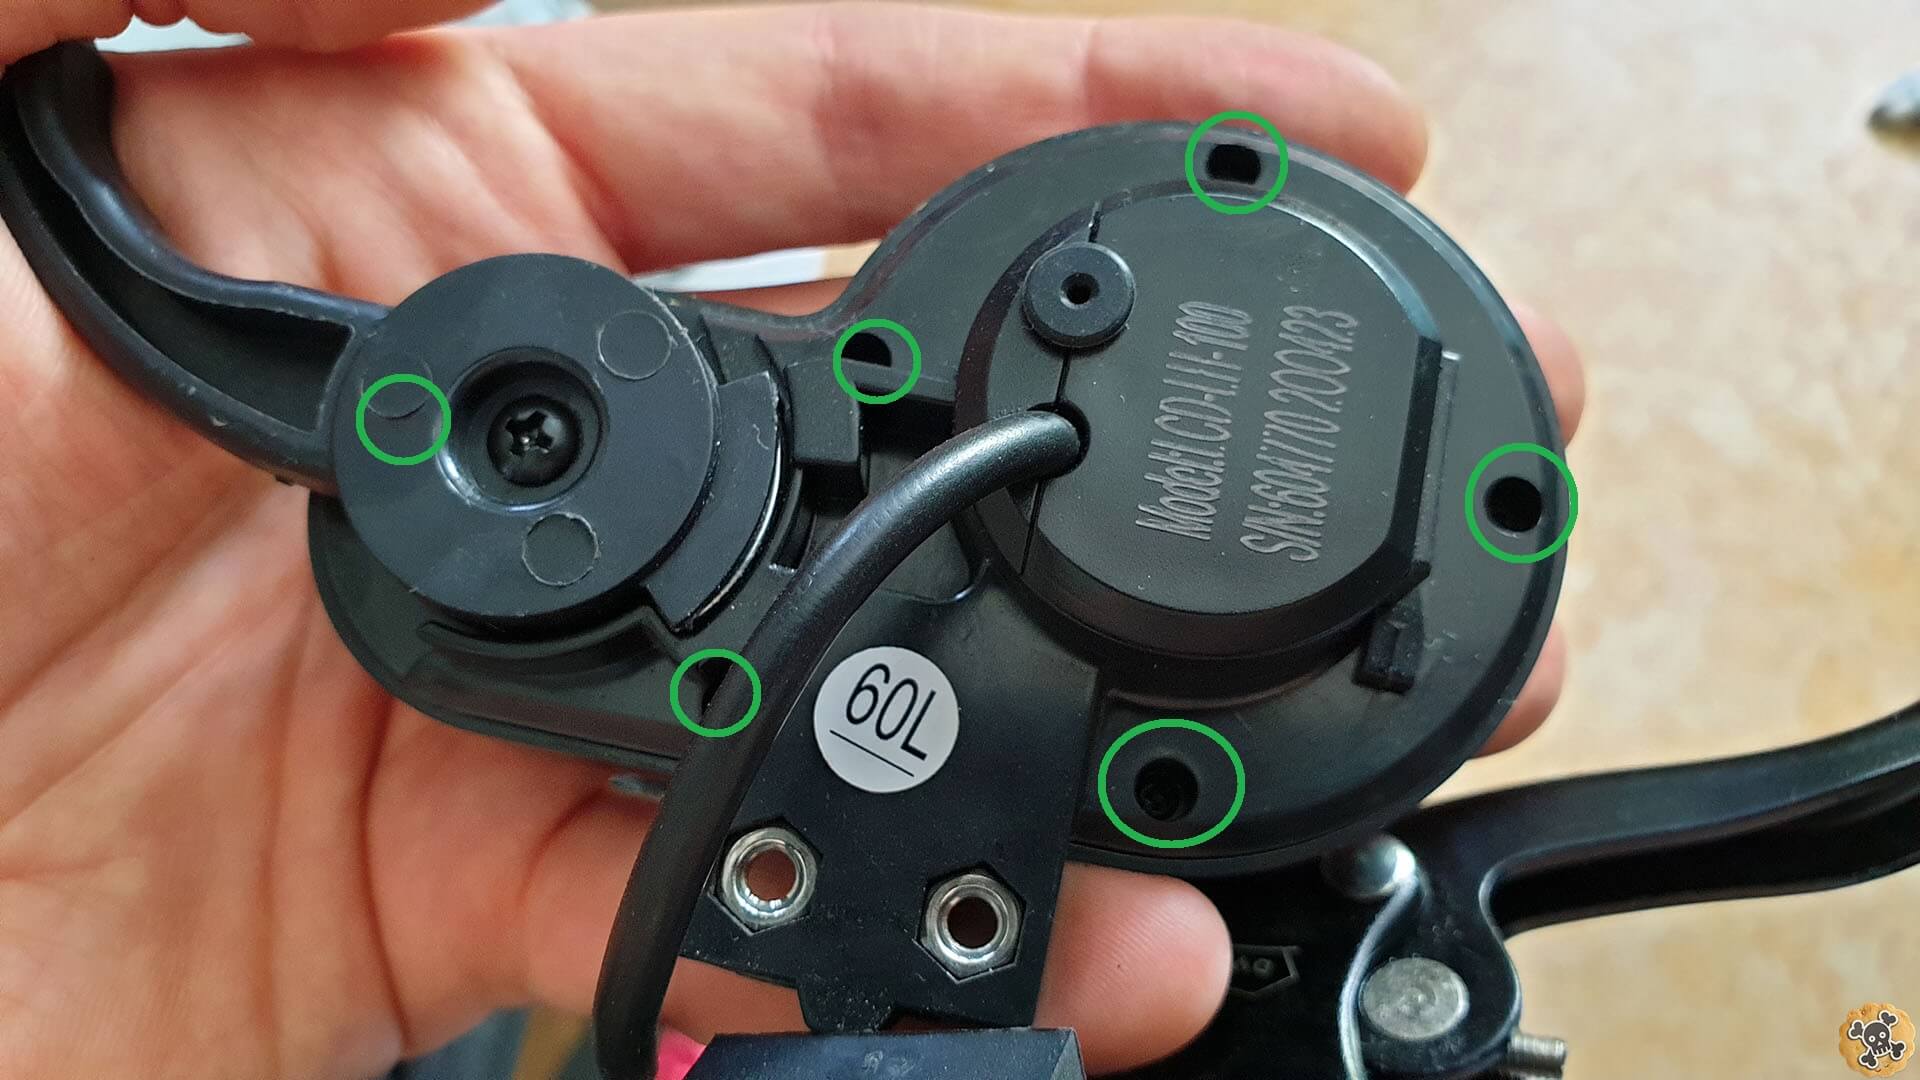
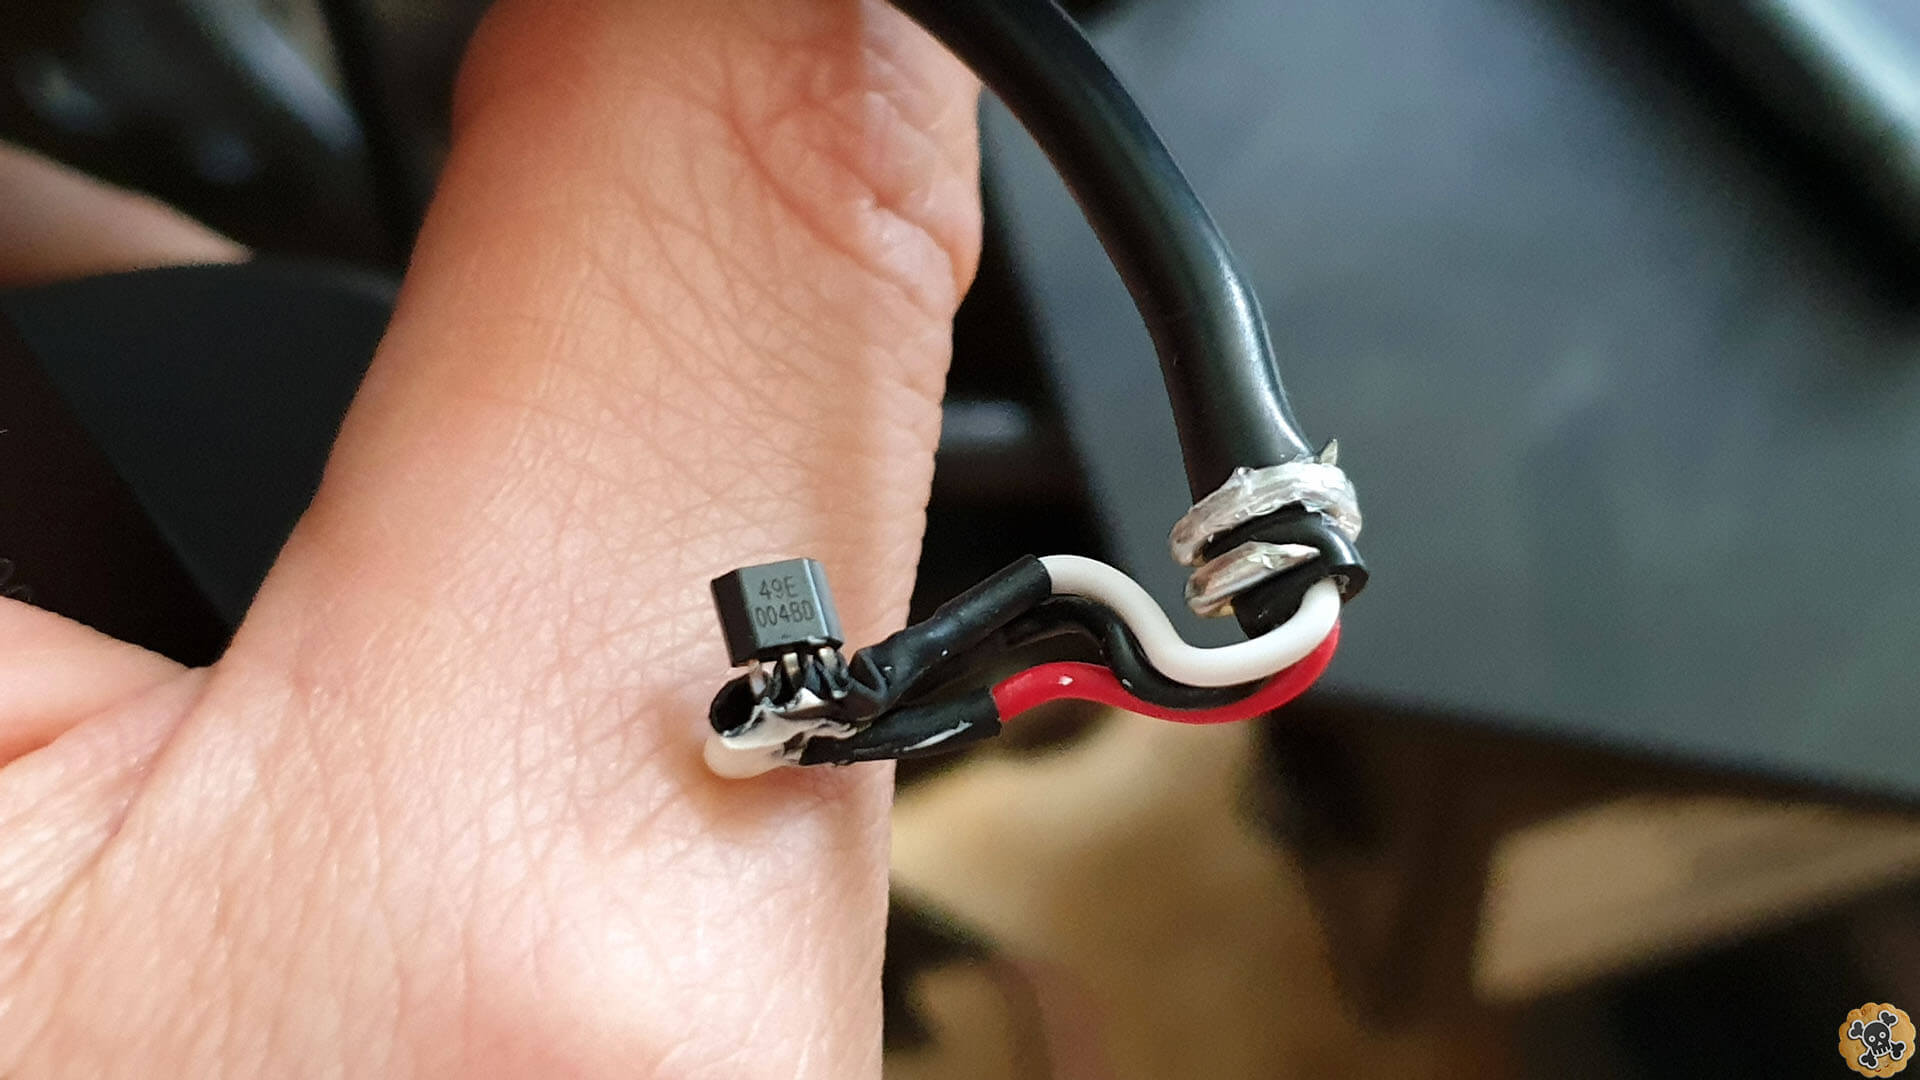
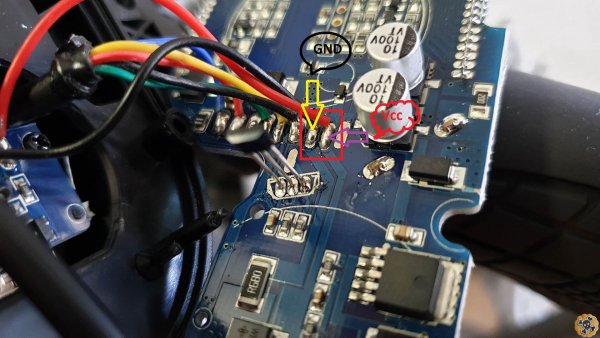
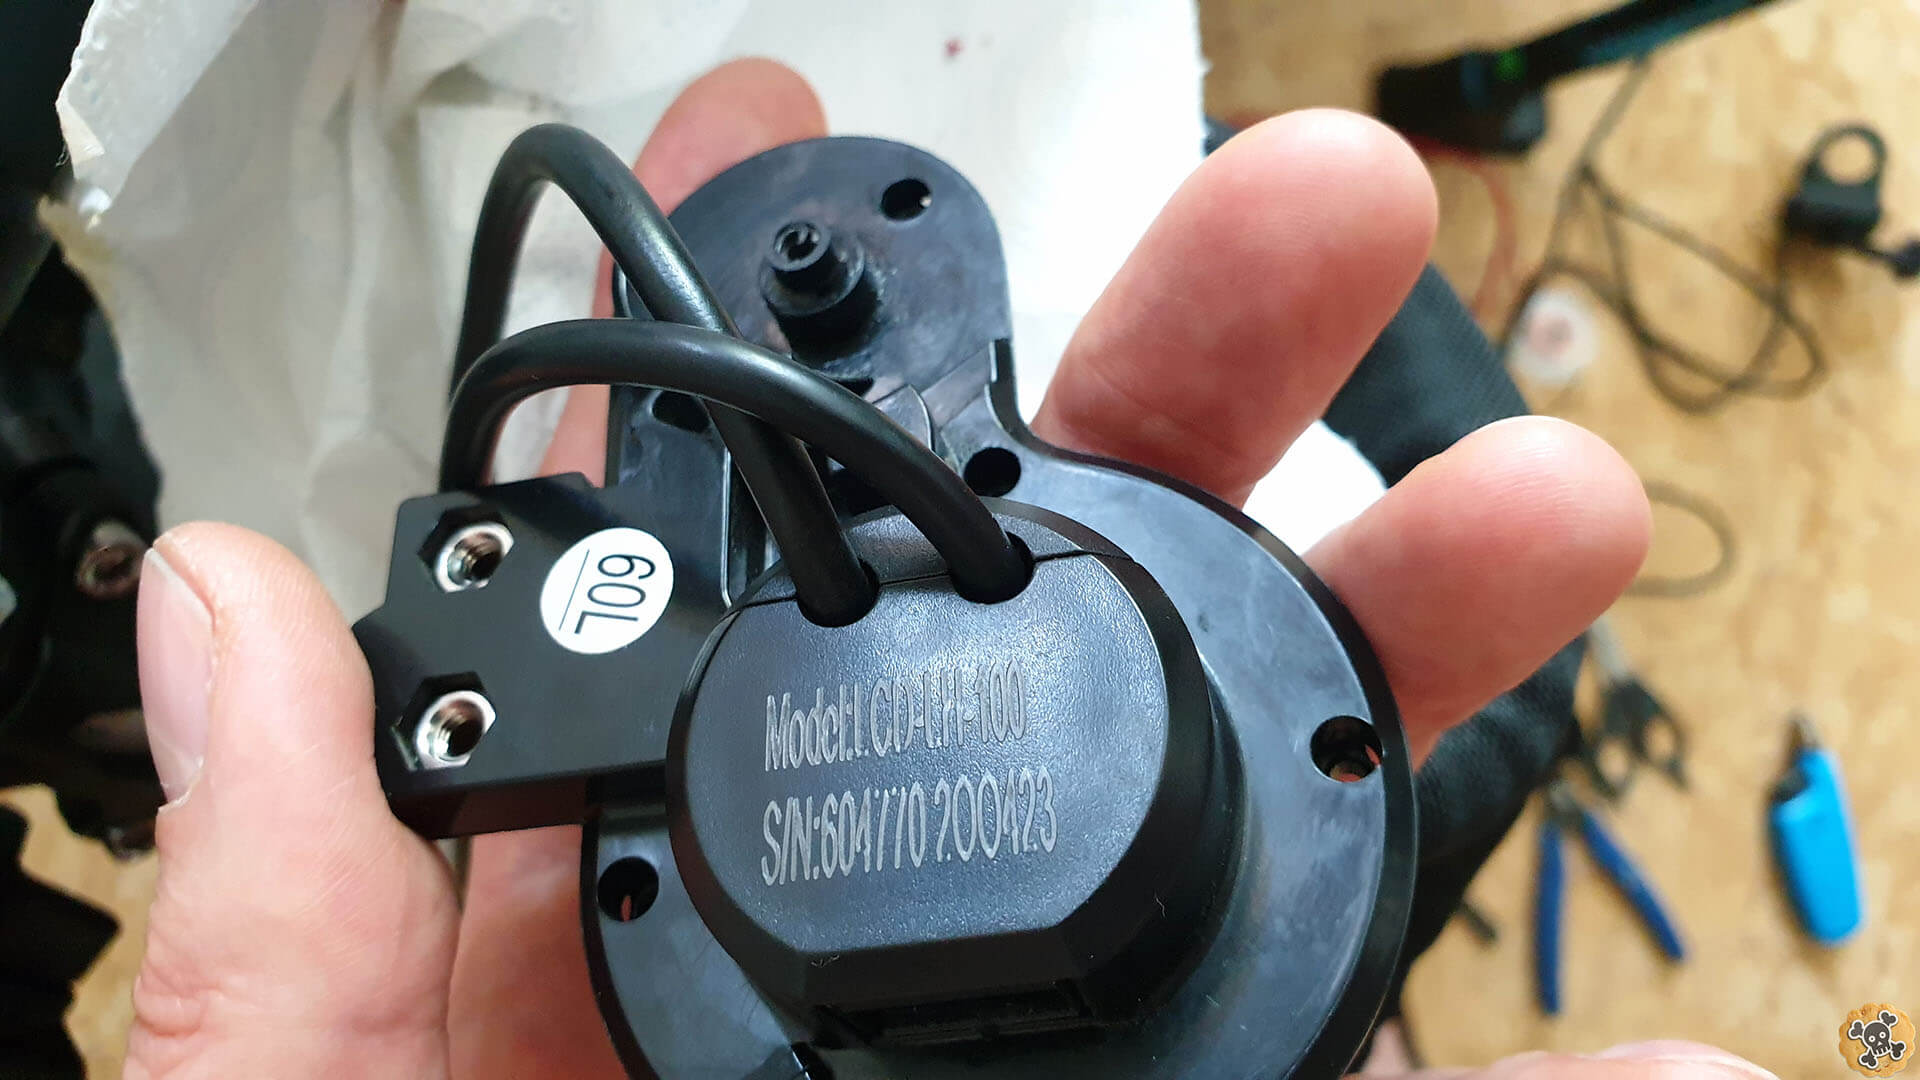
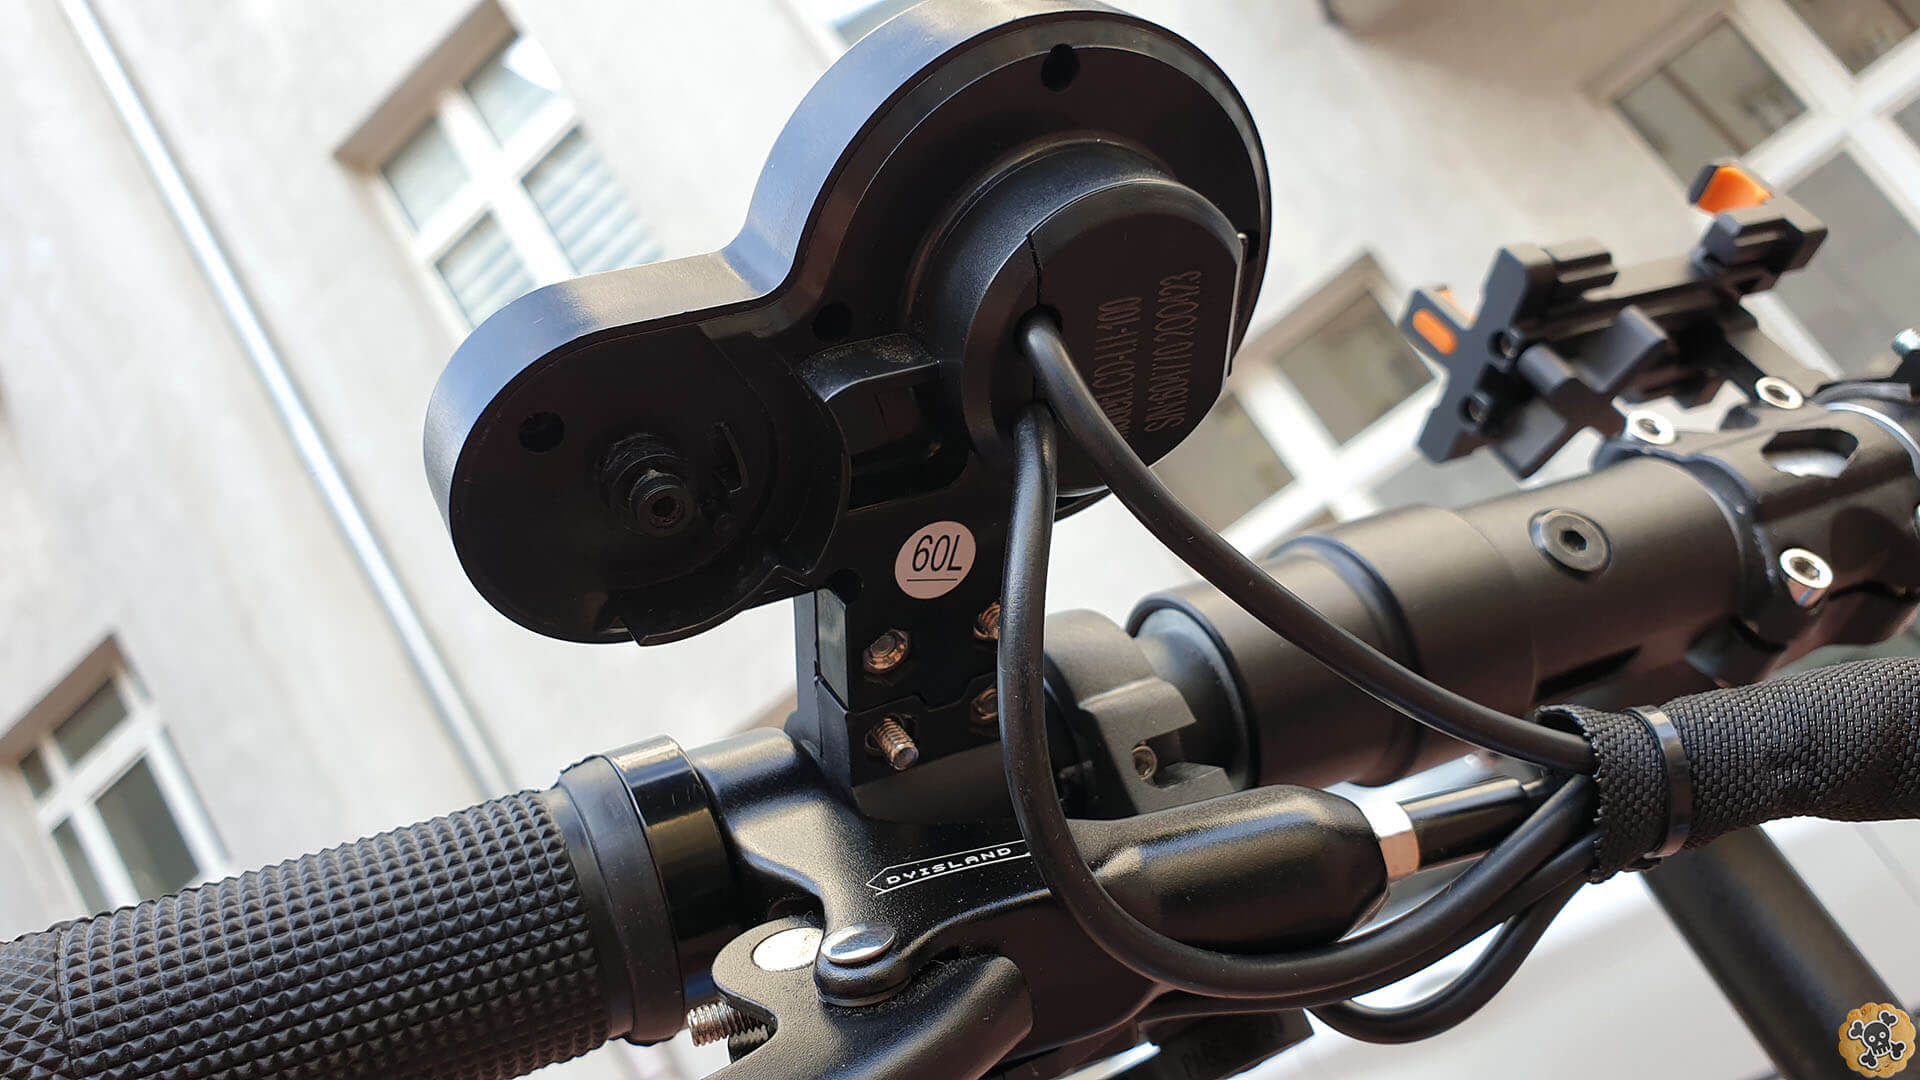
Today I will show you how to install thumb throttle for Chinese Escoot like Janobike Langefeite or Byoueda, also it will work with Ebikes. I decided to use Throttle gimbal called 108X because it’s Cheap ( 5-10$) , great quality and more or less easy to install ( some soldering skills are really needed ) also worth to mention is that thumb throttle is much safer to use ( for escoots ) compare to point finger or twist throttle.
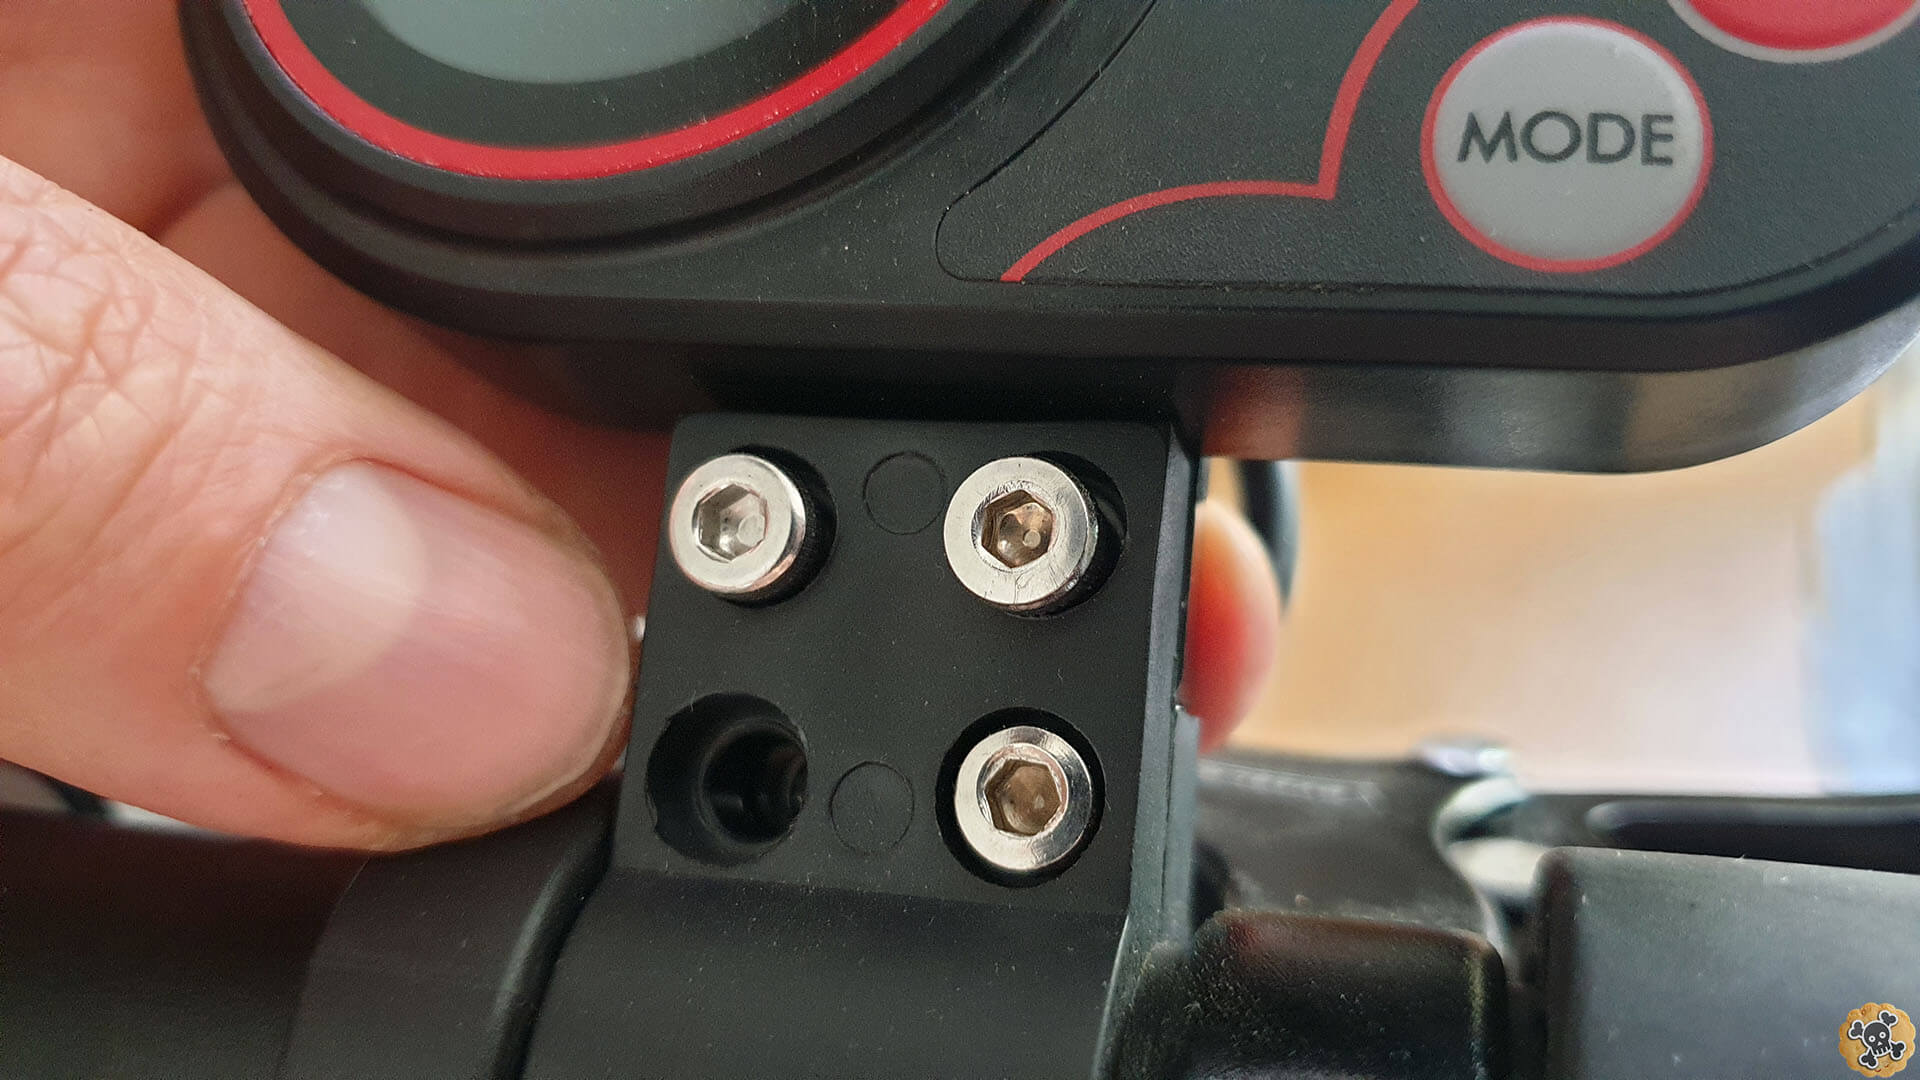
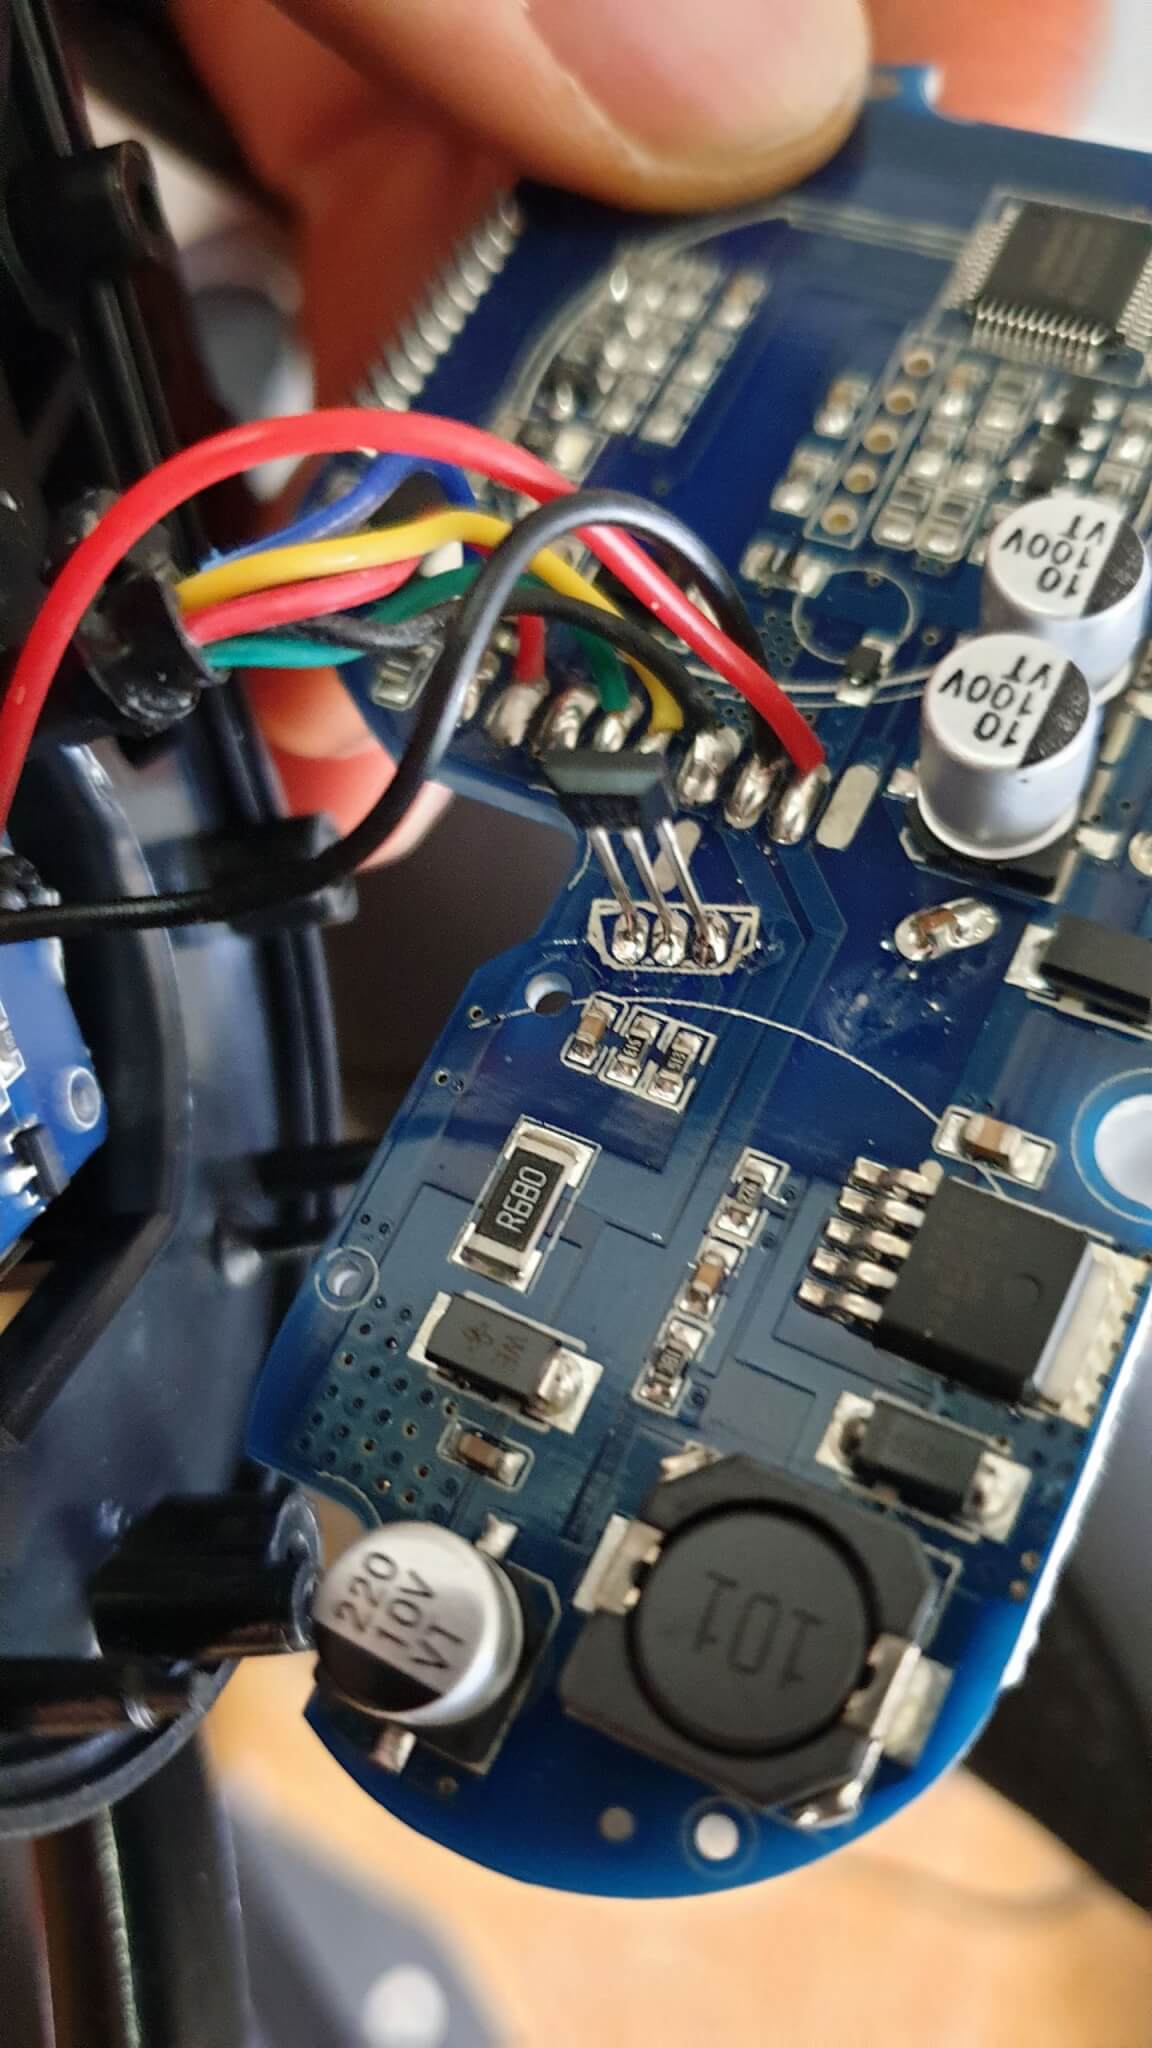
So let me show you how to install thumb throttle on my Boyueda Escoot, at first you have to open the mini computer with lcd screen. There are 6 screws around it and one is hidden under throttle knob.
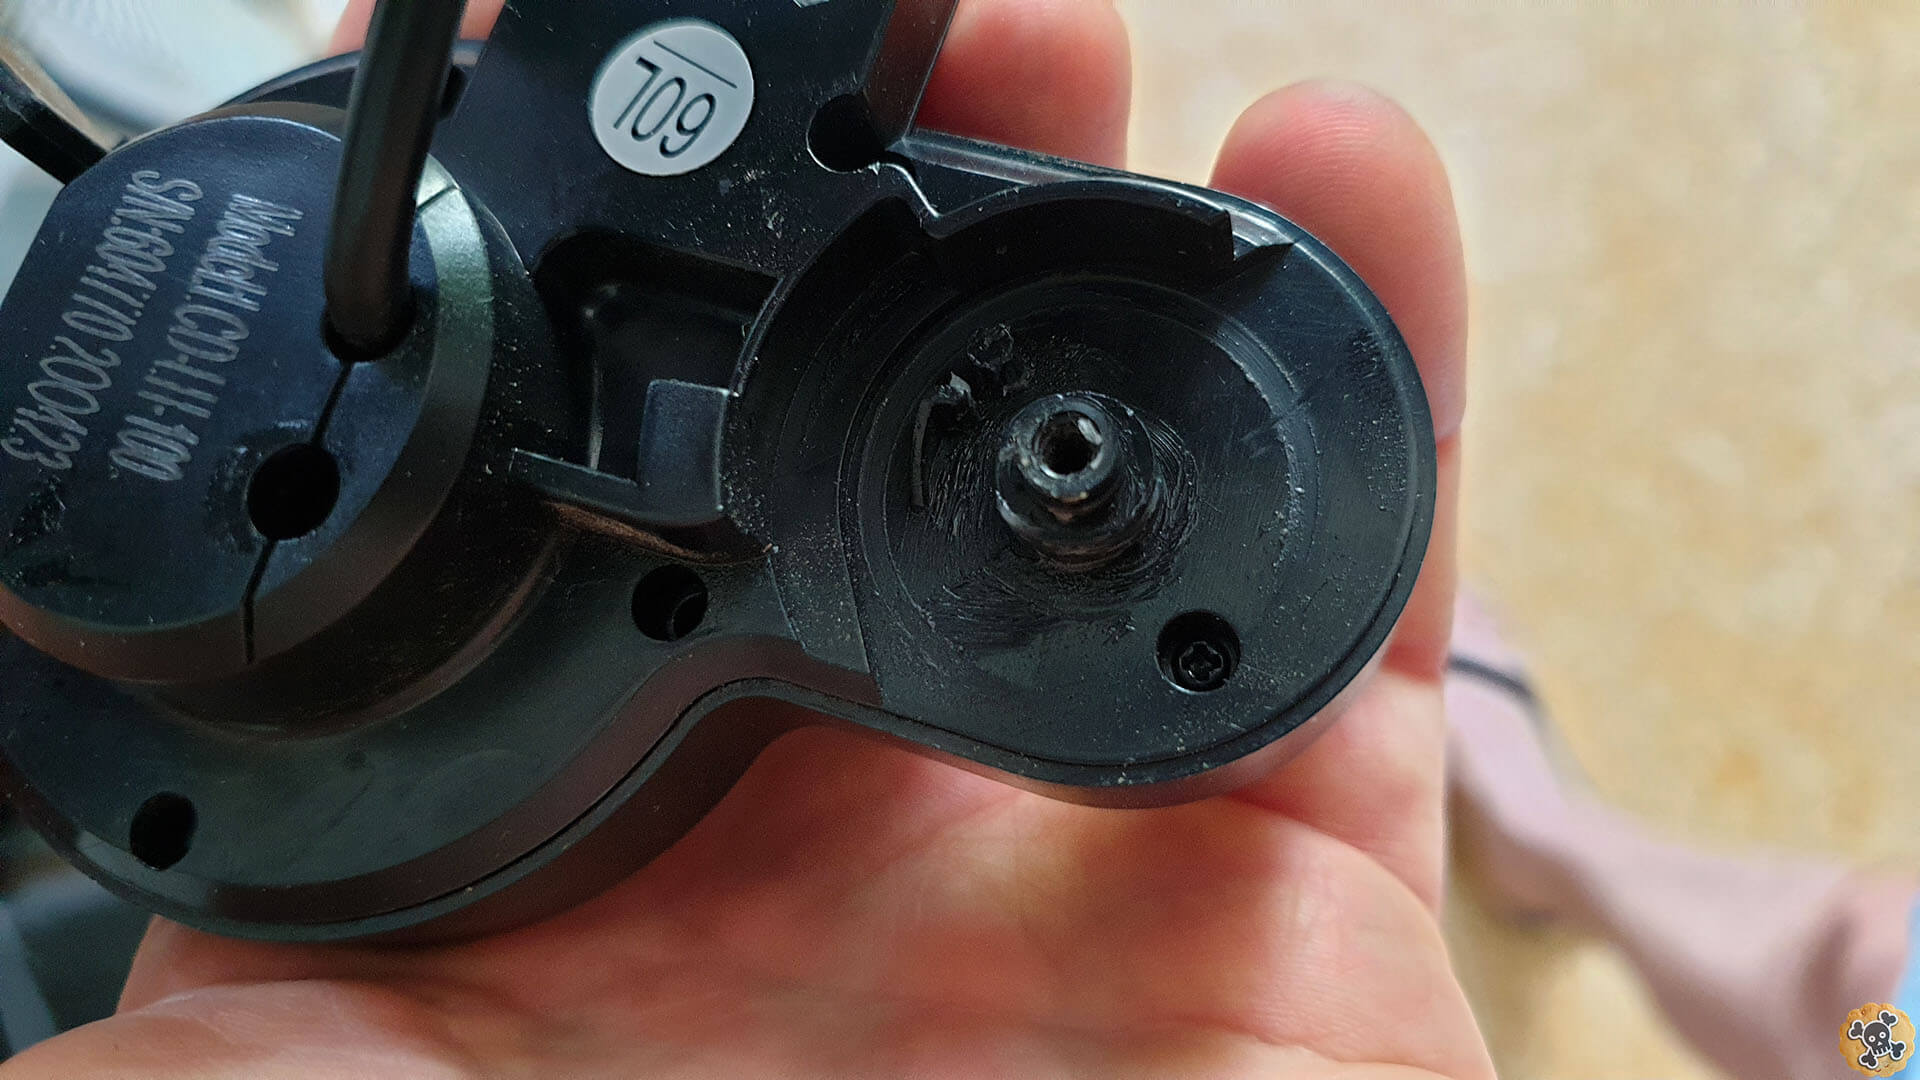
Then inside we got 2 extra screws which holds PDB to the shell.
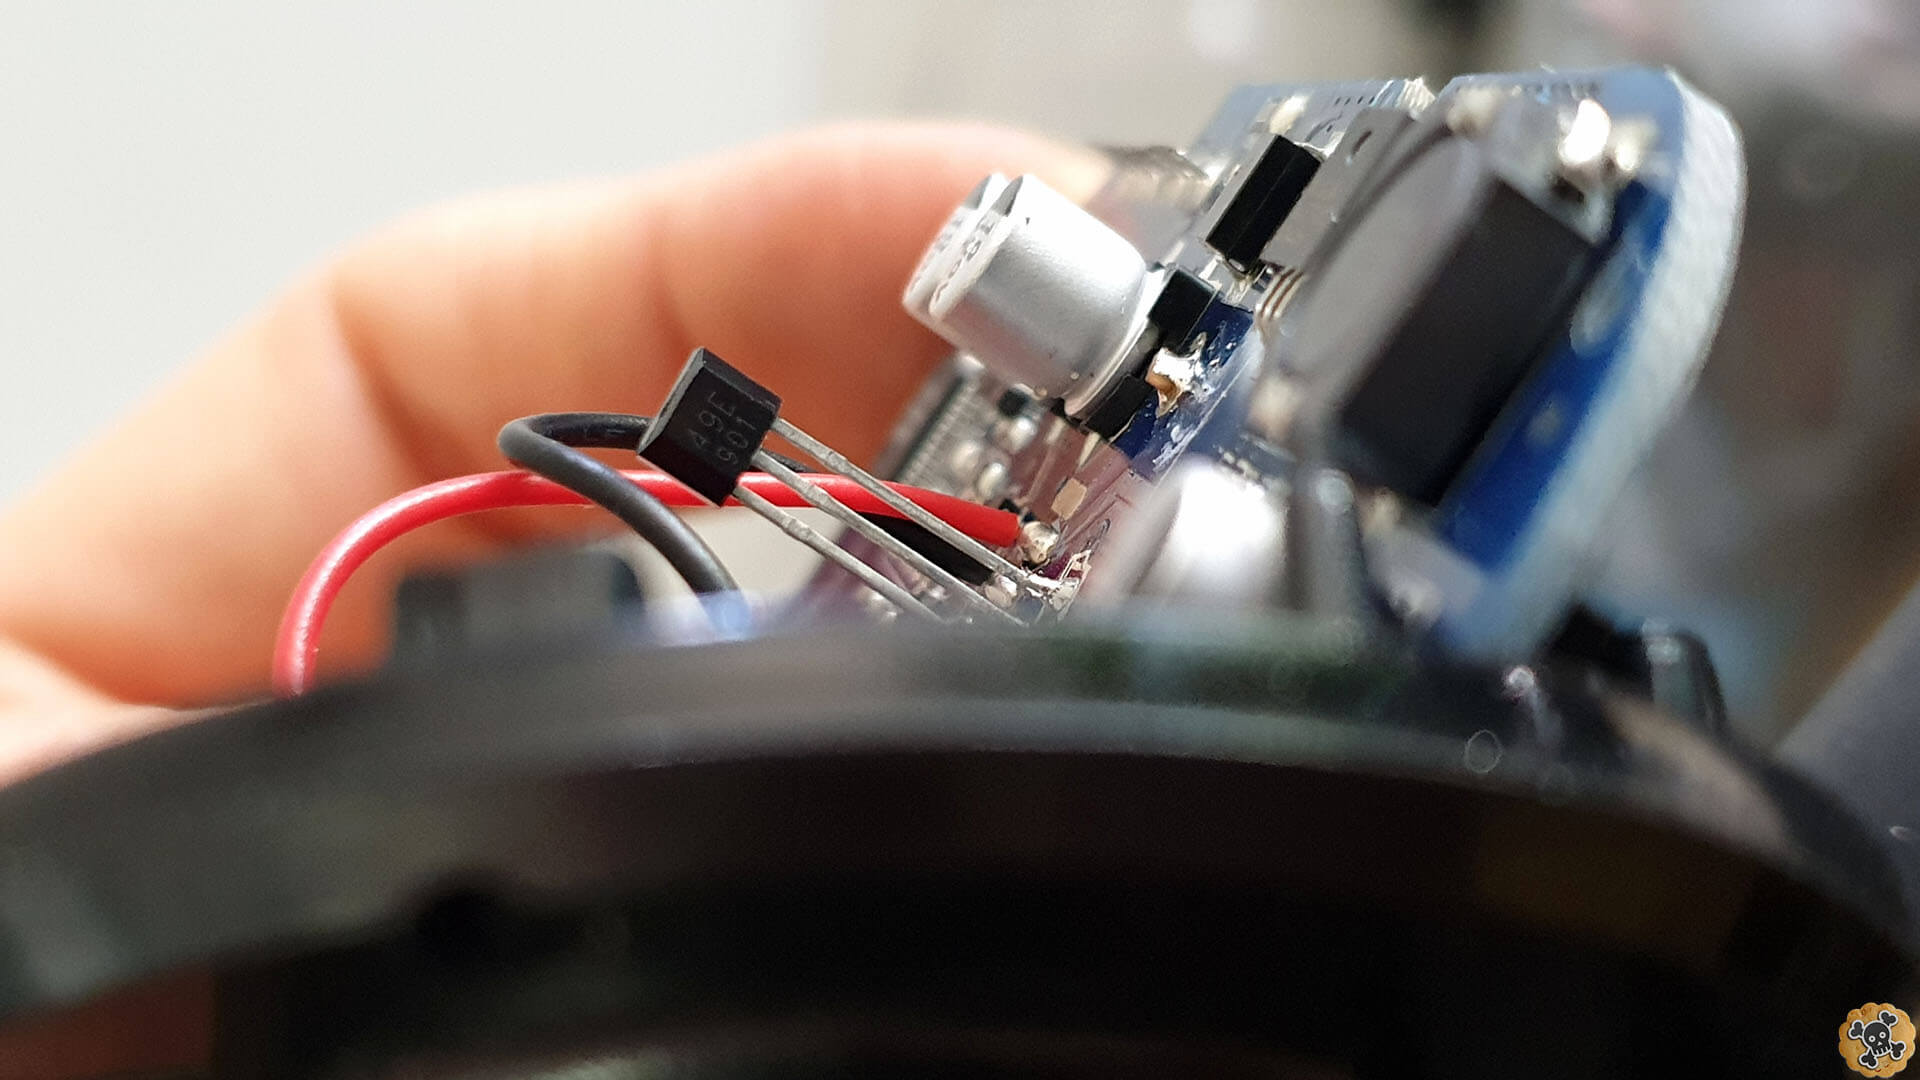
On PDB you can see hell sensor, looks like transistor with 3 legs , also hall sensor built in to 108X is exactly the same 🙂 .
108X Hall
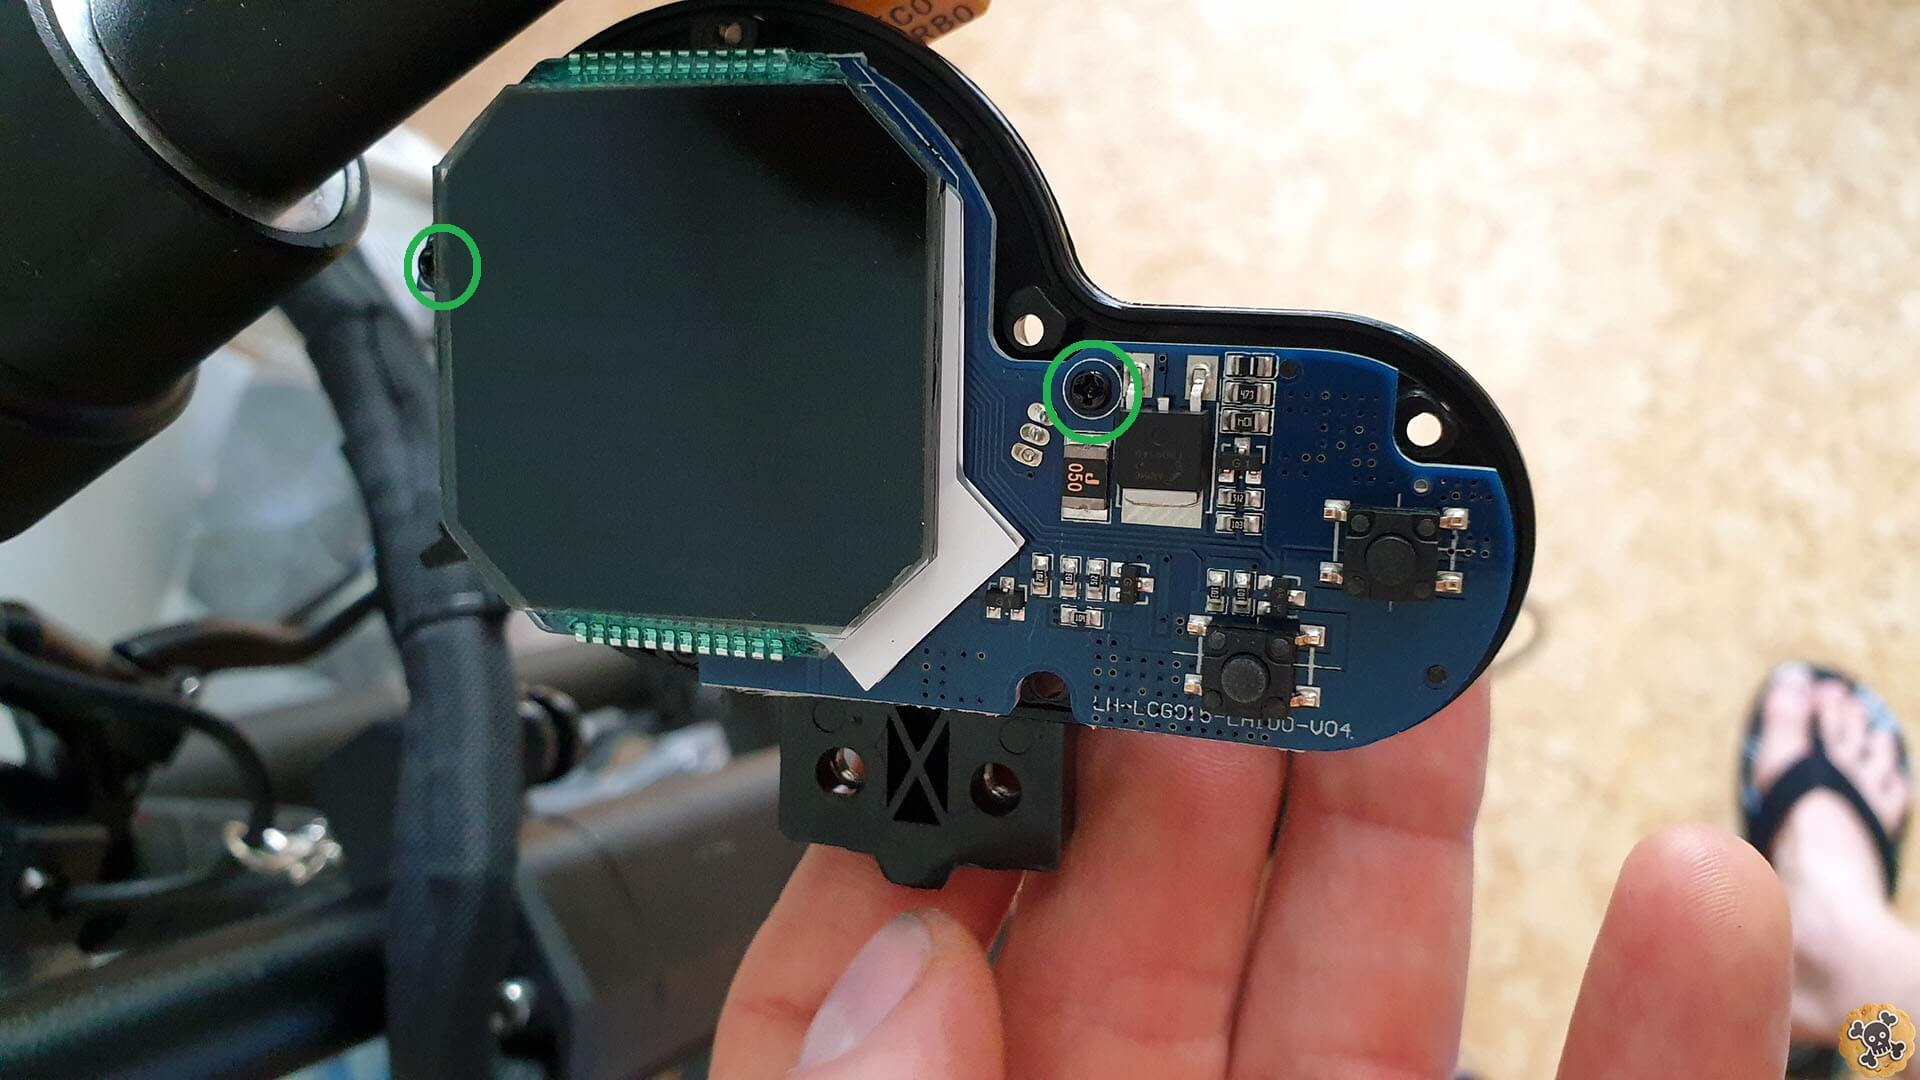
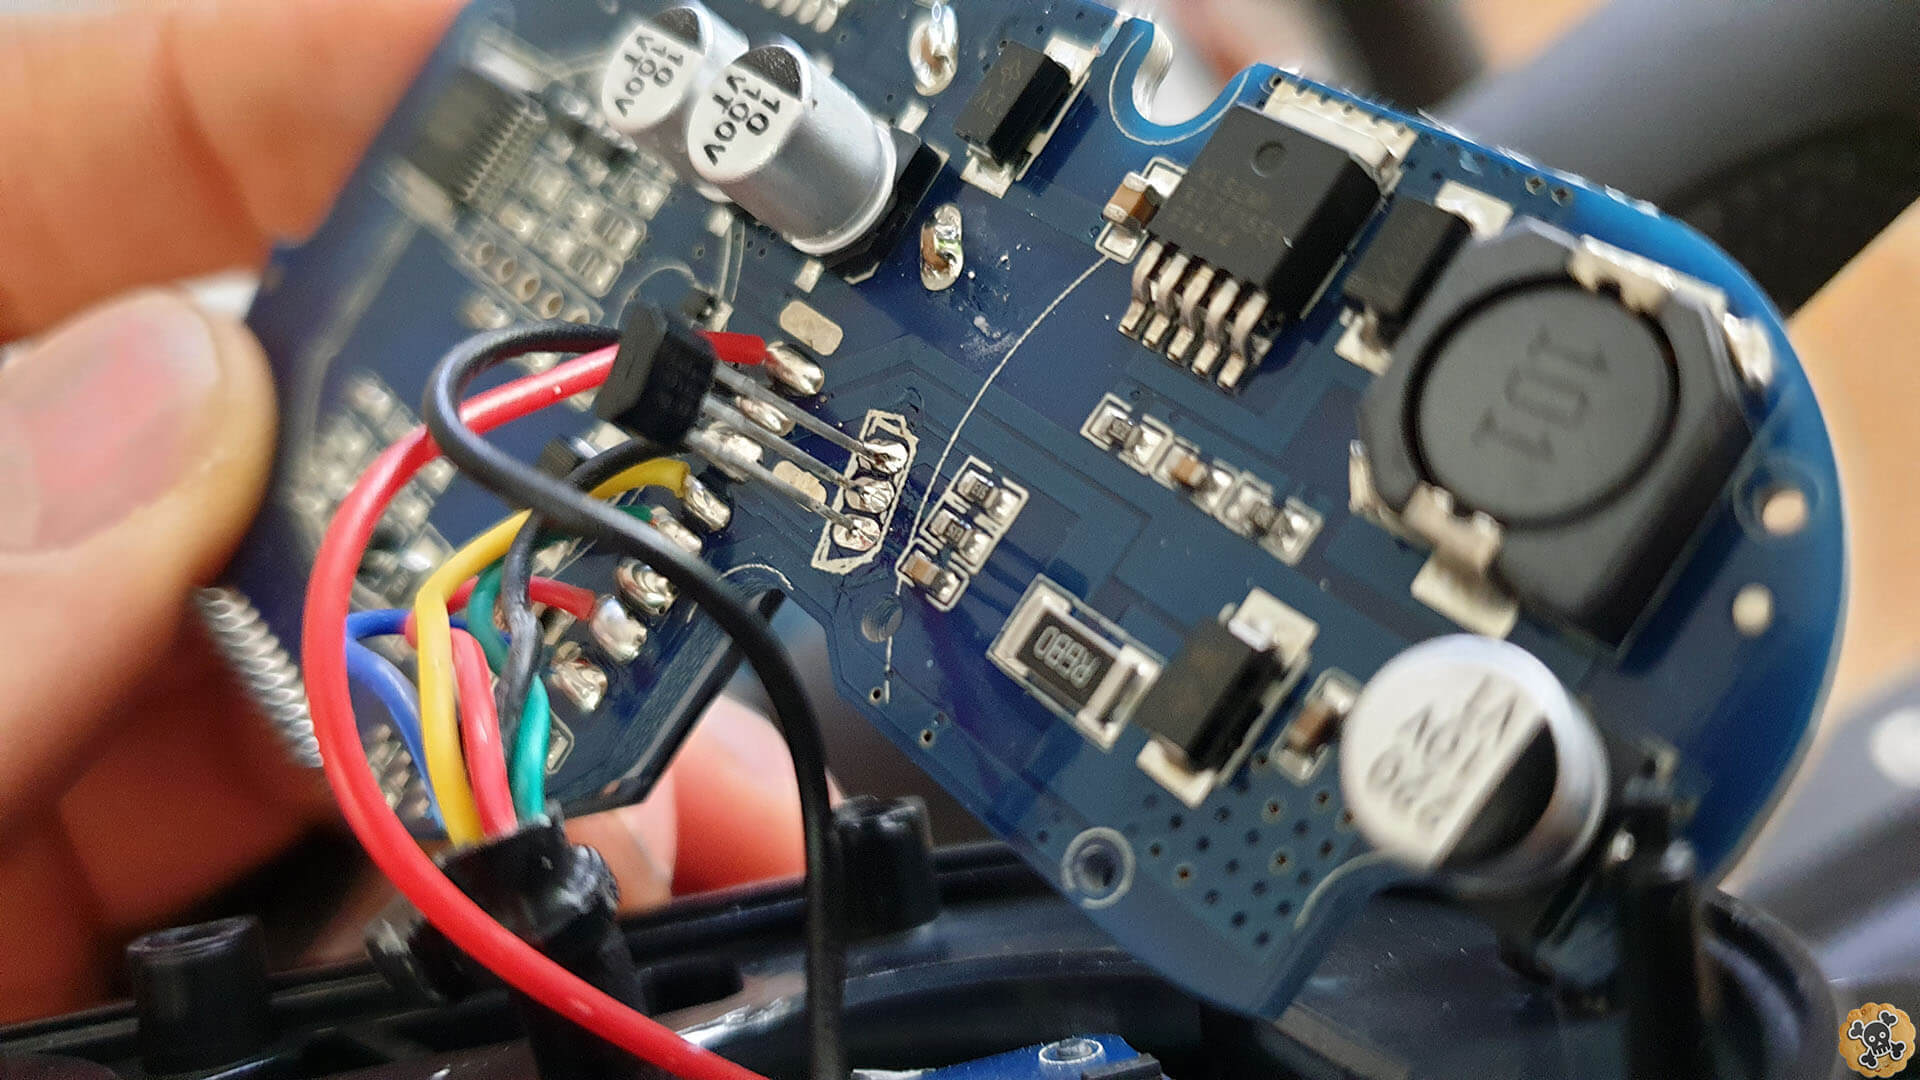
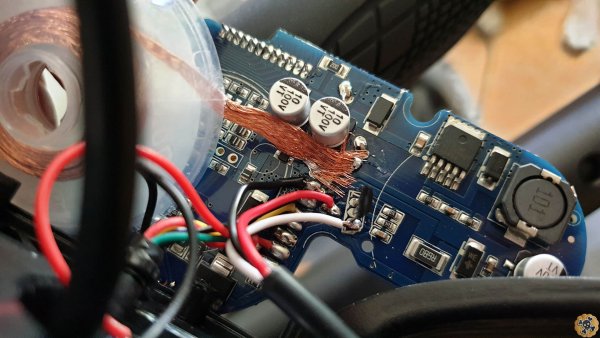
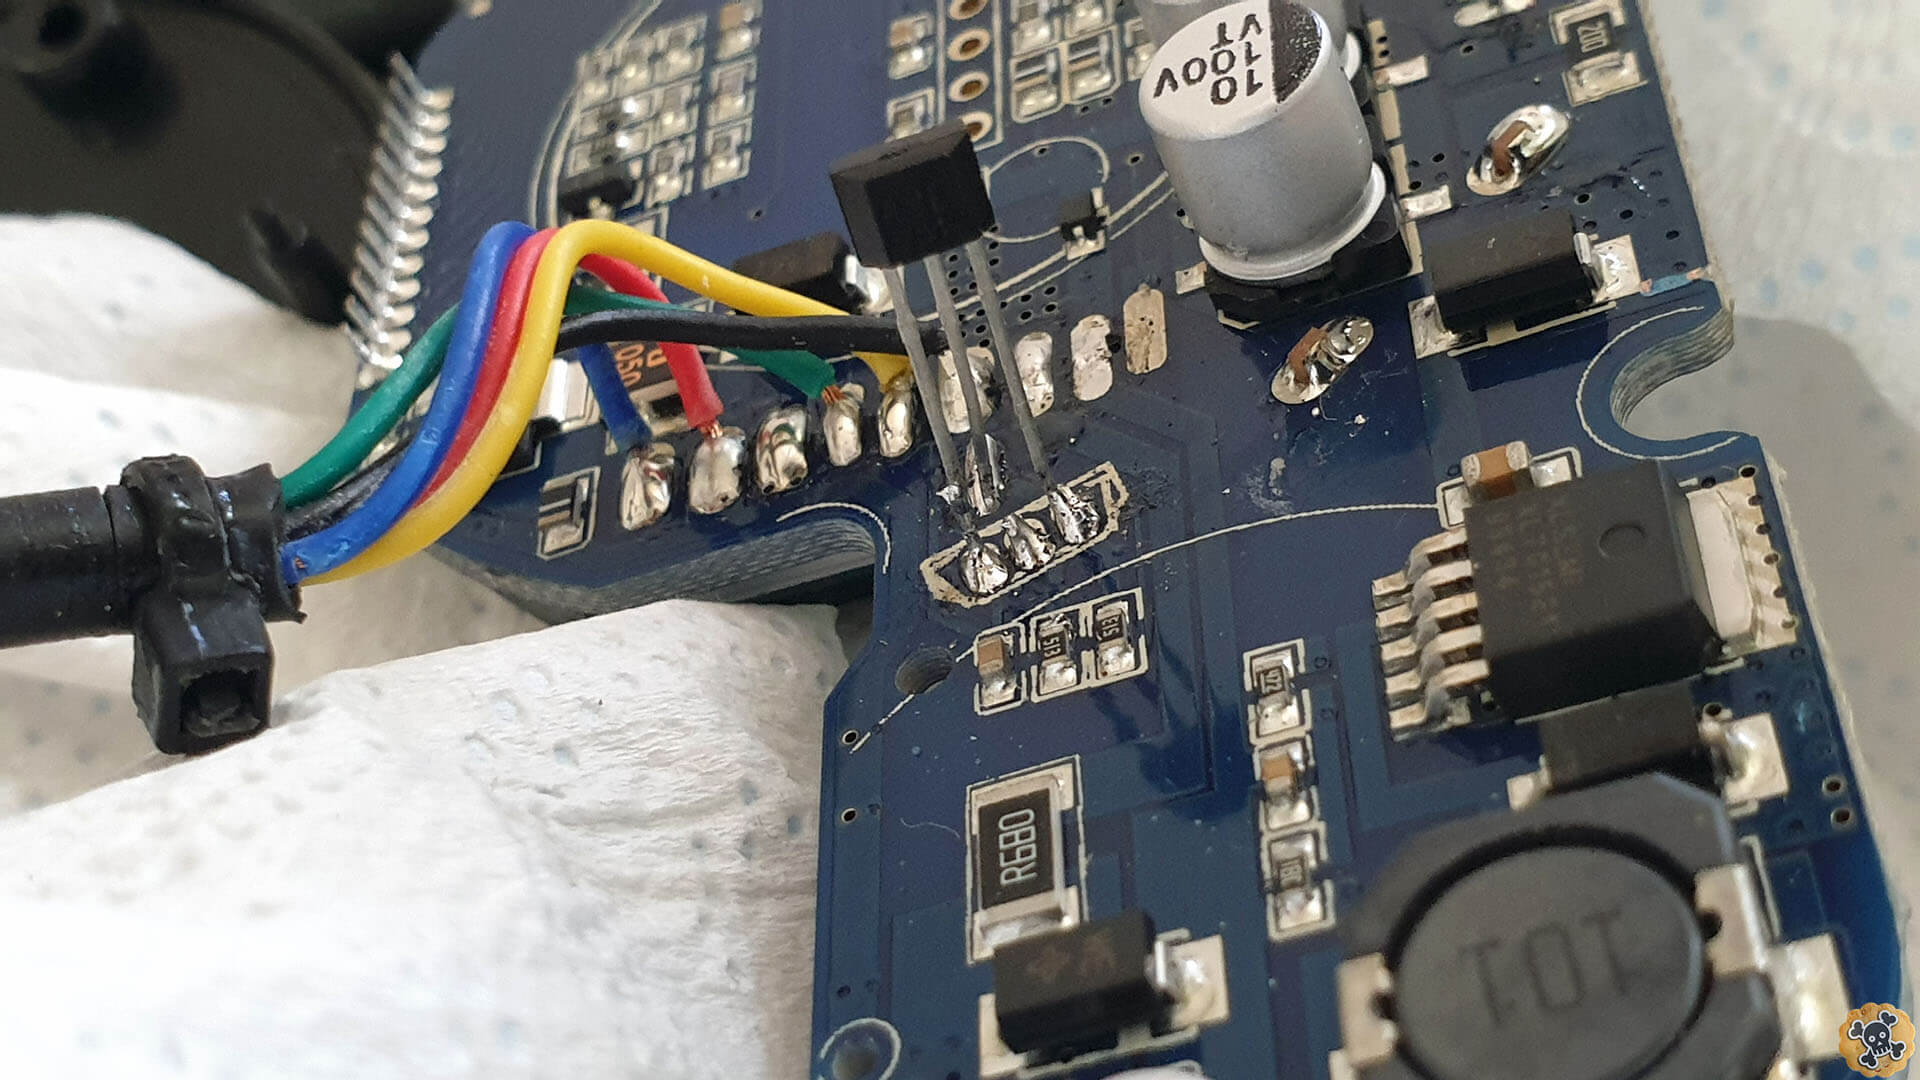
At first I recommend to remove USB charging port because we need some extra space inside and I do NOT recommend to use built in USB charging port for safety reason. You should remove side cables ( Black and Red like on picture )
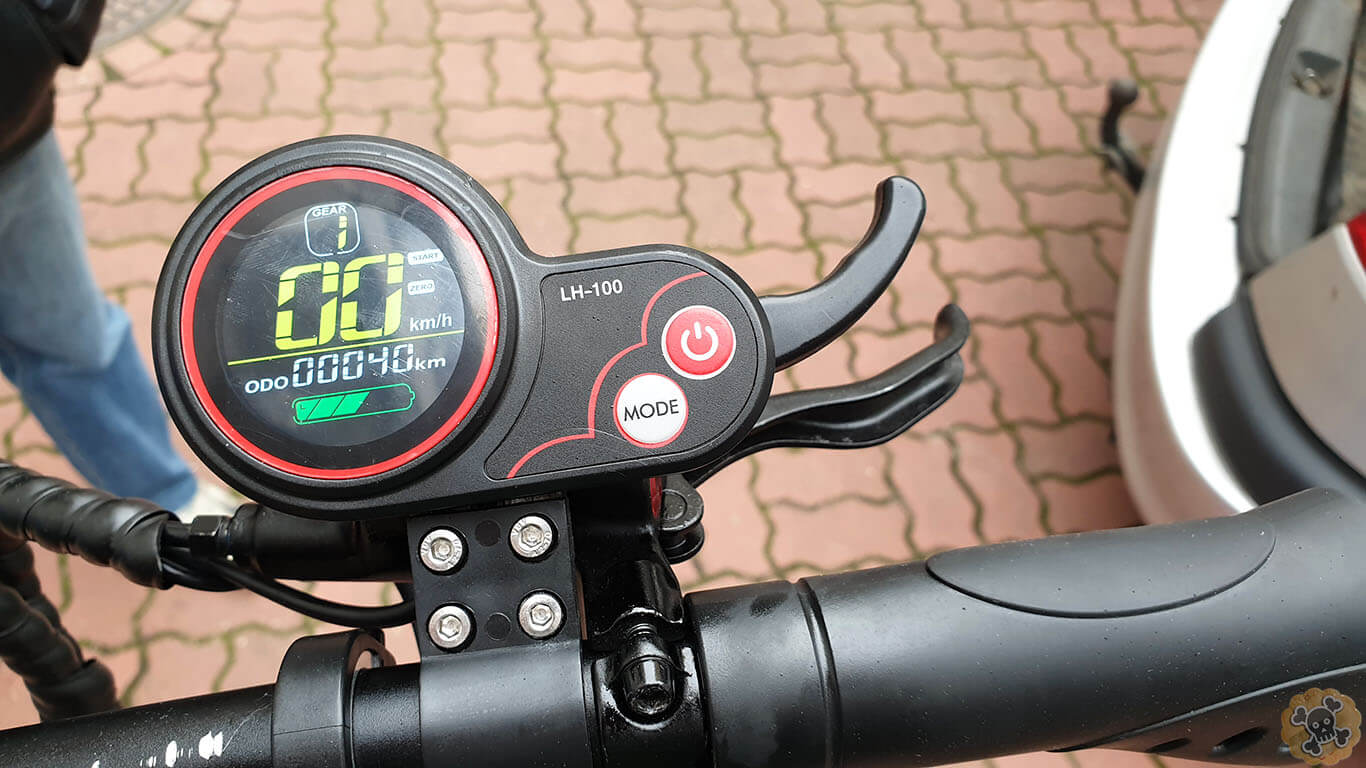
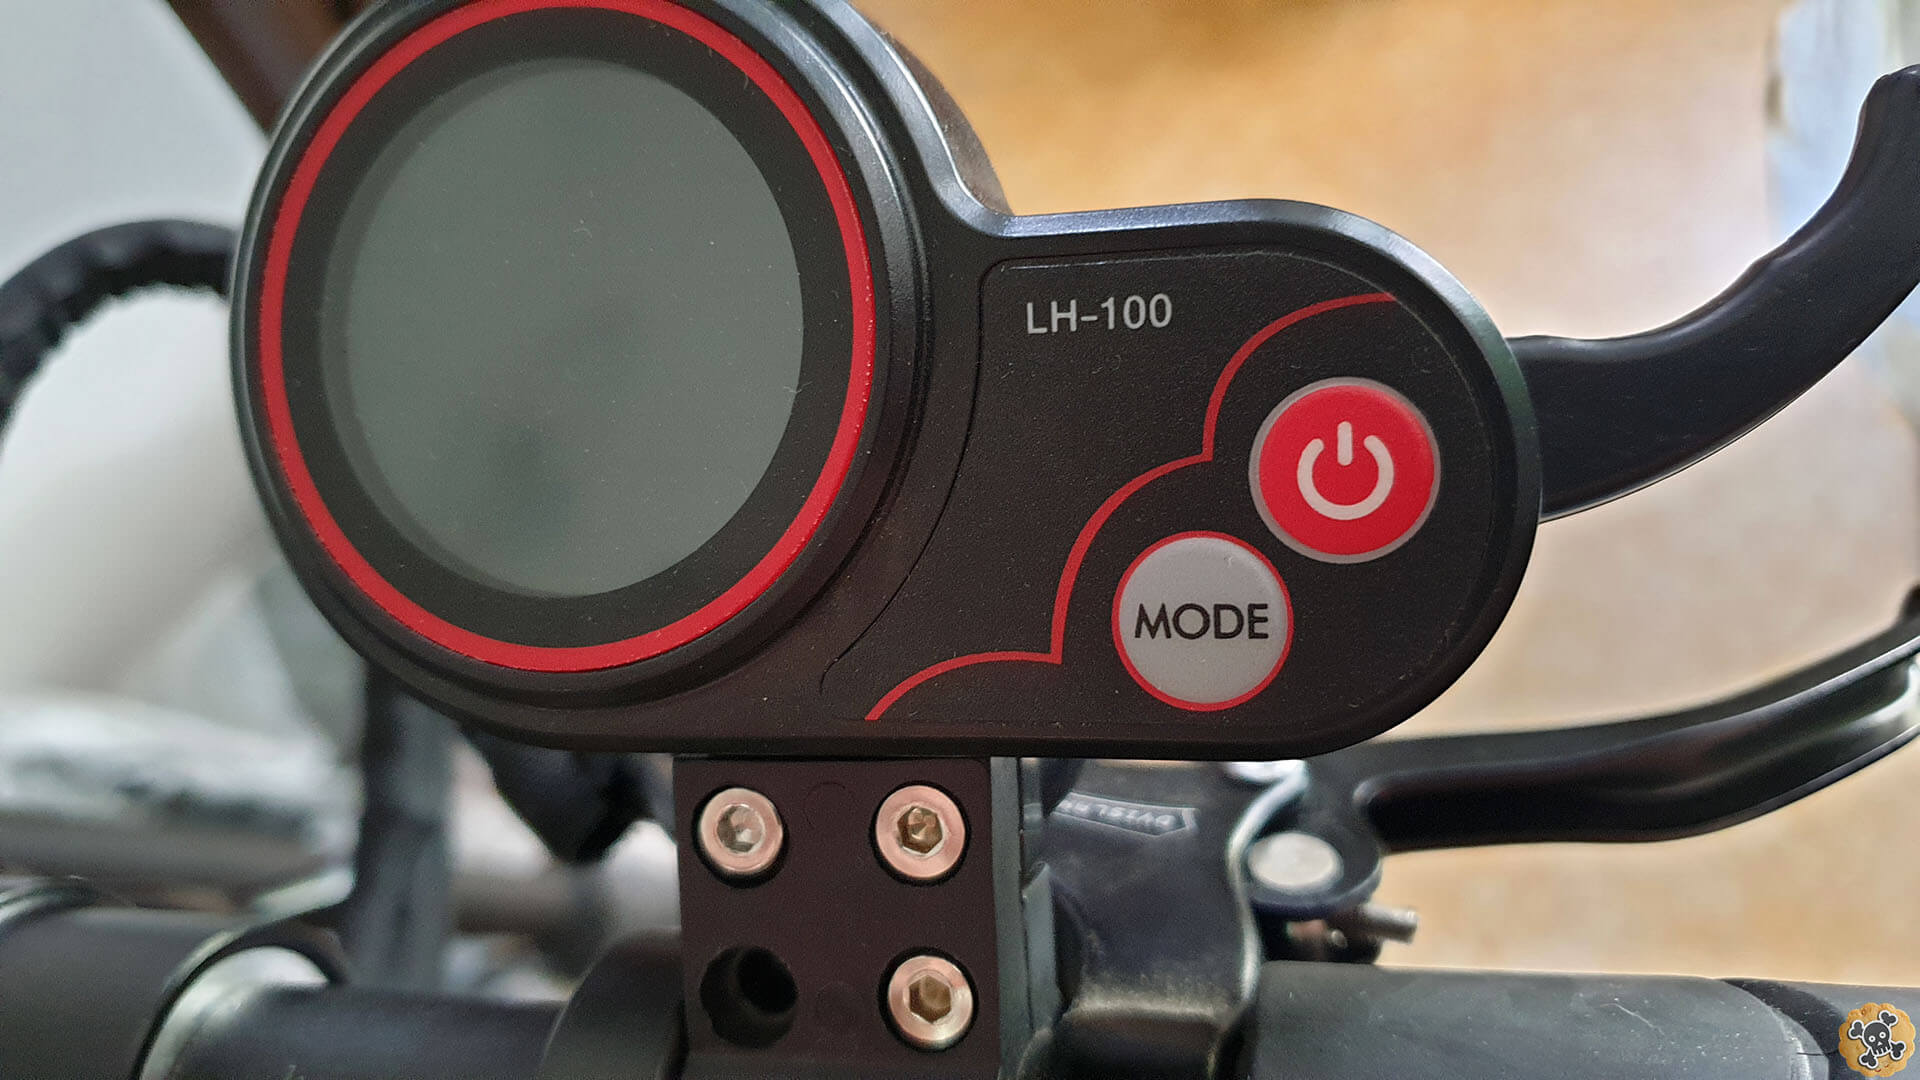
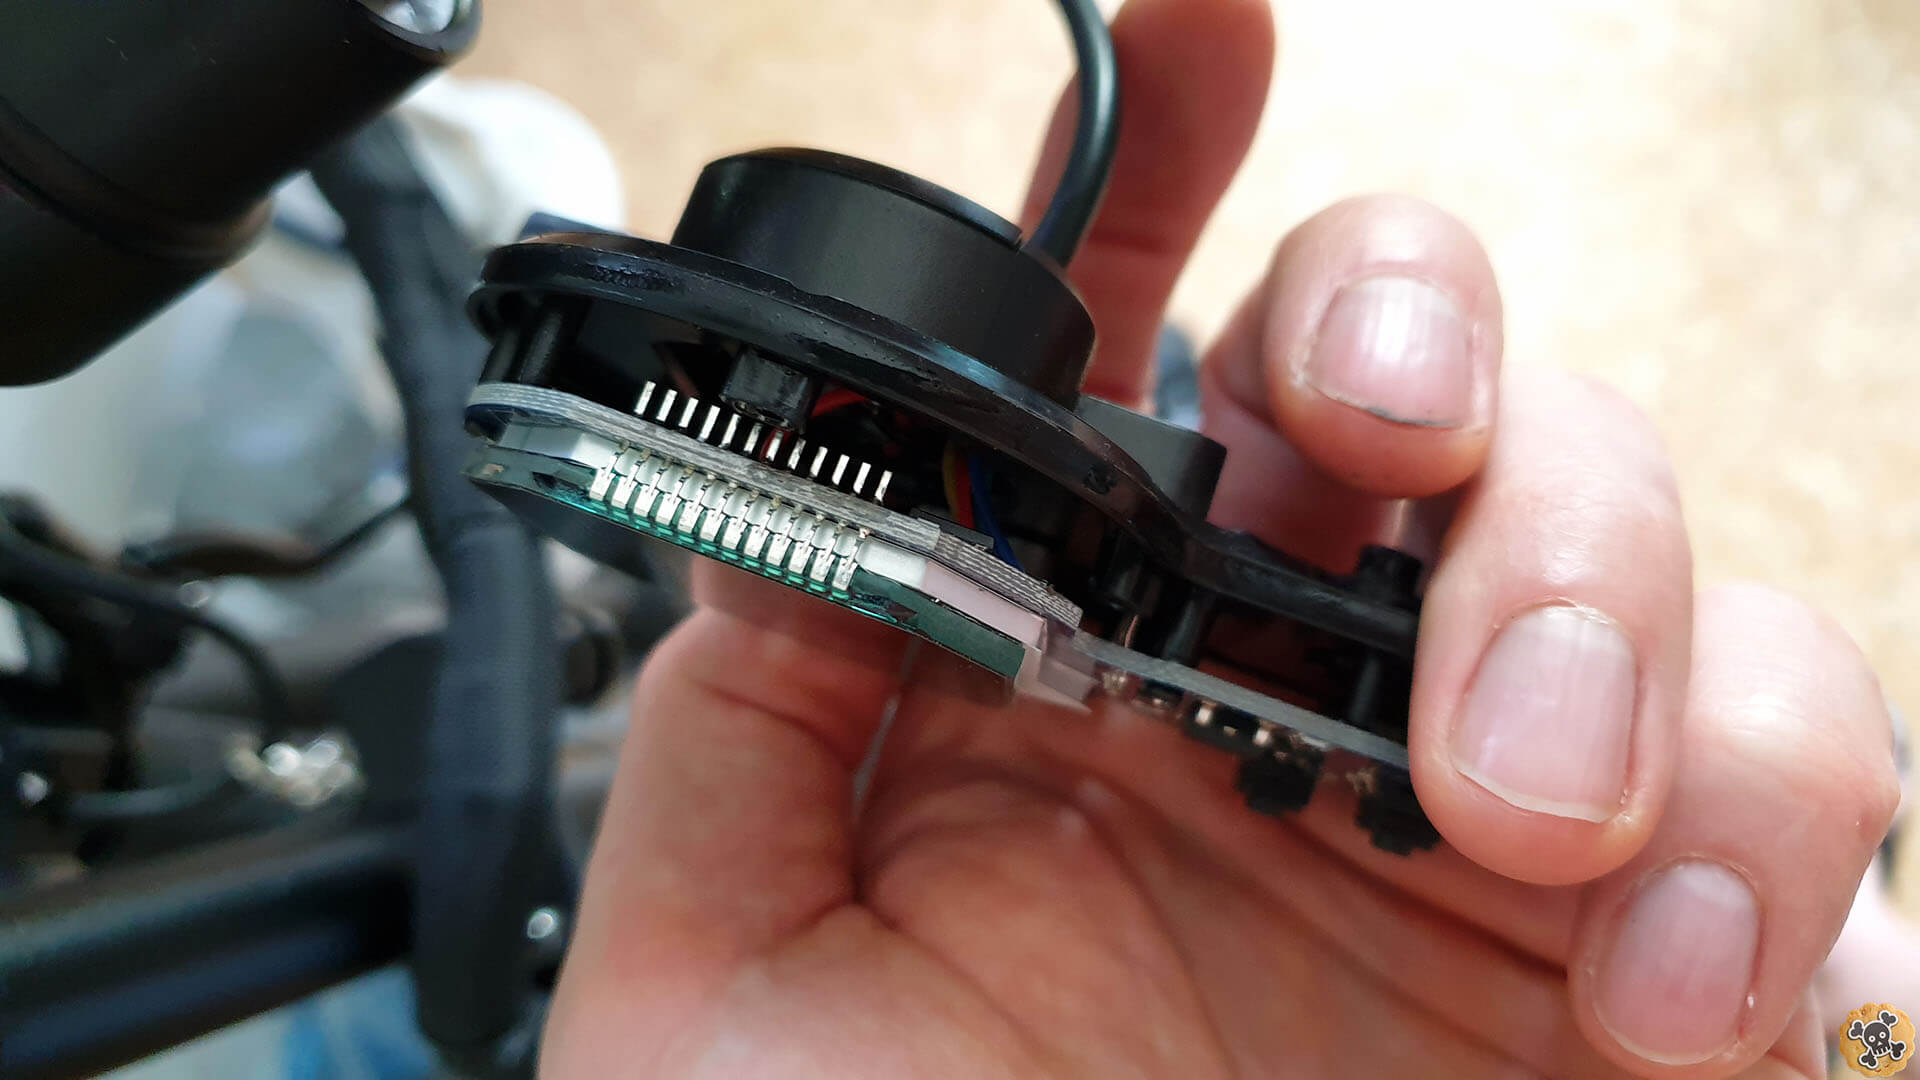
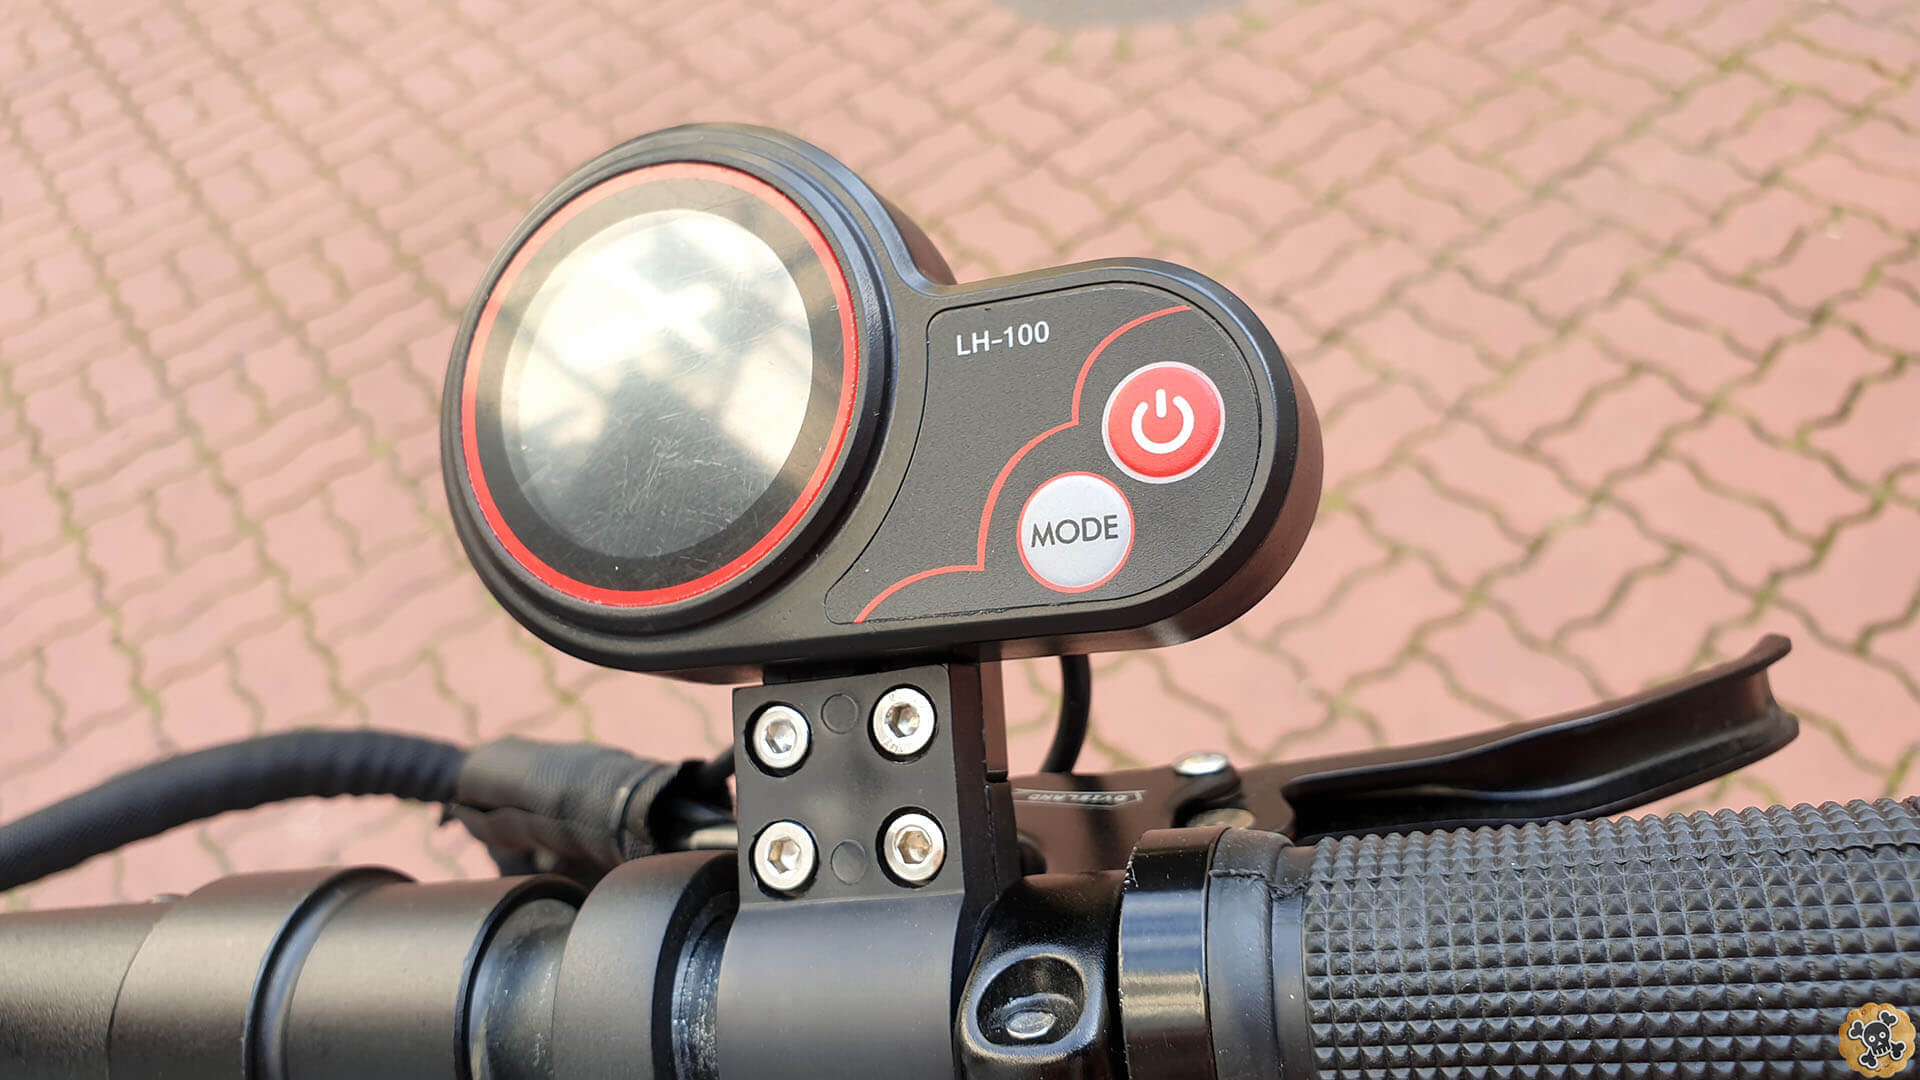
In LH-100 we got extra hole for the cable, on the back you can see rubber plug/cover , just remove it and pass through thumb throttle cable ( I short my cable to around 15cm )
Then you have to (actually you can choose )
Cut off 2 legs from hall sensor like GND and VCC ( I did it )
Cut off one Signal leg
Remove whole hall sensor
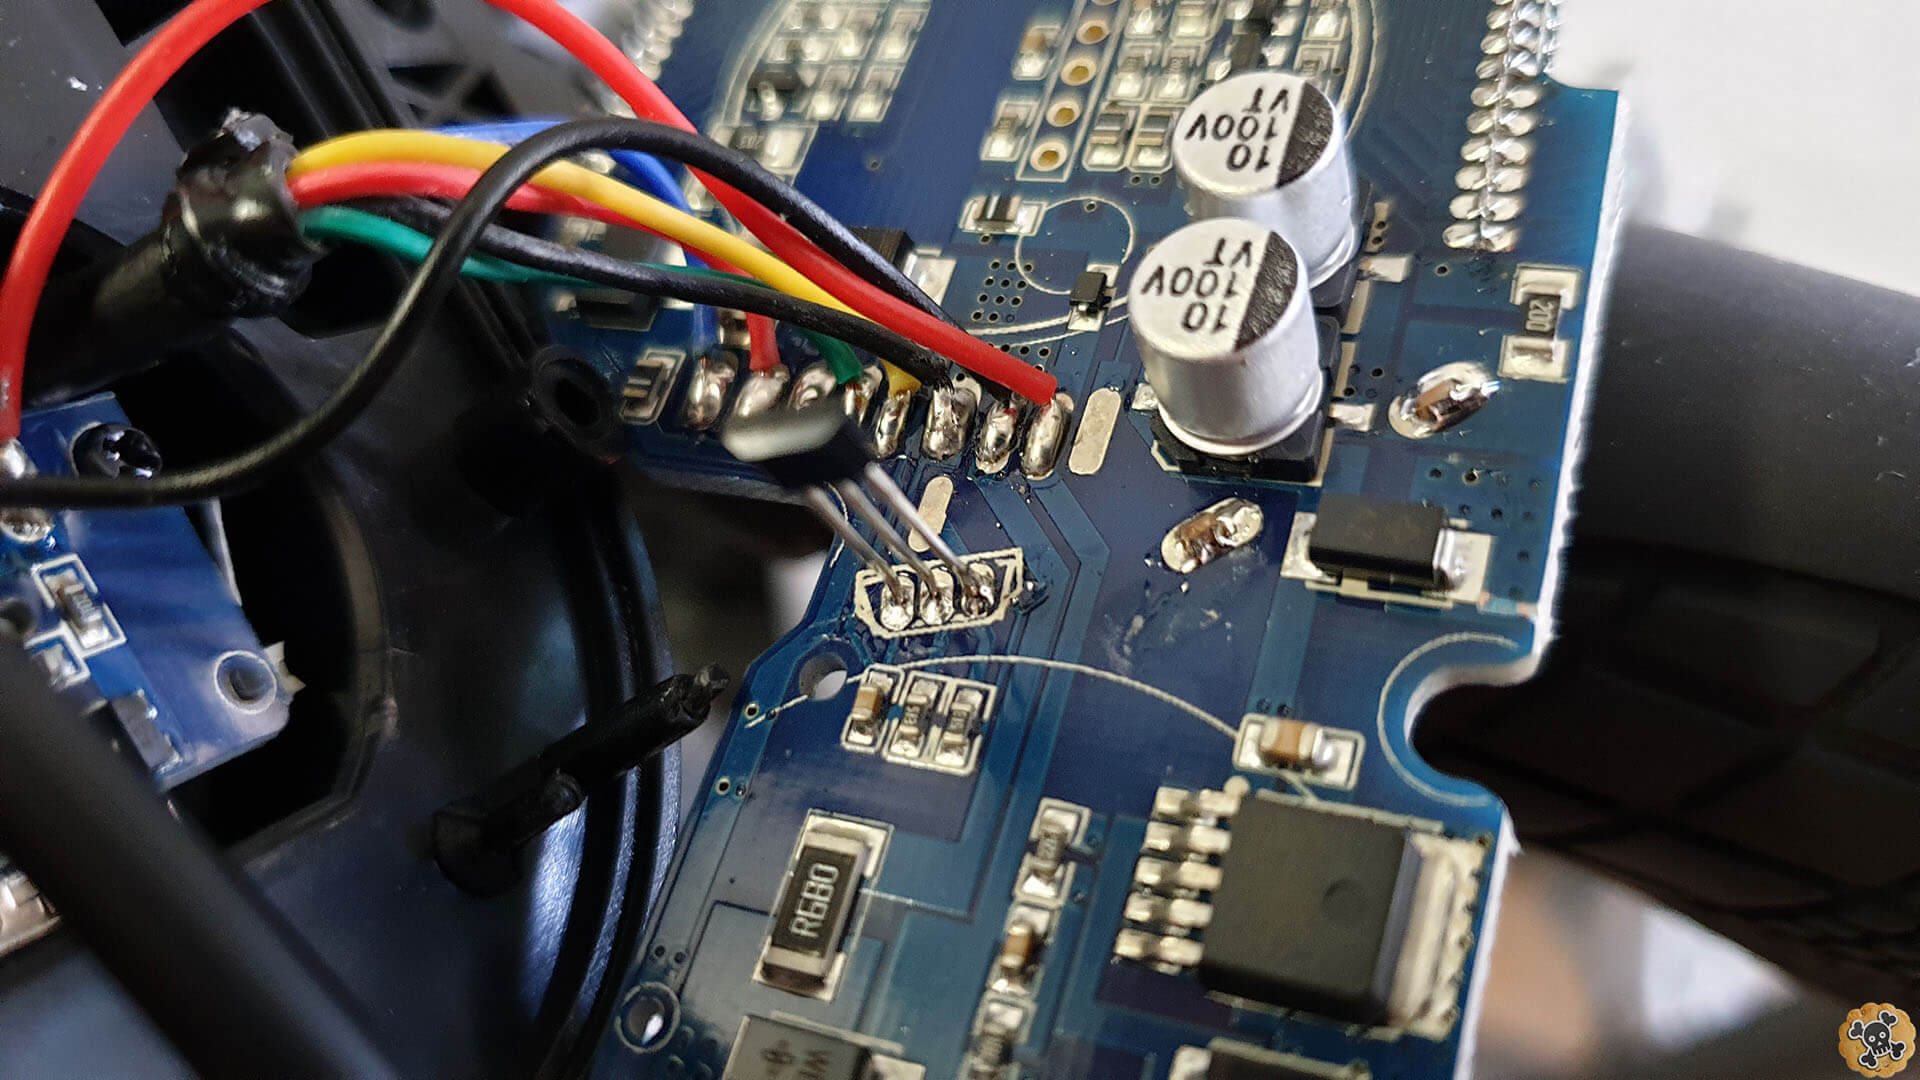
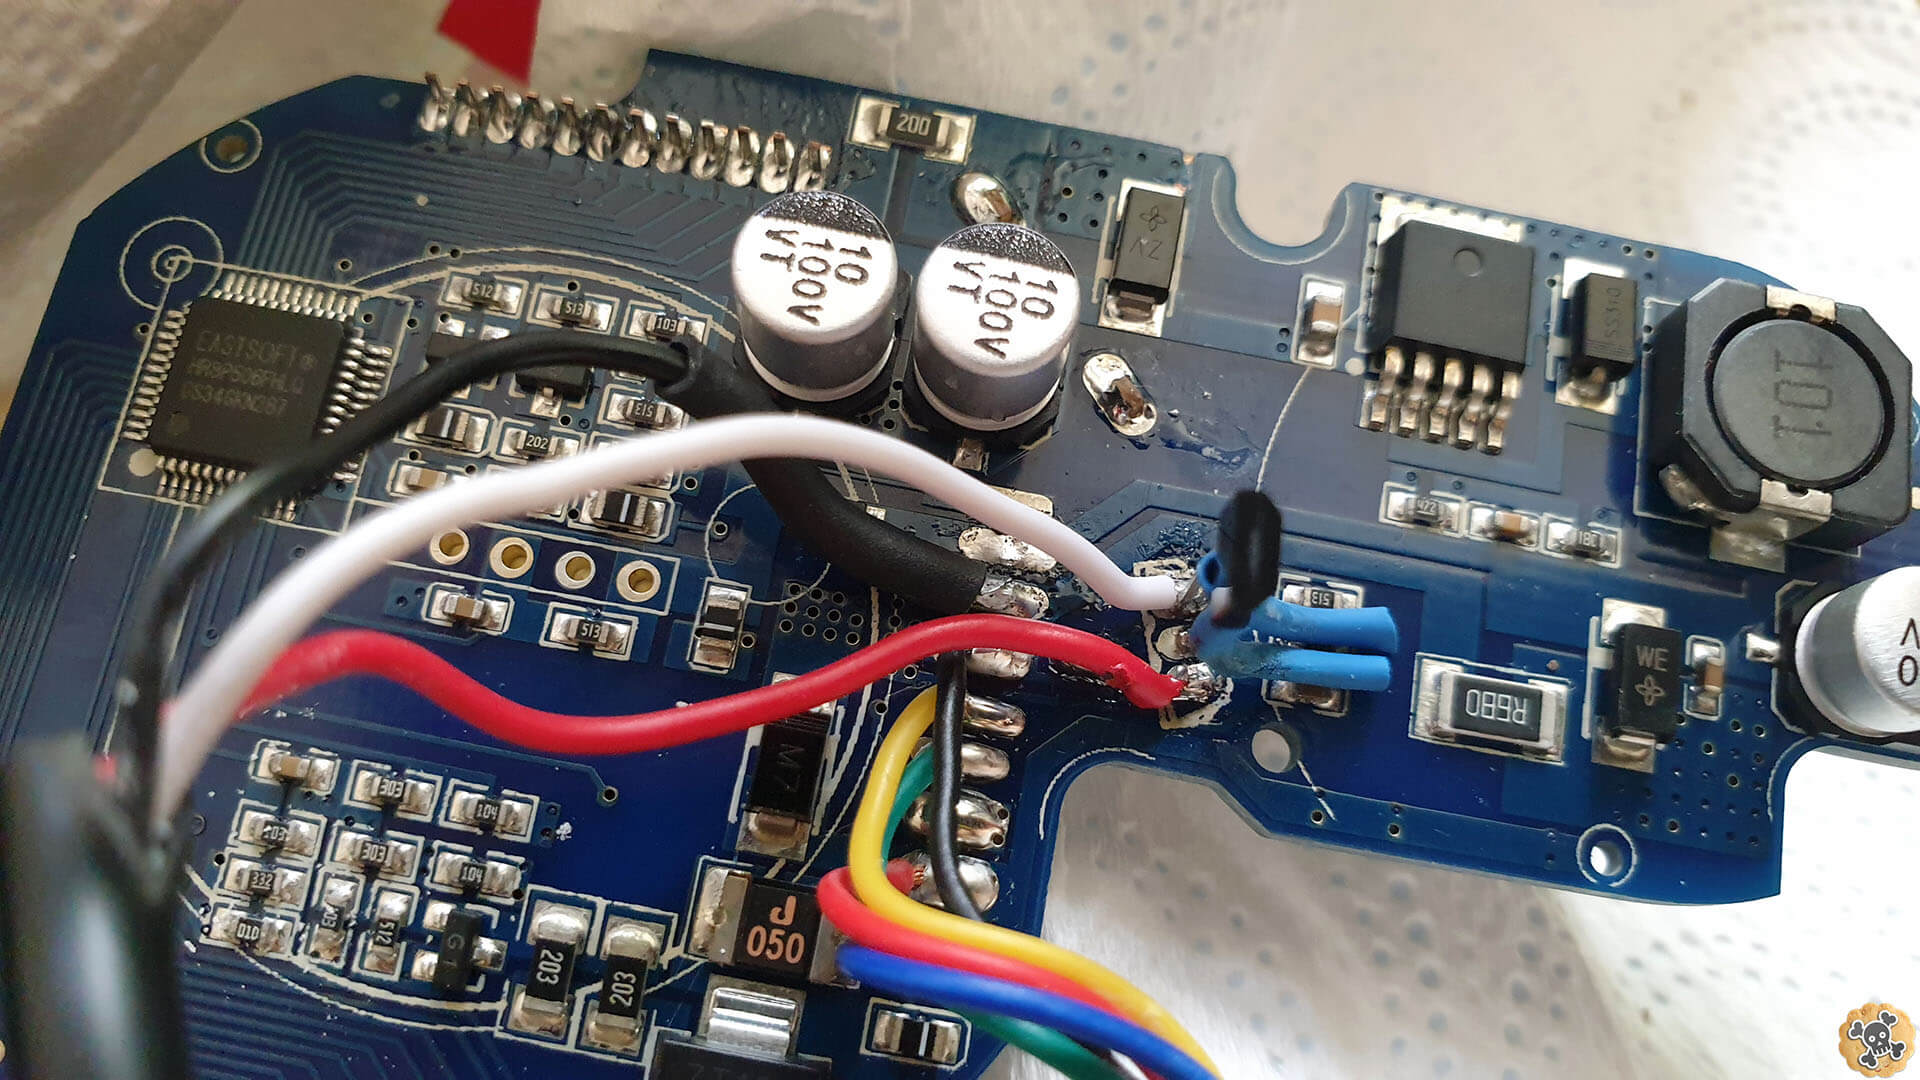
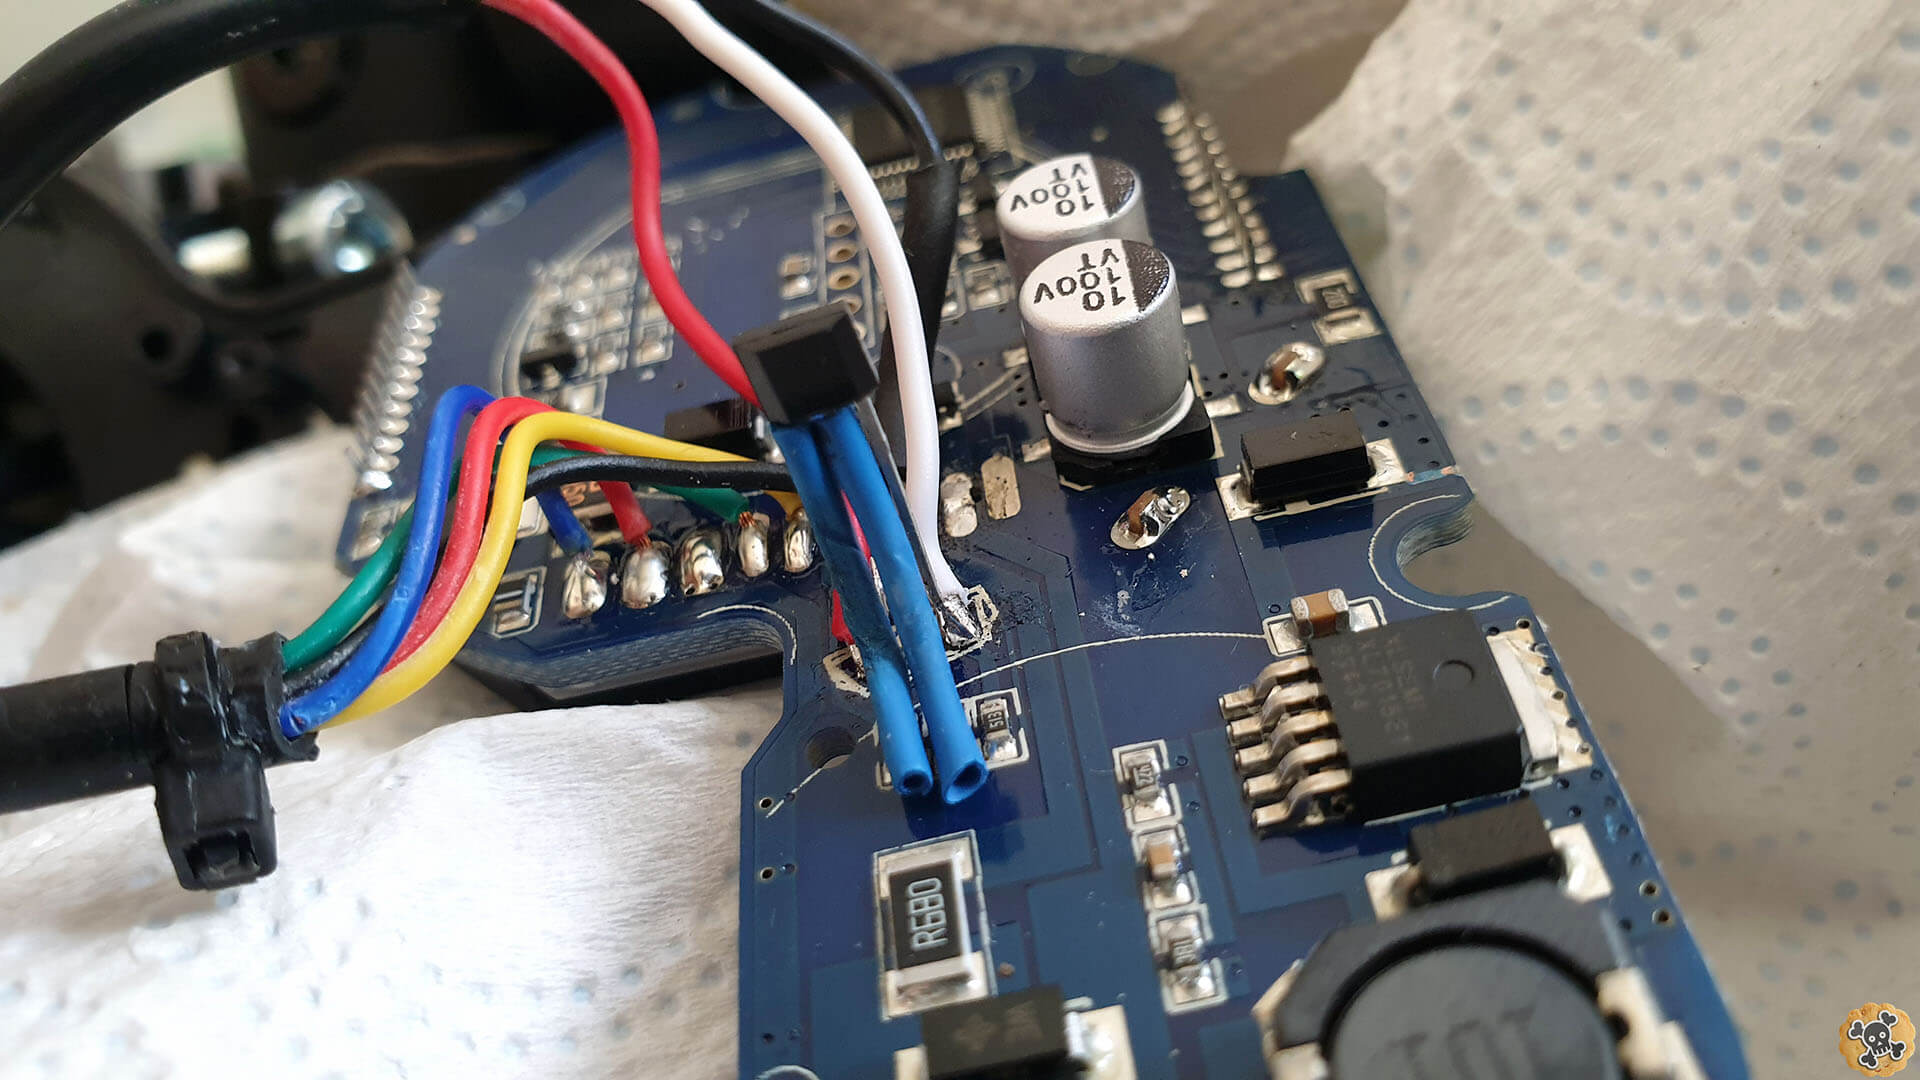
Ofcourse secure legs with shrink tube and solder 3 wires like I did. White cable is signal, Red is VCC and Black GND, I recommend to solder GND wire to spot where was GND for USB. Before 1st test check if there is not short circuit
Add zip on new cable , and put all things back together. After some testing I have to admit , this mod is Must Have , feels more natural and big movement of the throttle knob helps to controller better power of your Beast ??☠️
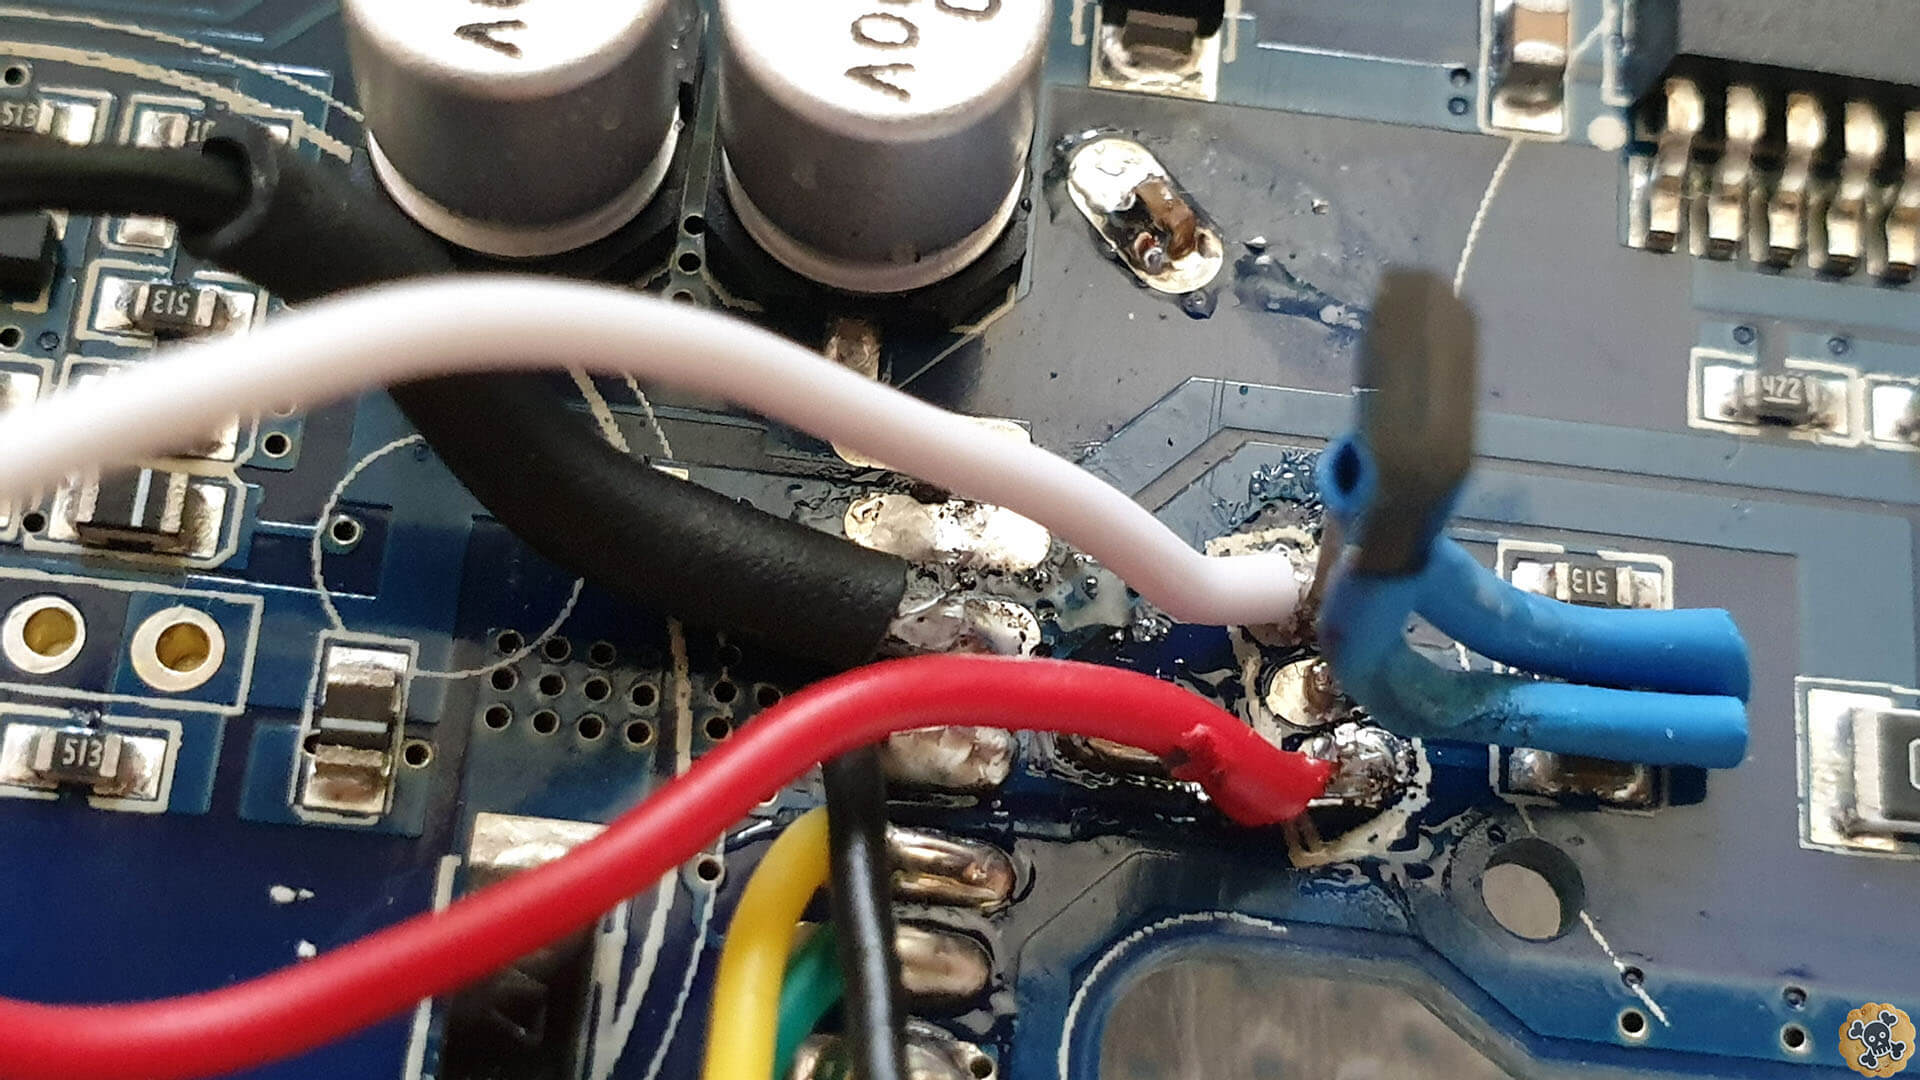
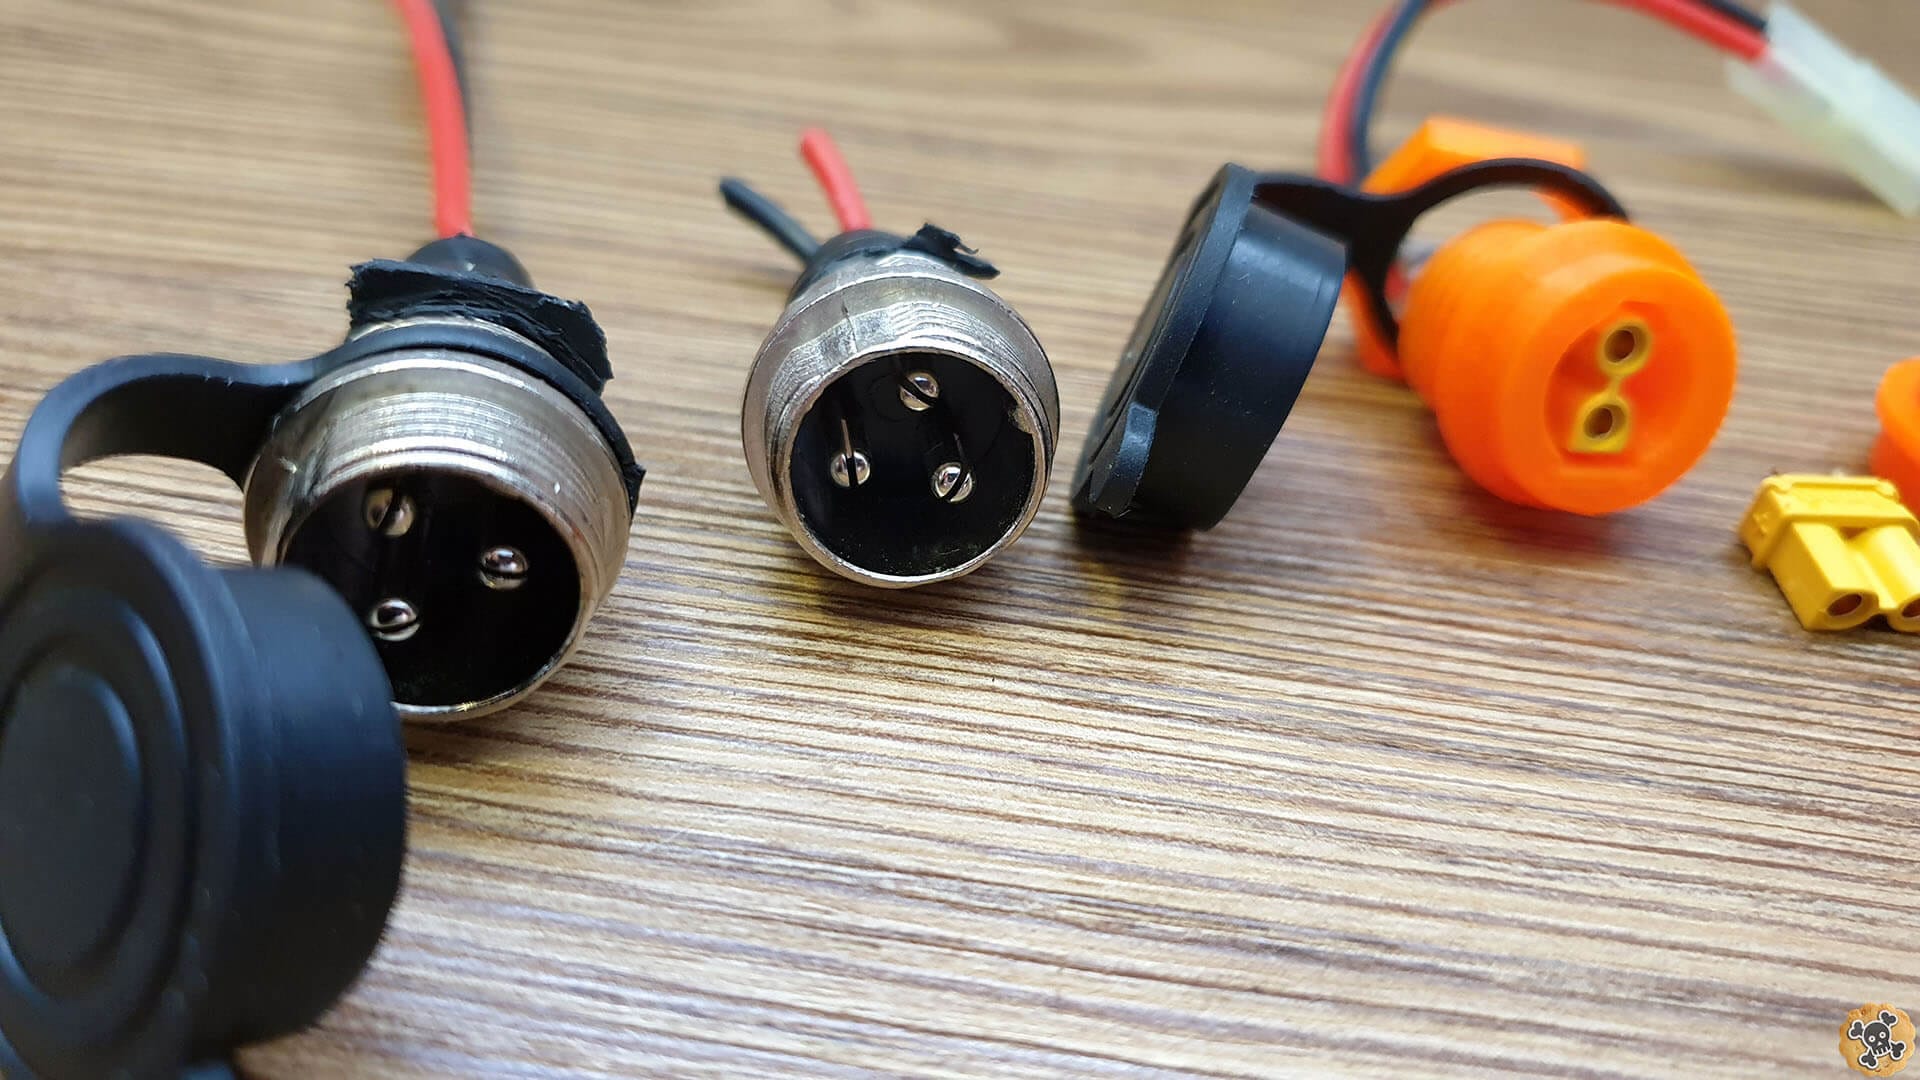
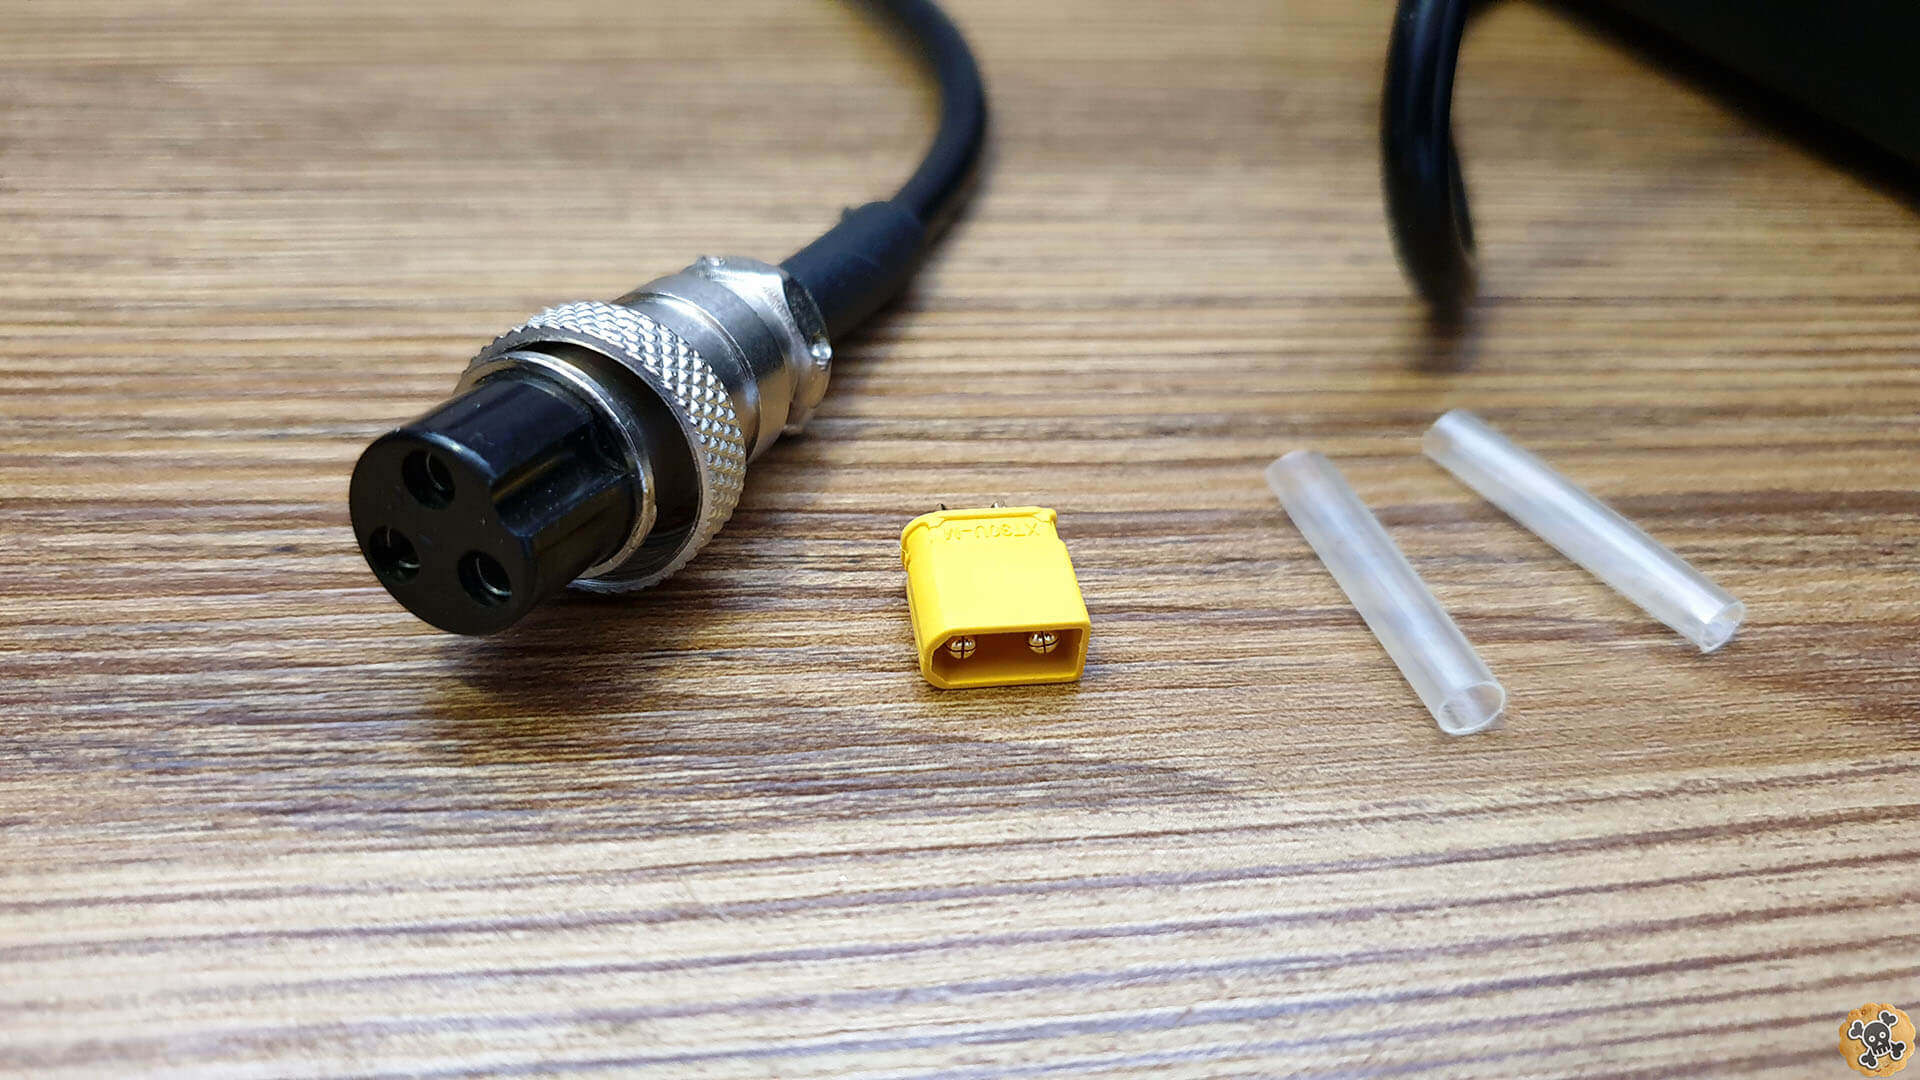
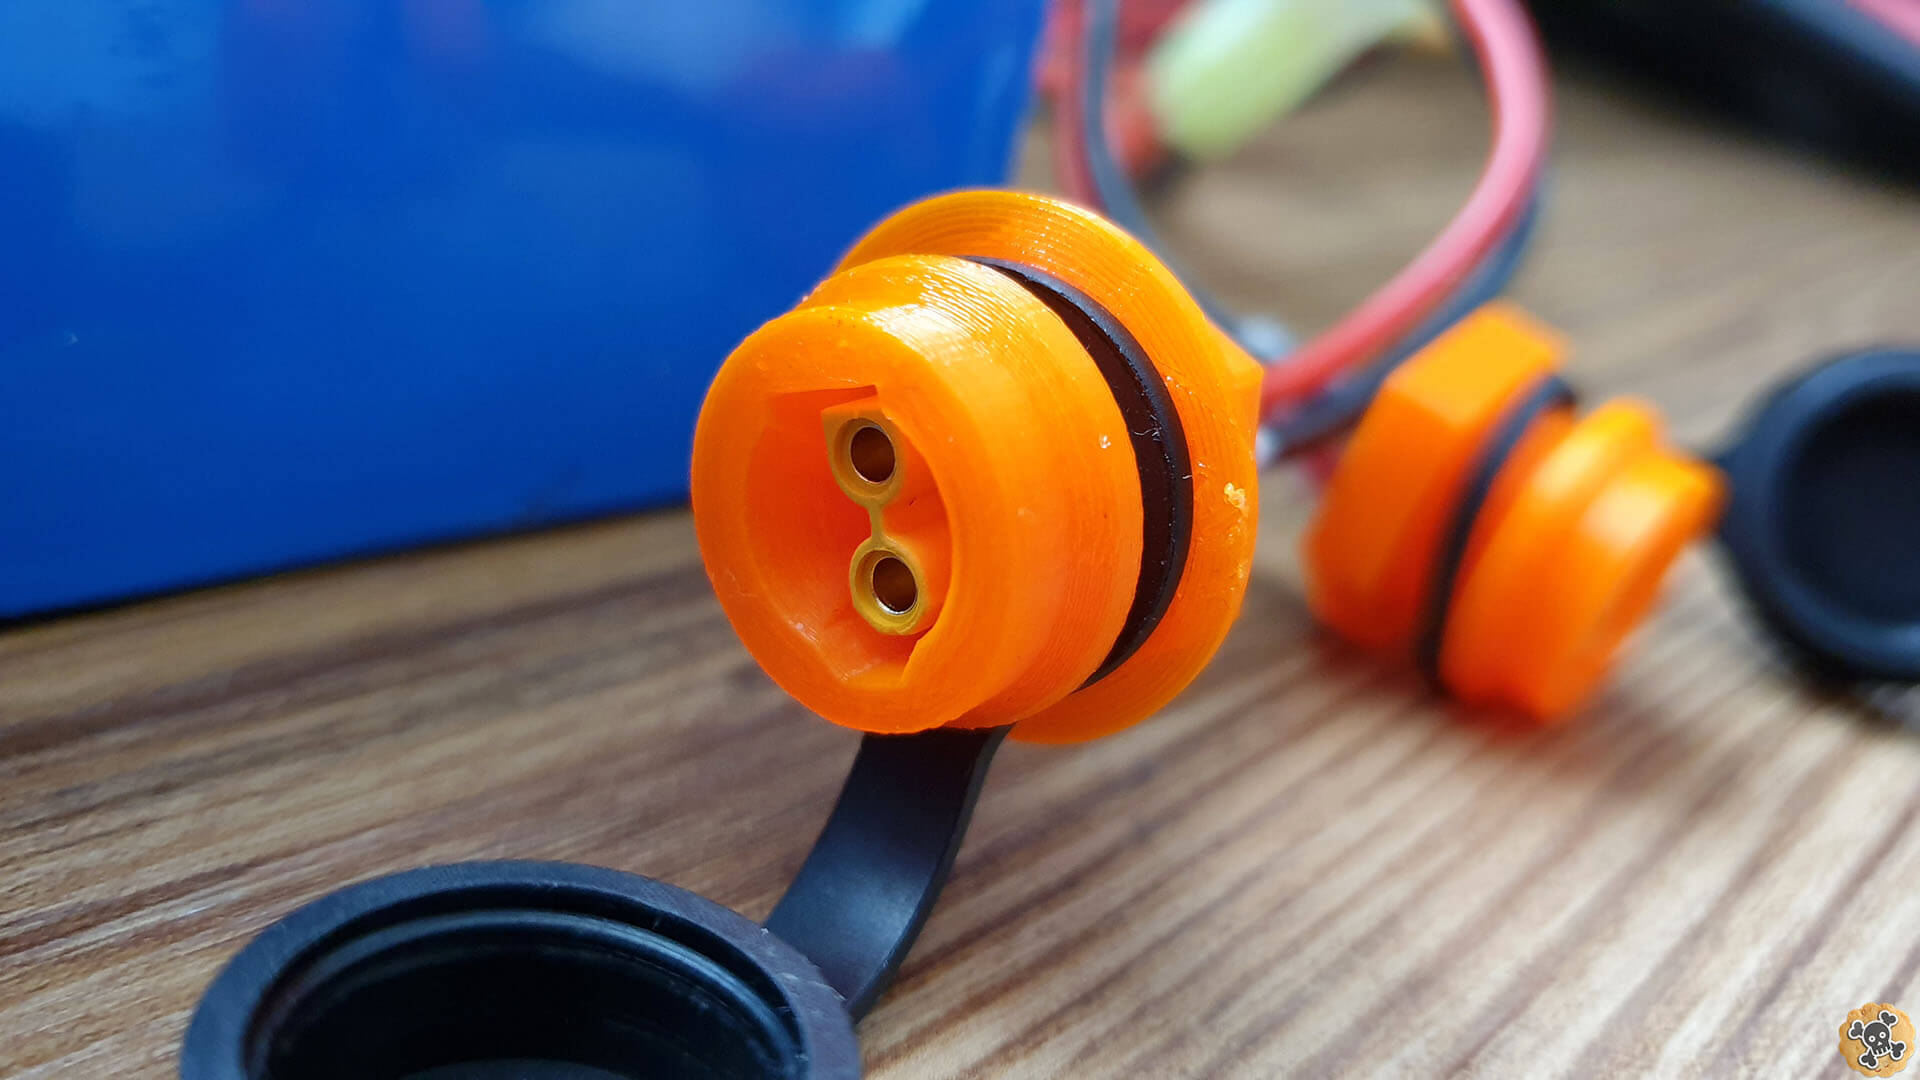
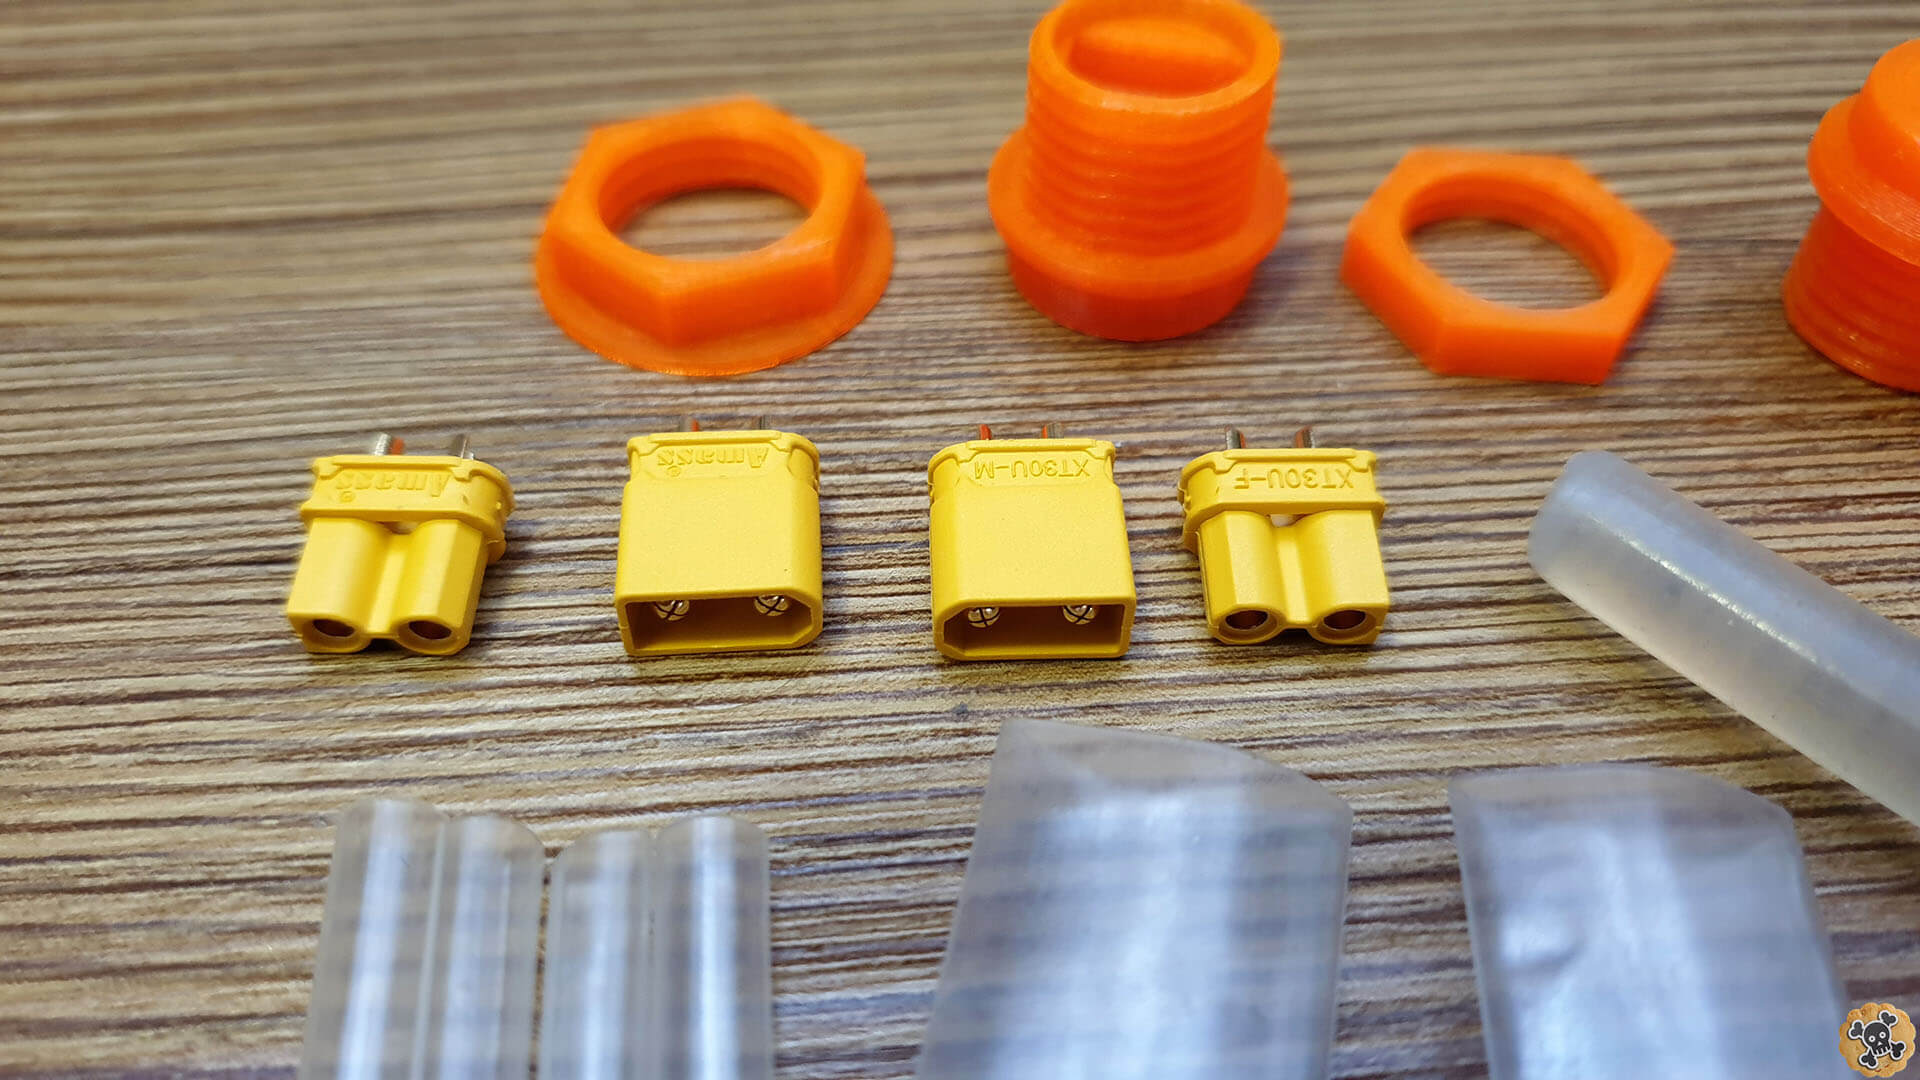
Stock metal charging ports are SUPER DANGEROUS !, you have to change it to something much safer and here is my idea with XT30 connectors.
Why stock microphone charging portis so dangerous ?!
1st thing, it has metal shell so short circuit can be done any time ! ?
There is no any insulator between power pins ! ?
That kind of connector is for microphones and should never be used as a charging port ! ?
It’s connected straight to battery so small short circuit and BIG battery can go literally ?BOOM? ?♂️
Why my charging port is easy to install and super safe to use ?!
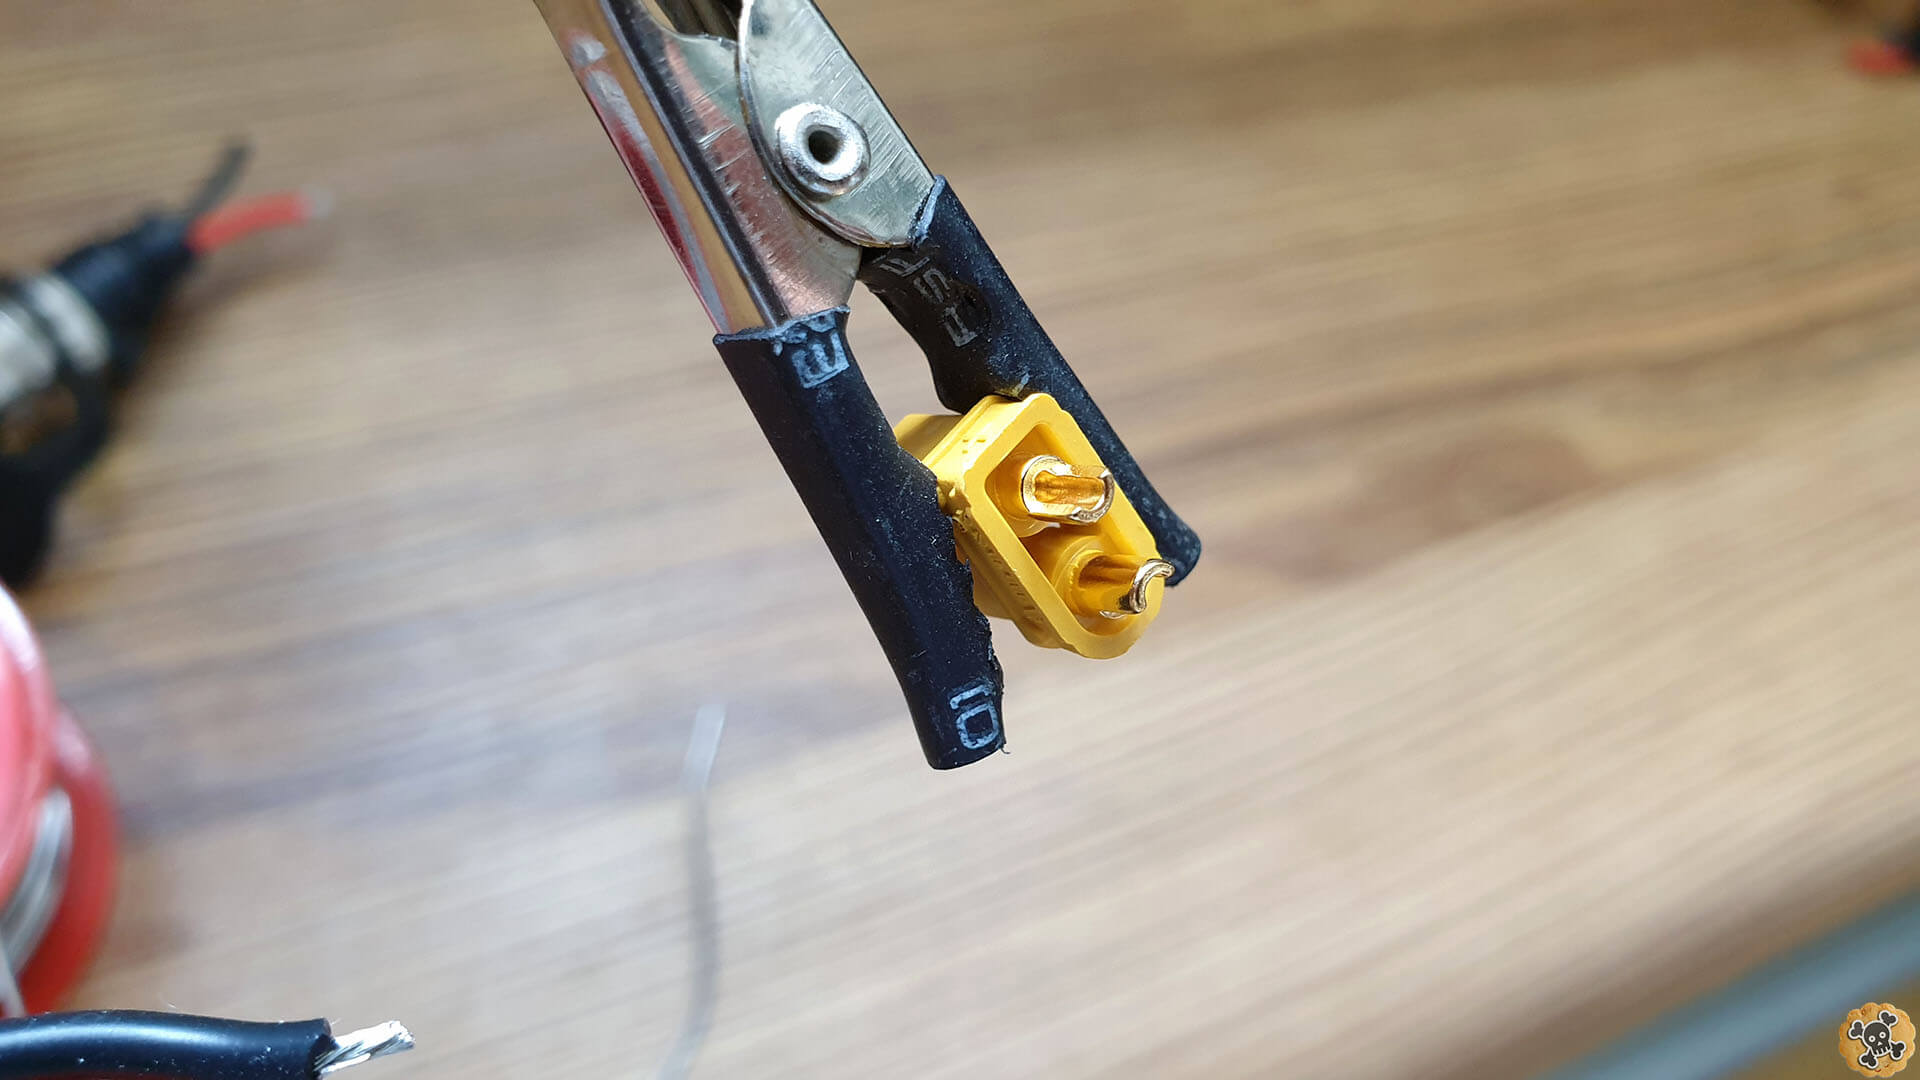
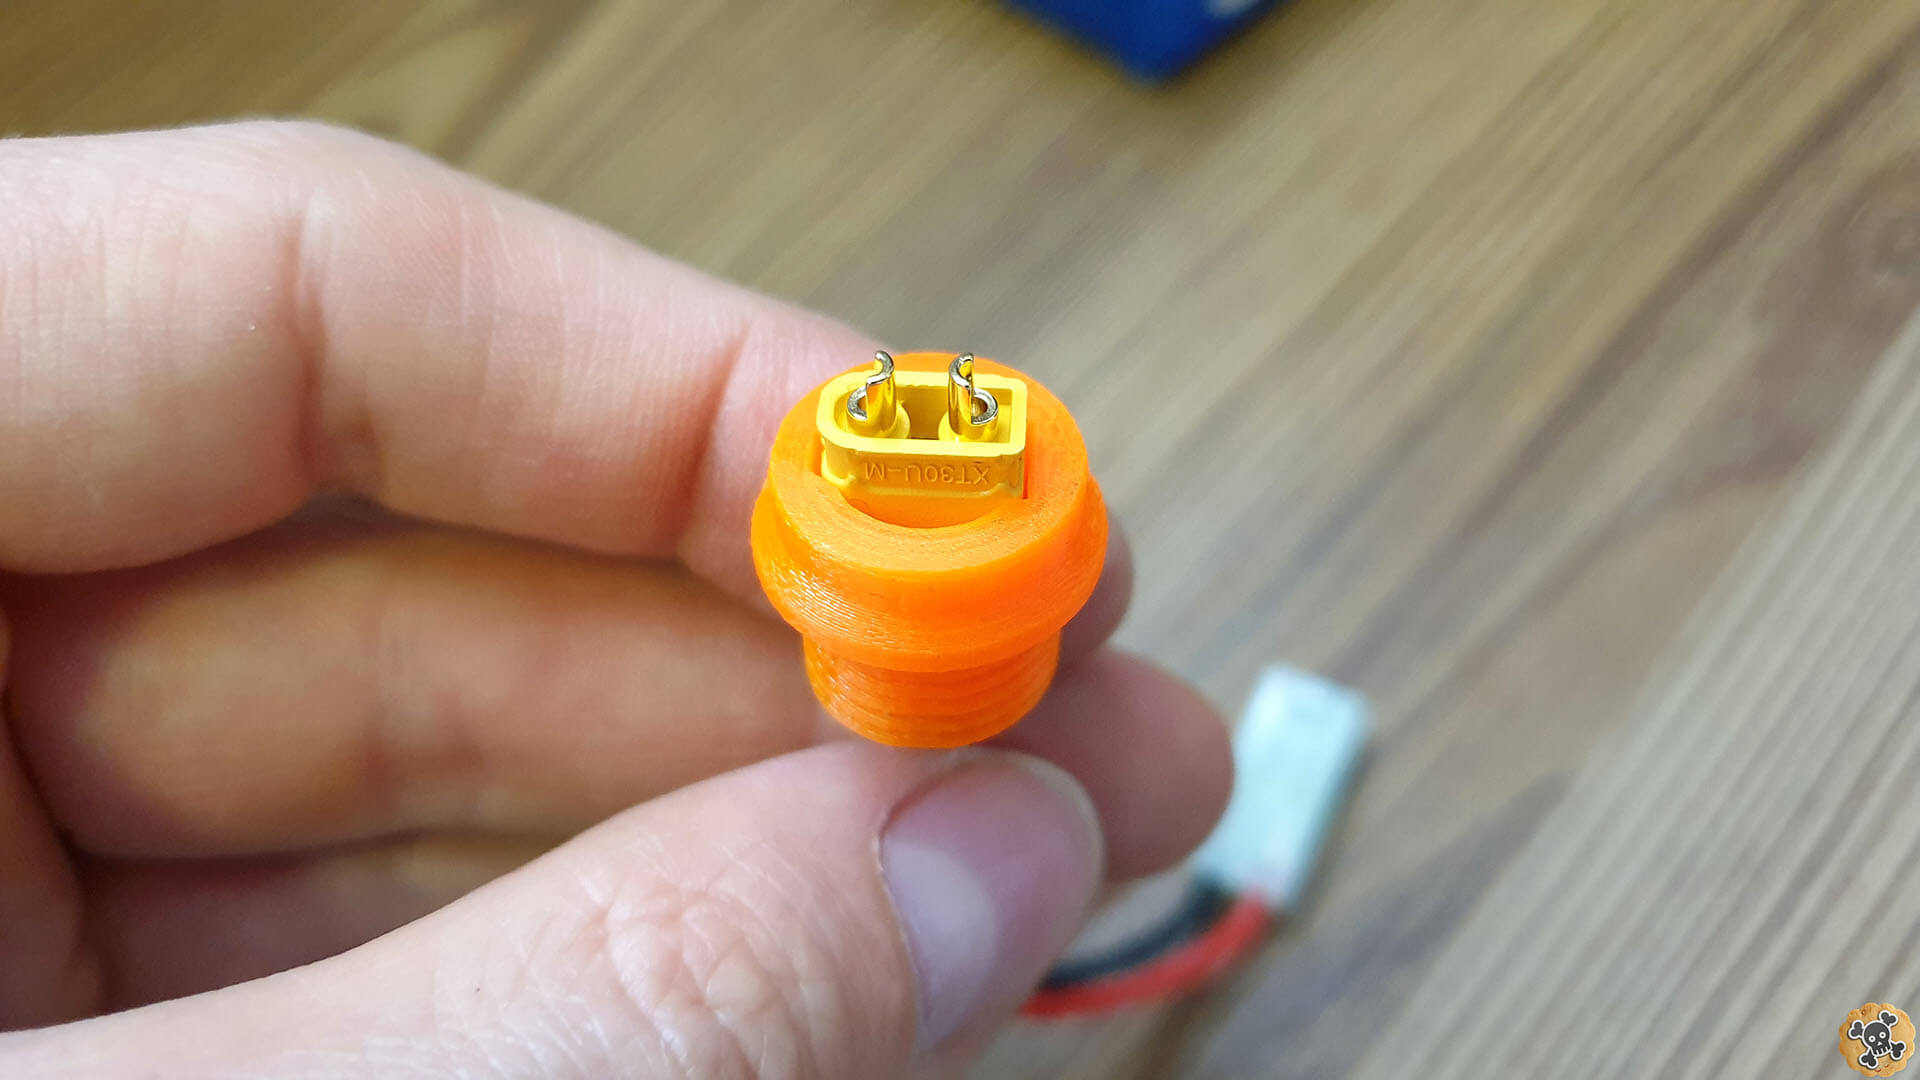
I am using XT30 connector, simply The Best in it’s size ?
XT30 connector is perfectly secured and widely used for LIPO batteries ⚡
Can handle high amperages even 30A ! ⚡?
My adapter is not electrical conductive ??
Fits perfect for almost all Escoots with stock Microphone port ?✌
Easy to DIY and Install ???
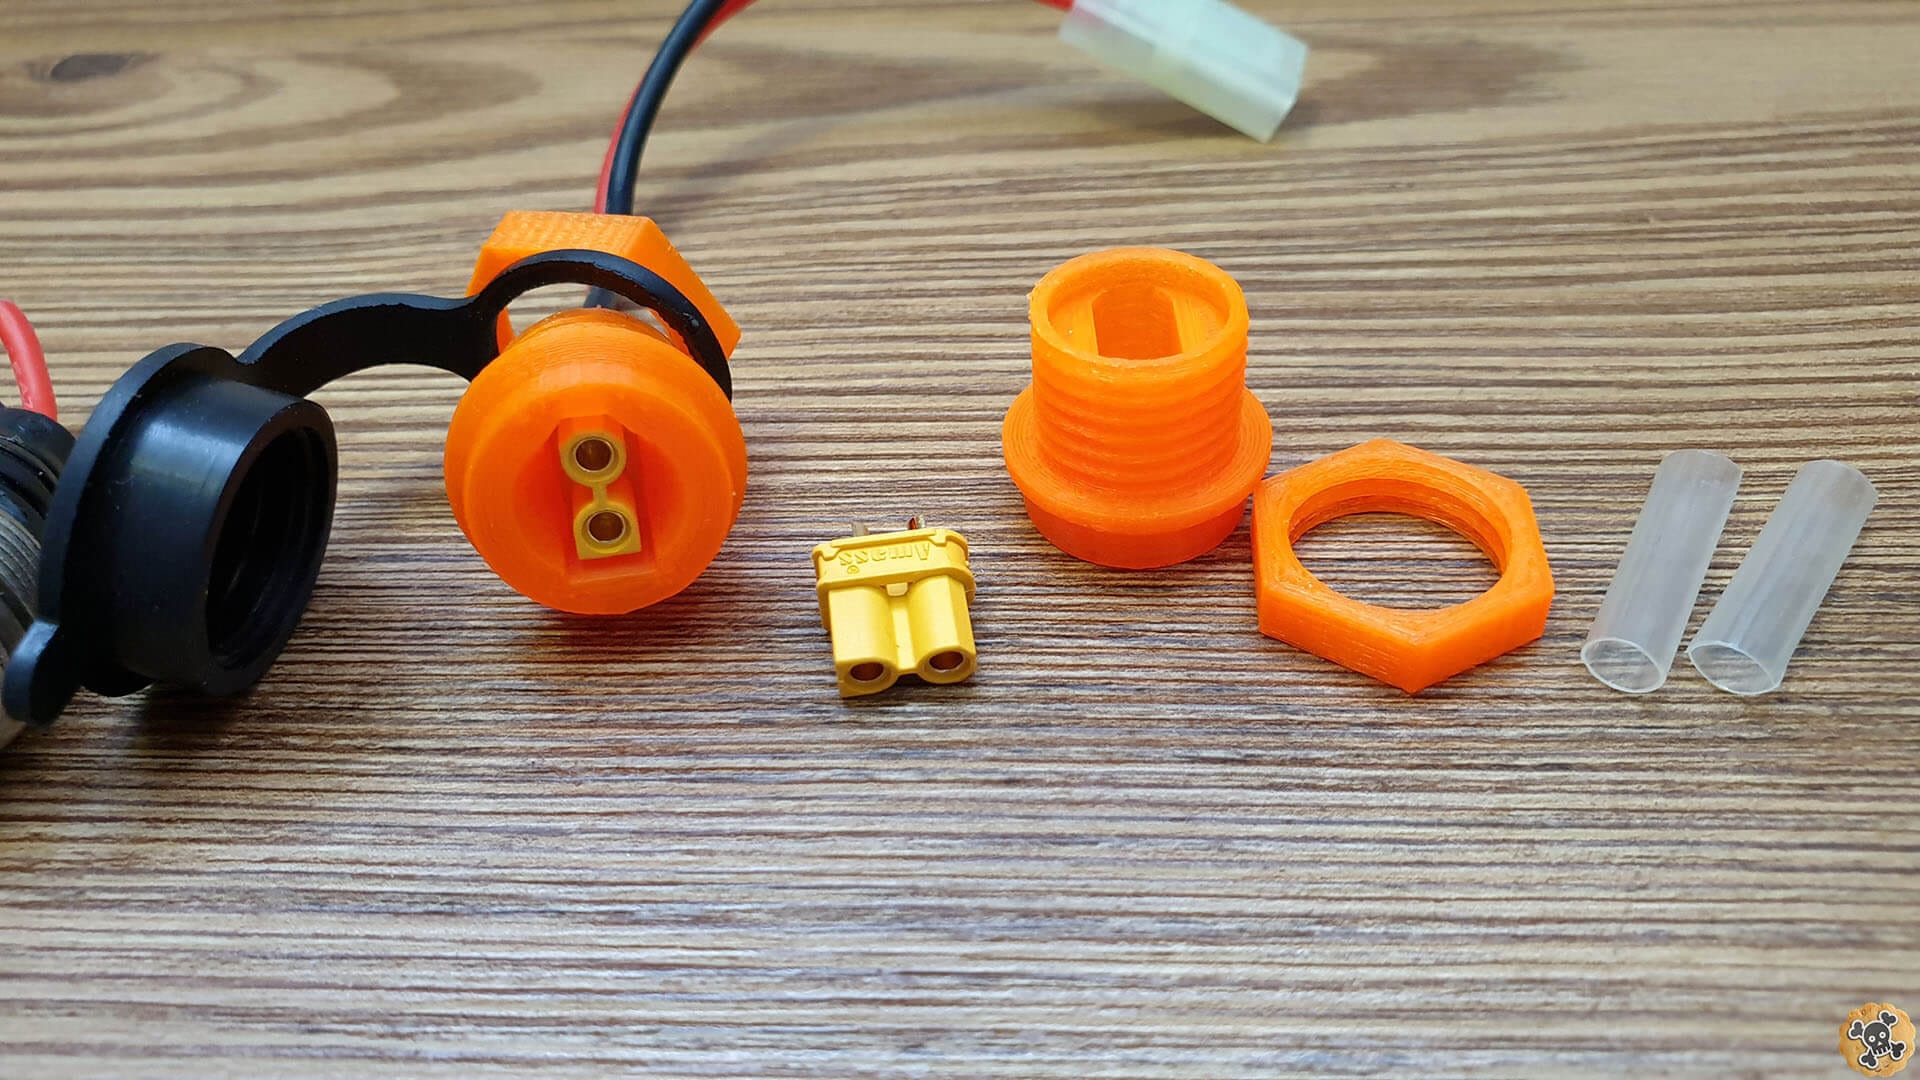
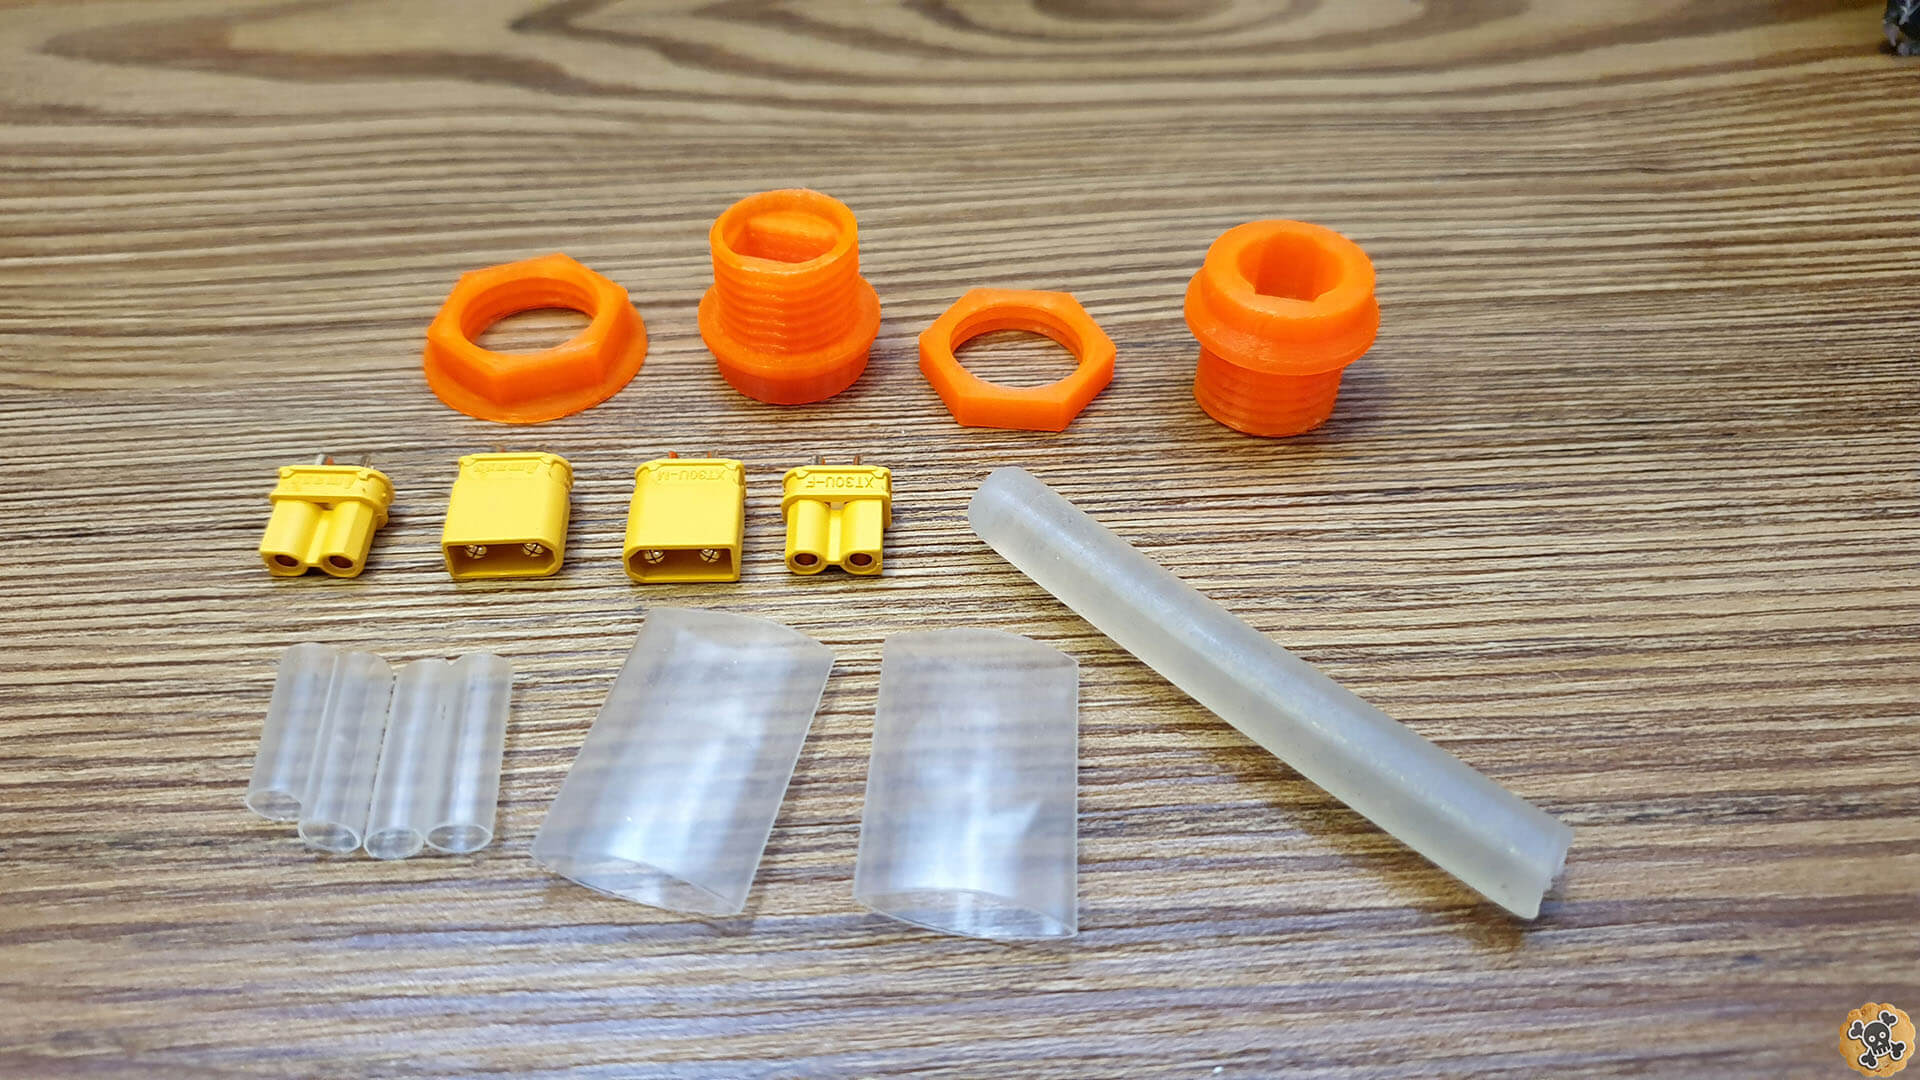
How to install my DIY Charging port.
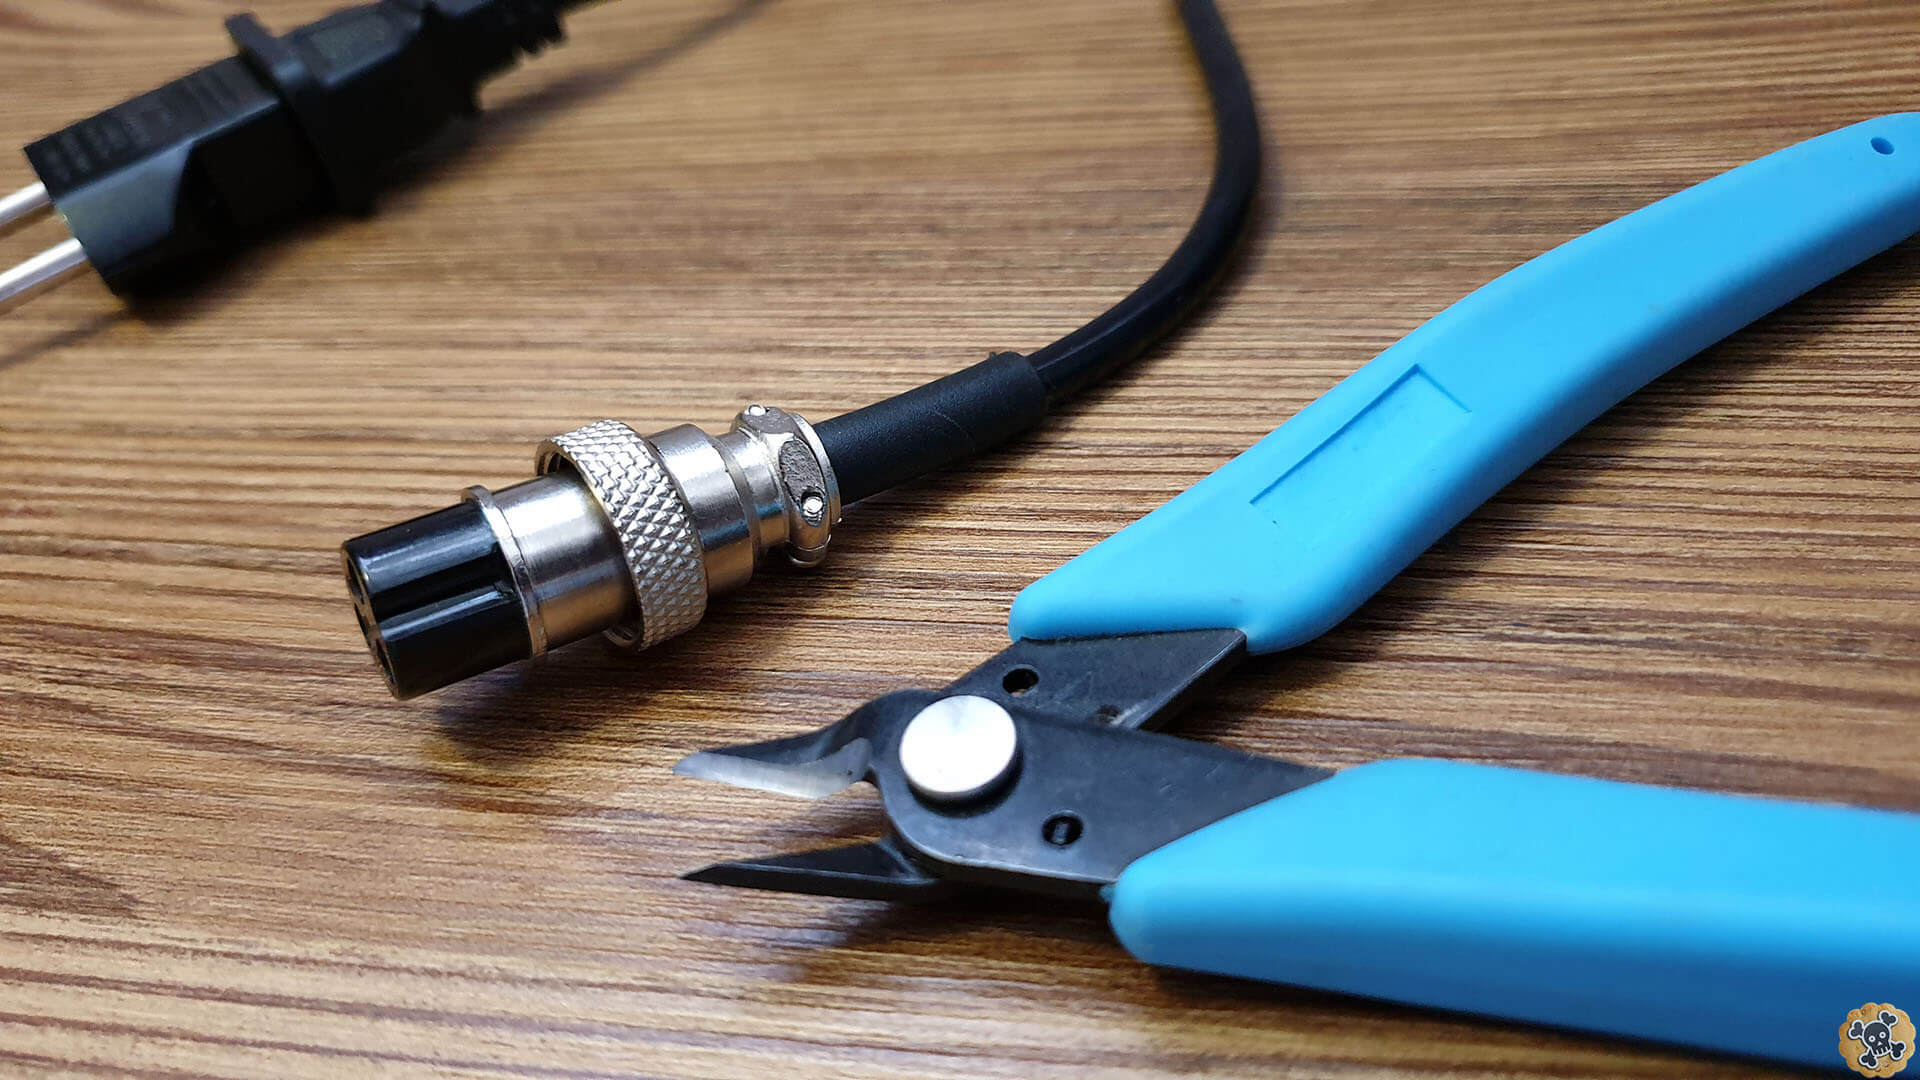
At first you have to open the deck in your scoot and disconnect battery from controllers ( big yellow XT60 connetors ) & disconnect charging ports ( translucent long connectors between between battery and charging port )
I showed it in this video
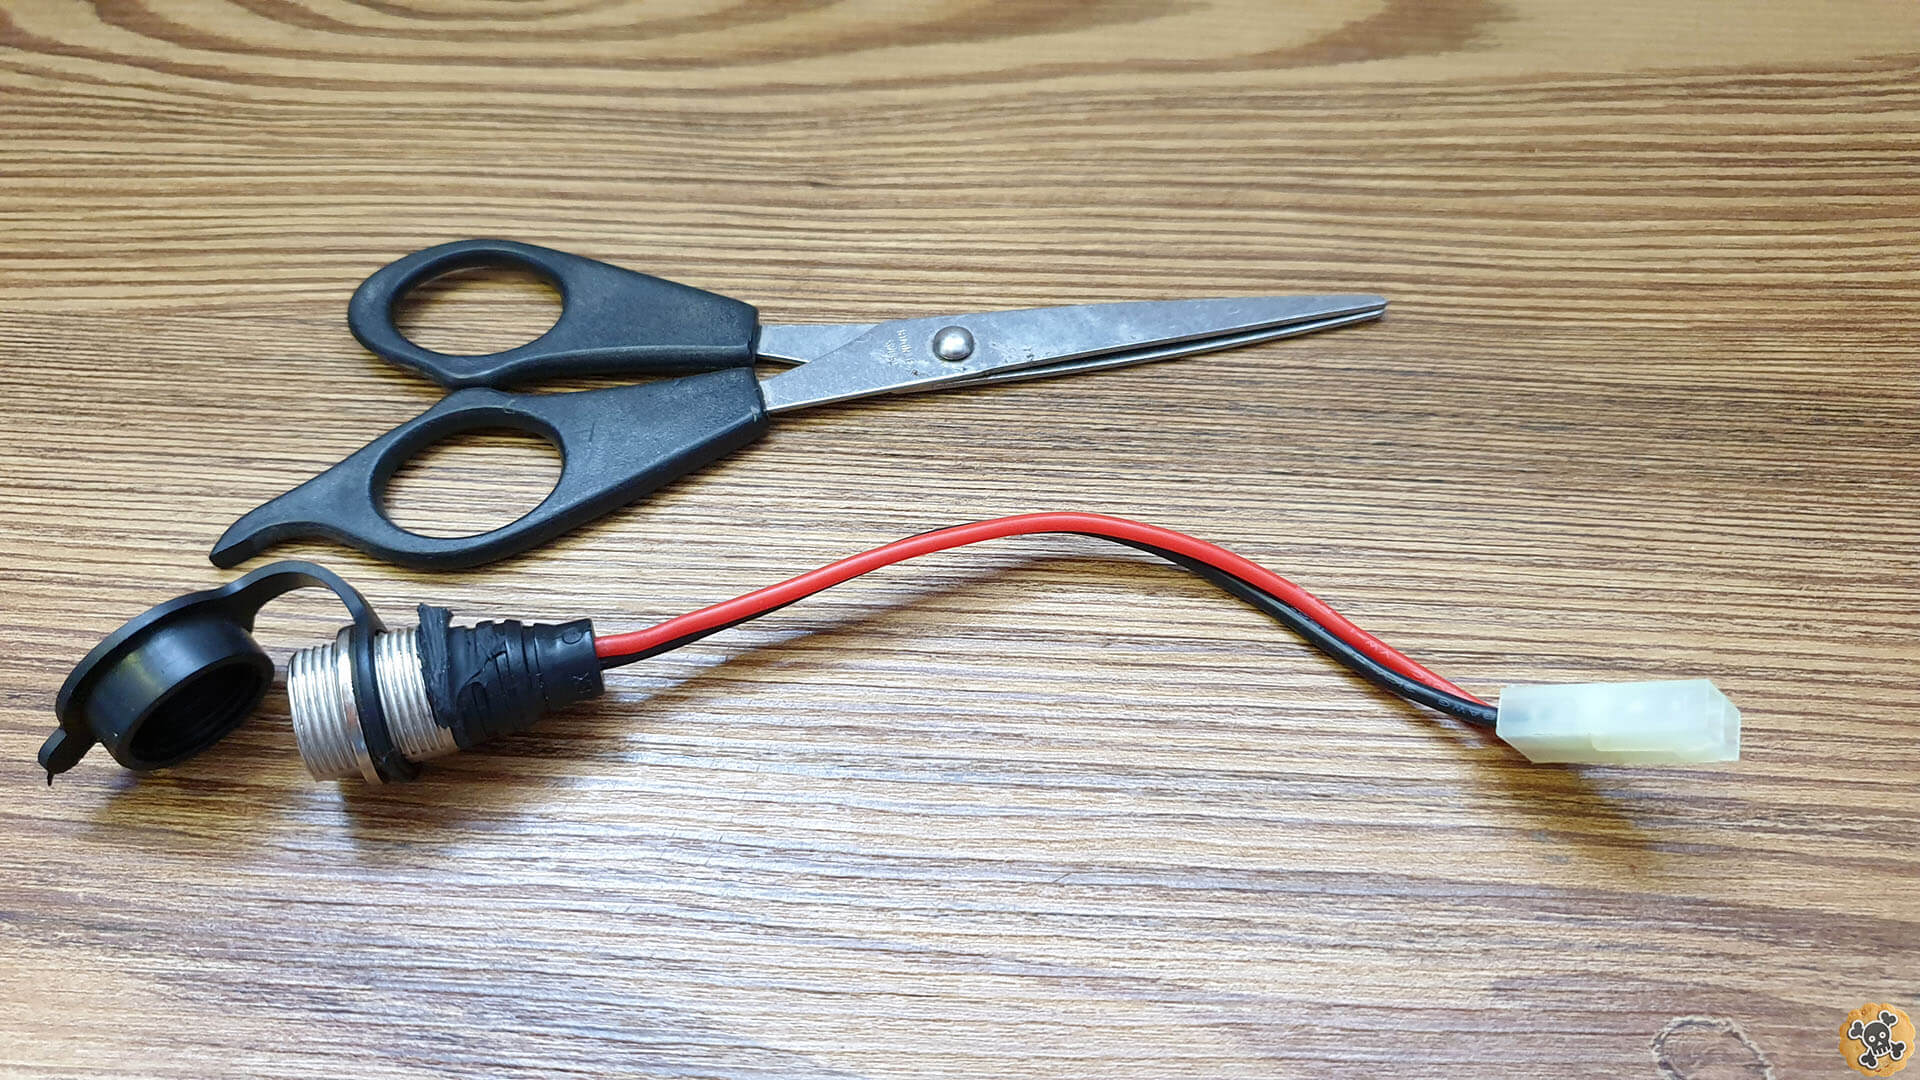
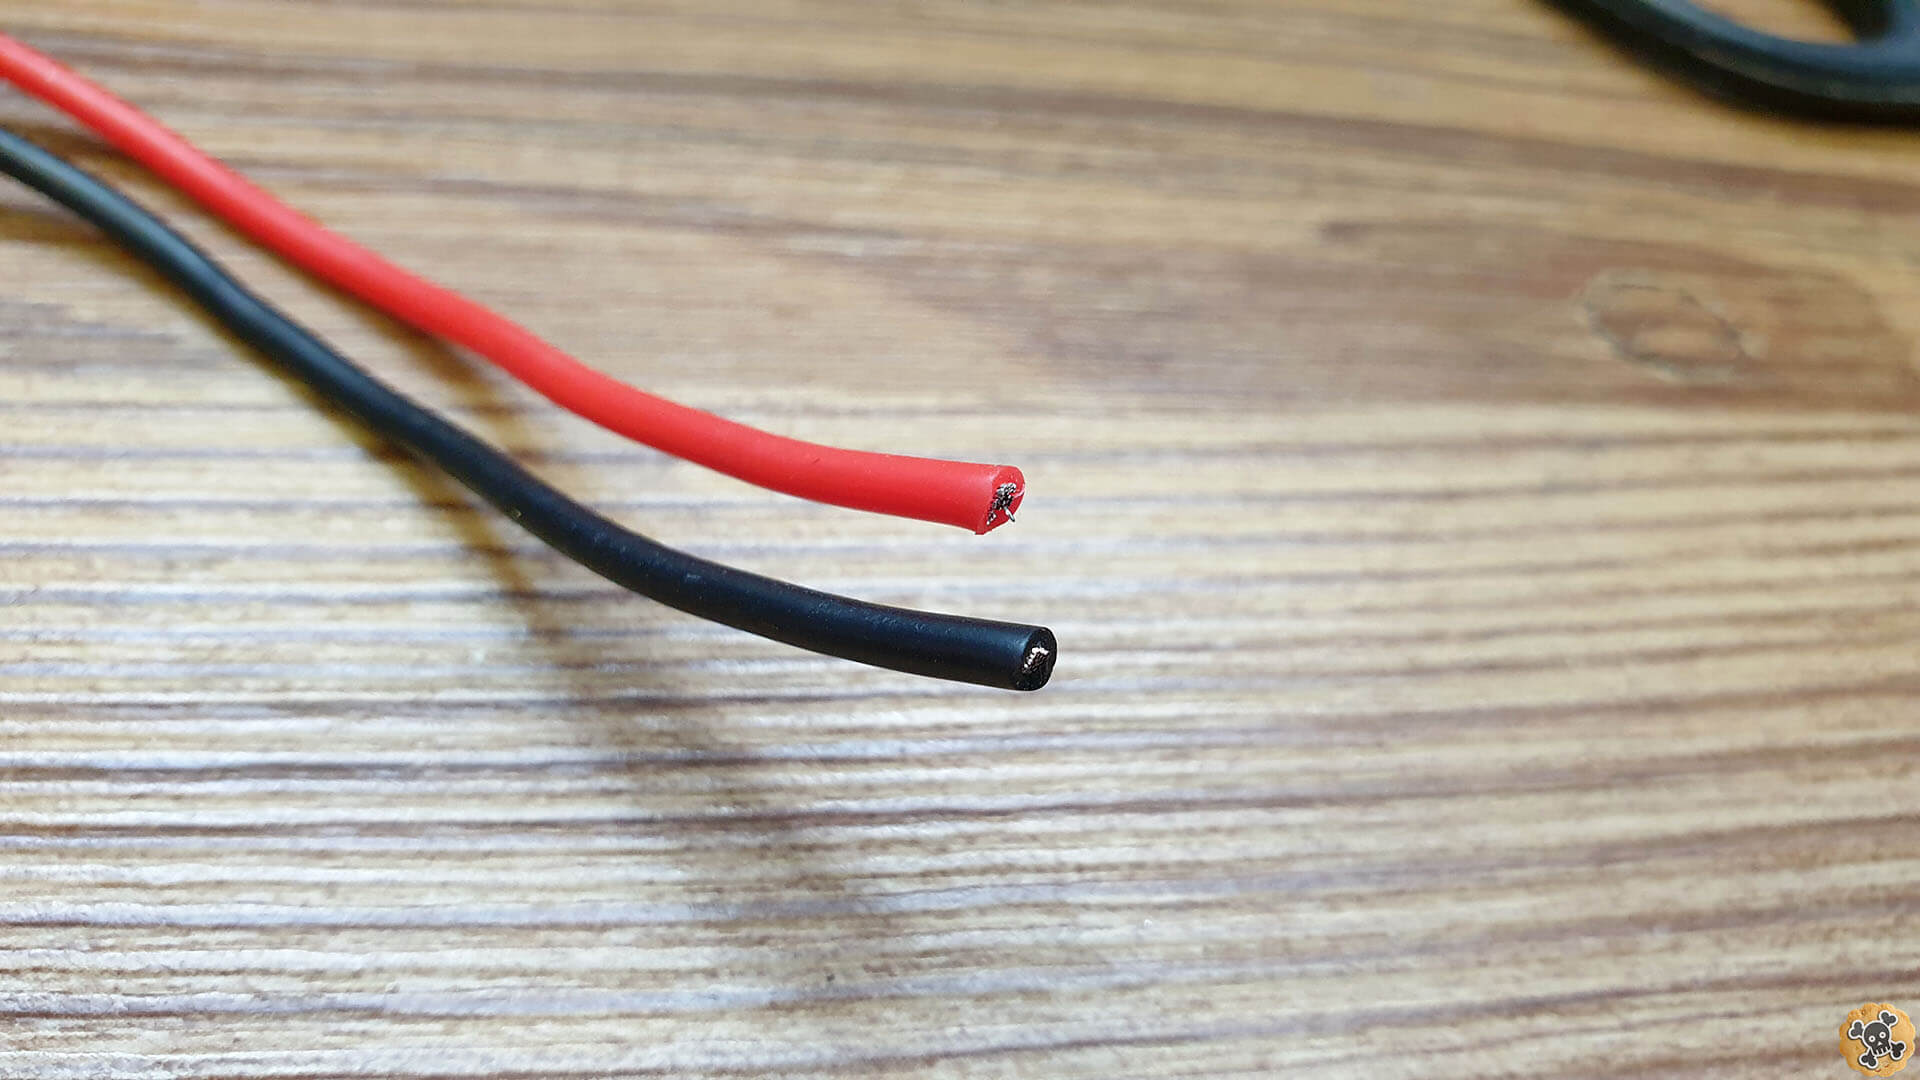
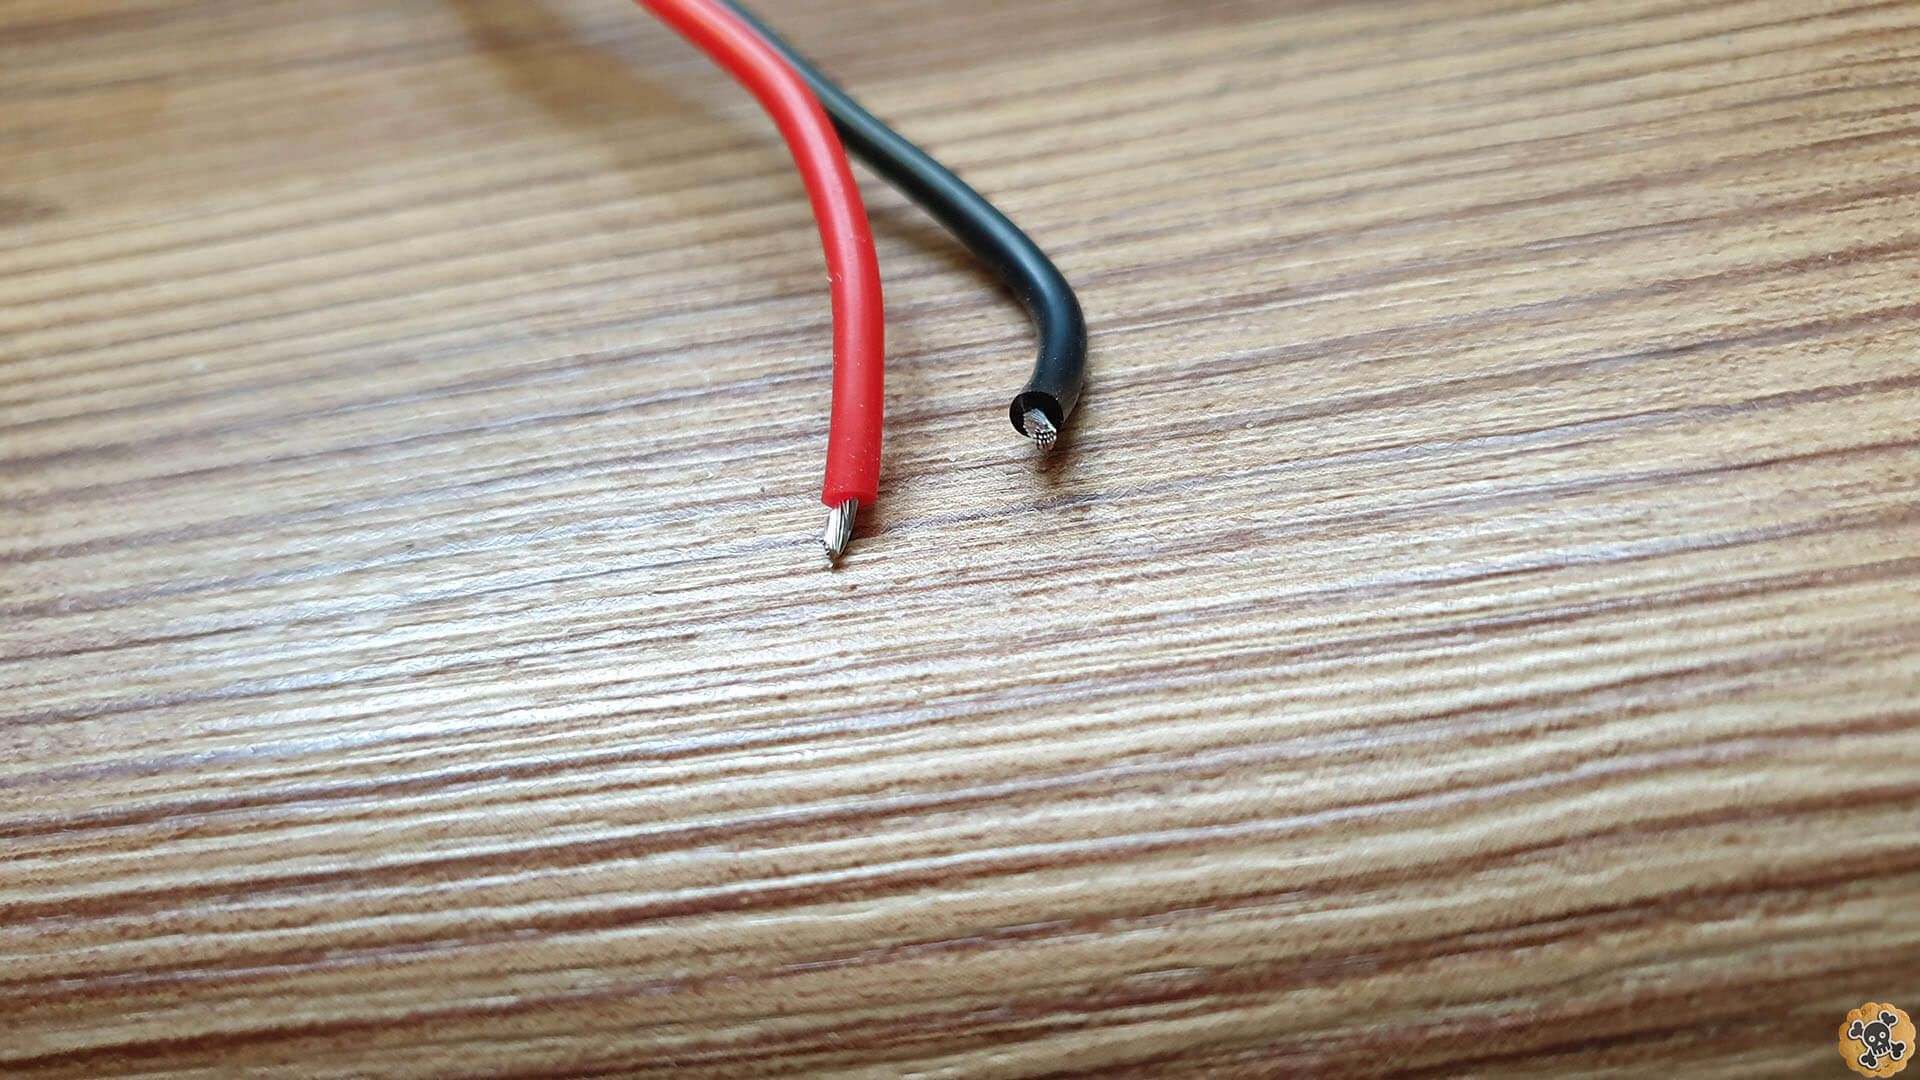
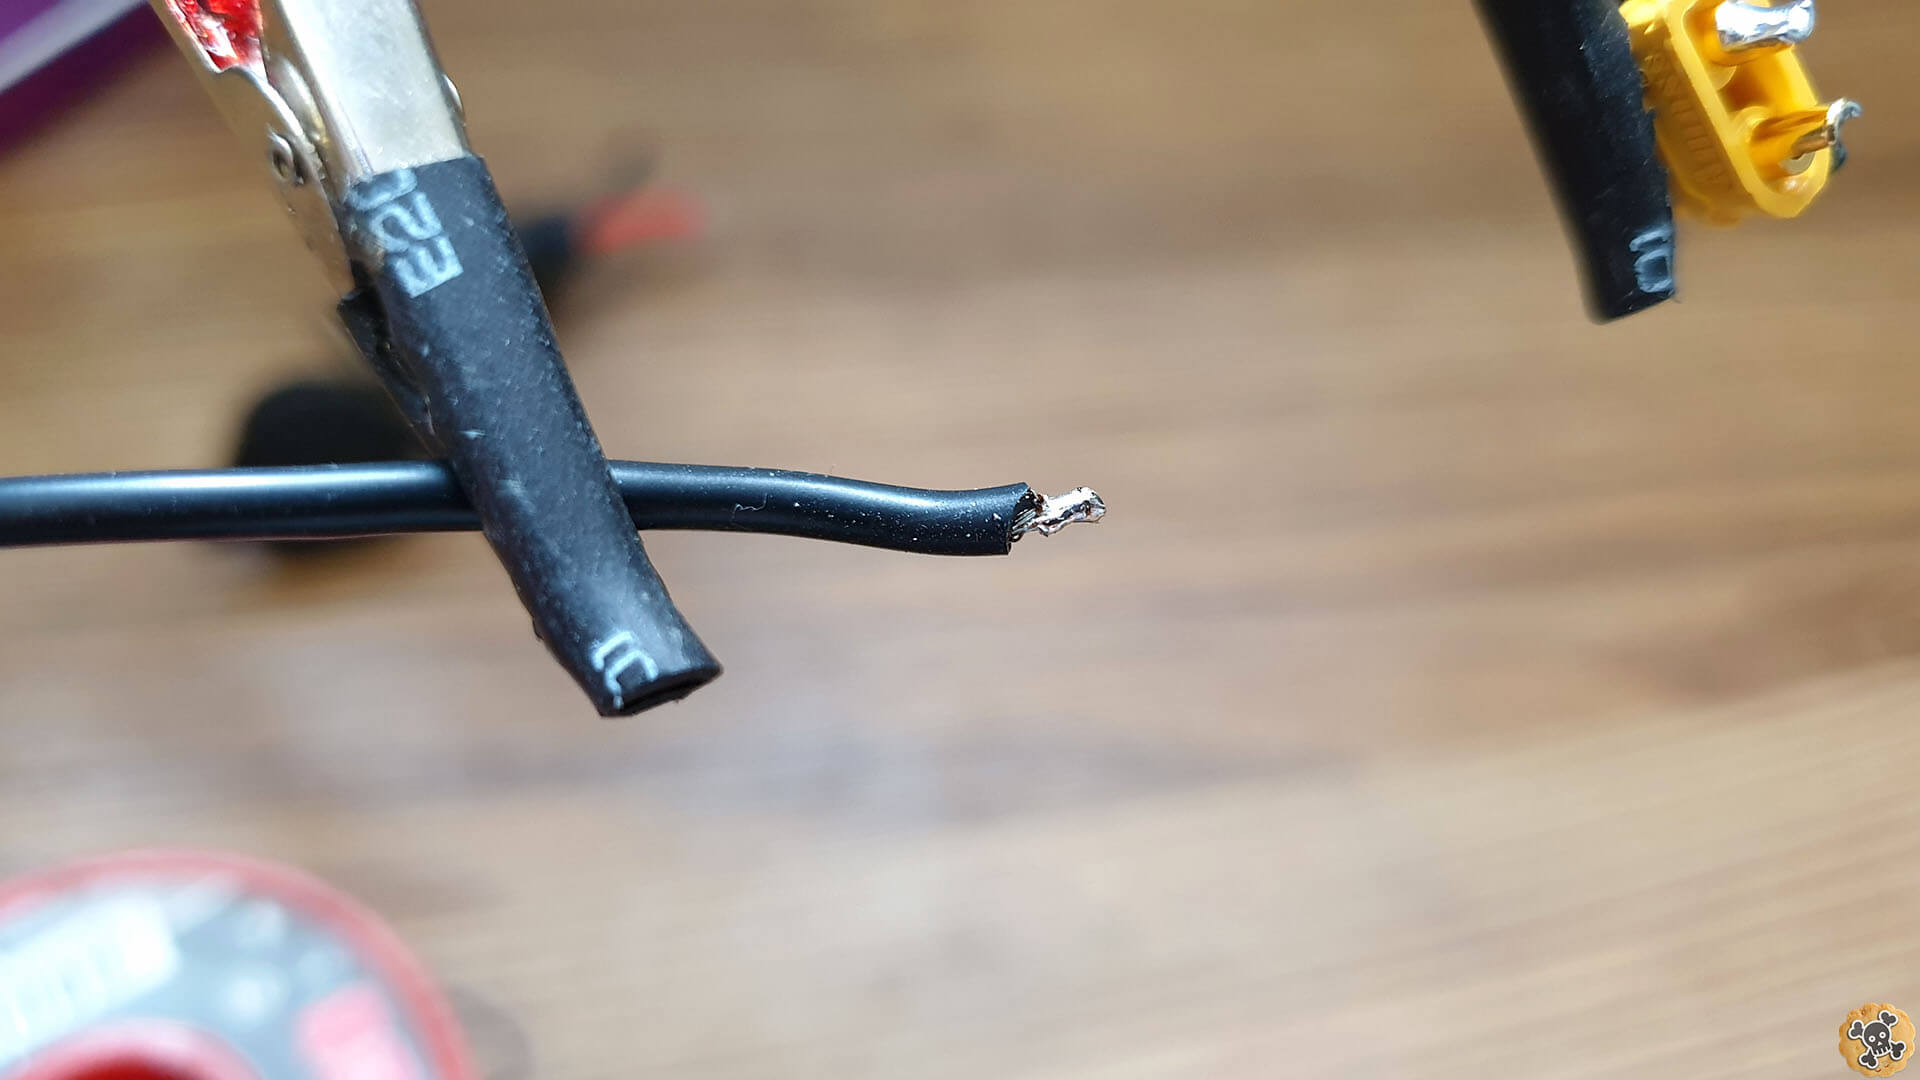
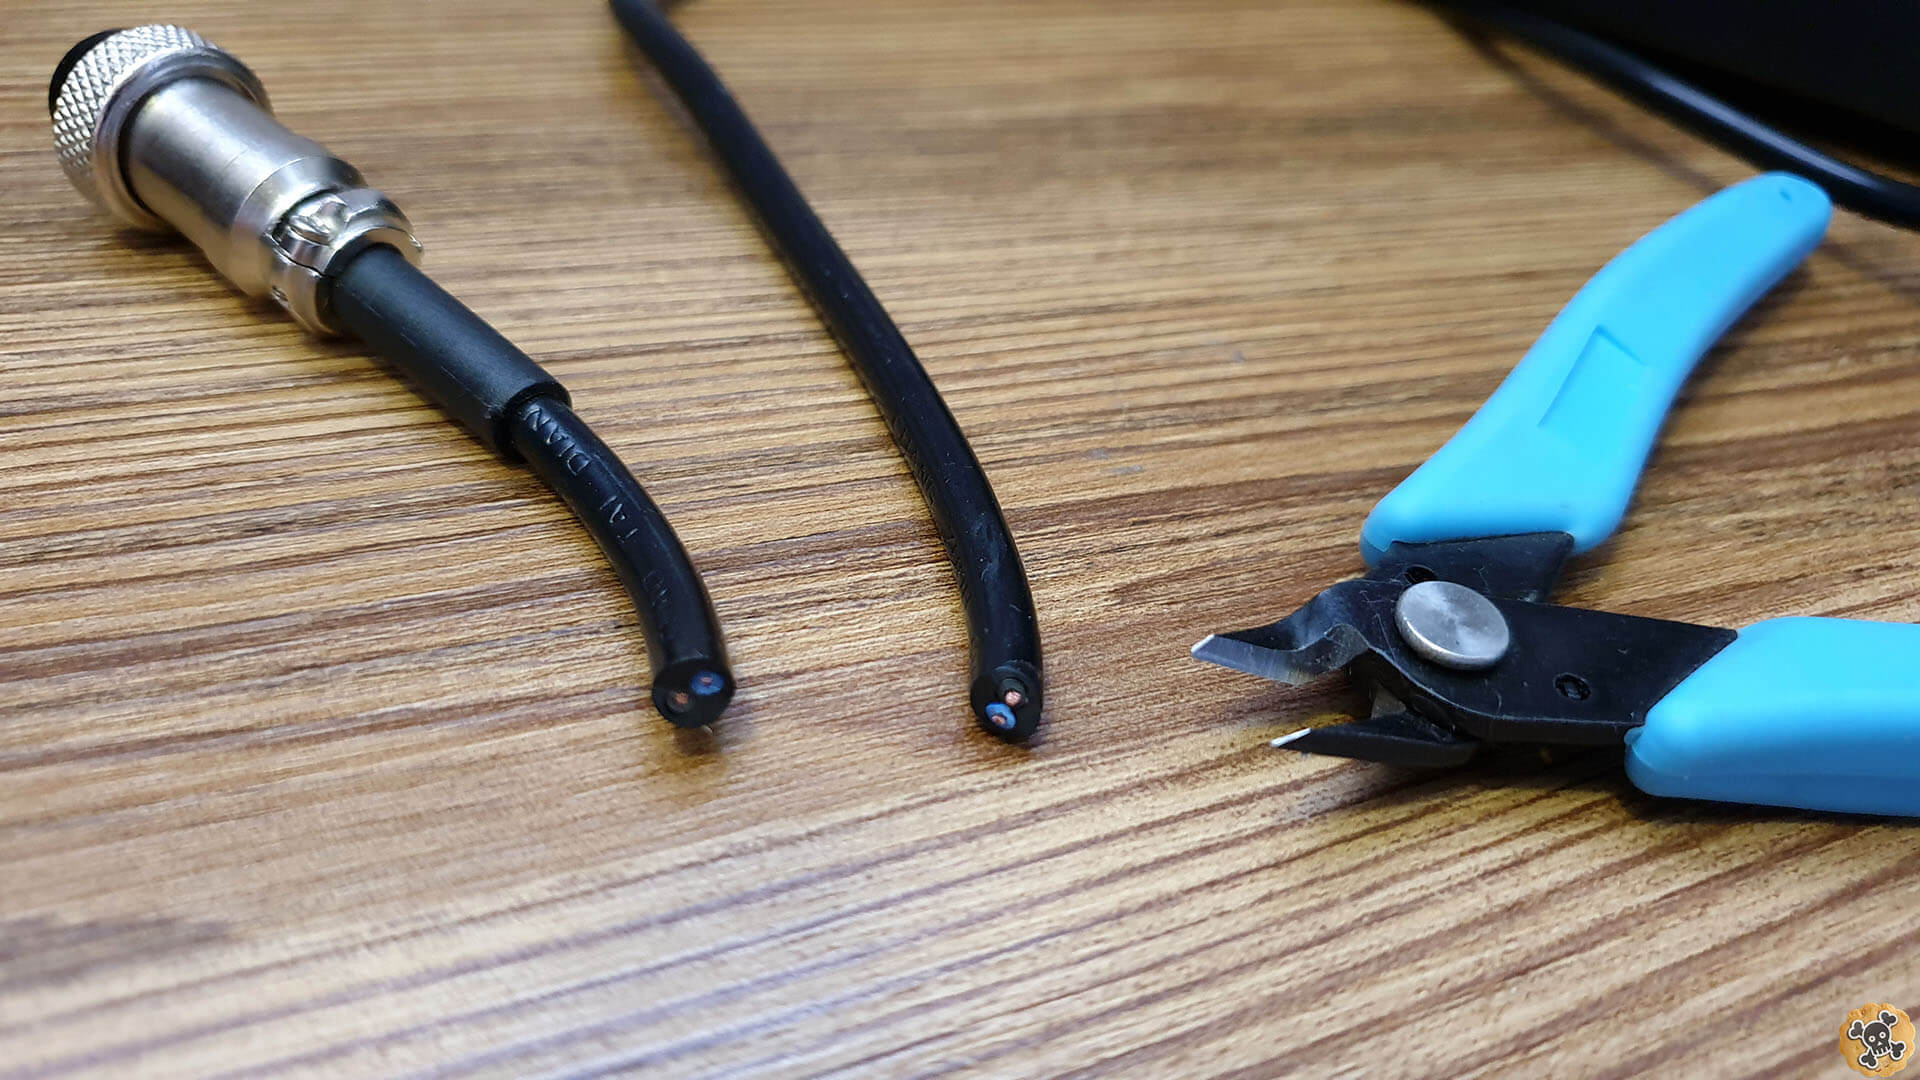
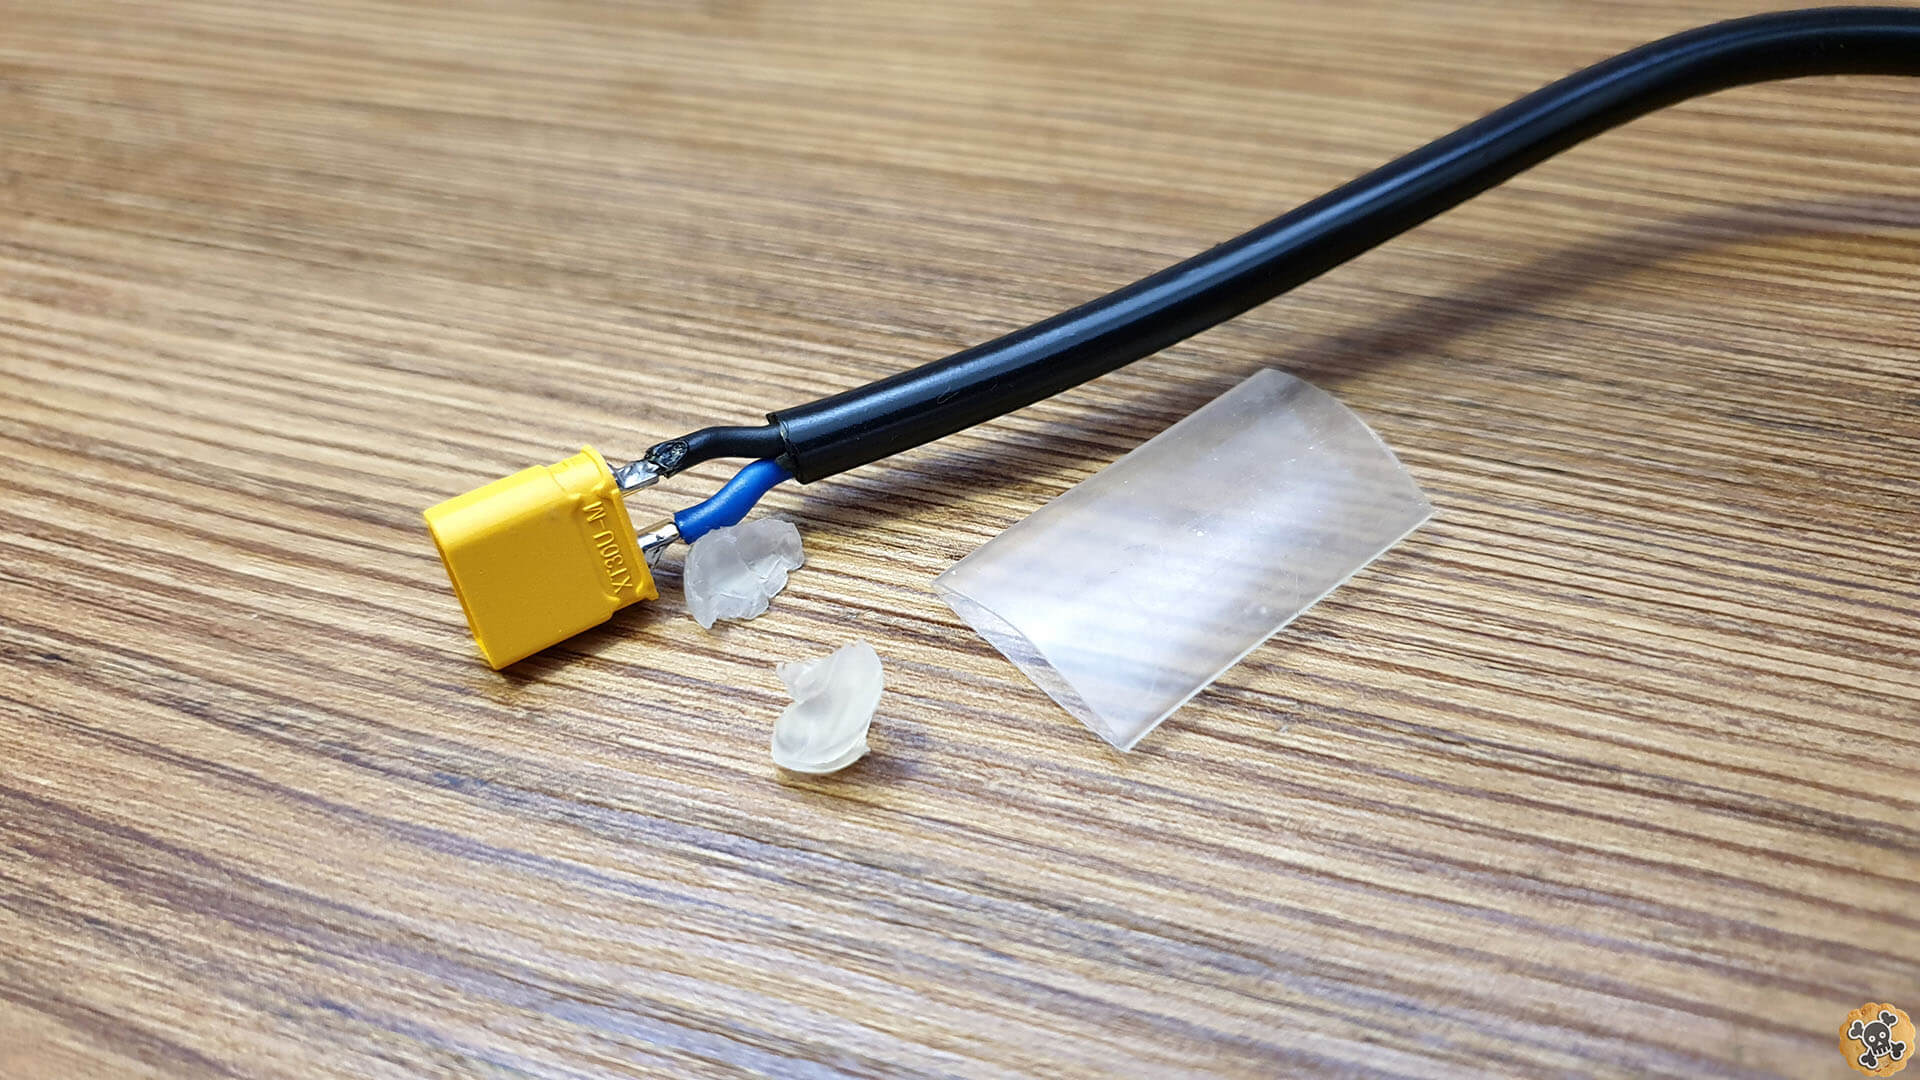
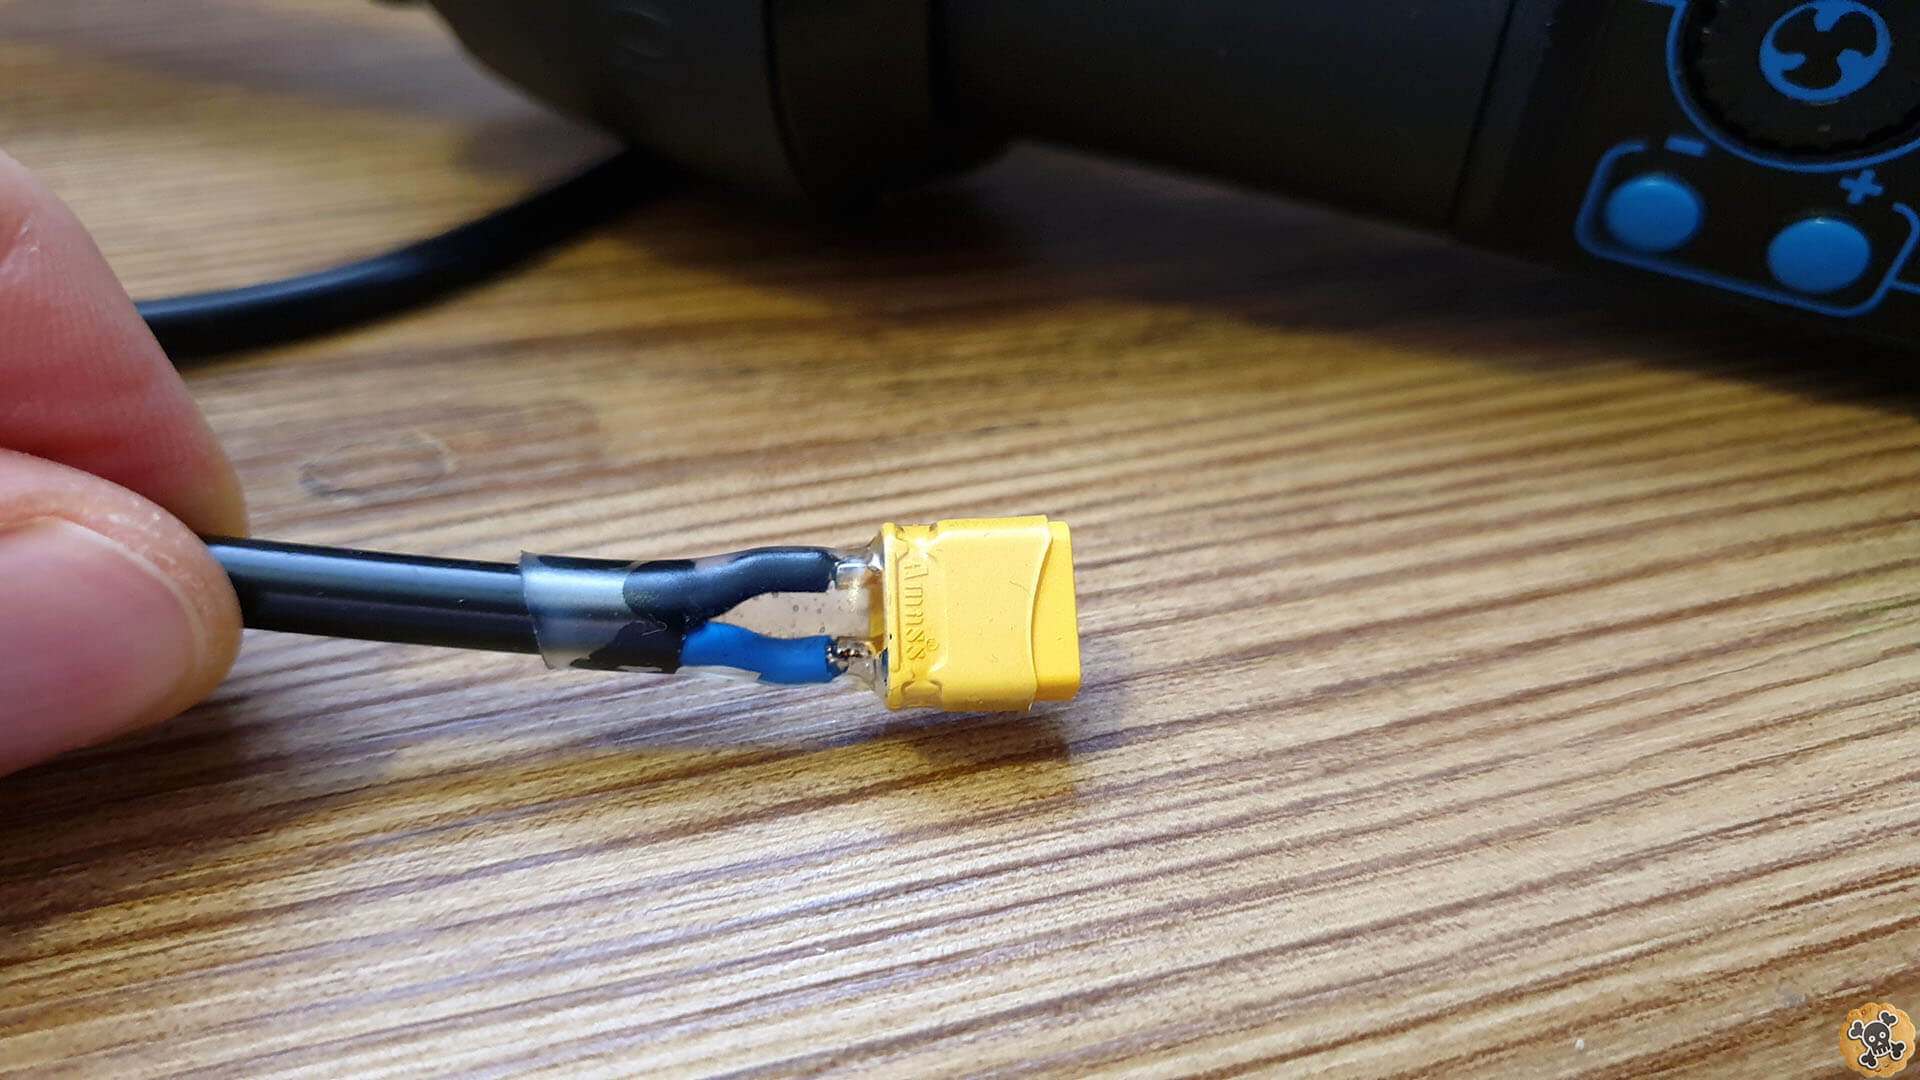
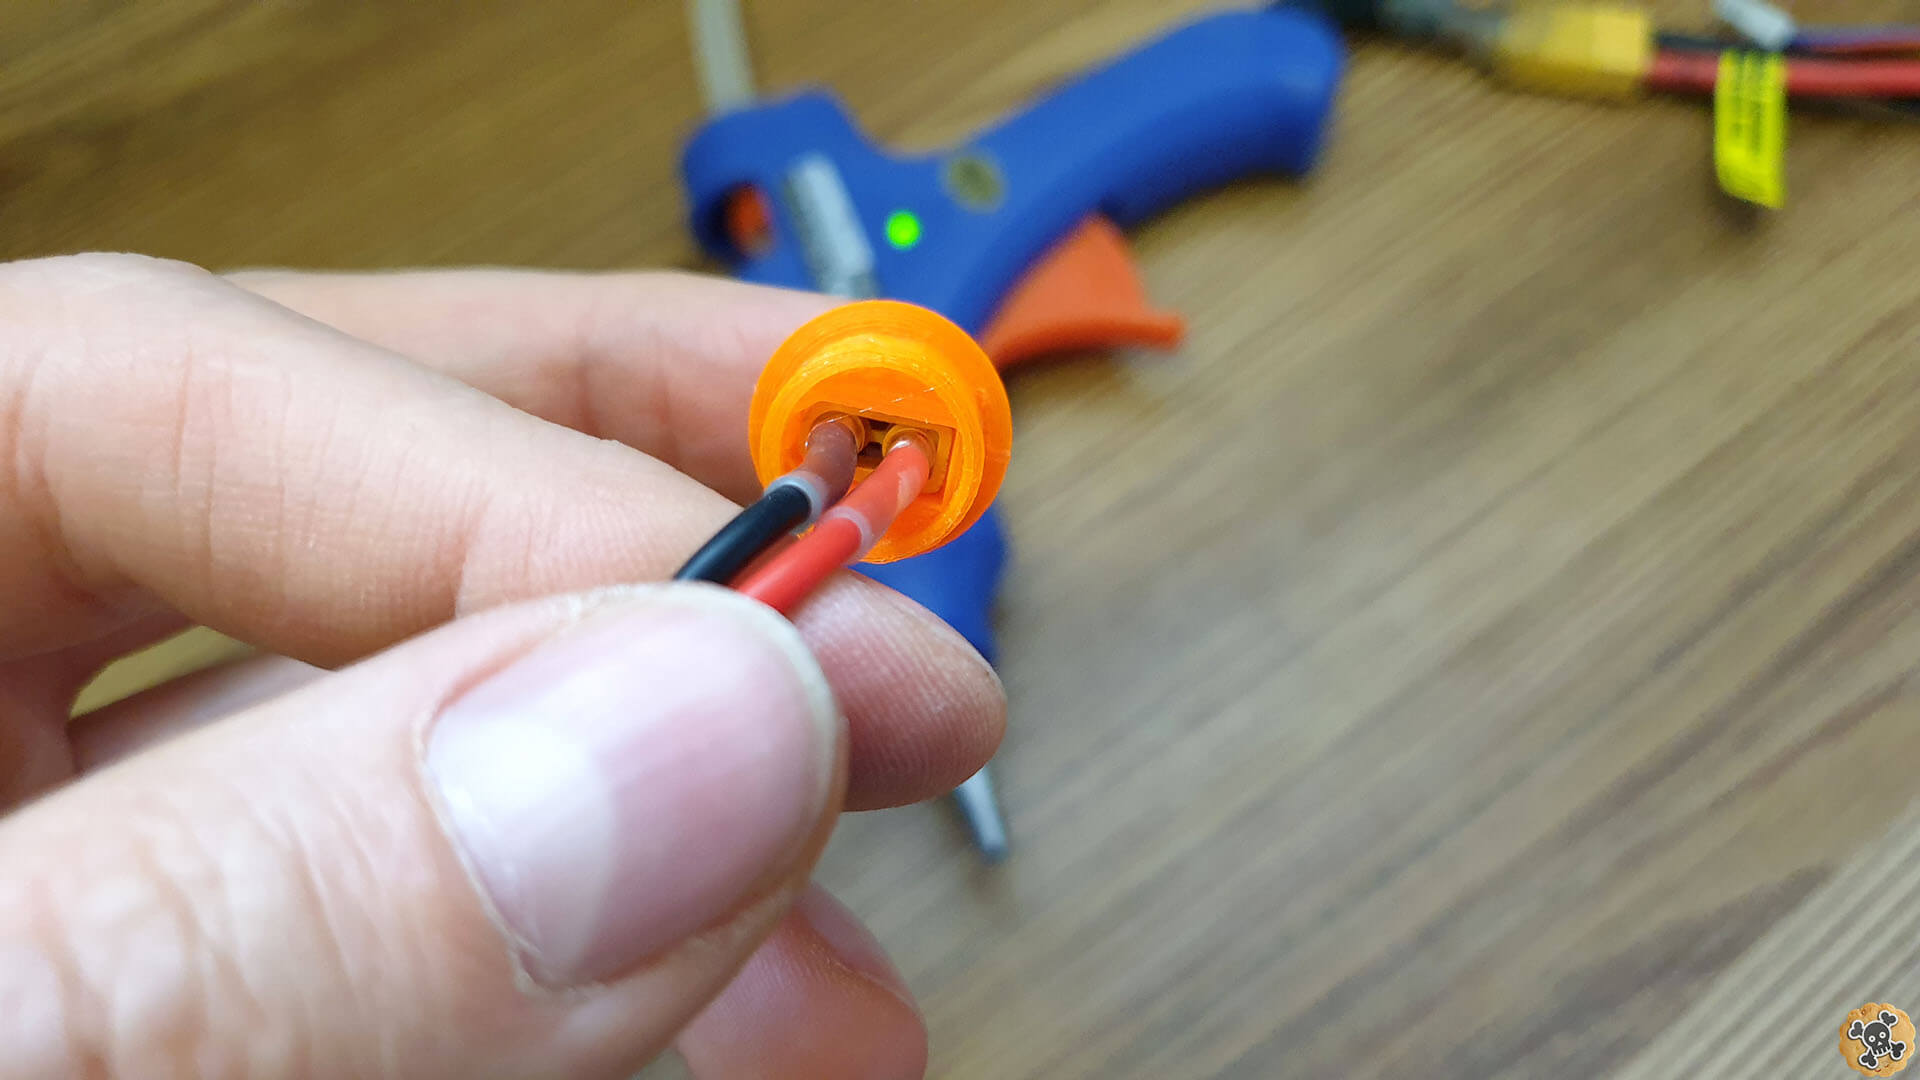
When you remove stock microphone charging port / cable, cut off microphone port like I did on img, then remove like 2mm of silicone cover
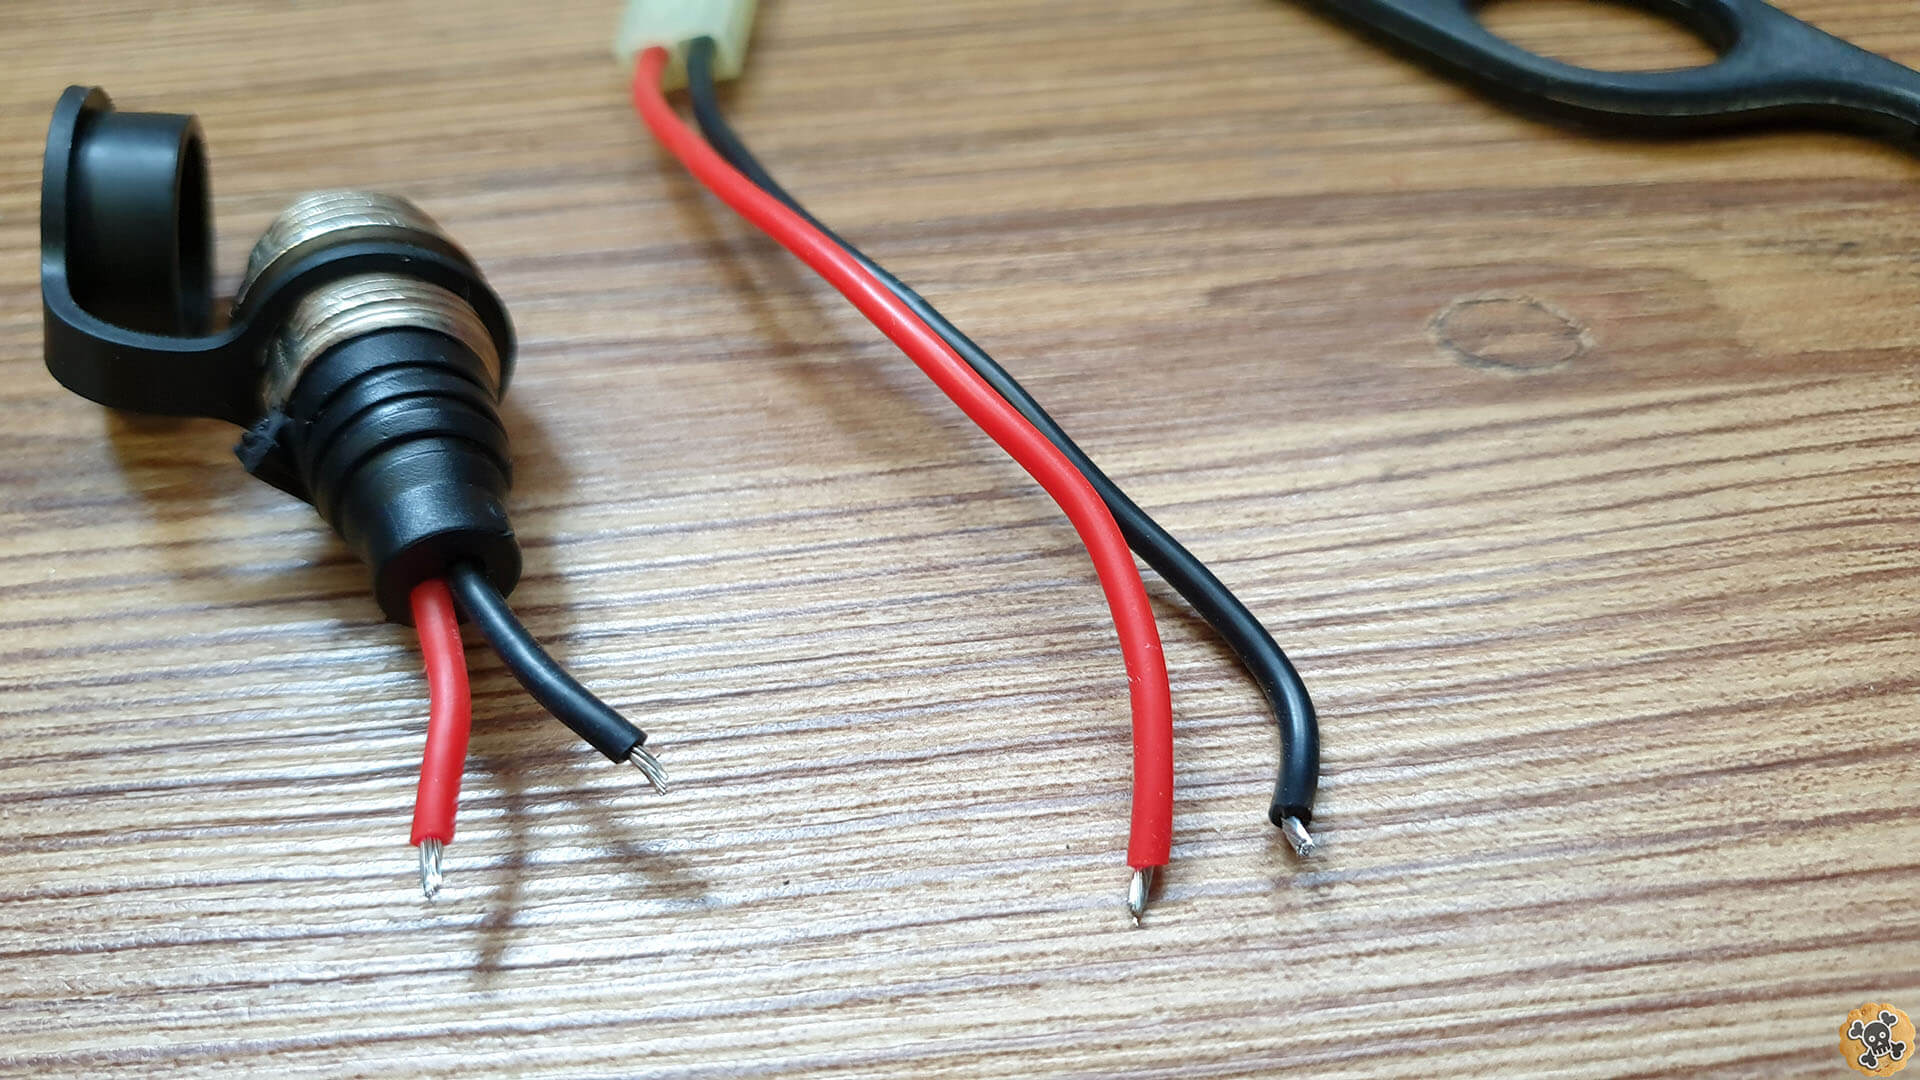
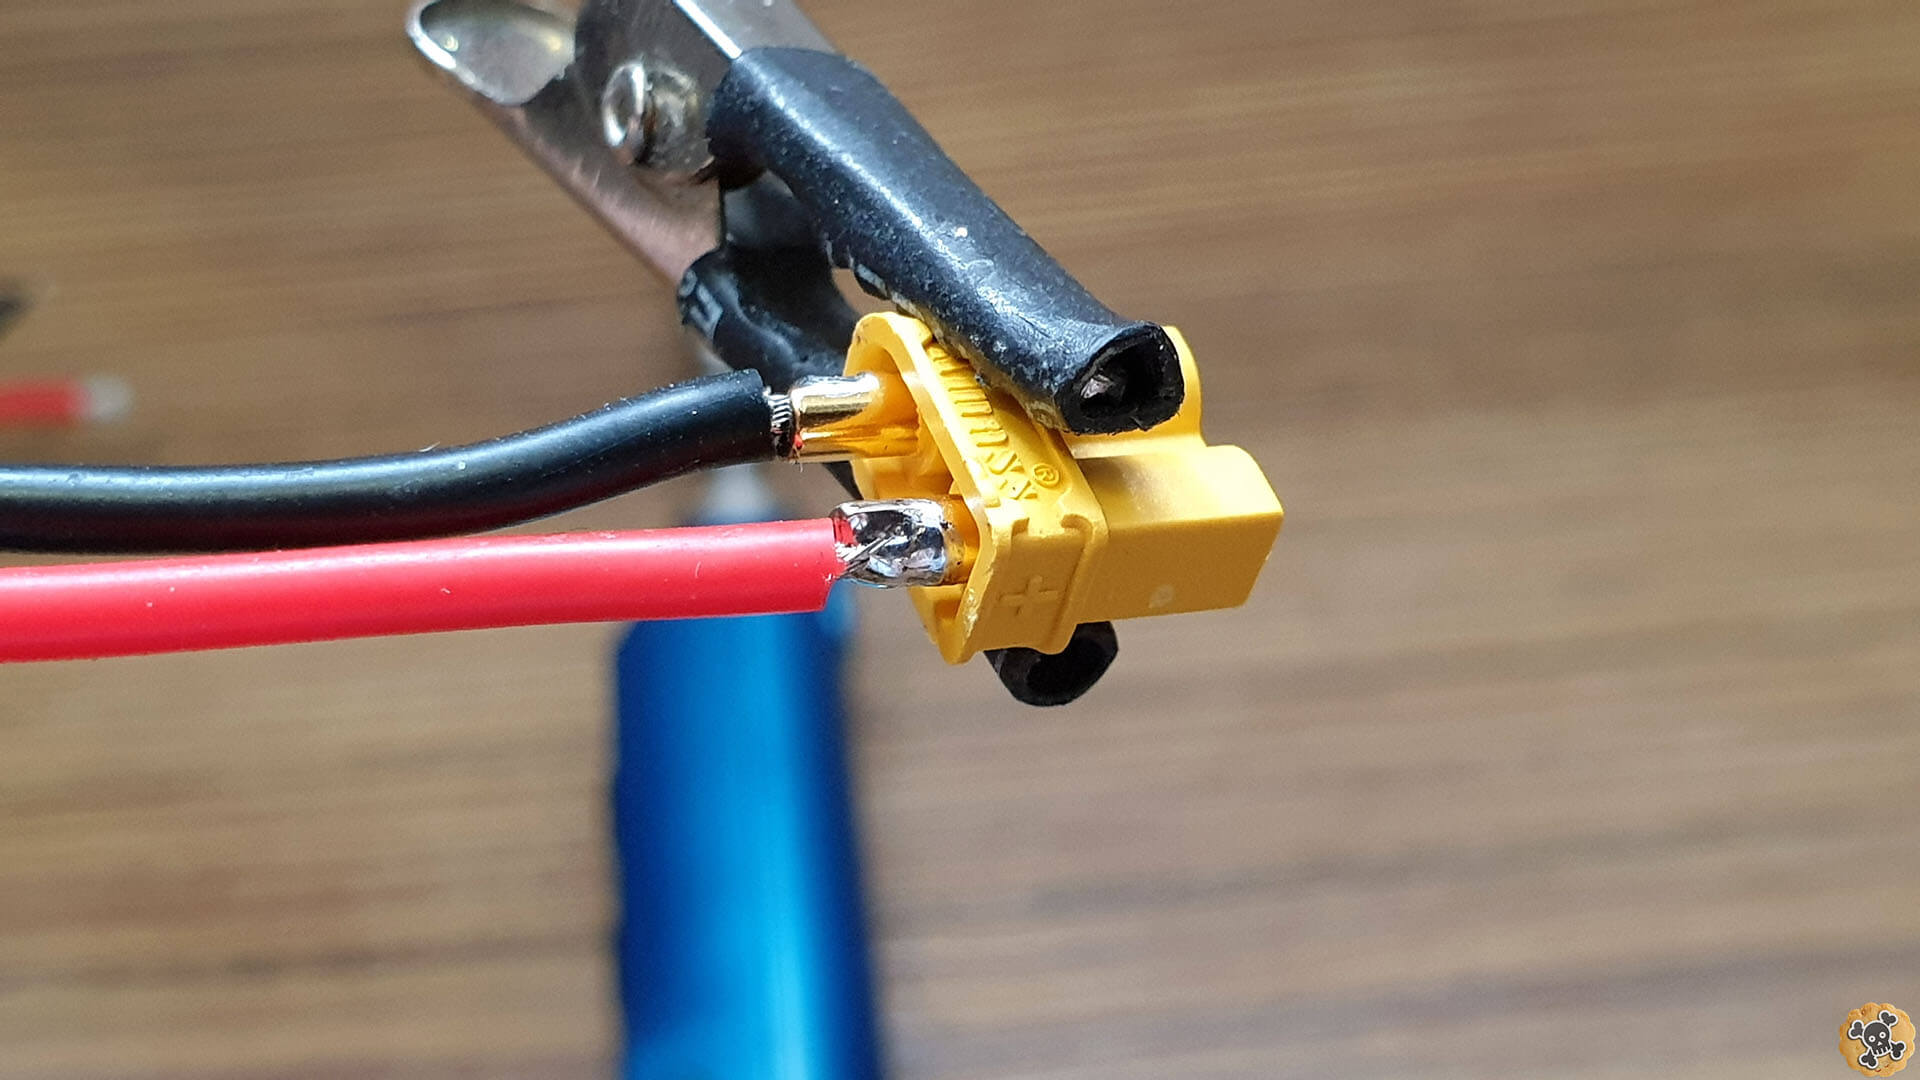
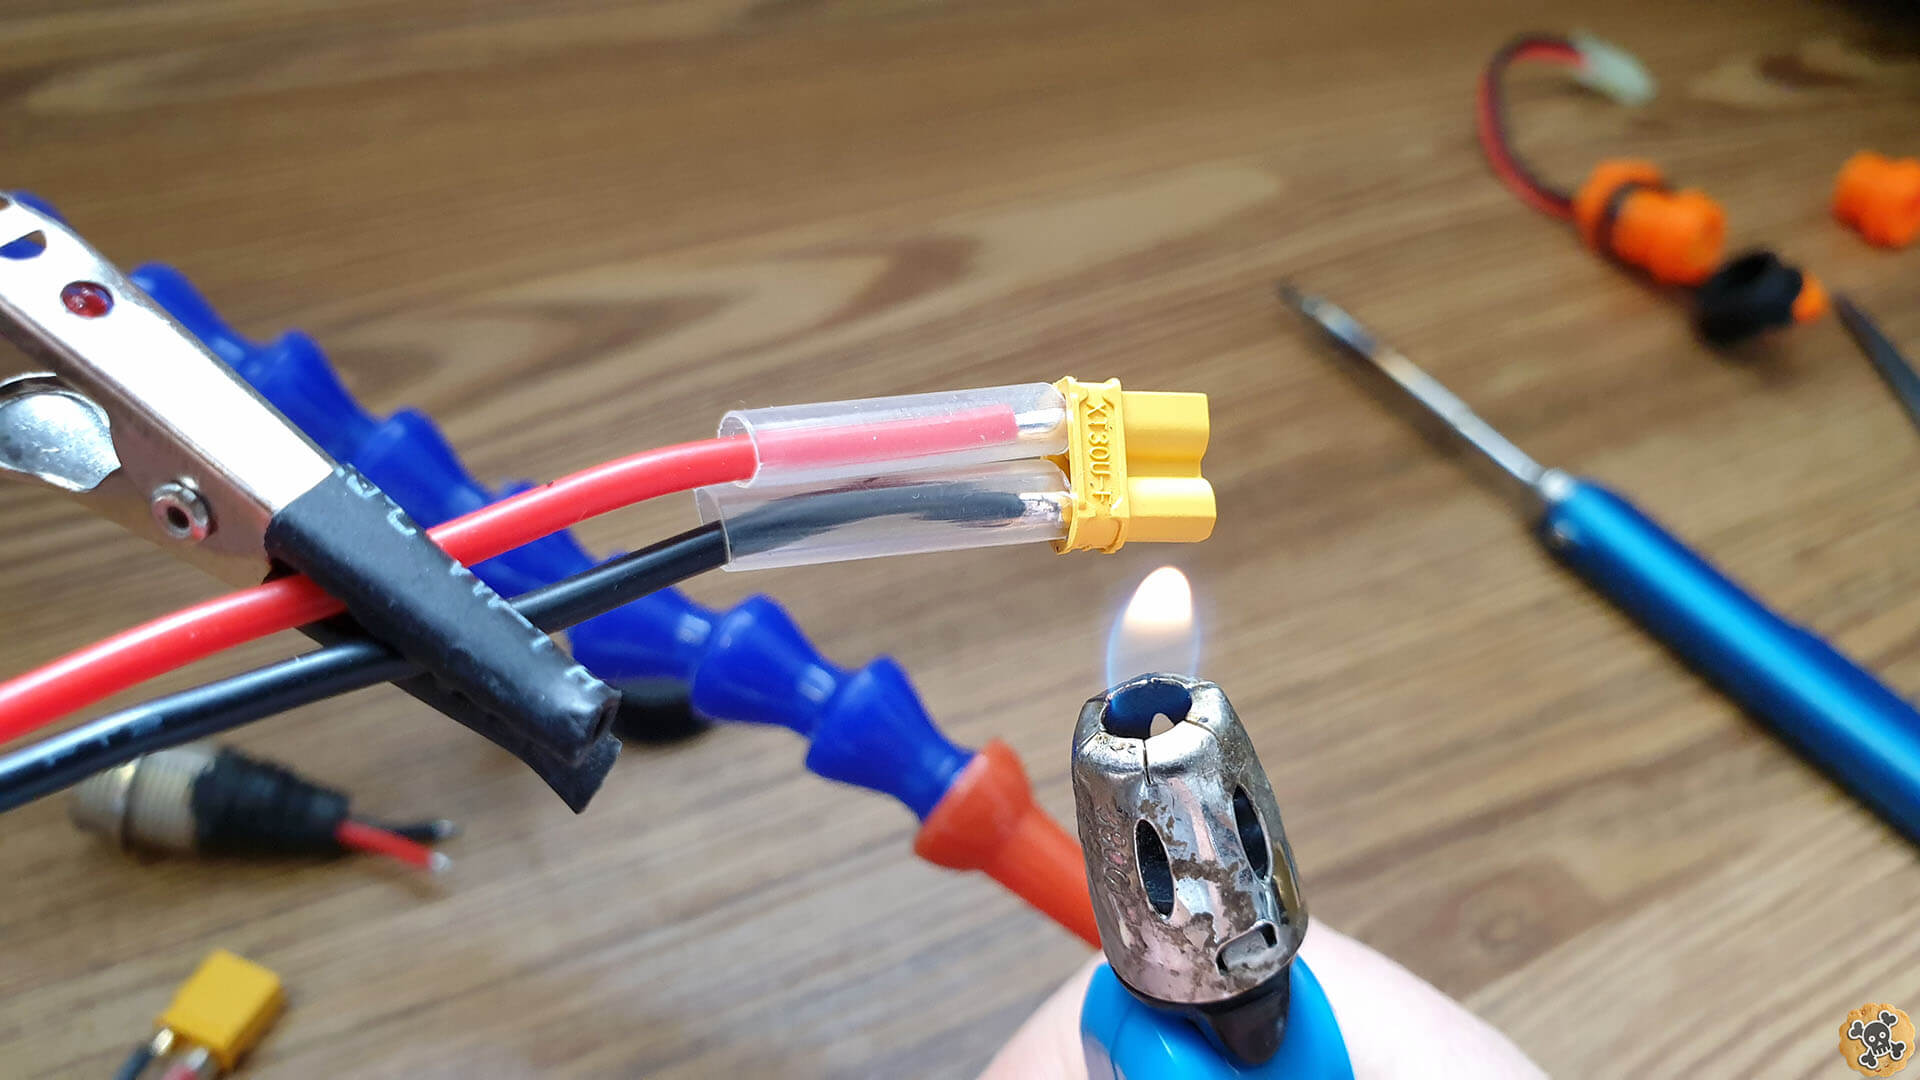
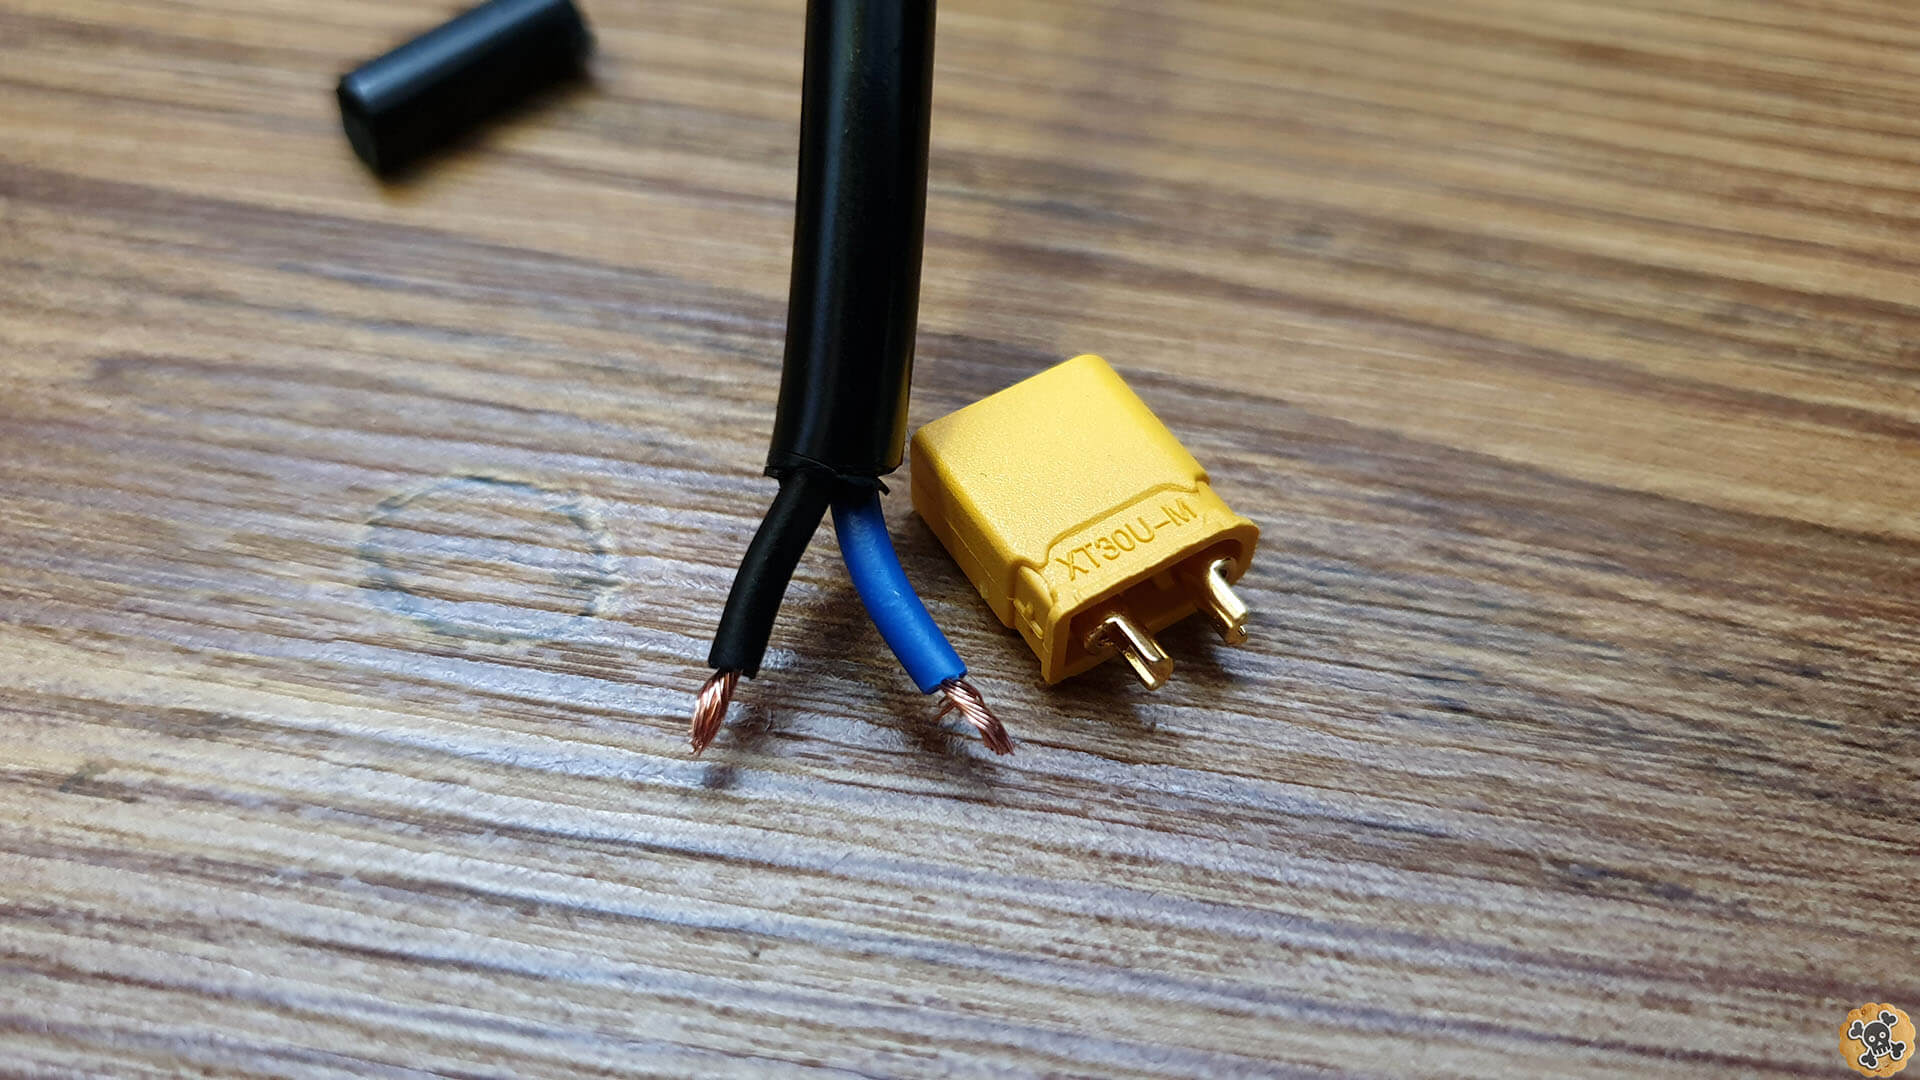
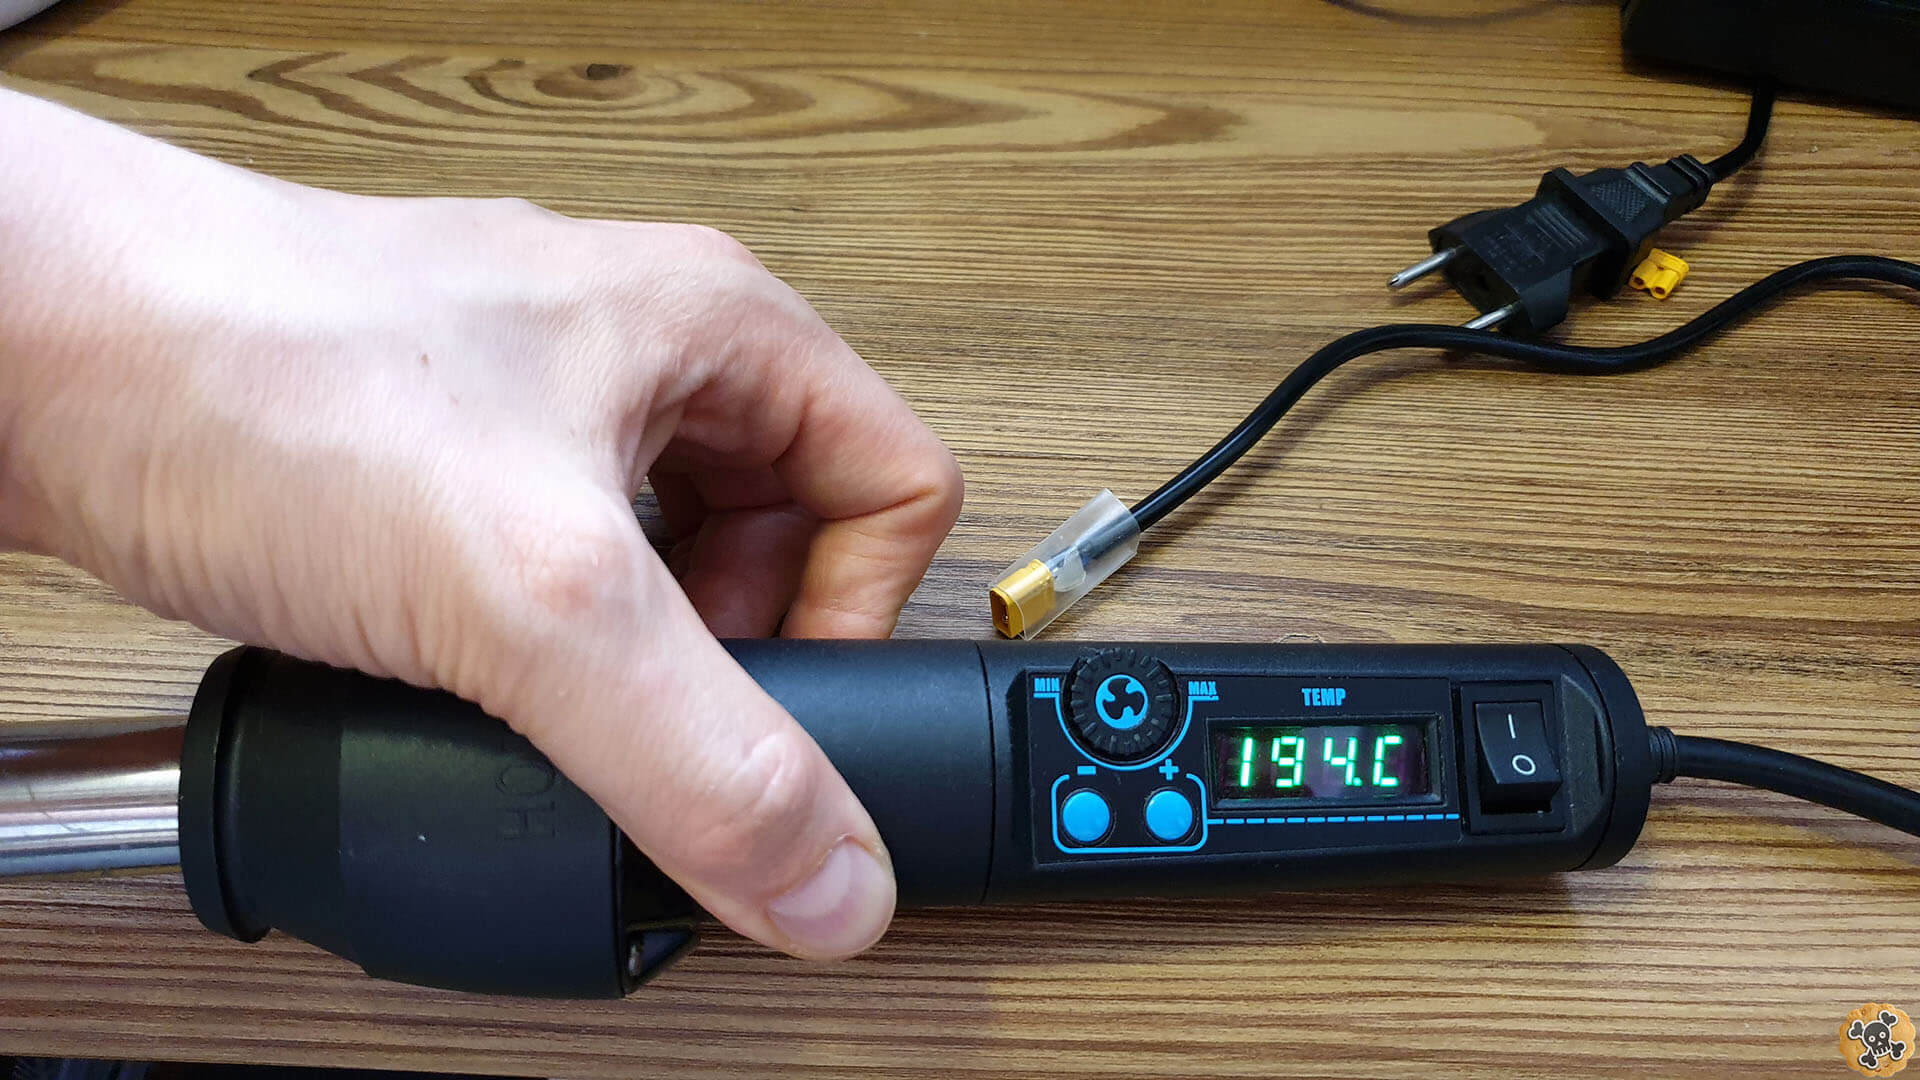
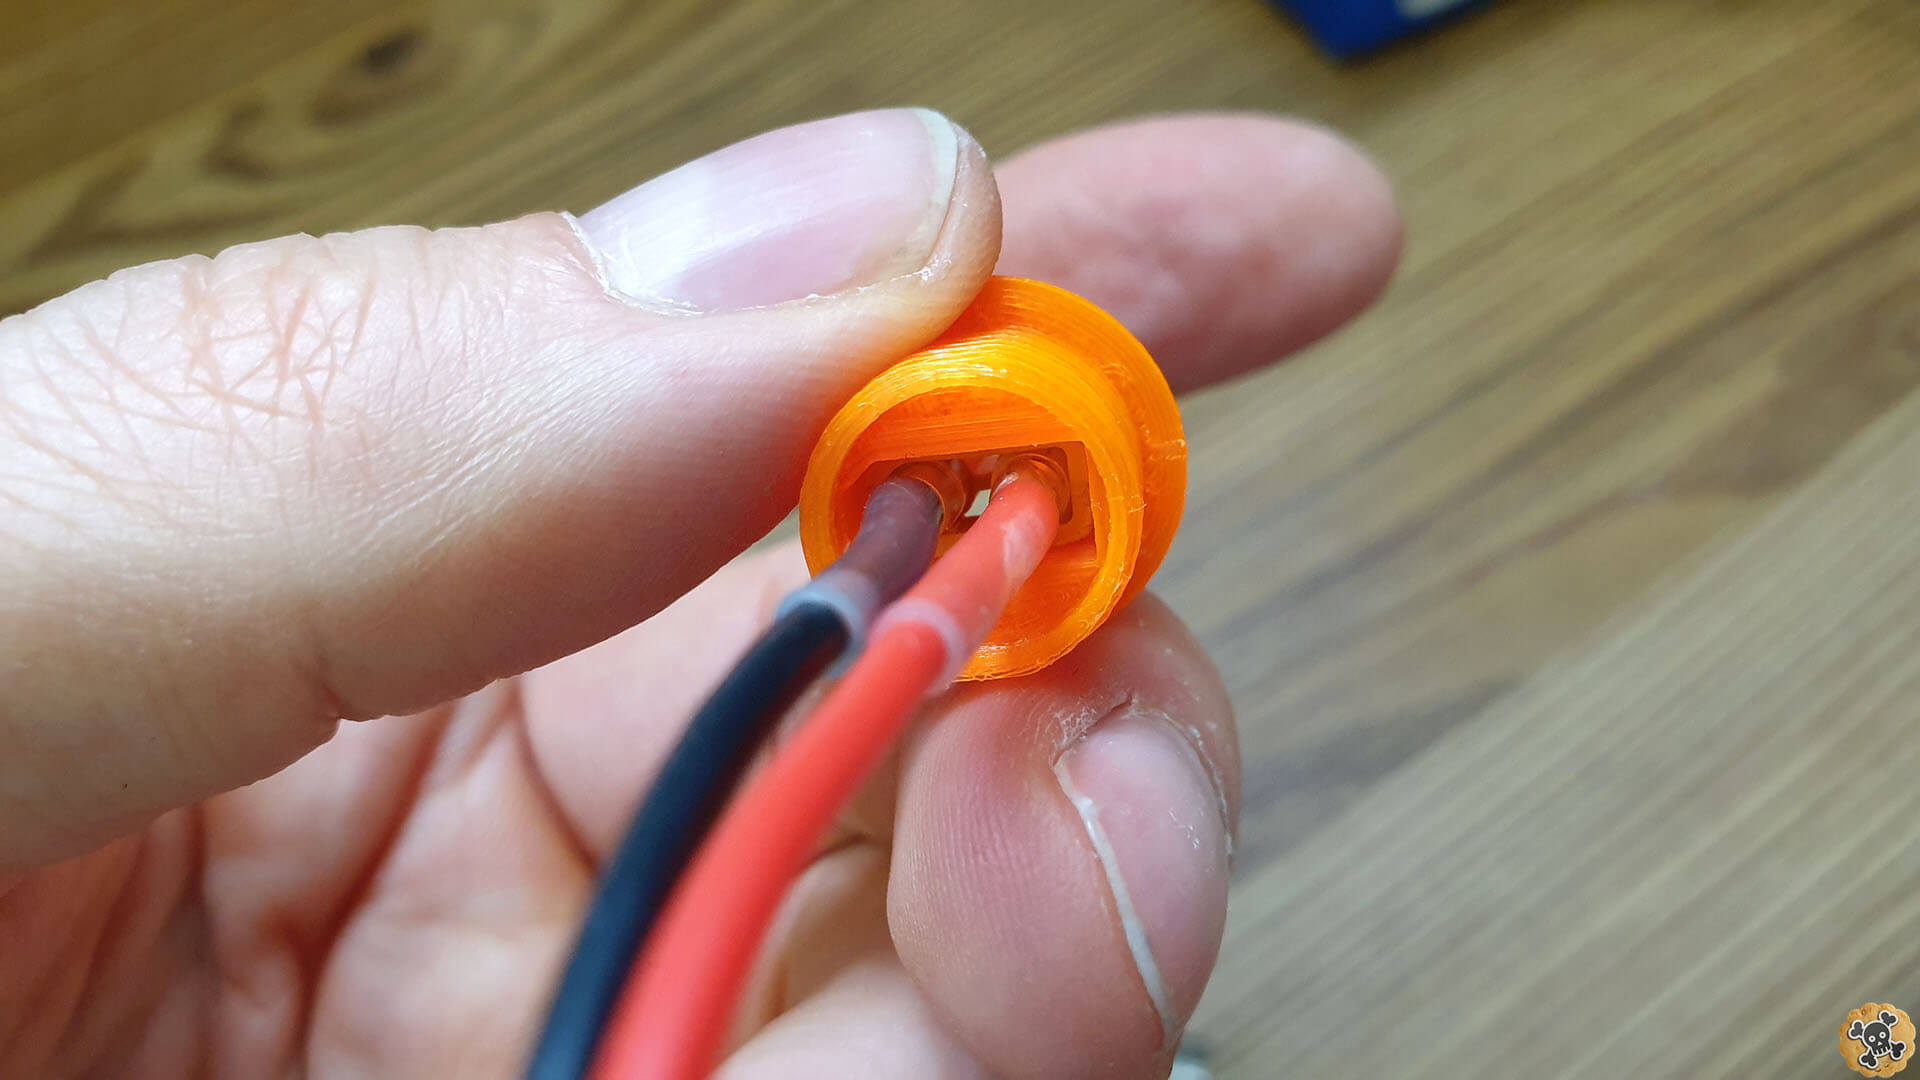
Slide 2 small shrink tubes on the cables and prepare yours solder iron. I recommend to set 340C , add a bit solder on the cables and connector. When you will solder cables to connector, take your time and all will go smooth !! Use the same type of the connector which I used & remember , Red is + Positive while Black is – ground !! . ** If you are newbie then check some videos how to do it, it’s great experience which can be very useful in a future
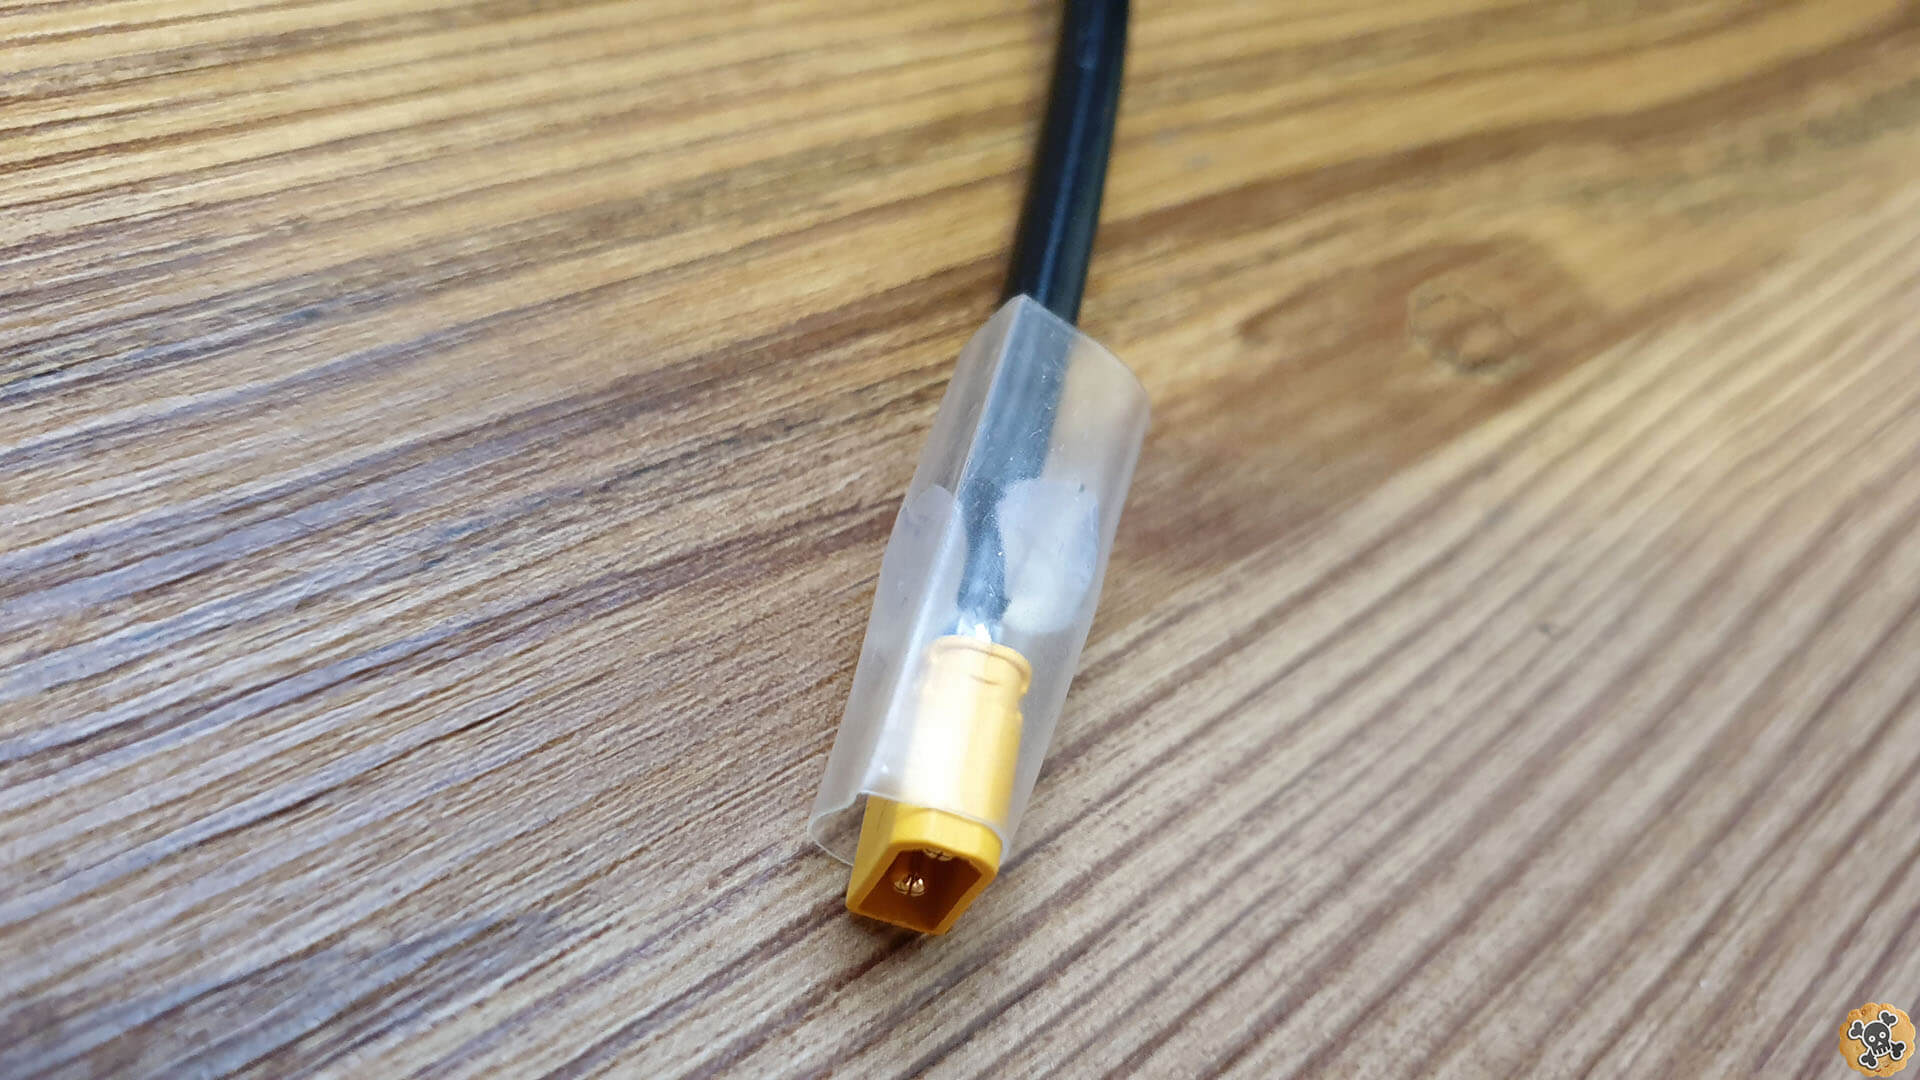
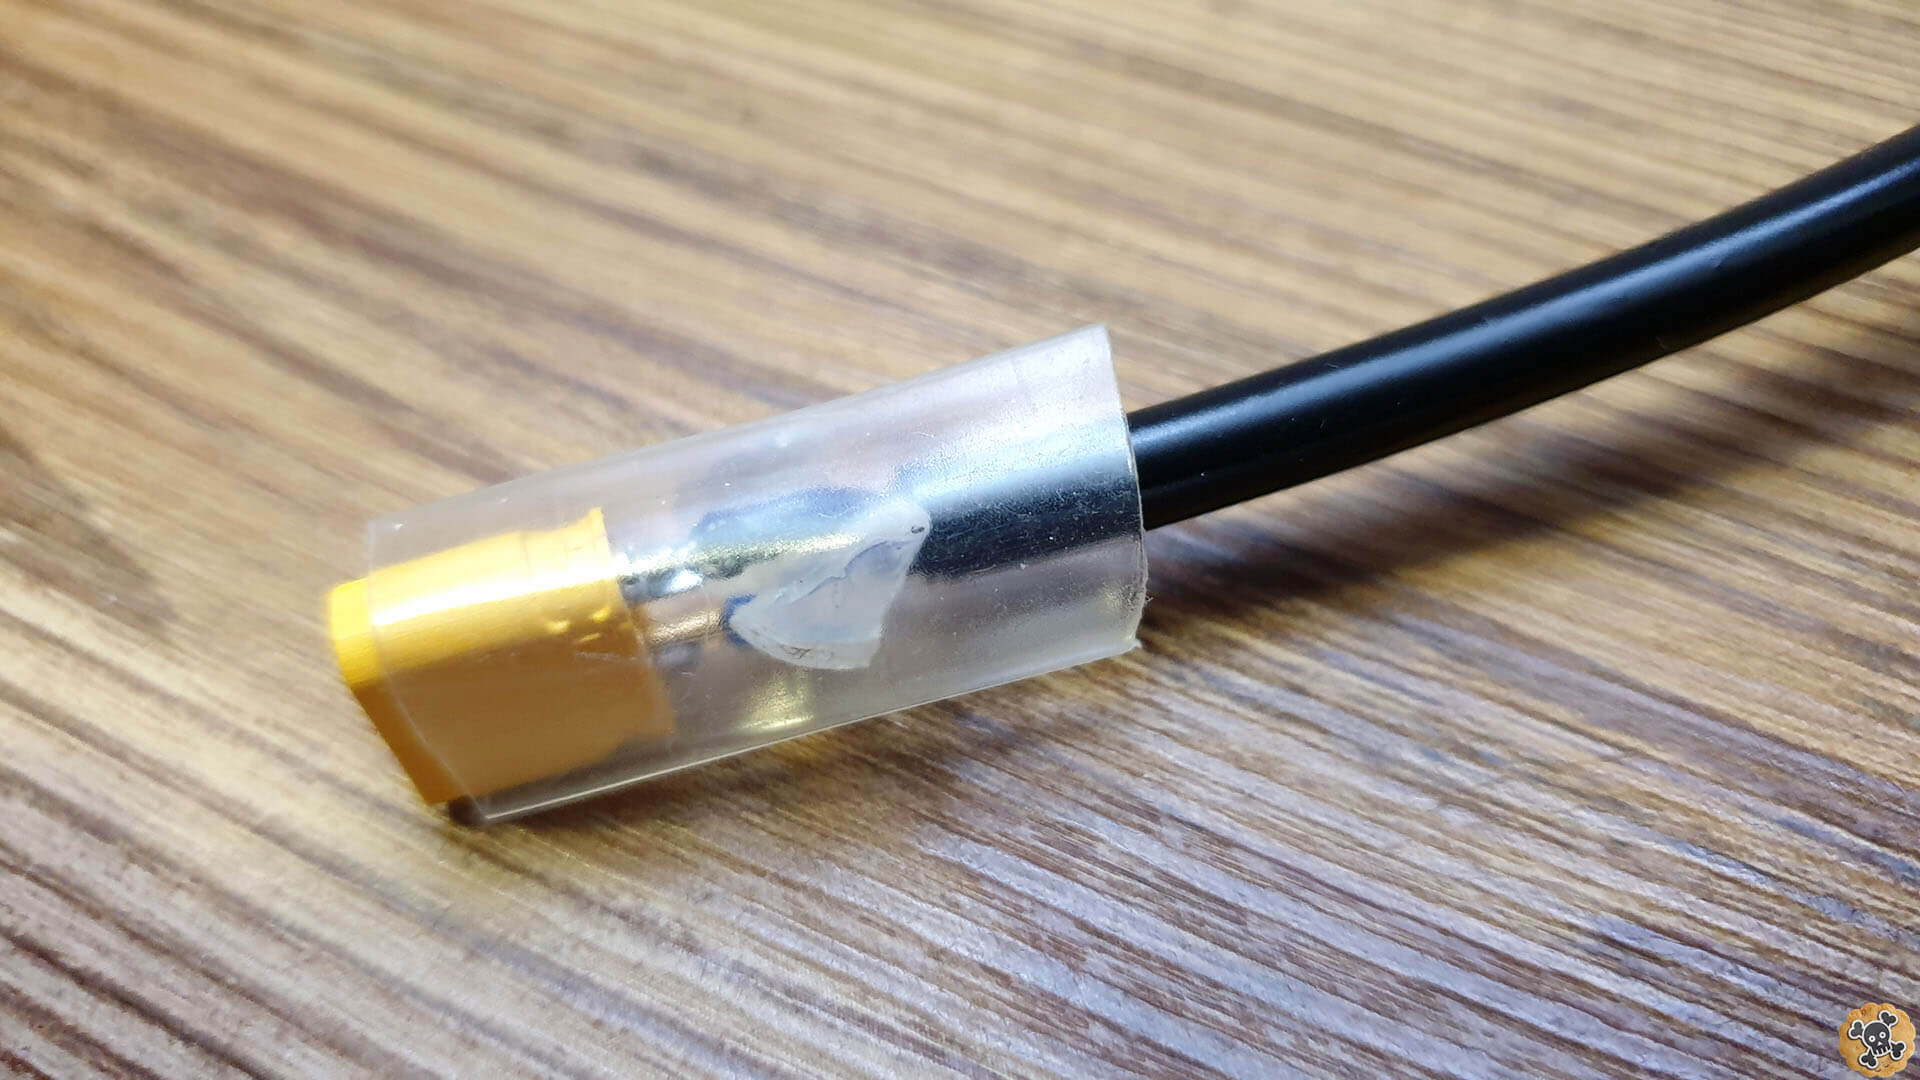
Now slide down shrink tube and use lighter or hot gun to shrink tube, remember to have some distance between lighter & shrink tube otherwise shrink tube and connector can be damaged ! .
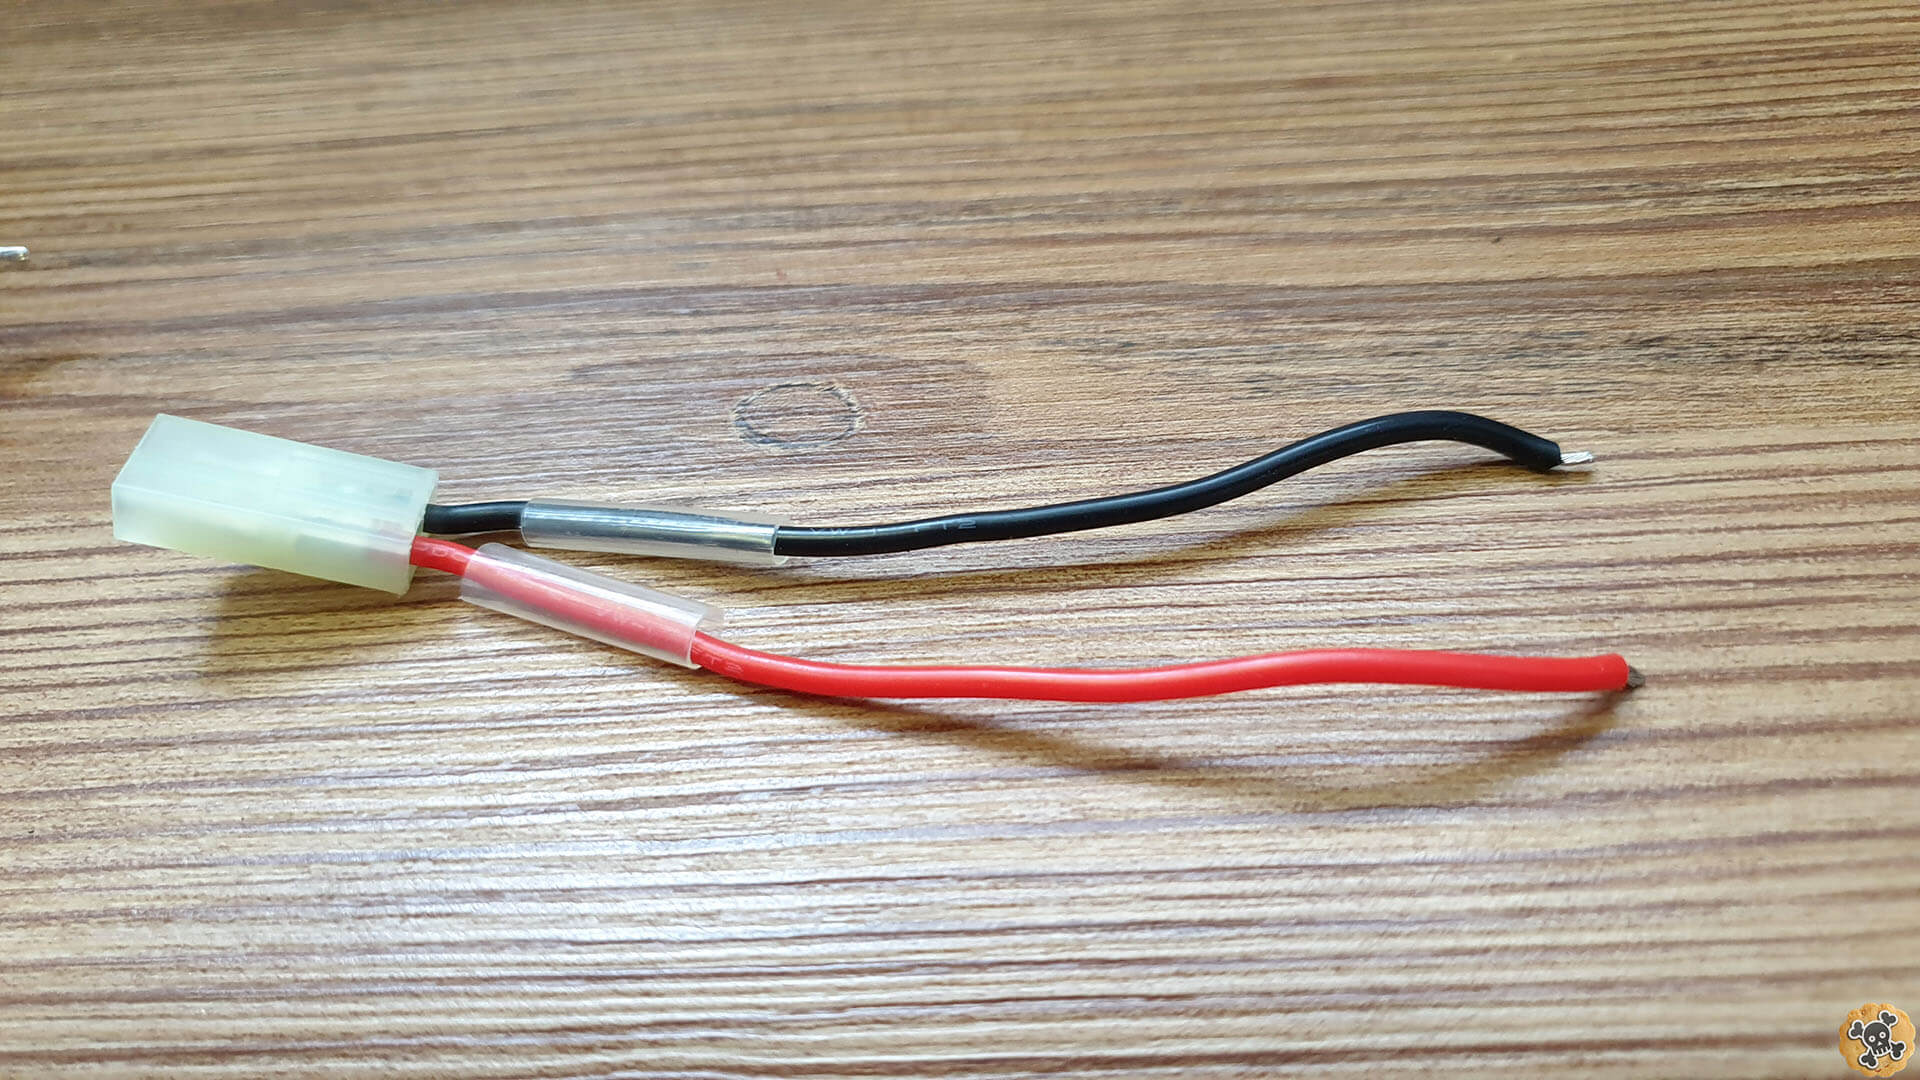
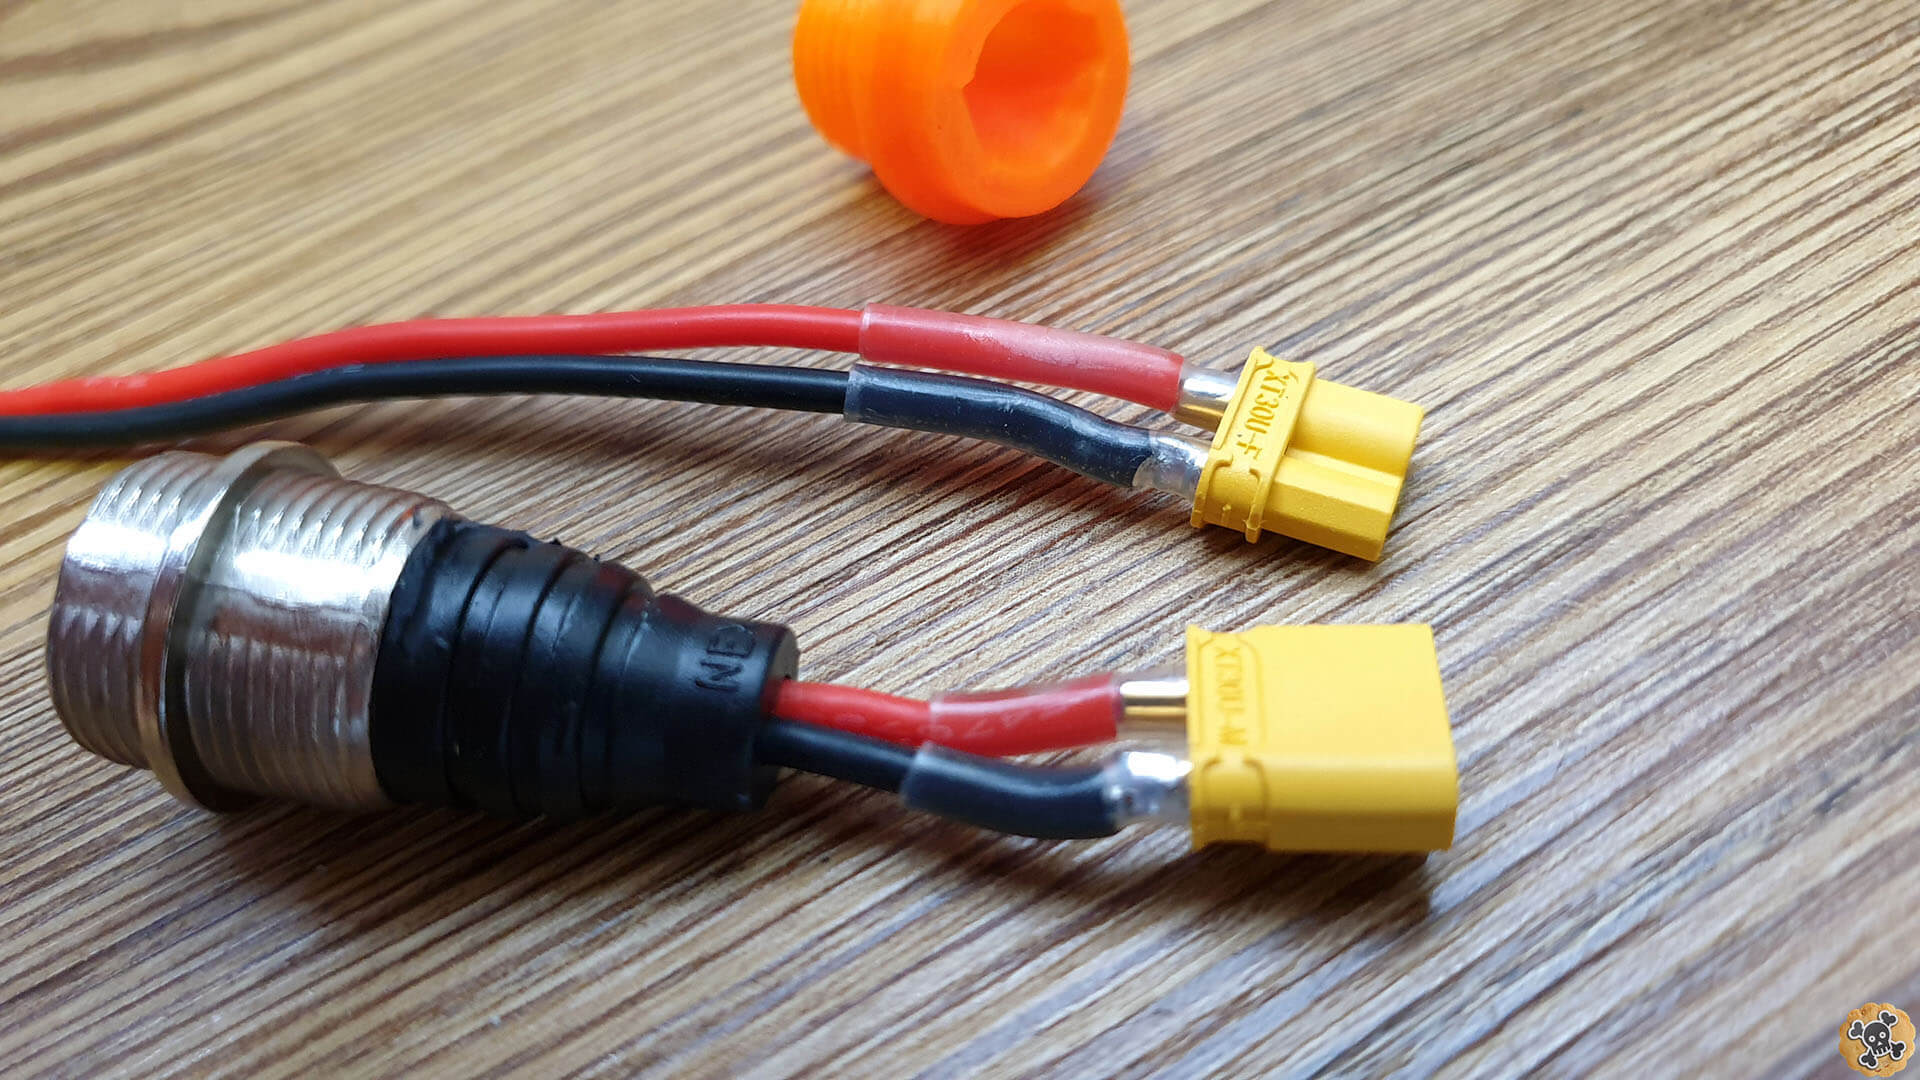
** Extra tip ** You can do the same steps for previously removed microphone port but used different connector ,thanks to it you don’t have to cut off microphone charging port from your charger to install new XT30 connector and you you will have charger with 2 ports which can be very useful in a future:)
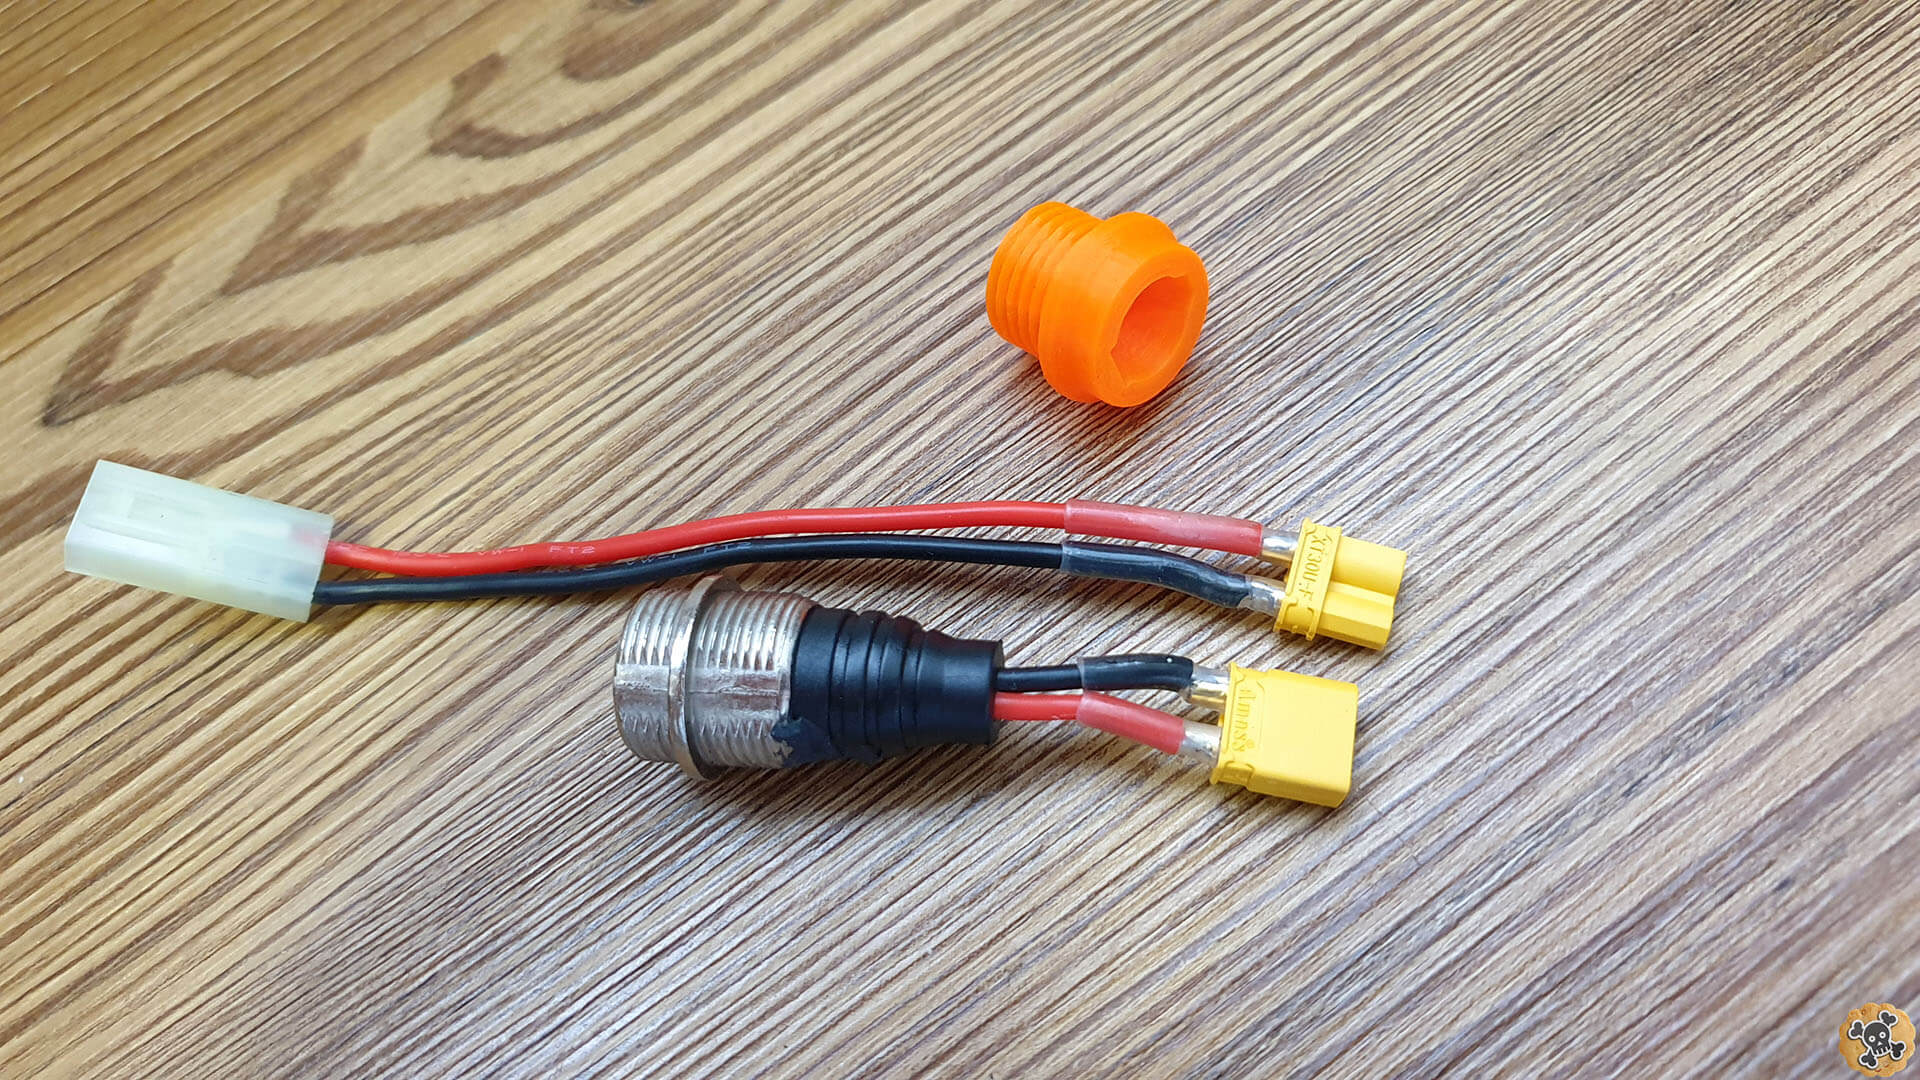
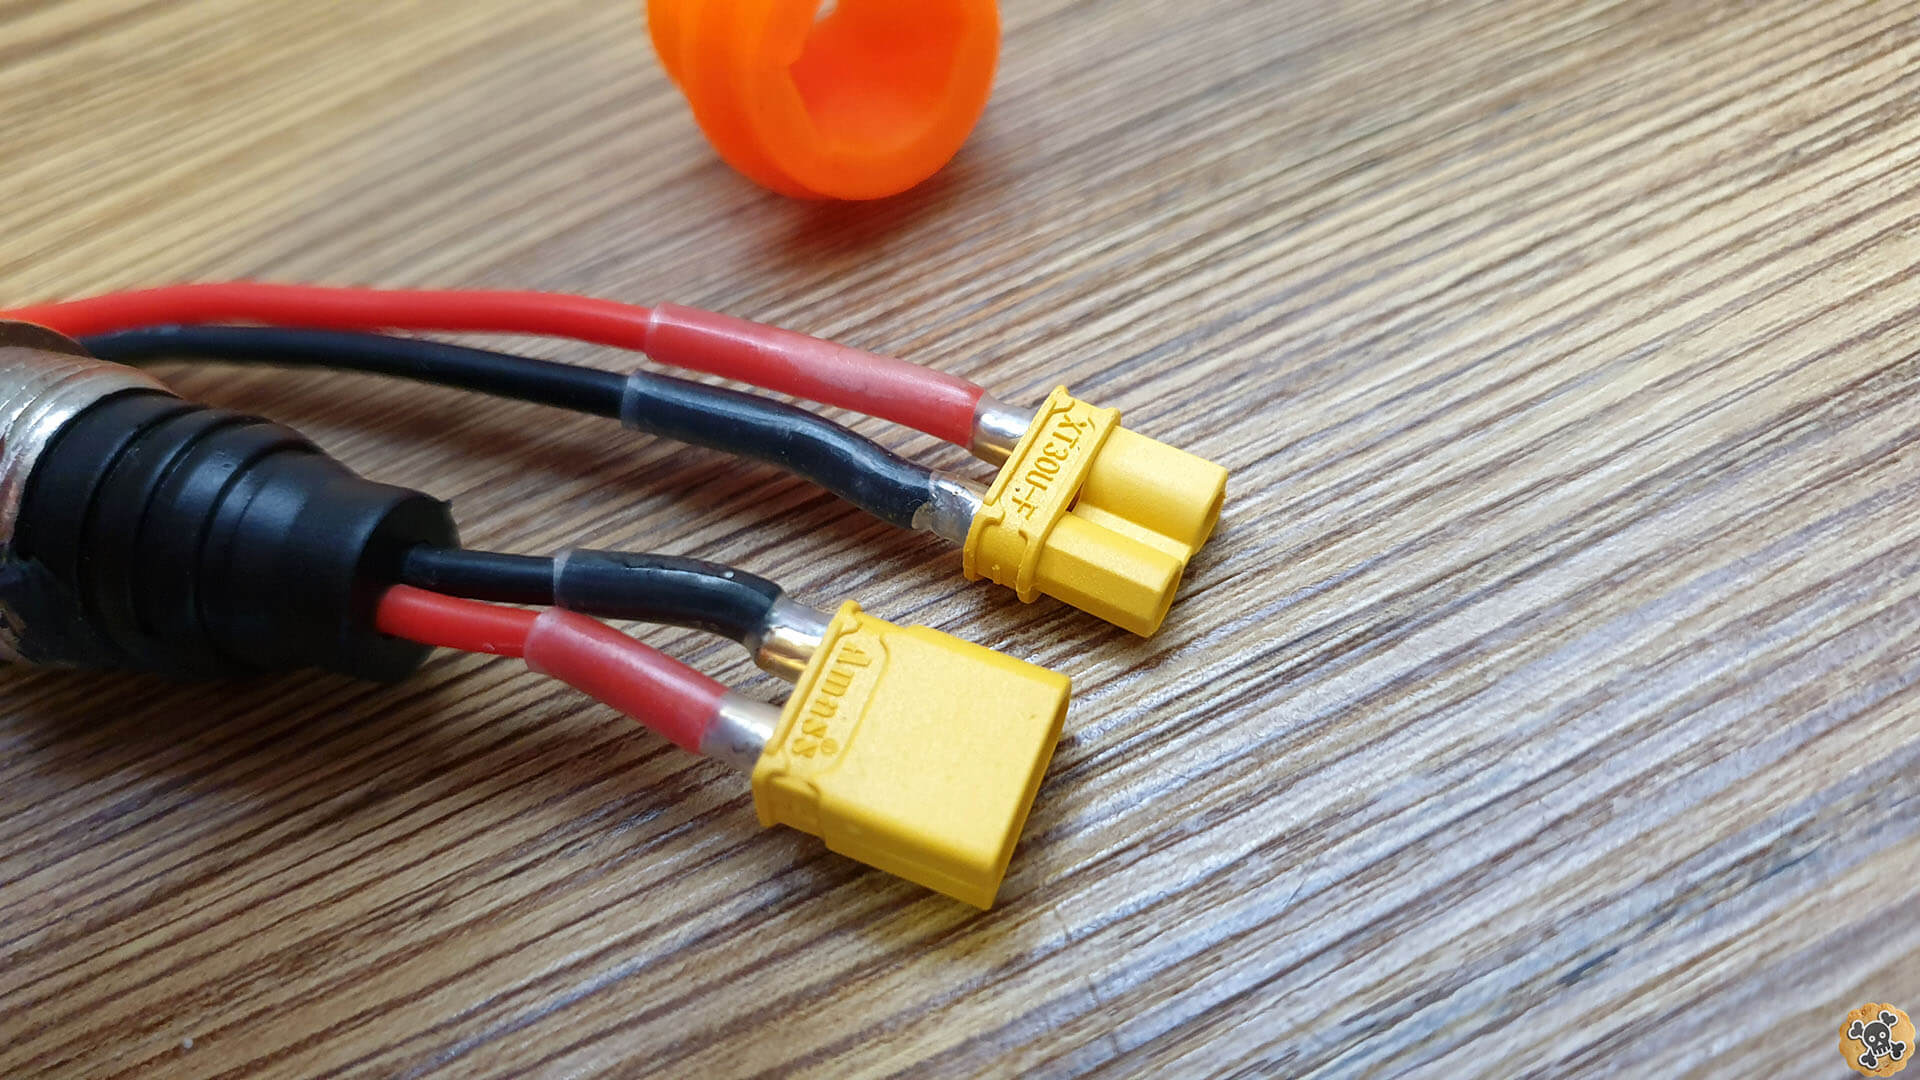
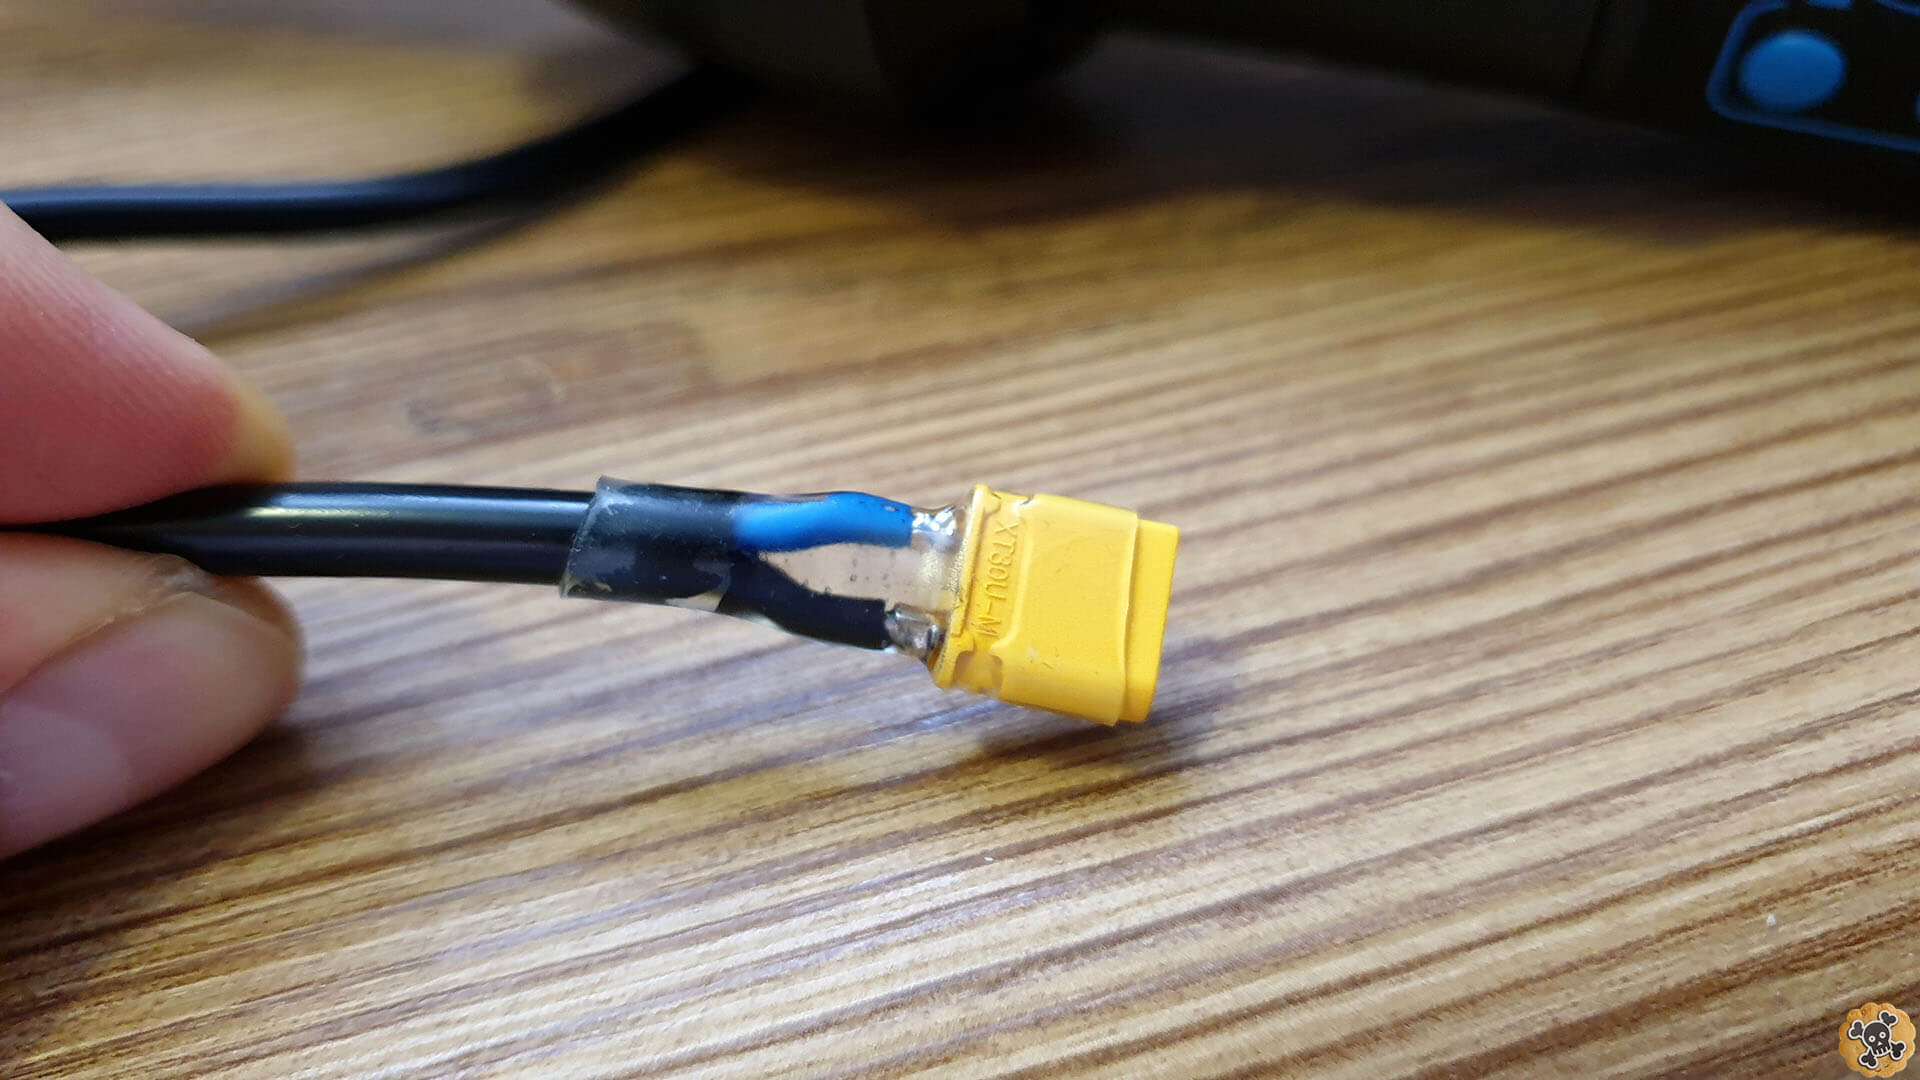
If you would like to replace stock charging port on your charger then do almost the same steps, cut off end , solder cables to connectors !! This time we got different color cables , Blue is + Positive & Black is – ground !!.
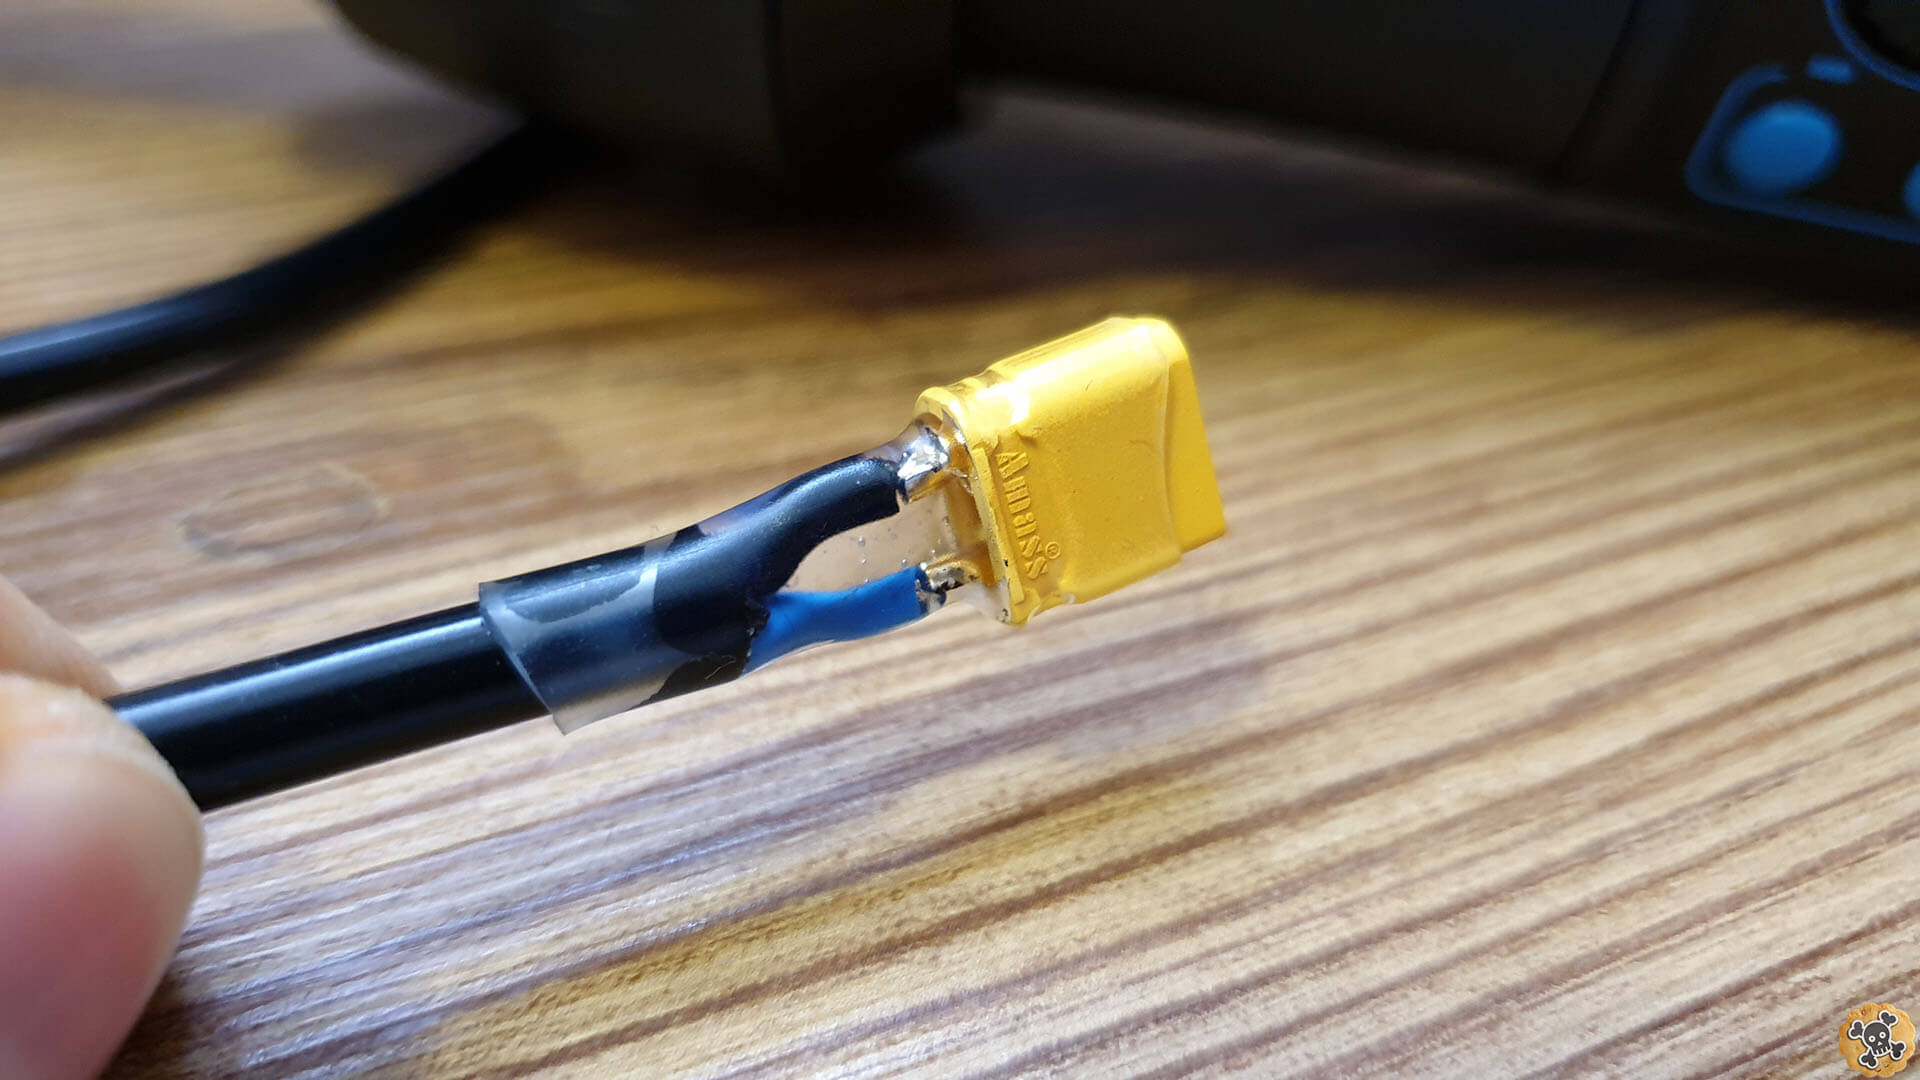
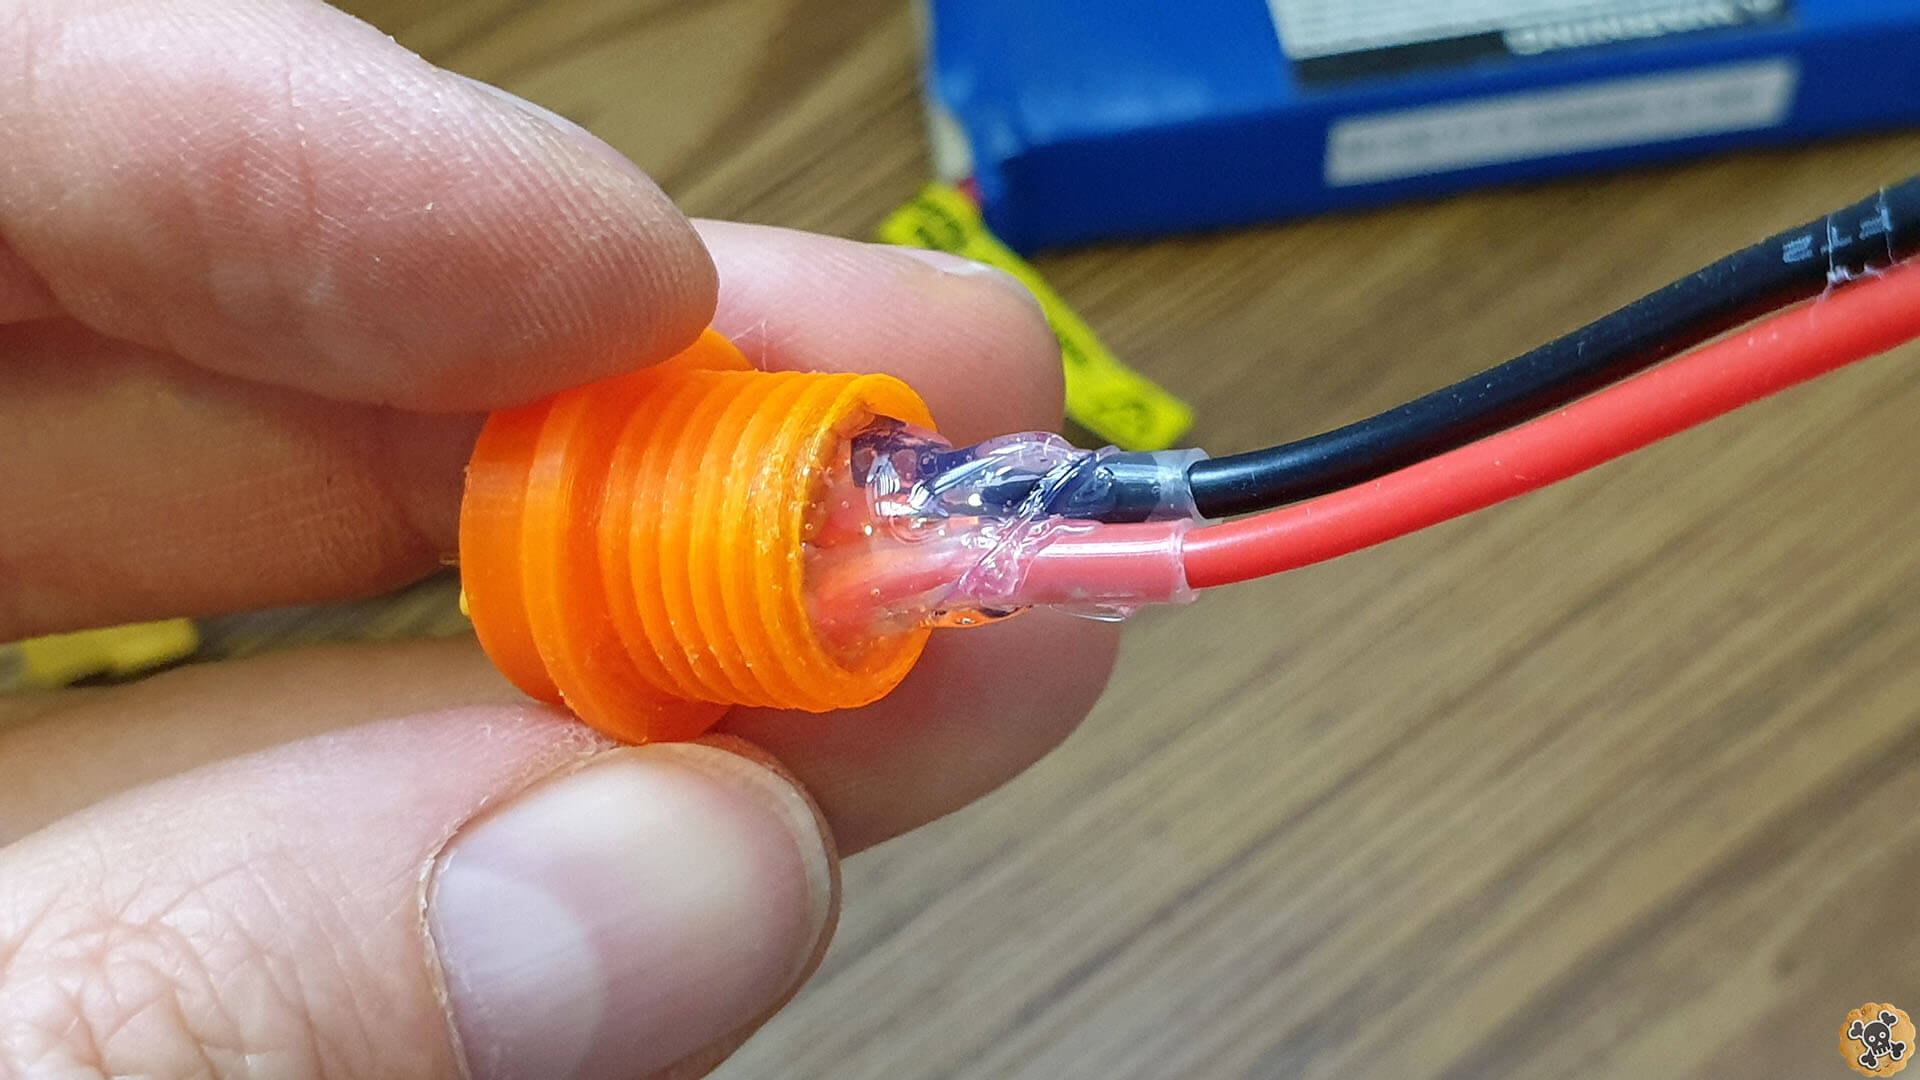
This time other better idea how to reinforce connector for charger. After you solder cables to connector slide in BiG shrink tube and place under the shrink tube and empty space between cables and connector, 2 small pieces of hot glue ( like you can see on photo). Then use Hot gun or lighter and wait a bit longer till hot glue melts under shrink tube and spill around, when it cools down connector will be rigid 🙂
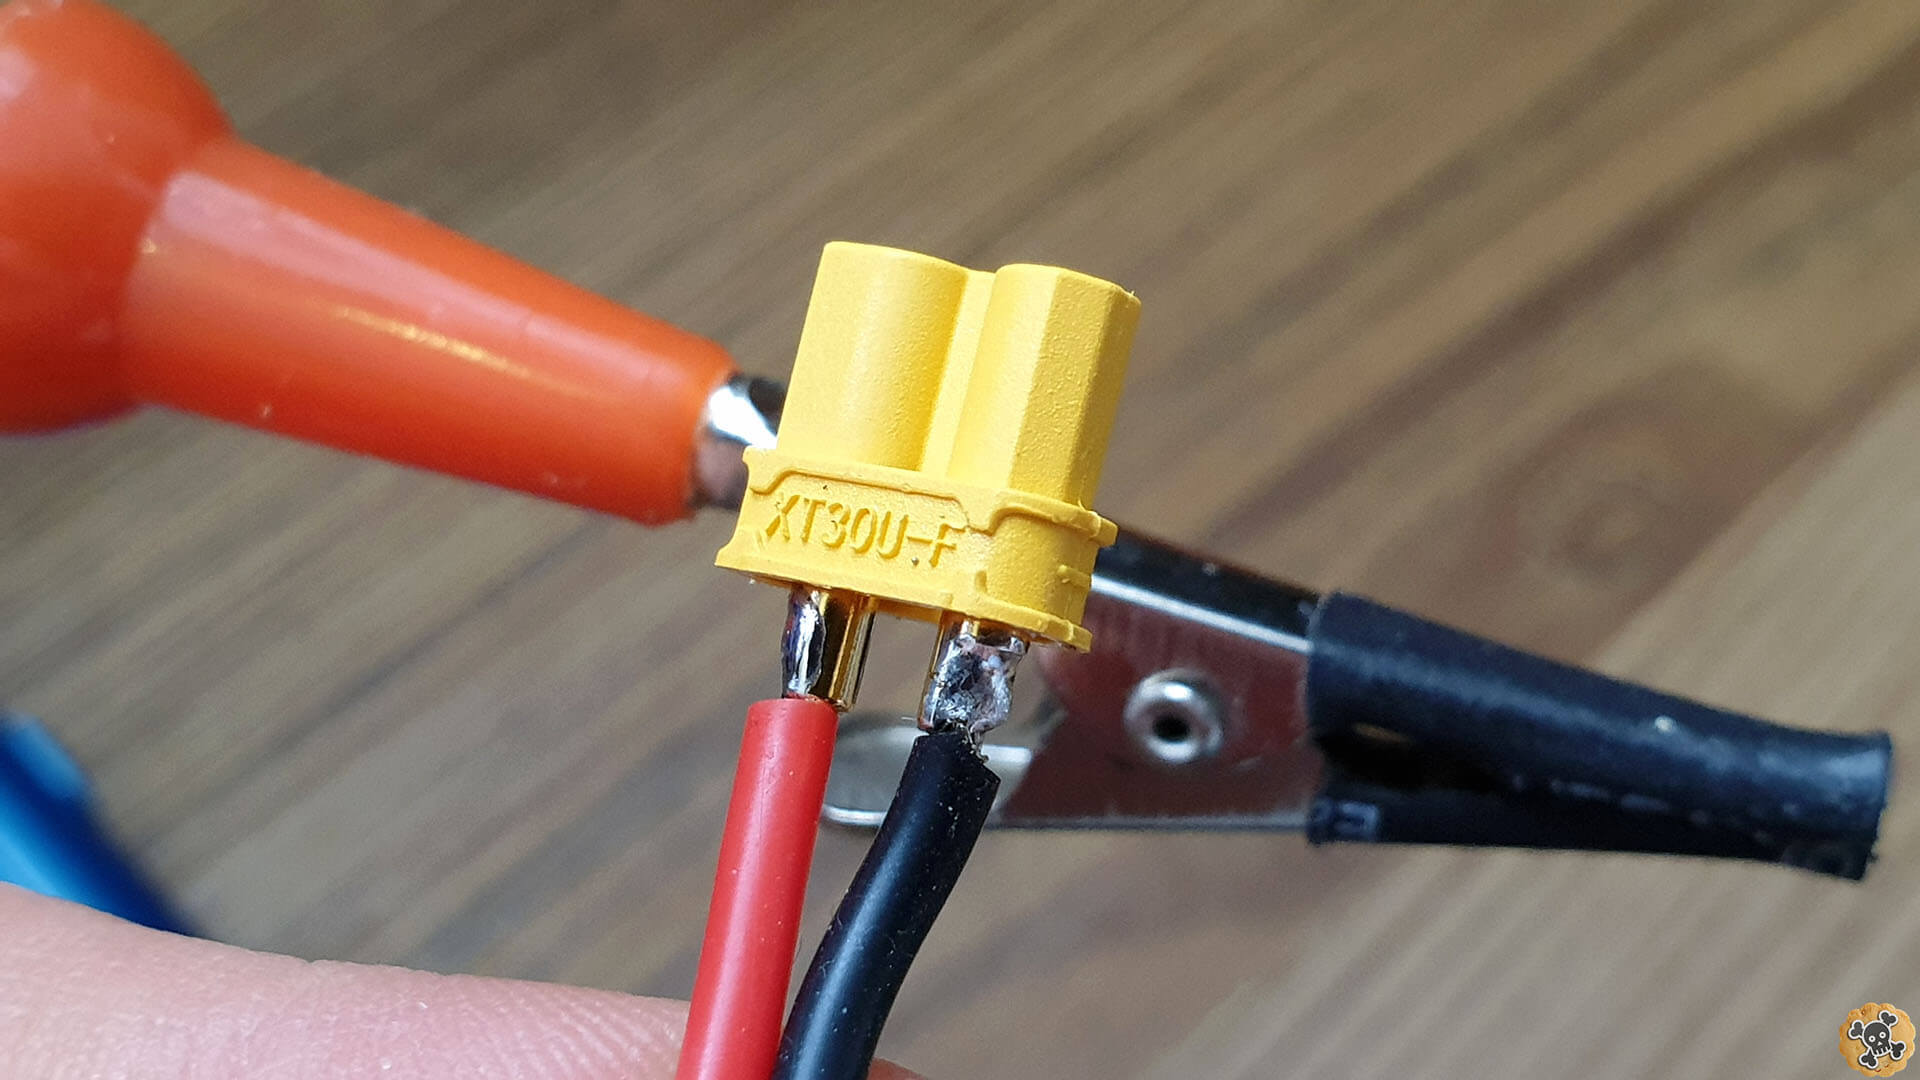
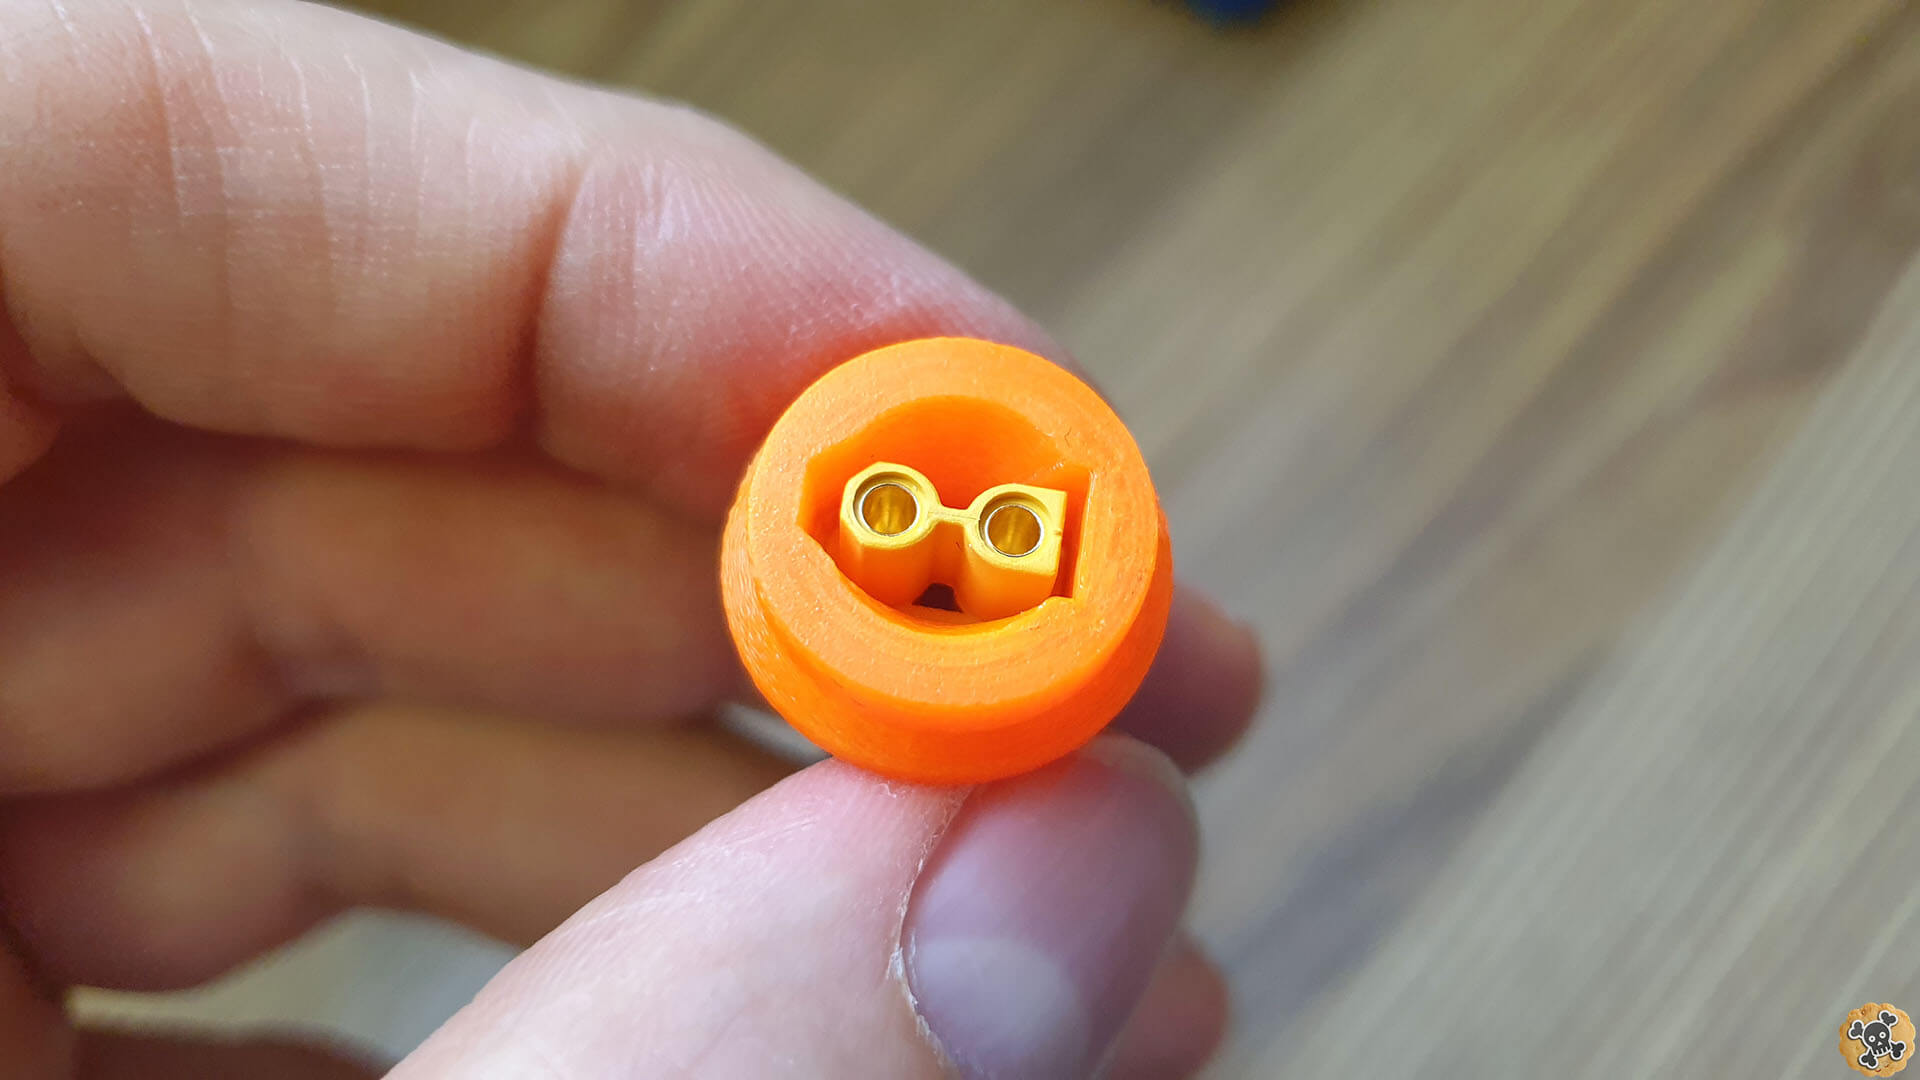
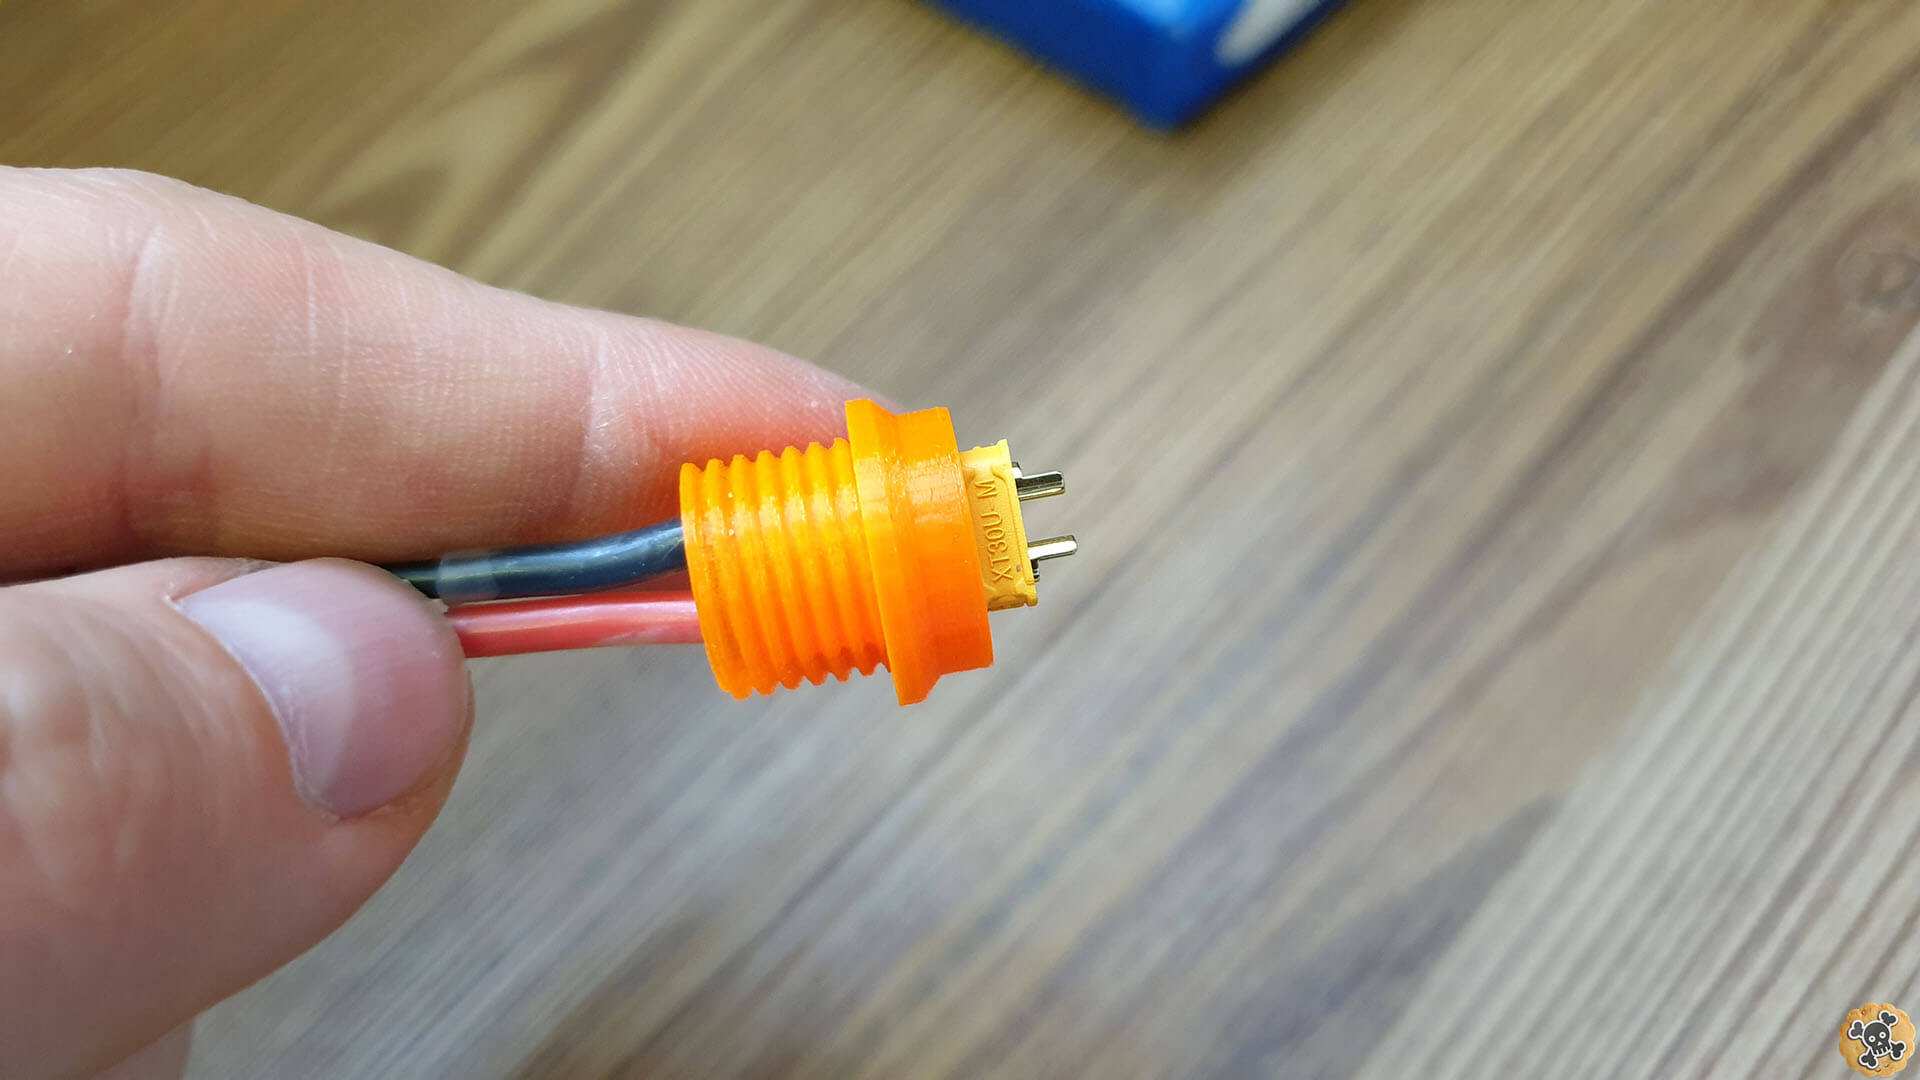
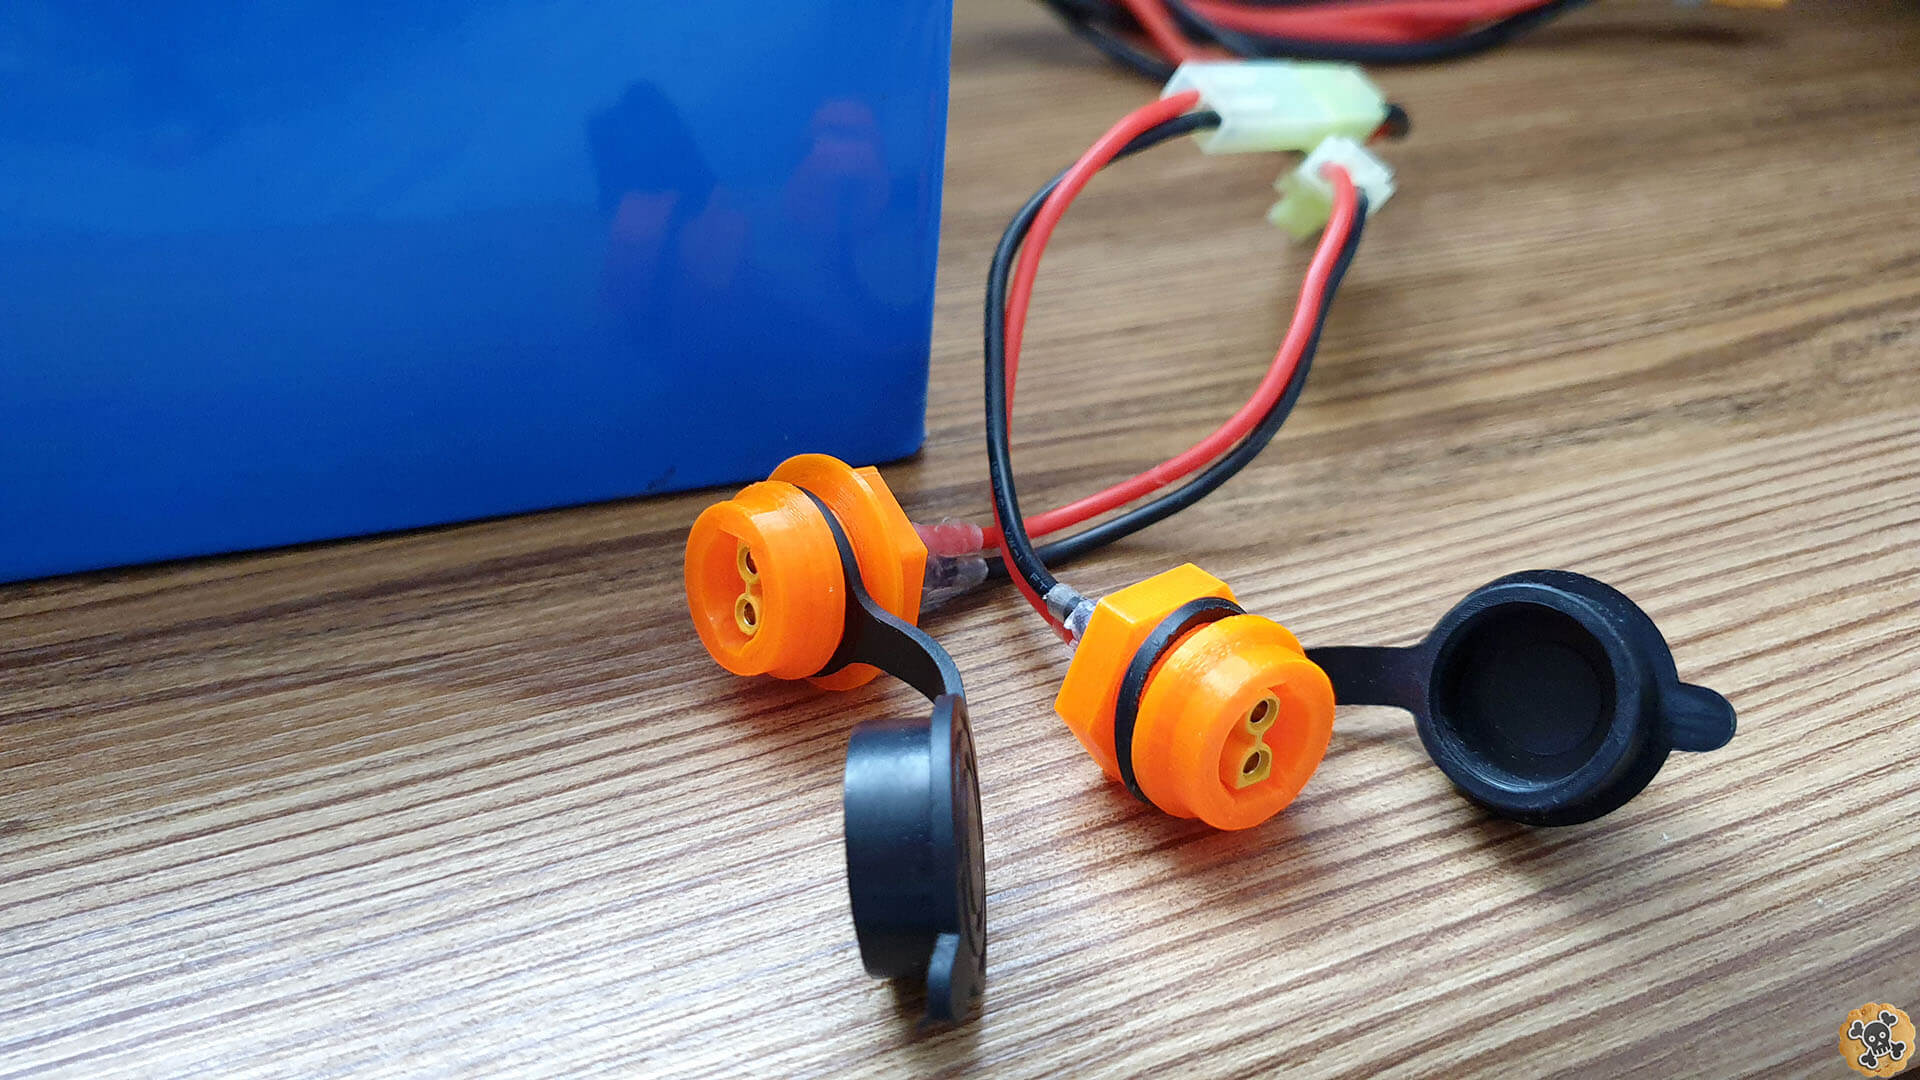
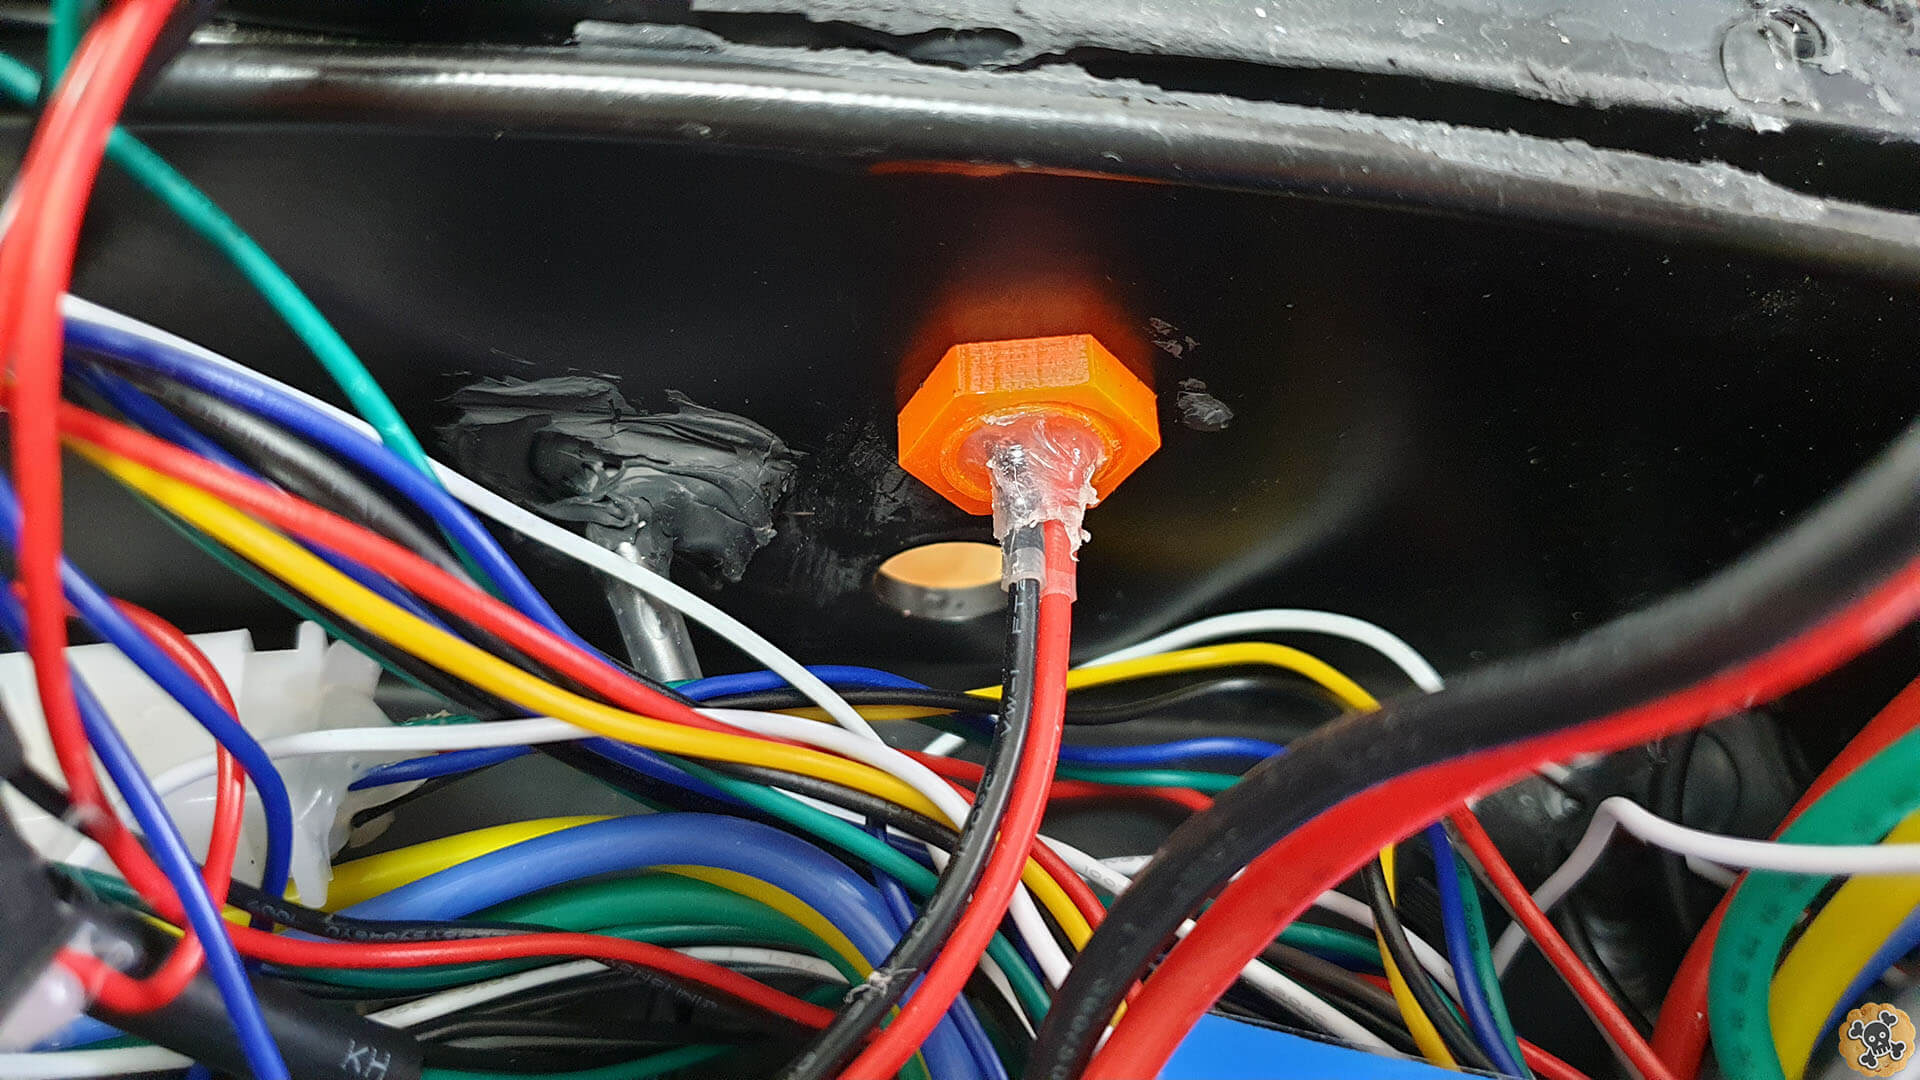
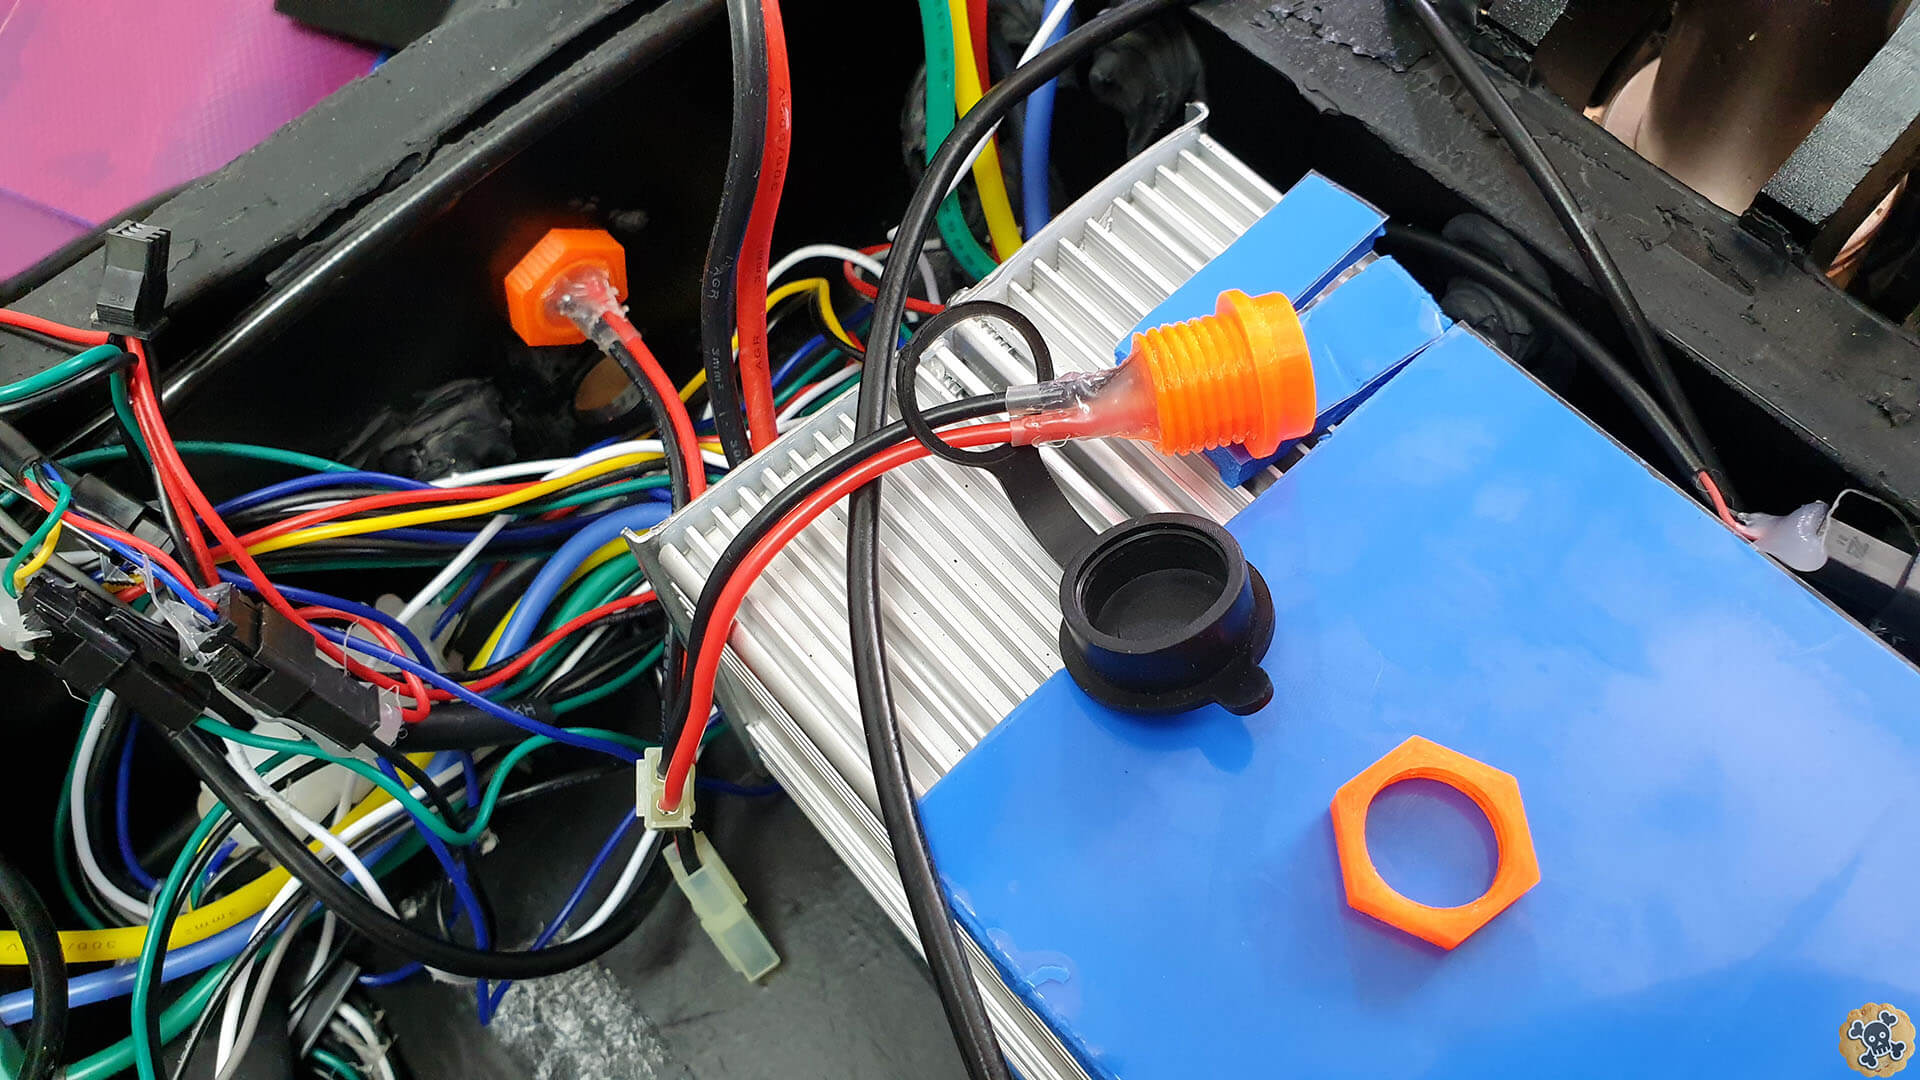
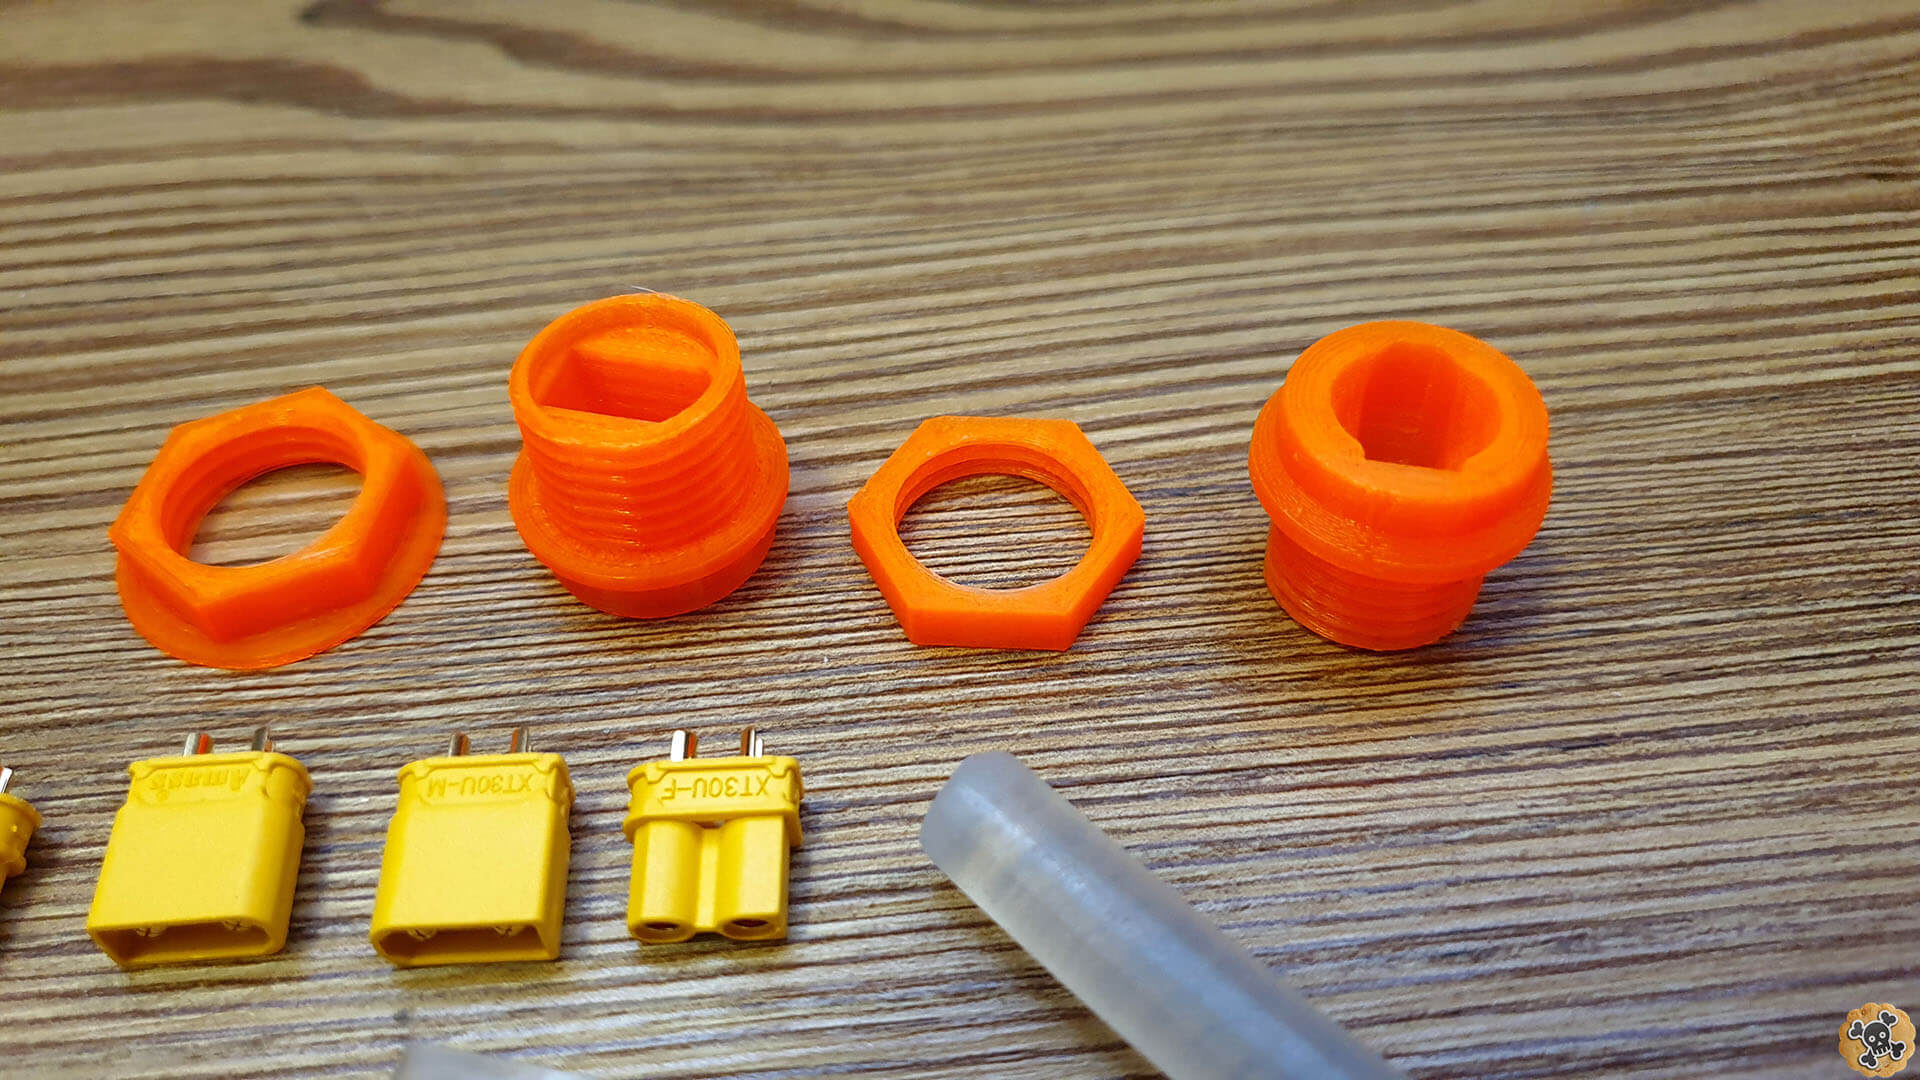
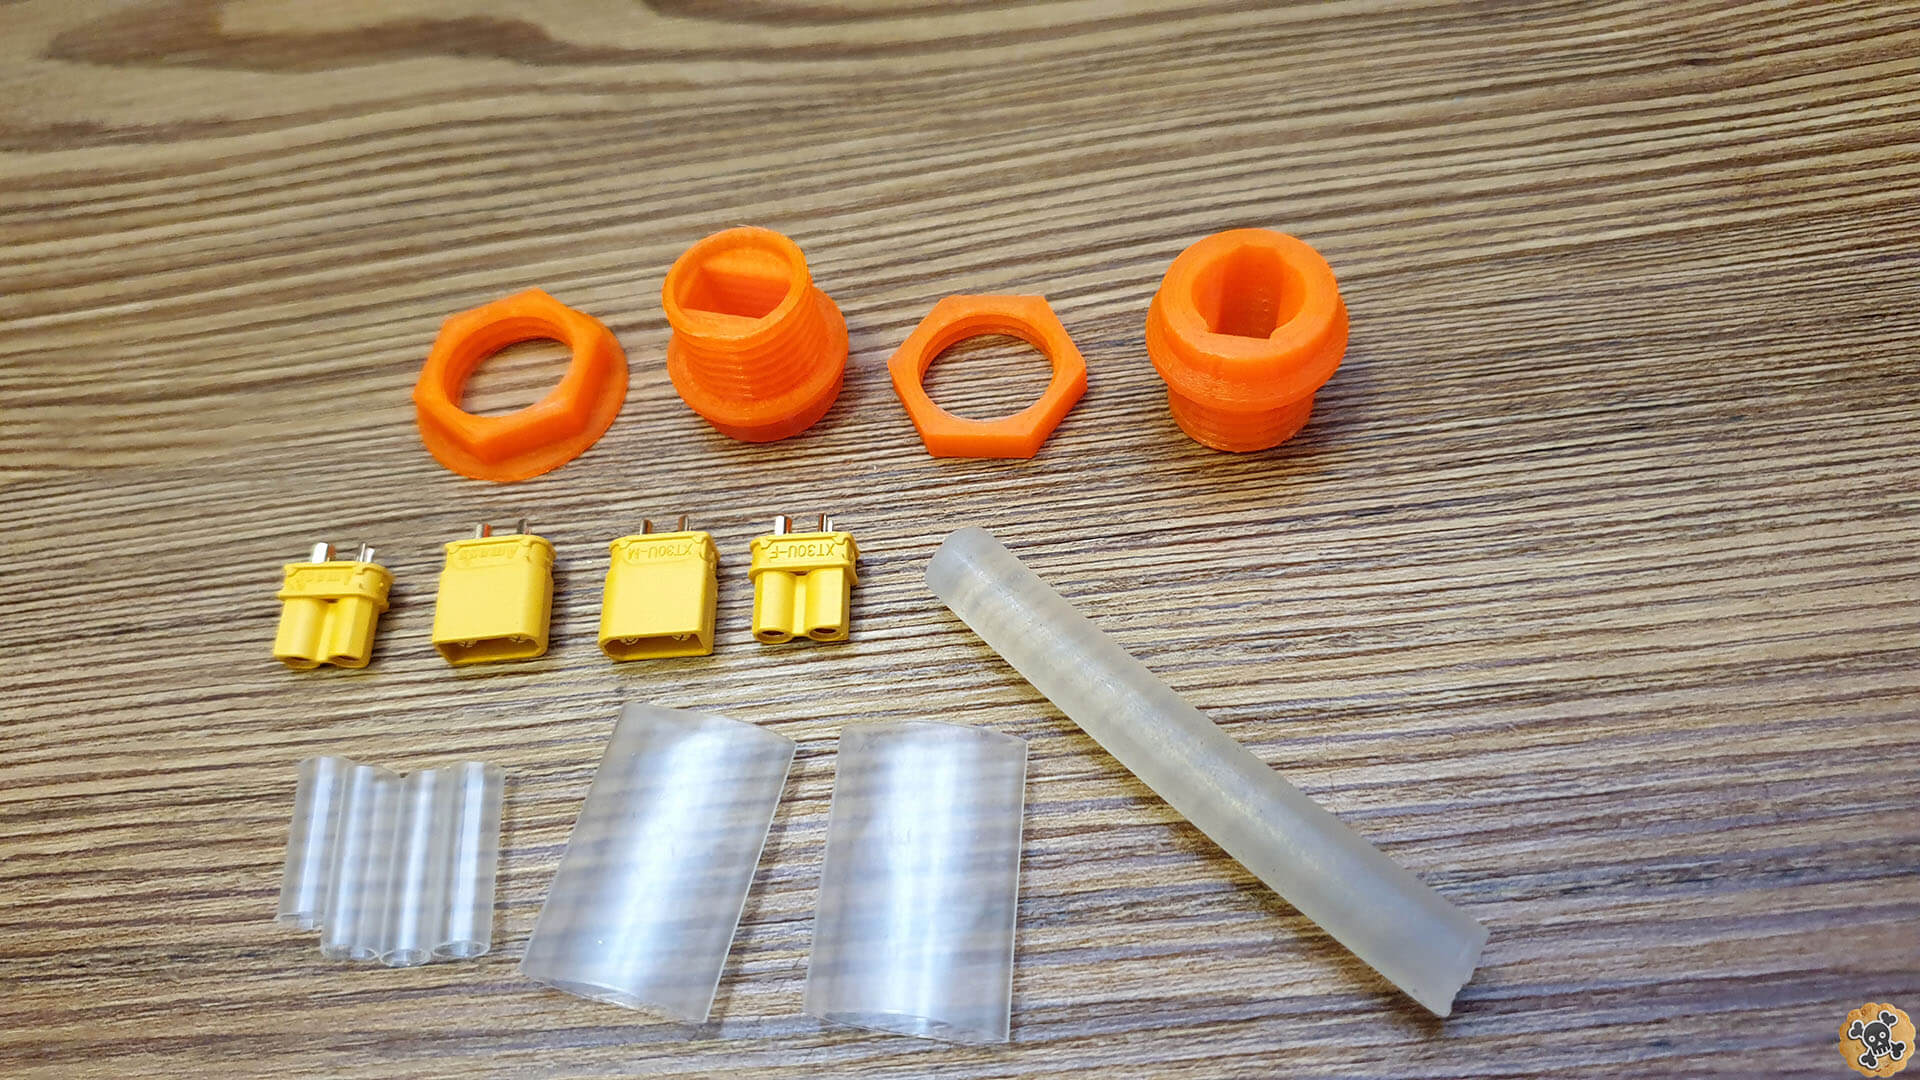
We got ready XT30 connectors , if you are still alive then trust me , You Are Doing Very well ???. Now we need printed charging port , Battery connector with XT30 and hot glue . Slide XT30 connector inside printed port like I did, on pics you can see small position difference between XT30 and port !! XT30 is 1-2mm lower than top side/shell of the printed port, it’s very important , check carefuly pics!!
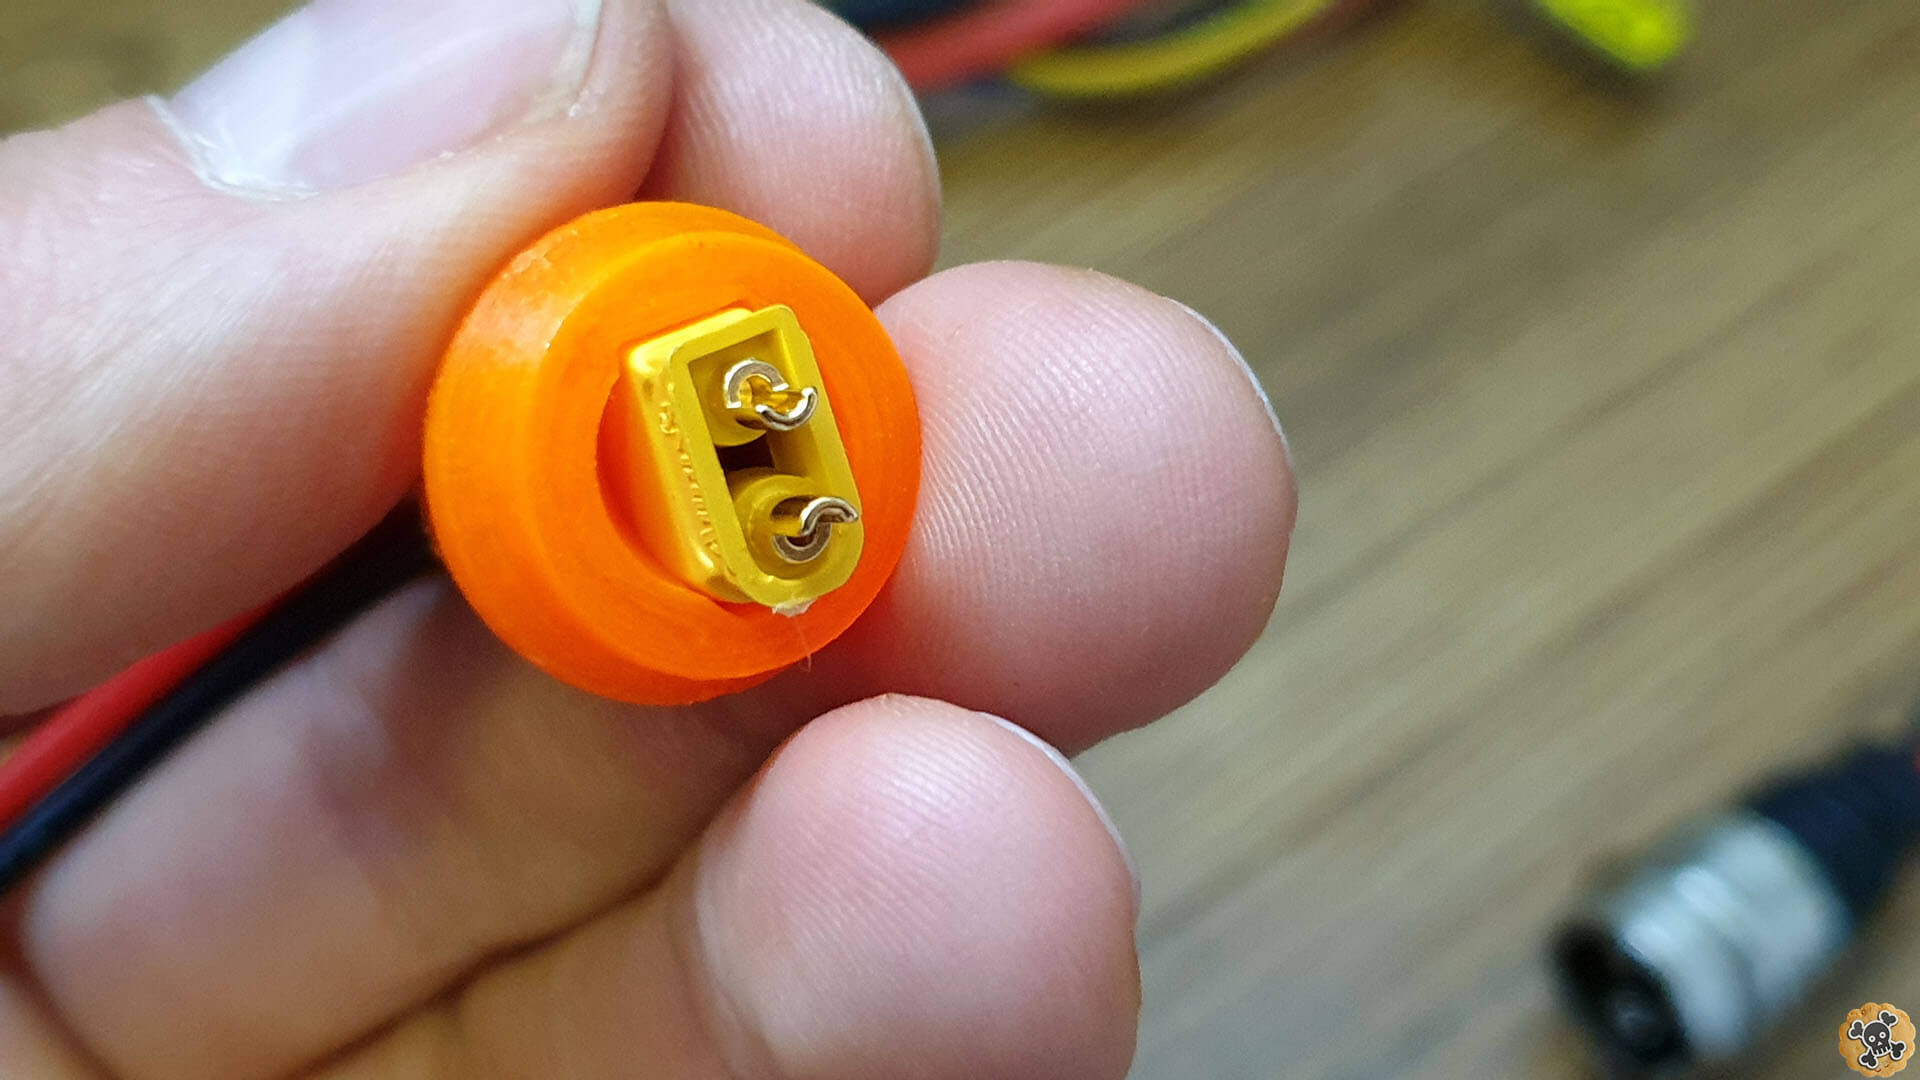
Now slide in carefully opposite XT30 connector, you are doing it secure both connectors at the center position and to be sure that all will fit when you finish reinforcing port !! Be sure to not move up/down or change position of 1st connector when you sliding in 2nd one!! .
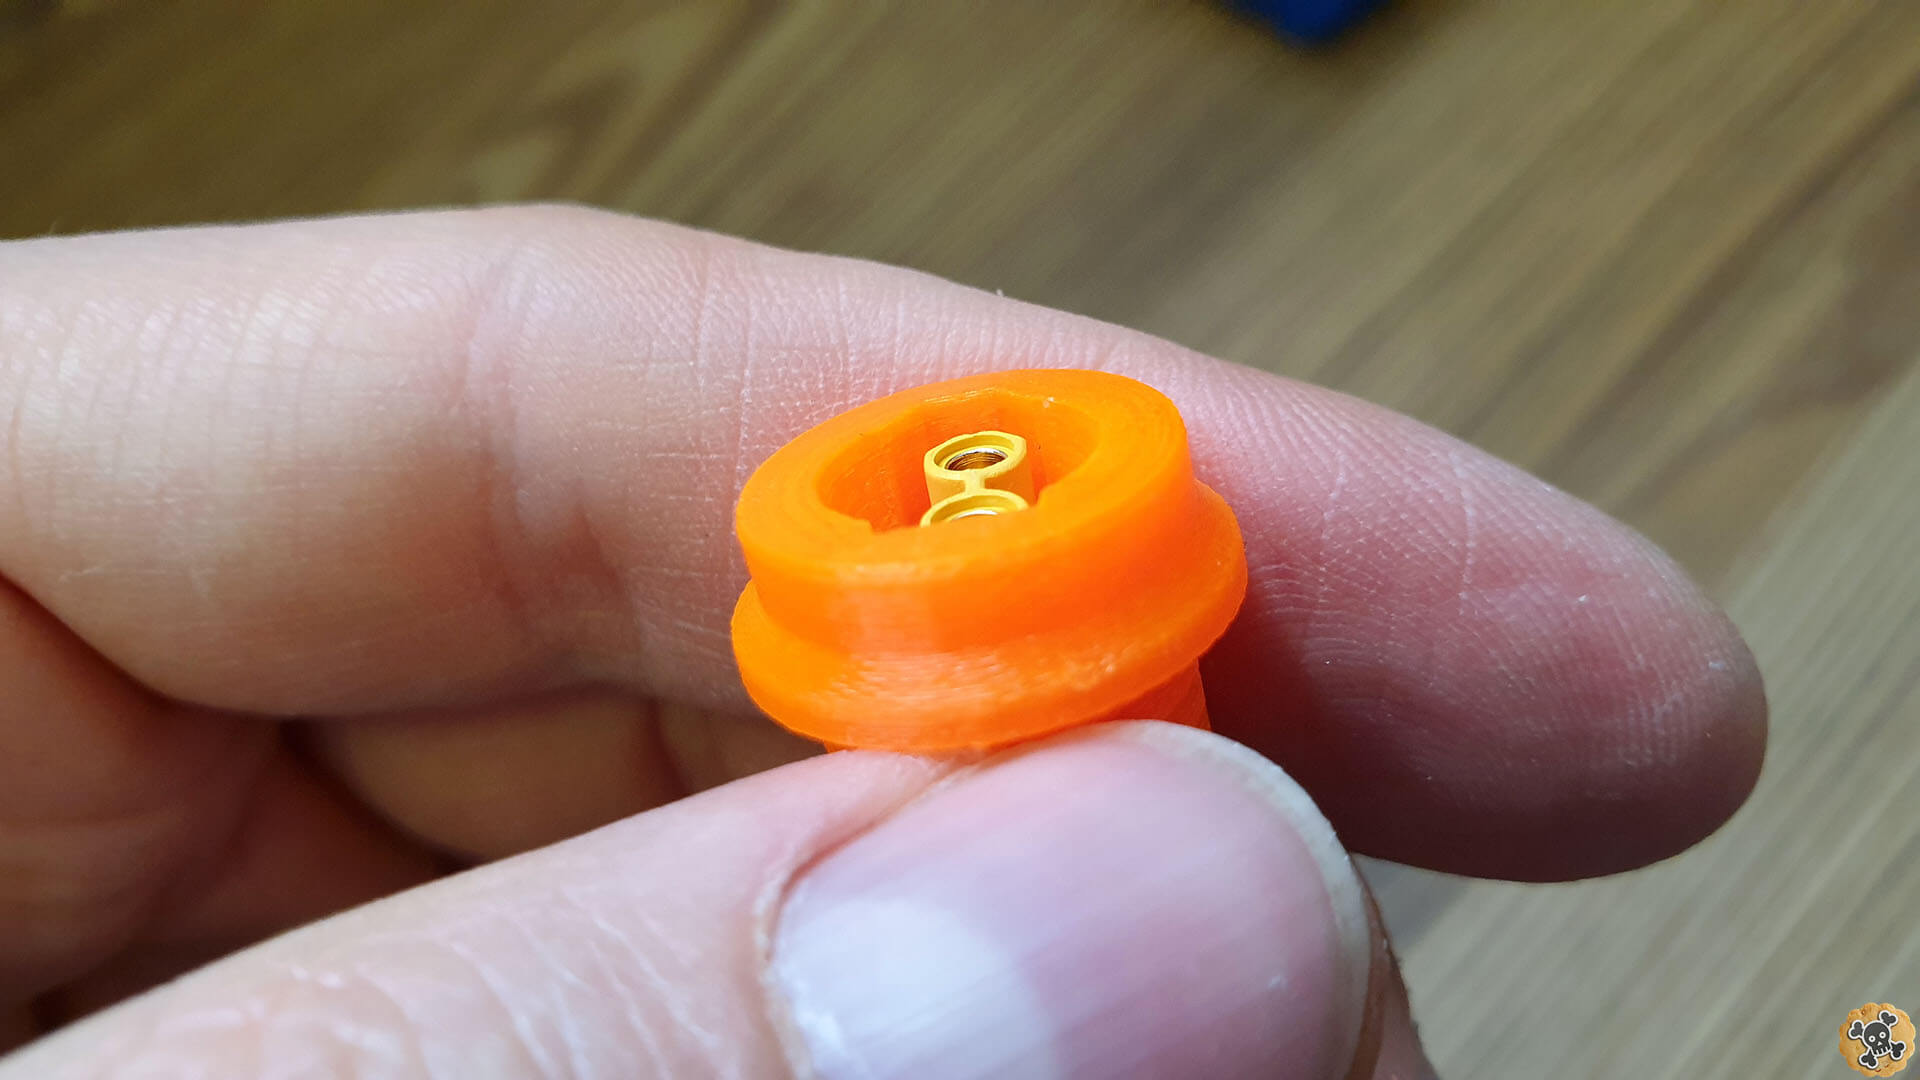
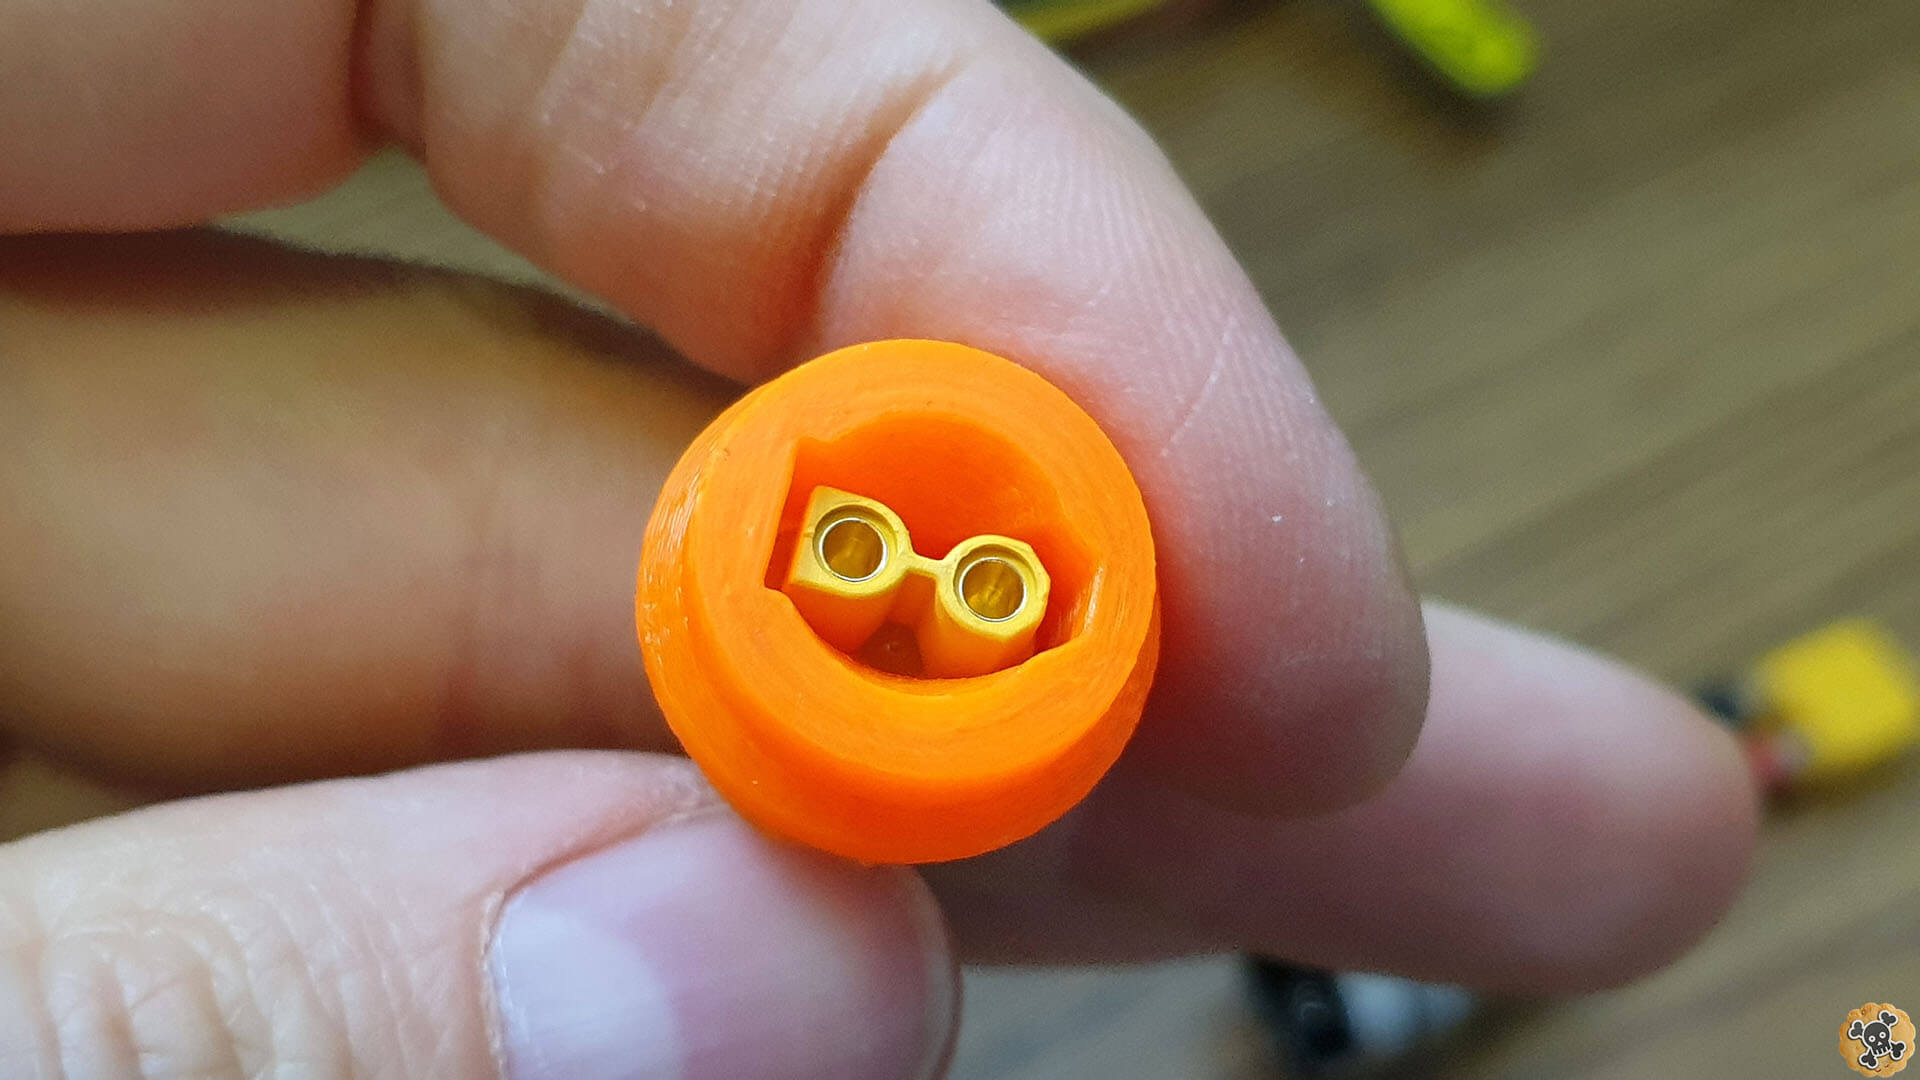
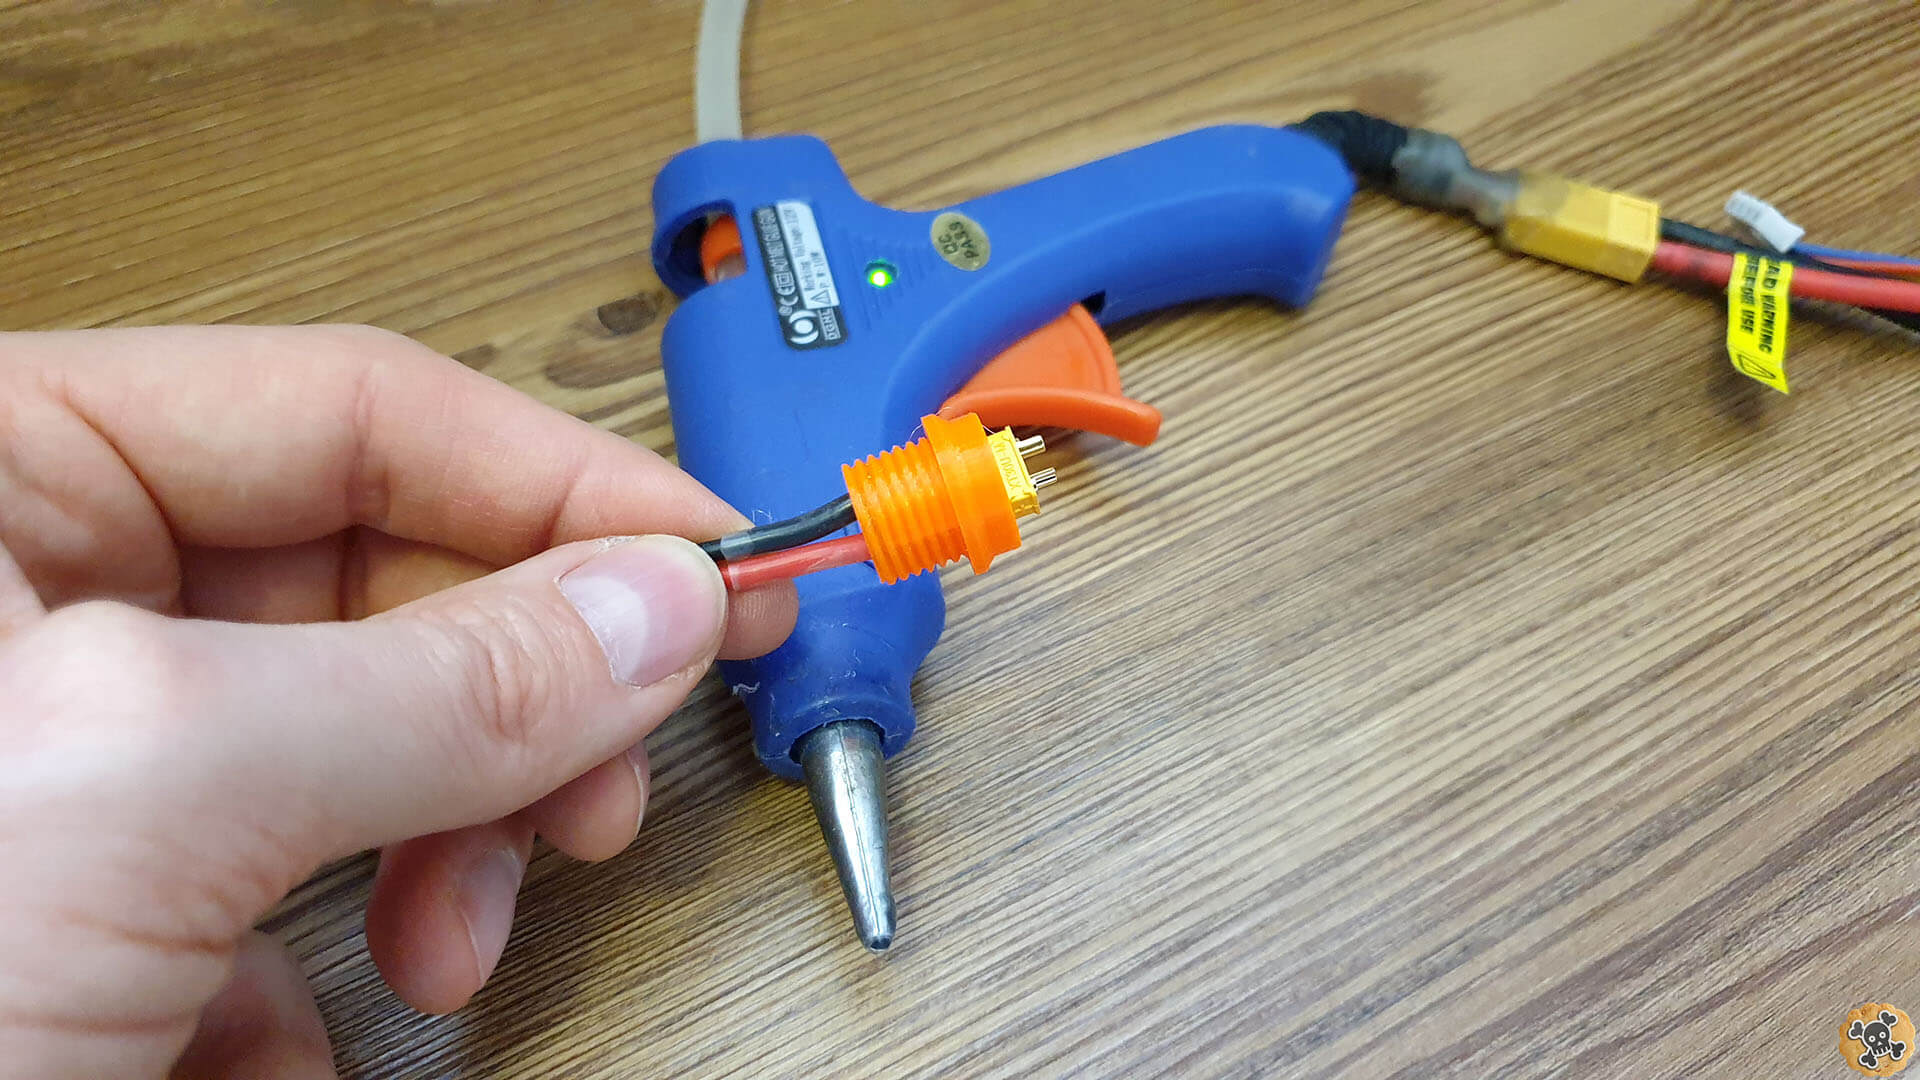
Now use Hot Glue ( better Got Glue gun ) to secure 1st XT30 connector in port , when got glue cools down, port will be waterproof and quite rigid. It should looks like my one ???
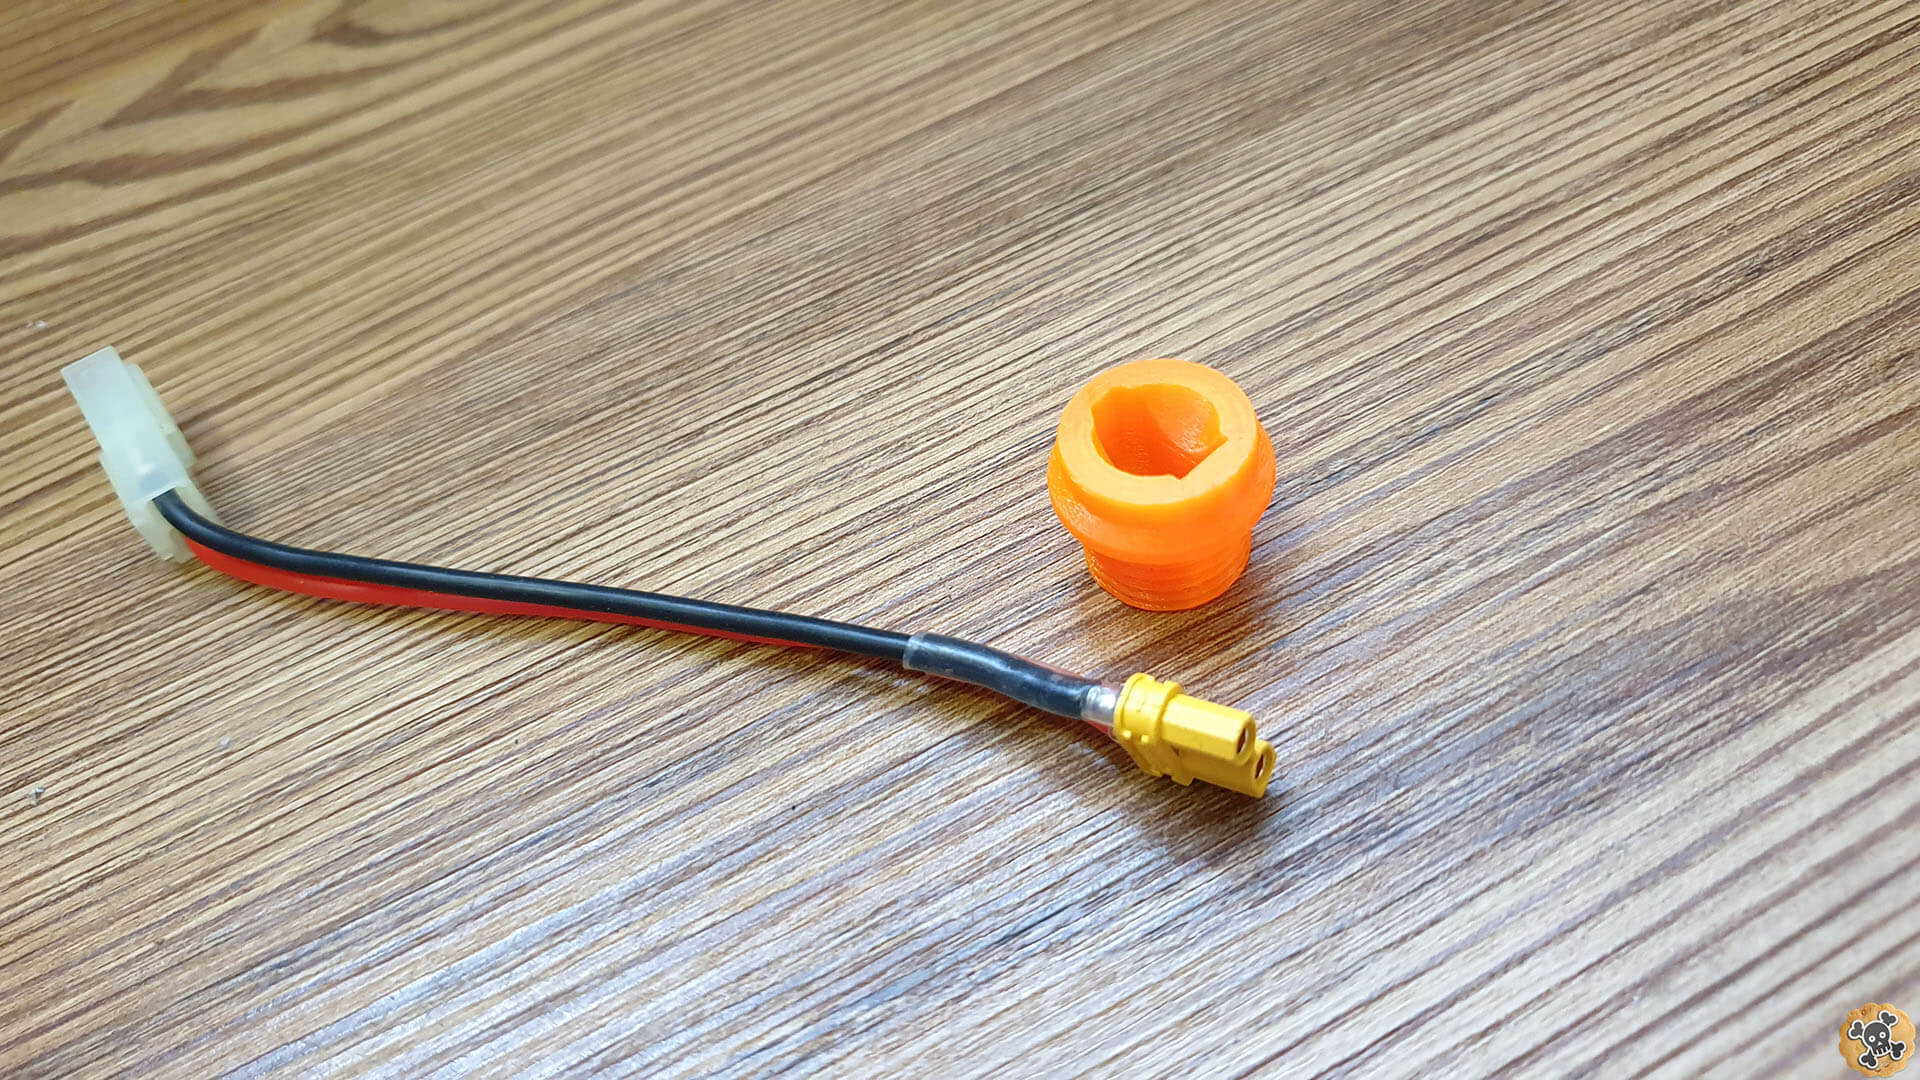
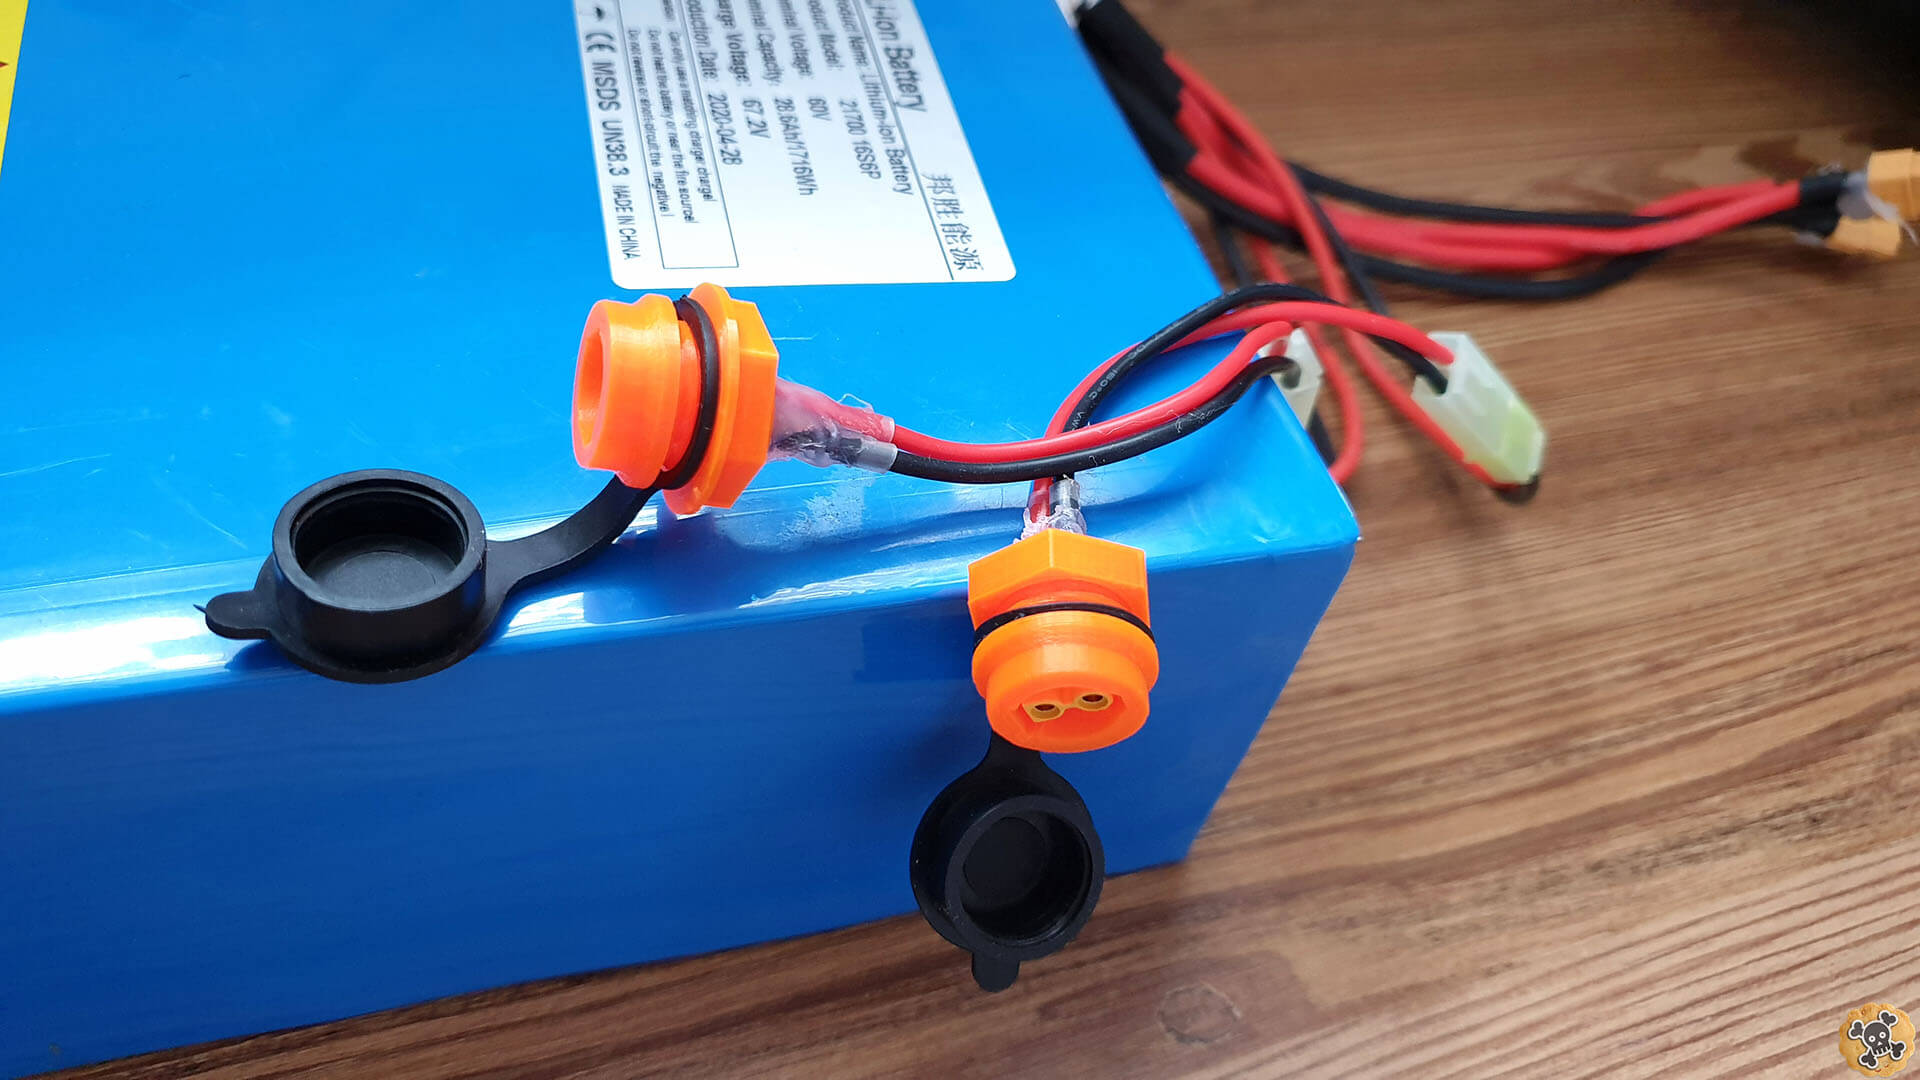
Now you can remove connector from the other side and actually you are pretty done at that point, just install new port in your scoot and use included nut to secure it .
!!!! Before you connect new connector to battery and/or charger to new port , check once again if there is no short circuits and if polarity is correct ( that you are connecting + to + and – to – ) !!!!
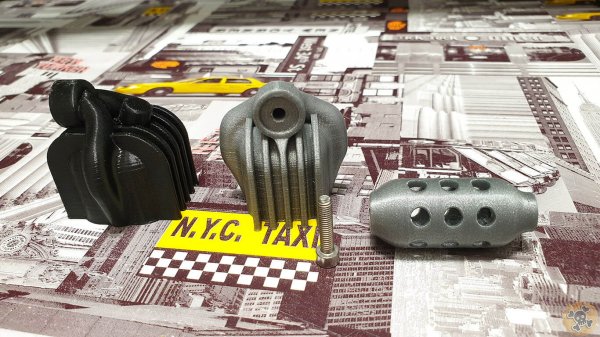
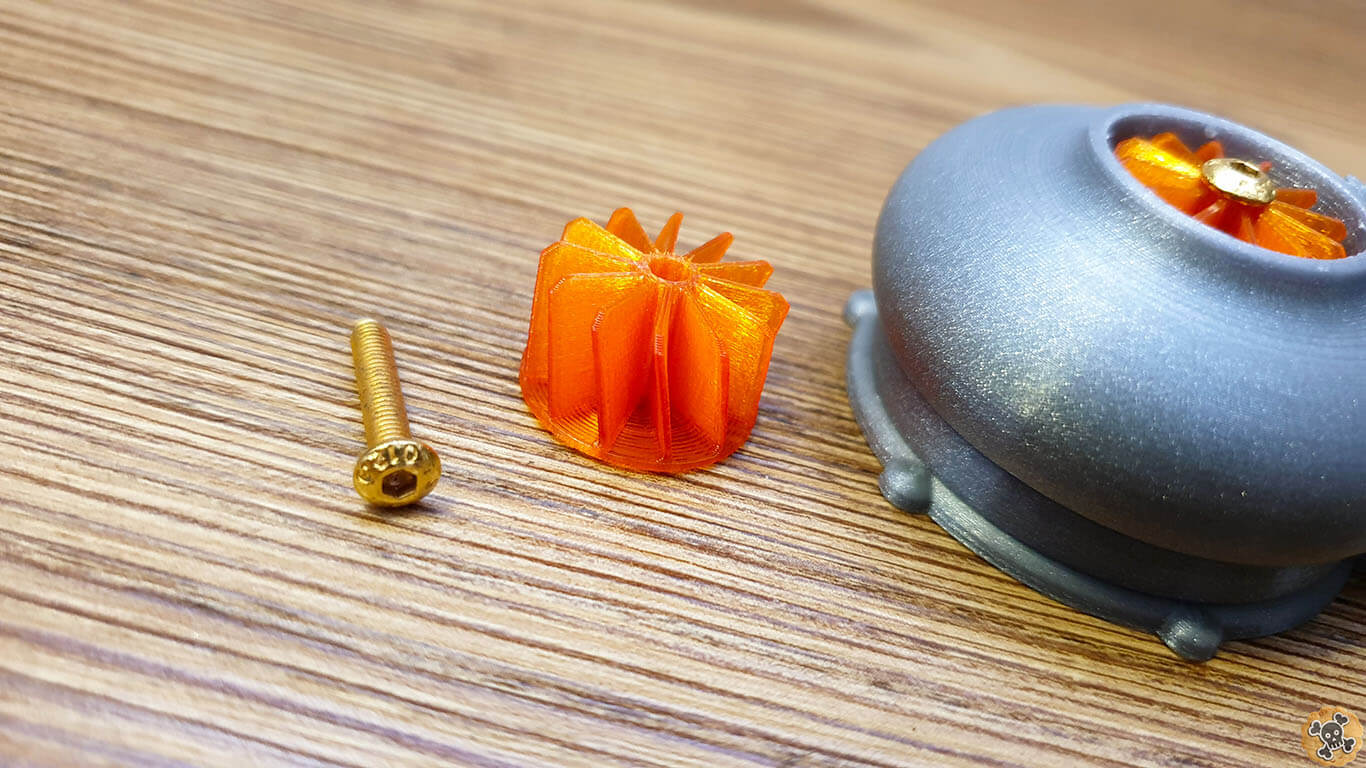
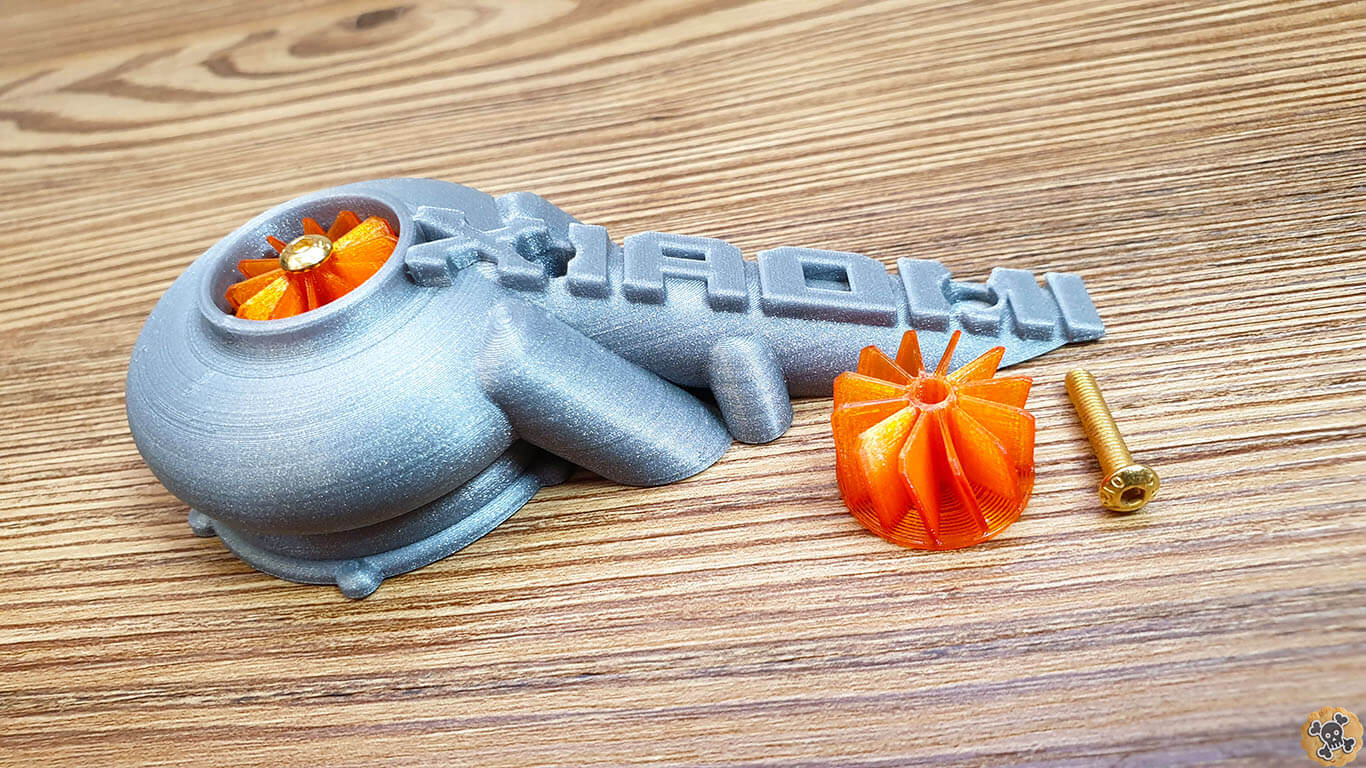
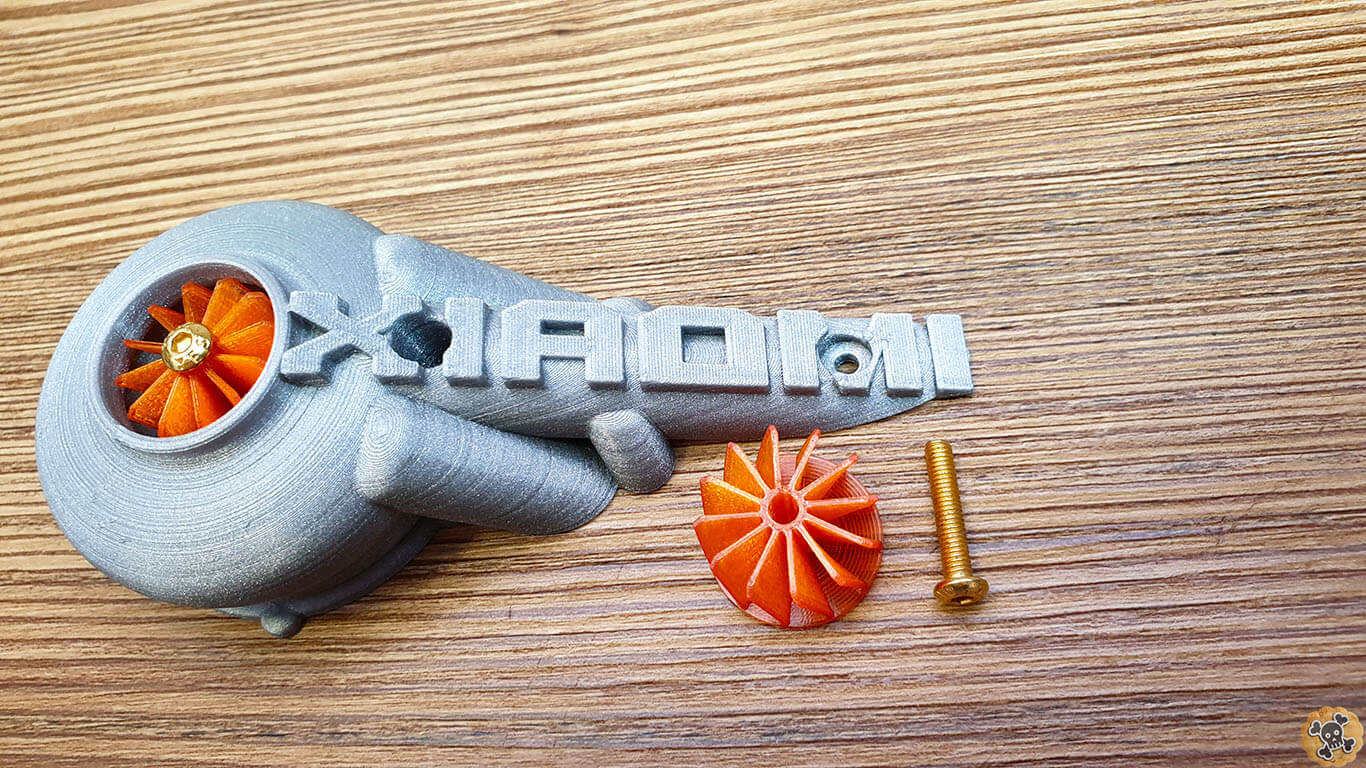
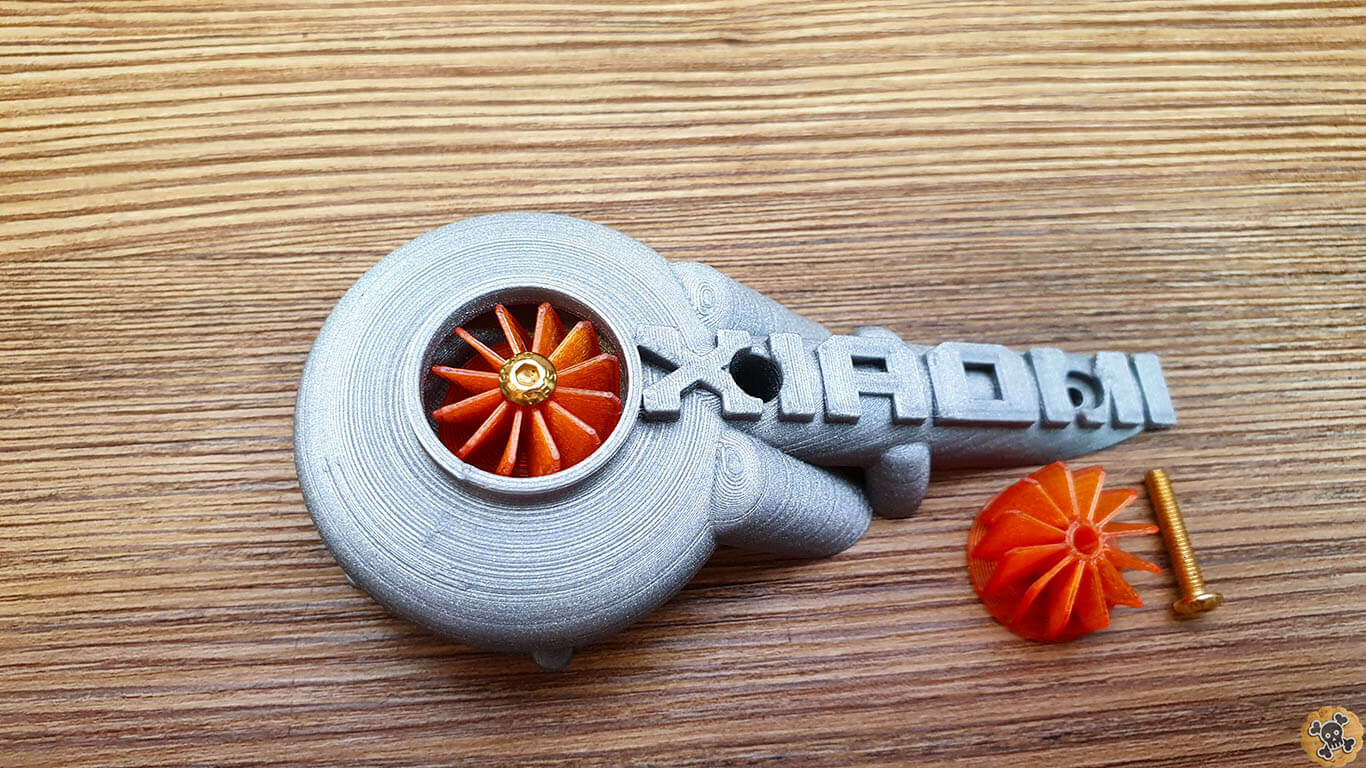
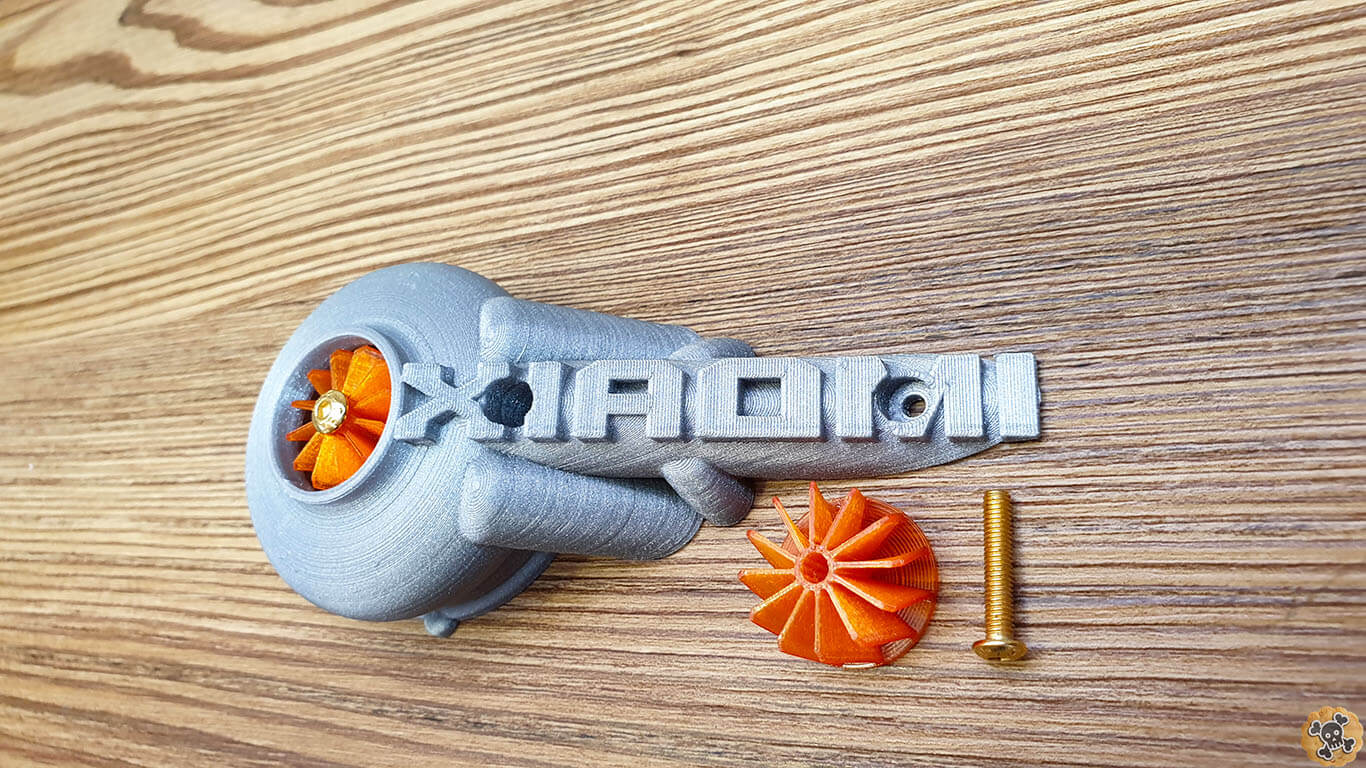
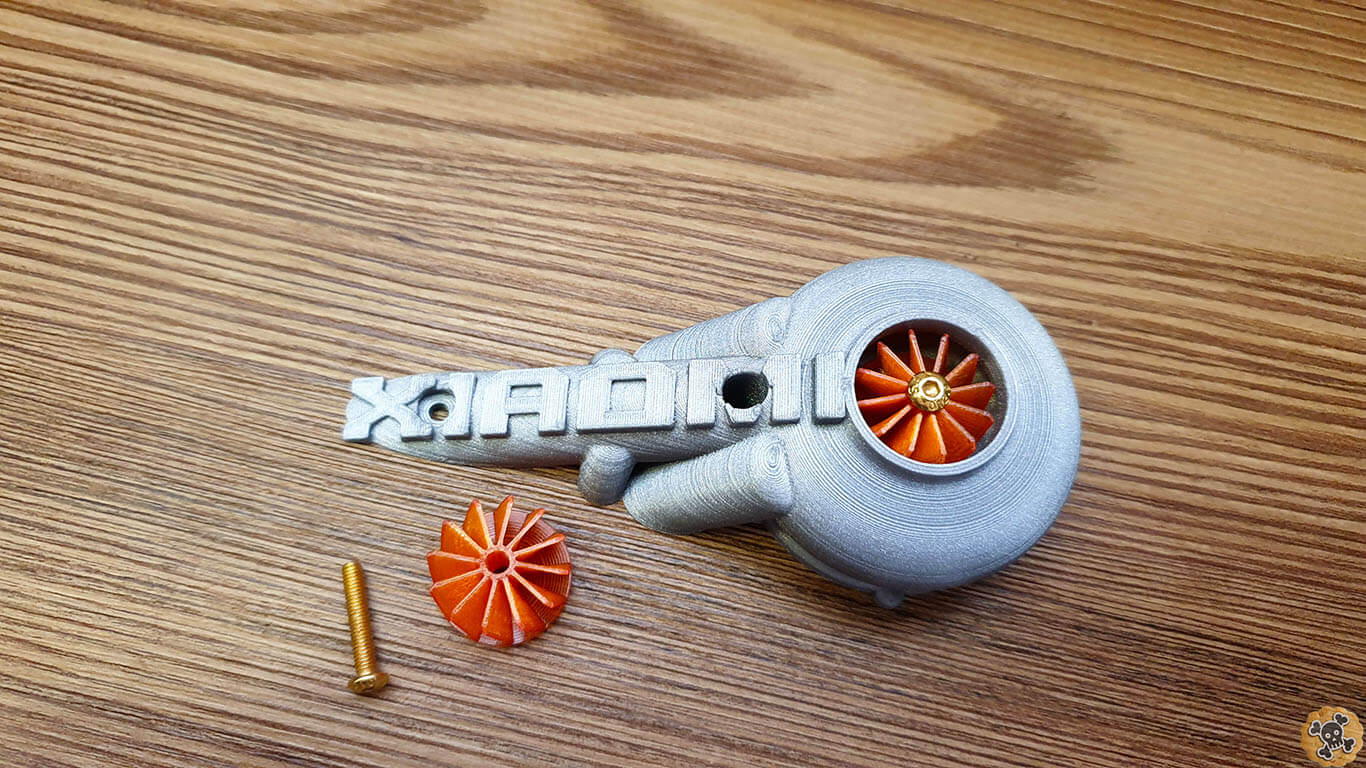
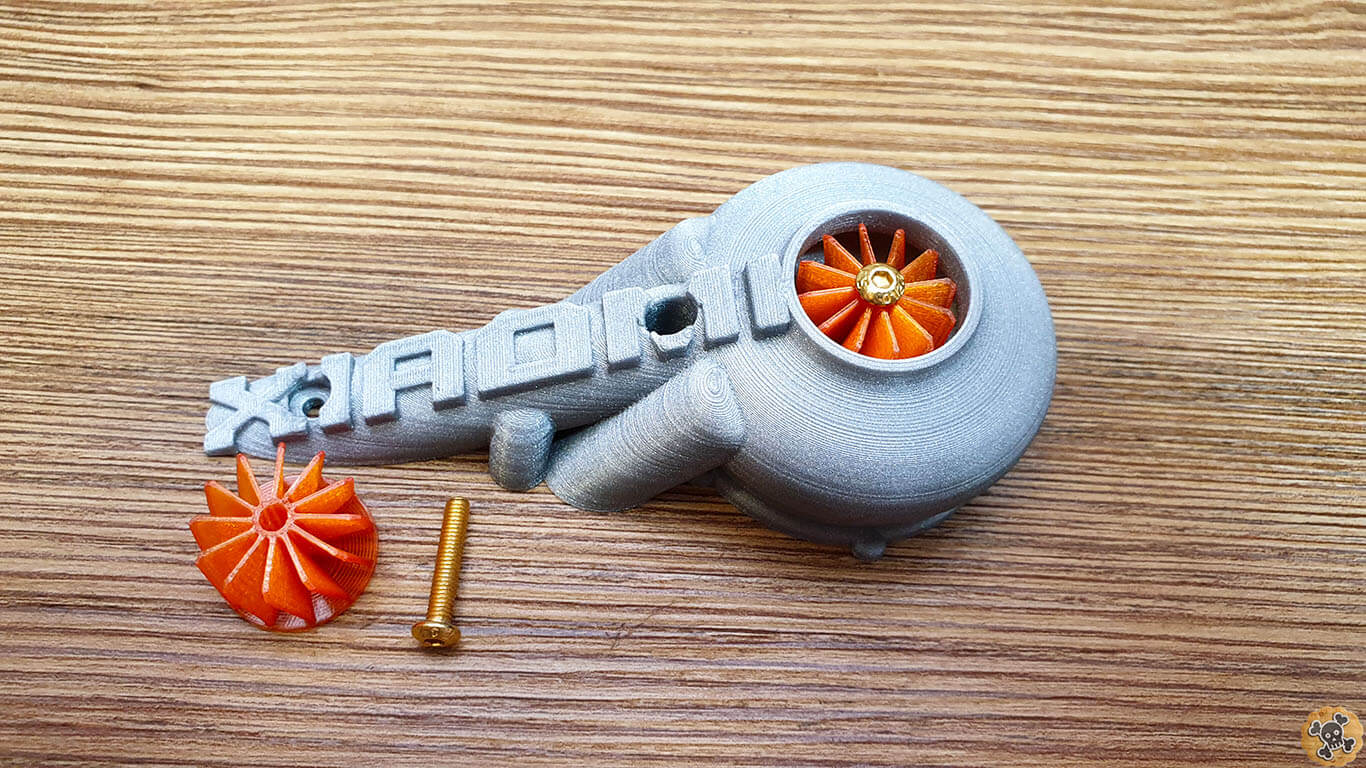
Stock covers sucks ! But Turbo ones are RAD . Those M365 Turbo covers will fi on Xiaomi classic and Pro . If you order this one you will get Turbo shell left or right side, gold screw and turbine/fan ).
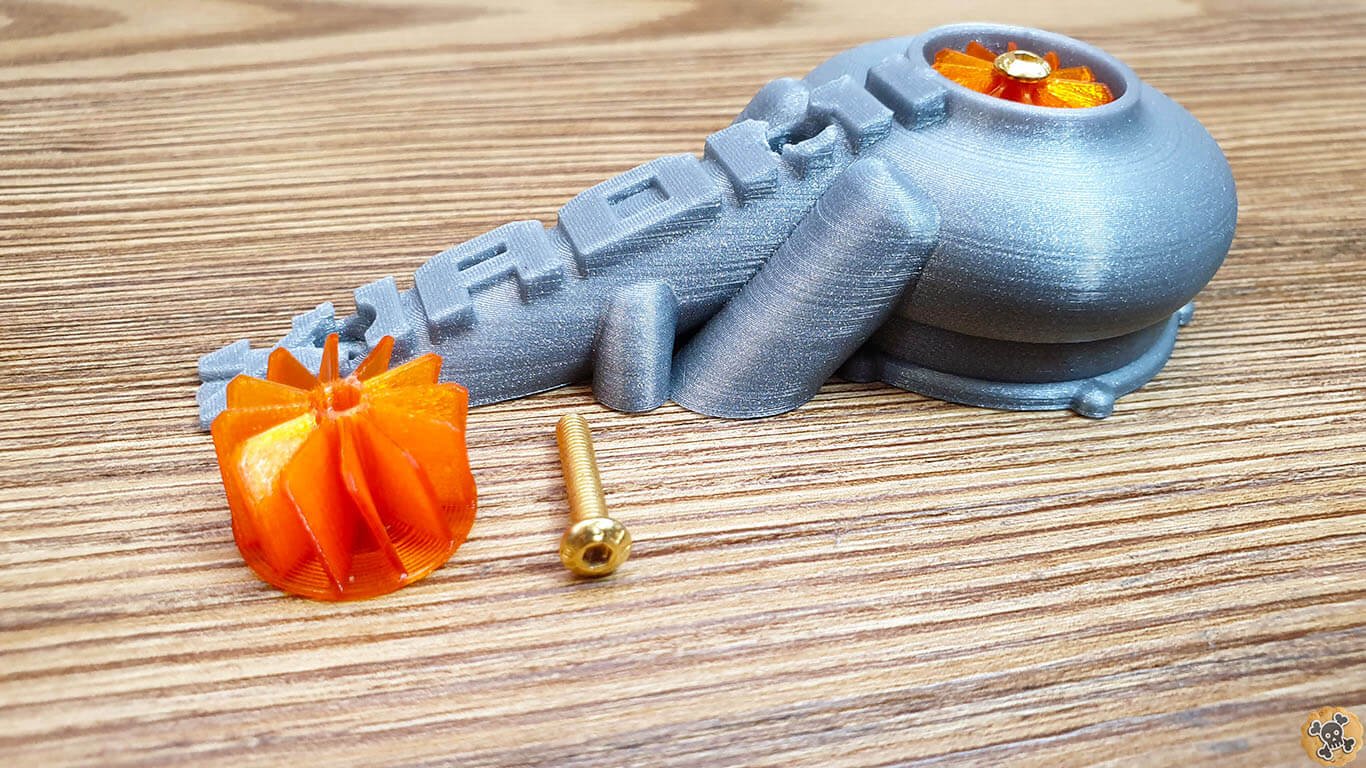
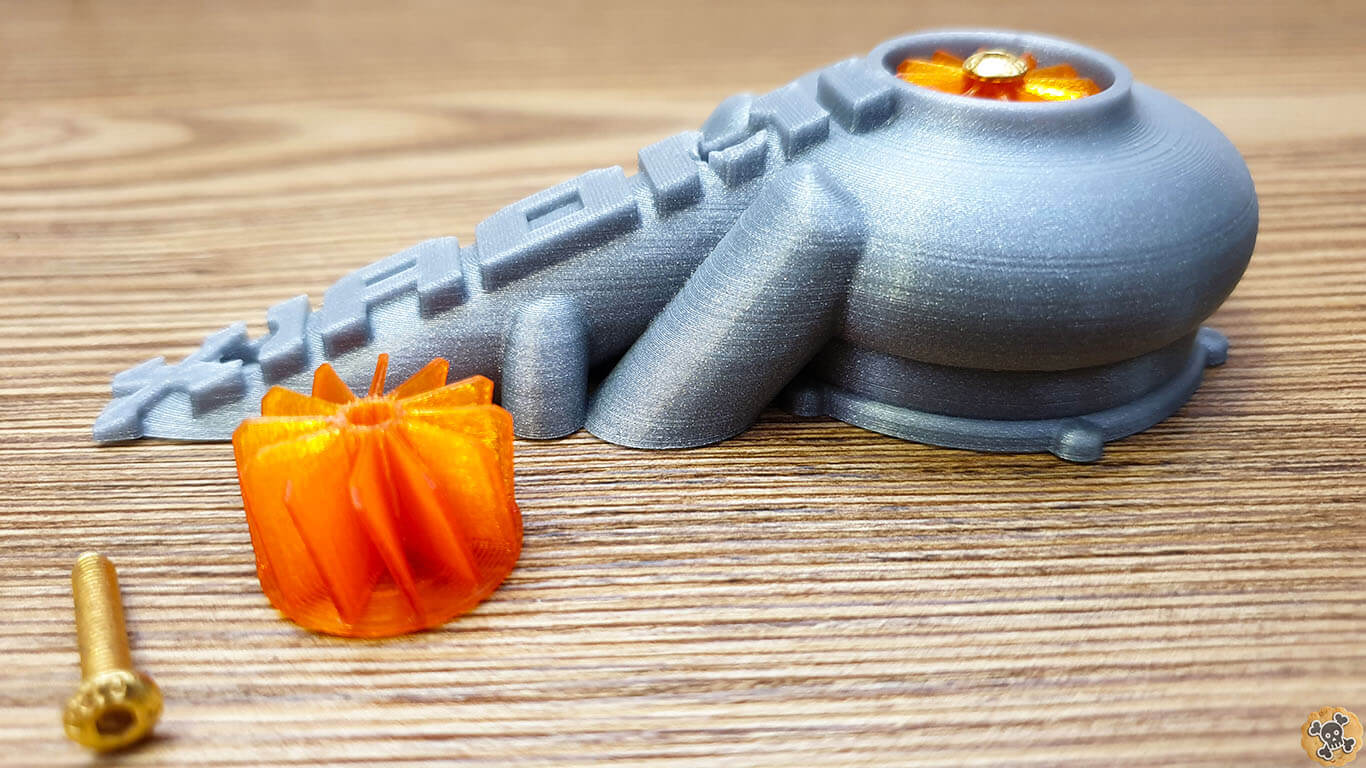
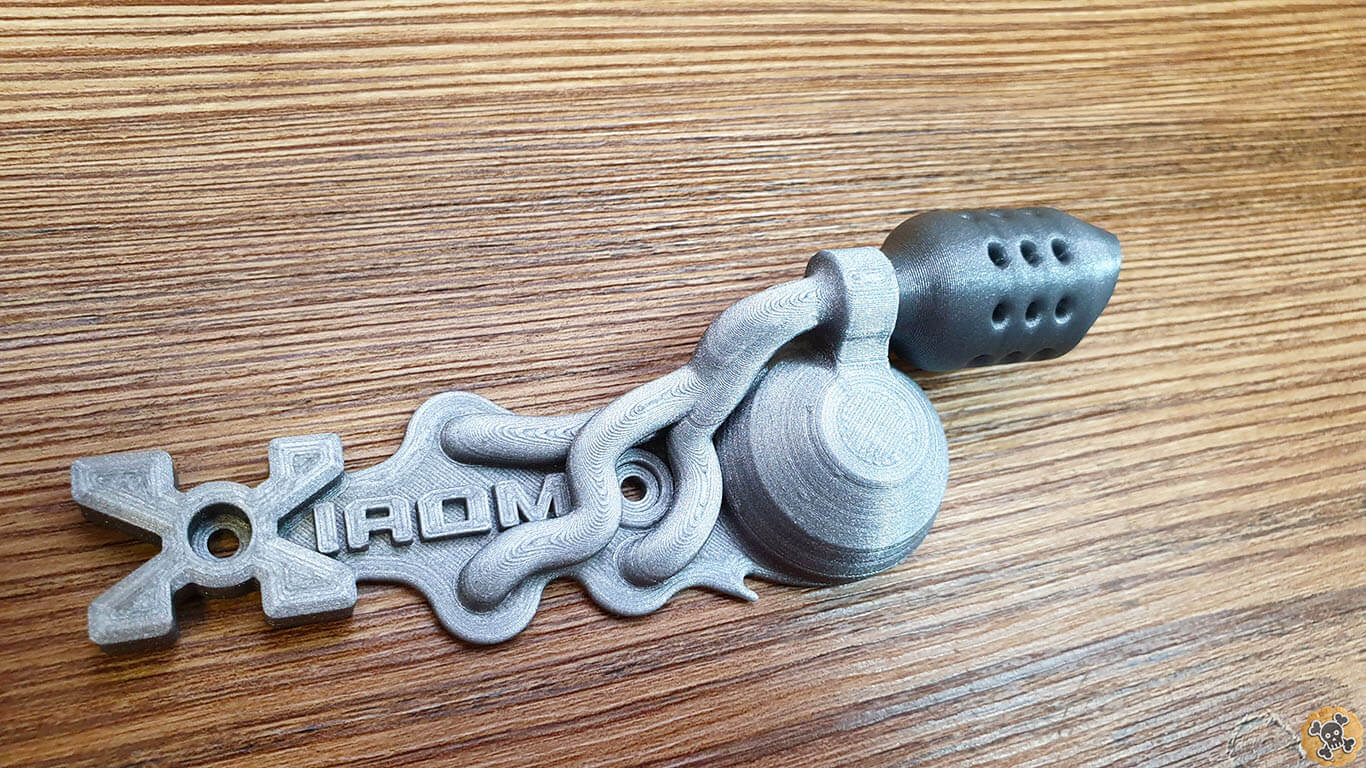
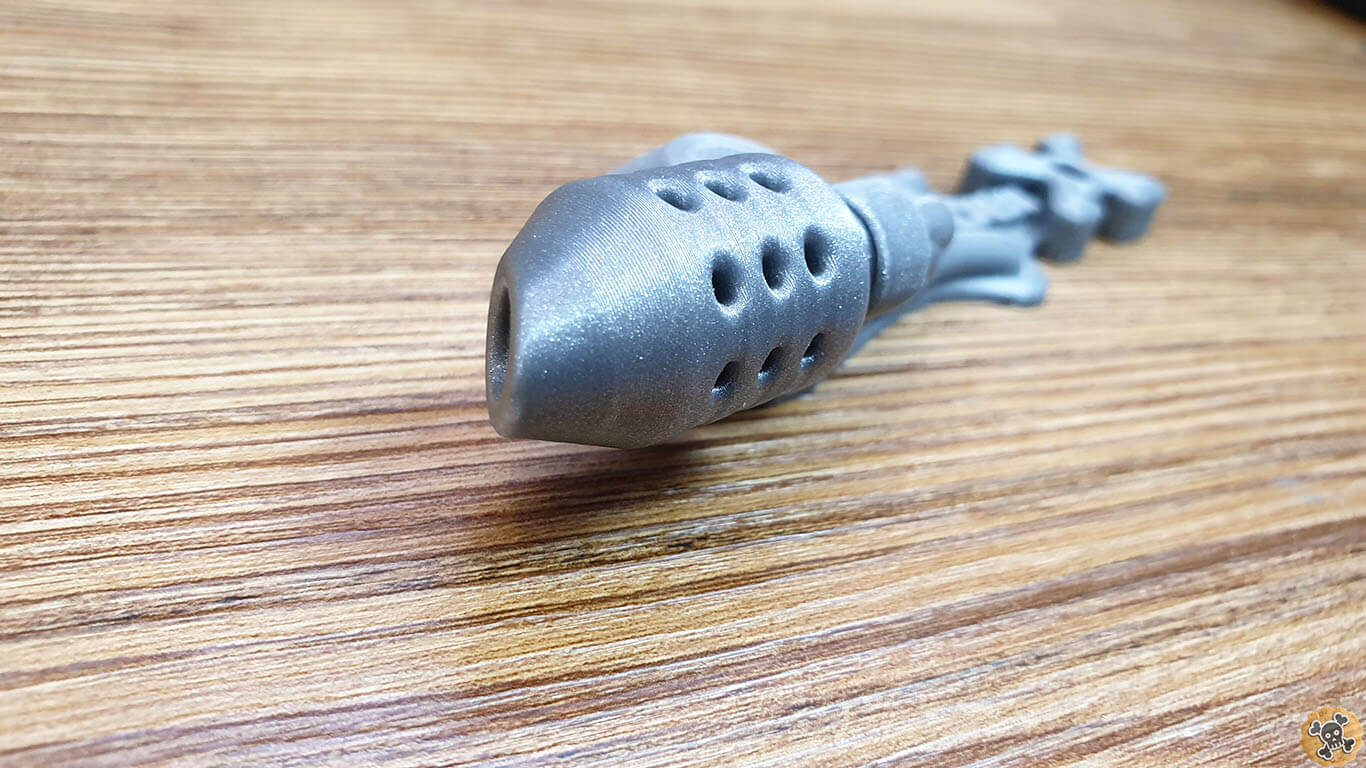
My newest DIY Exhaust design for M365 is one of the best I have did so far , lots of details and looks amazing. If you order this one you will get main plate, screw and exhaust pipe ). This cover can be used only on the back Left side, on pics you can see Silver Metallic color. Super Easy to install and maybe + 6.66% for speed ???
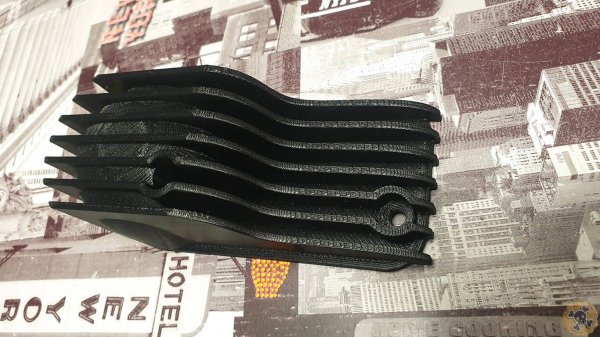
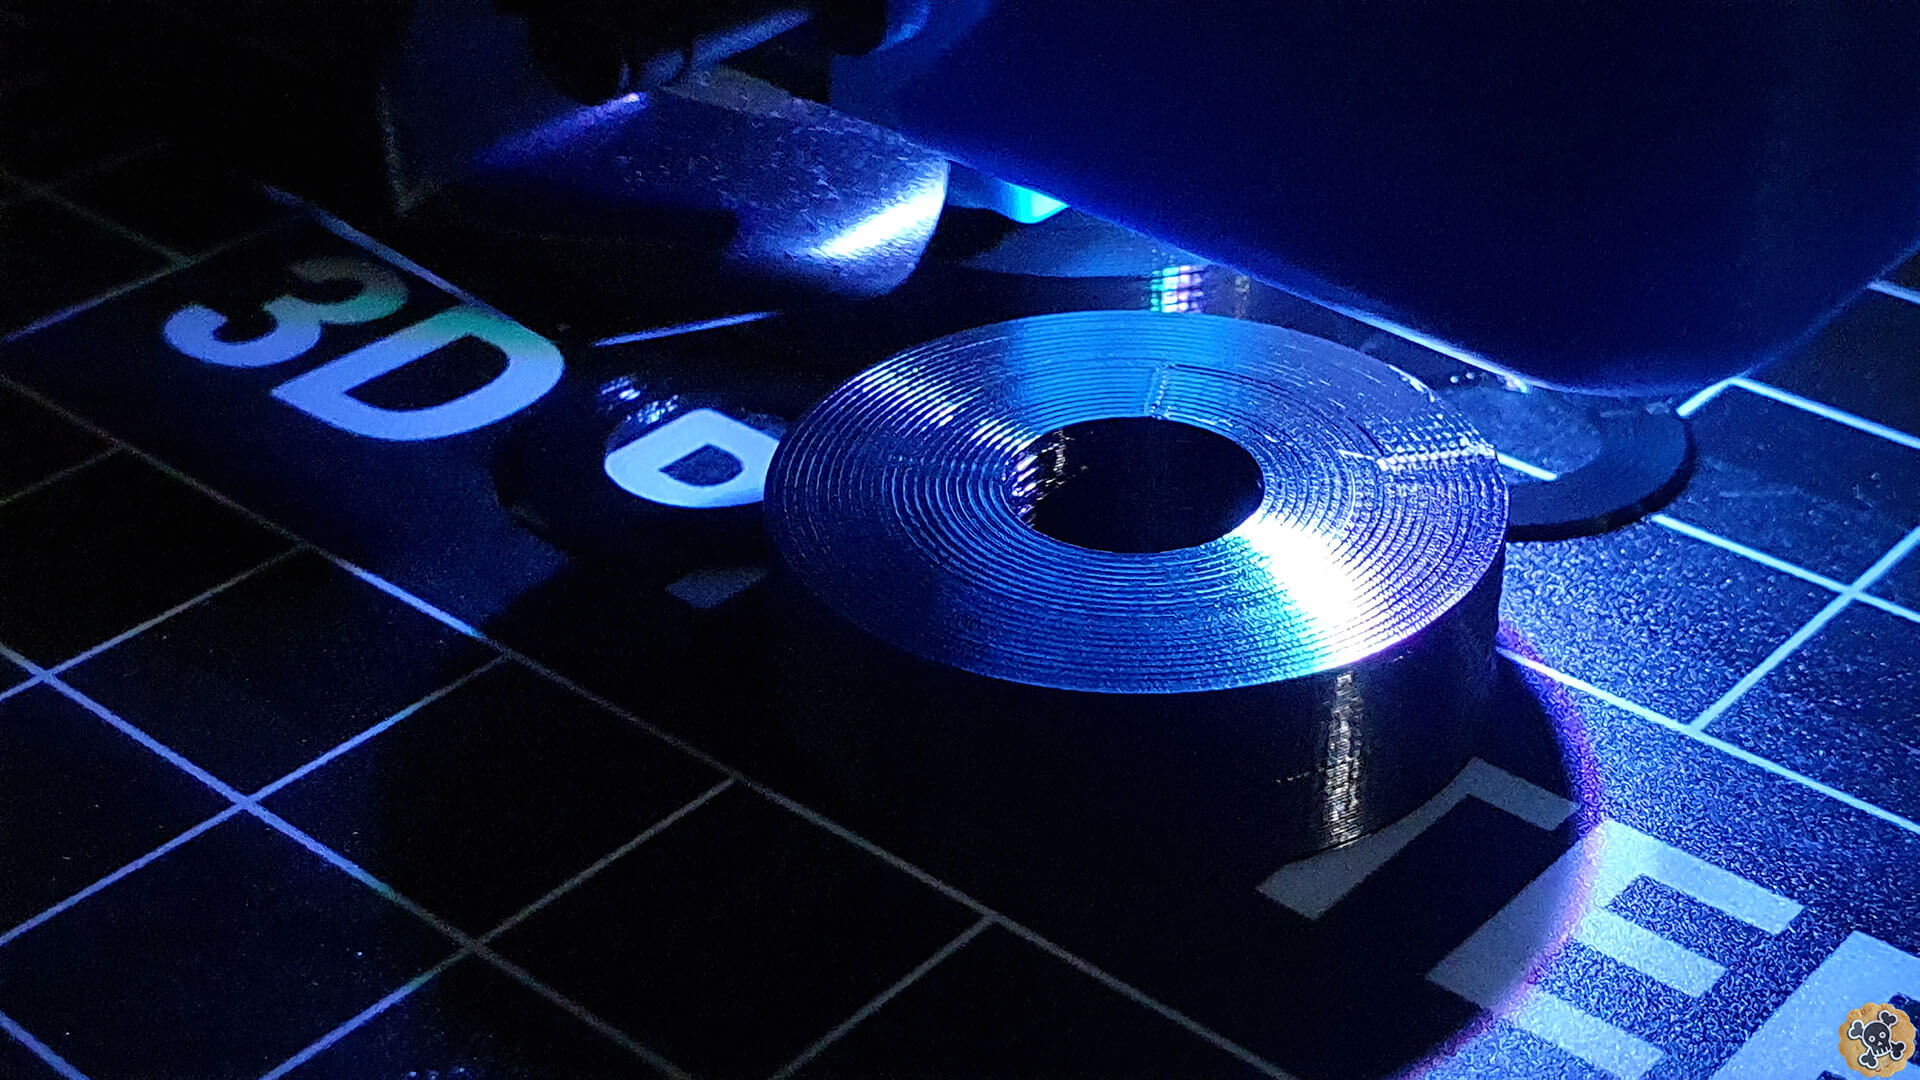
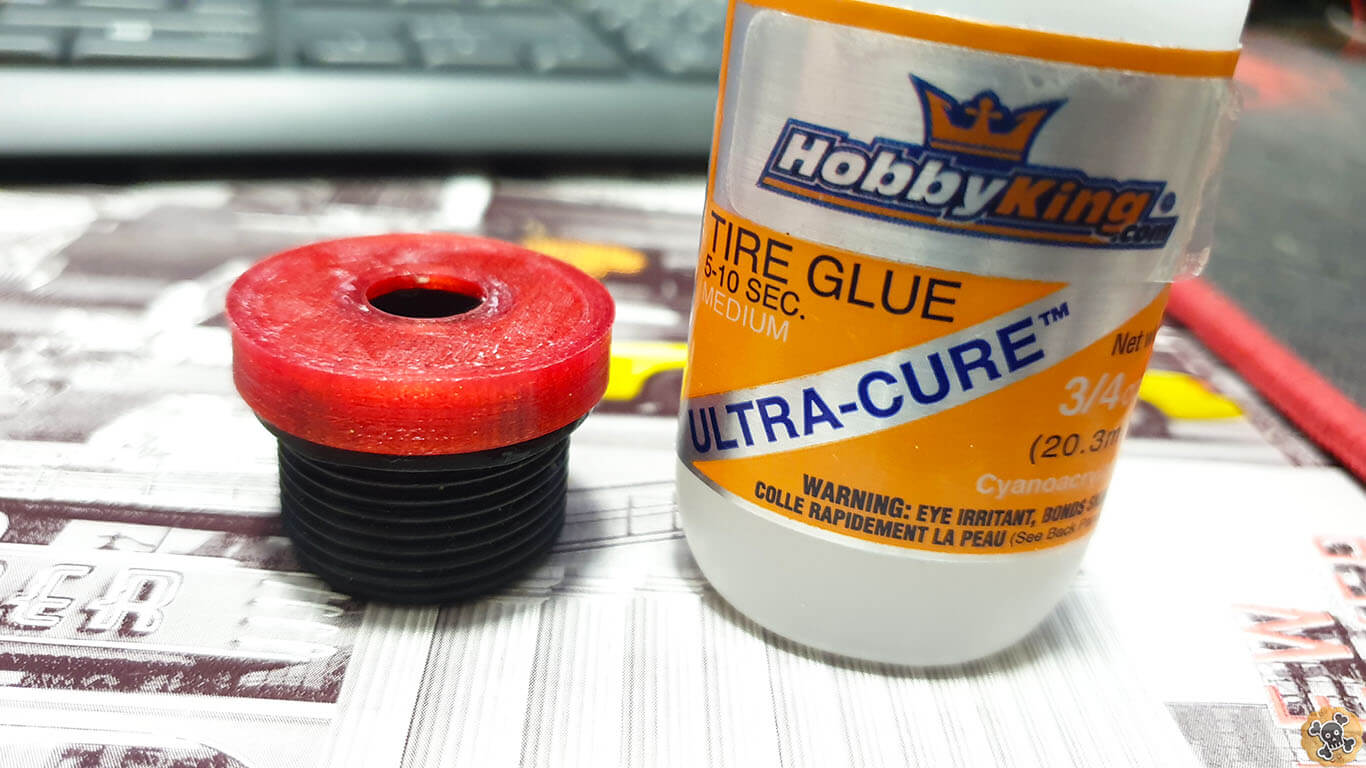
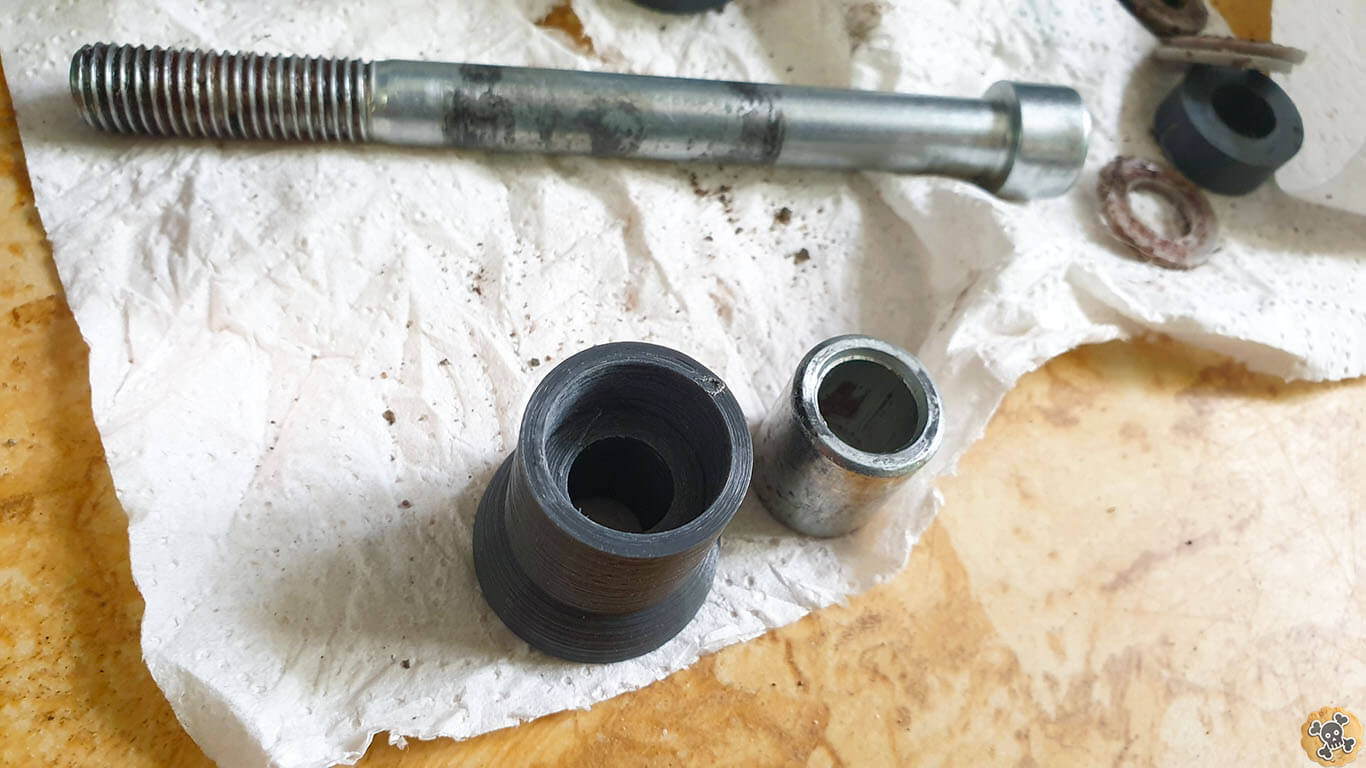
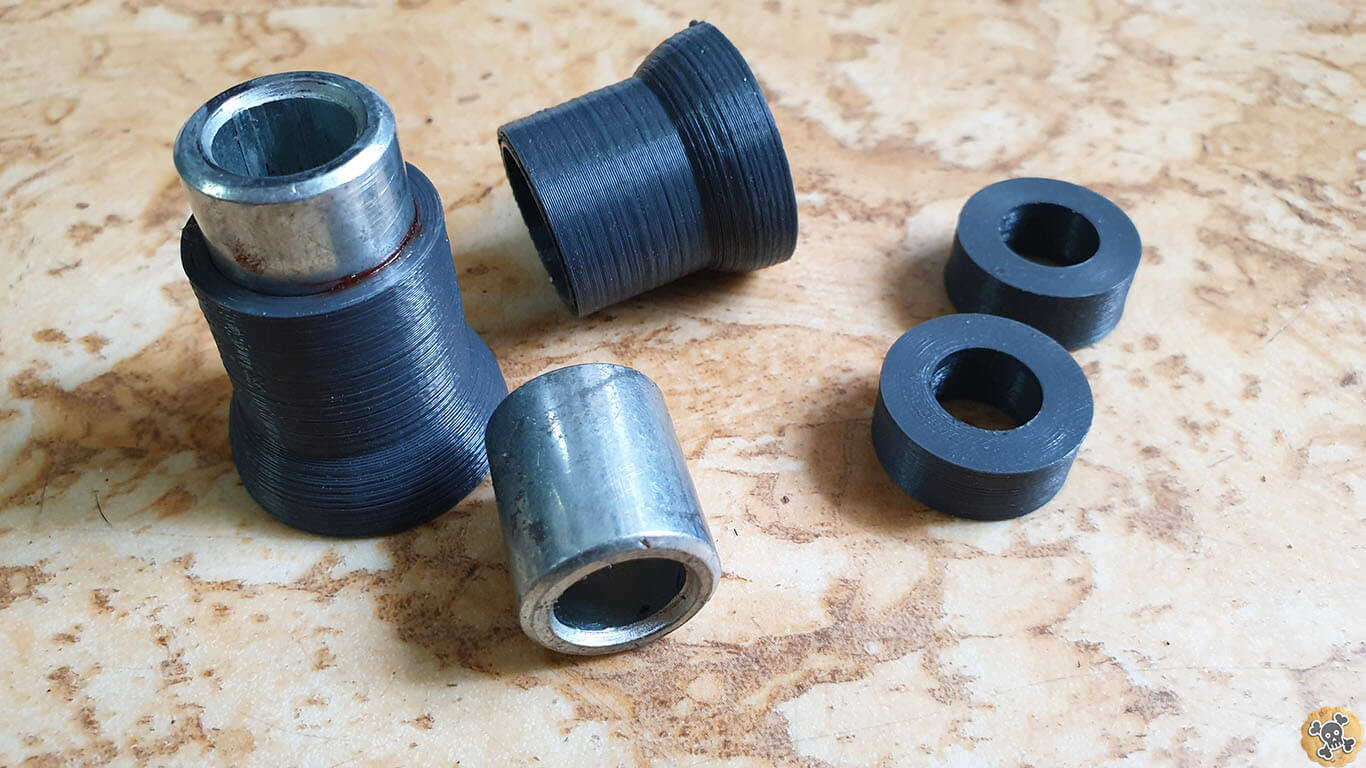
This is super simple Mod, you just need 4 printed parts and one extra seal. If You don’t have printer then ask some one for help, those parts are easy and cheap to make , if U still can’t get those parts buy a Printer cost like 200$ ( My FAV Creality Prusa bit.ly/CrealityP )and U can help others & make some extra $ thanks to it. to print BiG spacers use PLA and 80-90% infill , for extra seal use flexible filament ( rubber like ).
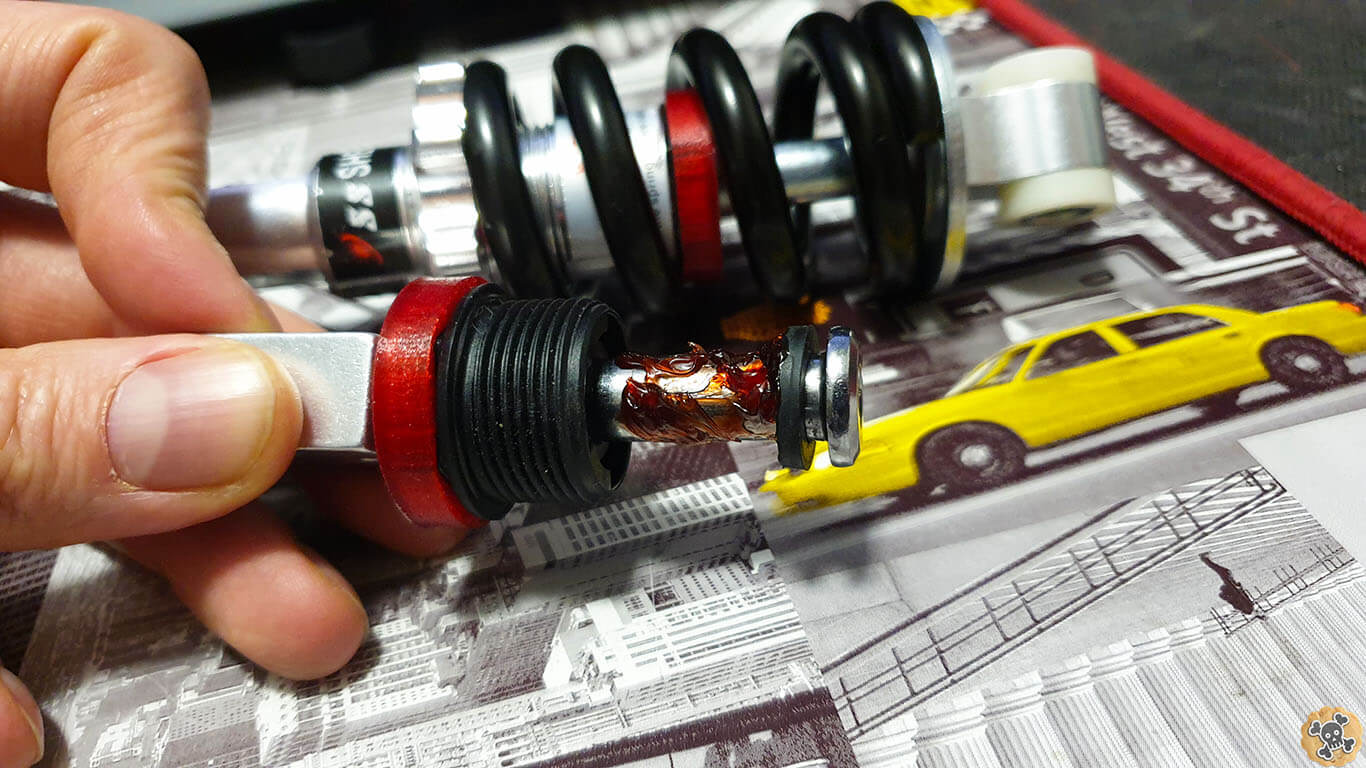
!! Important !! Do NOT open or modify OIL shock , inner lubrication and extra seal is only for cheap no oil shocks.
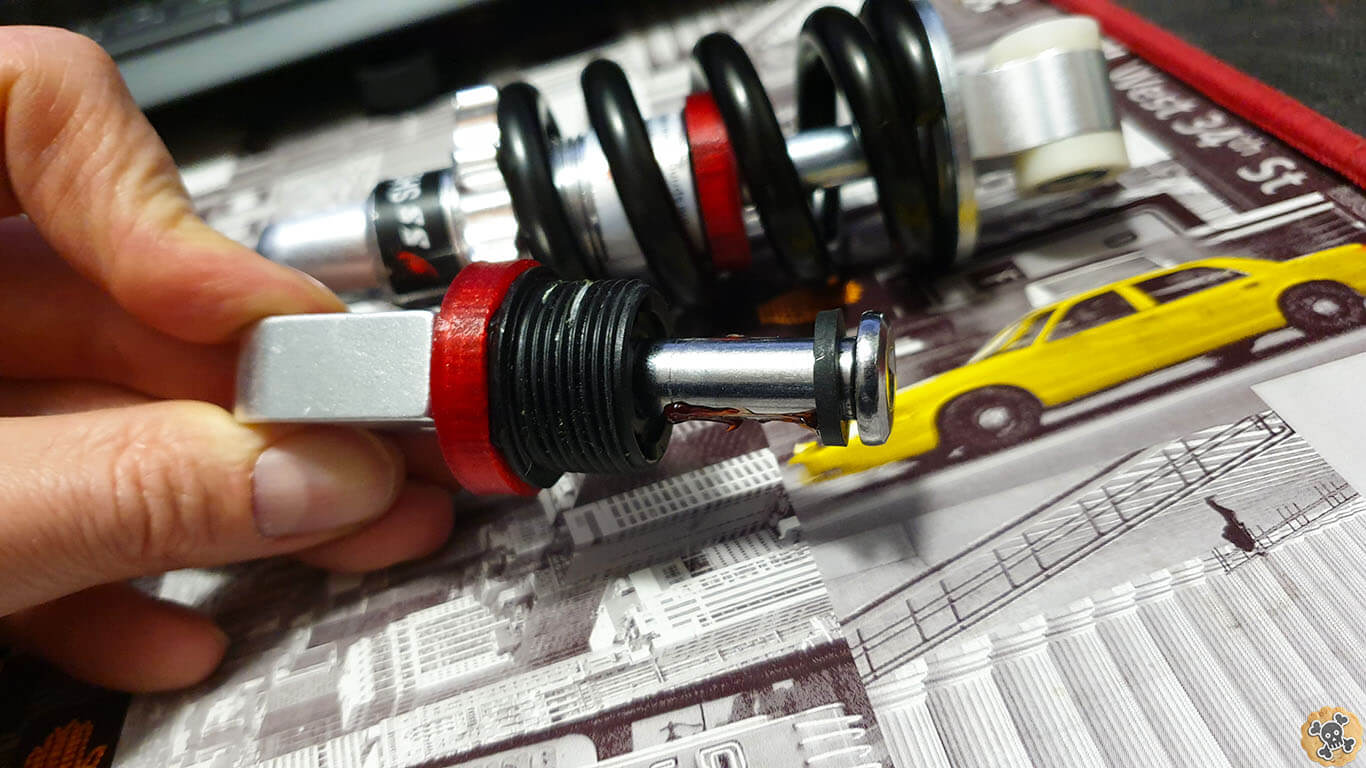
If U got all parts then open the shock, remove the spring and then use bigger wrench to unscrew middle BiG black nut ***( if U got extra seal printed also unscrew bolt from main shock shaft to remove black nut )
*** If you got extra Seal, glue it to the black nut , then place it back on fork shaft and secure it by screw.
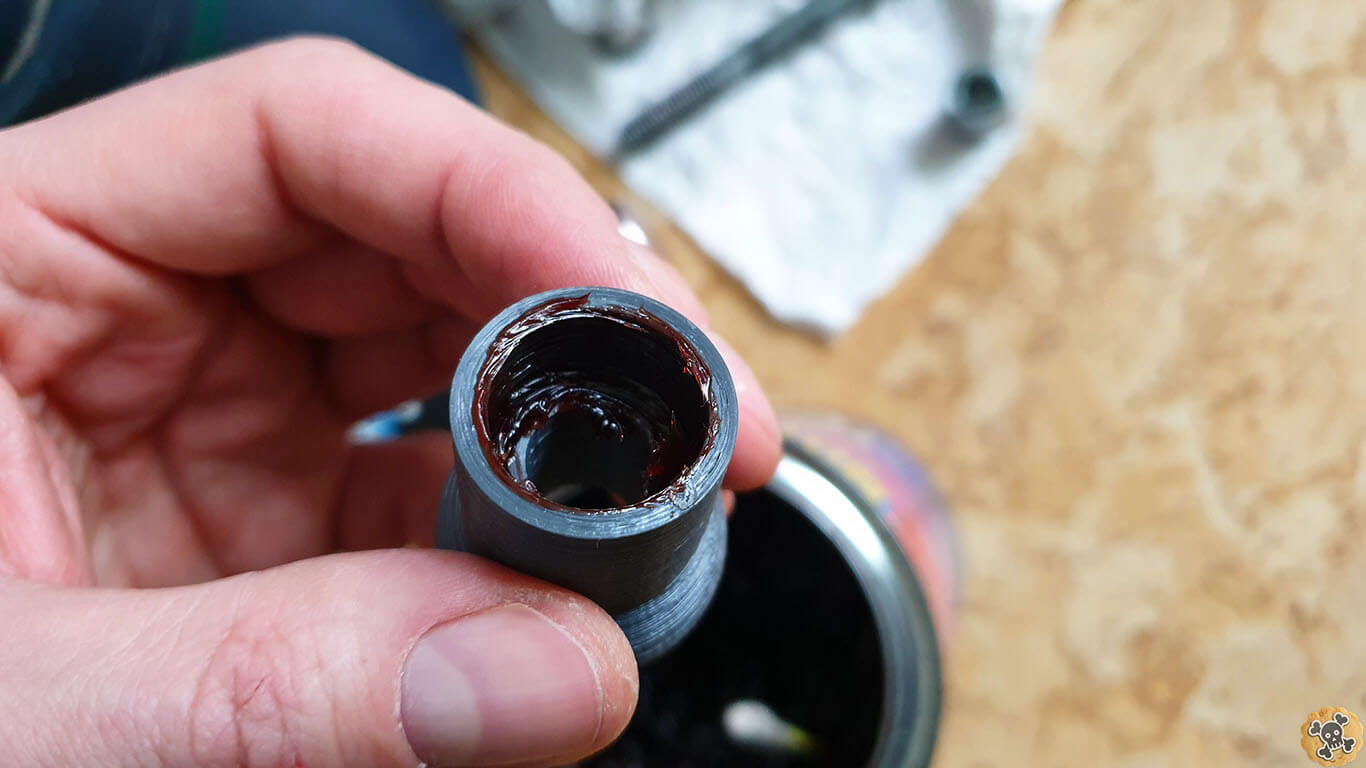
On shock shaft add lots of lubricant, in my case I used grease for bearings ( it has to be full synthetic , cause U got rubber and metal parts ).
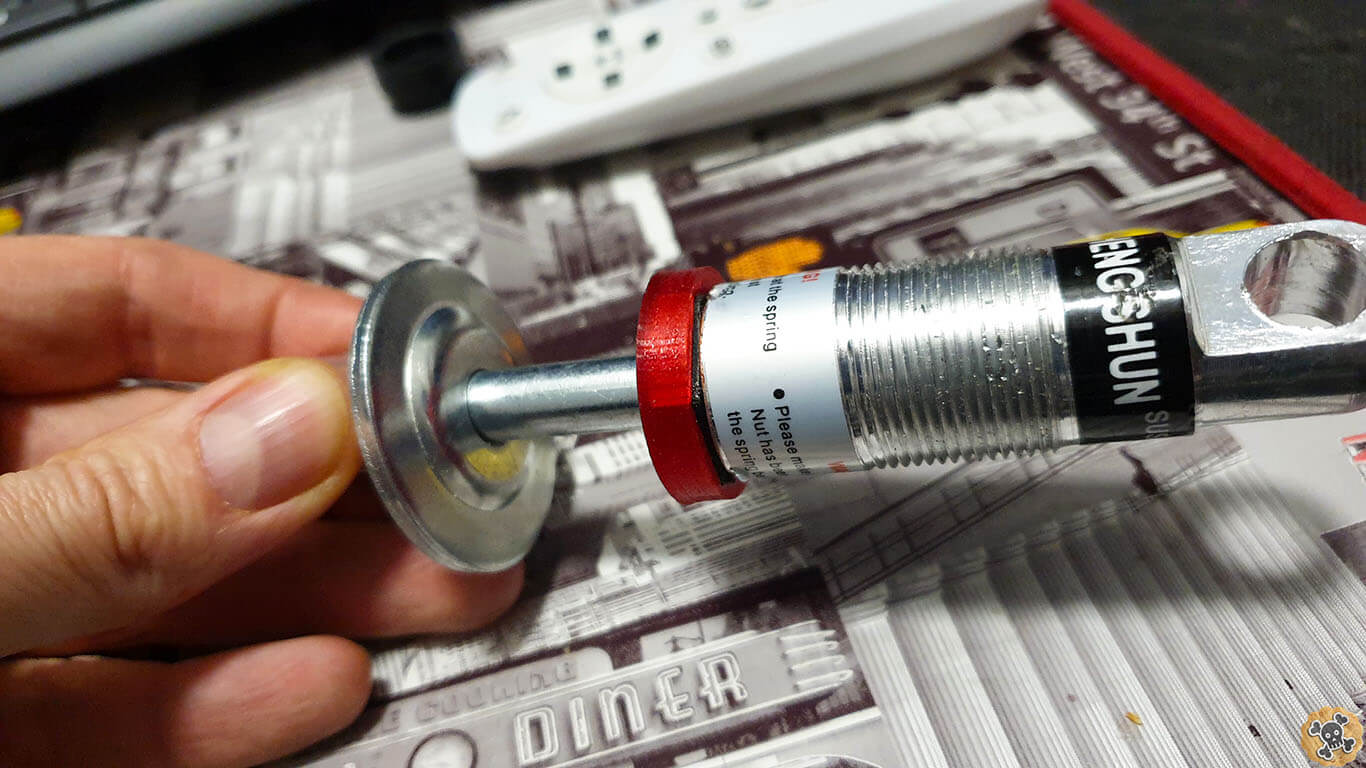
Screw big nut back
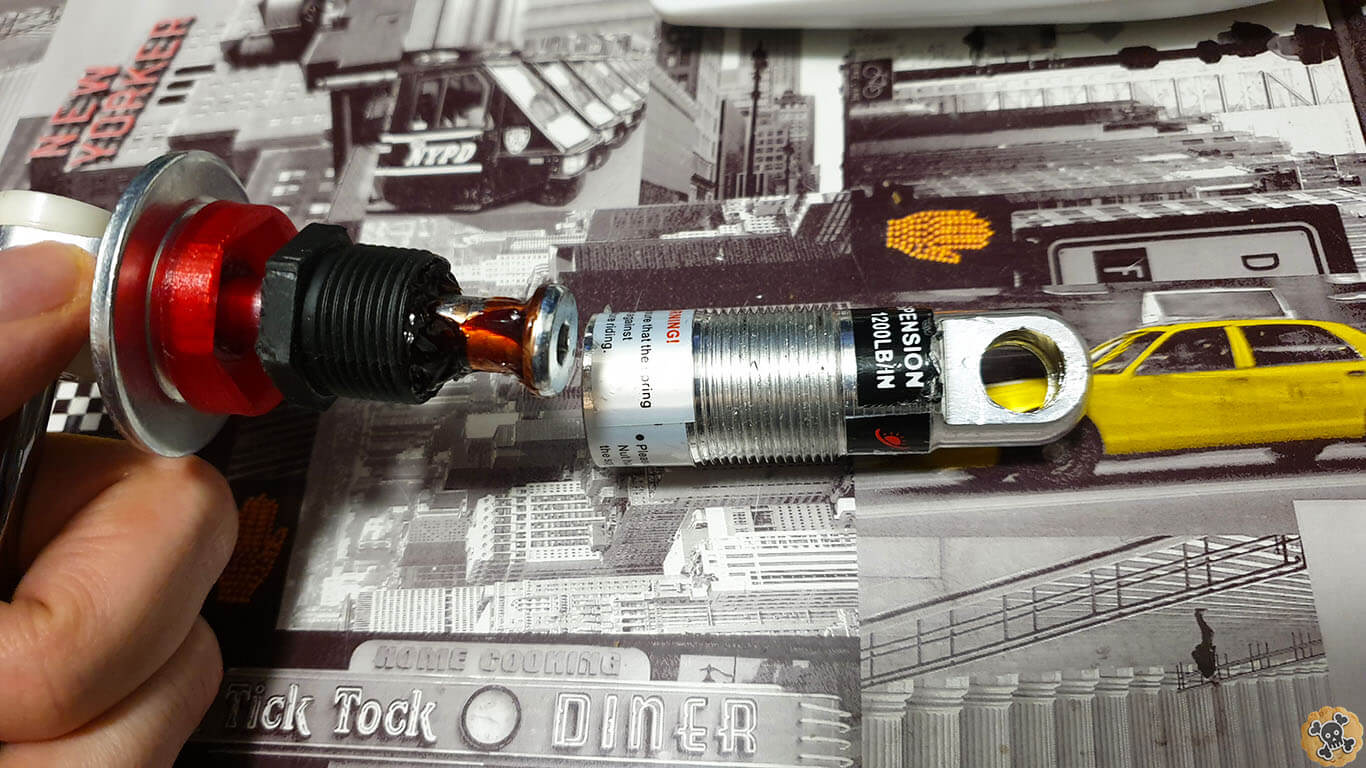
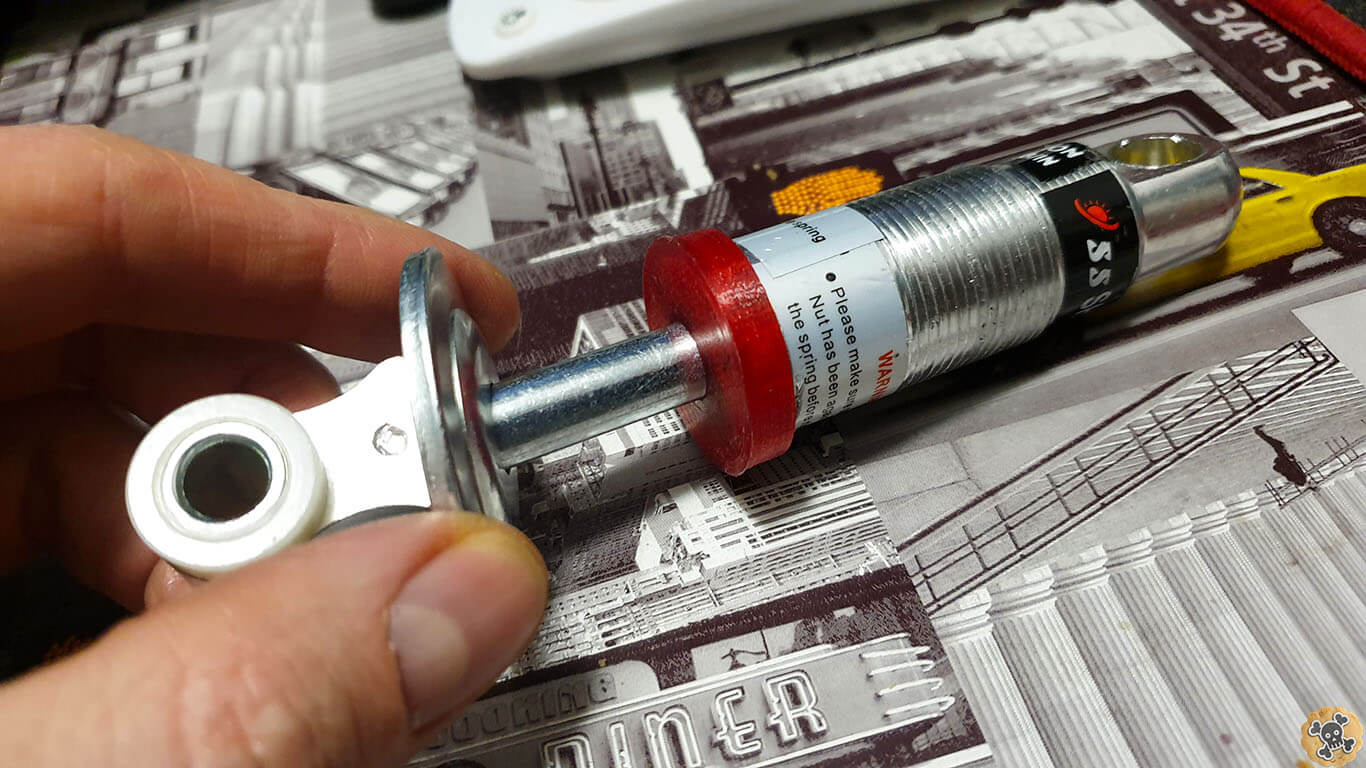
Now add some grease inside big printed spacers and slide in stock aluminium spacers
I recommend to cover fork from dust ( Even Oil one , way better life span ) , I used simple bag and zipps ?.
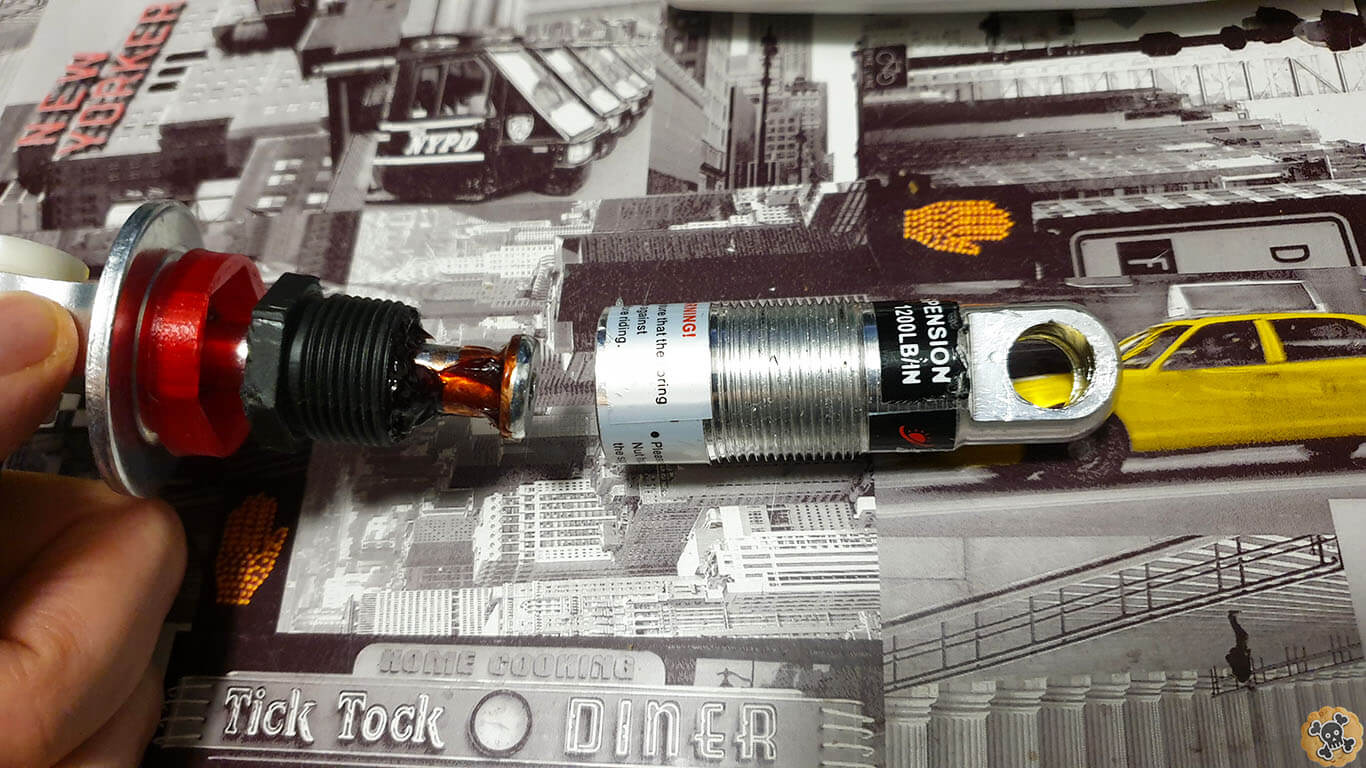
Now lubricate bolts and get all this shit together ?
** I made this MOD for free, so you can download all files without spending any $ BUT could you send even 1$ for animal shelters ?! I promisse, your life will be happier when you do it, cause U will help someone who really need it ? **
Cookies
To make this site work properly, we sometimes place small data files called cookies on your device. Most big websites do this too. If You accept just click "Accept" button. Terms
Accept
Cookies Settings
Cookie Box Settings
Cookie Settings
Cookie Box Settings
Cookie Settings
Privacy settings
Decide which cookies you want to allow.
You can change these settings at any time. However, this can result in some functions no longer being available. For information on deleting the cookies, please consult your browser’s help function.
Learn more about the cookies we use.
With the slider, you can enable or disable different types of cookies:
This website will
Remember which cookies group you accepted
This website won't
Remember your login details
Essential: Remember your cookie permission setting
Essential: Allow session cookies
Essential: Gather information you input into a contact forms newsletter and other forms across all pages
Essential: Keep track of what you input in a shopping cart
Essential: Authenticate that you are logged into your user account
Essential: Remember language version you selected
Functionality: Remember social media settings
Functionality: Remember selected region and country
Analytics: Keep track of your visited pages and interaction taken
Analytics: Keep track about your location and region based on your IP number
Analytics: Keep track of the time spent on each page
Analytics: Increase the data quality of the statistics functions
Advertising: Tailor information and advertising to your interests based on e.g. the content you have visited before. (Currently we do not use targeting or targeting cookies.
Advertising: Gather personally identifiable information such as name and location
This website will
Essential: Remember your cookie permission setting
Essential: Allow session cookies
Essential: Gather information you input into a contact forms newsletter and other forms across all pages
Essential: Keep track of what you input in a shopping cart
Essential: Authenticate that you are logged into your user account
Essential: Remember language version you selected
This website won't
Remember your login details
Functionality: Remember social media settings
Functionality: Remember selected region and country
Analytics: Keep track of your visited pages and interaction taken
Analytics: Keep track about your location and region based on your IP number
Analytics: Keep track of the time spent on each page
Analytics: Increase the data quality of the statistics functions
Advertising: Tailor information and advertising to your interests based on e.g. the content you have visited before. (Currently we do not use targeting or targeting cookies)
Advertising: Gather personally identifiable information such as name and location
This website will
Essential: Remember your cookie permission setting
Essential: Allow session cookies
Essential: Gather information you input into a contact forms newsletter and other forms across all pages
Essential: Keep track of what you input in a shopping cart
Essential: Authenticate that you are logged into your user account
Essential: Remember language version you selected
Functionality: Remember social media settings
Functionality: Remember selected region and country
This website won't
Analytics: Keep track of your visited pages and interaction taken
Analytics: Keep track about your location and region based on your IP number
Analytics: Keep track of the time spent on each page
Analytics: Increase the data quality of the statistics functions
Advertising: Tailor information and advertising to your interests based on e.g. the content you have visited before. (Currently we do not use targeting or targeting cookies)
Advertising: Gather personally identifiable information such as name and location
This website will
Essential: Remember your cookie permission setting
Essential: Allow session cookies
Essential: Gather information you input into a contact forms newsletter and other forms across all pages
Essential: Keep track of what you input in a shopping cart
Essential: Authenticate that you are logged into your user account
Essential: Remember language version you selected
Functionality: Remember social media settings
Functionality: Remember selected region and country
Analytics: Keep track of your visited pages and interaction taken
Analytics: Keep track about your location and region based on your IP number
Analytics: Keep track of the time spent on each page
Analytics: Increase the data quality of the statistics functions
This website won't
Advertising: Tailor information and advertising to your interests based on e.g. the content you have visited before. (Currently we do not use targeting or targeting cookies)
Advertising: Gather personally identifiable information such as name and location
This website will
Functionality: Remember social media settings
Functionality: Remember selected region and country
Analytics: Keep track of your visited pages and interaction taken
Analytics: Keep track about your location and region based on your IP number
Analytics: Keep track of the time spent on each page
Analytics: Increase the data quality of the statistics functions
Advertising: Tailor information and advertising to your interests based on e.g. the content you have visited before. (Currently we do not use targeting or targeting cookies)
Advertising: Gather personally identifiable information such as name and location